

Global Timer
The global timer can be used to start a process at a scheduled time. A timer event handler associated with a global timer can respond to the events generated by that timer.
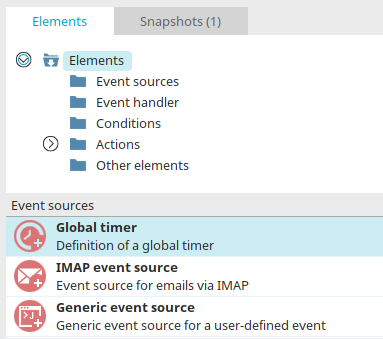
You can find the global timer in "Processes" under "Elements." It belongs to the "Event Sources" category. From there, it can be dragged and dropped to the desired location on the desktop and then configured. General information on creating process elements can be found here.
Once you have created the global timer on the workspace, double-click the element to open the Properties dialog box.
General
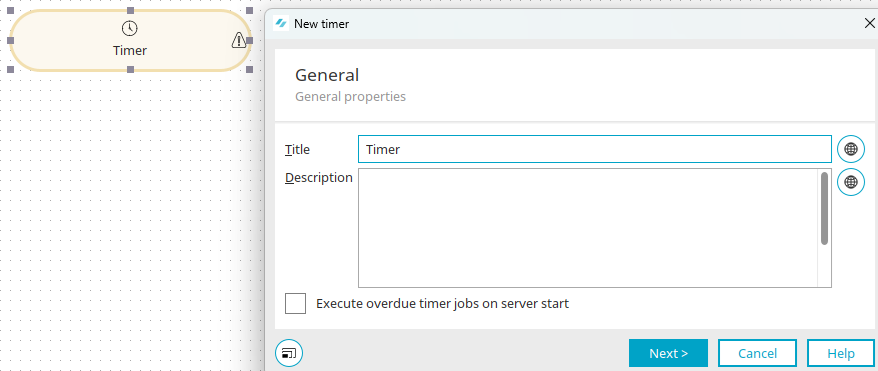
Title
You can edit the title here.
Description
You can enter a description here.
 Multilingualism
Opens a dialog box in each case where the title or description can be entered in multiple languages. You can find more information on this topic here.
Run Overdue Timer Jobs When the Server Starts
Causes the timer to generate all events retroactively if the server was shut down at the time they were originally scheduled to run.
Click "Next."
Execution Date
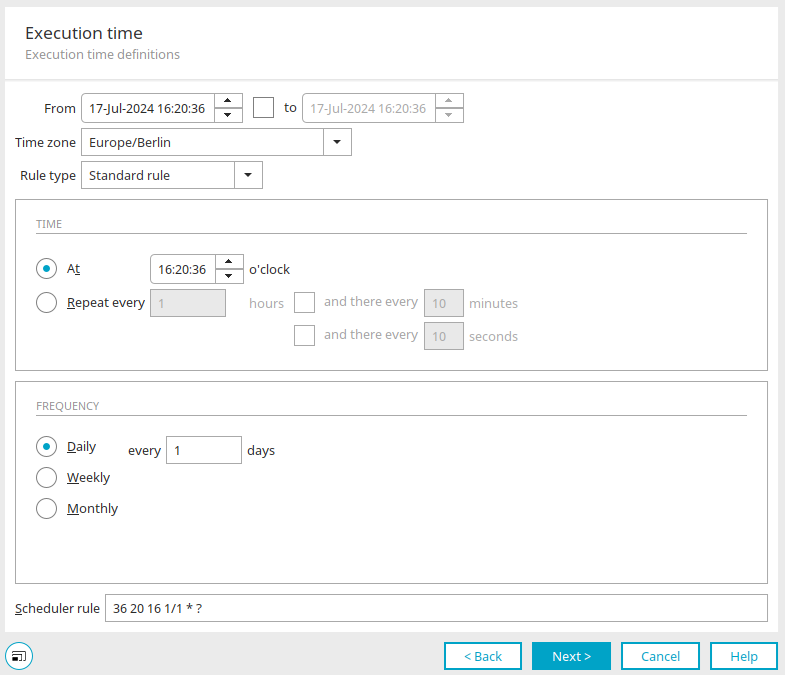
You can find all the information about the settings in this dialog box here.
Click "Next."
Data Group
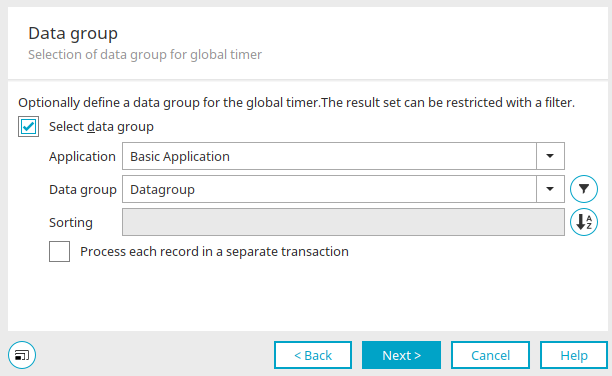
Select a data group
Here, you can select the desired application and the data group it contains. A timer event is generated for each data record in the data group.
 Filter
Opens a dialog box where you can create a filter for the data in the selected data group.
 Sorting
Clicking "Sort" on opens a dialog box where you can configure how the data is sorted.
The sort order determines the order in which the records are processed. If no sort order is specified, the records are processed in the order in which they are selected by the database being used.
Process each record in its own transaction
Ensures that each individual record is accessed. This feature is useful when processing large data sets—such as during data replication via a process—because it skips errors and keeps the transaction duration (and thus the duration of database locks) short. This setting can also be configured for sending bulk emails via a process. This ensures that, in the event of errors, the entire sending process does not fail; instead, only the emails in which an error occurs will not be sent.
With the "Process each record in its own transaction" setting, no error is reported if the rest of the process fails (e.g., due to an error in a script within a Groovy action). Individual errors in the process are simply logged. If this setting is not enabled, the process run will be reported as failed as soon as an error occurs during the process.
Click "Next."
User Selection - Intrexx
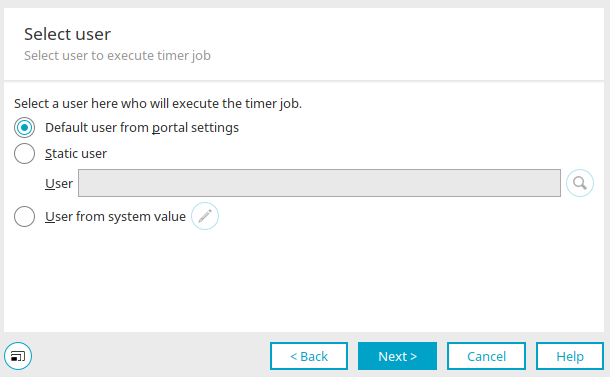
If you have selected an Intrexx data group as the data group, you can select the user who is to run the timer job here.
Default User from the Portal Properties
If no specific user is selected, this option automatically uses the user defined in the portal properties.
Static User
Displays the path and name of the user in whose context the queries are being executed.
 Select a user
Opens a dialog box where the user can be selected from the "Users" module.
 Remove selection
Removes the selected user from the list.
User from System Value
This option allows you to define a system value that returns a user GUID.
 Edit System Value
Opens a dialog box where the system value can be configured.
If no user is specified here, the global timer runs in the context of the user who last published the process.
User who last published the process (Compatibility Mode)
This option is only available if the process was created using an older version of Intrexx and no user is configured in the timer. In this case, the user who last saved the process in the old system is used.
User Selection - OData/SAP Gateway
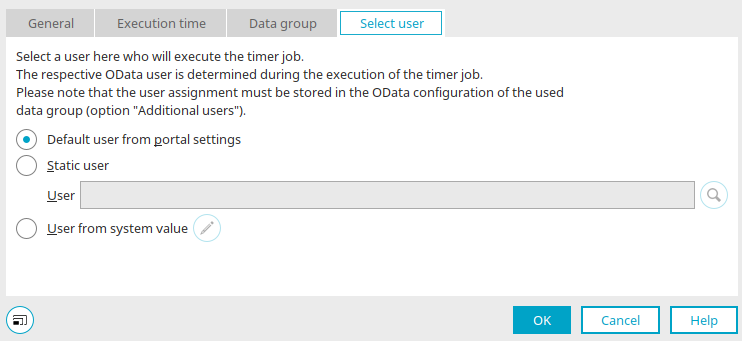
If you have selected an OData or SAP Gateway data group, you can select the user who is to run the timer job here. The appropriate OData user is determined when the timer job runs.
The settings in this dialog correspond to the settings you can configure in the user selection for an Intrexx data group.
User Selection - dg archive
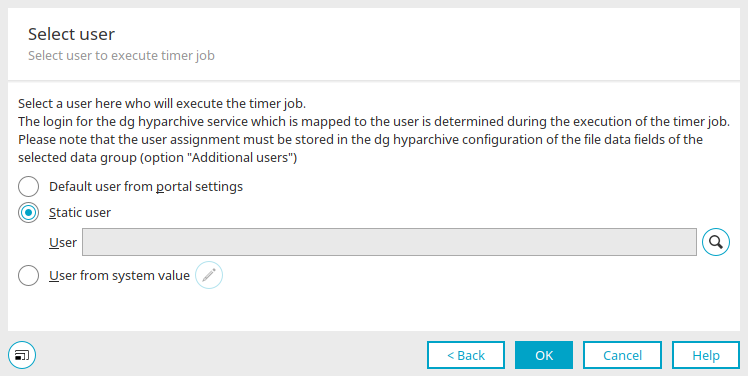
If you have selected a data group that contains a "dg archive" file field, you can select the user who is to run the timer job here. The corresponding dg archive user is determined when the timer job runs.
The settings in this dialog correspond to the settings you can configure in the user selection for an Intrexx data group.
User Selection - Exchange
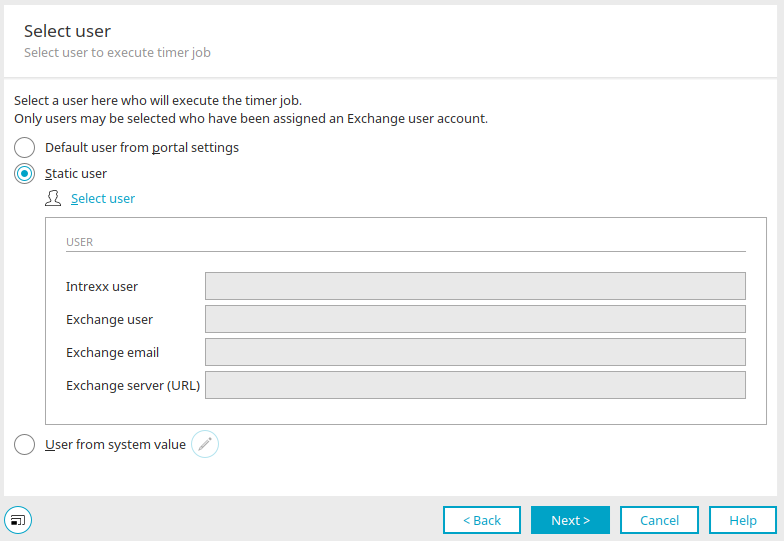
Here, you can specify a user in whose context the following action will be performed. The user must be associated with an Exchange account.
Default User from the Portal Properties
If the process has recognized the selected data group as a connection to the Microsoft Exchange server, you can define a user here in whose context the queries will be executed. You can only select users who are associated with an Exchange user account.
Static User
Selecting the "Log in as a static user" option enables the "Select user" link. Clicking this link opens a dialog box where you can select users who have already been created and assigned to Exchange users from the data source configuration. In the lower section, enter the connection information for the Microsoft Exchange server.
User from System Value
For the "User from System Value" option, the system value must contain a user GUID. Please note that a valid user assignment must exist in the Exchange configuration. In addition, you can, of course, use the process actions to schedule appointments, create tasks, and generate emails. The " Switch User" action allows you to switch users while the process is running. If a static user is assigned to both the data group and the process, the user assigned to the data group takes precedence.
Click "Next."
Processing Context
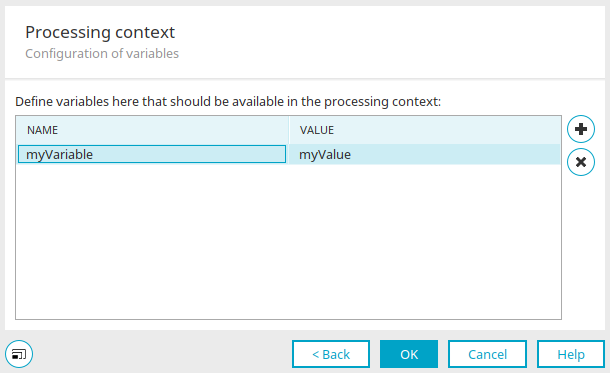
The name and value of the variable are displayed here. You can edit the name and value by double-clicking the corresponding cell.
 Add a variable
Creates a new line where a new variable can be defined.
Remove variable
Deletes the currently selected variable.
Please note that only string values are supported here.
Click "OK" to complete the configuration.
Start the Global Timer
A global timer creates time-based tasks as soon as it is configured in the process and the process is published to the server. In the timer's properties, you can, among other things, specify the user who will run the timer job.
These tasks are listed and logged in the "Tools" module in the task planner . The task can also be started manually there.
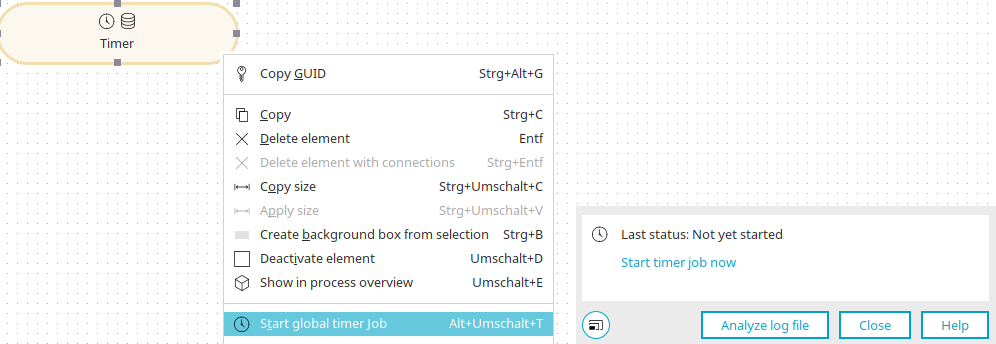
A global timer can also be run manually directly in the "Processes" module via the main menu option "Edit / Start Global Timer Job" or the corresponding context menu.
Start the scheduled job now
Triggers the timer to run.
Analyze the log file
Opens a dialog box that displays the log file for the execution.