Portal Properties
The portal properties are the central location in Intrexx where you can view a wide range of information and settings related to your portal. At the same time, you have the option to (subsequently) change settings made when the portal was created and to configure settings that are only required after the portal has been created.
You can access the portal properties from the main menu under Portal / Portal Properties.
In the portal properties, you can also perform actions such as porting (migrating) databases or adding certificates.
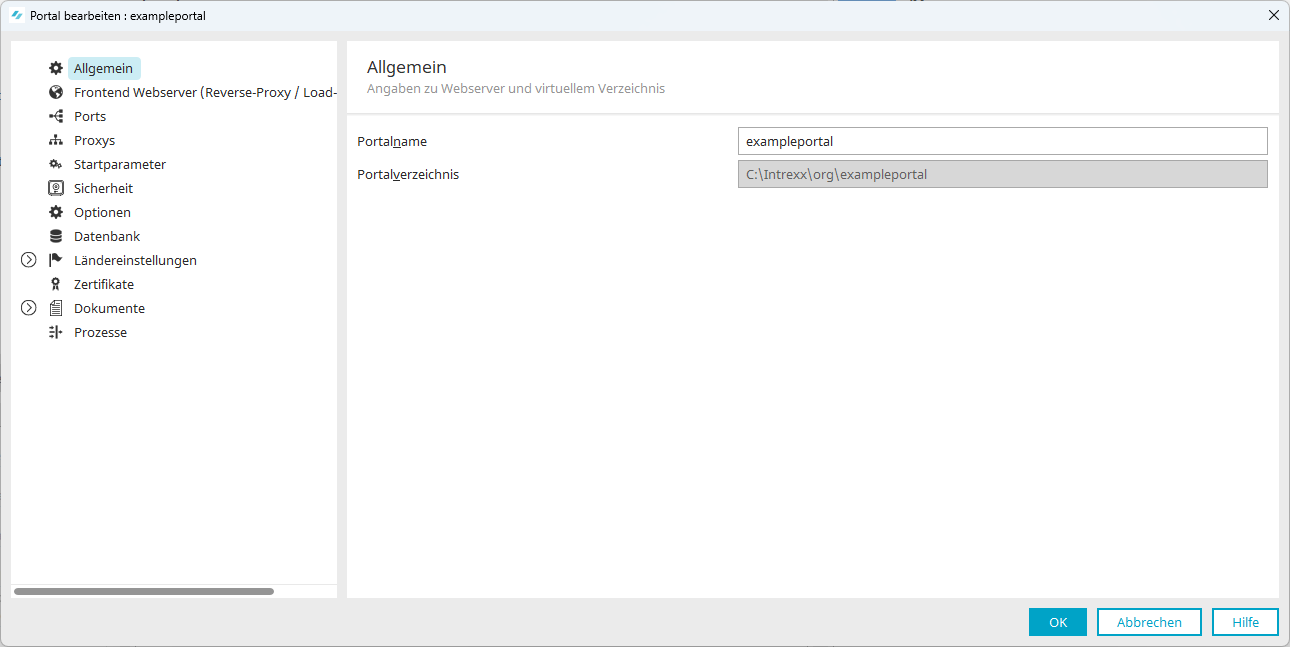
General
The portal name and portal directory are displayed here.
 Detailed Information
Portal Name
The portal name you specified when creating the portal (General Settings) is displayed here.
Changing the portal name will only result in changes to how it is displayed within the Portal Manager. For example, the (updated) portal name is displayed in the title bar of the Portal Manager or the "Options" dialog box.
Changing the portal name does not result in any changes to the portal directory or the files stored there, nor does it result in any changes to the database.
The portal name does not match the URL you use to access the portal in your browser. You configure the URL on the front-end web server. (See " Add a Website in IIS" for more information.)
Portal Directory
The portal directory that you selected when creating a portal (General Settings) is displayed here.
Front-end Web Server (Reverse Proxy / Load Balancer)
This page displays the settings you configured when setting up the front-end web server. The settings vary depending on which front-end web server you are using.
See the " Front-End Web Server" section for more information.
If you want to make a change related to the front-end web server, you can do so in this dialog box.
Detailed Information
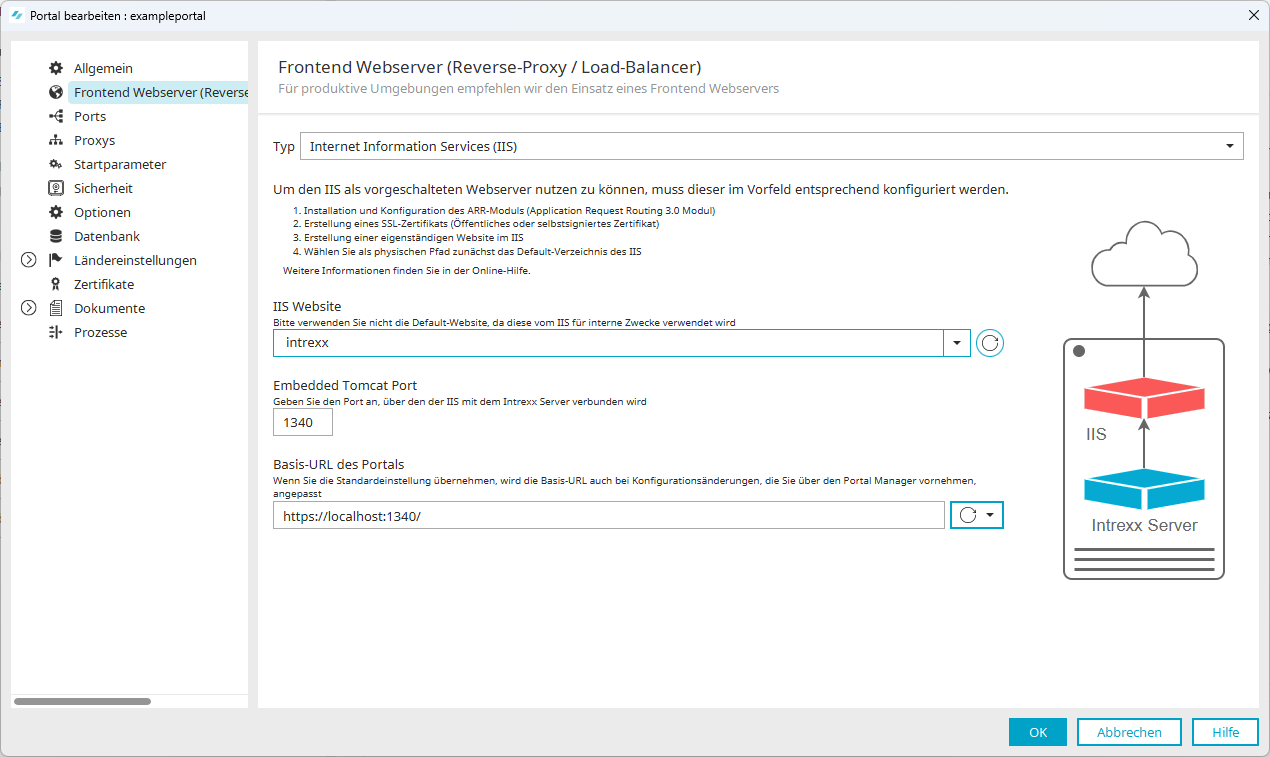
IIS
Field descriptions
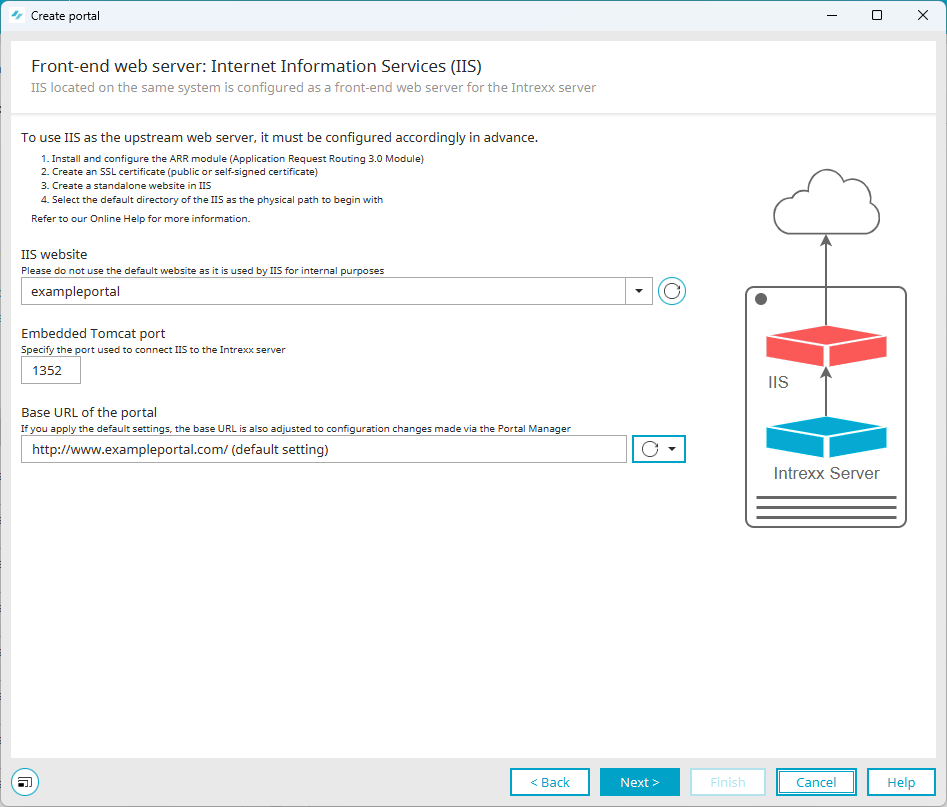
IIS Website
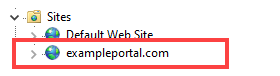
Select the website here that you created in IIS for the portal.
Embedded Tomcat Port
This displays the port you used in the previous version of Intrexx. You can leave this port as is.
Note: For a new installation, a free port—such as 1337—is preset here.
Portal Base URL
The portal's base URL is displayed here.
By default, the displayed base URL is derived from the website binding information in the Internet Information Service (IIS). These are the "Type" and "Hostname" fields. (See the section " Adding a Website in IIS" for more information.)
The base URL displayed here will be copied to the "Base URL" field in the portal properties under "General" after the portal is created.
NGINX
Field Descriptions
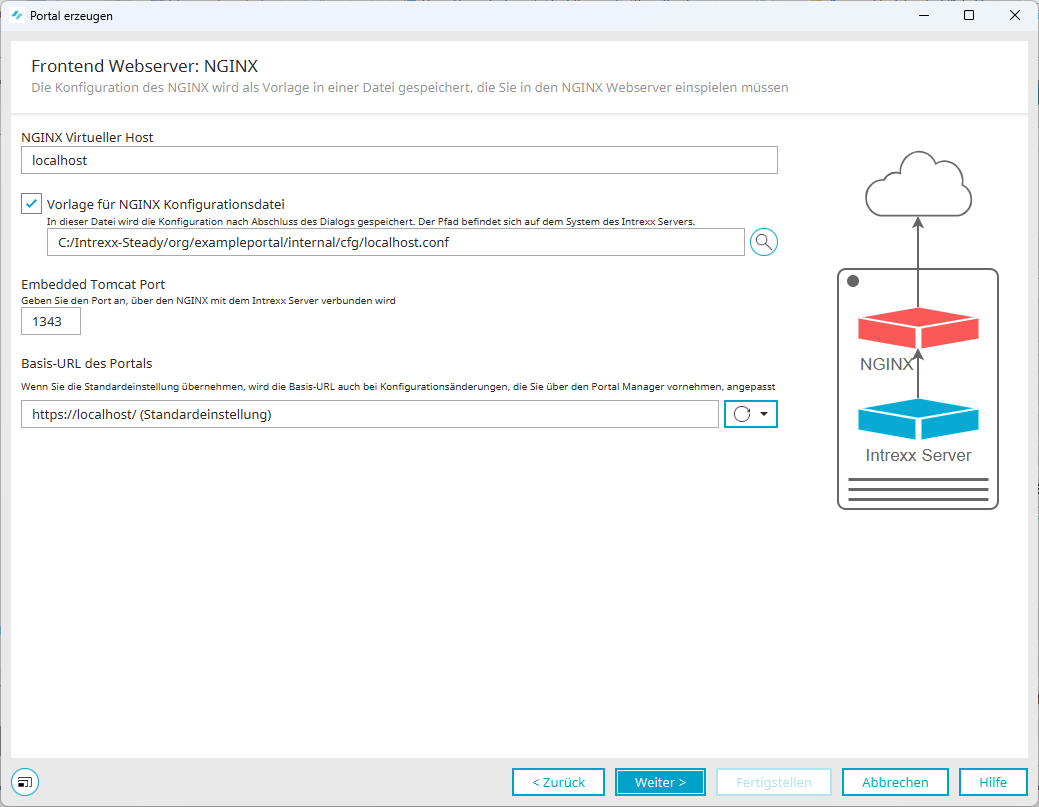
NGINX virtual host
"NGINX Virtual Host" refers to the embedded Tomcat. NGINX establishes a connection to the Intrexx portal service via the virtual host. Usually, you should enter "localhost" here. (An exception may apply if NGINX is installed on a different server than Intrexx. (In that case, the Intrexx server should be specified here.)
NGINX Configuration File
You can generate the NGINX configuration file using Intrexx.
Enter the path to the directory that the NGINX configuration file should be generated in.
Example: /myfolder/portal.example.com.conf
Next, copy the NGINX configuration file to the desired location under "/etc/nginx".
Example: /etc/nginx/sites-available/ portal.example.com.conf
Embedded Tomcat Port
The port for Embedded Tomcat is displayed here. (For a new installation, this is port 1337.)
Base URL of the portal
The base URL needs to be entered here. The first part consists of the minutes. Please note that "https " is specified here. The second part consists of specifying the hostname that you have defined in the NGINX configuration file. Note that a trailing slash (/) is included. It is essential that you enter the correct information so that your portal can be accessed in the browser.
No front-end web server
Field Descriptions
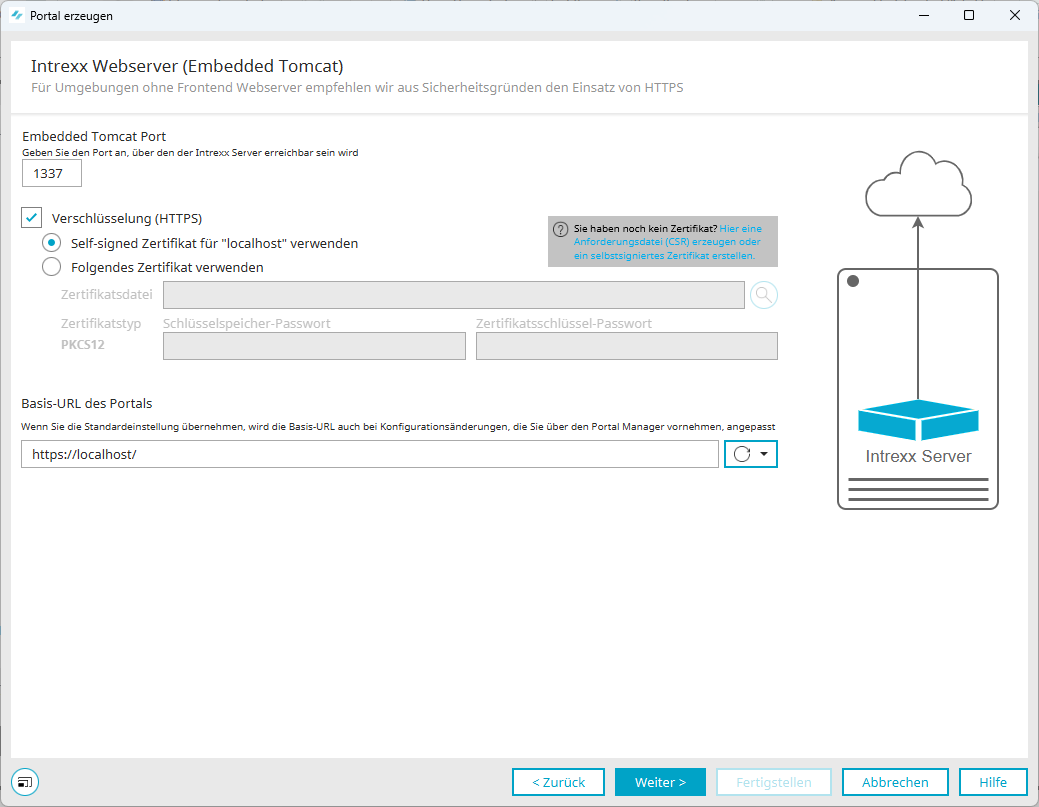
Embedded Tomcat Port
The port for Embedded Tomcat is displayed here. (For a new installation, this is port 1337.)
Encryption (HTTPS)
Select this checkbox if you want to establish an encrypted connection between Intrexx or the embedded Tomcat and the browser.
Self-signed certificate for "localhost"
Select this option if you want communication between the Embedded Tomcat and the browser to be encrypted using a self-signed certificate (for test or development portals).
In this case, Intrexx automatically generates a self-signed certificate and uses it for the encrypted connection.
Certificate file
You can use the "  " icon to locate the certificate file.
Certificate Type
Select the type of certificate store (keystore) here where you have saved the certificate file.
Key Storage Password
Enter the password for the keystore that the certificate is saved in.
Certificate key password
Enter the key for the certificate file here.
Note: The keystore password and the certificate key password are often the same.
Portal Base URL
The base URL needs to be entered here. The first part refers to the protocol. Please note that "https " is specified here. The second part consists of specifying the hostname. Please make sure that this ends with a slash (/). It is essential that you enter the correct information so that your portal can be accessed in the browser.
In this dialog box, you can generate a CSR (Certificate Signing Request). For detailed information on this topic, see the " Generating a CSR (Certificate Signing Request) Without Using a Front-End Web Server" section.
Manual Setup
Field Descriptions
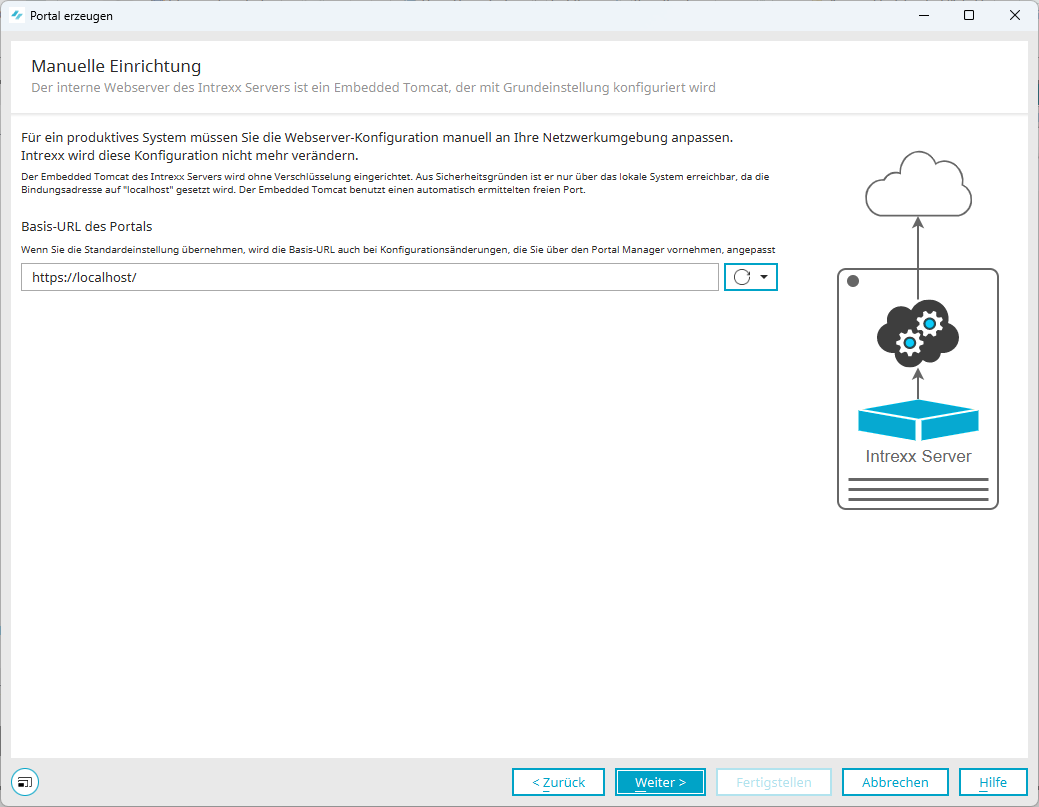
Portal Base URL
The base URL needs to be entered here. The first part consists of the minutes. You have configured an encrypted connection between the Intrexx portal server and the browser. The second part consists of specifying the hostname. Note that a trailing slash (/) is included. It is essential that you enter the correct information so that your portal can be accessed in the browser.
Ports
The settings for the ports in use are displayed here.
Detailed Information
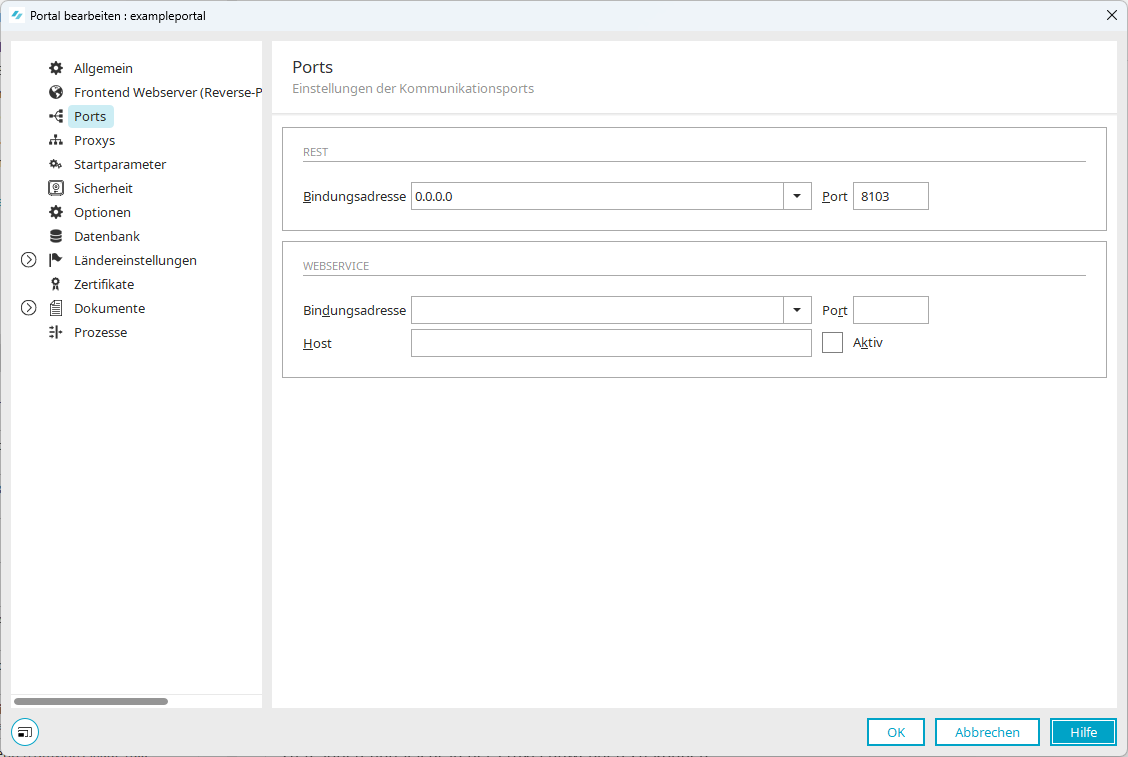
REST
The Portal Manager communicates with the respective portal on the portal server via the REST port. You must specify the REST port every time you log in to the portal. For more information, see the section " Connecting to Your Portal."
This section displays the values that Intrexx automatically assigned when the portal was created. If necessary—for example, if security considerations require it—you can change the values. Any changes require a restart of the portal service.
Binding address
By default, the value 0.0.0.0 is set here so that the system is ready to receive data on all available addresses.
Port
When creating a portal, Intrexx automatically determines a suitable port. This port is displayed in this field.
Web Service
In Intrexx, you can offer web services in the "Integration" module.
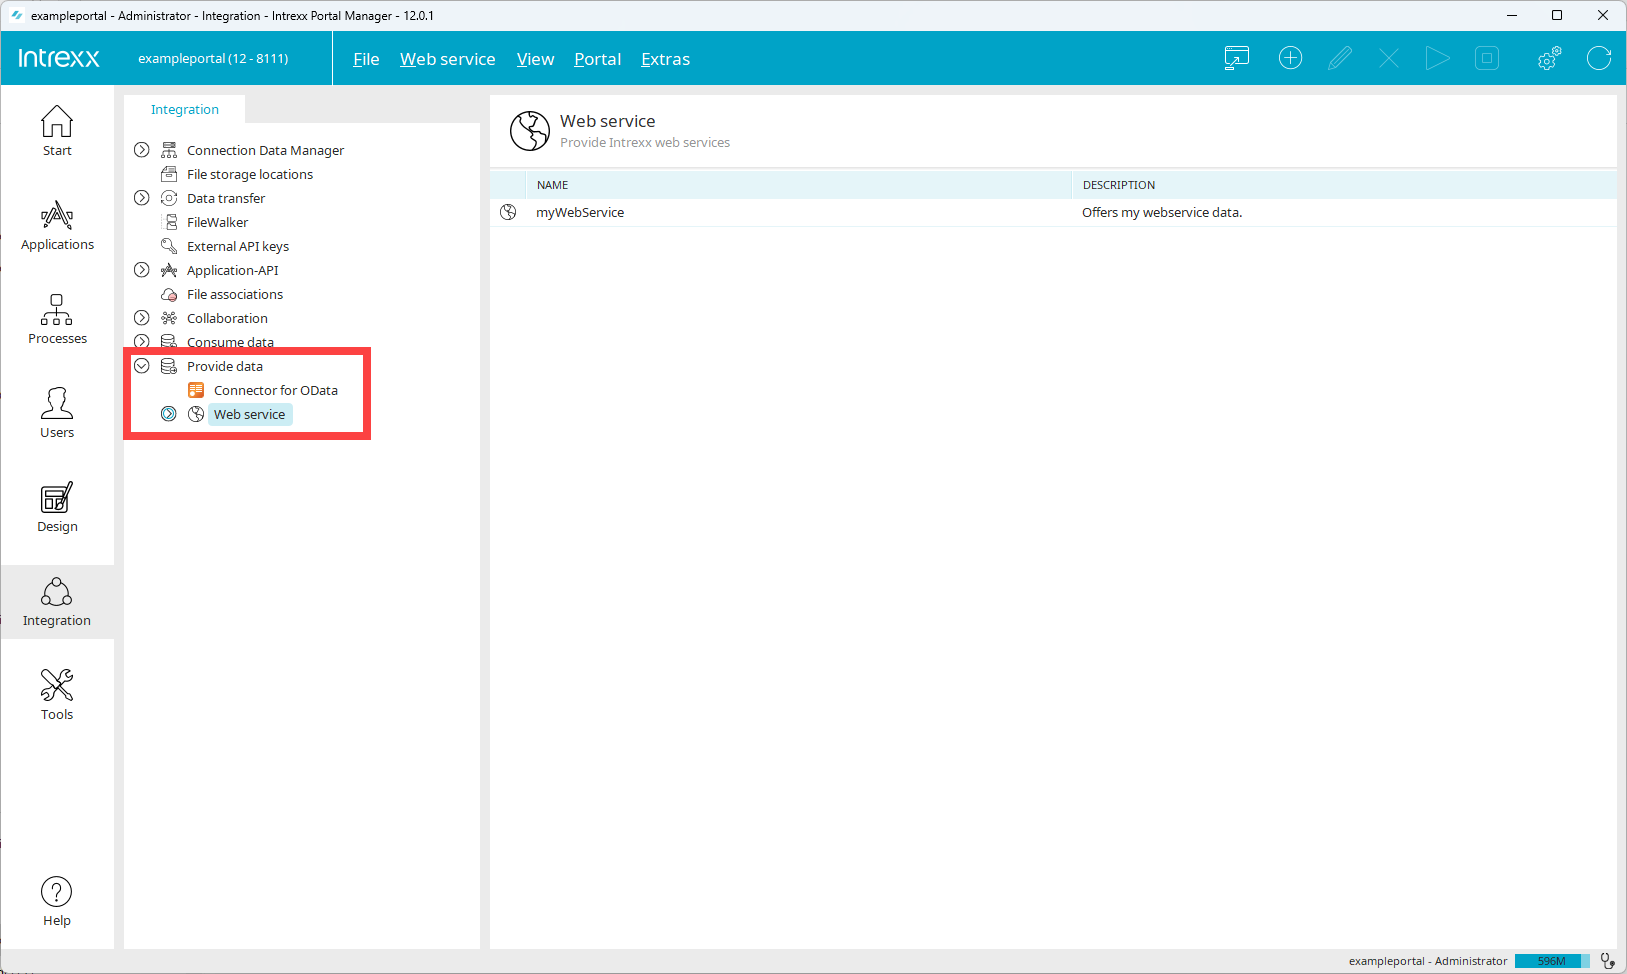
You can configure the settings required for the web service either in the "Integration" module or centrally in the portal properties. The settings specified in the portal properties are applied to the settings in the "Integration" module.
The following screenshot shows the settings dialog in the "Integration" module.
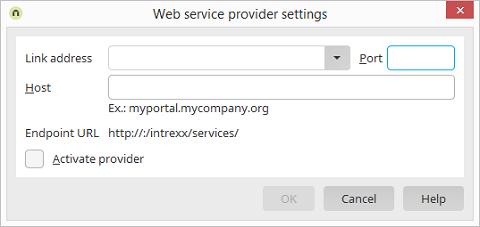
The following section describes the settings that you can configure centrally in the portal properties.
Binding address
You can enter the binding address (IP or server name) here.
Port
You can enter the port here.
Host
Here you can enter the web service host.
Active
If you select this checkbox, the web service is enabled.
More Information
Proxies
Here you can create and manage proxies. The proxies set up here are used for communication between Intrexx and external websites and Internet services.
Detailed Information
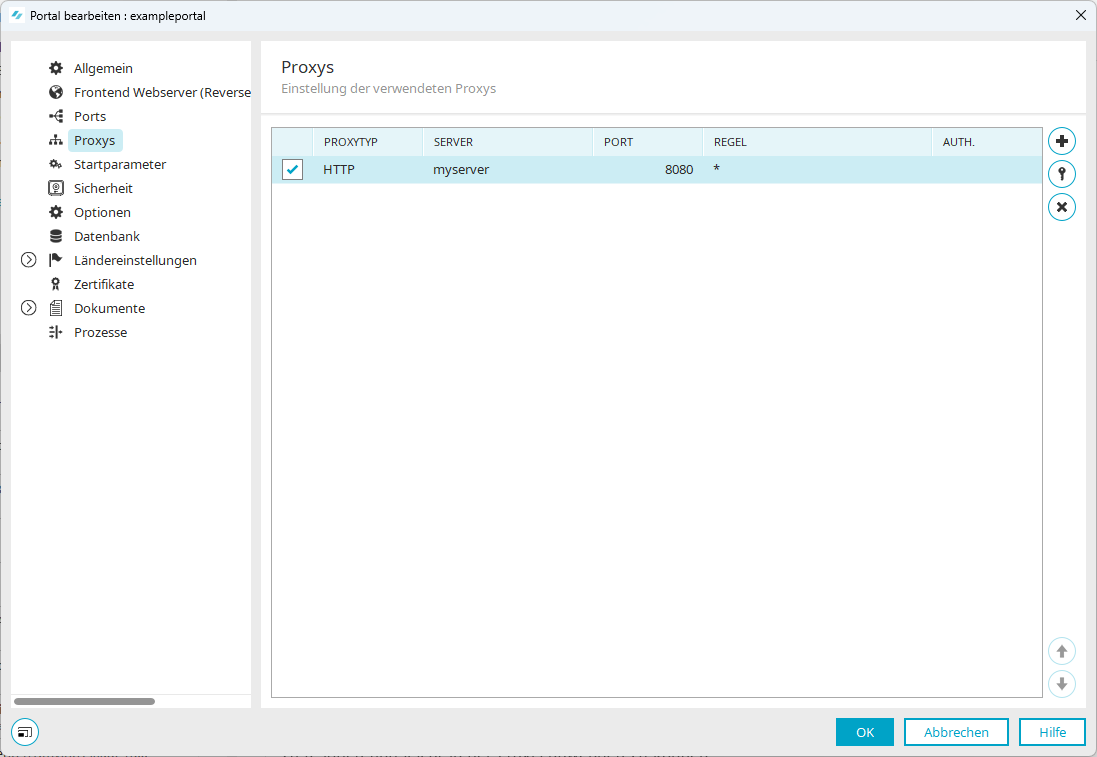
First column (checkboxes)
Click in the first column to enable or disable a proxy. This setting should always be understood from the perspective of the Intrexx Portal Server.
"Proxy Type" column
Select the proxy type here. If you do not select a proxy type, this means that no proxy should be used for the specified URL pattern.
"Server/Port" column
Enter the server name or IP address of the server here. The port only needs to be changed if port 8080 is already in use.
"Rule" Column
Here, you can enter a comma-separated list of rules that will then be applied via the proxy. At least one of the rules must apply. The * symbol routes everything through the proxy.
Example 1
https://server\\.tec\\.example\\.com:4444/services*
This rule accepts only URLs that begin with:
https://server.tec.example.com:4444/services
Example 2
https://server.tec.example.com:4444/services*
This rule accepts only URLs that begin with:
https://server.tec.example.com:4444/services
Example 3
https://*/services/*_"
This rule accepts URLs that begin with:
https://
And include the following:
/services/
Be sure to define the rules so that they cover only the cases for which they are intended. Otherwise, unexpected behavior may occur—for example, using the rule https://* will cause URLs on the local computer (e.g., https://localhost:8983) to be affected as well, which is generally not the intended result.
"Auth." column
A key icon appears in this column if you have set up proxy authentication. (See " Authentication" for more information.)
 Add a proxy
You can use this icon to add another proxy. This inserts one row at a time. Click in the respective fields to edit them.
 Delete Proxy
You can use this icon to delete a proxy.
If necessary, you may need to enter authentication credentials in the proxy.
To do this, click the "  " icon.
The "Proxy Authentication" dialog box appears.
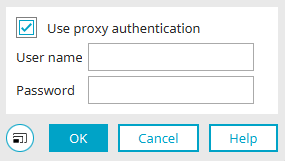
Select the "Use proxy authentication" checkbox and enter your username and password.
More Information
Start Parameters
Here you can specify startup parameters. These include the memory requirements for RAM and the duration of a "portal session" before an automatic logout occurs.
Detailed Information
Up to Intrexx version 12.1.0:
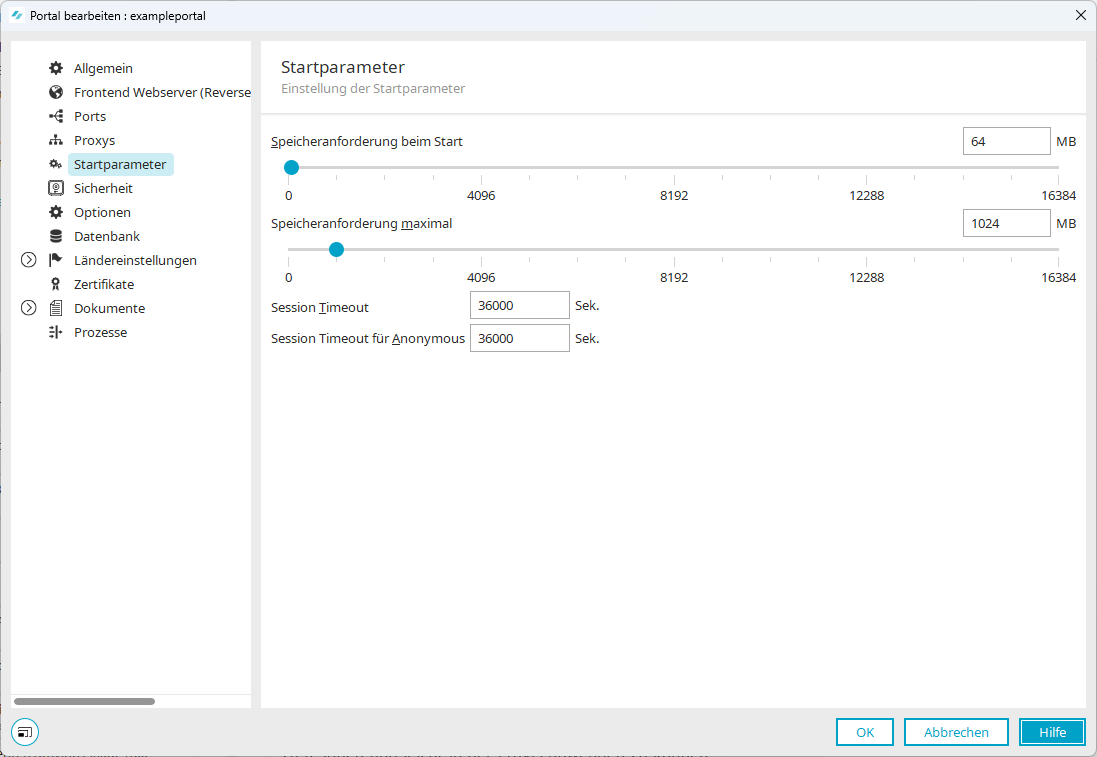
Memory Requirement at Startup
Here, you can define startup parameters that optimize the portal's performance. Use the slider to specify how much memory is allocated to the portal at startup. The initial value is 64 MB. This is sufficient in almost all cases. If you would like to increase this value, we recommend setting it to 256 MB. The value should be increased to a maximum of 512 MB.
Starting with Intrexx version 12.1.0:
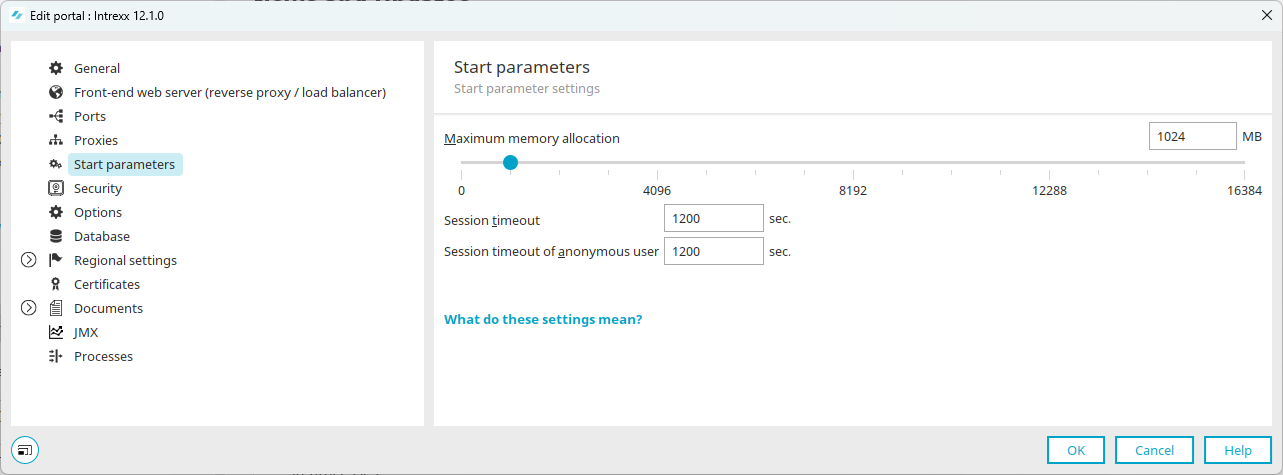
Maximum memory requirement
Use this setting to specify the maximum amount of memory to be allocated to the portal. The maximum storage capacity depends directly on the size of the portal. For this reason, no genuine recommendation can be made here. Based on experience, a live system should be run with at least 2048 MB of RAM. Experience shows that well-used portals with approximately 100 active users require 4096 MB. If your portal requires more than 8 GB of RAM, we recommend that you contact technical support.
Session Timeout
Enter the number of seconds here after which a session will automatically end.
The session timeout must not exceed 2,073,600 seconds. (24 days).
Anonymous Session Timeout
Enter the number of seconds here after which a session for anonymous users will automatically end.
The session timeout must not exceed 2,073,600 seconds. (24 days).
Session Notifier (Automatic Logout)
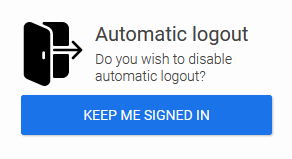
The layout of the message that appears in the lower-right corner of the portal to automatically log you out after a session timeout can be changed in the "Design" module.
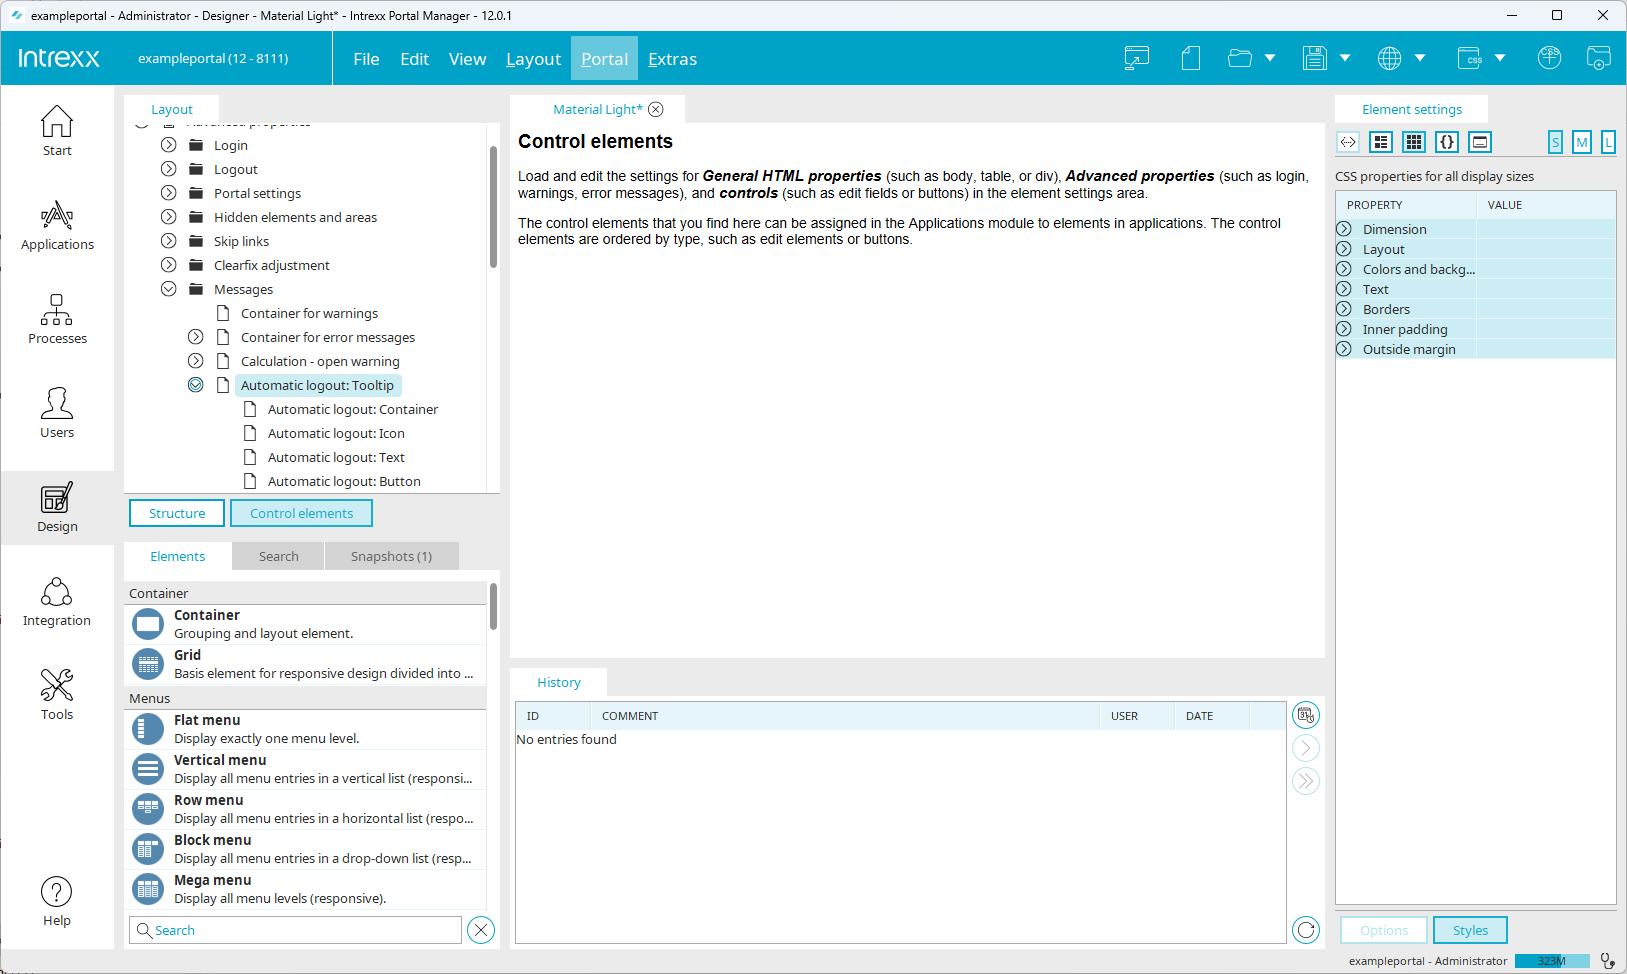
You can find the corresponding styles in the "Layout / Control Elements / Advanced Properties / Messages" section.
Security
Here you can configure security settings. This involves settings related to the following points:
-
Session Cookies
-
CORS Settings for API Login Endpoints
-
Uploading and downloading images to and from the "userfiles" directory
-
Custom Portlets
Detailed Information
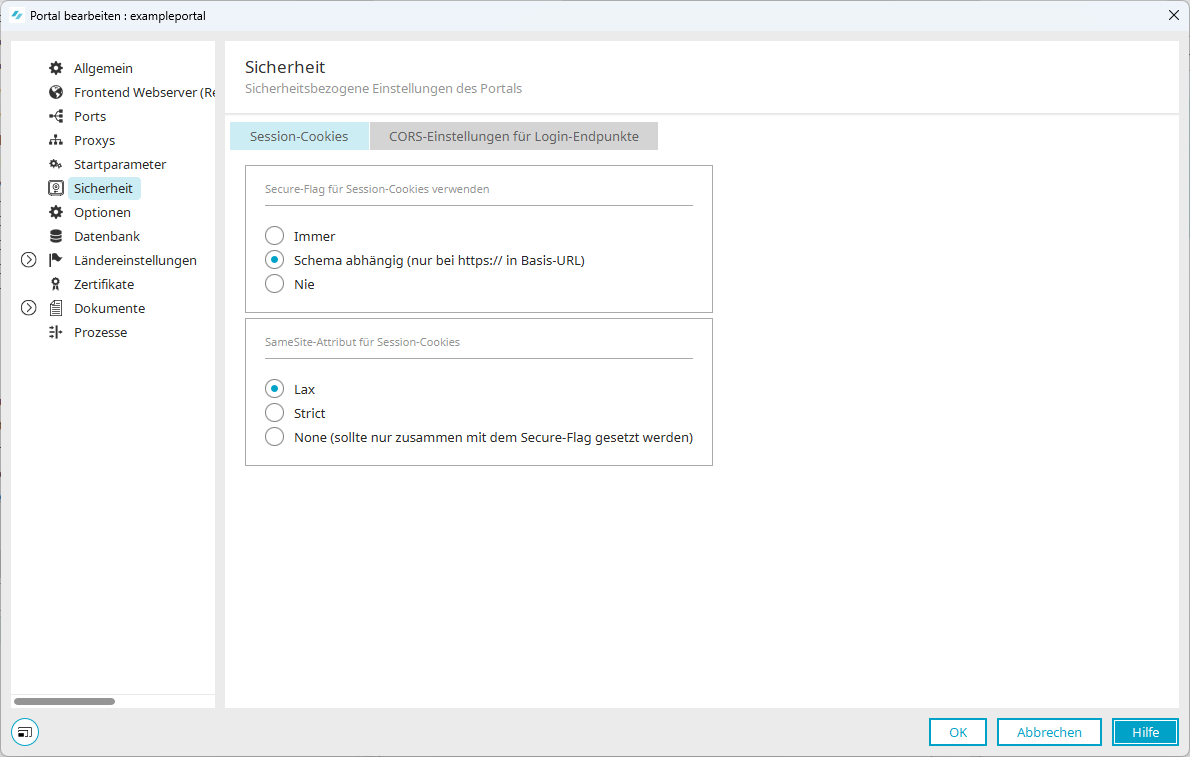
Session Cookies
Intrexx Version 12.0.0
Intrexx Version 12.0.1
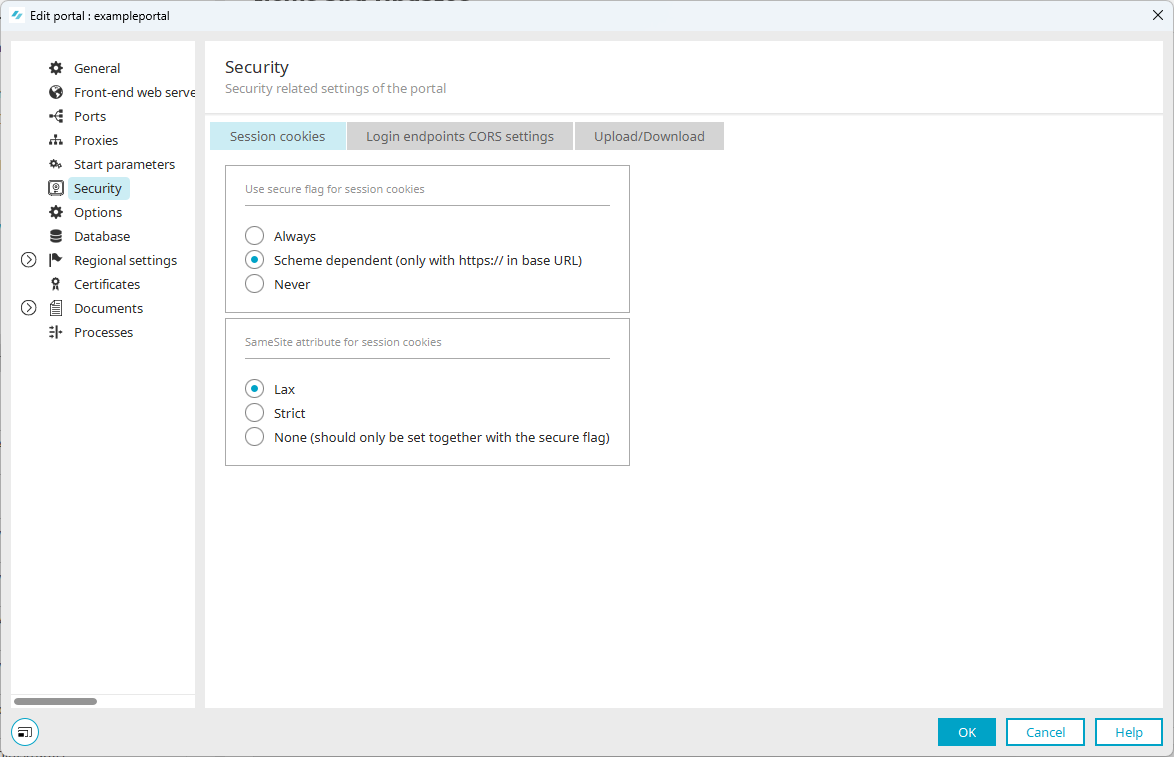
Use the "Secure" flag for session cookies
This setting sets the "Secure" flag for the session cookie. This prevents the browser from including the session cookie in HTTP requests, which prevents eavesdropping when accessing unencrypted resources. Consequently, the session cookie is sent only with HTTPS requests to the same domain. There are three options available:
-
Always
-
Schema-dependent (only possible with https:// in the base URL)
-
Never
SameSite attribute for session cookies
There are three options available here:
-
Lax
-
Strict
-
None
The "None" option should only be used if the connection is encrypted from the browser's perspective.
For more information on this topic, please visit https://developer.mozilla.org and follow the link titled " Set-Cookie."
CORS Settings for API Login Endpoints
You can configure CORS settings for the Login API Endpoints that come with the system by default and for the API endpoints you have created. You can use the CORS settings to control from which websites or portals the API endpoints can be called (in the browser).
For more information on API login endpoints, see the section on CORS - Cross-Origin Resource Sharing.
Intrexx Version 12.0.1
Upload / Download
Here you can configure settings for the "userfiles" directory.
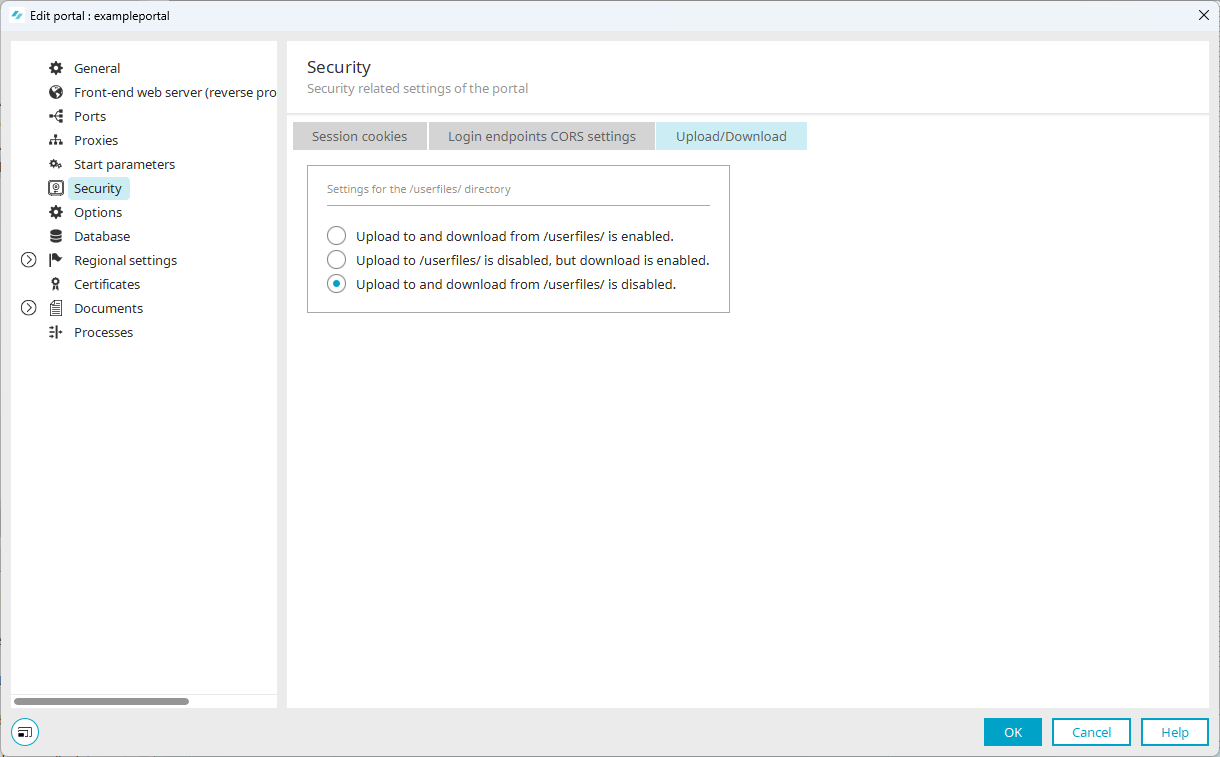
You can find the "userfiles" directory at the following location: <portal-directory> \external\htmlroot\userfiles
The "userfiles" directory stores image files that portal users upload, among other ways (?), using the "Insert/Edit Image" button in the "TinyMCE-Advanced" editor (TinyMCE Advanced).
Using the settings on this page, you can specify whether portal users are allowed to upload and download images.
Uploading to and downloading from /userfiles/ is enabled
If you enable this option, files can be uploaded in the "TinyMCE-Advanced" editor.
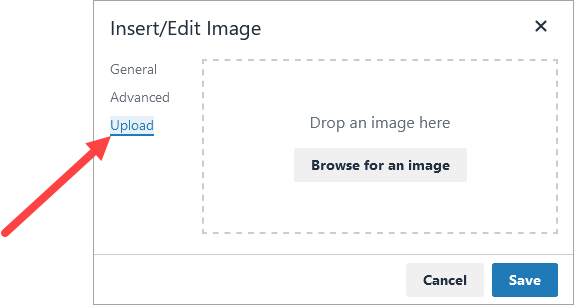
At the same time, the files are available on the portal or are displayed there.
Please note that to upload files, the "Enable file upload" checkbox must be selected in the "TinyMCE-Advanced" editor settings.
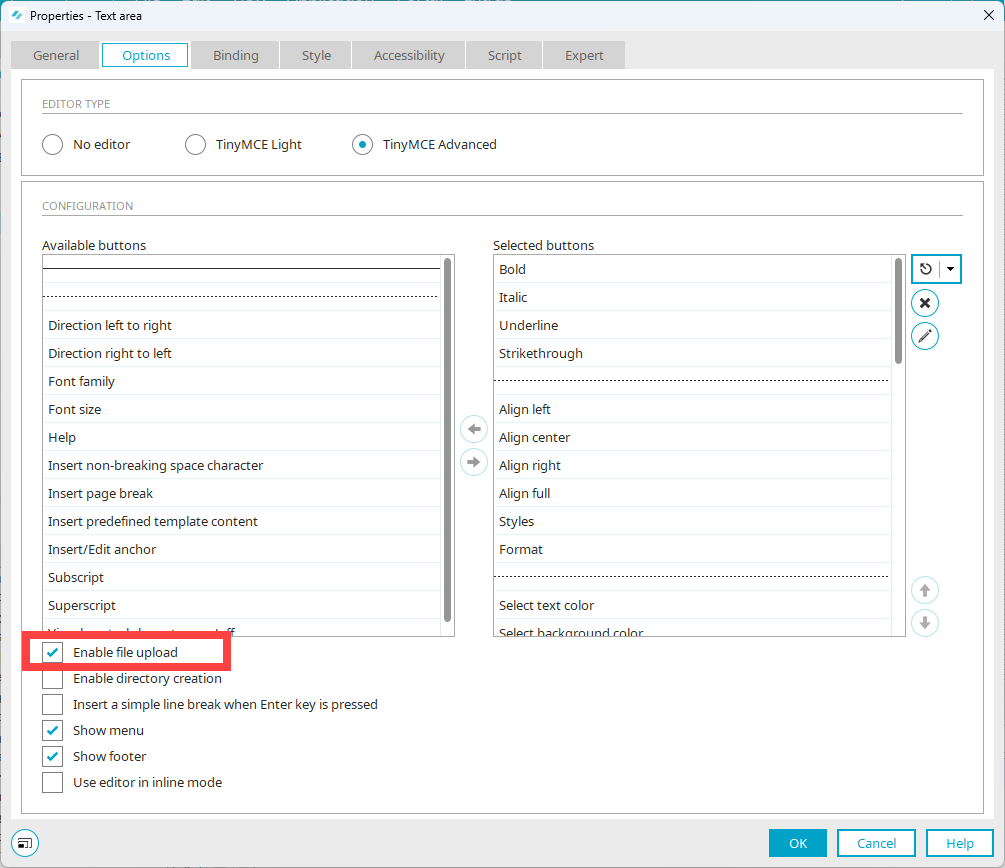
This option is enabled by default when updating existing portals to Intrexx version 12.0.1 (and later).
Uploading to /userfiles/ is disabled, but downloading is enabled.
If you enable this option, you will not be able to upload files in the "TinyMCE-Advanced" editor. However, files that were uploaded at an earlier time are still available on the portal or are displayed there.
This option is relevant when changing the settings. For example, if you had temporarily enabled the option "Upload to and download from /userfiles/ is enabled" (see above), you were allowed to upload files. If you want the files that have already been uploaded during this time to remain available for download, you can select this option ("Uploading to and downloading from /userfiles/ is enabled").
You can also use this option if you want to allow files to be uploaded to the "userfiles" directory, but these files are not needed in the portal—they are processed in other contexts.
Uploading to and downloading from /userfiles/ is disabled.
If you enable this option, files cannot be uploaded in the "TinyMCE-Advanced" editor, nor will they be available on the portal.
This option is enabled by default when creating new portals.
This option overrides the "Enable file uploads" setting in the "TinyMCE-Advanced" editor.
More Information
Intrexx Version 12.0.2
Portlets

Here you can configure how the content of custom portlets should be rendered.
View HTML (with cross-site scripting protection)
With this option, only the HTML code is rendered. JavaScript code is removed before rendering.
This option is the default setting.
View HTML
With this option, the HTML code is rendered and JavaScript code is executed.
Show text only
With this option, the HTML code is not rendered. The HTML code is displayed as plain text only.
Overview of Preferences
Below is an overview of the default Intrexx settings for the "Security" menu item:
Session Cookies Scheme "Dependent (only when https:// is included in the base URL)"
SameSite Attribute "LAX"
Upload/Download " Uploading and downloading from /userfiles/ is disabled"
For "Display HTML (with Cross-Site Scripting Protection)" portlets
Behavior During Portal Import and Update
If you have exported portals from Intrexx 12.01 or earlier and import them into Intrexx 12.0.2 or later, the setting for portlets will be set to "Display HTML (with cross-site scripting protection)."
When updating to Intrexx 12.0.2, the settings remain unchanged.
Intrexx Version 12.1.0
Multi-factor authentication
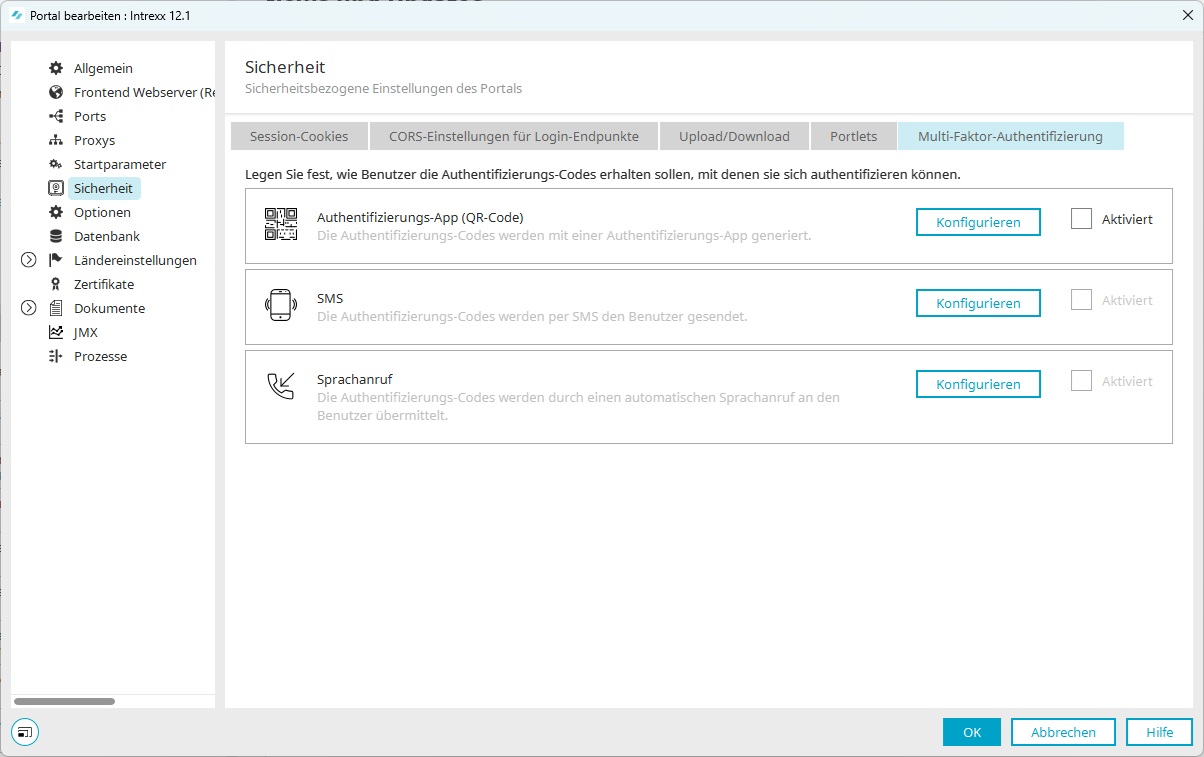
Here you can configure multi-factor authentication. For detailed information on this topic, see the section Administrator: Deploy Multi-Factor Authentication."
Options
Here you'll find a range of different settings for your portal. The settings range from user tracking to enabling Groovy remote debugging.
Detailed Information
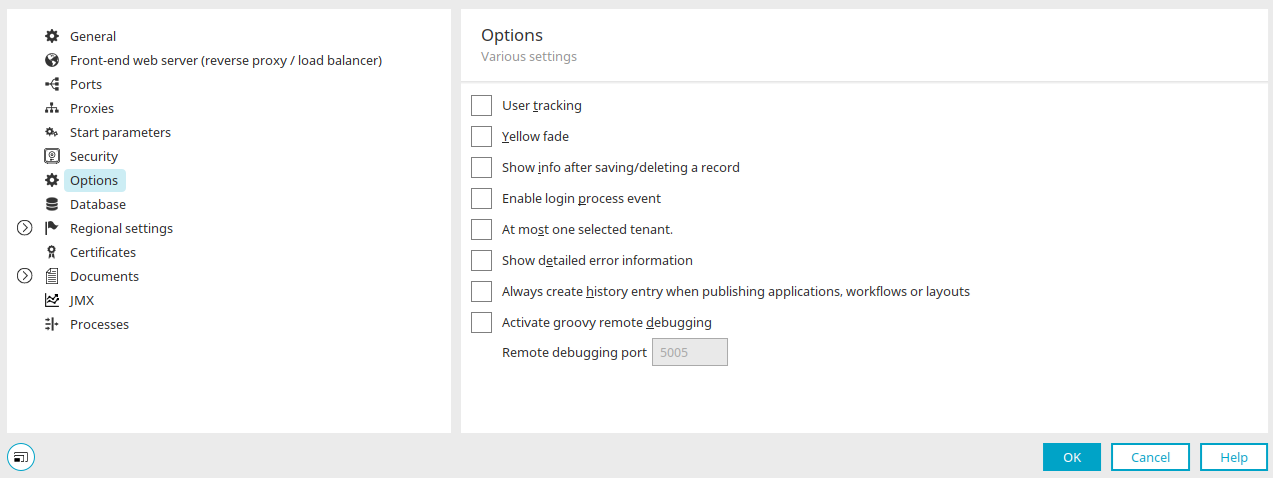
User Tracking
With this setting, the user's GUID is also written to the log file in the portal directory `internal/statistics` whenever application pages are accessed.
Please observe the applicable privacy policies.
Yellow Fade
In some contexts, the (dynamic) loading of data may take some time. If you select this checkbox, changes will be briefly highlighted in yellow during this time.
Display Information After Saving/Deleting a Record
If you select this checkbox, portal users will see a message informing them that they have saved or deleted a record.
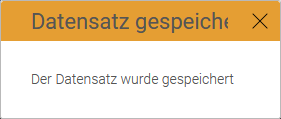
Displaying the notification message is required for accessible portals. It is also generally useful if you want to display visual confirmation to portal users after they save or delete records.
Send a login process event upon registration
This setting causes a user's login to be sent as a server event, which can then be processed in the "Processes" module using a Groovy event handler.
At most one selected client
With this option, a user can select only one client and therefore sees only the data for the selected client.
Display detailed error information
On the web, any server errors that may occur are reported as such. If this setting is enabled here, the error details will also be displayed.
Always create an entry in the history when publishing applications, processes, or layouts
If you select this checkbox, you must always enter a comment regarding the history when publishing (saving) applications, processes, and designs.
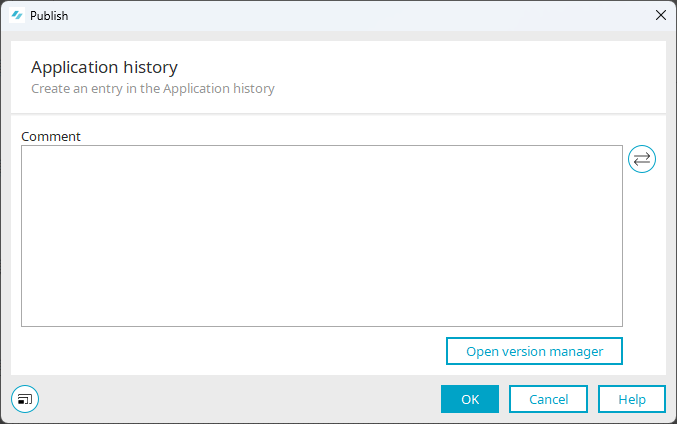
The checkbox that allows you to prevent a comment from being entered will not be displayed.
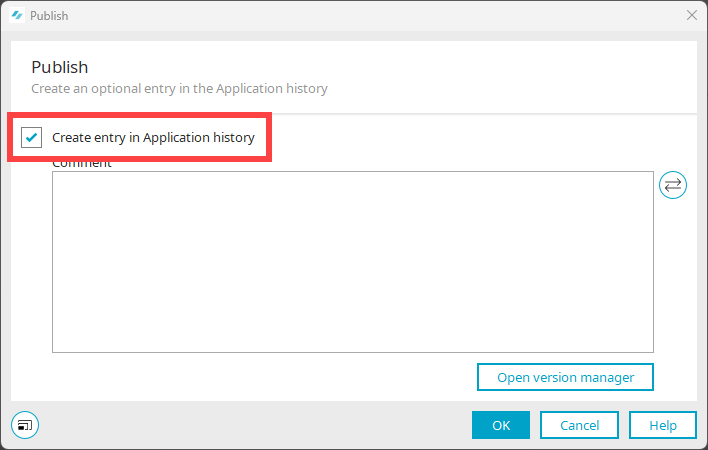
You can find additional settings for entering comments in the main menu under "Tools/Options. " There, you can configure the settings for each module to publish applications, processes, and layouts with or without a history.
The option described here in the portal properties, "Always create an entry in the history when publishing applications, processes, or layouts," overrides the setting you can specify for each module.
For more information on versioning, see the " Versioning" section.
Enable Groovy Remote Debugging
For detailed information on this topic, see the " Groovy Remote Debugging" section.
Database
This section displays the database settings you specified when creating a portal.
For detailed information on this topic , see the " Database Server" section .
At the same time, you have the option to migrate databases.
Detailed Information
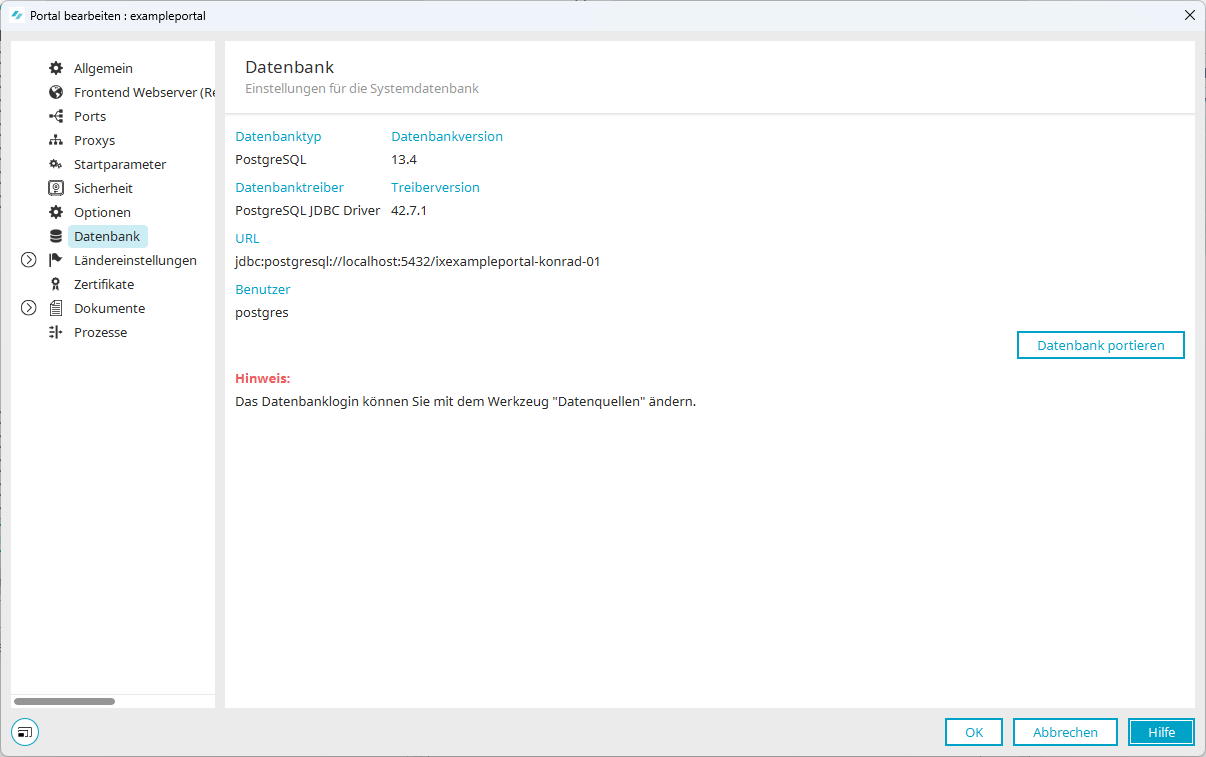
This section provides information about the database type, the database version, the current drivers, the driver version, the database name, and the username used to access the database.
Porting a Database - Database Migration
Data sources ( )
)
You can configure the database login in the Integration module under"Consume Data / Change JDBC Data Source."
For more information on this topic, see here: JDBC Data Source.
Country Settings
Here, you can customize the country settings for your portal. These include formats, time zones, languages, and global texts. You can set up multilingual portals here. For detailed information on this topic, see the " Multilingualism" section.
Detailed Information
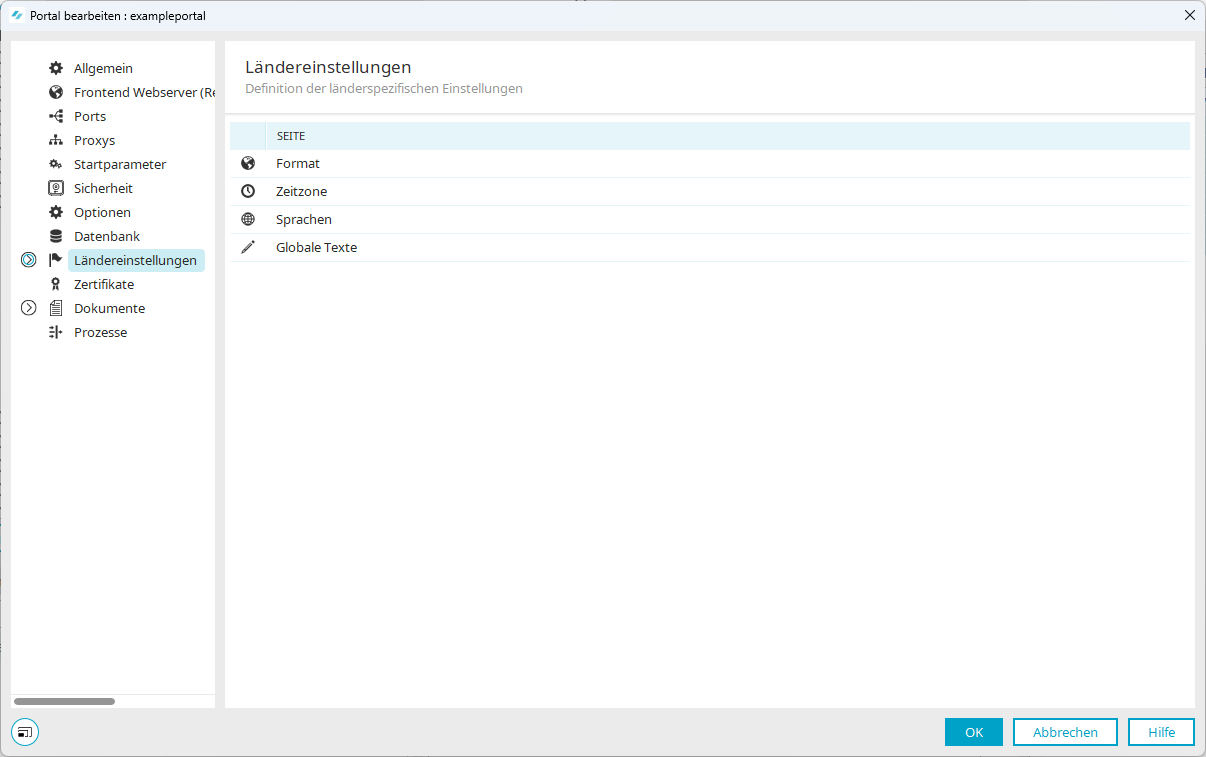
Format
Different formats are used worldwide for representing dates and numbers. To allow portal users to set the display formats appropriate for their region, so-called formats can be defined.
For detailed information on this topic, see the " Format" section.
Time Zone
Here, you can assign a time zone to the portal. As a rule, it is the time zone in which the server or the company's headquarters is located. If portal users work in different time zones, you can assign the appropriate time zone to each user in the "Users" module under the user properties. The time zone specified in the portal properties is used if no individual time zone has been entered for a user.
For detailed information on this topic, see the " Time Zone" section.
Languages
Any number of languages can be enabled for a portal.
For detailed information on this topic, see the " Languages" section.
Global Texts
In the global texts, all standard texts that appear in the portal can be edited in the various languages.
For detailed information on this topic, see the " Global Texts" section
Certificates
Here you can configure the portal server's certificate store. Certificates required, for example, to access web services, LDAP servers, RSS feeds, or OData services are retrieved from this store.
For detailed information about certificates, see the " Certificates and Encrypted Connections in Intrexx" section .
Detailed Information
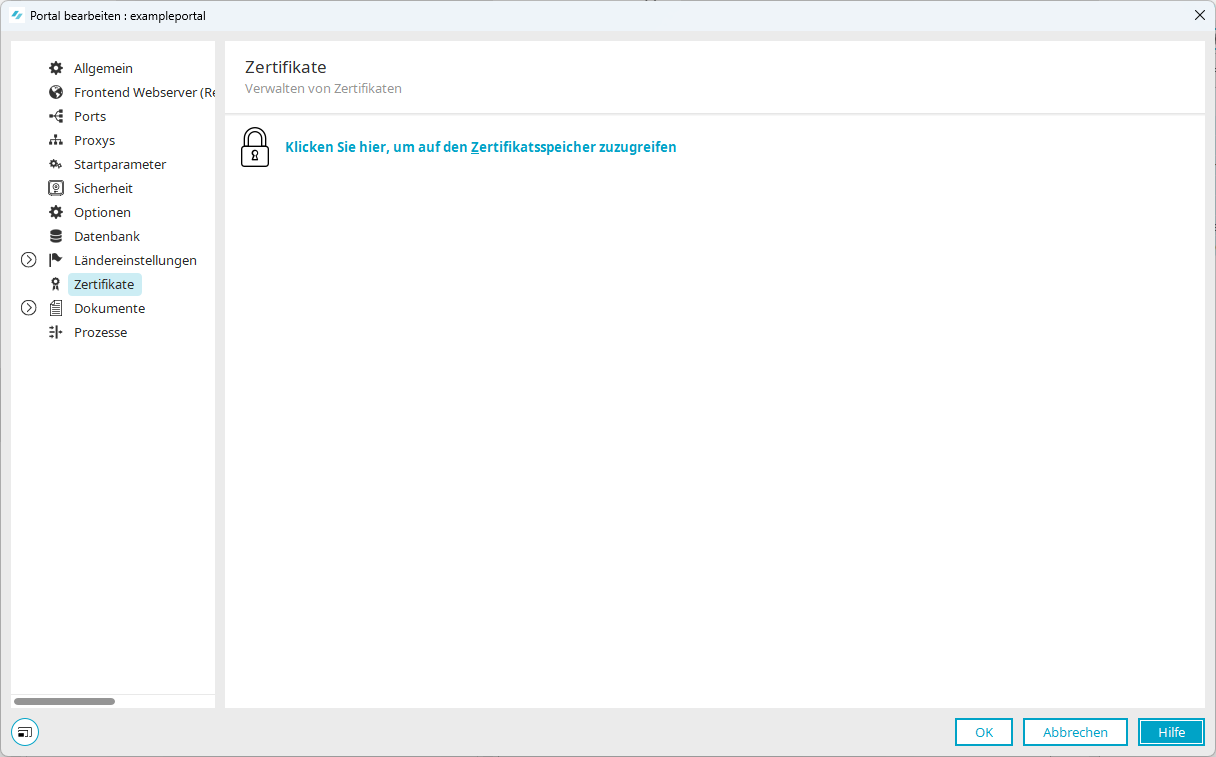
Import a certificate into the certificate store
Step-by-step guide
To import a certificate into your portal's certificate store, follow these steps:
-
Open the portal properties ("Portal > Portal Properties").
You will be taken to the "Edit Portal pagee.
-
Click "Certificates."
You will be taken to the "Certificates" page.
The lock icon and the link will only appear if you have not yet accessed the certificate store during the current session.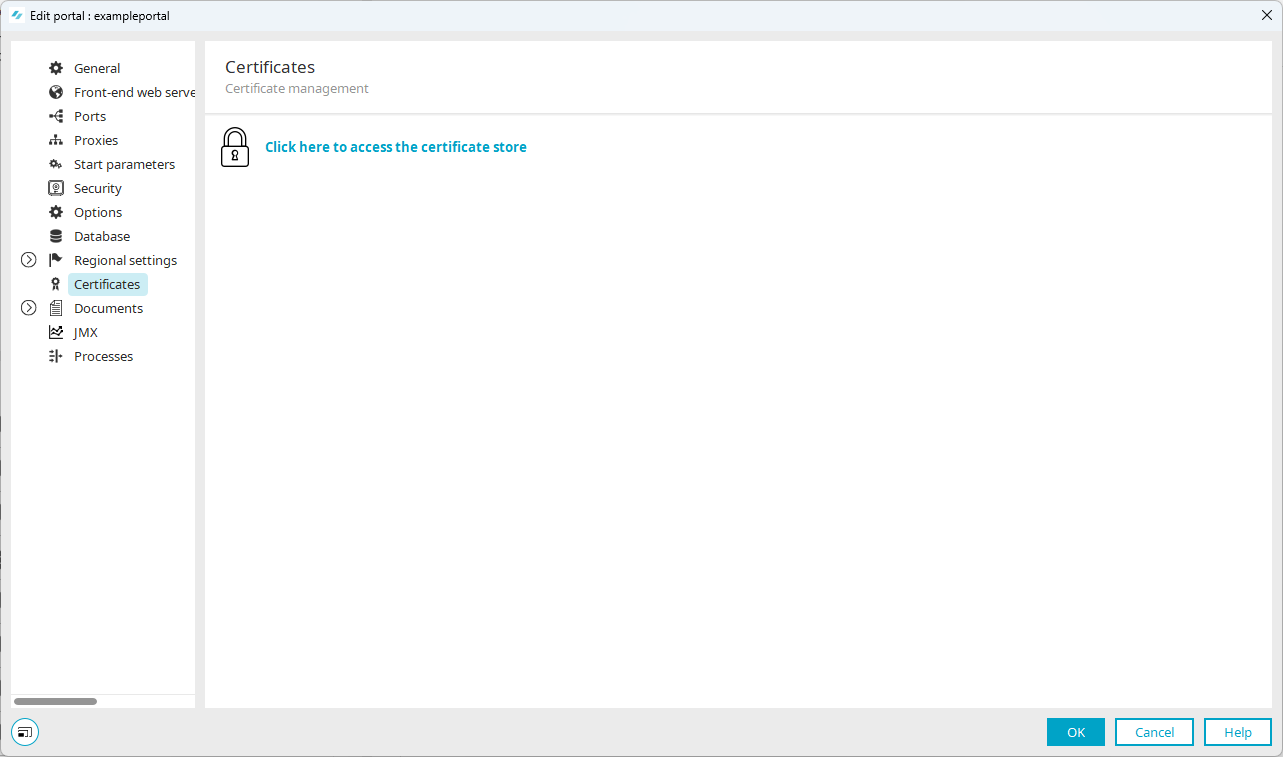
-
Click here to access the certificate store.
The "Certificate Store Password" dialog box will appear.
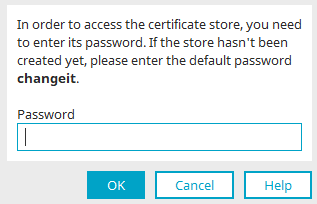
Enter "changeit" as the password if you have not yet set a password for the certificate store. (You can change the password for the certificate store in the next dialog.)
Enter your own password if you have set one for the certificate store.
-
Click "OK."
You will now see a list of all certificates included with Intrexx.
-
Make the necessary entries.
-
Click "Next."
Details of the certificate selected in the previous step are shown in the next dialog. -
Click "Next."
-
In the next dialog box, enter an alias name for the certificate.
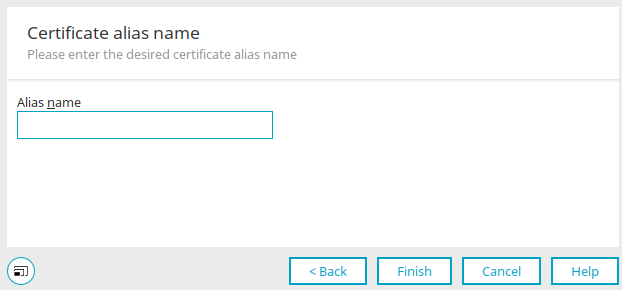
The alias name helps you identify the certificate in the certificate store. -
Click "Finish."
You will now be returned to the certificate store. The certificate you imported will be displayed.
You have imported a certificate into your portal's certificate store.
Click on ""+"".
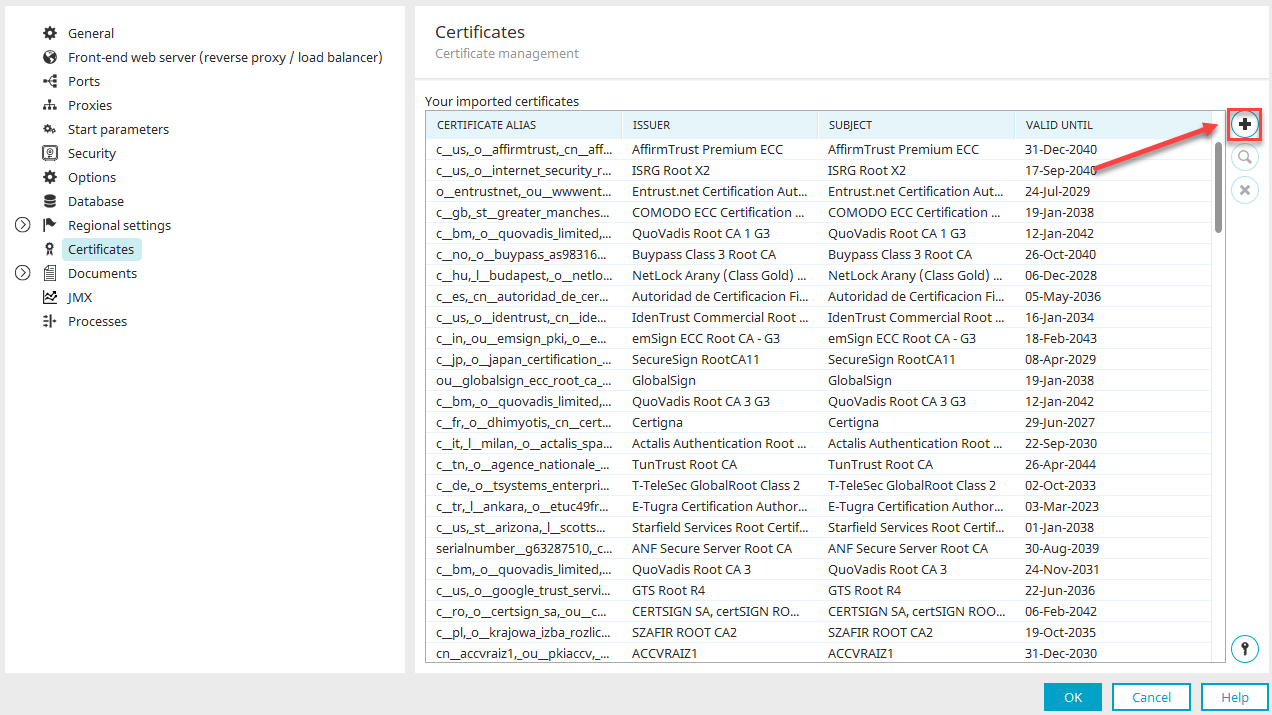
This will take you to the "Certificate Import" dialog box.
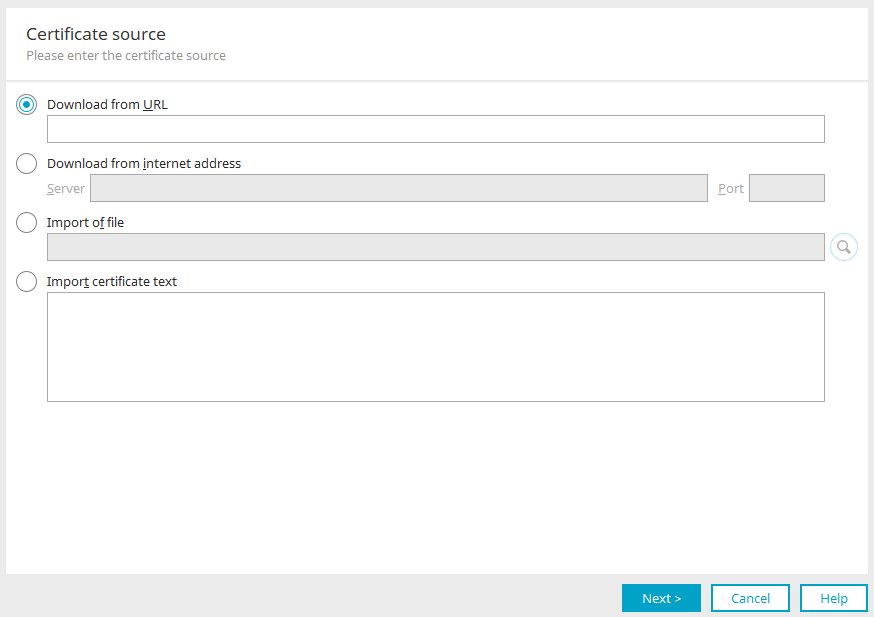
|
Name |
Description |
|---|---|
|
Download from URL |
A certificate can be loaded here. Enter the appropriate URL. |
|
Download from Internet address |
Allows you to download certificates. |
|
Server / Port |
Enter the download server (its name or IP address) and the port. |
|
Import the file |
A certificate file can be integrated with this option. |
| Add File |
Opens a dialog where the certificate file can be selected. |
|
Importing the Certificate Text |
Allows for the direct import of certificate texts. Paste the appropriate text into the input field. |
To complete the import of a new certificate or to prevent a deleted certificate from continuing to be used, you must restart the portal server.
Change Password
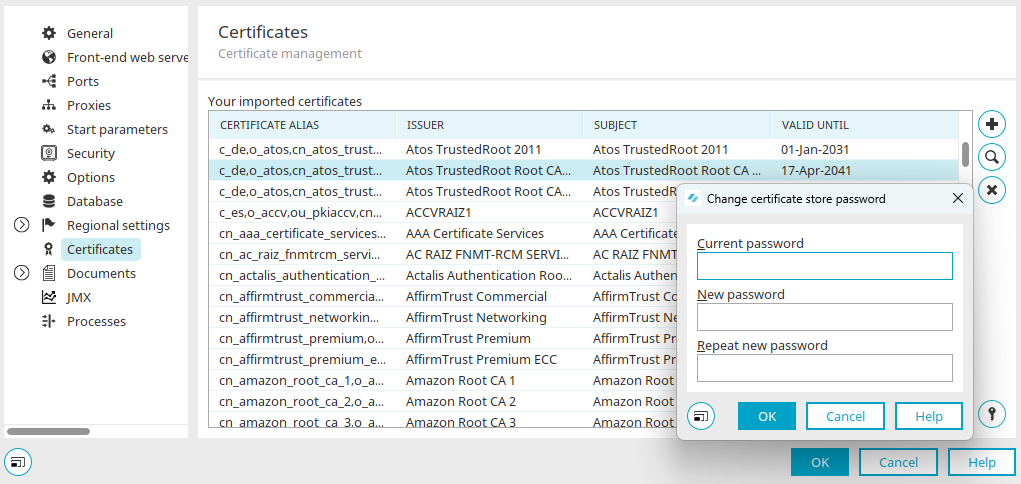
You can change the password for the certificate store by clicking the key icon in the lower-right corner of the dialog box.
Reset certificate store
If you no longer remember the password for the certificate store (Portal > Portal Properties > Certificates), you must reset the certificate store. (You cannot "reset" your password.)
To reset the certificate store, replace your portal's certificate store at the file level with the certificate store that was delivered with Intrexx.
You can find your portal's certificate store here:
<intrexx-installation-directory><org><portalname>/internal/cfg/cacerts
You can find the certificate store that was delivered with Intrexx here:
<intrexx-installation-directory>/orgtempl/blank/internal/cfg/cacerts
Please note that any certificates you have added will be lost when the certificate store is reset.
Deploying a Custom Certificate for Communication Between the Manager and the Portal
You can use the keytool command to import your own certificates.
By default, the keystore used is located in the portal directory tomcat/internal/cfg/cacerts.
The alias is " portal," and the password is " changeit." The path and alias can also be changed in the portal.cfg file (located in the portal directory internal\cfg).
Documents
Here you can configure settings for creating documents.
For detailed information on this, see the " Create Documents" section.
Detailed Information
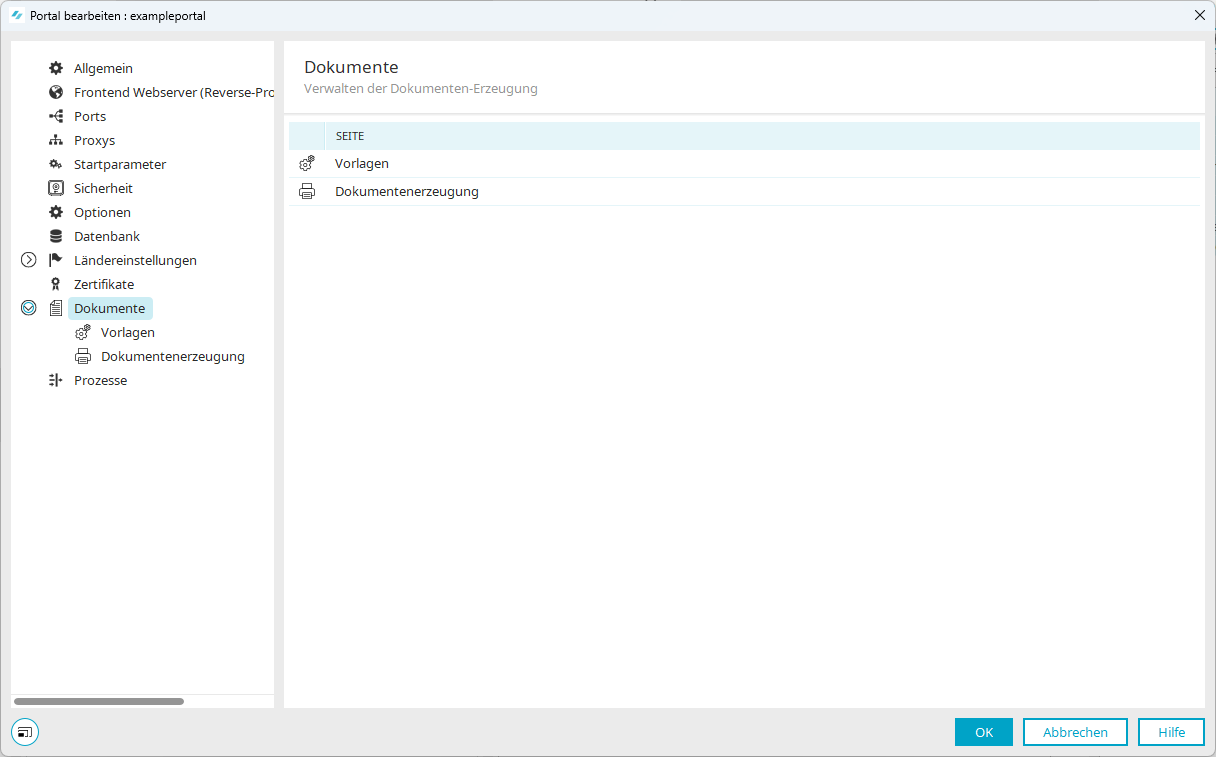
Templates
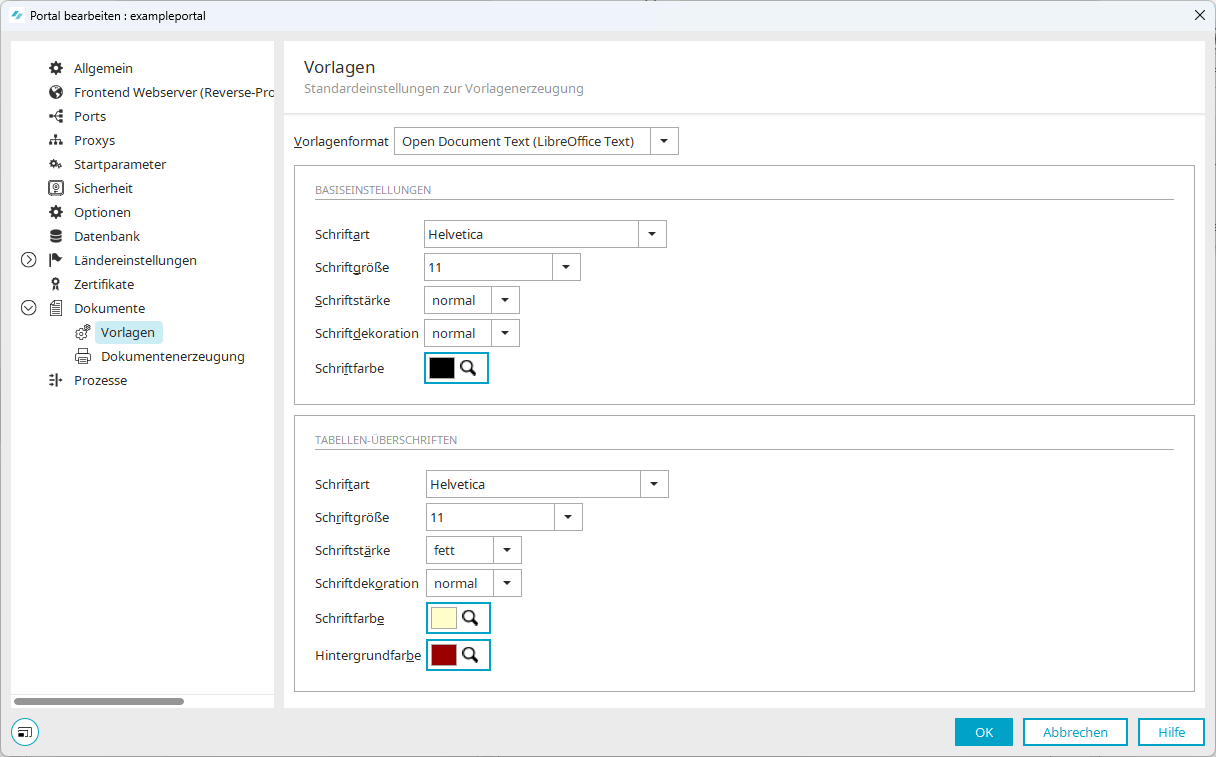
For detailed information on this topic, see the " Templates" section.
Document Generation
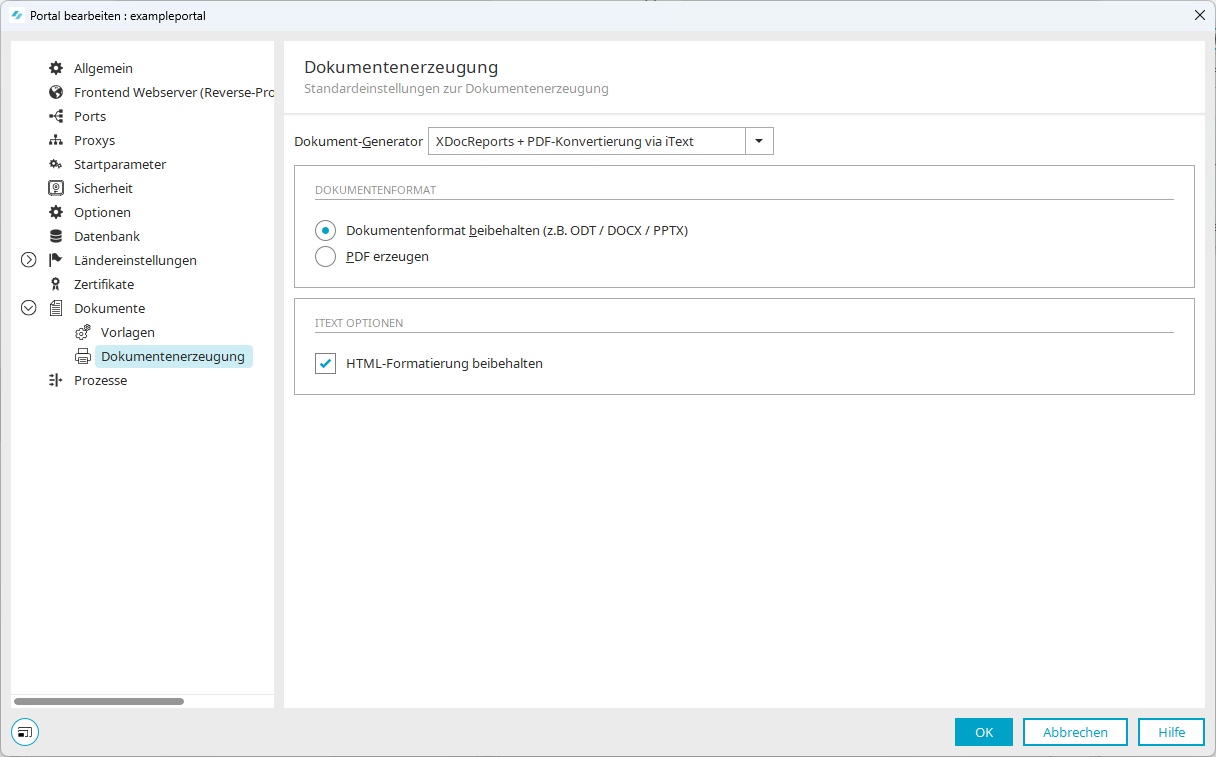
For detailed information on this, see the section
JMX
This page is displayed only if the expert options (Options - Portals) are enabled for the portal.
Here you can enable JMX (Java Management Extensions).
Detailed Information
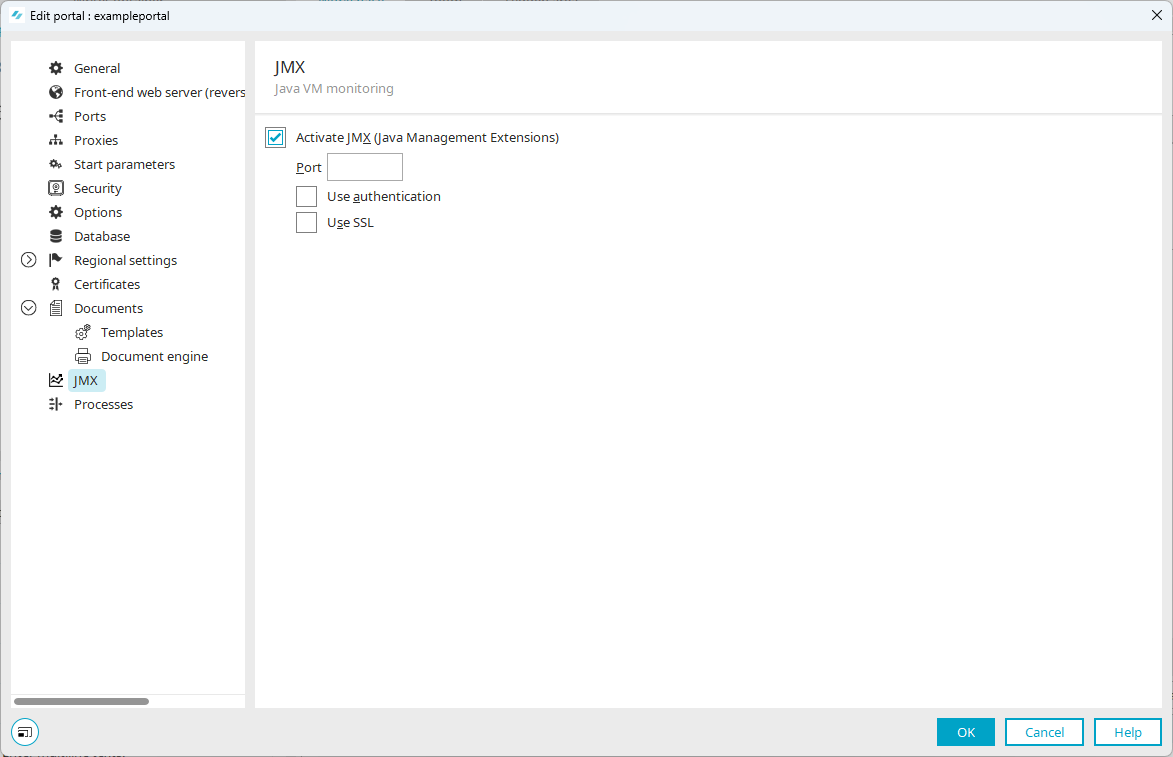
The settings configure the following properties in the portal.wcf file:
-
com.sun.management.jmxremote.port=<port number>
-
com.sun.management.jmxremote.authenticate=[true/false]
-
com.sun.management.jmxremote.ssl=[true/false]
<intrexx-installation-directory>\org\<portal-name>\internal\cfg\.
If necessary, you can manually make changes to the file.
More Information
Processes
Detailed Information
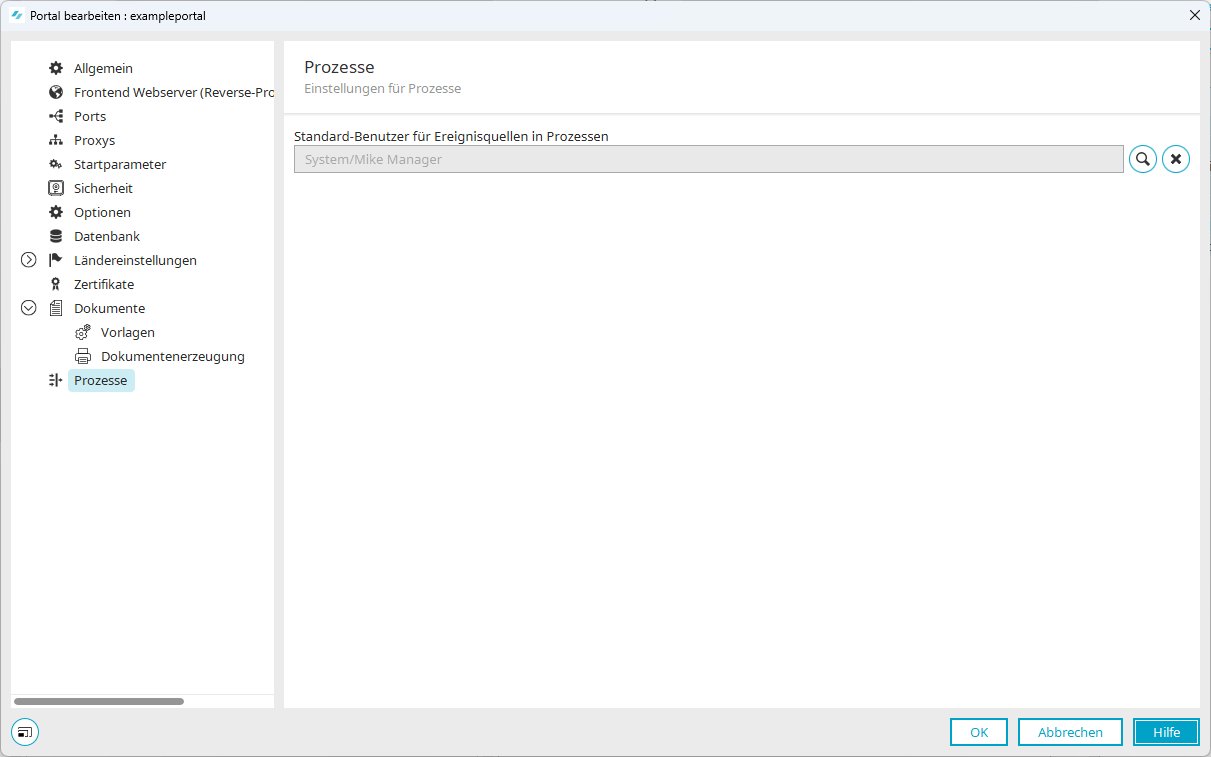
Default User for Event Sources in Processes
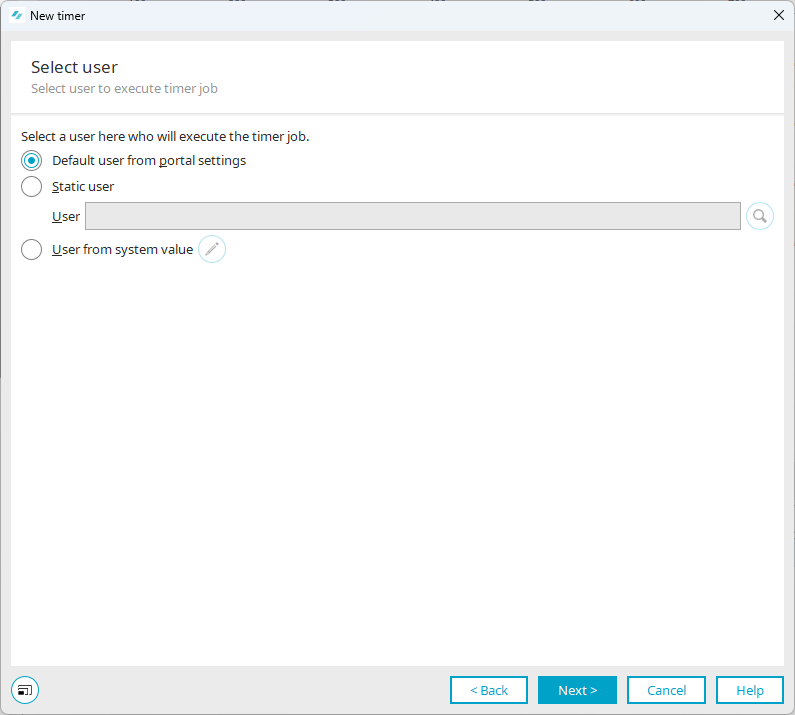
Here, you can specify a default user for event sources in processes. Intrexx uses this user as the "Executing User" for the process if you have not specified another user in the event source.
Background: Processes in Intrexx must always run in the context of a user so that Intrexx can, for example, perform permission checks or so that users can be written to a data record during data group actions that may be triggered by event sources.
The following screenshot shows a timer as an event source, where the user specified in the portal properties has been selected as the "Executing User."
Groovy Script
The standard user listed here can also be identified in Groovy Script using the "g_om" object, if necessary.
More Information