

Step-by-Step
To add a new website in IIS, follow these steps:
-
In the left navigation pane, select the "Sites" menu item.
-
In the right-hand navigation pane, click "Add Website."
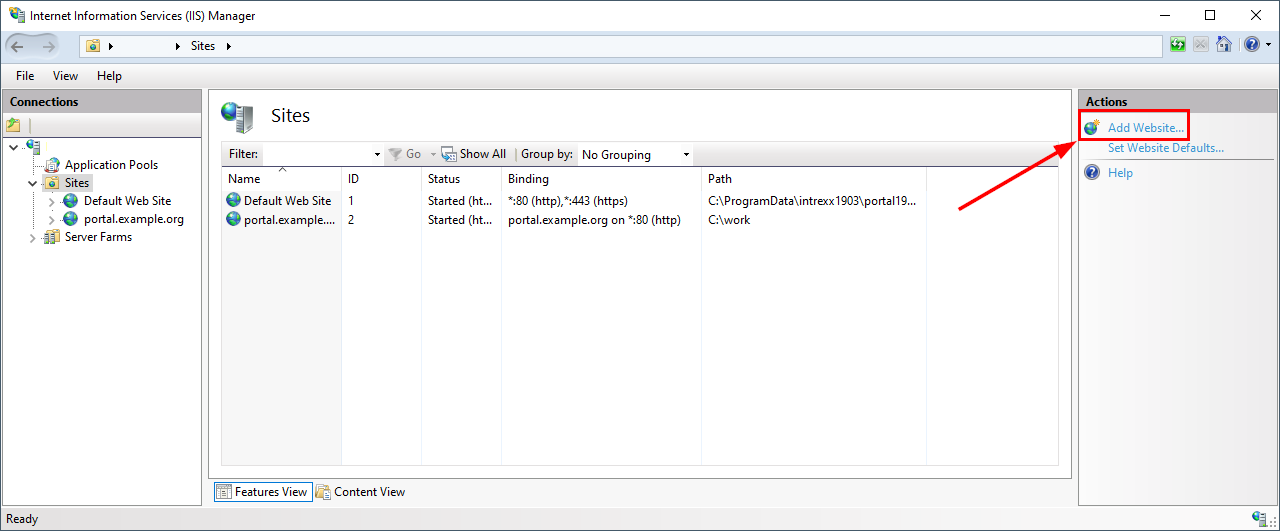
The "Add Website" dialog box will appear.

-
In the "Type" drop-down menu, select "https."
The "SSL Certificate" selection field appears in the dialog box.

Names
Description
Site Name
Enter a name for the website here. It is recommended that you use the same name for both the site name and the hostname. When you create a new portal or configure an existing one, the site name entered here will be listed as an option in the Intrexx portal properties under "Frontend Web Server (Reverse Proxy / Load Balancer) > IIS Website."
Physical Path
Enter the directory where the website should be stored here. Usually, this is: "C:\inetpub\wwwroot" Binding Type
Select HTTPS.
IP address
Select "None assigned."
Port
443
Hostname
Enter the name under which the portal should be accessed in the browser. For example, "exampleportal". Assigning a hostname is mandatory. You must later enter the hostname recorded here in the Intrexx portal properties as part of the base URL.
SSL Certificate
Select the SSL certificate here that you want to use for the encrypted connection between your portal and the browser.
-
Click "OK." You will be taken back to the overview of the websites you have created.
You have created a new website.Remove the "X-Powered-By" header after setting up the website
We recommend removing X-Powered-By headers after setting up the website.
To do this, select the webpage and double-click "HTTP Response Headers."

Select the header(s) (
 ) and then click "Remove" (
 ).
).