

Web Service Provider Settings
To offer your own web service, configure the necessary settings in the "Integration" module in the left-hand pane under "Provide Data / Web Service." You can access the corresponding dialog from the "Settings" context menu when the "Web Service" entry is selected.
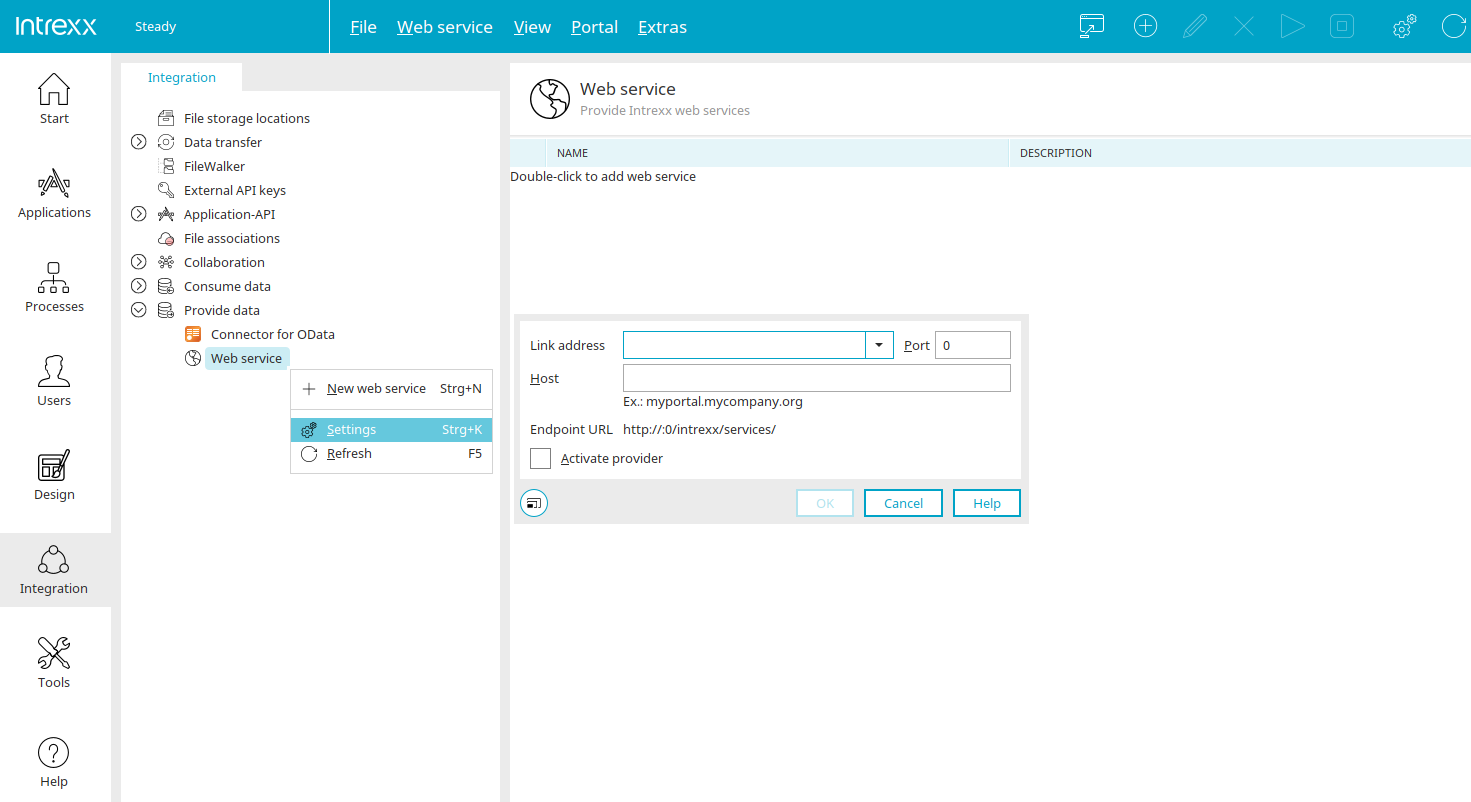
Binding address
Defines who is allowed to access the web service. If "localhost" is entered, the web service is only available locally. Alternatives include
-
any (IPv4)
-
any (IPv6)
-
an IP address
Select "localhost" if you want to test your first web service locally.
Port
Specifies the TCP port on which the web service should be accessible. Ideally, you should use a port number between 49152 and 65535—a so-called "private port." These can be used in a variety of ways because they are not registered and are therefore not associated with any specific application.
Host / Port
Together, they form the endpoint URL at which your web service should be accessible. The web service can also be easily integrated under your domain for public use.
Endpoint URL
This is automatically generated from the previous entries.
Active Provider
With this configuration, the web service is now accessible via the endpoint URL.
Click "OK" to save the settings.
Create a Web Service
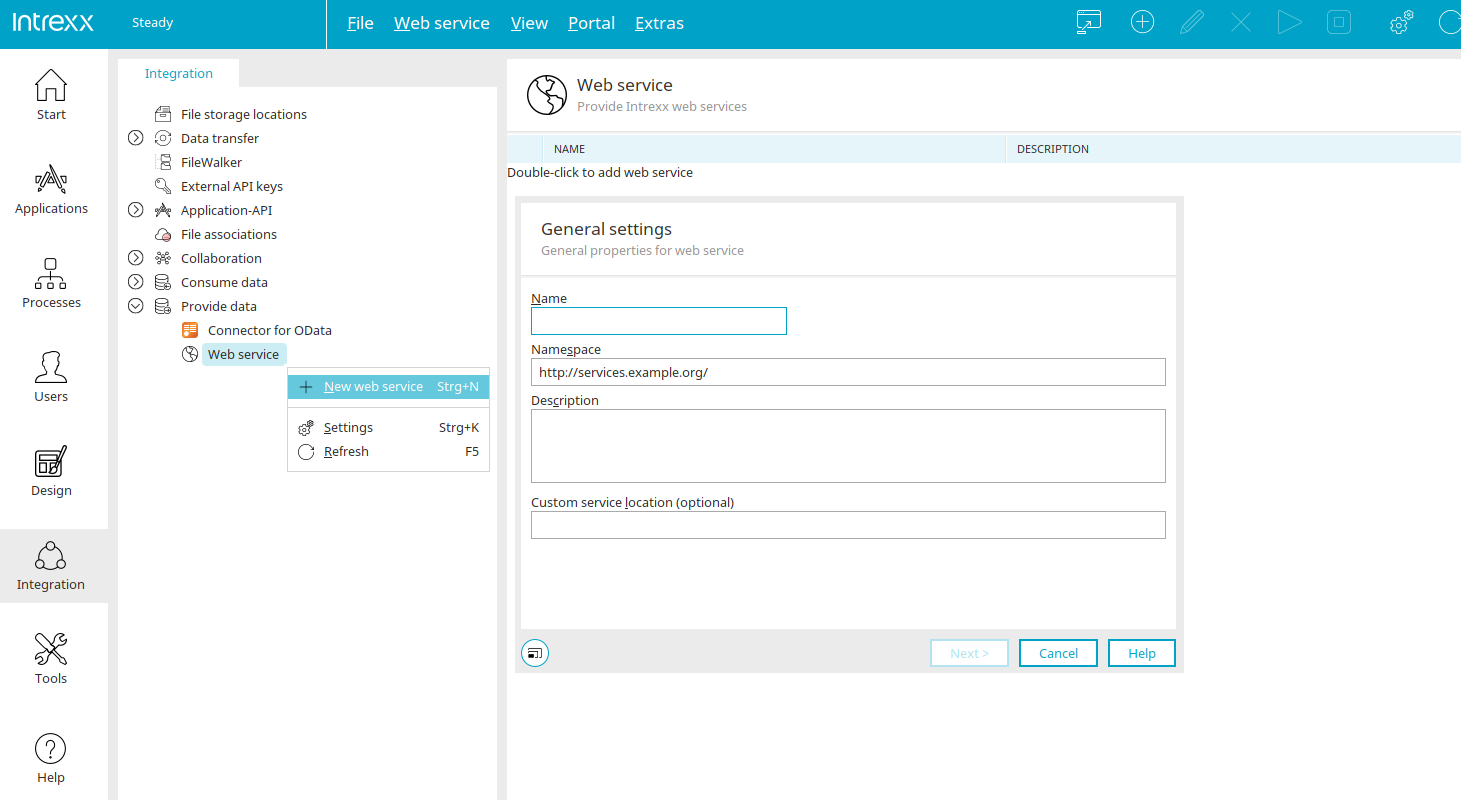
You can create a new web service by selecting "Web Service / New Web Service" from the main menu. To do this, the "Web Service" entry under "Provide Data" must be selected. In order to use custom web services, the web service provider's settings must be configured accordingly.
General Characteristics of the Web Service
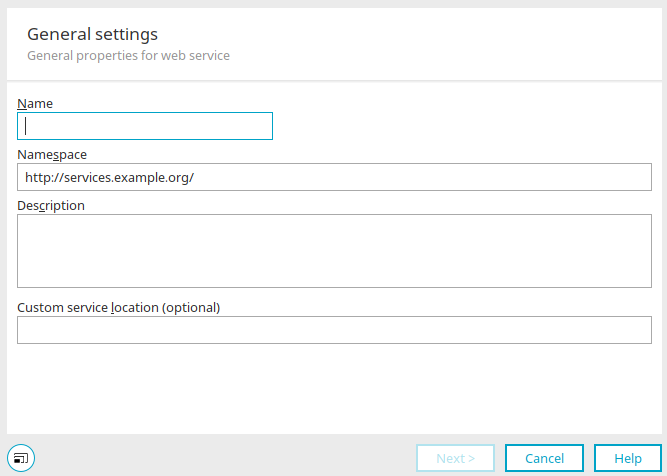
Enter a unique name here. The web service will be accessible later under the namespace entered here. A brief description of the web service can also be entered here.
Different Service Location
For network scenarios in which clients access the web service via the location defined here, regardless of the binding address and port defined on the Intrexx side. The alternate service location is specified in the WSDL.
Click "Next."
Surgeries
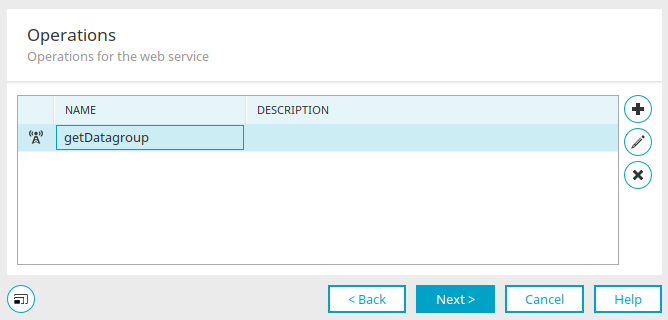
The names and descriptions of existing operations are displayed here.

 / Edit an Operation
Opens a dialog box in which an operation can be created or edited. You can find more information here.
 Deleting an Operation
Deletes the currently selected operation.
Once you have defined the desired operation(s), click "Next" here.
Finish
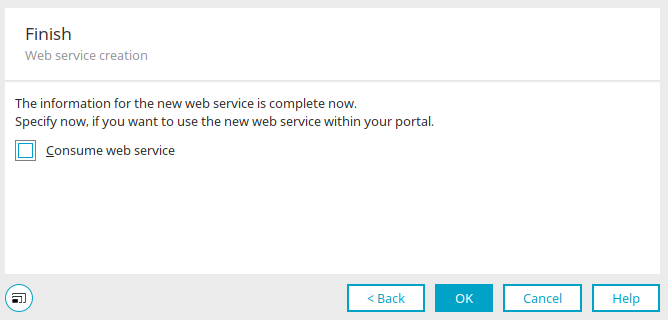
Consume a Web Service
If you want to use the web service within the same portal (e.g., with a web service action in processes), enable the "Consume web service" setting here, and then configure the web service registration in the next step. You can find all the information here.
Surgeries
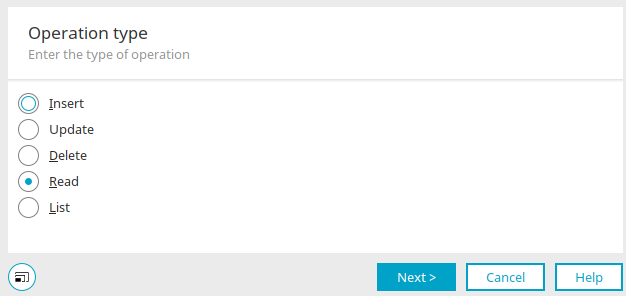
Insert
This type of operation sends a new data record—for example, a new item—to the web service, which is to be inserted into the original dataset.
Refresh
Here, an existing record in the source application is modified.
Delete
This type of operation deletes an existing record in the source application. Essentially, the procedure for defining the operation is no different from that for the "Update" operation type. Here, too, the record to be deleted is identified based on the ID provided. Additional transfer parameters—that is, additional data fields that are taken into account during the synchronization—cannot be defined. When deleting a record, this wouldn't be necessary anyway.
Read
In this type of operation, data is simply read from existing records. Here, too, identification is performed automatically using the ID. Any data fields from the source application can be selected as return parameters.
List
This type of operation differs from the others in that it allows multiple data records—similar to an array—to be read. The operation type can be used, for example, to search for the occurrence of a specific string in part numbers.
Click "Next" once you have selected the desired type of operation.
Select a data group
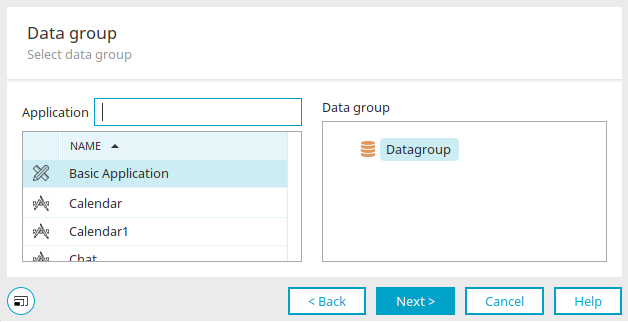
Here, you can search for an application by name or GUID. Select the desired application with a single click. Next, select the data group whose data you want to make available via a web service.
Click "Next."
Input Parameters and Return Parameters
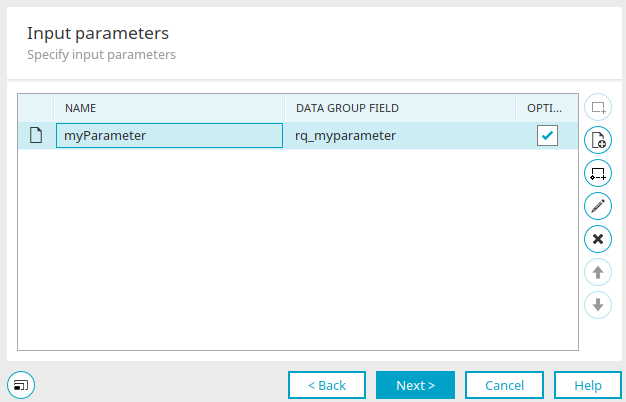
This dialog is also used to define return parameters.
You can double-click here to change the parameter name. The second column displays the name of the data field from the source application. This name cannot be changed. In the "Optional" column, you can specify which data group fields are required when data is entered. If a field is marked as optional, entering a value is not required.
 / Edit a Parameter
This button is only active for the "Insert" or "Select" operation types. It opens a dialog box where you can select data fields. This specifies which data must be collected for a given input.
Data Field Selection
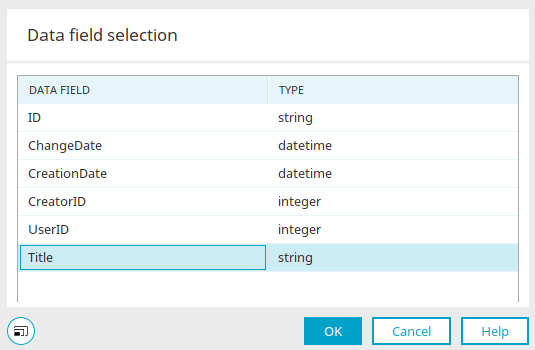
Select the desired data field here.
If you edit a parameter again, you'll also see the "General" tab here.
Edit Parameter ID
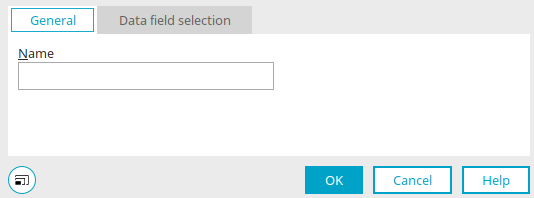
You can change the name of the parameter here.
Then click "OK" to save the changes and close the dialog box.
 / Editing a Parameter
Opens a dialog box where a request parameter can be defined. To do this, the "List" operation type must be selected.
Add Parameter
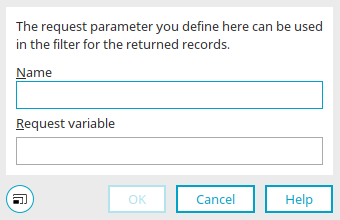
Give the request variable a unique name. This name is used for mapping in the WSDL file.
In Intrexx, the names of request variables must begin with "rq_". Otherwise, the variable will not be recognized as a request variable. This prefix is automatically inserted here when you enter the name of the request variable. The value is automatically stored in the request variable defined here.
The request variable, in turn, is used during the response to filter the data set based on the input value. For example, if you search for item numbers that contain the characters "SW" for software, the value "SW" is stored in the request variable. The "List" operation then sends a query for this string to the source data and returns all records that contain the characters "SW" in the item number.
Click "OK" to save your entries and close the dialog box.
 Adding a Parameter for the Number of Records
Sets the rowcount parameter. To do this, the "List" operation type must be selected. This parameter specifies the maximum number of records to be returned. Here, too, you can decide whether the parameter is optional or required.
Click "Next."
List Filter
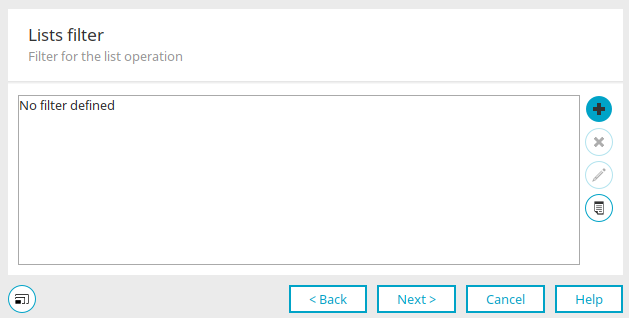
If you have selected the "List" operation, you can create a filter here to narrow down the list. You can find more information about this dialog here.
Click "Next."
Additional Settings
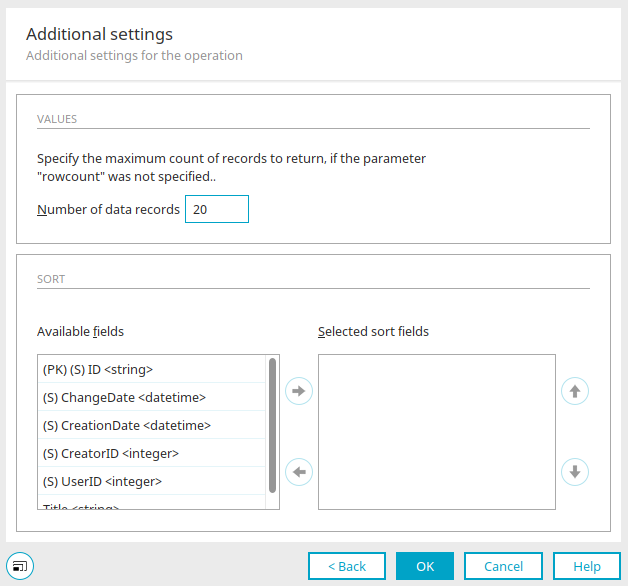
If you have selected the "List" operation, you can edit the following settings here:
Values
Number of records
If the "rowcount" parameter has not been defined as a pass-by-reference parameter, the maximum number of returned records can be set here.
Sorting
Available Fields Column
This section lists all the fields by which you can sort.
Column: Selected Sort Fields
The fields listed here sort the dataset. You can use the context menu for the fields to specify whether the list is sorted in ascending or descending order.


Moves the currently selected field from one list to the other.


Changes the order of the sort fields.
Click "Next."
General Characteristics of the Operation
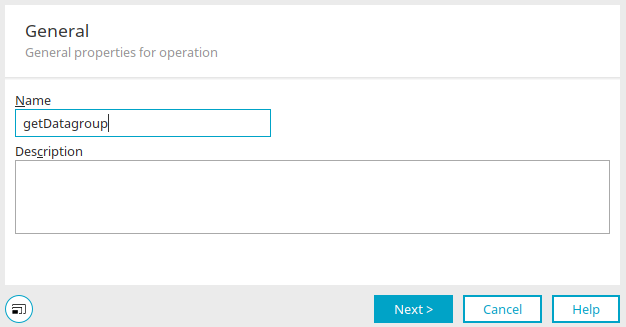
Enter the name of the new operation here. You can also enter a description here that explains the procedure and will be displayed later during registration or when selecting a procedure.
Click "OK" to save your entries and close the dialog box.
HTTPS Encryption
The following assumes that the necessary certificates, keystore, and truststore are already available. Make sure that the keystore and truststore are of the Java keystore type.
Configure AXIS2
To set up HTTPS communication, you must make changes to the Axis2 configuration file. To do this, navigate to the portal directory "internal/webservice/provider/axis2/conf/" and open the "axis2.xml" file in a text editor. Now look for the following entry:
            <!-- ================================================= -->
<!-- Non-blocking http/s Transport Listener  -->
<!-- the non blocking http transport based on HttpCore + NIO extensions -->
<transportReceiver class="de.uplanet.lucy.server.webservice.provider.axis2.transport.nhttp.HttpCore NIOListener" name="http">
	<parameter locked="false" name="port">"WS_PORT"</parameter>
	<parameter locked="false" name="non-blocking">true</parameter>
	<parameter locked="false" name="hostname">"HOST_NAME"</parameter>
</transportReceiver>
Below this entry, you will find the commented-out <transportreceiver> element. Remove the comment tags to activate the entry.
                <!-- the non blocking https transport based on HttpCore + SSL-NIO extensions -->
<transportReceiver class="de.uplanet.lucy.server.webservice.provider.axis2.transport.nhttp.HttpCore
NIOSSLListener" name="https">
	<parameter locked="false" name="port">SSL_WS_PORT</parameter>
	<parameter locked="false" name="non-blocking">true</parameter>
	<parameter locked="false" name="keystore">
		<KeyStore>
			<Location>KEYSTORE.jks</Location>
			<Type>JKS</Type>
			<Password>KEYSTORE_PASSWORD</Password>
			<KeyPassword>KEY_PASSWORD</KeyPassword>
		</KeyStore>
	</parameter>
	<parameter locked="false" name="truststore">
		<TrustStore>
			<Location>TRUSTSTORE.jks</Location>
			<Type>JKS</Type>
			<Password>TRUSTSTORE_PASSWORD</Password>
		</TrustStore>
	</parameter>
	<parameter name="SSLVerifyClient">require</parameter>
<!--supports optional|require or defaults to none -->
</transportReceiver>
Enter the following values correctly:
|
Parameters |
Description |
|---|---|
| SSL_WS_PORT |
Port through which the HTTPS web service can be accessed. Be sure to distinguish this port from the port used for unsecured web service calls. |
| KEYSTORE.jks |
Path to the keystore in JKS format. The path must be specified relative to the portal directory "internal/webservice/provider/". |
| KEYSTORE_PASSWORD |
Password for the specified keystore. |
| KEY_PASSWORD |
Password for the key being used. |
| TRUSTSTORE.jks |
Path to the trust store in JKS format. The path must be specified relative to the portal directory "internal/webservice/provider/". |
| TRUSTSTORE_PASSWORD |
Password for the specified trust store. |
If the values have been set correctly, look for the following entry:
                <transportSender class="org.apache.axis2.transport.http.CommonsHTTPTransportSender" name="https">
	<parameter name="PROTOCOL">HTTP/1.1</parameter>
	<parameter name="Transfer-Encoding">chunked</parameter>
</transportSender>
Below this entry, you'll find another <transportsender> element that is still commented out. Remove the comment tags to activate the entry.
                <!-- the non-blocking https transport sender based on HttpCore + NIO SSL extensions-->
<transportSender name="https" class="de.uplanet.lucy.server.webservice.provider.axis2.transport.nhttp.Http
CoreNIOSSLSender">
<parameter name="non-blocking" locked="false">true</parameter>
<parameter name="keystore" locked="false">
	<KeyStore>
		<Location>KEYSTORE.jks</Location>
		<Type>JKS</Type>
		<Password>KEYSTORE_PASSWORD</Password>
		<KeyPassword>KEY_PASSWORD</KeyPassword>
	</KeyStore>
</parameter>
<parameter locked="false" name="truststore">
	<TrustStore>
		<Location>TRUSTSTORE.jks</Location>
		<Type>JKS</Type>
		<Password>TRUSTSTORE_PASSWORD</Password>
	</TrustStore>
</parameter>
<parameter name="HostnameVerifier">DefaultAndLocalhost</parameter>
	;<!--supports Strict|AllowAll|DefaultAndLocalhost or the default if none 	specified-->
</transportSender>
Enter the following values correctly:
|
Parameters |
Description |
|---|---|
| KEYSTORE.jks |
Path to the keystore in JKS format. The path must be specified relative to the portal directory `internal/webservice/provider/`. |
| KEYSTORE_PASSWORD |
Password for the specified keystore. |
| KEY_PASSWORD |
Password for the key being used. |
| TRUSTSTORE.jks |
Path to the trust store in JKS format. The path must be specified relative to the portal directory "internal/webservice/provider/". |
| TRUSTSTORE_PASSWORD |
Password for the specified trust store. |
Save the file and then restart the portal service. Open the WSDL file in your browser to test HTTPS authentication. Be sure to use HTTPS instead of HTTP and specify the port. If the URL is entered correctly, the certificate used must be accepted. The WSDL file will then be displayed in the browser.