

Getting Started with Portal Manager
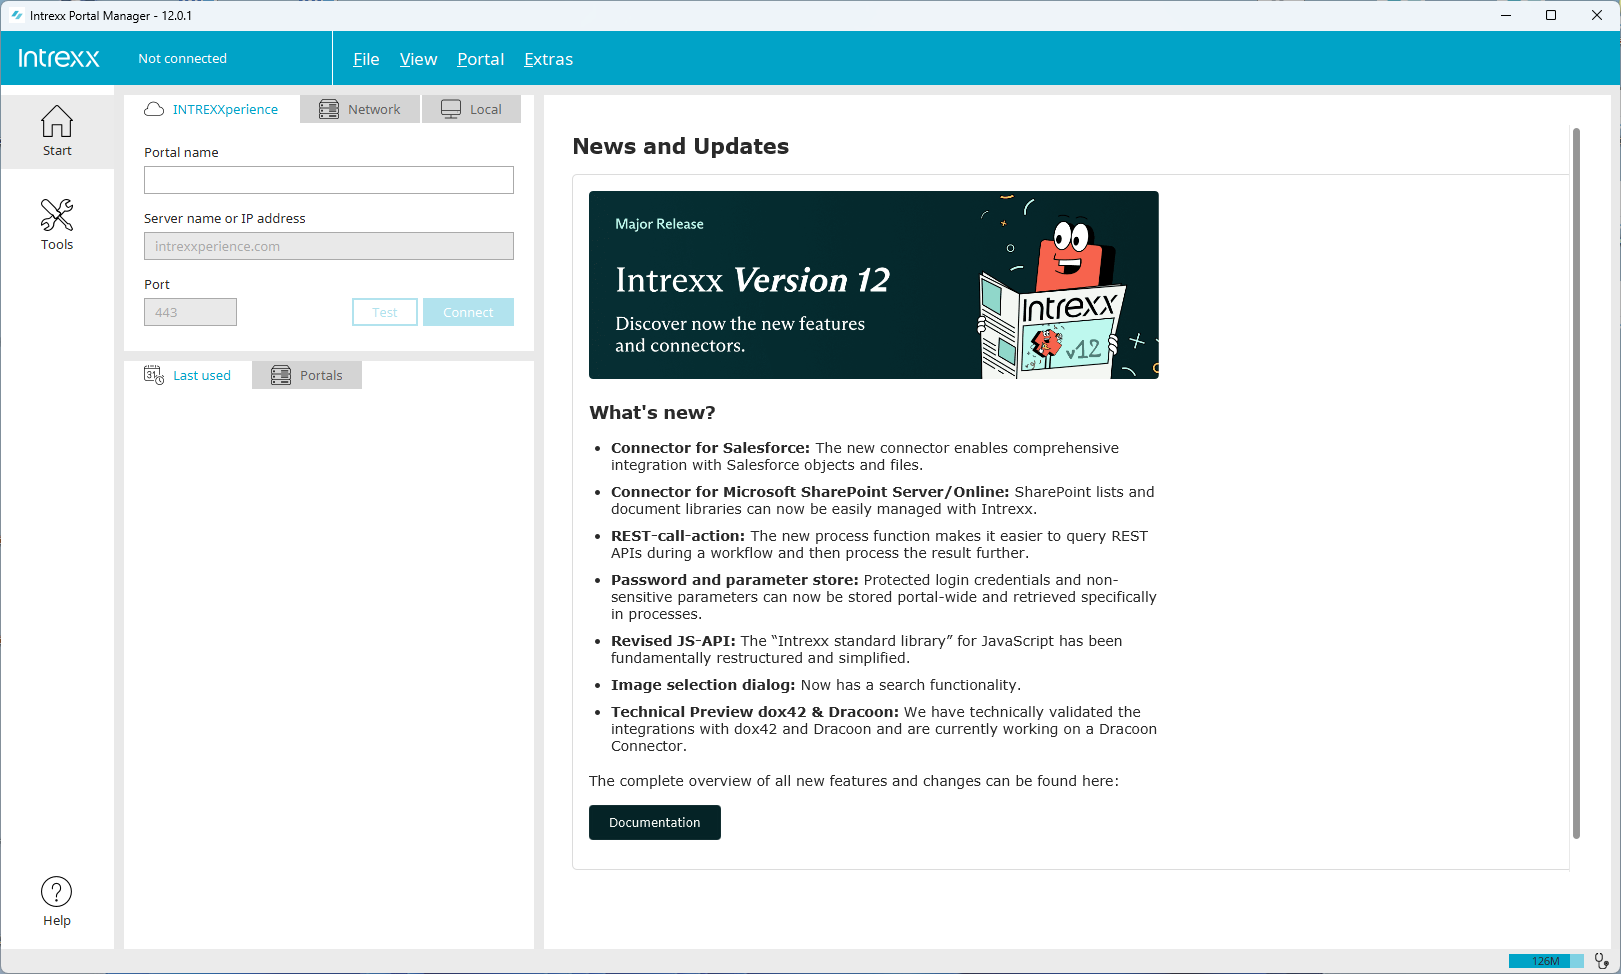
After you start Intrexx Portal Manager, the startup screen appears.
Connect to Your Portal
In the login area of the home screen, you will find the three tabs "INTREXXperience"  , "Network"
  , and "Local"
  .
.
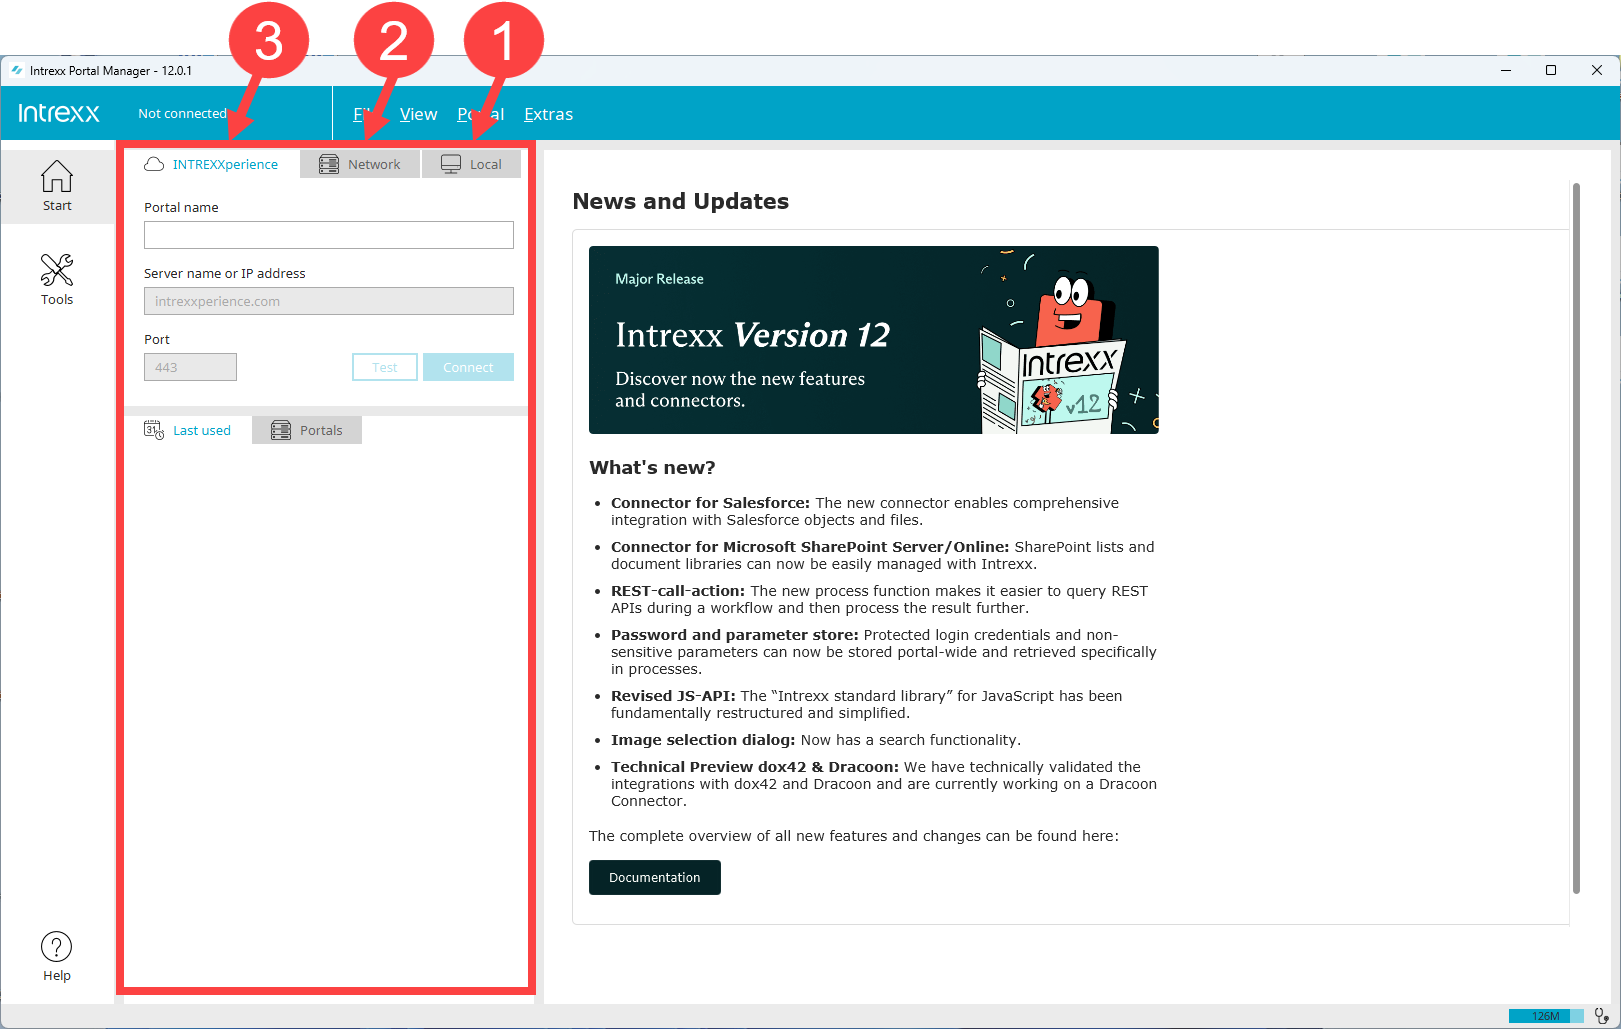
Which of the three login options is right for you depends on how you use the Portal Manager or how Intrexx is implemented in your organization.
Option 1 – Local
This login option is right for you if you have Intrexx installed locally on your IT infrastructure and if you want to access your portal using the "Integrated Portal Manager," which is installed along with Intrexx.
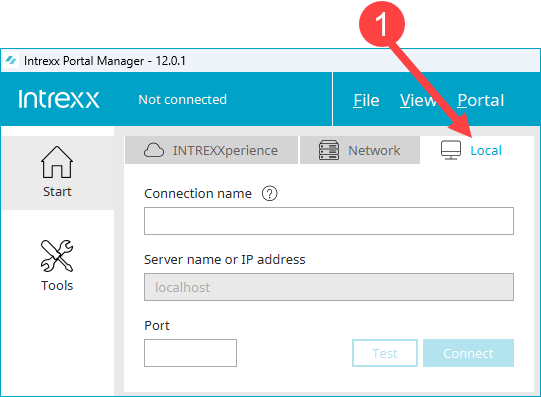
Connection Name
Enter a name here for the connection to your portal. Choose any name you like. The name is then saved and displayed as a hyperlink under "Recently Used" in the login area. To register at a later time, simply click on the hyperlink displayed.
Server name or IP address
"localhost" is set as the default for this login option. You cannot edit this entry.
Port
Enter the port for the portal you want to connect to here.
The port can be found in the portal properties or in the "portal.cfg" file. You can find them here:
<intrexx-installation-directory>/org/<portal directory>/internal/cfg/portal.cfg
Use this button to test whether the Portal Manager can establish a connection to the portal.
Use this button to connect to the portal.
Option 2 - Network
This registration option is right for you in the following two cases:
-
The Intrexx Portal Server is installed on a server within your IT infrastructure, and you can access it via your network.
-
You use Intrexx as a PaaS ("Platform as a Service") and have received the corresponding login credentials from Intrexx GmbH.
This version is a cloud-based solution. In other words, Intrexx GmbH provides you with the infrastructure along with the Intrexx Portal Server.
In both cases, use the Portal Manager to log in.
The Portal Manager does not require installation. You can download it and start right away. The Portal Manager can connect to different versions of the Intrexx Server. It automatically synchronizes its own version with the portal server's version.
Download
Please contact our support team to download the Portal Manager.
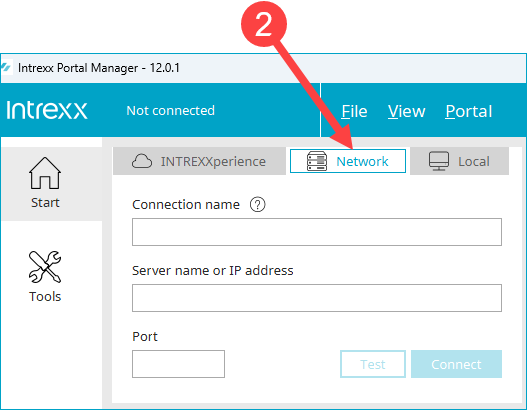
Connection Name
Enter a name for your portal connection here. You can choose any name you like. The name is then saved and displayed as a hyperlink under "Recently Used" in the login area. For later registrations, you only need to click on the hyperlink displayed.
Enter the name you received from Intrexx GmbH here.
Server name or IP address
Network: Enter the server name or IP address of the server on which the Intrexx Portal Server is installed. The server name must be specified as a hostname without a preceding protocol and without a trailing slash.
PaaS: Enter the server name you received from Intrexx GmbH here.
Port
Network Enter the port of the portal you want to connect to here.
The port can be found in the portal properties or in the "portal.cfg" file. You can find them here:
<intrexx-installation-directory>/
PaaS Enter your portal's port here. This is usually port 8101.
You can use this button to test whether the Portal Manager can establish a connection to the portal server or the portal.
You can use this button to connect to the portal server or the portal.
Option 3 – Intrexxperience
This registration option is right for you if you'd like to learn more about Intrexx and have received access to an "INTREXXperience" portal through our website or by contacting an Intrexx employee. The INTREXXperience Portal is a test portal with numerous preinstalled applications. It is hosted by the Intrexx GmbH, and you can access it via the Internet.
For detailed information about INTREXXperience, see the section INTREXXperience - Try Intrexx for 30 days."
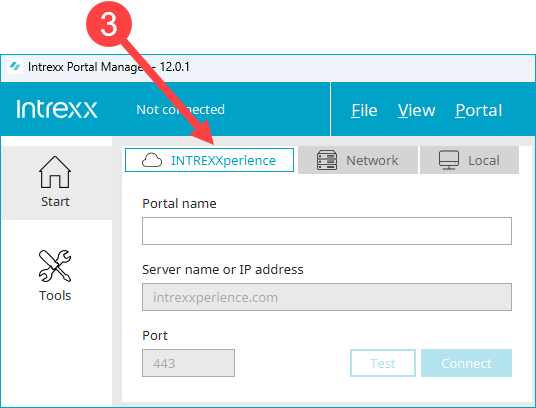
Portal Name
Intrexx GmbH will provide you with the name of the portal.
Server name or IP address
For this login option, "intrexxperience.com" is specified as the server name. You cannot edit this entry.
Port
Port 443 is stored for this login option. You cannot edit this entry.
You can use this button to test whether the Portal Manager can establish a connection to the portal.
Use this button to connect to the portal.
Portal Connection via Command Line
The following options are available for connecting to a portal via the command line, which can also be used to open modules, applications, or processes directly if needed:
-Usage: de.uplanet.lucy.client.lucymanager.MainFrame [OPTION]...
  -h, --help                      Show this help.

  --connect <[user[@domain]@]host:port>
                                  Optional login user, optional domain,
                                  and the host and port for the Intrexx
                                  portal service to connect to.

  --module <moduleId>[:guid]      The module to be opened on startup.
                                  Valid module IDs are:
                                    - Portal module: portal
                                    - Application module: app + optional
                                      GUID of an application
                                    - Layout module: layout
                                    - Process module: process + optional
                                      GUID of a process
                                    - User module: user
                                    - Integration module: integration
                                    - Tools: tools
                                  The optional GUID can be used to open
                                  a specific instance.
                                  E.g. for the application module, the GUID
                                  of an application can be given to open
                                  that application directly.

  --user-prefs-dir <path>         The user preferences directory to be used.
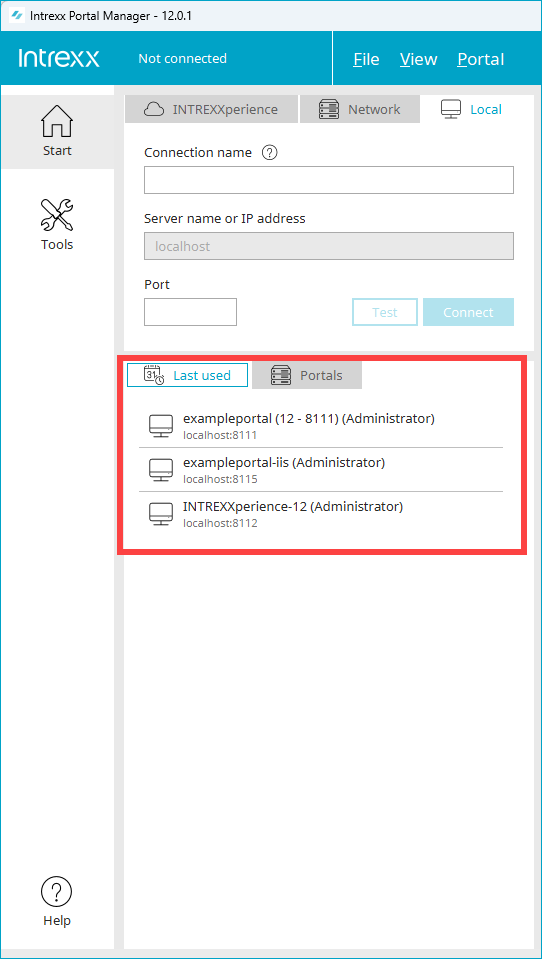
Display of the connections used
The login area displays all connections that were last used successfully. The connections are displayed in the order in which they were made.
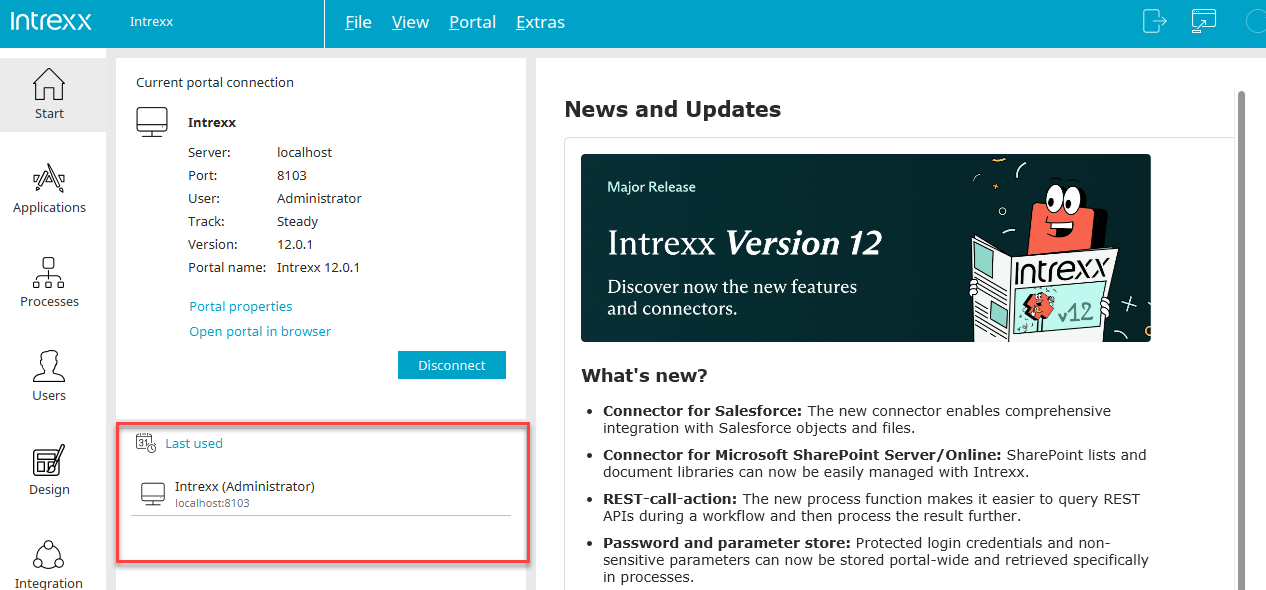
If you want to log in to a portal again, simply click the corresponding link. The login dialog box will then appear.
Create and Manage a List of Portals
In the login section of the home screen, you can create a list of the portals you want to connect to.
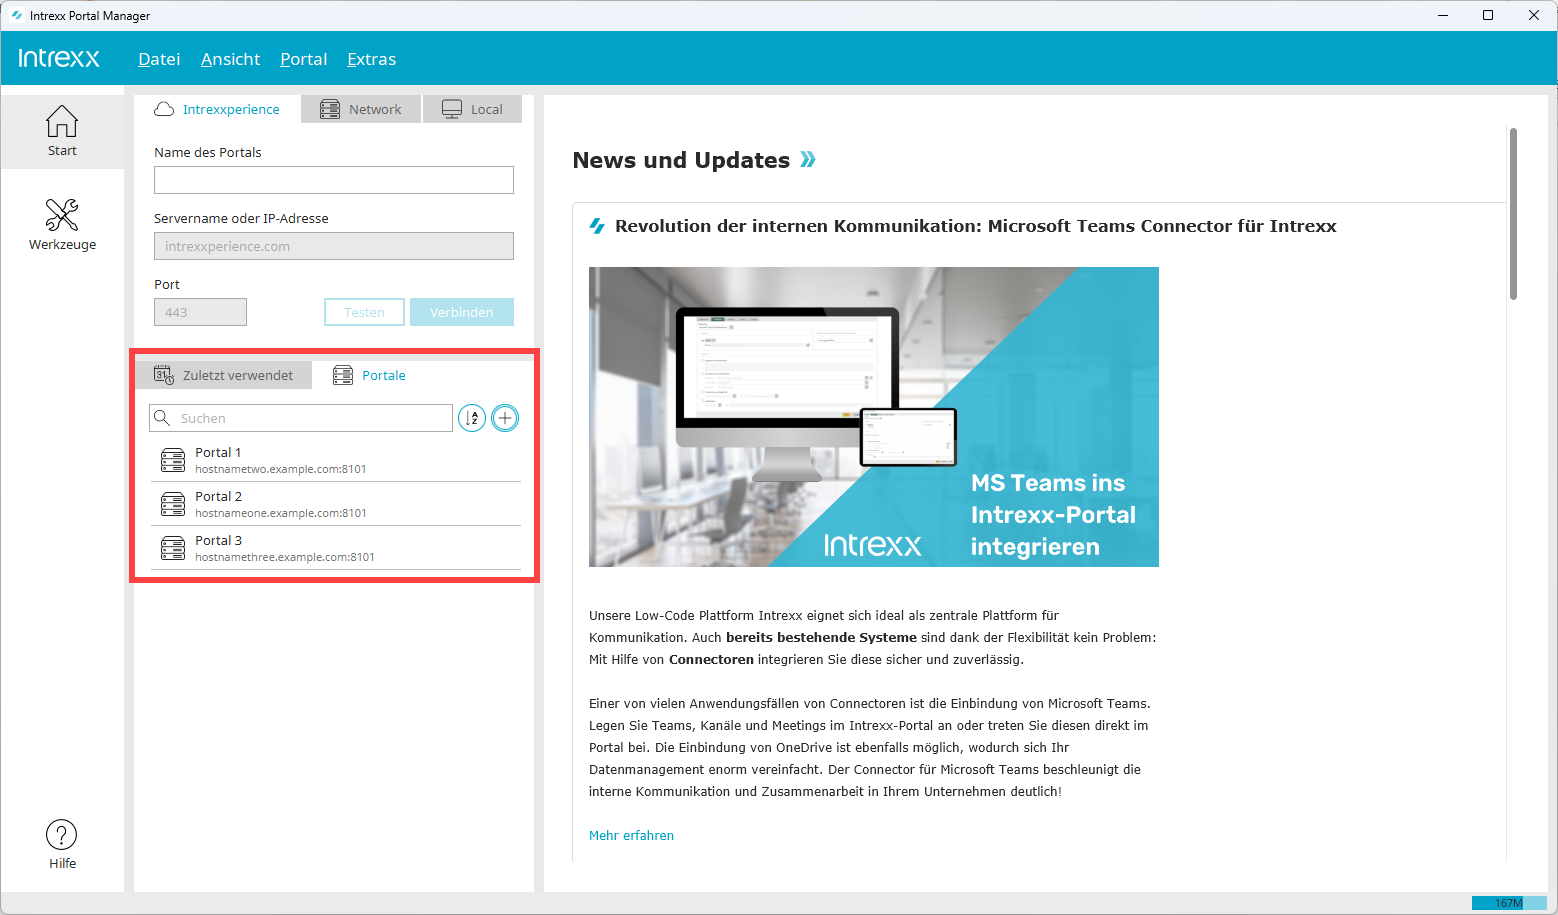
If you want to log in to a portal again, simply click on the corresponding entry. The login dialog box will then appear. You can sort and search the portal list in various ways.
The portal list is not displayed by default. You must enable the display by selecting "View > Show Portal Management."
Step-by-Step
To create a portal list, follow these steps:
-
Click "View > Show Portal Administration."

-
The "Portals" tab appears.

-
Click the "
 " icon.
The "Register Portal" dialog box appears.

Connection Name
Enter a name here for the connection to your portal. You can use the name of the portal for this.
The name is then saved and displayed as a hyperlink in the "Portals" tab. To connect to the portal later, simply click on the hyperlink that appears.
Server name or IP address
The value you need to enter here depends on how you run Intrexx and whether you use the Portal Manager or the Integrated Portal Manager.
See also the section Getting Started with Portal Manager."
localhost
Enter "localhost" if you are working on the server where the Intrexx Portal Server is also installed. You typically use the Integrated Portal Manager for this.
Server name or the server's IP address
Enter the server name or IP address of the server you want to log in to here. The server name must be specified as a hostname without a preceding protocol and without a trailing slash.
intrexxperience.com
Enter "intrexxperience.com" here if you are currently testing Intrexx and have received the corresponding login credentials via email. For detailed information about "INTREXXperience" and how you can try Intrexx for 30 days, see the section INTREXXperience - Try Intrexx for 30 days."
Port
Enter the port here for the portal you want to connect to.
The port can be found in the portal properties or in the "portal.cfg" file. You can find them here:
<intrexx-installation-directory>/
-
Click "OK."
The previously registered portal is displayed.

You can now open the login dialog for the corresponding portal with a single click.
Additional Information
For more information on how to implement Intrexx and the various login options this provides, see the following section: