

Version Control with Git
Create History
A history can be found in the modules
be created. The history is based on a Git repository. This is done in each
-
Application directory (portal directory internal/application/store/<application GUID>)
-
Process Directory (Portal Directory internal/workflow/<process GUID>)
-
Layout directory (portal directory internal/layout/xml/layouts/<layout name>)
created. Each entry in the history corresponds to a commit in the Git repository. When you publish an application, a process, or a layout via the "File" main menu, a dialog box opens where you can create an entry in the Git history.
Publish with History
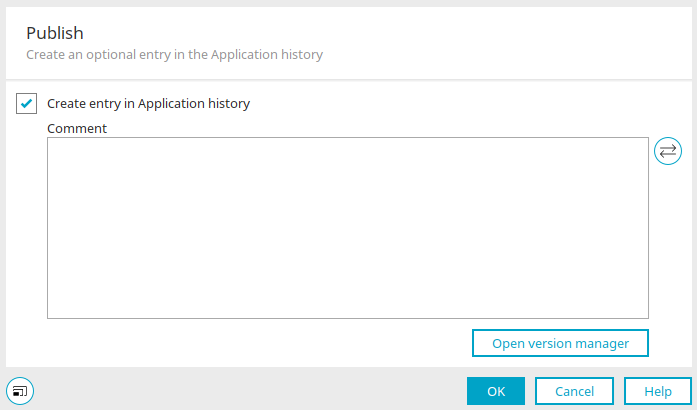
Here is the dialog box that appears when you publish an application. As part of the versioning of applications or processes, any included scripts are also versioned.
Create an entry in the application history / process history / layout history
If this setting is enabled, the current change is recorded in the history. This setting is not available if the option "Always create an entry in the history when publishing applications, processes, or layouts" is selected in the portal properties options.
Comment
The latest changes to the application can be documented here. If no comment is entered, the default comment from the language constant "COMMIT_DEFAULT_MESSAGE" in the default portal language is used. Here is a guide to formatting commit comments.
 Compare the currently open version with the most recent entry in the application history
Opens a dialog box where you can track changes in the application.
Open the Version Manager
Opens a dialog box where you can edit the semantic version number.
Options / Publish
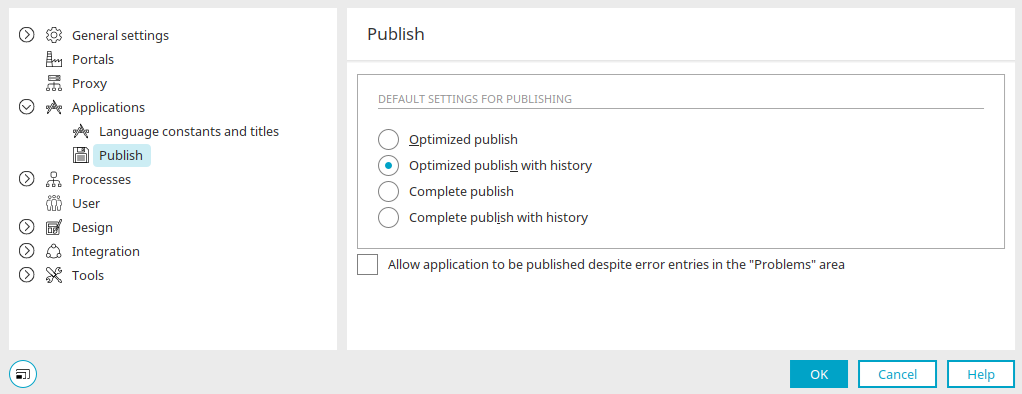
In the "Tools/Options" main menu, you'll find settings for each module that allow you to publish applications, processes, and layouts with or without a history. These settings control the default behavior when publishing. Regardless of this, you can select any option from the "File" main menu —including publishing without a history—even if the setting for publishing with a history is selected in the options.
Default Settings for Publishing
Publish an Optimized Application
With this option, only the modified objects are published when an application is published. As a general rule, optimized publishing is recommended.
Publish an Optimized Application with History
Here, too, only the modified objects are published. In addition, when the application is published, a dialog box appears in which you can add comments about the changes and create an entry in the application history.
Publish the application in its entirety
When an application is published, all objects are published. Full publishing is required, for example, when XSL files for transformation have been exchanged in the portal—such as after applying a patch that contains XSL files, or during the development of XSL files. In this case, all pages must be republished.
Publish the application in its entirety, including the history
All objects are also published here. In addition, when the application is published, a dialog box appears in which you can add comments to the changes and create an entry in the application history.
Allow the application to be published even if there are error entries in the "Issues" view
An application is checked for errors while it is open. Relevant notes are displayed in the "Problems" section. Entries of the "Warning" type are displayed as a note. The application can still be released. Entries of the "Error" type prevent the application from being published. However, if you set the option described here, an application can still be published.
This setting may no longer be available in future versions of Intrexx. The best course of action is to fix the reported errors.
Regardless of the options set here, you can also find the various methods for publishing applications in the "File" main menu.
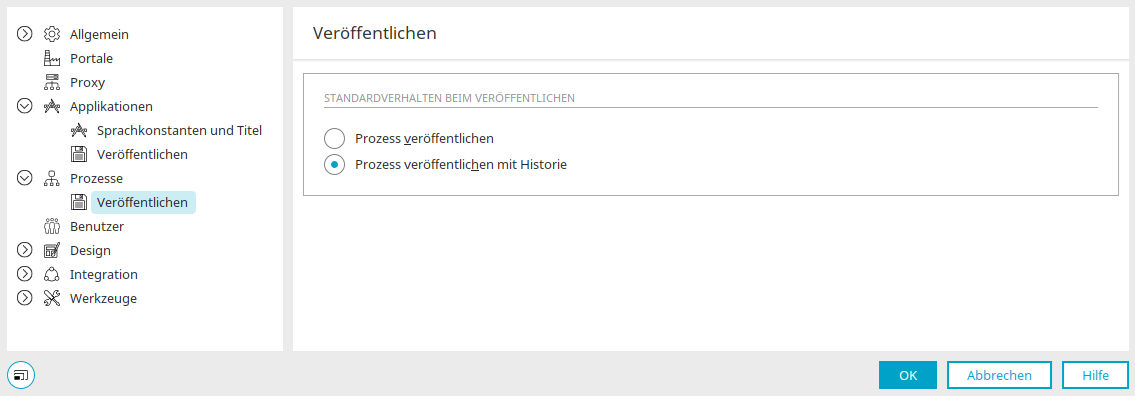
For processes and layouts, you'll find the following settings in the "Publish" dialog box:
Default Behavior When Publishing
Publish Process / Layout
The process or layout is published without a history.
Publish Process / Layout with History
When you publish the process or layout, a dialog box appears where you can add comments about the changes and create an entry in the history.
Regardless of the options set here, you can also find the various methods for publishing processes or layouts in the "File" main menu.
Publish regardless of the settings in the options
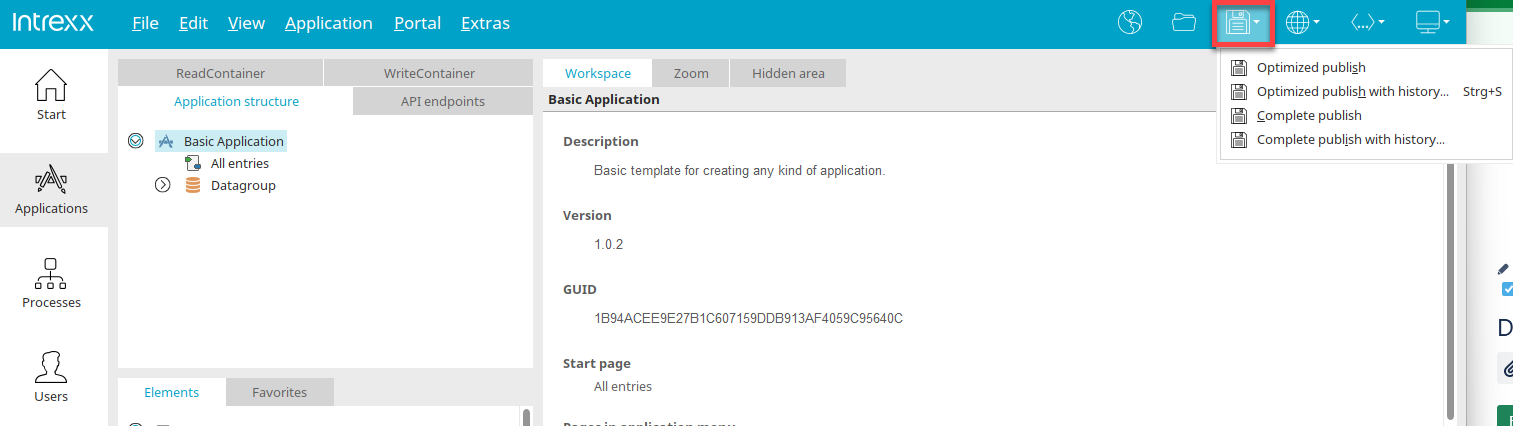
Regardless of the settings configured in the options for applications, processes, or layouts, you can select the desired mode for each publication.
To do this, click the small arrow to the right of the floppy disk icon in the top-left corner of the toolbar. This will bring up a menu where you can select the following modes:
-
Publish an Optimized Application
-
Publish an Optimized Application with History
-
Publish the application in its entirety
-
Publish the application in its entirety, including the history
If you click directly on the floppy disk icon, the application (or the process or layout) will be published according to the settings in the options.
Portal Properties / Options
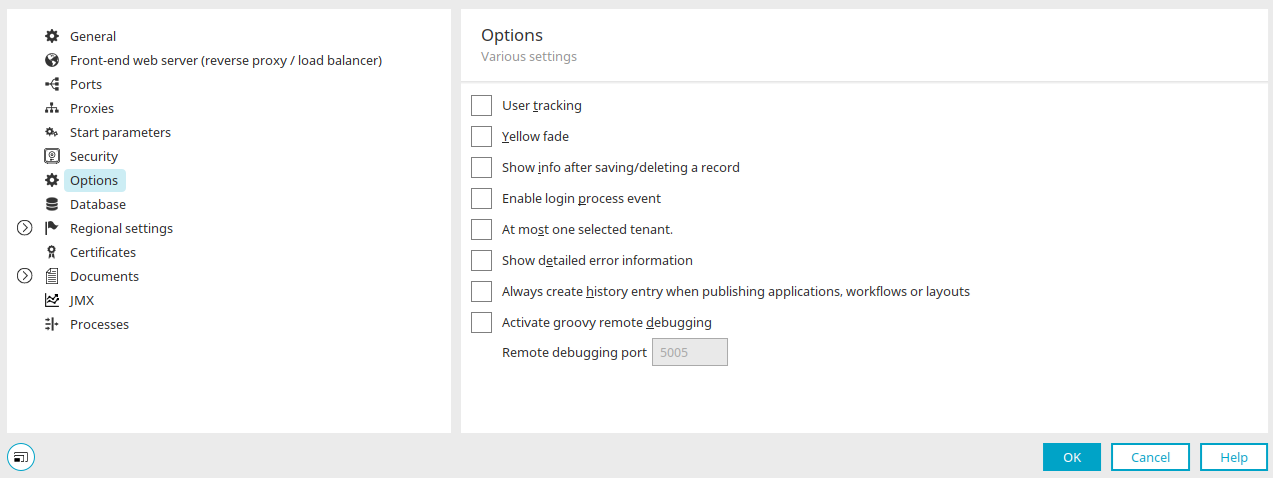
In the "Portal / Portal Properties" main menu, you can configure the options so that a new entry is created in the history every time applications, processes, and layouts are published. This is useful, for example, for production systems, so that changes in the portal can be tracked. This option applies to both user and system actions. Regardless of the setting, all publishing options are displayed. When performing an action that does not normally include a history (e.g., publishing an optimized application), the user receives a notification that an entry in the history is required, after which a dialog box opens for entering a new entry.
New entry in the history
A new entry in the history can be created in the following ways:
-
Applications - "File" Main Menu
-
Publish an Application
-
Publish an Optimized Application with History
-
Publish the application in its entirety, including the history
-
-
Create an entry in the application history
-
-
Processes - "File" Main Menu
-
Publish Process with History
-
Create an entry in the process history
-
-
Design - "File" Main Menu
-
Publish Layout with History
-
Create an entry in the layout history
-
New entries in the history are created by user or system actions.
User Actions
An entry is created in the following cases:
-
When publishing applications, processes, or layouts via the "File" main menu, this occurs whenever the setting "Always create an entry in the history when publishing applications, processes, or layouts" is enabled. If a repository does not yet exist, one will be created.
-
When publishing the history of applications, processes, or layouts via the "File" main menu, if the "Create entry in application history" setting is selected in the dialog box. The post will be created after it is published. This setting is hidden in the dialog if the " " portal property "When publishing applications, processes, or layouts" "Always create an entry in the history" is set.
-
The "File / Create History Entry" option in the main menu opens a dialog box where you can create an entry if there are changes on the server that have not yet been added to the history.
System Actions
For certain actions, the system automatically creates a new entry in the history if the corresponding setting is enabled in the portal properties. If a repository does not yet exist, one will be created. New entries are each assigned a static comment in English with the prefix "Intrexx:". The user recorded in the history entry depends on the action (see below). The following system actions are supported:
-
Process
Enable/Disable a Process (User: Current User)
-
Layout
Setting the Default Layout (User: Current User)
-
User Management
Publishing the User Application When the Schema Changes (User: Intrexx)
-
Script
publishAllApplications, publishAllProcesses (User: Intrexx)
Complete History
The following menus open a dialog box where you can view your entire history:
-
For the currently open application in the main menu "Application / Application History"
-
For the currently open process, select "Process / Process History" from the main menu
-
For the currently open layout in the main menu "Layout / Layout History"
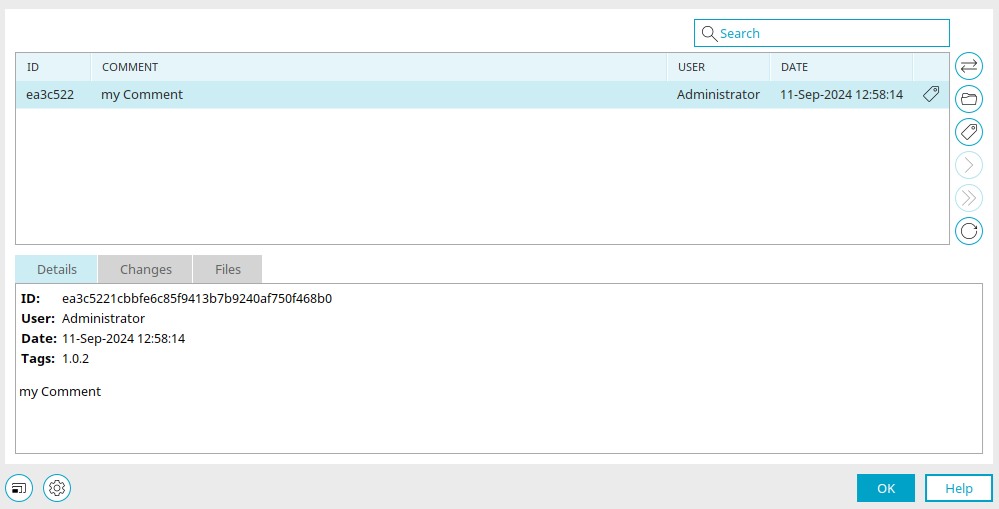
Search
The search filters the list based on the search term you entered. Comments, users, and tags are searched. Searches within tags are performed on names, comments, and users.
"ID" column
The ID of a repository entry is generated automatically and displayed in the abbreviated format commonly used in Git.
"Comment" Column
This section displays the comments you entered when publishing the history of applications, processes, or layouts.
"User" Column
This displays the user who made the most recent entry in the history.
"Date" column
Displays the date on which the history was generated.
 Open in Portal Manager
Opens the selected version in the corresponding module. For applications, this closes the currently open application. For processes and layouts, the selected entry opens in a new tab. You can access this feature only if the Expert Options are enabled. The server name will not be changed during this operation. If you want to use the selected stand, the application (or the process or layout) must be explicitly published via the "File" main menu.
Publishing a different version from the version history may result in data loss, for example, if the current version contains a data field that does not exist in the restored version.
 Manage Tags
Entries with tags are marked with this symbol in the last column of the table. Once you've selected an entry, click " Manage Tags" on the right. This opens a dialog box where you can manage the tags for the selected entry.
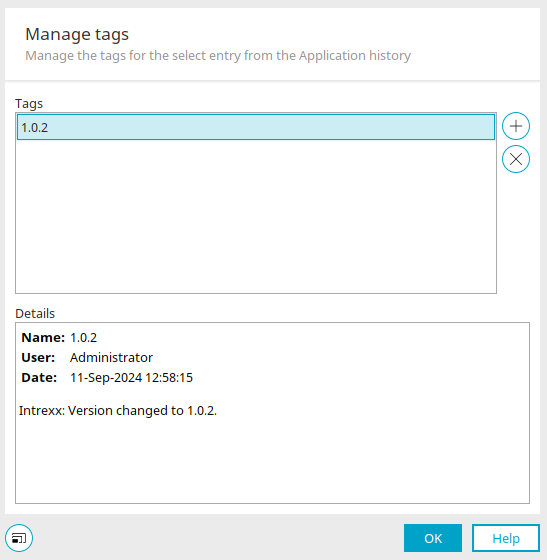
Details
The tag name, the user who created the tag, the creation date, and—if available—the comment are automatically displayed here.
 Delete Tag
Removes the currently selected tag from the history.
 Create a tag
Opens a dialog box where you can enter a new tag.
A New Day
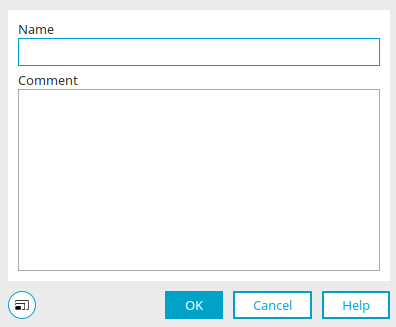
Name
A tag's name must be unique; that is, it may appear only once per history. In addition, the tag name must be Git-compliant. For example, it must not contain any spaces.
Comment
You can post one comment here per day. Click "OK" to save the new tag and close the dialog box.
You will then return to the "Manage Tags" dialog box. Click "OK" here as well to return to the history.

 / Load all entries
When the dialog box opens, the last 25 entries in the history are loaded. By clicking "Load Next 25 Entries" or "Load All Entries," you can load the corresponding number of entries.
 Refresh
Reloads the current version of the history from the server, for example, if there are changes that do not yet exist in the history. This situation occurs, for example, when an application has been published on the server without creating an entry in the history. If this is the case, a corresponding message will appear at the bottom of the dialog box.
 Advanced Options
If the expert options are enabled in the current module, the advanced options are available at the bottom of the dialog box. The button opens a submenu that allows you to delete all entries in the history. The Git repository will also be deleted in the process.
Deleting individual entries from the history is not supported
 Information Text
Appears at the bottom in certain situations, such as when changes have been made on the server but are not recorded in the history.
Details
You'll find the details at the bottom of the dialog box. The ID, user (QualifiedLoginName), date, and comment for the currently selected entry are displayed here.
Changes
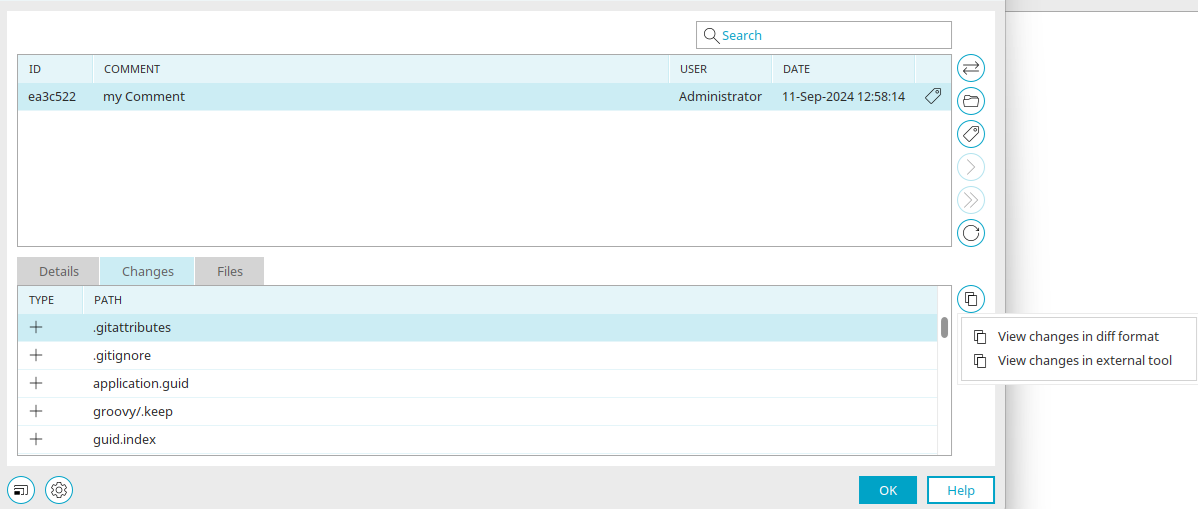
This section displays files that have been added, edited, or deleted for the currently selected entry.
"Type" Column
The type of change can be identified by the icon:
-
Added
-
 Edited
 -
Deleted
"Path" column
The path to the modified file is displayed here relative to the portal directory `internal/application/store/<application GUID>`.
 View Changes
Opens a submenu with the options "Show changes in diff format" and "Show changes in an external tool."
Show changes in diff format
Opens a dialog that displays the differences in Git's diff format.
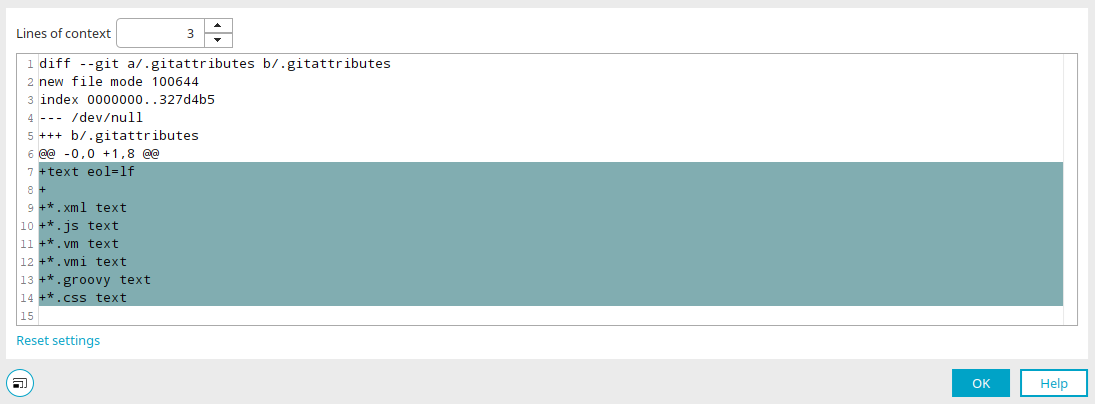
Here you can view the changes to the file in the standard Git diff format. For binary files, such as images, the system only indicates that changes have been made.
Number of Context Lines
Context lines are lines that appear before or after a changed line in the diff. In Git, the default value is 3. Here, you can change the number of context lines.
Reset Settings
Resets the number of context lines to the default value of 3. Click "OK" to close the dialog box.
View changes in an external tool
The file for the selected entry is compared with the file for the previous entry in the external tool.
The external tool is used for viewing only. Changes to files are not applied here.
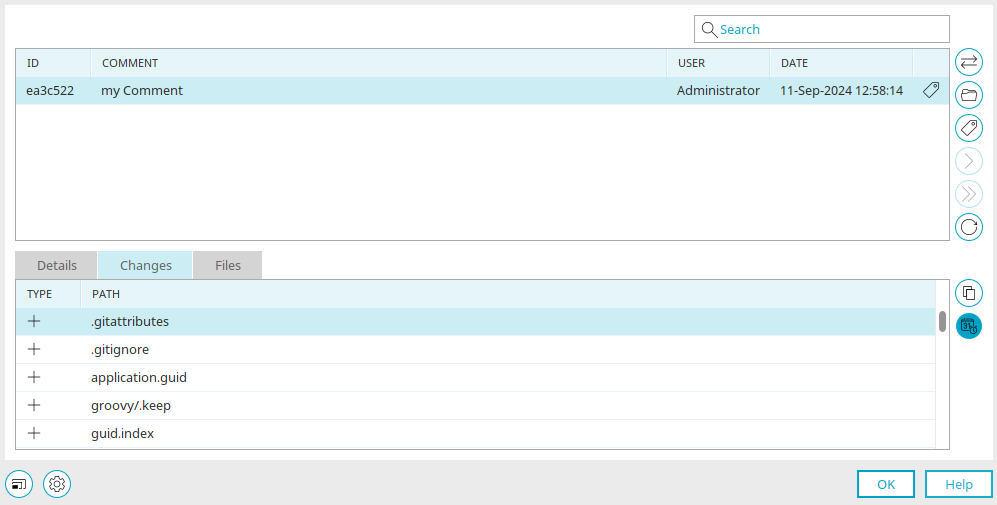
 View File History
Opens the change history again in another dialog box that functions in the same way as this currently open dialog box. Only the entries in which changes were made to the file are displayed.
Files
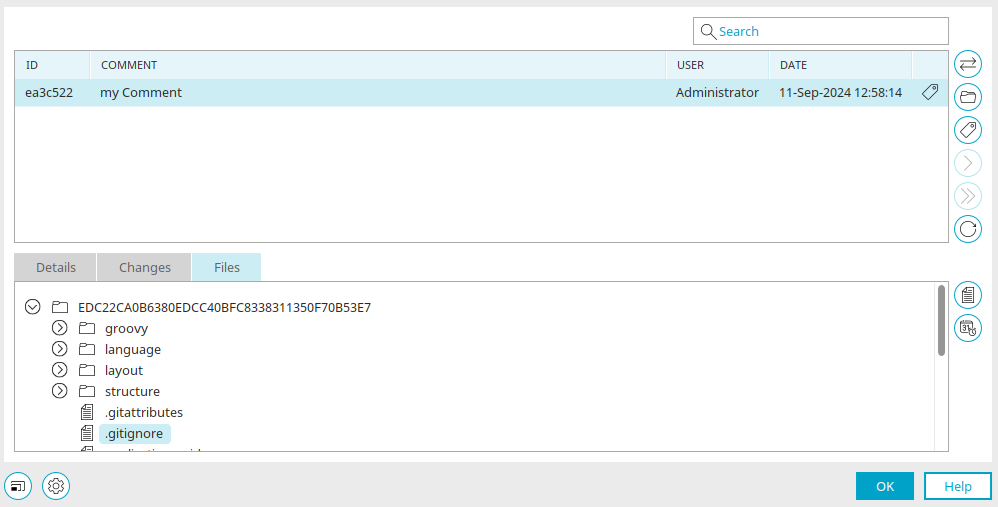
For the selected entry, all directories and files from the respective state are displayed in a tree structure. Files that have been deleted are not displayed in the file tree. The buttons described below are active only for files, since only files—and not directories—are versioned in a Git repository.
 View File
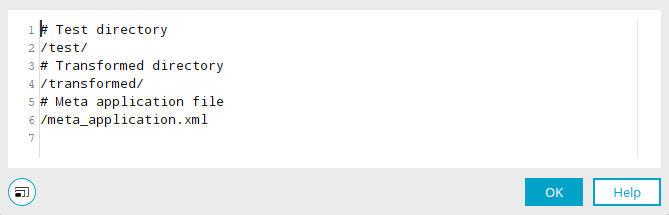
Opens a dialog box that displays the contents of the selected file. Syntax highlighting is supported for files with the extensions xml, js, vm, vmi, groovy, or css. Image files with the extensions png, jpg, jpeg, or gif are displayed as images. Click "OK" to close the dialog box.
View File History
Displays the history of the selected file in the same dialog box, which is reopened for this purpose. The comparison can then be performed.
Compare Versions
You can also access the comparison directly via the main menu options "Compare with the last entry in the application history" and "Compare with an entry in the application history. " When publishing, the currently open version can also be compared to the most recent version of an entry in the history in the dialog box where the history entry is created. The same applies to processes and layouts.
Select an entry from the history
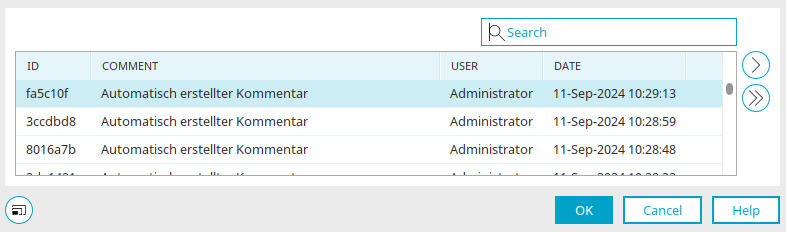
Search
The search filters the list based on the search term you entered. Comments, users, and tags are searched. Searches within tags are performed on names, comments, and users.
"ID" column
Displays the ID of the repository entry.
"Comment" Column
Displays the comments that were entered when saving applications, processes, or layouts.
"User" Column
This field displays the user who created the entry in the history.
"Date" column
Displays the date on which the history was generated.
Select the version you want to compare. When you click "OK," the differences between the two versions will be displayed.
Comparison
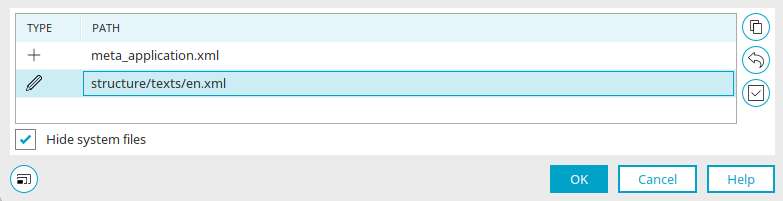
"Type" column
The type of change can be identified by the icon:
-
Added
-
Edited
-
Deleted
"Path" column
The path to the modified file is displayed here relative to the portal directory `internal/application/store/<application GUID>`.
View Changes
Opens the following submenu:
-
Show changes in diff format
Opens a dialog that displays the differences in Git's diff format.
-
Display changes in the external tool
The file for the selected entry is compared with the file for the previous entry in the external tool.
The external tool is used for viewing only. Changes to files are not applied here.
-
Merge changes made in the external tool
This submenu is only available if the expert options are enabled. In addition, the version to be compared must currently be open in Portal Manager. Changes to the selected file can be interactively merged between the currently open version and the selected history entry. The changes will take effect in the currently open version. Changed files are marked with an * in the list. The selected file is then compared to the two-pane view in the external tool.
Changes can only be applied to files in the currently open version in the local working directory. Any changes made in the history (for the version selected for comparison) will not be applied. This action allows users to edit files directly and is therefore reserved for users with the necessary expertise. All changes in this area are made at your own discretion. We cannot provide support for editing the files or for any resulting issues.
 Revert Changes
This action allows you to completely revert any changes made to the selected file between the currently open version and another selected history entry. The changes will take effect in the currently open version. Changed files are marked with an * in the table. This feature is available only if the Expert Options are enabled. In addition, the version to be compared must currently be open in Portal Manager.
Changes can only be applied to files in the currently open version in the local working directory. Any changes made in the history (for the version selected for comparison) will not be applied. This action allows users to edit files directly and is therefore reserved for users with the necessary expertise. All changes in this area are made at your own discretion. We cannot provide support for editing the files or for any resulting issues.
Changes to files may not be compatible with the current portal's patch level. Please note that the patch level for individual files cannot be adjusted, and this may cause issues.
 Validate files in the current working directory
Opens a dialog box where you can check the files associated with applications, processes, and layouts.
Validation
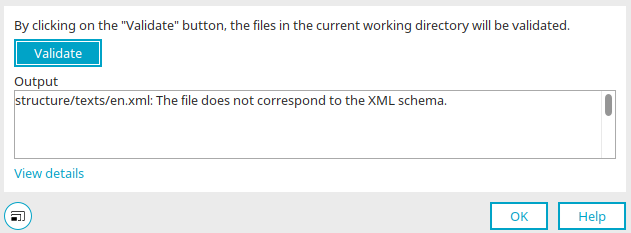
Clicking the "Validate" button triggers the validation of the files in the working directory. In this process, for example, the schema of XML files is checked. Validation is useful when files have been modified. This action is available for applications and processes.
Issue
Displays the result.
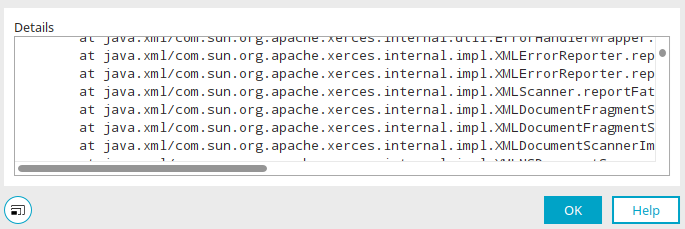
View Details
This link is active if an error occurs during validation. Clicking it opens a dialog box that displays the error details.
Details
Hide system files
This option filters the table. System files are files that are typically generated automatically by the system, such as when creating a new application or publishing an application.
"History" Section
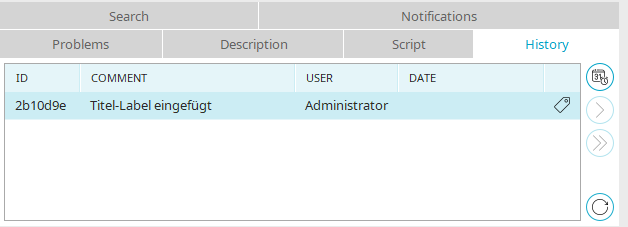
In the "Applications, " "Processes," and "Design" modules, you'll find the "History" tab at the bottom. This tab displays the complete history of the currently open application, process, or layout.
Open Detailed History
Opens a dialog box that displays the complete history. The entry selected in the tab is preselected there.
/ Load all entries
When you open the section, the last 25 entries in the history are loaded. By clicking "Load Next 25 Entries" or "Load All Entries," you can load the corresponding number of entries.
Refresh
Reloads the history from the server. The view is automatically refreshed when the following actions occur:
-
Publication by the User
-
Publication Upon Completion of Certain Actions
-
Design: Set as Default Layout
-
When deleting applications, processes, or layouts
Using Tags
You can mark entries in the history as important so that you can easily identify them in the history. It often takes a day to tag a new version. In principle, any entry that is important for development can be tagged. Intrexx automatically links the Intrexx version numbers to tags in the history. For example, if a new version number is created in an application and the application is then released, a tag with that version number is created for that commit.
Tags can be created for the history of applications, processes, and layouts in the dialog that displays the entire history. Any number of tags can be assigned to each entry in the history. Tags can also be deleted. Each day is structured as follows:
-
Name
-
User (QualifiedLoginName) — is automatically determined from the "Users" module. It consists of the username and the domain.
-
Date
-
Comment (optional)
A tag's name must be unique; that is, it may appear only once per history. In addition, the tag name must comply with Git conventions—for example, it must not contain any spaces. You can find the rules for tag names here. Optionally, one comment may be posted per day. If no comment is posted, the comment field remains blank. A tag is automatically created if the system detects that the semantic version number has changed during publication. The tag name corresponds to the semantic version number and may be adjusted as needed to prevent duplicates. supplemented with a suffix.
Displaying Information on the Current Status
The version currently open in the various modules is displayed in the following locations:
-
For applications on the workspace, when the application node is selected.
-
For processes on the Process tab and in the Details dialog, shown here with the abbreviated Git ID and date.
-
For layouts, on the Layout tab and in the Details dialog, shown here with the abbreviated Git ID and date.
External Tools
For version control with Git, you can also use external tools that you can integrate here in Intrexx.
Miscellaneous
Applications, processes, and layouts can be saved locally via the "File" main menu. A locally stored application does not contain any Git information. This also applies to locally stored processes and layouts. If you open a locally stored object in the corresponding module, you can view the object's history if an application or process with the same GUID—or a layout with the same directory name—is published on the server.
Git configuration files
When you create a Git repository, configuration files are created. Depending on the object type (application, process, layout), it is possible that not all configuration files are required.
-
.gitattributes
This file contains definitions for line-end characters for various file types.
-
.gitignore
This file contains directories and files that should not be versioned.
Import / Export
When you import or export applications, processes, or layouts, you can configure how version control should be handled during this process.
Import
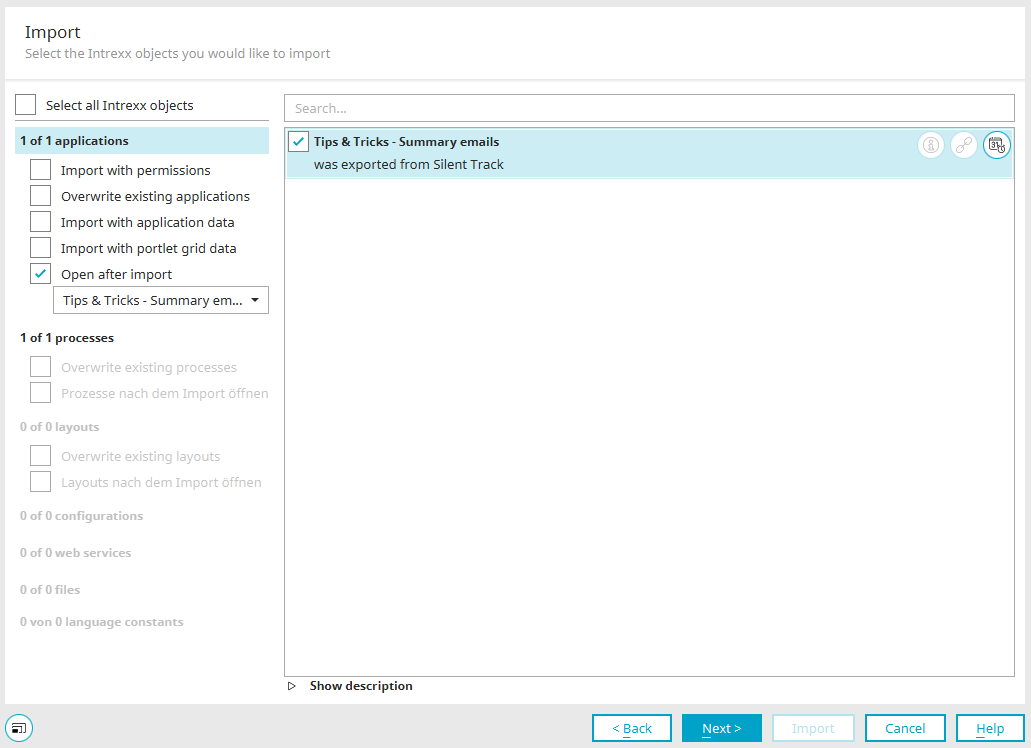
You can access the version control dialog in the import dialog by clicking " " "Version Control."
Options
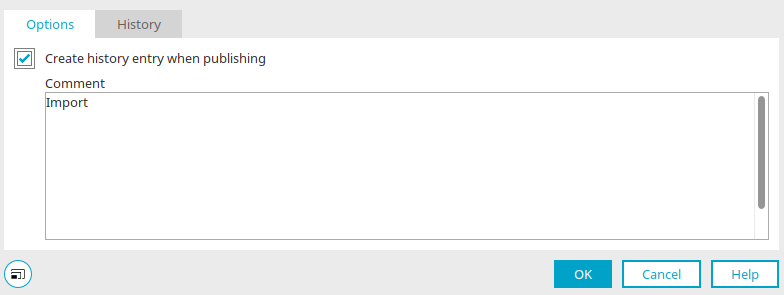
If the "Create an entry in the history when publishing" setting is enabled, an entry is created in the history during import. Under "Comment," you can overwrite the "Import" entry with your own comment. Please follow the guidelines for formatting commit comments.
History
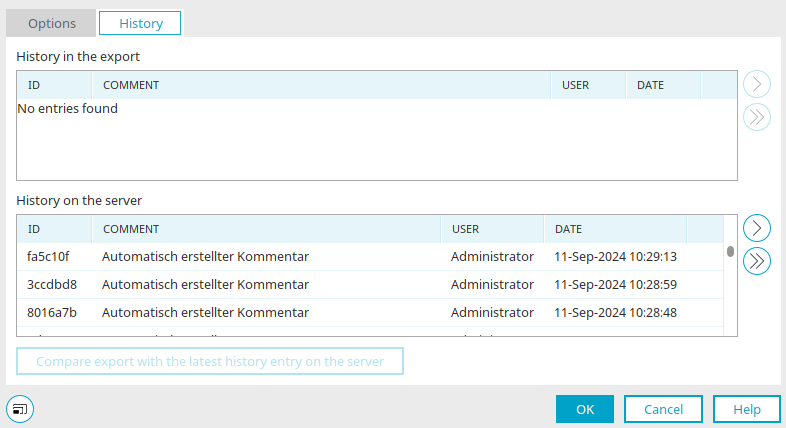
Export History
All entries in the history that are included in the export are displayed here. In the list, you'll find the ID of each entry, the comment, the user who created the entry, and the date the entry was created.
History on the Server
This section displays all entries in the history that currently exist for the import object on the portal server.
Compare the export with the most recent entry in the history on the server
Opens a dialog box in which the export is compared to the most recent entry in the history on the server. This action is only active if there is a history both in the export and on the server.
In the import dialog, you can view version information by clicking "  " under "Version Information."
Version Information
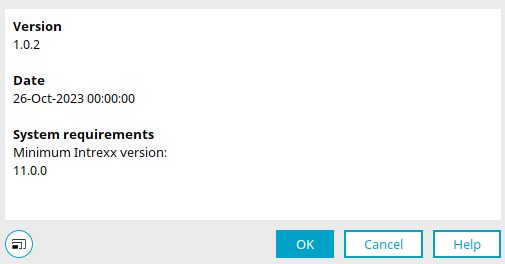
The version number and date are displayed here. Under "System Requirements," you will find the minimum Intrexx version required to use the import object.
Export
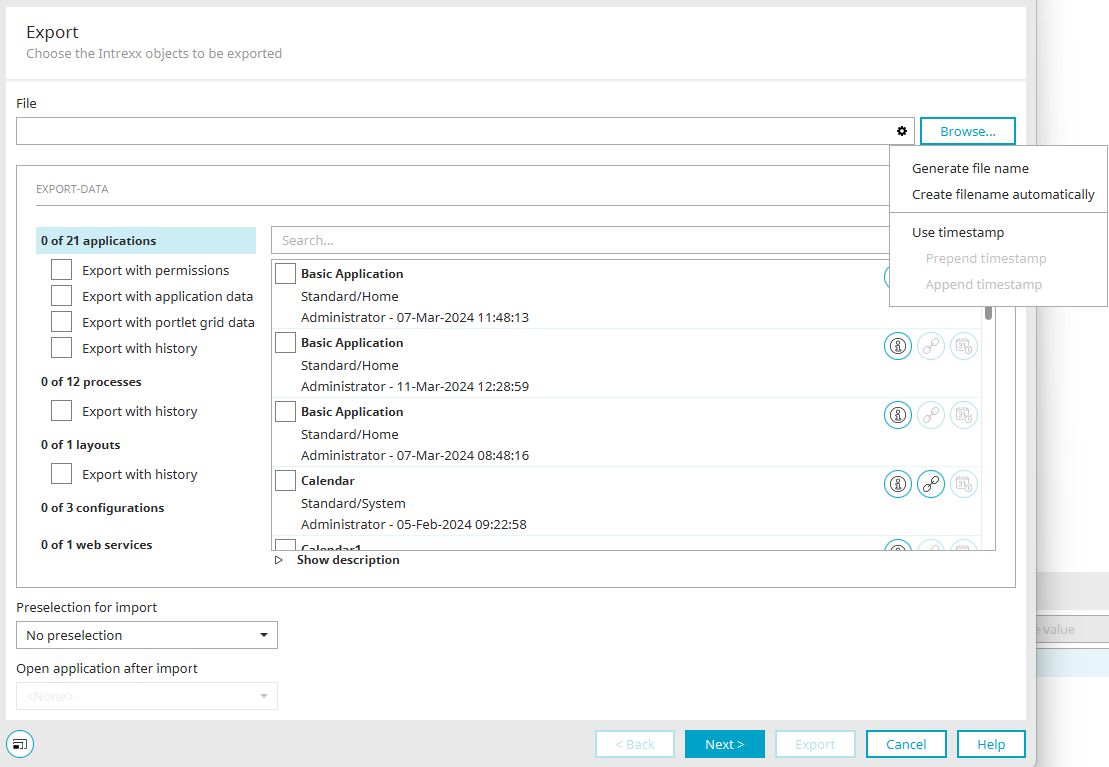
In the export dialog, you can open version control by clicking " " and selecting "Version Control."
Version Information
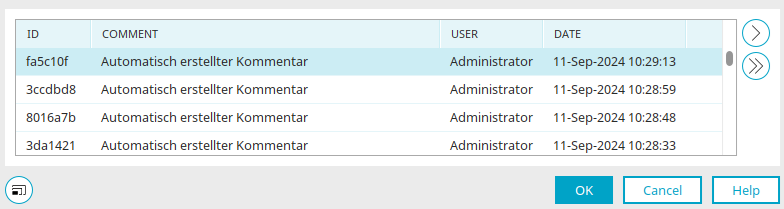
This section displays the ID, the comment, the user who created the entry in the history, and the date the entry was created. In addition, a message will appear at the bottom of the dialog box to inform you if there are changes on the server that are not yet included in the history.
In the export dialog, you can also view version information by clicking " " under "Version Information."
The version number and date are displayed here. Under "System Requirements," you will find the minimum Intrexx version required to use the export object.
Options - History
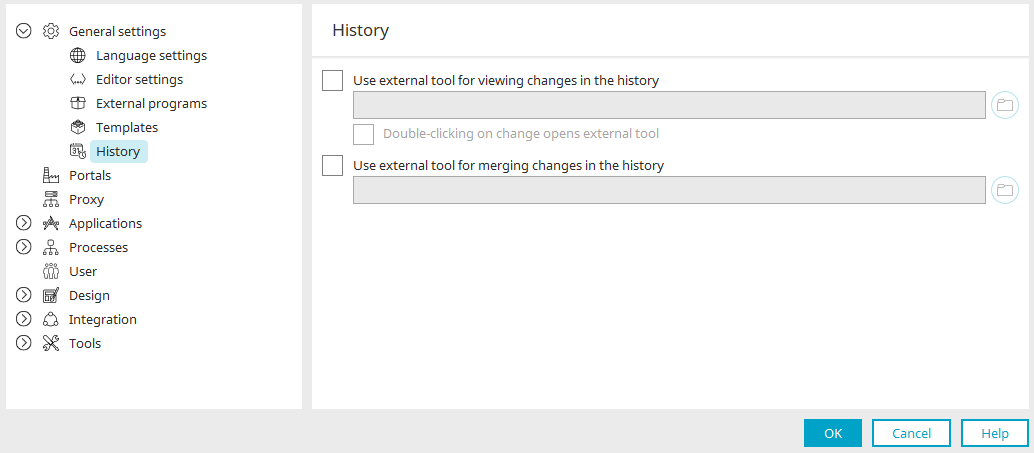
You can access the history options via the main menu under "Tools / Options / General."
Paths to external tools can be entered here to view and merge changes in the history. The tools must be installed on the system where the Portal Manager is also running. Tools that can compare and merge two files in a two-pane view are supported. The program path must support parameters for the file paths to be compared. To do this, you can use the placeholders ${file1} and ${file2} in the program path. ${file1} refers to the file used as the basis for the comparison, and ${file2} refers to the file being compared to it. The placeholders are optional. If these are not specified, they are appended to the program path programmatically.
The external tool is used for viewing only. Changes to the files will not be saved.
Use an external tool to view changes in the history
With this setting, you can enter a path to an external tool for displaying changes.
Examples:
-
WinMerge (Windows)
"C:\Program Files (x86)\WinMerge\WinMergeU.exe" /wl /wr ${file1} ${file2}
-
KDiff3 (Windows)
"C:\Program Files\KDiff3\kdiff3.exe" ${file1} ${file2}
-
KDiff3 (Linux)
kdiff3 ${file1} ${file2}
-
KDiff3 (Mac)
/Applications/kdiff3.app/Contents/MacOS/kdiff3 ${file1} ${file2}
-
OpenDiff (Mac)
/usr/bin/opendiff ${file1} ${file2}
Select
Opens a dialog box where you can select the tool.
Double-clicking on a change opens the external tool
Causes a change in the history to be displayed in the external tool when double-clicked. If this option is not selected, the change is displayed in diff format.
Use an external tool to merge changes in the history
With this setting, you can specify a path to an external tool for merging changes.
Examples:
-
WinMerge (Windows)
"C:\Program Files (x86)\WinMerge\WinMergeU.exe" /wr ${file1} ${file2}
-
KDiff3 (Windows)
"C:\Program Files\KDiff3\kdiff3.exe" ${file1} ${file2}
-
KDiff3 (Linux)
kdiff3 ${file1} ${file2}
-
KDiff3 (Mac)
/Applications/kdiff3.app/Contents/MacOS/kdiff3 ${file1} ${file2}
-
OpenDiff (Mac)
/usr/bin/opendiff ${file1} ${file2}