

Expert Mode in the "Applications" module
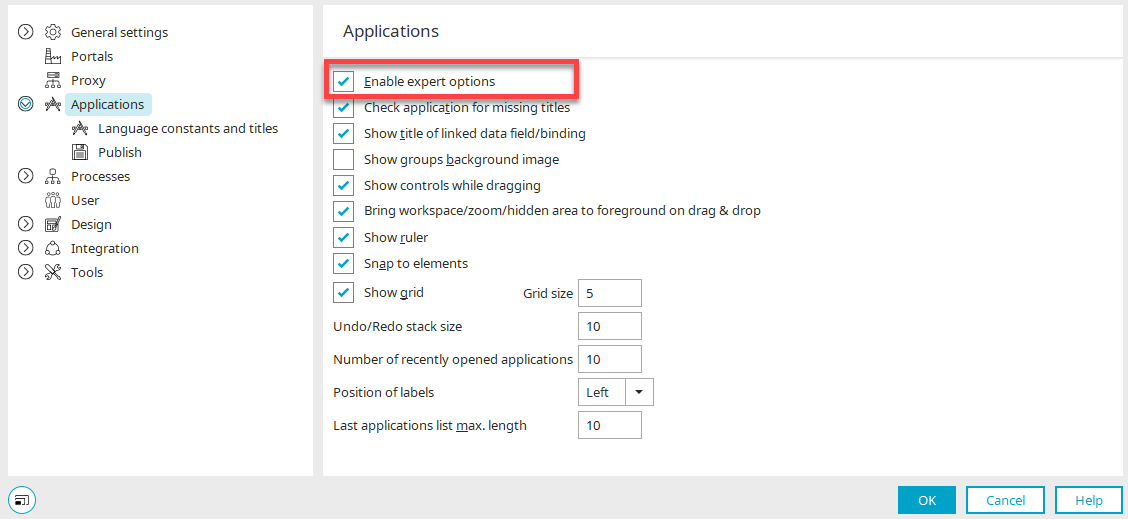
You can enable the "Enable expert options" setting via the main menu under "Tools / Options / Applications. "
"Expert" tab
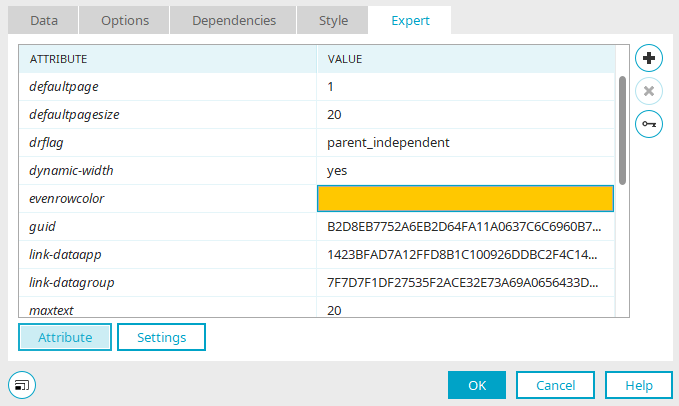
In Expert Mode, an additional "Expert" tab appears in the Properties dialog box for elements, data groups, pages, and the application node. Here, you can define attributes that describe the respective element in the XML application file, as well as settings.
Attributes
Here you can see all the attributes that describe the currently selected element in the XML application file.
You can edit the value of an attribute by clicking in the corresponding cell in the "Value" column.
 Add an attribute
Opens a drop-down list in the "Attribute" column from which a new attribute can be selected. All attributes available for the currently selected element are listed. Attributes that work only under certain conditions are marked with an *. In addition to the attributes listed, other attributes can be entered directly into the cell.
 Remove Attribute
Deletes the currently selected attribute.
 Generate a GUID
Generates a GUID and copies it to the clipboard.
The name of a data group is specified in the "name" attribute. It must not exceed 26 characters and may contain only uppercase letters, numbers, and underscores. The first character must be a letter. If these requirements are not met, a message will be displayed when the attribute is saved.
Below the attribute list, you'll find the "Settings" button, which you can use to switch to the Expert Settings.
Settings
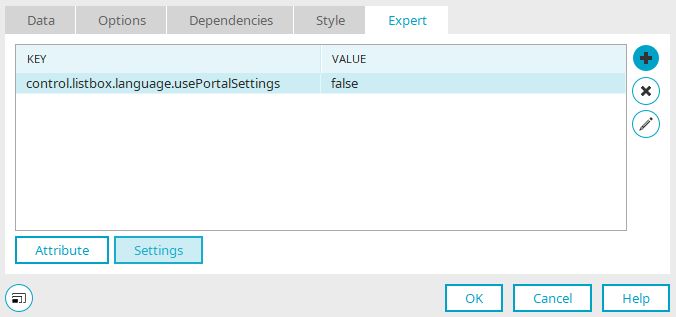
Settings control the behavior of the server and the behavior of the controls. The names of the settings are structured in such a way that it is clear to which elements a setting can be applied.
Remove Setting
Deletes the currently selected setting.
 / Edit Setting
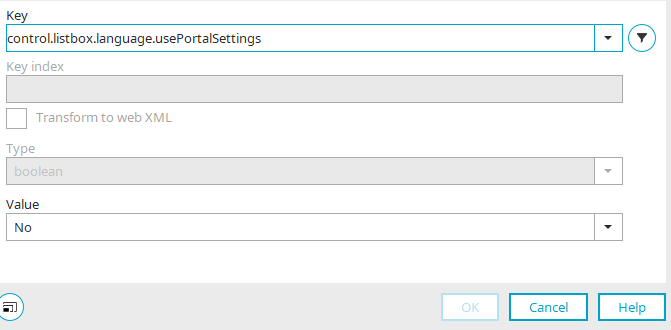
Opens a dialog box where you can create a new setting.
Edit Settings
Examples
control.listbox.language.usePortalSettings
Can be used with drop-down lists.
Function: Lists only the languages that are enabled in the portal.
Possible values: No / Yes
Drop-down lists with the "special value source" setting that use the "LanguageListProcessor" class will, when the "control.listbox.language.usePortalSettings" setting is enabled, list only the languages that are activated in the portal.
control.distribution.storage.dataGroup.triggerWorkflow
Can be used with the "Multiple Selection" element.
Function: Trigger a process when selecting entries in a multiple-selection list
Possible values: No / Yes
When saving values from a multiple selection to the associated child data group, a process event can be triggered for each child data record, allowing the system to respond to the selection of individual entries via a process. Data group event handlers for which the child data group is selected are triggered.
Starting with Intrexx version 12.1.5:
control.multiselect.storage.pipe.binding@useDisplaySortOr
Can be used with the "Multiple Selection" element.
Function: Include / exclude the "Text (Long Text)" data type when sorting. This setting has no effect on child data groups.
Possible values: true / false
Details
In Expert mode, additional information can be accessed via an element's context menu or by pressing the F4 key when the element is selected.
"Quick Info" tab
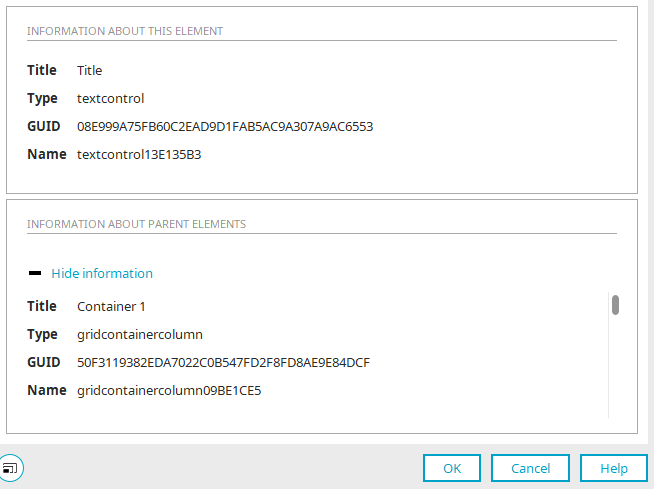
Here you'll learn about
-
Title
-
Type
-
GUID
-
Names
about the currently selected element in the XML.
Show information
Displays additional information about all elements that are parent elements of the currently selected element, such as the page that contains the element or a group that includes the element.
"XML" tab
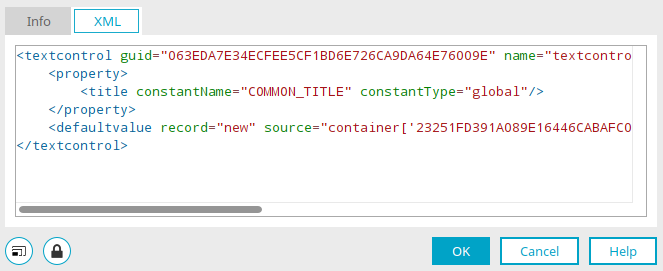
On this tab, you can access the XML editor, which allows you to edit the XML of the current element directly.
 Unlock
The XML is read-only when the dialog box opens to prevent accidental changes. Clicking this button removes the write protection.
 Show Abridged XML
Hides or shows XML sections of child elements of the displayed element, such as pages within a data group.
Filter Editor
Filters can also be edited directly in Expert Mode. To do this, click "  " in the filter dialog to "Edit filters in expert mode."
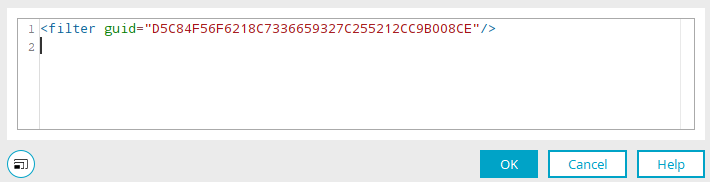
The source code for filters defined using the standard dialog is displayed in the Filter Editor and can be edited directly in XML there. Changes to the XML take effect after the application is published.
Indexes
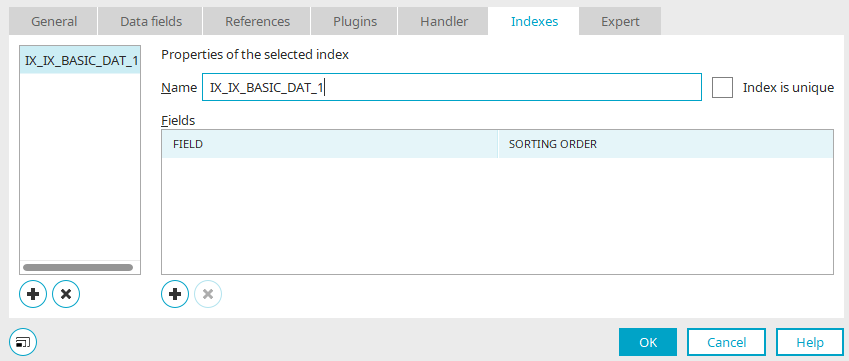
If the Expert Options are enabled, the additional "Indexes" tab is available in the Data Groups Properties dialog box. Here, you can define indexes for database fields, which help improve performance when filtering or sorting tables in applications.
If the data group contains foreign keys or references, you will find indexes that have already been created automatically—one index for all foreign keys and one index per reference. These indexes cannot be deleted via the dialog box or modified—except for the index name. If a reference to the data group is deleted, the corresponding index is also automatically deleted.
In the left pane of the dialog box, you'll find a list of all defined indexes.
Add an index
Creates a new index. The index name is automatically generated from the name of the current data group and a sequential number.
Remove Index
Resets an existing index. The index is removed from the list.
Properties of the Selected Index
Name
The name of the currently selected index is displayed here and can be edited.
The index is unique
If the field(s) listed in the "Fields" column contain unique values, you can set the "Index is unique" option, which further improves performance when filtering or sorting tables.
When retrieving data from the database, a unique index is created. Please refer to the documentation for the database you are using for more information on how this query is interpreted by the database.
"Fields" Column
List of fields selected for the index.
"Sort Order" Column
For each field, you can specify whether the index should be sorted in ascending or descending order.
Add Field
The desired data field can be selected from a drop-down list.
Remove Field
The selected data field was removed from the list.
Conditional Display
The following elements can be shown or hidden in Expert Mode based on specific criteria:
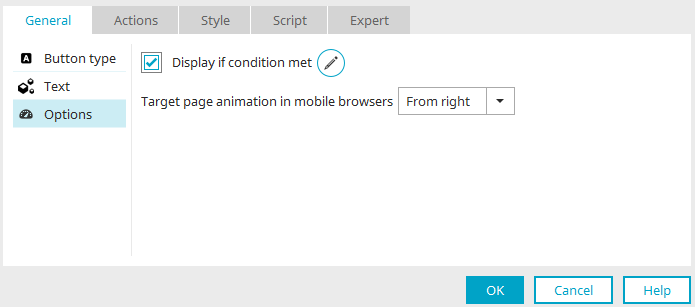
In the Properties dialog box, you'll find the "Conditional Display" setting in Expert Mode.
Edit Condition
Opens the Velocity Editor, where you can define the condition.
For elements with conditional display enabled, you can open Velocity directly by pressing F12.