

Script Editors
Some of the editors described here are only available in Expert mode. Find out how to turn on this mode here.
You can find general information on "scripting" here.

You can access the JavaScript editor in the "Applications" module via the main menu "Edit / Edit Script" or by pressing the F12 key directly from the workspace. In addition, the editor can be accessed in the properties of elements and pages on the "Script" tab.
The JavaScript code entered here will be saved when you click "OK." It can then be assigned to an event. Once the script has been published and the event occurs—for example, due to a user action in the browser—the script is executed.
"Edit" Menu
In the editor, you'll find the "Edit" menu, which offers the functions described below. Information about the submenus not described here can be found here.
Insert
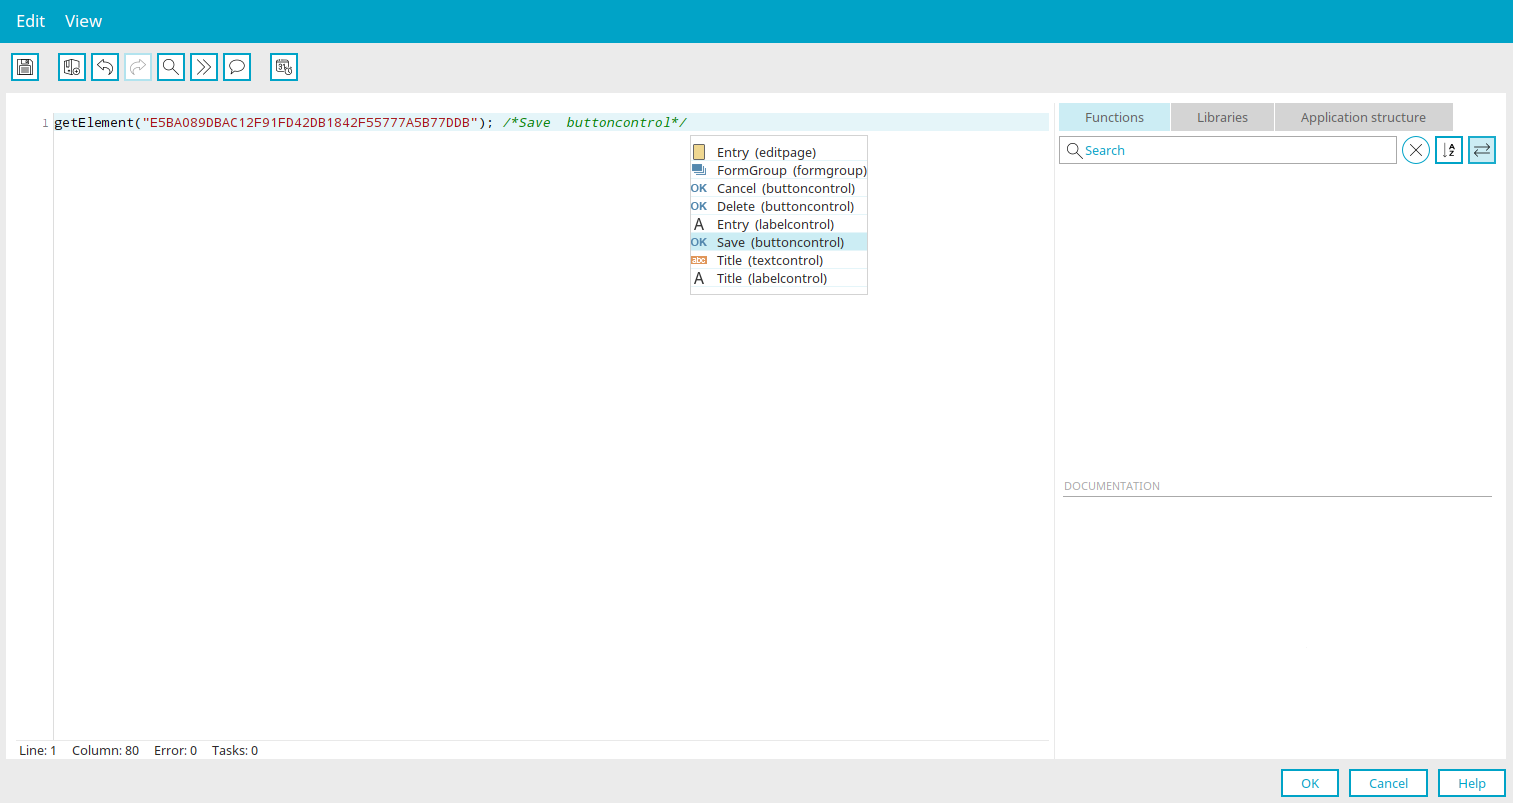
Displays a list of all input and view elements located on the current page at the current cursor position. If text is selected, it will be replaced when pasted. The list of elements can also be displayed by right-clicking on the desired location in the editor's workspace. Select the element you want to use in the script. The following program code is then automatically inserted into the script editor:
getElement("<GUID of the element>")
Create your reference to the HTML object using
var <myElement> = getElement("<GUID of the element>");
Comment out / uncomment a block
Inserts the characters "//" at the current cursor position on the editor's workspace.
Search the library
Go to the search field on the "Libraries" tab.
Search for a function
Go to the search field on the "Functions" tab.
Insert JSDoc

Opens a list of JSDoc tags at the current cursor position. JSDoc is used to document functions. The following JSDoc tags are supported:
-
@author
-
@deprecated
-
@description
-
@example
-
@param
-
@private
-
@public
-
@returns
-
@throws
-
@version
Select the desired day and enter it in a comment line. "New JSDoc Comment Block" inserts a complete paragraph into the script that includes the author, description, and version.

If the function containing JSDoc tags is selected on the "Functions" tab, the corresponding information is displayed in the lower section.
"View" Menu
You can find information about this editor menu here.
"Functions" tab
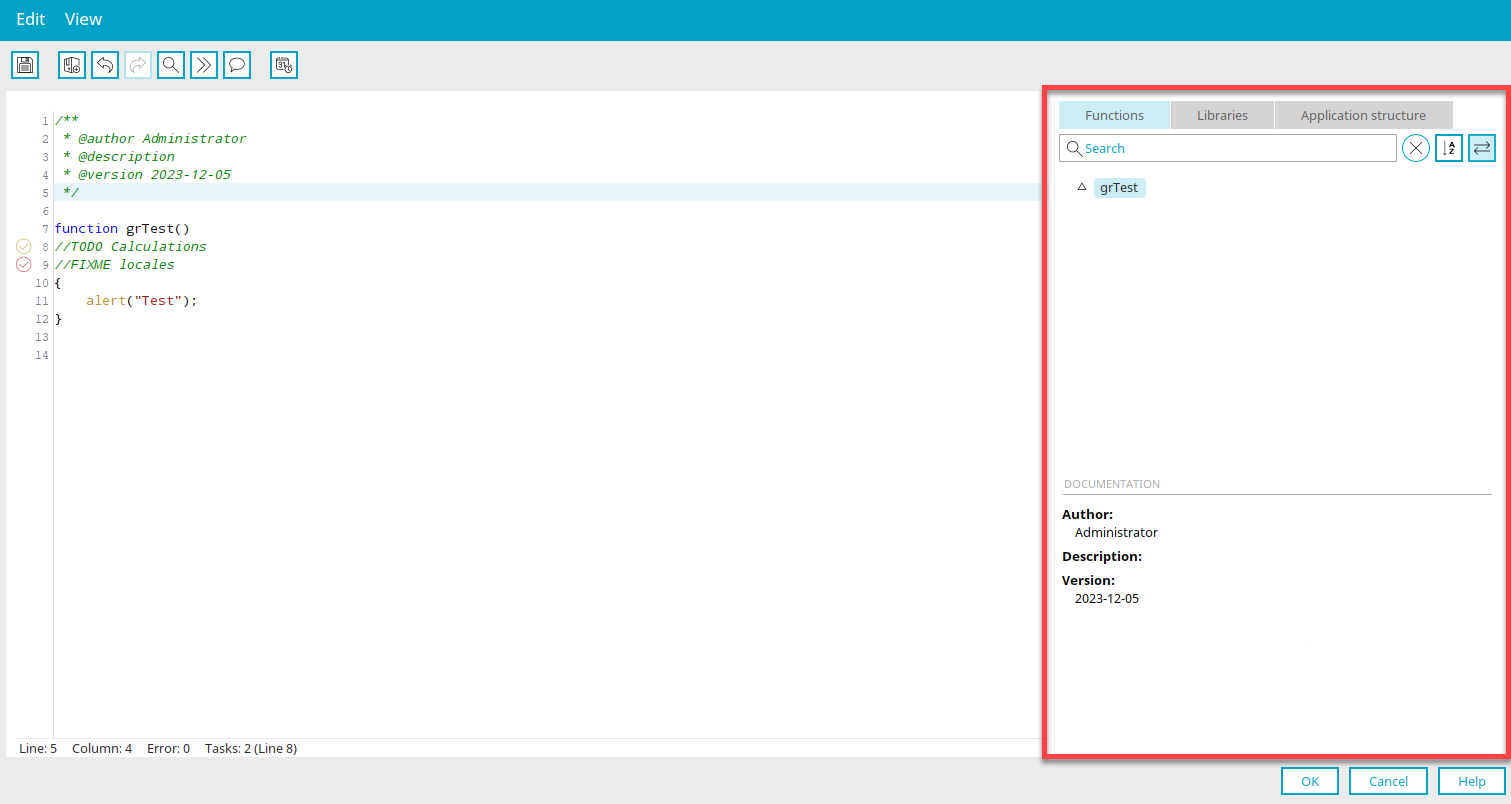
The "Functions" section lists all JavaScript functions written in the editor workspace.
Search
You can search for features here.
 Reset Filter
Clear the search field.
 Sort
Sort
Changes the alphabetical order of the function names to ascending or descending.
 Connect to Editor
The cursor is positioned at the beginning of the selected function on the workspace.
Documentation
In this section, any JSDoc tags that are present are converted into a description and displayed.
"Application Structure" tab
You can find all the information about this topic here.
"Libraries" tab
You can find all the information about this topic here.

You can access the Groovy script editor in processes via the Properties dialog for the "Groovy Event Handler," "Groovy Action," and "Groovy Condition" elements on the "Script" tab. You can also find it in the properties of applications and application pages, where you can create handler definitions on the "Handler" tab. You'll also find it in the "Integration" module under Data Transfer, where you can control the transfer using a Groovy script.
You can use the Groovy script editor to extend Intrexx's functionality. The script written here is saved when you click OK and is executed accordingly in processes, applications, or during a data transfer.
"Edit" Menu
In the editor, you'll find the "Edit" menu, which offers the functions described below. Information about the submenus not described here can be found here.
Comment out / uncomment a block
Inserts the characters "//" at the current cursor position on the editor's workspace.
Search the library
Go to the search field on the "Libraries" tab.
File History
Opens a dialog box where you can manage the versioning of the Groovy script file.
"View" Menu
You can find information about this editor menu here.
"Application Structure" tab
You can find all the information about this topic here.
"Libraries" tab
You can find all the information about this topic here.

Velocity can be written, for example, using the "VTL-Include" application element. The script created in the Velocity Editor is saved and executed when you click "OK."
"Edit" Menu
In the editor, you'll find the "Edit" menu, which offers the functions described below. Information about the submenus not described here can be found here.
Comment out / uncomment a block
Inserts the characters "##" at the current cursor position on the editor's workspace.
Search the library
Go to the search field on the "Libraries" tab.
Insert a closing line break when exiting
With this setting, a line break is inserted at the end of the code.
"View" Menu
You can find information about this editor menu here.
"Application Structure" tab
You can find all the information about this topic here.
"Libraries" tab
You can find all the information about this topic here.
Stylesheet Editor
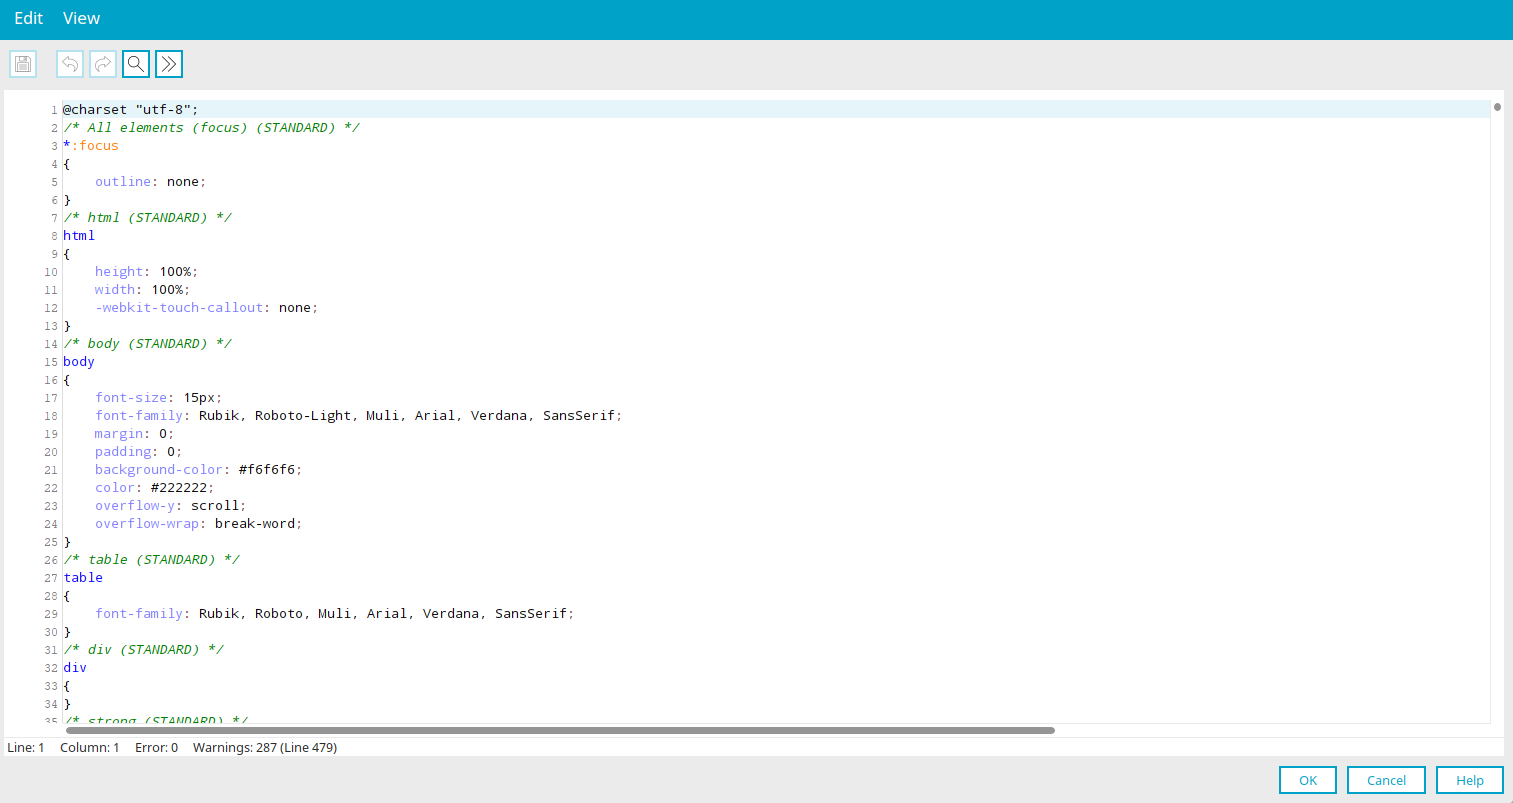
You can access the stylesheet editor in the "Design" module via the main menu under "Edit / Edit Stylesheet." You can change the layout's CSS here. All changes are applied when you click "OK" and take effect when the layout is published.
"Edit" and "View" menus
You can find information about the two editor menus here.
Formula Editor
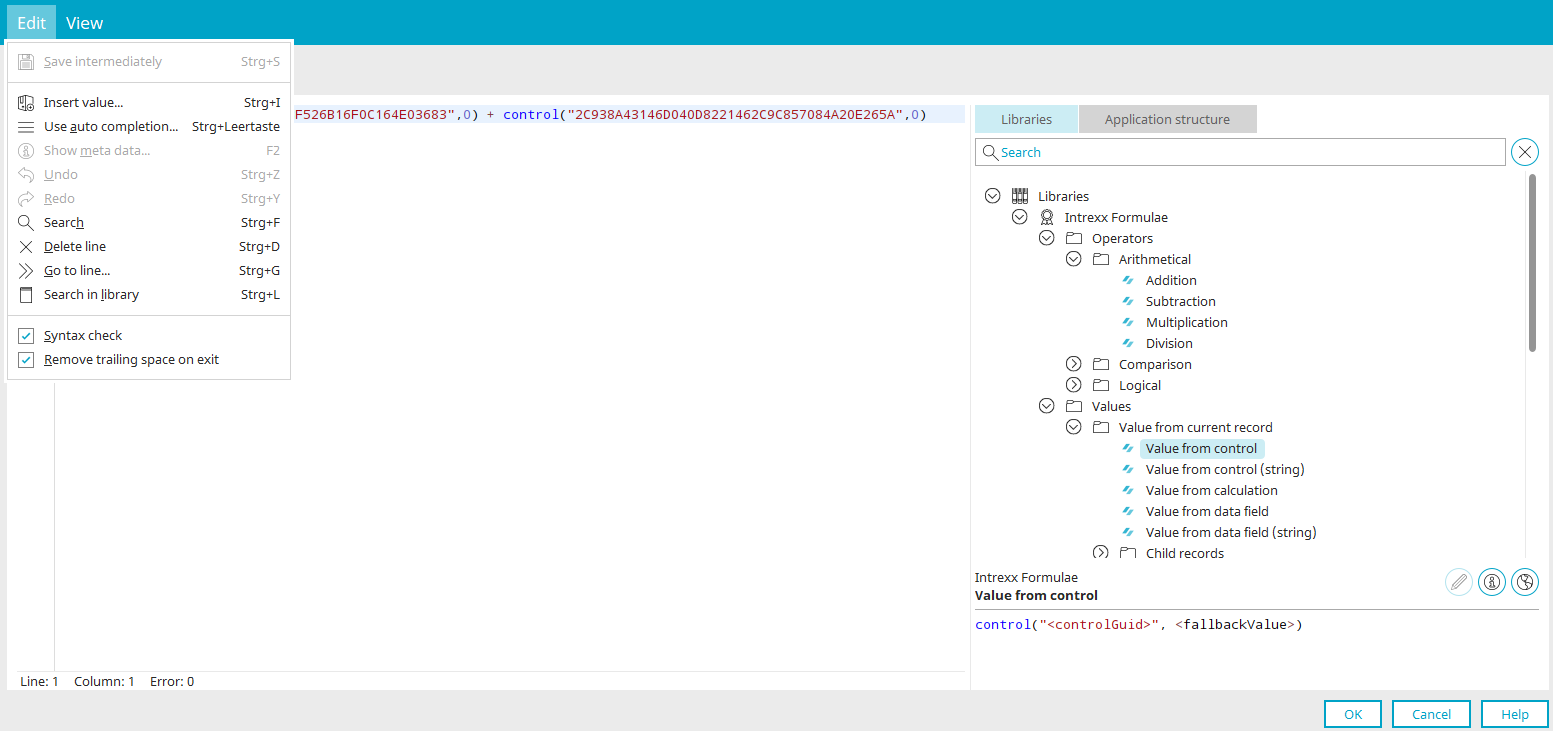
This editor allows you to perform calculations and display the result in the corresponding element. Here you'll find a "Tips & Tricks" post on this topic.
"Edit" Menu
In the editor, you'll find the "Edit" menu, which offers the functions described below. Information about the submenus not described here can be found here.
Insert value

Shows all application objects that can return a value in the script. When you click on an object, its GUID is inserted into the editor's workspace at the current cursor position.
Use AutoComplete

Here, you can select formulas in a tooltip. For example, if you type the term "sum" into the editor and use this menu, formulas that begin with "sum" will be suggested. If a parameter keyword is selected in a formula, the context menu is filtered to show only options for that parameter type. You can find more information on this topic here.
View Metadata
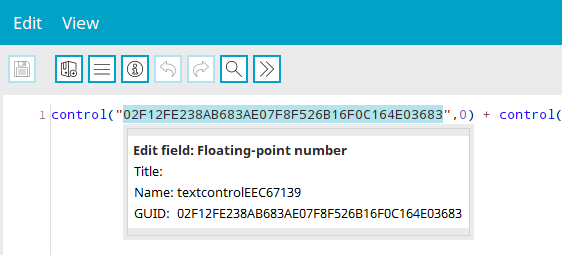
If a GUID or the name of a control is selected in the script, you can use this menu to display additional information about the object in a tooltip, provided that the GUID or the name of the control is known.
Search the library
Go to the search field on the "Libraries" tab.
Undo / Redo
Restores the step performed before the last change or repeats the current step.
"View" Menu
You can find information about this editor menu here.
"Libraries" tab
You can find all the information about this topic here.
"Application Structure" tab
You can find all the information about this topic here.
XML Editor
You can find all the information about this editor here.
Filter Editor
You can find all the information about this editor here.
"Libraries" tab

You can find this tab in the editors for
Here, you can create custom libraries for the respective scripting language or for formulas. The existing Intrexx standard library provides many useful functions. You can find a description of each one here:
You can search the libraries in the upper section.  "Reset Filters" clears the search field.
Creating Your Own Libraries
In addition to the standard Intrexx library, you can create any number of your own libraries directly in the editor.

To do this, select the top entry, "Libraries," and choose "New / Insert Library" from the context menu.
File Name
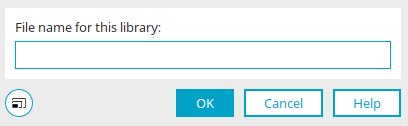
You can enter the library's file name here. Click "OK."
Edit

Here you can enter the title, the description (which can be in multiple languages), and a link to relevant content on the web. If you click "OK," the library will be created. You'll also see this dialog box when you create categories or templates within a library.

The underlying file is stored on the client and is retained during an Intrexx update. You'll usually find the files in the following directories:
-
Installation directory client/cfg/templates/ECMAScript/custom/<library title>.xml
-
Installation directory client/cfg/templates/formula/custom/<Library Title>.xml
-
Installation directory client/cfg/templates/groovy/custom/<library title>.xml
-
Installation directory client/cfg/templates/velocity/custom/<library title>.xml
If the installation is located in a subfolder of C:/Program Files on a Windows computer, you will find the files in the following directories in a standard installation:
-
C:/ProgramData/intrexxclient<version>/cfg/templates/ECMAScript/custom/<library title>.xml
-
C:/ProgramData/intrexxclient<version>/cfg/templates/formula/custom/<Library Title>.xml
-
C:/ProgramData/intrexxclient<version>/cfg/templates/groovy/custom/<library title>.xml
-
C:/ProgramData/intrexxclient<version>/cfg/templates/velocity/custom/<library title>.xml
If the installation is located in a directory under C:/Program Files on a Windows computer, you can find the files for a custom Intrexx instance in the following directories:
-
C:/ProgramData/intrexxclient<version>_<instance>/cfg/templates/ECMAScript/custom/<Library Title>.xml
-
C:/ProgramData/intrexxclient<version>_<instance>/cfg/templates/formula/custom/<Library Title>.xml
-
C:/ProgramData/intrexxclient<version>_<instance>/cfg/templates/groovy/custom/<Library Title>.xml
-
C:/ProgramData/intrexxclient<version>_<instance>/cfg/templates/velocity/custom/<Library Title>.xml
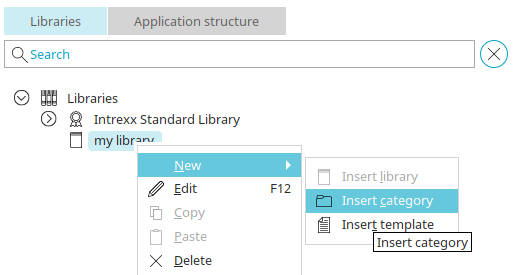
Context menu "New / Insert Category"
If the new library is selected, you can use this context menu to create categories to organize the library's contents. The context menu opens a dialog box where you can enter the category title, a description, and—as with the library—a link to content on the web. Click OK to create the category.
Context Menu "New / Insert Template"
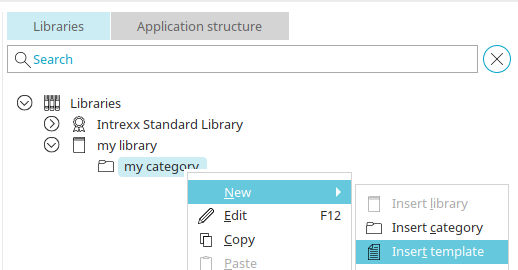
Opens a dialog box where you can write the function you want to add to your library category and save it as a template.
Additional functions in the context menu
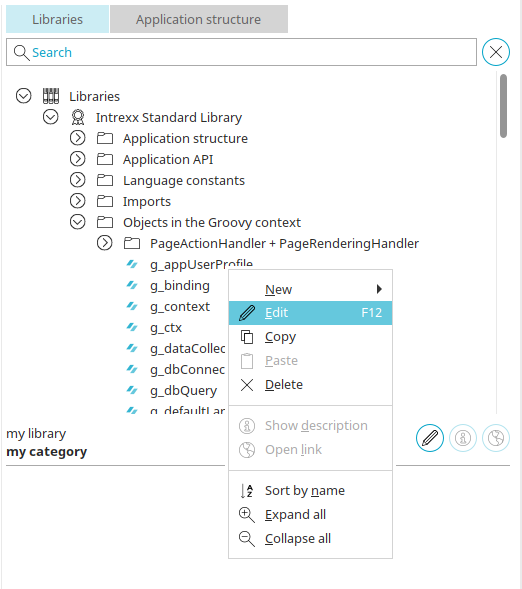
Edit
Opens the Properties dialog box for custom libraries, categories, or templates when they are selected on the "Libraries" tab.
Copy / Paste / Delete
User-defined libraries, categories, or templates are copied, pasted, or deleted. Content from the Intrexx standard library can only be copied.
View description
Displays the description of the currently selected item.
Open link
Opens the destination page specified as a link for the currently selected element.
Sort by Name
Sorts custom libraries, categories, or templates by name.
Expand All / Collapse All
This context menu shows or hides all sublevels of the structure.
Export/Import Library
Exports the library in XML format / Imports a previously exported library.
Insert into the script
Inserts the selected function at the cursor position in the script.
Details
When a library is selected, you can use this context menu to open a dialog that displays the name and path of the script file.
Link Target, Edit Properties, Description
On the "Libraries" tab, you'll find the following buttons when a function or method is selected:
 Link destination
Opens the webpage in the browser whose URL is stored as a link.
 Edit
Edit
Opens the Properties dialog box for the currently selected library item.
 View description
Displays the description.
The Intrexx standard library cannot be modified. Accordingly, the Properties dialog—where you can edit the title, description, and link of library items—is also unavailable. The ability to create, edit, delete, and import custom libraries is disabled if the current user does not have write permissions for the folder where the library is stored.
"Application Structure" tab

This tab displays the application structure. When an element is selected in the tree structure, properties such as the GUID or the element's name are displayed in the lower section. Clicking this button at  inserts the corresponding value at the current cursor position in the editor workspace.
"Edit" Menu

Caching
This menu saves the script locally. If you close the editor by clicking "Cancel," all changes that have already been saved to the clipboard will be applied.
Save and Publish
In the "Applications" module, you can publish the application directly from the JavaScript, Velocity, or Groovy editor. To do this, the editor must be opened via the main menu under "Edit / Edit Script." You'll find the corresponding menu items in the editor's Edit menu.
Undo
Undoes the last editing step.
Repeat
Repeats the last editing step.
Search
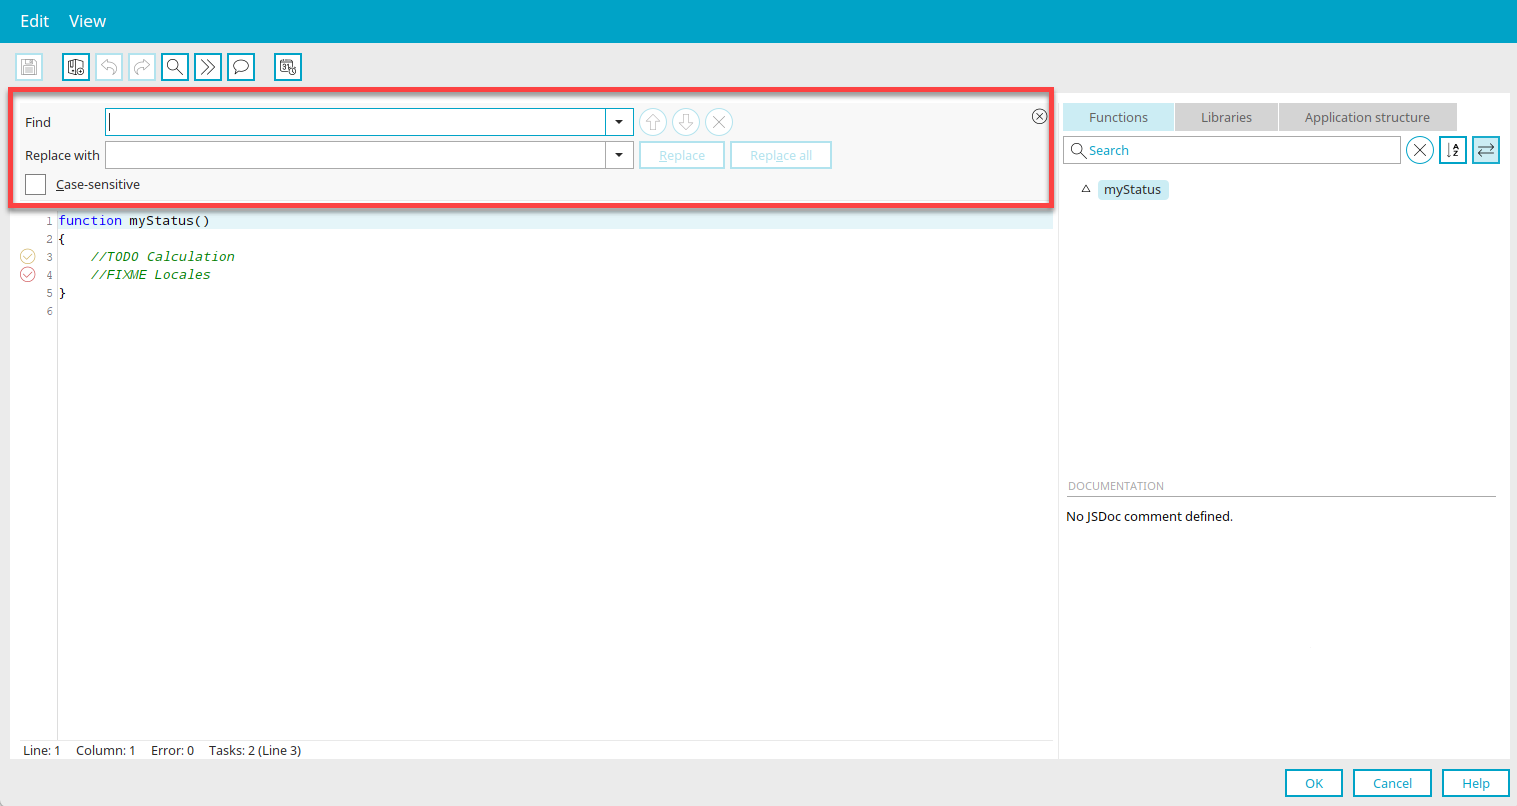
Displays a pane where you can search for and replace portions of the script. The search begins when you enter a search term. Use the arrow keys to navigate to the next or previous search result.
Delete Row
Deletes the line in the script where the cursor is currently located.
Go to Line
Opens a dialog box where you can enter a line number to be selected in the editor.

Enter the desired line here, and then click "OK."
Syntax Check
The syntax check alerts you to missing pairs of parentheses and other invalid parts of the script.
Delete spaces and tabs at the end of lines when exiting
Removes extra spaces and tabs at the end of script lines when you close the editor.
"View" Menu
Show
If an editor contains tabs—such as the "Functions," "Libraries," and "Application Structure" tabs in the JavaScript editor—you can show or hide them here in the upper section of the "View" menu.
Restore Default View
Restores the editor to its original view.
Full Screen
Maximizes the editor.
Options
Opens a dialog box where you can set the font and font size.
Font
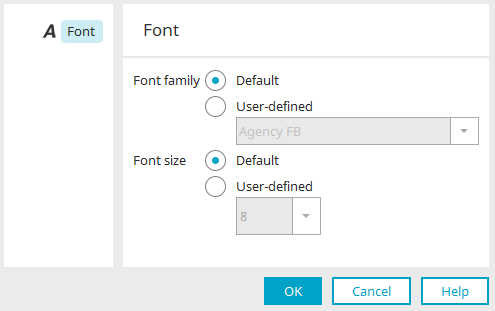
Here, you can set the font and font size in the editor.
JavaScript Editor: Set Markers
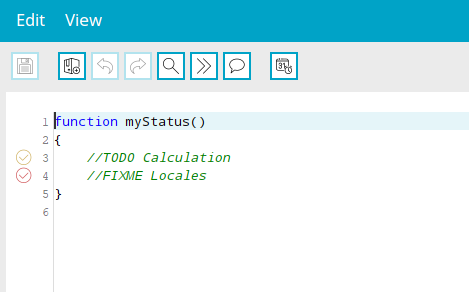
When an application is opened, JavaScript is scanned for comments containing the string //FIXME or //TODO. The terms FIXME or TODO must appear immediately after the comment symbol. In the editor, the symbols for  //FIXME and
  //TODO comments are displayed to the left of the corresponding line number.
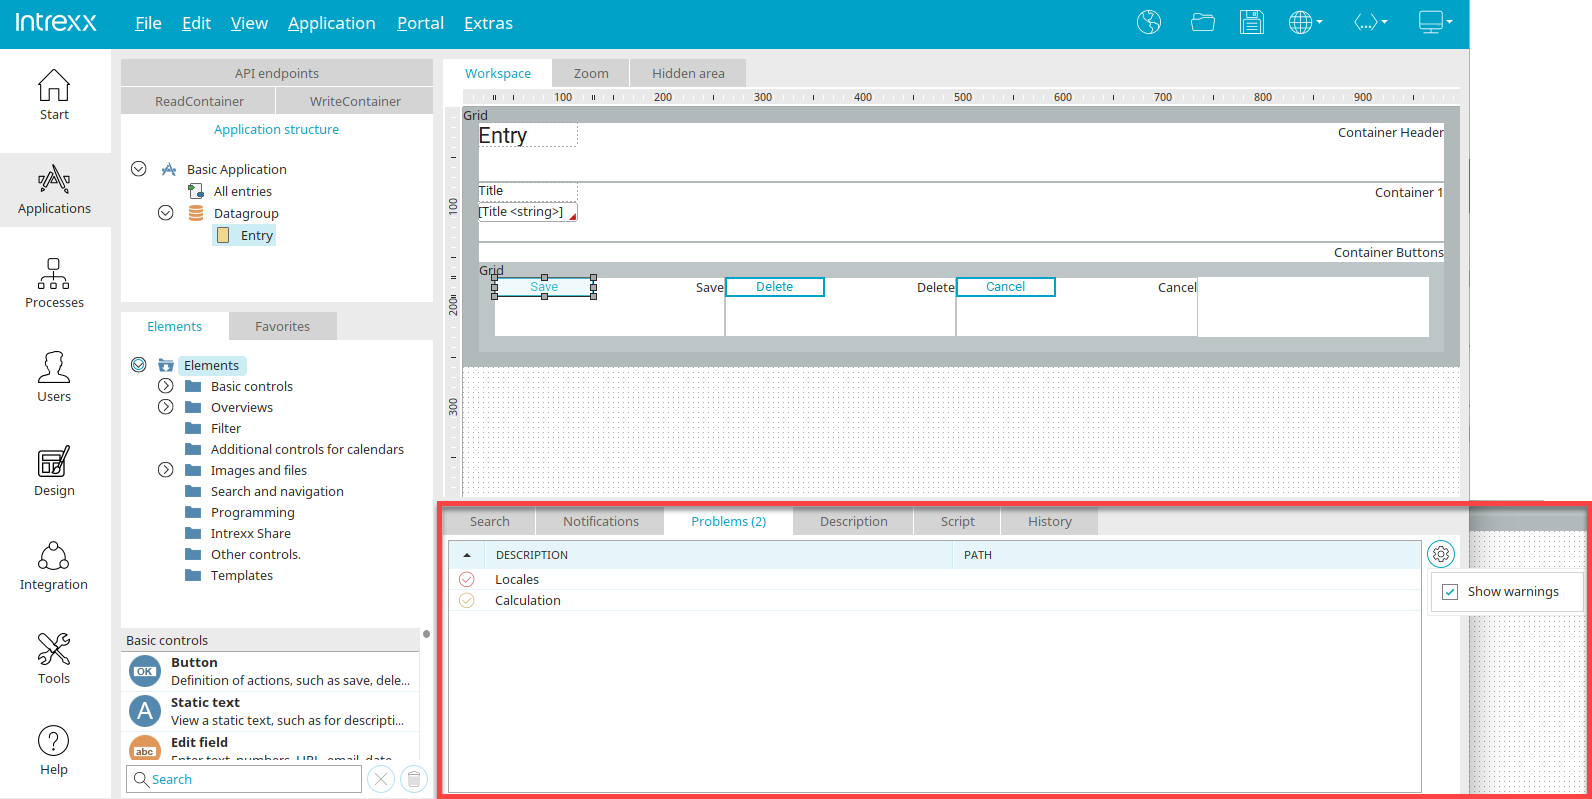
Matches for //FIXME comments in the script are displayed in the "Issues" section below the workspace with this icon: . Matches for //TODO comments in the script are displayed with this symbol: . Double-clicking a match opens the script editor at the corresponding location.
Status Bar
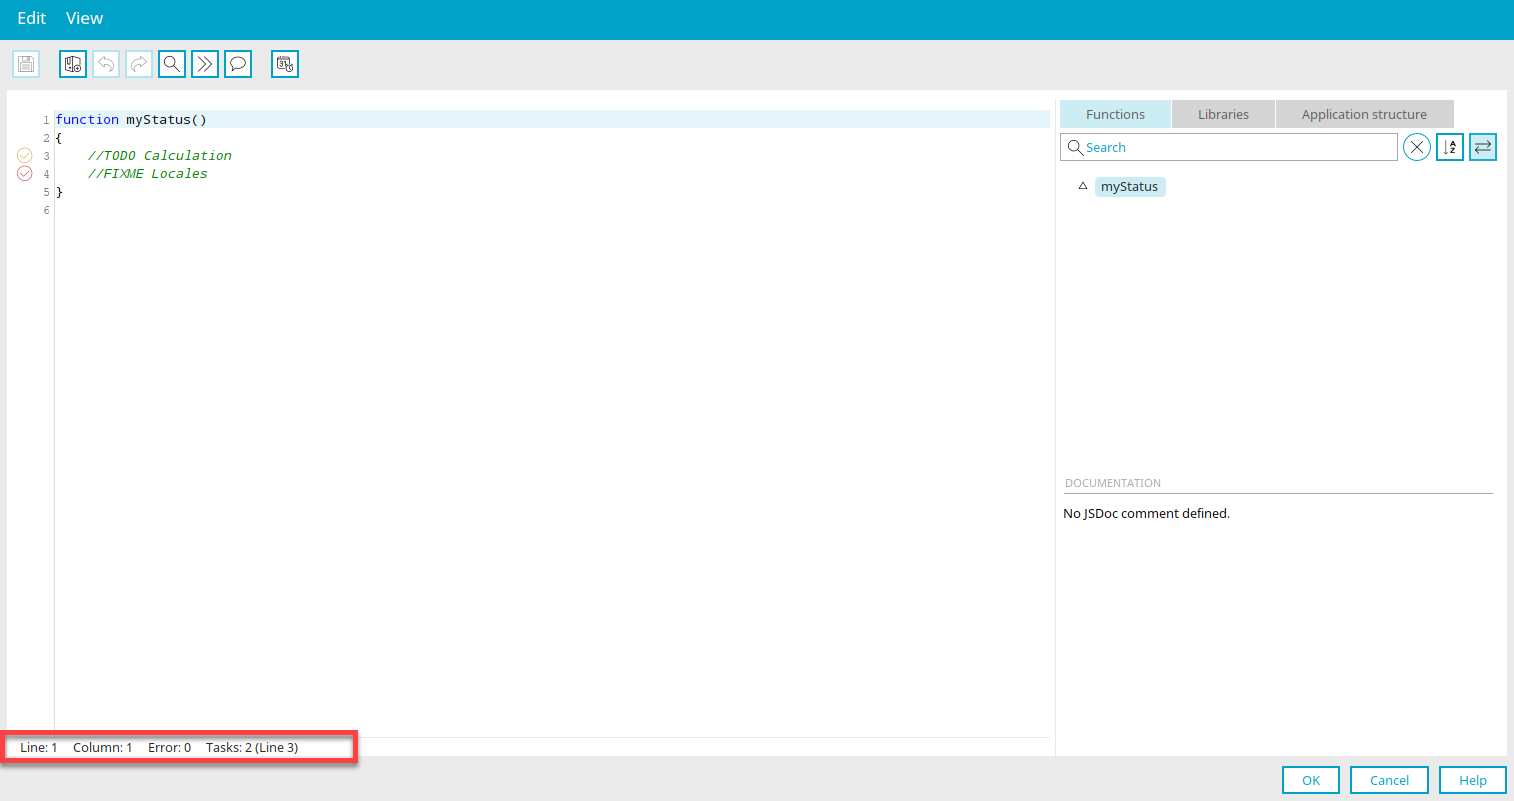
The editor's status bar displays the cursor position along with the row and column numbers, any errors along with their row numbers, and the number of tasks, including the row number of the first task.
Integrating External Editors
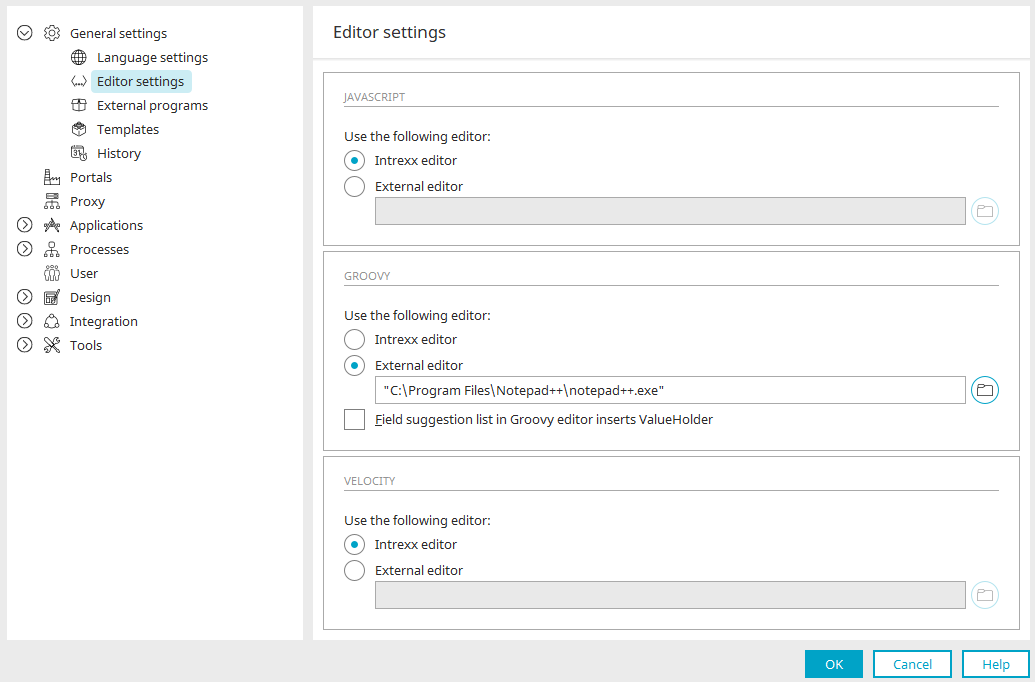
You can edit the editor settings via the "Tools / Options" main menu, under the "General" node.
Instead of the internal Intrexx editor, external editors can also be used for JavaScript, Groovy, and Velocity. To do this, select the "External Editor" option here in each case. By clicking "Select" next to "  ," you can specify the path to the external editor.
If a script file (e.g., JavaScript in an application) is opened in an external editor, the external editor cannot be reopened until it has been closed. The external editor works on a temporary file, which is not applied until the editor is closed. Please do not change the temporary file name. Use the "Save" function in the external editor.
Parameters in the path specification for external editors
Notepad++
"\notepad++.exe" -multiInst ${file}
EditPlus
"\editplus.exe" ${file}
gedit
"/usr/bin/gedit" --new-window ${file}
Specifying the ${file} parameter is generally not necessary, but it can be used if the external editor expects or supports additional parameters after the filename. The program path must be enclosed in quotation marks, followed by the parameters. If the setting "Field Suggestion List in Groovy Editor Returns ValueHolder" is enabled, the field suggestion list in the Groovy editor returns g_record["GUID"]. If this setting is not configured, the field suggestion list returns g_record["GUID"].value.