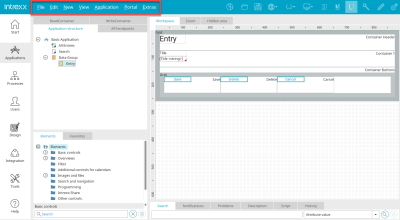
Main menu in the "Applications" module
File
Connect / Disconnect portal service
All information on these menu items can be found here.
New, Open, Close, Delete application
These menu items open a dialog in which new applications can be created or existing applications can be copied, opened, released or closed.
Import / export application
Information on importing and exporting applications can be found here.
Publish application
Opens a submenu with the different variants for version management with or without Git. You can find all information here.
Create entry in application history
Opens a dialog in which changes that have been saved but not entered in the application history can be subsequently added to the history.
Save working copy
Saves a working copy of the currently opened application in its current status locally or on the server. The application data will not be applied to this. The file created with the extension *.ixapp can be loaded again later via the main menu File / Open application.
Delete application
Opens a dialog in which existing applications can be deleted.
Publish JavaScript / Velocity / Groovy files
If your application contains JavaScript or references its own Velocity files and Groovy script in the application package, clicking on this menu item publishes changes in the script and changes in the Velocity file on the server. Changes to the application are not published.
Publish layout files
With this menu item, only the layout files that relate to the application will be published.
Recently opened applications
The most recently opened applications are listed under the "Exit" menu item. From here, they can be loaded directly.
Quit
All information on this menu item can be found here.
Edit
In this main menu, some menu items are only accessible if elements are selected. For example, the "Group" menu item is only accessible if several elements are selected on the workspace.
Undo
This command allows you to undo individual editing steps. The size of the history (number of editing steps) is set in the main menu "Extras / Options".
Redo
This command allows you to reproduce individual editing steps that you have previously undone.
Add parent folder, Add child folder, Edit folder, Delete folder, Add document
You can find all information here.
Copy
All elements, as well as pages can be copied to the clipboard. Properties set for them will be retained.
Insert
Copied elements will be inserted from the clipboard. The insertion of elements with all defined properties can only be carried out in the same data group.
Delete
The selected element will be deleted.
Set focus
This menu item can be selected for the following elements:
When the page is loaded, the selected element will have the focus.
The selected element will have a green arrow on the workspace in the Applications module.
Copy / Apply view
This menu can be used to copy the view properties of the currently selected element.
Then select the element to which you want to transfer the copied view using the "Apply view" menu and then the "Apply view" menu.
Apply view
"Style class" only takes over the style class. If only the style class is adopted, individual customizations that have already been defined are retained. "Individual adjustments" only accepts individual adjustments. If only the individual adjustments are adopted, the style class already defined is retained. "Do not show this message again until the next copying of view properties" means that the dialog is no longer displayed when a view is copied until you copy the view of a control again.
Move to hidden area
This menu moves the selected element to the hidden area.
Create template
Creates a template for new elements based on the properties of the selected element.
Display links
This function displays all links between an element and other elements in the search window (e.g. pages with buttons that load other pages).
Properties
This menu item opens the properties of the currently selected element.
Details
This menu item is only accessible if the setting "Activate options for experts" is selected in the main menu "Extras / Options".
Group
The elements selected on the workspace are grouped together.
Ungroup
The grouping is removed.
Edit script
This menu item opens the script editor for editing
-
JavaScript for desktop
-
JavaScript for mobiles
-
Velocity script
-
Groovy script
will open.
Homepage
Clicking on this menu item defines the currently selected page as the start page of the application.
Create label
This menu item is used to create the "Static text" element, which contains the title of the selected element and can be used as a label for the element.
Create a date picker
All information on this menu item can be found here.
Show / Hide elements
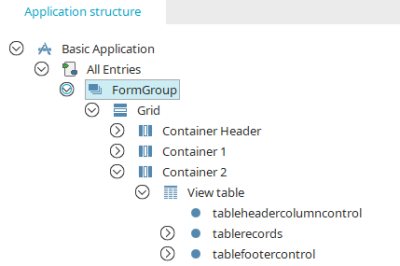
Shows or hides the elements of a page in the application structure. The properties dialog of a page element can also be accessed via the main menu "Edit" or by double-clicking. If a page element is selected in the application structure, it is also highlighted on the workspace.
Show / Hide data fields
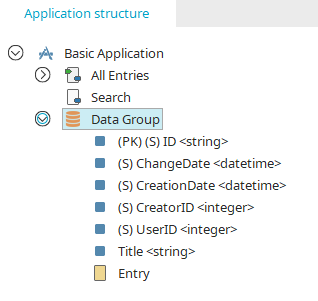
Shows or hides data fields and references of a data group in the application structure.
Define tab order
Opens a dialog in which a tab index can be defined.
Define tab order
In the browser, users can move from one edit element to the next with the TAB key. This sequence is defined via the "Tabindex" menu.
Elements without tab index
In this list, you can see of all of the elements that can be selected for the tab index. Write-protected elements are written in italics. They can also be added to the tab index.
Elements with tab index
When the TAB key is pressed in the browser, the focus will move from one element to the other in the order defined here. The order of the elements in this list can be changed using drag & drop.
![]()
![]() Add element to the tab index sequence / remove element from the tab index sequence
Add element to the tab index sequence / remove element from the tab index sequence
Moves the selected element to the respective list.
![]()
![]() Move up / down
Move up / down
Adjusts the order.
Edit web services
This menu item takes you to the settings dialog for web services.
Decrease frame / Increase frame
This menu reduces or enlarges the border area of the grid element on the workspace.
Set full size
This menu is used to display an image that is included in the "Image" element on the workspace in its original dimensions.
Create preselection
This menu item can be used to create a preselection for view tables.
Delete preselection
Deletes the preselection.
Move left / Move right
These menu items are used to change the order and therefore the priority of preselections in a view table. The following applies: The further to the left a preselection is arranged in the table, the higher its priority. For example, if you apply a preselection to customer data that filters all customers with the country code "DE" and arrange it on the far left, all preselections further to the right are applied to the filter result of this first preselection. Further preselections therefore only filter customers with the country code "DE".
Edit layout / Edit for mobile devices
This menu can be used to define individual styles for desktops or mobile devices for each application, which are also included in the export of the application.
Design presets for elements
Opens a dialog in which outer spacing and user-defined style classes for elements in tableless layouts can be edited.
Decrease grid
The grid of the workspace can be reduced using this menu item.
Increase grid
The grid of the work surface is enlarged.
New
As an alternative to the toolboxes and context menus of the application structure, all elements of an application can also be created via this main menu. This main menu is displayed when an element is selected in the application structure.
Page wizard
The page wizard helps you to create new pages.
Form wizard
The form wizard supports you in designing pages.
Copy GUID
This function can be used to copy the GUID of the following elements to the clipboard if they are selected in the application structure:
-
Application
-
Page
-
Data group
-
Data Field
-
Reference
-
Reference data field
Copy name
This function can be used to copy the name of the following elements to the clipboard if they are selected in the application structure:
-
Data group
-
Data Field
-
Reference data field
View page with elements
This menu can be used to create a view page from an input page that contains all elements of the input page as view elements. The view elements will then be already connected to a corresponding data field and located at the same position were placed on the edit page.
View
In this menu, the individual areas of the "Applications" module can be shown or hidden.
Global views
All information on this menu item can be found here.
Restore default view
Rearranges all areas to the original view.
Application
Export / import texts
With this menu item, all descriptions or titles of elements in an application will be exported in the formats CSV, XLS or XML. The function can be used in the translation of applications into other languages.
Language constants
Opens the dialog for managing language constants.
Refresh
Layout attributes (styles) can be assigned to individual elements via the "View" tab. If you have opened an application for editing and switch to the "Design" module to change style properties there, the changed attributes are only available in the "Applications" module once you have updated the application.
Permissions
Opens a dialog in which the application rights can be configured.
Show license
This menu item is available when a licensed application is opened. Here you can find out about the publisher and information about the license.
Application history
Opens a dialog with the history of the currently open application.
Comparison with last entry in the application history
Opens a dialog in which the current status is compared with the last entry in the history.
Comparison with entry in the application history
Opens a dialog in which the current status can be compared with entries in the history.
Properties
Opens the properties dialog of the application.


