As an Intrexx administrator or Intrexx Share Administrator, you have the possibility to edit reported posts, settings, events, contacts and more in Admin Mode. However, you will not have access to the "Chat" module and the messages it contains from other users.
For Intrexx Share administrators, the application, data group, and page permissions defined in the respective application take effect, so that the data is protected from unauthorized access.
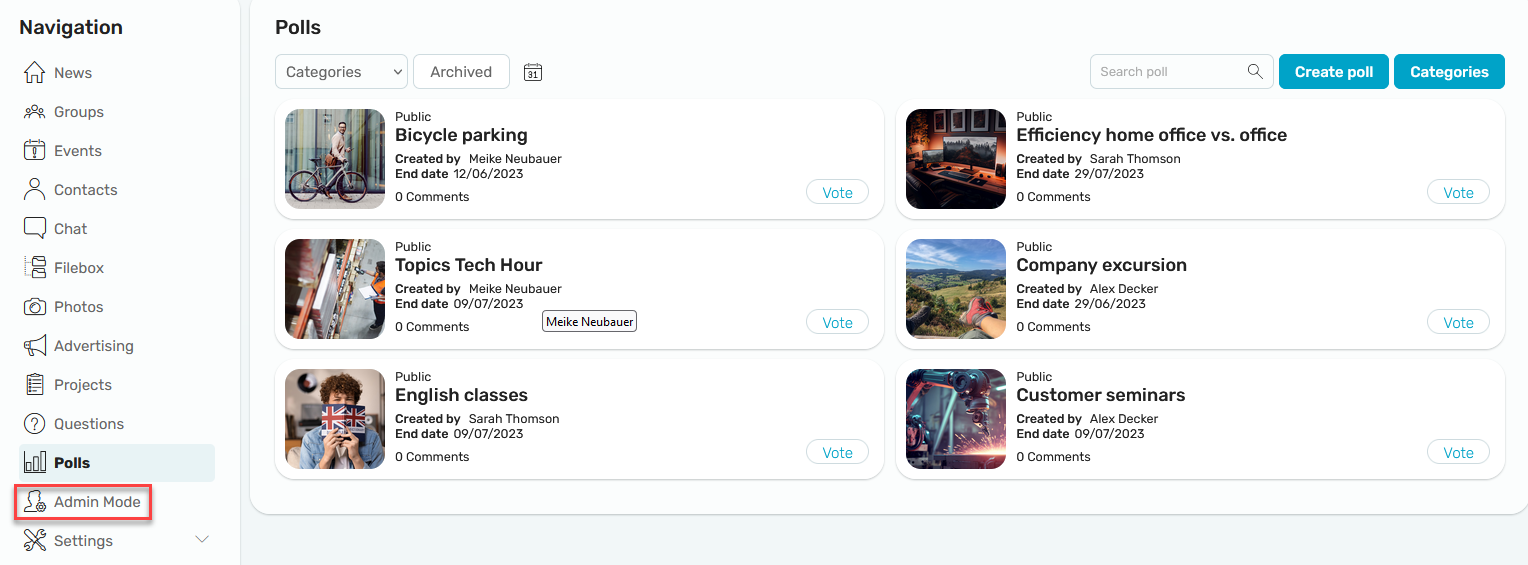
If you have opened an Intrexx Share module and would like to make changes there, simply click on "Admin Mode" in the navigation.
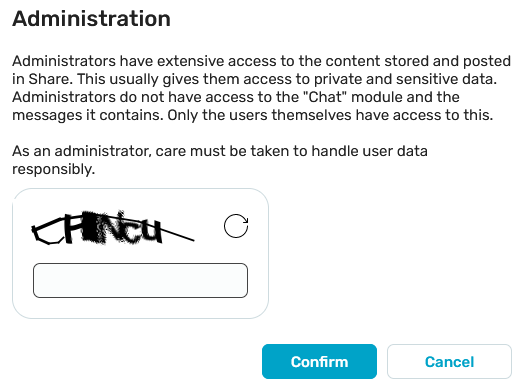
Enter the chaptcha here and click "Confirm".
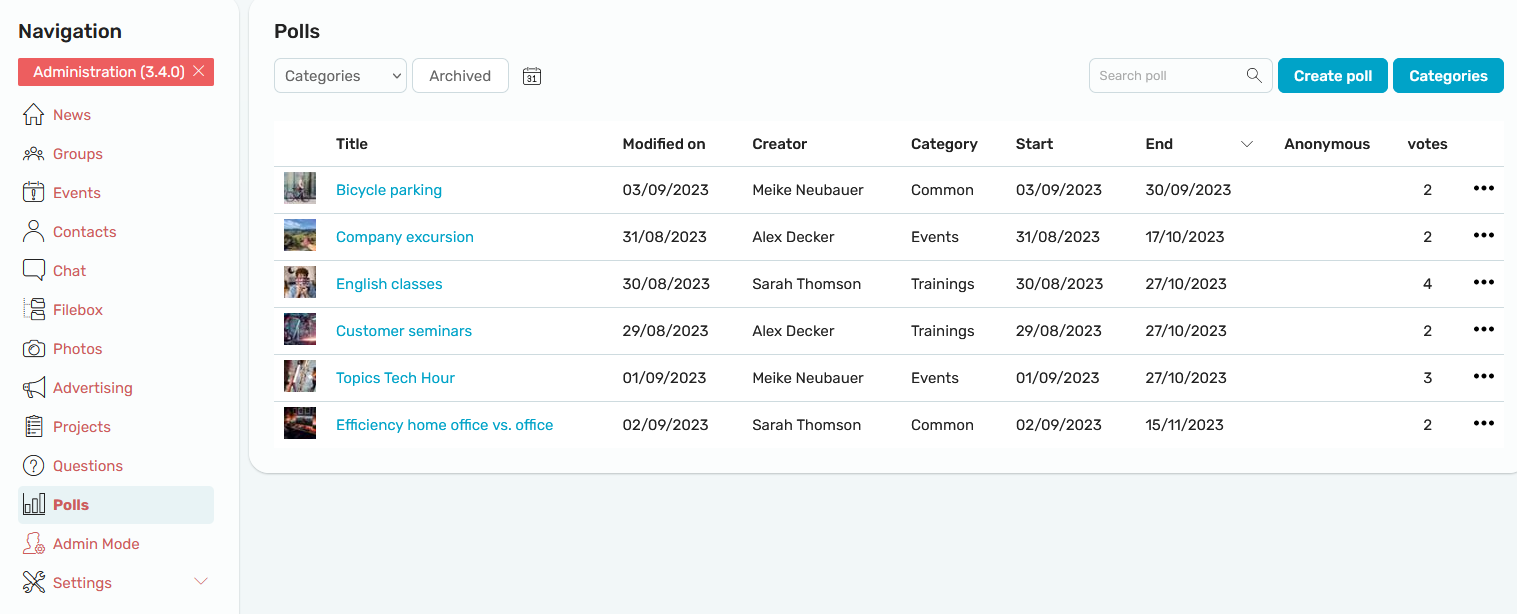
The Navigation portlet is then shown in red. This color will be kept as long as you do not click on "Admin Mode" or ![]() "Close" again at the very top of the navigation to the right of "Administration ([Version])" to leave Admin Mode again.
"Close" again at the very top of the navigation to the right of "Administration ([Version])" to leave Admin Mode again.
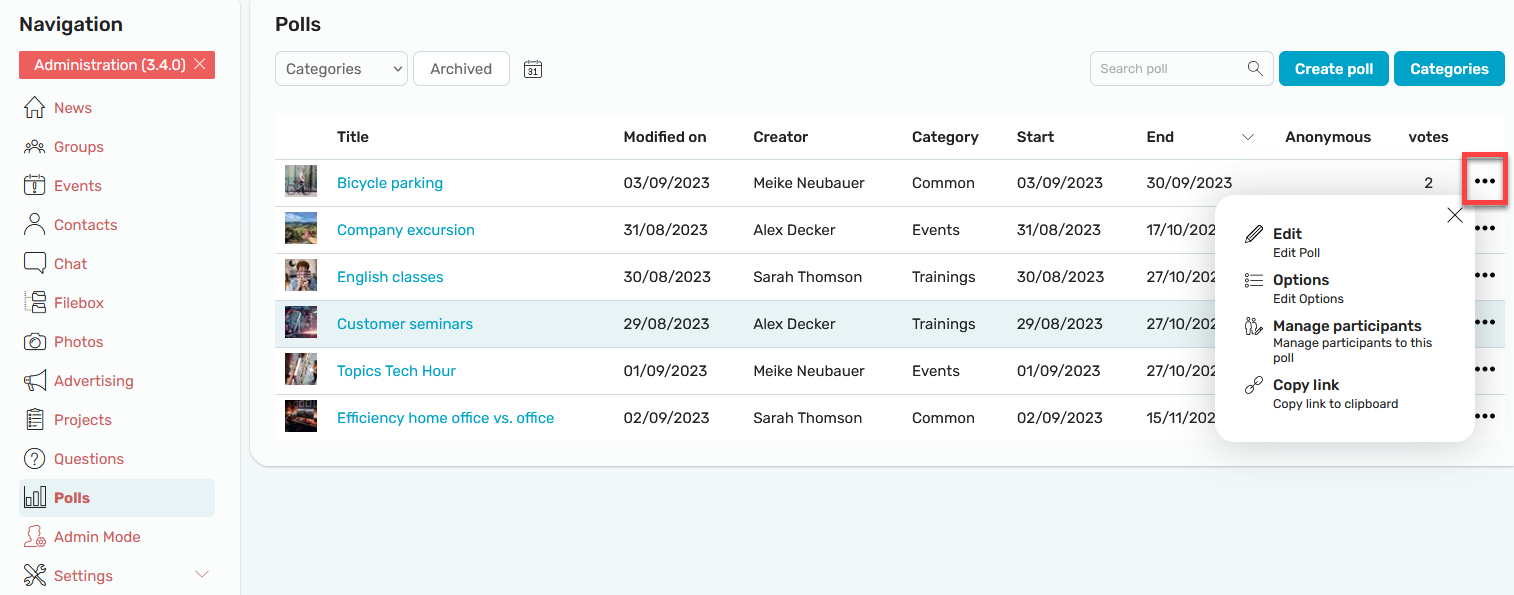
In each module you will find the ![]() options button in the Admin Mode, which allows you to edit the objects (posts, photo albums, events, etc.). Information on editing options can be found in the Help for each individual module.
options button in the Admin Mode, which allows you to edit the objects (posts, photo albums, events, etc.). Information on editing options can be found in the Help for each individual module.
Special features
"News" module

In the "News" module, you will find the ![]() options menu at the top right of each post. Here, the usual functions can also be used to restore a post that has been marked as deleted, as long as the process has not yet executed the deletion. In Admin mode, you also have the option of deleting the post immediately via the "Delete" menu item.
options menu at the top right of each post. Here, the usual functions can also be used to restore a post that has been marked as deleted, as long as the process has not yet executed the deletion. In Admin mode, you also have the option of deleting the post immediately via the "Delete" menu item.
Settings
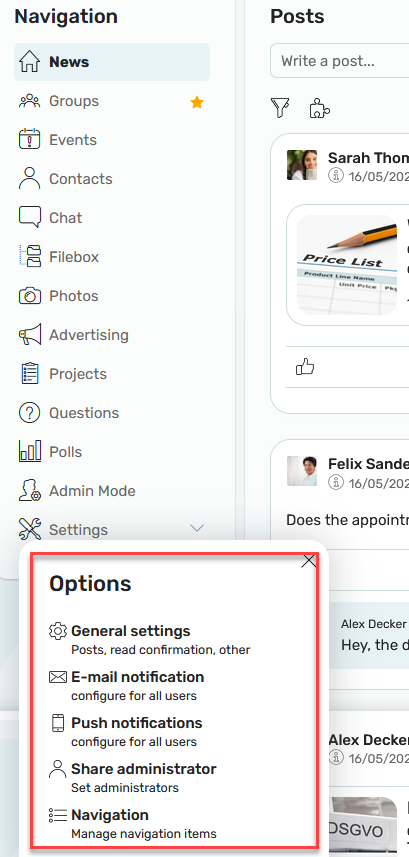
Administrators can access the settings via the navigation, regardless of whether they are in Admin Mode.
General settings
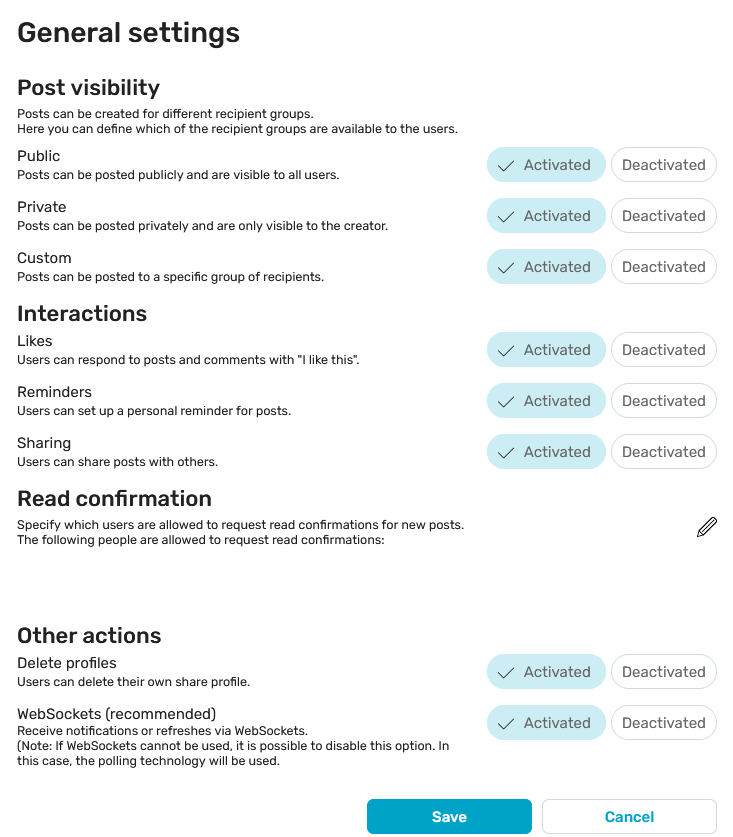
Visibility
You can set the visibility of posts here. Decide whether users have the option to issue posts as public, private or user-defined (freely definable group of recipients).
Interactions
Decide here if users can perform the "Like", "Reminders" or "Share" actions.
Read confirmation
Specifies which users can request read receipts. Click ![]() "Edit" to select the desired users.
"Edit" to select the desired users.
Other actions
You can grant permission to delete profiles here. In addition, the use of websockets can be enabled or disabled.
Safari - without WebSockets
If you use Intrexx Share with active websockets and integrated authentication or basic authentication, you cannot use the "Safari" web browser. If you still want to use "Safari", deactivate "WebSockets". Polling technology is then used automatically.
Web push notifications
Here you can activate or deactivate the sending of web push notifications.
Email notifications
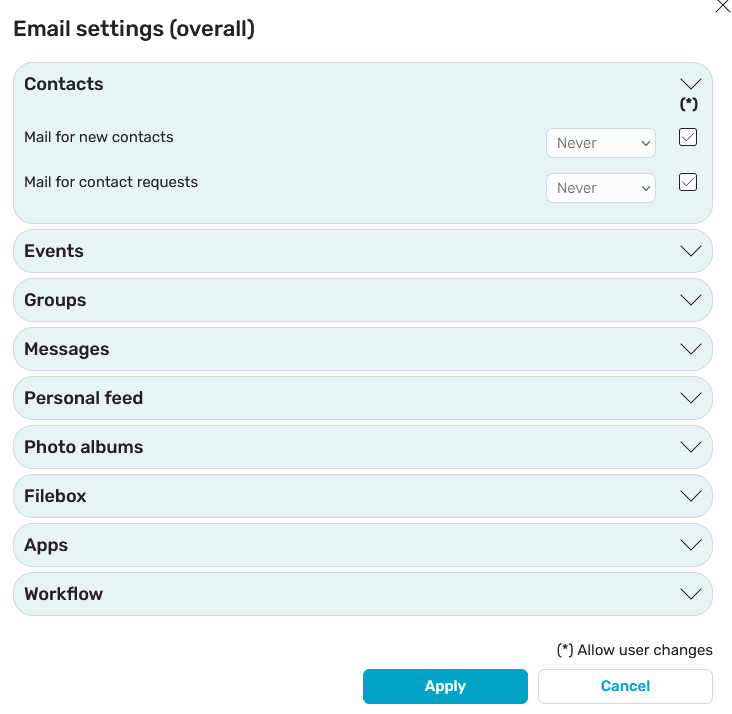
In Intrexx Share, users are sent notifications about different events. For each type of notification, users can define whether they also want to receive an email by defining their email settings in their own profile.
The default settings for the user profiles can be configured here. Click on the module whose settings are to be edited so that the respective settings section is displayed.
The subject of the notification can be changed in the portal properties, in the global language constants. Please note that changes made here are not update-proof and may can also be overwritten during an update.
Push notifications
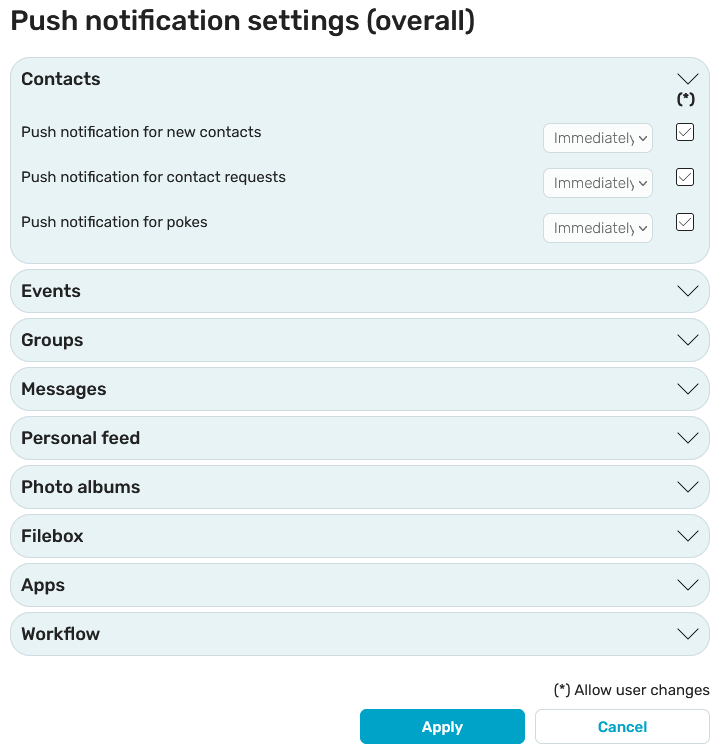
As is the case with email options, you can define the default values for push notification for profile settings.
Intrexx Share Administrator
Share administrators can manage the content of the modules via admin mode and make central settings for Share. The first share administrator can be appointed by an Intrexx administrator.
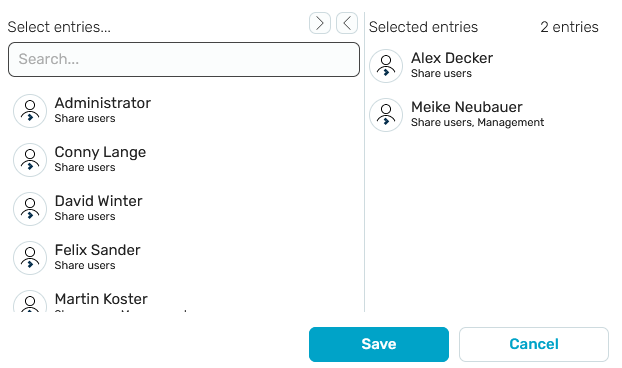
To define a share administrator, move it from the "All entries" list to the "Selected entries" list by double-clicking or by clicking on the arrow button in the upper area. Then click on "Save". All share administration rights are then already granted.
Users who are not Intrexx administrators can also be defined as share administrators.
A Share administrator can remove themselves from the list if needed.
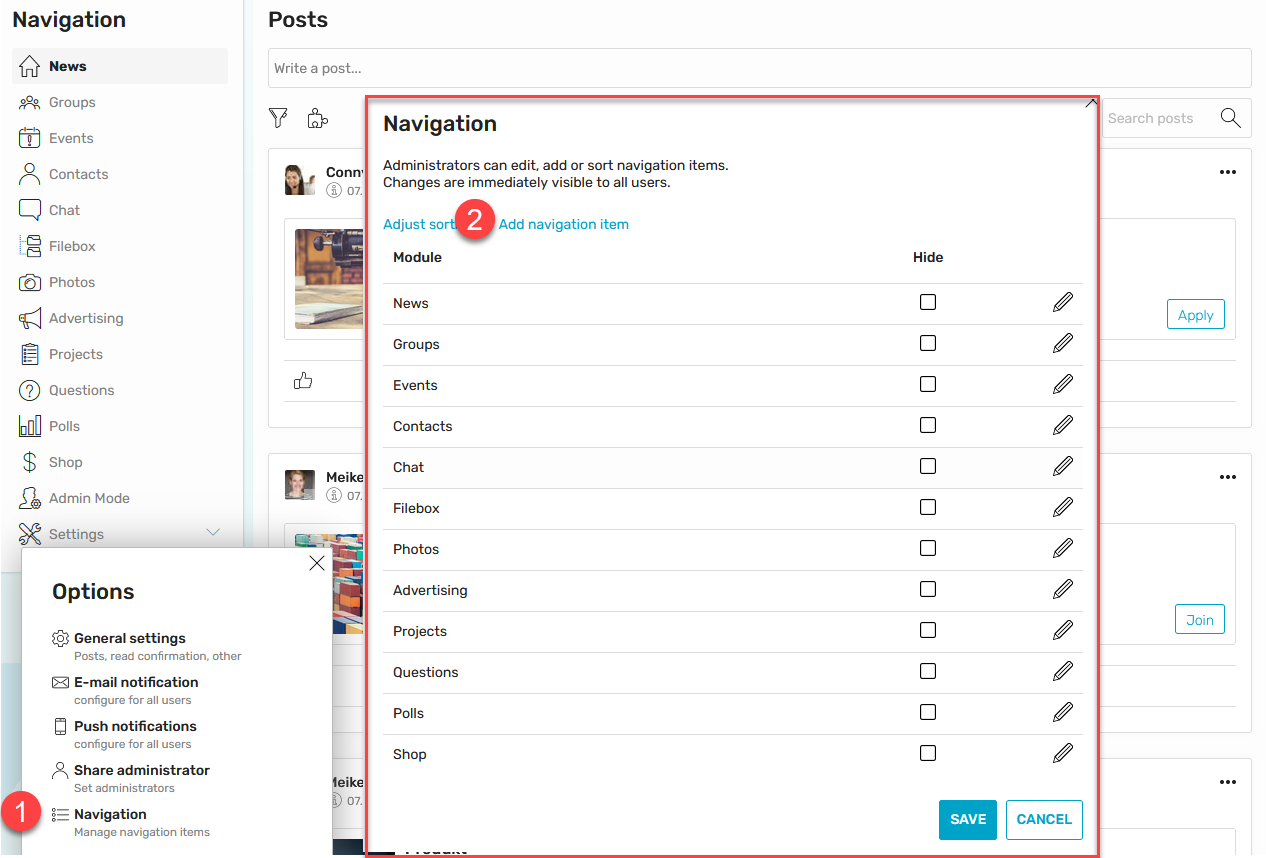
Navigation
You can access all the modules in Intrexx Share via the navigation. In addition, you can switch to Admin Mode here. Administrators can access the settings. To edit the navigation, select the "Navigation" menu item here.
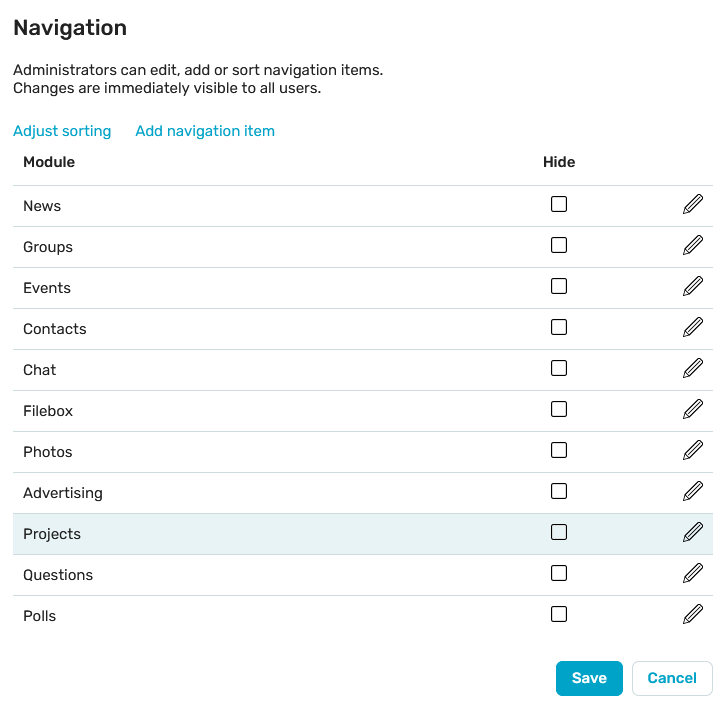
Edit navigation points
Click on ![]() "Edit" to edit the properties of existing navigation points. A module can be hidden by clicking on the corresponding checkbox.
"Edit" to edit the properties of existing navigation points. A module can be hidden by clicking on the corresponding checkbox.
Change order
Click on "Change order" in the upper area.
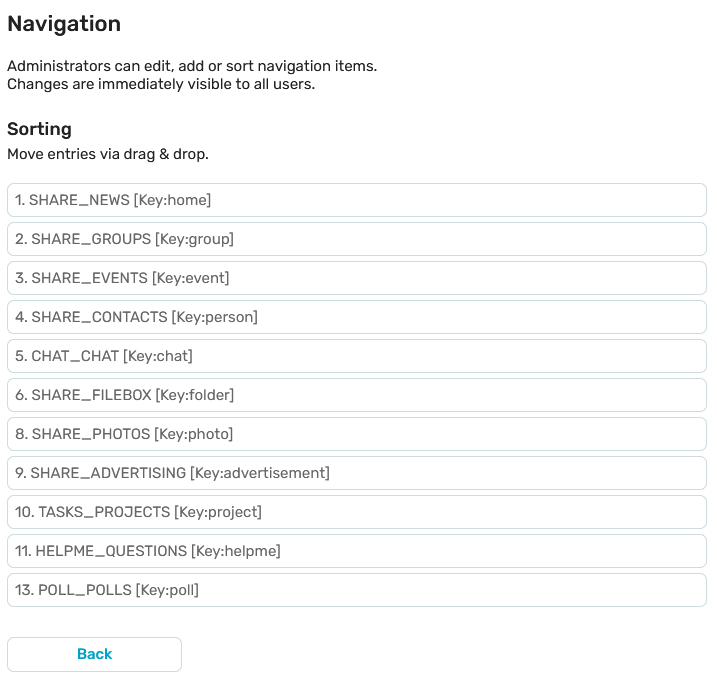
Here the order of the navigation points can be changed by drag and drop.
Add navigation points
By clicking on the "Add navigation point" link in the upper section of the dialog, additional applications can be added to the navigation. Click here for more information.
Process-driven deletion
The process "Intrexx Share Administration" is responsible for the automatic deletion of the following Intrexx Share objects:
-
Profiles
24 Hours after a profile has been marked as deleted
-
Groups including posts
30 Days after the group has been marked as deleted
-
Events including posts
30 Days after the event has been marked as deleted
-
Posts marked as deleted
90 Days after the post was deleted.
-
Archived posts
90 Days after the post was archived.
-
Read notifications
depends on the profile setting. Default: 90 days
The time delay can be modified in the respective Groovy script (variable "delay"). This change, however, is not update-proof. INTREXX Ltd Assumes no responsibility for errors caused by making changes to the script. The deadline for the deletion of read notifications can be modified on the profile.
By default, the process is executed daily at 00:19 in the portal's time zone.
Blocked or deleted user accounts in the "Users" module are synchronized with Intrexx Share profiles. Concerned Intrexx Share profiles will be deactivated.
If an Intrexx Share user deletes their profile, this will initially be marked as deleted. The process also automatically deletes profiles marked as deleted. Groups, events, and posts, which have been deleted by Intrexx Share users, will initially be marked as deleted. The process takes over the task of deletion including all posts that were created in the concerned group or event.
In Plugin settings, you can define lifecycle and time management so that posts are archived under certain circumstances. These are then no longer visible among the current posts. These archived posts and read notifications are also deleted by the process.
Extend navigation with menu items
Administrators can integrate additional menu items in the navigation with additional SVG icons in Intrexx Share.
To do this, click on "Settings". Then click on "Add navigation point".
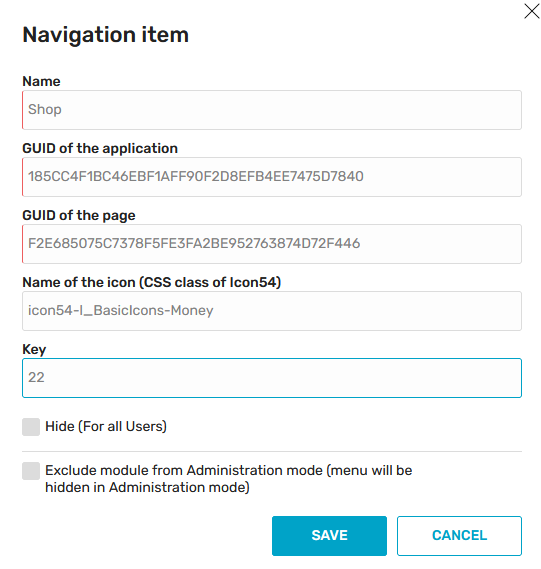
Enter the following values here:
Name
Enter the desired name of the new menu item here. You can also use a language constant for the name.
Application and page GUID
The GUIDs of the application and the desired page to be displayed when the new menu item is clicked can be determined when the application is open in the "Applications" module.
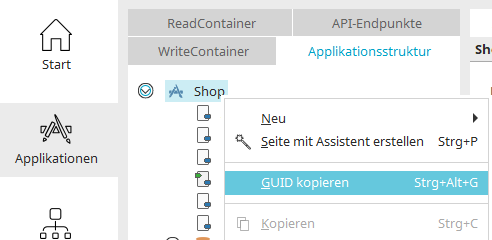
The expert mode needs to be switched on for this. Afterwards, the GUID can be determined via the context menu "Copy element GUID" if the application node or the desired page is selected in the application structure.
Icon name
Here you can integrate the icon for the new menu item. The CSS file icon54-solid.css is in the portal directory external\htmlroot\thirdparty\icon54\font. Open the file in a text editor.
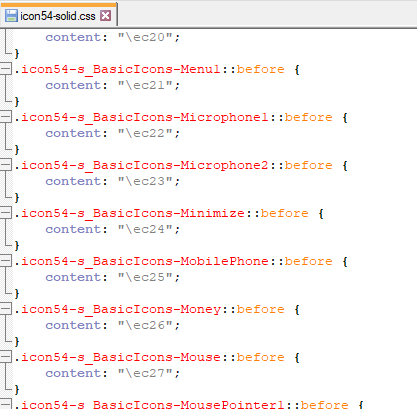
All SVG graphics that can be integrated in Intrexx by default are listed here. For the new menu item, the "Money" icon is to be included in this example. To include this icon, simply copy the part "icon54-l_BasicIcons-Money" in the class and enter it as a CSS class in the dialog.
Key
Assign a unique key here that is not yet in use for other menu items in the navigation.
Save your settings by clicking on "Save".
The new menu item is now included in the navigation.
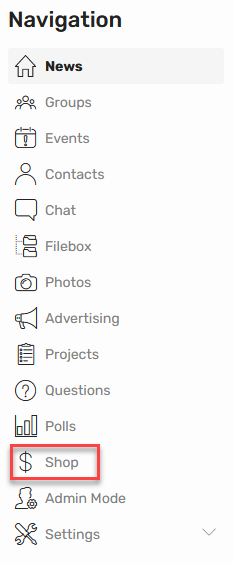
Clicking on it loads the page for which the GUID was specified in the settings dialog.