

To use the connector for SAP Business Suite, please refer to the "Installation" section for the prerequisites. Then set up a connection as described here. The connection can then be integrated into any application.
Create a connection
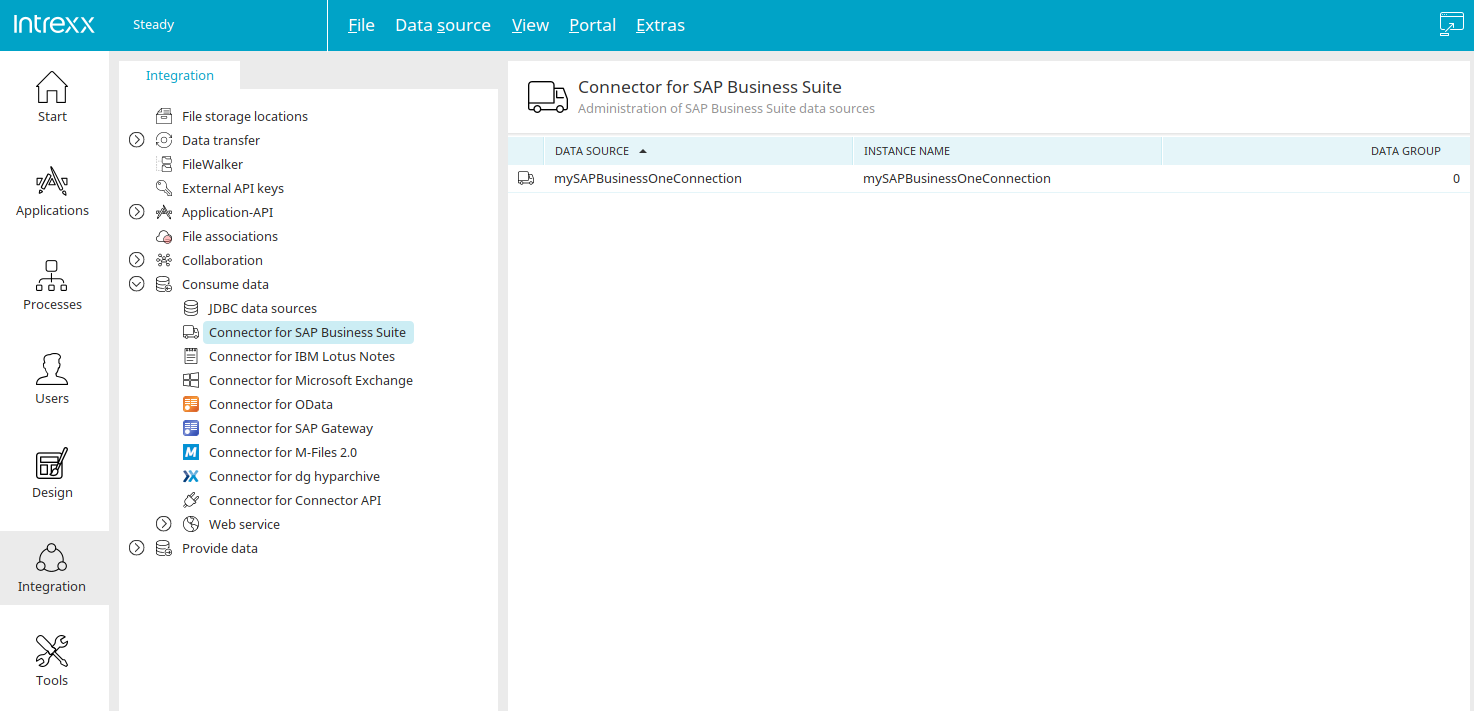
To create a connection, go to the "Integration" module.
In the left pane of the module, select the connector for SAP Business Suite under "Consume Data." You can now open a wizard from the main menu by selecting "Add Data Source / Instance" or from the corresponding context menu; this wizard will guide you through configuring a new connection to your SAP Business Suite system.
General Information

Enter a unique connection name here (e.g., SAP, CRM, ERP, OLTP). We do not recommend separating the development system from the production system.
The "SAP Business Suite Connector" application (Connector for SAP Business Suite - SAP Script Generator) can only access connections named "saperp." So, if you are using the "SAP Business Suite Connector" application, you must create a connection named "saperp."
For applications you've created yourself, the name of the connection doesn't matter.
Instance
Host
Enter the path to the SAP server here (e.g., IP address (192.168.200.100) or a router string in the format /H//S/3299/H/).
System Number
Enter the system number here (00..99). You can find out how to determine the system number here.
System Login Information
Client
Enter the client number of the SAP system here (000..999). Find out here how to identify the client.
Username / Password
Enter the username and password for the technical portal user here.
Language
Enter the login language here (e.g., DE, EN, FR).
Click "Next."
License
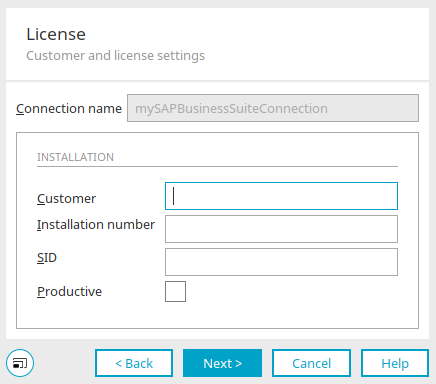
Customer
Enter your Intrexx GmbH customer number here.
Installation Number
Enter the SAP installation number of the connected SAP system here. You can find out how to determine the system number here.
SID
System ID of the connected SAP system (three-digit identifier, such as CRD). Find out here how to calculate the SID.
Productive
Enable this setting when using the connector in a production environment.
Click "Next."
Advanced
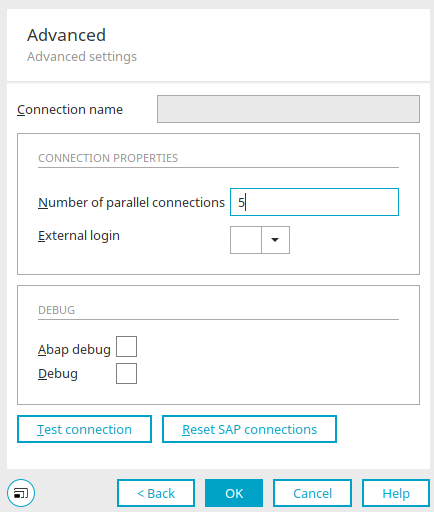
Number of parallel connections
Number of concurrent connections to the SAP system—performance parameter.
External Login
Specifies which external login from the "Users" module should be used for personalized login to the SAP system.
Debug
ABAP Debug
ABAP Debugging Enabled (for experts only).
Debug
Advanced trace information for troubleshooting.
Test Connection
Click this button to test the connection.
Reset SAP Connections
Disconnects all SAP-JCO connections.
Click "OK" to complete the connection setup.
Edit Connections
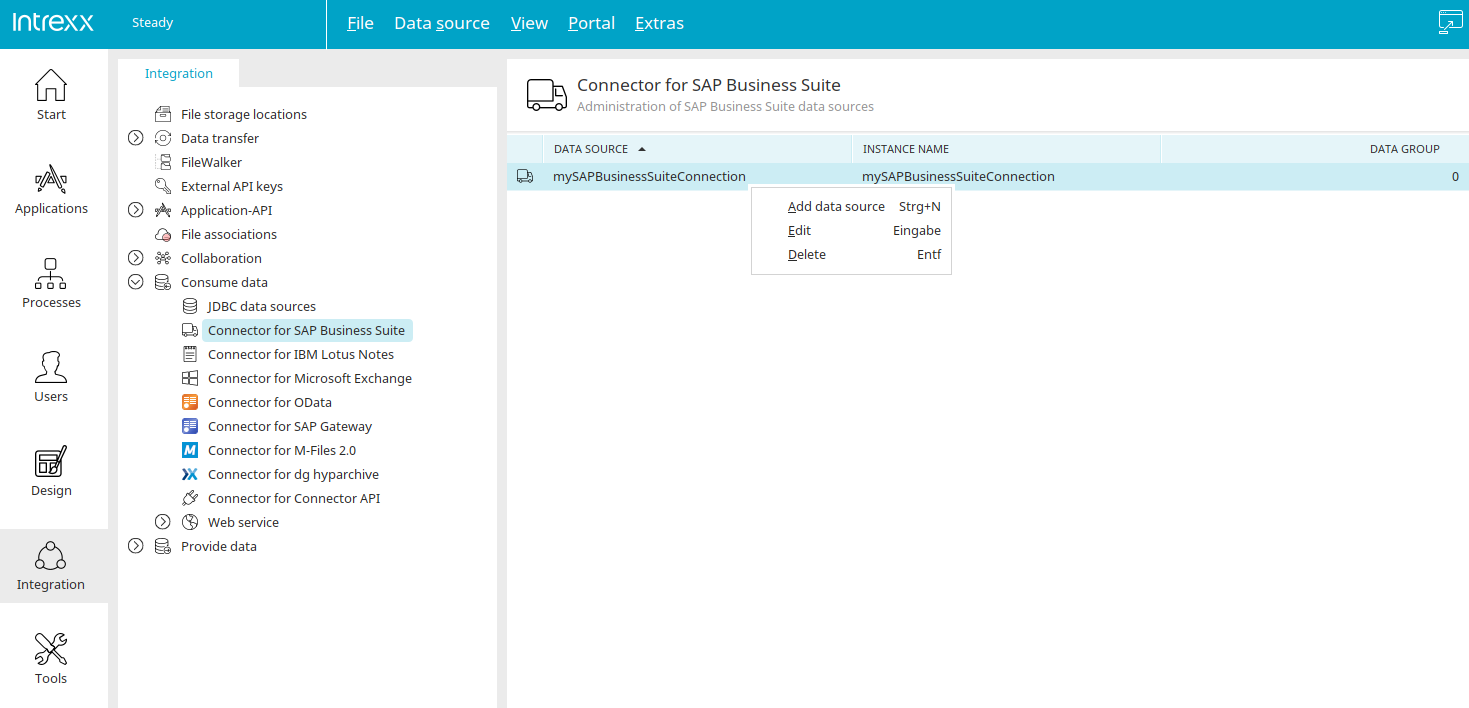
Every connection you've created is listed in the right-hand pane. The "Data Groups" column displays the number of external data groups in applications that use the connection. You can access all editing functions via the "Data Source" main menu or the context menu when an existing connection is selected in the right-hand pane. In the next step, you can now integrate the connection with a third-party data group into an application so that you can use the external data there in real time. You can find all the information here.
Request a License
A license is required for the portal server to access SAP. A temporary license can be requested free of charge for testing purposes. To request these licenses, you will need the following information from the SAP systems to be integrated:
-
System Number (Instance Number)
-
SID (System ID)
-
Client designated for communication with Intrexx
-
Installation Number
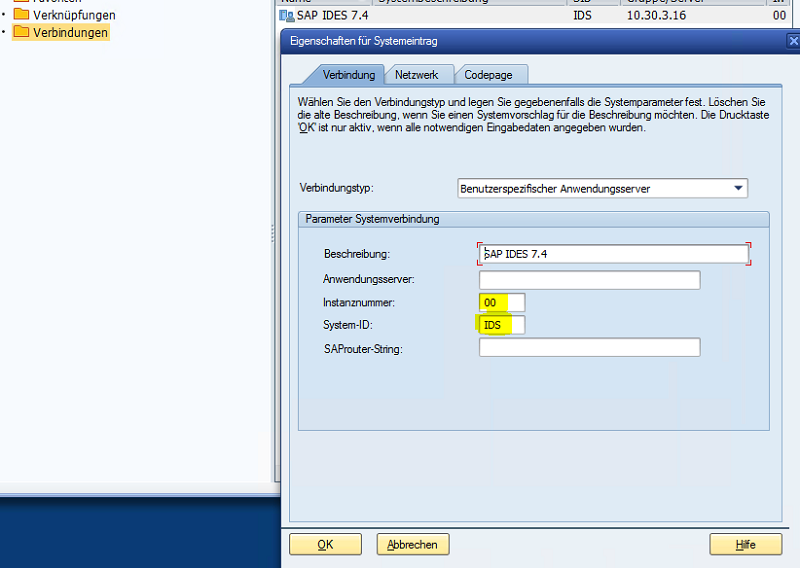
As a logged-in SAP user, you can find the instance number and system ID in the SAP GUI properties.
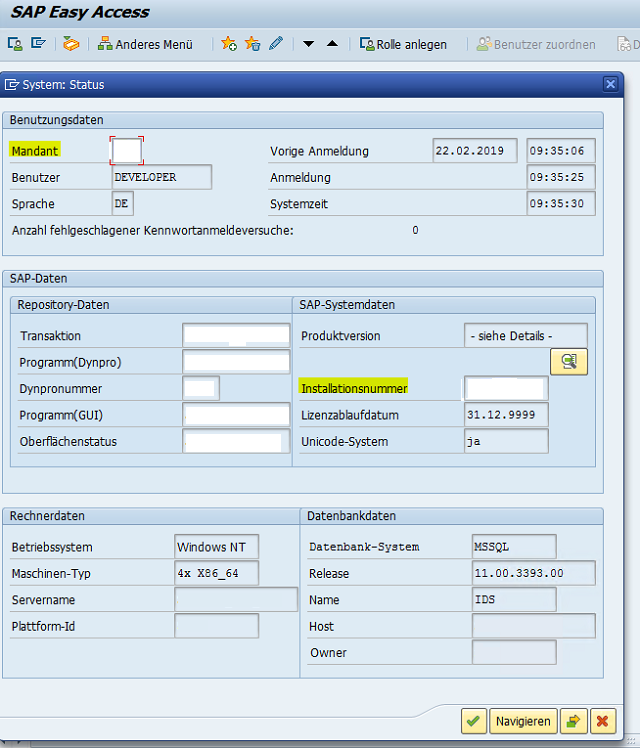
In the SAP GUI system status, which you can access via the System / Status menu, you will find the client and installation number. Please request the license from your partner or at Intrexx GmbH.
Modifying VTL and Groovy Scripts
If you upgrade from Intrexx version 6 or earlier to Intrexx version 20.09, any Groovy scripts you have written yourself must be modified accordingly, as the SAP JCo libraries have changed.
Groovy
Delete the following line:
import com.sap.mw.jco.JCO;
The Definitions
            def JCO.Client l_client = null; // CONNECTION TO AN SAP SYSTEM
def JCO.Function l_function = null; // PROXY TO AN SAP FUNCTION MODULE
def JCO.Table l_table = null; // SAP TABLE OBJECT
Replace with
            def l_client = null; // CONNECTION TO AN SAP SYSTEM
def l_function = null; // PROXY TO AN SAP FUNCTION MODULE
def l_table = null; // SAP TABLE OBJECT
SAP Portal Plugin Transport
Intrexx portals access the SAP system via an RFC API. This RFC API is freely available as an SAP transport and is not an official part of the SAP Connector. You can find the transport in the installation directory adapter/sap/ (130405-POPIWAS-2010.zip). There are currently two versions available:
-
Version for SAP Gateway systems starting with Basis 6.10 (Standard)
-
Version for Basis 4.6 (full API, limited functionality)
The SAP Portal plugin (the RFC API) must be imported into the SAP system. The SAP objects included use the namespace /IATL/. A list of objects included with the transport contains all the objects in the transport.
Check this list to ensure that the objects it contains do not conflict with your own SAP ABAP objects. Always import the data into a test or development system first, and, if necessary, ensure that a failed import can be undone.
We assume no liability for any damages arising in connection with the import of the SAP Portal plugin.
After the import, set up a service user so that the portal can access SAP later. This can be done in exactly the same way as is customary for the ALEREMOTE and BWREMOTE users, which are typical in the SAP environment.
More Information
SAP Trust Manager SSO Configuration
API Description, Part 1 - Overview
API Description, Part 2 - SAP Portal Plugin
API Description, Part 3 - Implementing Custom Processing Modules
API Description, Part 4 - Sample Code
Developer's Guide, Part 2 - Integration Scenario: SAP External Data Group
Developer's Guide, Part 3 - Integration Scenario: Scripting
Developer's Guide, Part 4 - Personalized SAP Access / Single Sign-On (SSO)