

General Information
The Trust Manager module of the Connector for SAP Business Suite enables Single Sign-On (SSO) and, as a result, automatic authentication of Intrexx users in SAP. To this end, the module uses cryptographic methods to generate an SSO ticket for each user session, which Intrexx uses to authenticate portal users for access to SAP. Conversely, SAP users can access Intrexx without having to log in to SAP again. The following section describes how to set up the Trust Manager module in Intrexx and SAP. You can also find more information on this topic in the Developer's Guide, Part 1.
Installation
For the Trust Manager SSO configuration, Intrexx provides an application that you can easily import into your portal. You can find the import file "sap-business-suite-connector.zip" in the "adapter/sap" installation directory. To use the application, you must first install and configure the connector for SAP Business Suite.

Here you can see the app's home screen in the browser. To launch the Trust Manager module, click "SAP Trust Manager (SSO)."
PSE Keystore

A PSE keystore containing the certificate used to sign the SSO tokens is required in the portal directory at the destination "internal/cfg/security/system.pse". Keystore Properties:
-
Type: JKS
-
Provider: SUN
-
Type: Key Pair
-
Public Key: DSA (1,024 bits)
-
Signature Algorithm: SHA1withDSA
The keystore can be created here by clicking "New Entry" at  or, alternatively, using the Java Keytool.
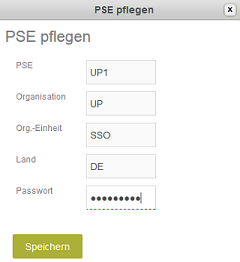
PSE
Enter the title here.
Organization
Enter the organization here.
Organizational Unit
Enter the organizational unit here.
Country
Enter the country code here.
Password
Enter the keystore password here.
Click "Save."

Click "Select Record" here at  .
.
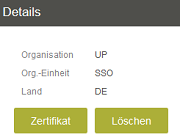
Click "Certificate" to download the certificate.
SSO parameters
Click "SSO Parameters" here.

Click "New Parameter" here at .
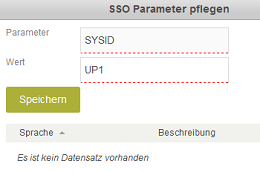
Parameters
Enter "SYSID" here.
Value
Enter the SID of the SAP system here. Click "Save."
Enable SSO
Click "Enable SSO" here.

Select the "Enable SSO" setting here and click "Save."
Login
For an Intrexx user to log in to the SAP system using SSO, the Intrexx username must match the SAP username. Alternatively, the SAP username can be stored in the Intrexx session using the key "sapsso_user." If this is not defined, the system checks the "xia_sec_user_mapping" table for a mapping for the user. If none is found, the Intrexx username must match the SAP username. To ensure that the SSO ticket for SAP is automatically generated when a user logs in to Intrexx, the login process must be enabled in the "SAP Business Suite Connector" process.
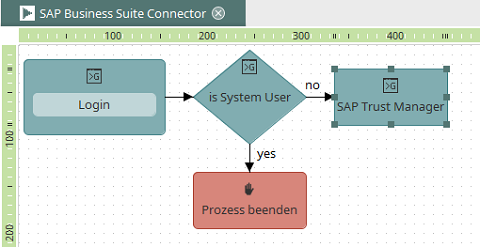
The "SAP Trust Manager" action checks whether the user exists in SAP and then generates the SSO ticket, which is stored for further access during the session.
SAP Configuration
-
To allow RFC connections between Intrexx and SAP, set the profile parameter "gw/acl_mode" to 0 or maintain the corresponding ACL files in SAP. The parameter can be defined or changed using transaction "RZ10." After that, the SAP system must be restarted.
-
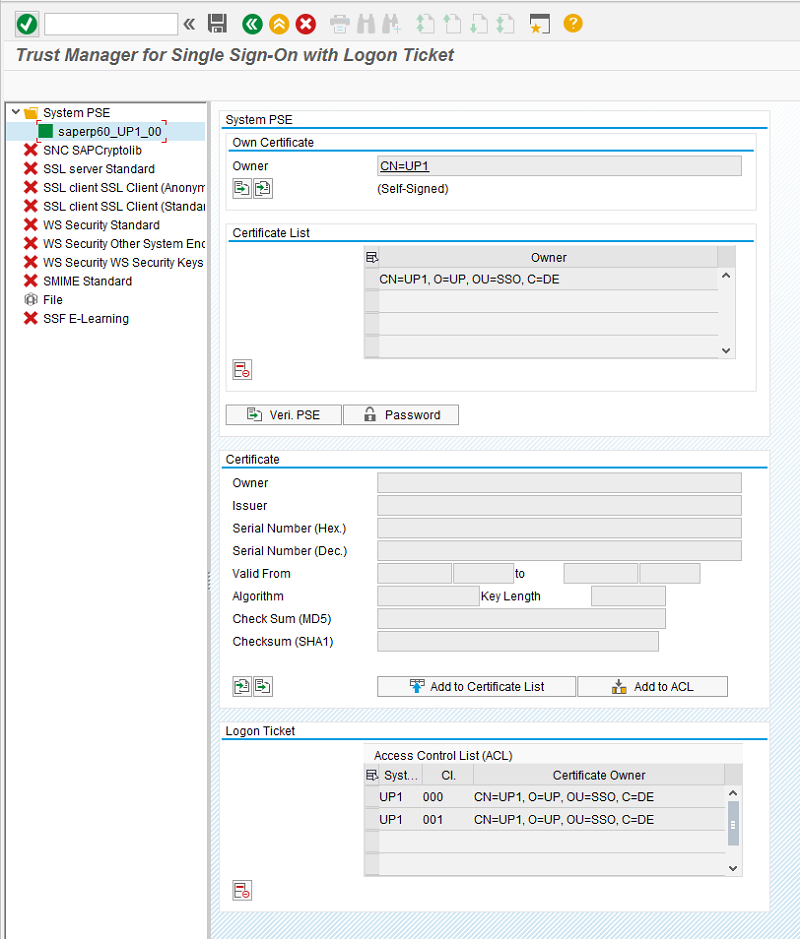
Now, the certificate previously downloaded from Intrexx must be uploaded to SAP. To do this, you must call the "STRUSTSSO2" transaction.
-
Go to "Certificate / Import" and select the certificate file.
-
The certificate should now appear under "Certificates."
-
Click "Add to Certificate List" and then "Add to ACL."
-
The certificate should now appear in the Certificate List as well as under "Logon Ticket" in "ACL." Check there to see if the SID and client ID match.
-
Exit the transaction.
-
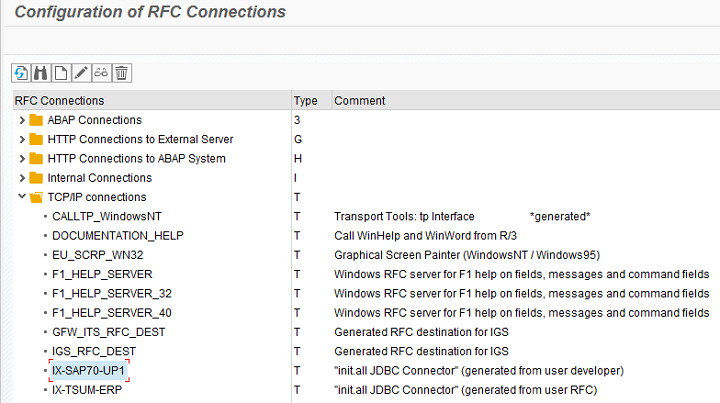
Call up transaction "SM59" to test the TCP connection from SAP to Intrexx.
-
Among the TCP/IP connections, there must be a suitable connection to the SAP system and the Intrexx portal (in this example, the "SAP70" portal and SID "UP1").
-
Double-click the connection, and then click "Test Connection." The result should look something like this:

-
Exit the transaction.
-
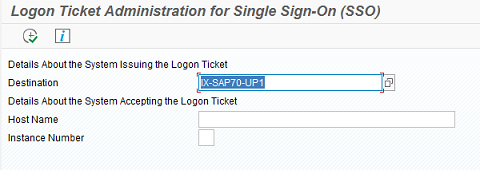
Test the SSO ticket using the "SSO2" transaction.
-
Under "Destination," select the RFC connection to Intrexx and run the test.
-
The result should look something like this:
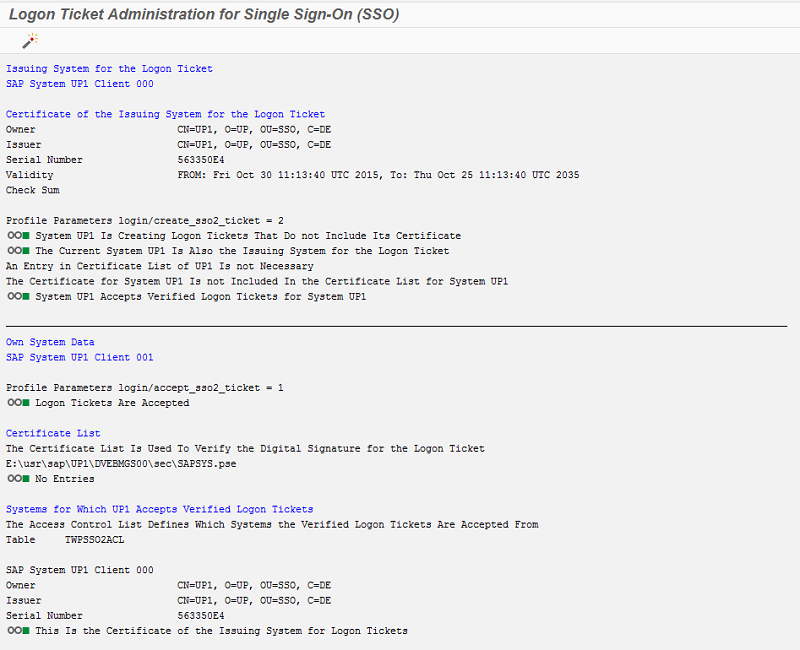
If an error occurs, follow the instructions in the log.
More Information
SAP Trust Manager SSO Configuration
API Description, Part 1 - Overview
API Description, Part 2 - SAP Portal Plugin
API Description, Part 3 - Implementing Custom Processing Modules
API Description, Part 4 - Sample Code
Developer's Guide, Part 2 - Integration Scenario: SAP External Data Group
Developer's Guide, Part 3 - Integration Scenario: Scripting
Developer's Guide, Part 4 - Personalized SAP Access / Single Sign-On (SSO)