

Text Feed Campaign
The Text Feed feature allows you to create a custom post. This is always helpful when a post cannot necessarily be directly assigned to a data group. For example, you can send automated system alerts to IT staff (hard drive space quotas), notifications about scheduled maintenance, employee birthday reminders, and much more.
Create a Text Feed Campaign
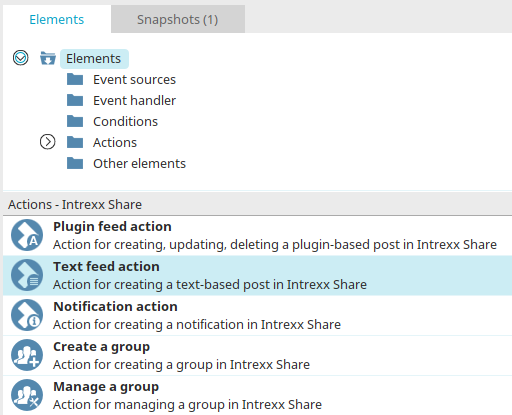
You can find the Text Feed action in Processes under "Elements." It belongs to the "Actions - Intrexx Share" category. From there, it can be dragged and dropped into the desired location in the process chain and then configured. General information on creating process elements can be found here.
Once you have created the Text Feed action on the workspace, double-click the element to open the Properties dialog box.
General
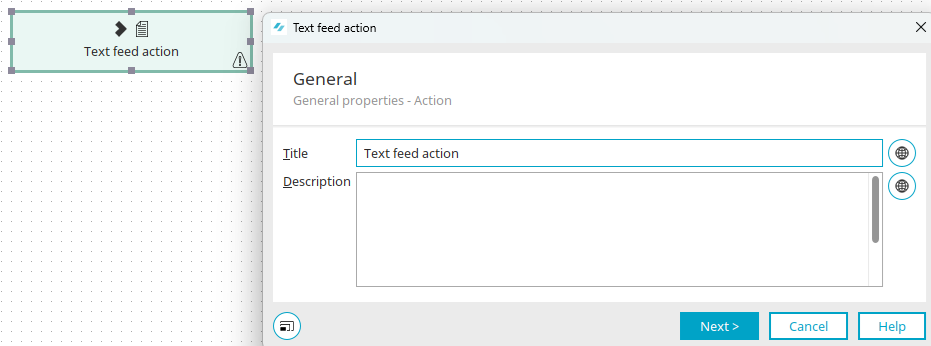
You can edit the title and description of the promotion here.
 Multilingualism
Opens a dialog box in each case where the title or description can be entered in multiple languages. You can find more information on this topic here.
Sender and Recipient
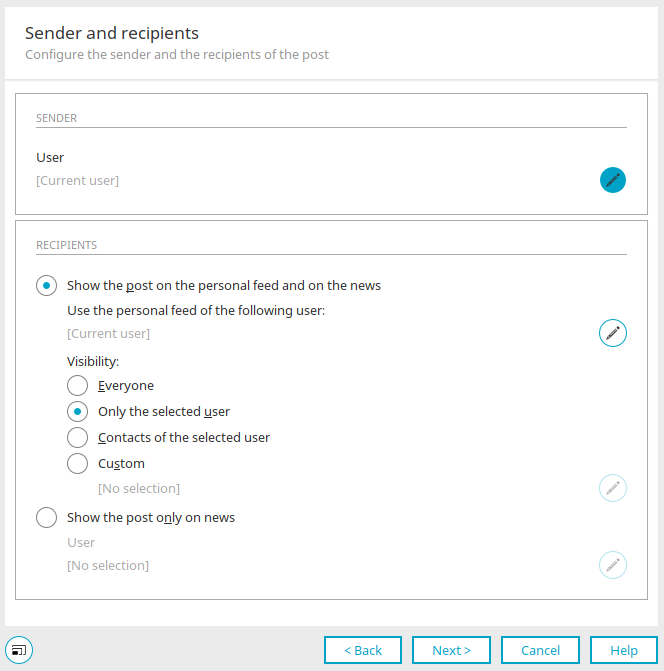
Sender
User
The user who will be used as the sender is entered here.
 Configure Users
Opens a dialog box where a user can be selected
Selecting the User Source
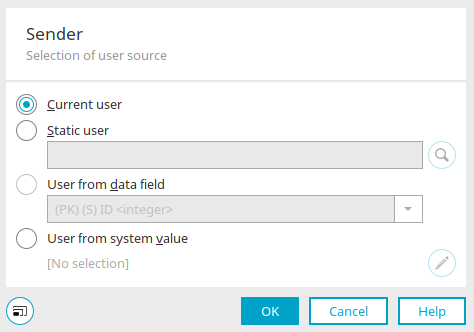
Current User
The currently logged-in user is used as the recipient or sender.
Static User
This option allows you to use a static user.
 Select a user
Opens a dialog box where a user can be selected.
User from data field
Here, you can select a data field containing GUIDs or user IDs.
User from System Value
System values can also be used as a source for user GUIDs or IDs.
Edit System Value
Opens a dialog box where a system value can be defined.
Click "OK" to save your changes and close the dialog box.
Recipient
Display the post on the personal page and in the News section
Here, you specify that the post will appear on a specific user's personal page and in the news feed.
Please note that a user's personal page is essentially a private diary and should not be diluted with general content.
Use the following user's profile page
This is the user whose personal page the post should appear on.
Configure Users
Opens a dialog box where the user can be configured.
Visibility
Here you can specify which group the post should be visible to.
-
Everyone
-
Only the selected user
-
Contacts of the selected user
-
Custom
Configure Users
For the custom option, opens a dialog box where users can be configured.
Selecting the User Source
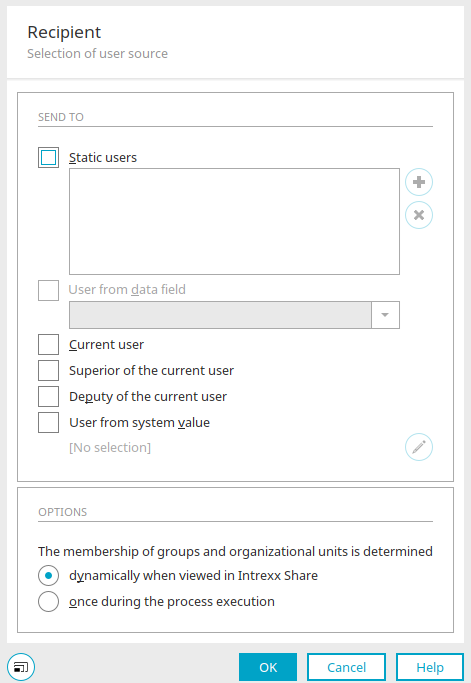
Send to
Static Users
Static users can be entered as recipients here.
 Add a User Object
Opens a dialog box where user objects can be selected.
Remove User Object
Deletes the currently selected user object from the list of static users.
User from data field
Here, you can select a data field that stores user IDs. In addition to integer data fields, string or text data fields can also be selected if they contain user GUIDs.
Current User
The current user is used as the recipient here.
Supervisor / Deputy of the Current User
The deputy designated for the current user in the "Users" module of the portal will receive the post.
User from System Value
Here, you can define a system value that returns the GUIDs of users.
Edit System Value
Opens a dialog box where a system value can be defined.
Options - Determining Membership in Groups and Organizational Units
Dynamic Display in Intrexx Share
With this option, users are dynamically identified and stored when displayed in Intrexx Share.
One-time during process execution
Users are identified only once during process execution.
Click "OK" to save the user selection and close the dialog box.
Show posts only in the News section
With this option, the post will only appear in the News section.
Configure Users
Opens a dialog box where users can be configured.
Contents
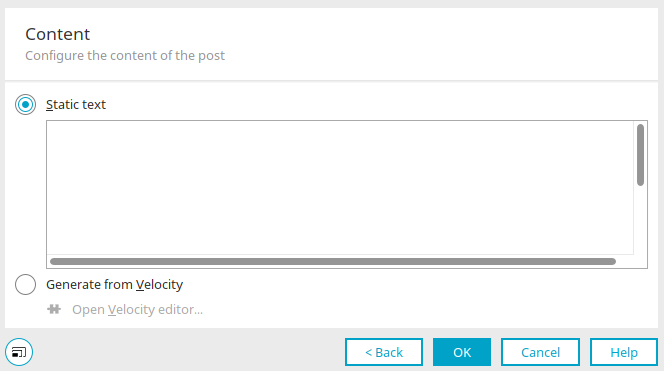
Static Text
You can enter static text here.
Generate from Velocity
With Velocity, you can dynamically generate the content of the post.
Open the Velocity Editor
Opens the Velocity editor, where you can write the script.
Click "OK" to complete the configuration.
Exception Handling
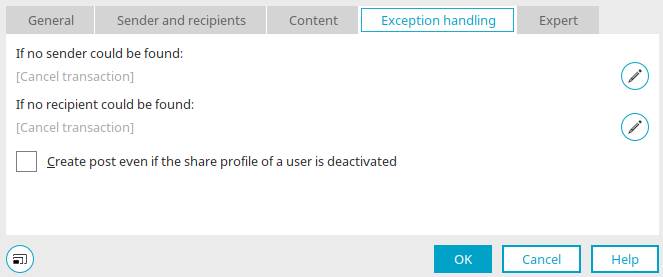
Exception handling can only be configured in the Properties dialog for process elements that have already been created. This setting determines whether the transaction should be canceled or continued if there is no sender or recipient. To do this, click "Configure Exception Handling" under " " in each case.
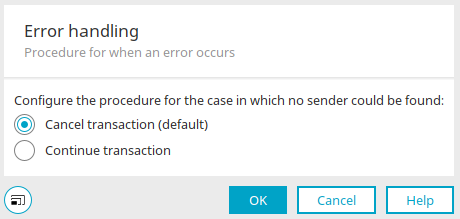
Click "OK" to save the settings and close the dialog box.
Create a post even if a user's Share profile is disabled
Ensures that the notification is created even if the Intrexx Share profile of the sender or the user on whose personal page the post is to be displayed is disabled.
More Information
The sections of the "Processes" module