

Data Fields
Intrexx data fields are the equivalent of a column in the portal database. Data entered by users in Intrexx applications is stored in data fields that are linked to input elements. Data that has already been saved is displayed using view controls and input controls, but can only be edited using input controls.
You can find more information about application elements here.
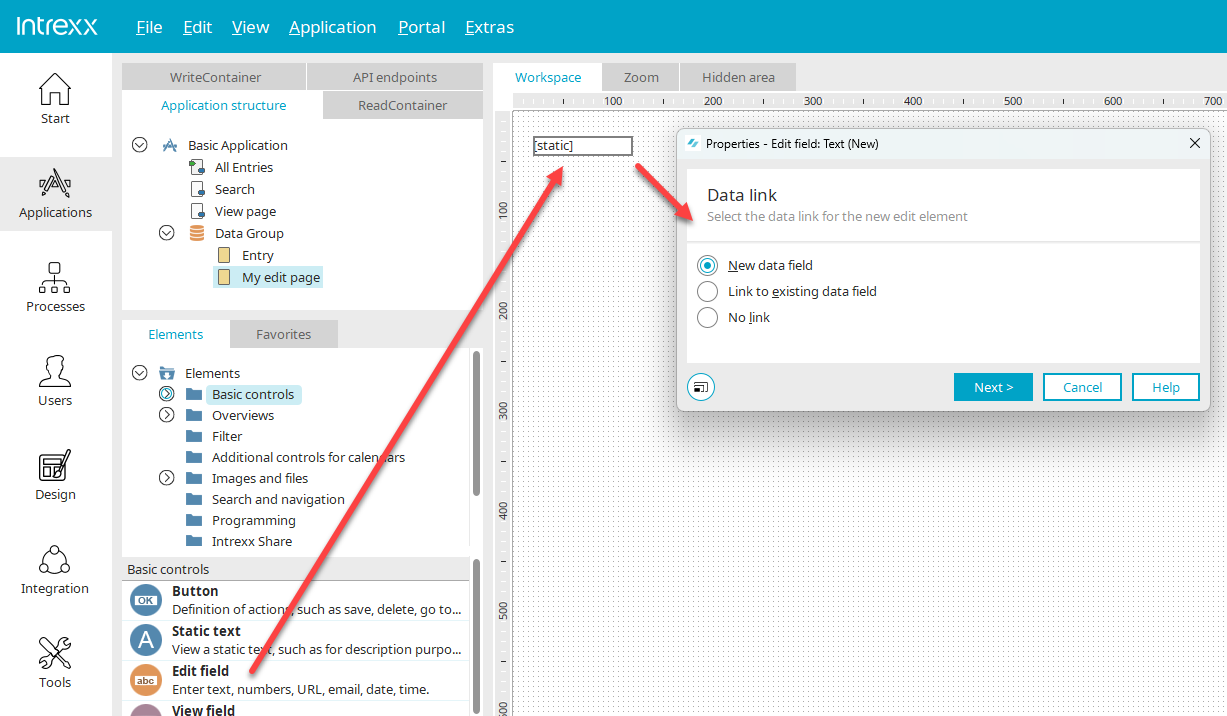
When you create a new element, a wizard will guide you through the process. Here, you can choose whether you want to create a new data field along with the new element, which will then be automatically linked to the element. You can find all the information here.
You also have the option to create elements and data fields independently of one another and link them together as needed.
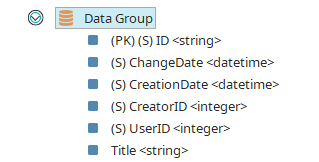
The data fields in a data group can be displayed or hidden using the main menu option "Edit / Show Data Fields" or "Hide Data Fields, " or via the context menu of a data group in the application structure when the data group is selected.
Each data group already contains the system data fields
-
(PK) (S) ID
Record ID
-
(S) User ID
ID of the user who last edited the record
-
(S) Date
Date of Last Change
-
(S) Creator ID
ID of the user who created the record
-
(S) Creation Date
Date of Change
-
(S) Date of Change
Date of Change
If desired, these data fields can be linked to view elements. Intrexx automatically populates system fields with the relevant data.
You can find information about data types and control types in Intrexx here.
New data fields that are not automatically linked to elements can be created using the properties of a data group.
Create a New Data Field
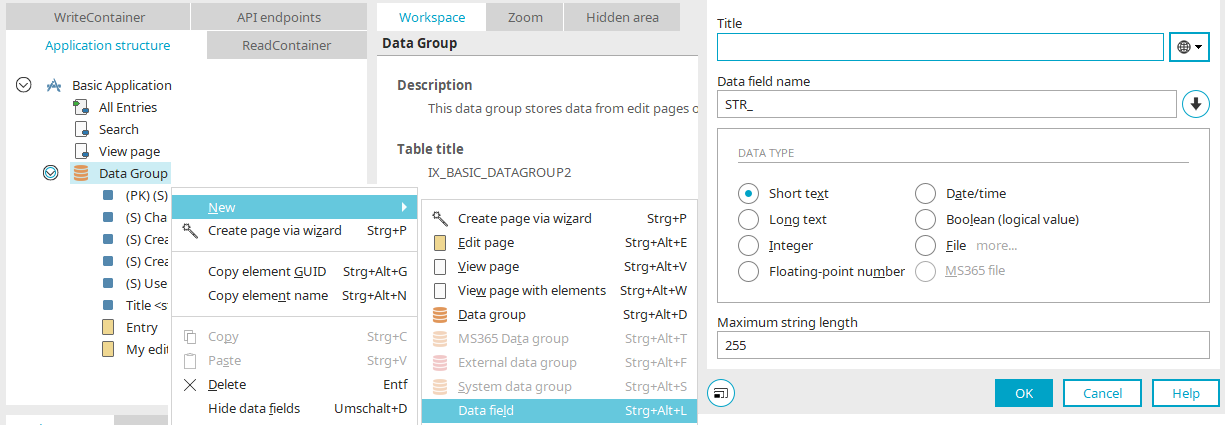
To create a new data field, select a data group in the application structure. Then select "New / Data Field" from the context menu or the main menu.
Title
You can change the title of the data field here. You can find more information on this topic here.
Data Field Name
The name of the data field can be changed here as long as the application has not yet been published. The prefix is adjusted when the data type changes (see below). The actual name remains unchanged. If the specified name does not have a data type prefix, the name remains unchanged when the data type is modified. So, for example, if the data type is changed from "String" to "Datetime," "STR_NAME" would become "DT_NAME," while "TEST_NAME" would remain unchanged.
Data Type
Select the desired data type here.
File
This data type is used, for example, for the "File Selection" element.
More...
Opens a dialog box where you can configure the handler class.
MS365 File
For detailed information on this, see the section Add an MS365 file field to a data group.
"Data Fields" Tab - Data Group Properties
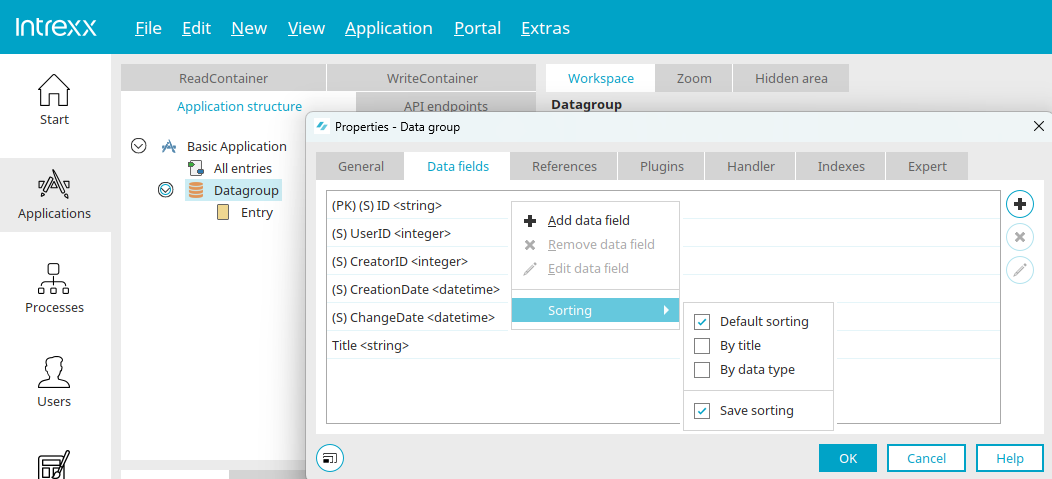
You can open the Properties dialog for a data group by double-clicking the data group in the application.
On the "Data Fields" tab, you'll find all the data fields included in the data group.
For a clearer overview, you can use the "Sort" option in the context menu to sort the data fields by title and data type, in addition to the default sorting. The specified sort order can also be saved and will be available again the next time you open the "Data Fields" tab.
 Add Data Field
Opens a dialog box where you can create a new data field.
 Remove Data Field
The selected data field—and thus the data stored in it—will be deleted. Data fields that are linked to view or input elements cannot be deleted as long as the link remains active.
 Edit Data Field
Opens a dialog box where you can edit the properties of the data field.
Data Field Properties
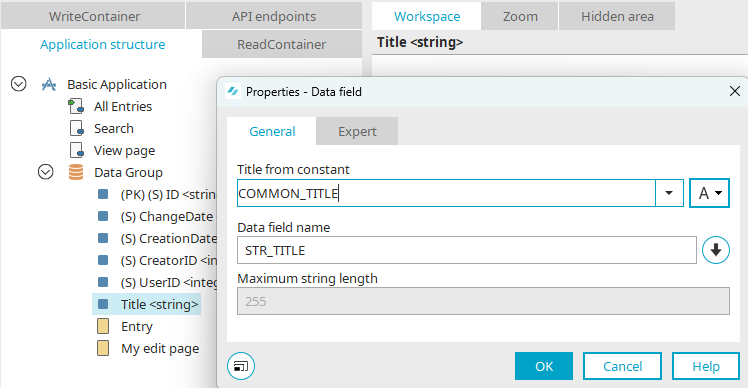
You can access the properties of a data field through the Properties dialog box for a data group (on the "Data Fields" tab), by double-clicking a data field in the application structure, or by selecting "Properties" from the context menu or main menu. Depending on the data type, different settings are available here.
String Data Fields
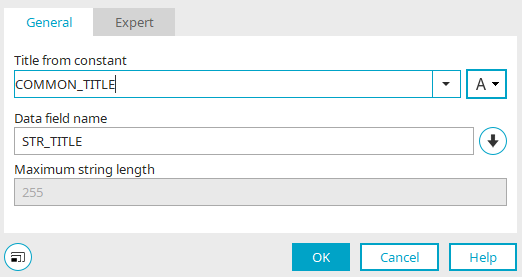
You can change the title of the data field here. You can find information about multilingual titles here.
Data Field Name
You can change the name of the data field here.
 Generate a Name from a Title
Uses the title as the data field name. The prefix is retained in this process.
Maximum length
Displays the character limit for string data fields.
Text, Integer, Double, Datetime, and Boolean data fields
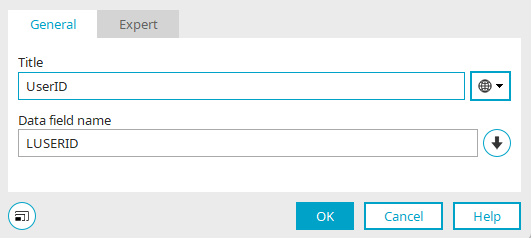
Here, you can change the title and name of the data field.
The names of primary key data fields can be changed as long as the application has not yet been published.
File Data Fields
General
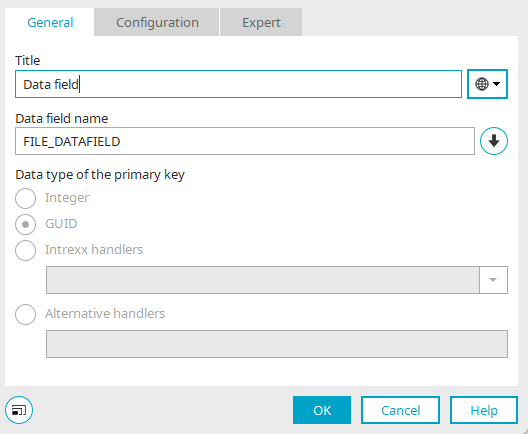
In addition to the title and name of the data field, the data type of the primary key used to map the files is displayed here.
If file data fields have been configured in connection with Intrexx connectors, you will find the corresponding settings here. You can find all the information on "Connectors" here.
Starting with Intrexx version 12.0.2:
A 32-bit salt is used instead of a numbering system to generate unique filenames. Starting with Intrexx version 12.0.2, this change applies only to newly created file data fields.
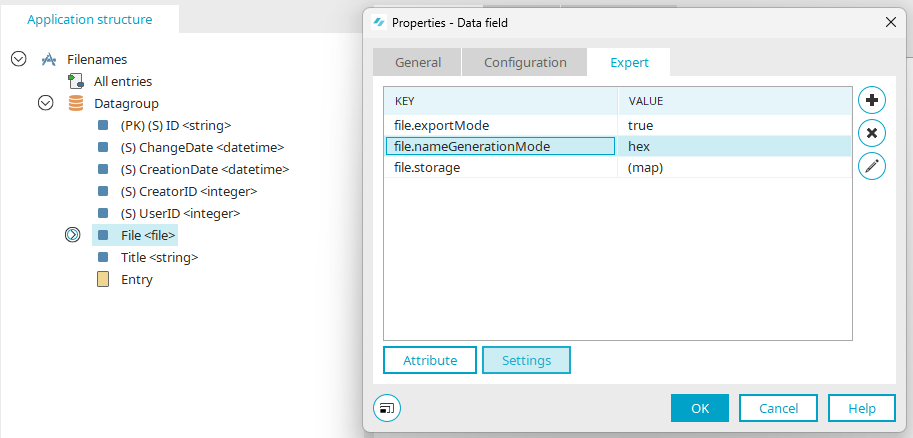
For existing file data fields, the "file.nameGenerationMode" setting must be changed from "numeric" to "hex." You can find general information about settings here.
Configuration
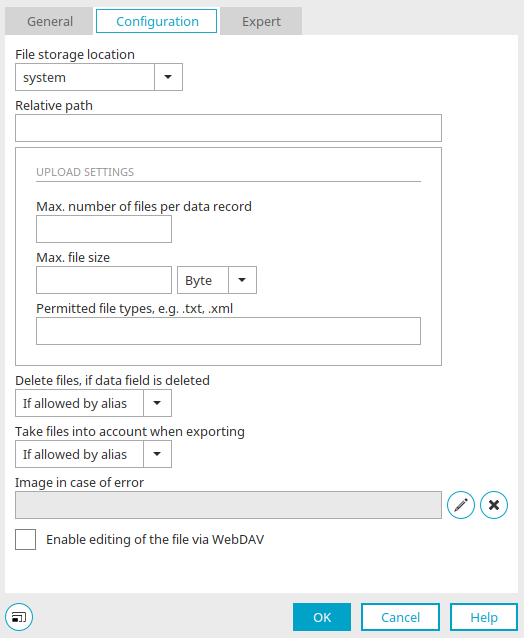
File location
Select the file location here.
Relative path
Here, you can edit the subpath to the selected file location.
Upload Settings
Maximum number of files per record
Specifies the maximum number of files allowed per record.
Maximum file size
Sets the maximum size of files that can be uploaded. Select the desired unit from the list to the right of the input field.
Accepted File Types
Enter the allowed file types here, preceded by a period (e.g., .txt or .xml) and separated by commas.
Delete files when a data field is deleted
This setting determines how file data fields should be handled when they are deleted.
-
If allowed by Alias
Uploaded files are deleted if deletion is permitted by the settings configured for the corresponding file location.
-
No
Uploaded files are not deleted.
Include files during export
The same conditions can also be specified for the process of exporting files.
Images in the Event of an Error
Opens a dialog box where you can select an image to display when files are not physically present.
Enable file editing via WebDAV
If you select this checkbox, you can open, edit, and save documents or files directly from your portal using the appropriate program.
All other settings required for "WebDAV functionality" and further explanations on this topic can be found in the following sections: