

Tips & Tricks - Importing Supervisors from Active Directory
In this post, we'll show you how to import supervisors when importing users via LDAP if they are assigned in Active Directory (AD).
Configure a Replication Job
Go to the "Users" module. Select the main menu "Users / Import Users and Groups" here.
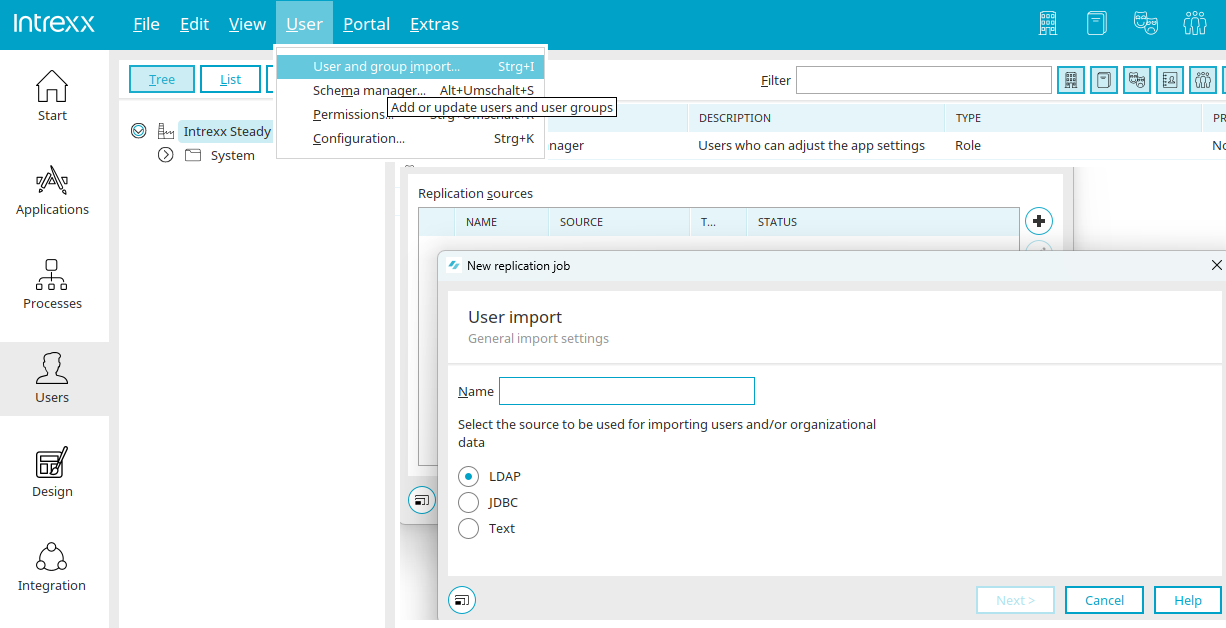
Click "Edit" at  to edit your existing connection, or click "Add" at
  to create a new connection. Click "Next."
In the next dialog box, enter the name of the connection and select "LDAP" as the source. If replication is already set up, click "Next" directly.
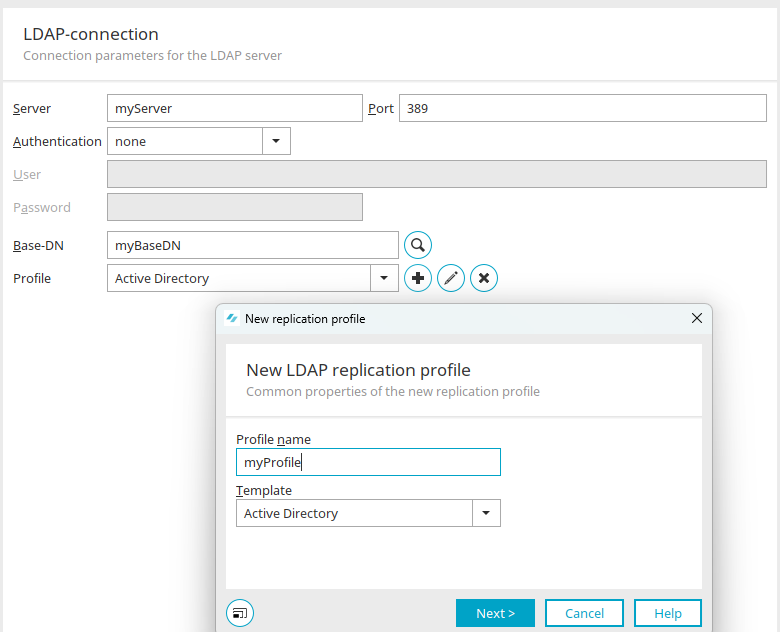
Click here to add " ." Enter a name for the new Replication.xml file. Select "Active Directory" as the template and click Next.

Search here for <!-- Import of boss --> and remove the line <!— at the beginning of the block and the line --> at the end of the block. This activates the code, and the supervisor will be automatically imported from Active Directory during the next replication job. Click "OK" and follow the wizard's remaining instructions to finish configuring the replication job. Replication can be performed immediately in the final step.
Supervisors in the User Account
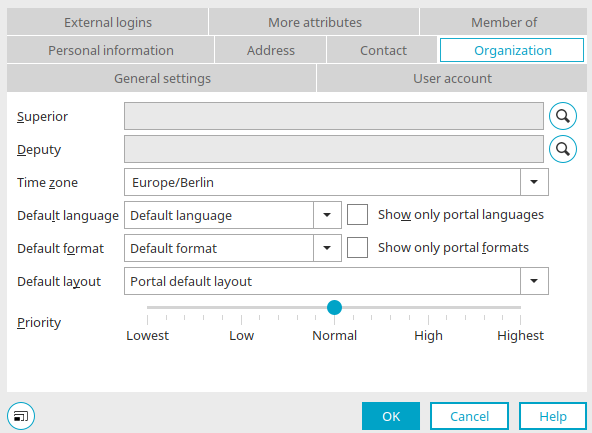
Once replication has been successfully completed, you will now find the assigned supervisors in each user account on the "Organization" tab.
Supervisor's Name in Applications
In user management, the supervisor is stored in the user's record only by their ID. To display your supervisor's name in applications, follow the steps described below.
Shortlist
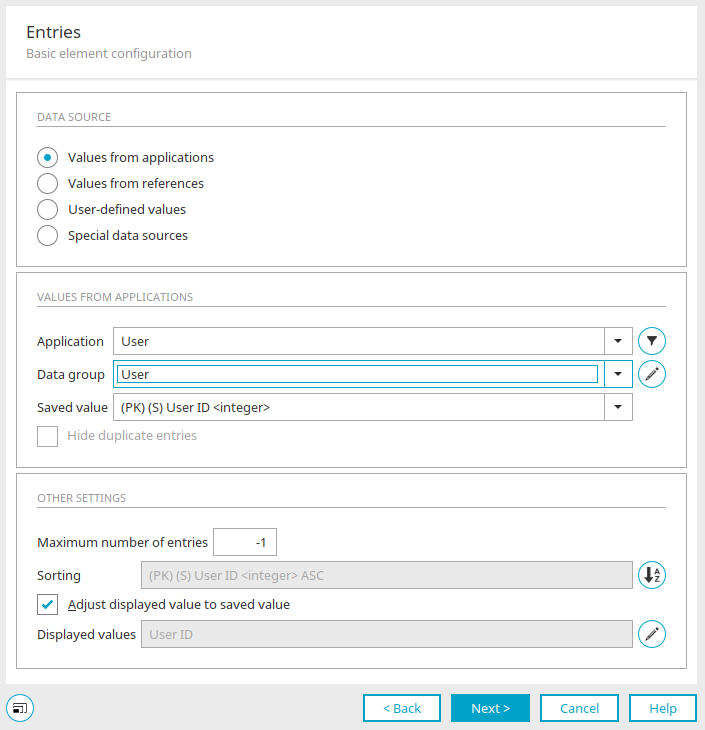
In drop-down lists, the full name of supervisors can be displayed and their ID can be saved. To do this, in the Properties dialog box for the drop-down list, on the "Entries" tab, select "Values from Applications" as the data source, and then select the "Users" application. Select "(PK) (S) User ID" as the stored value. "Full Name" is used as the display value here. This will display the supervisor's full name in the drop-down list in the browser.

To ensure that the employee's correct supervisor is displayed, you still need to set the filter. Select "(PK) (S) User ID" as the data field again. Select "Equal" as the operation and "Current User" as the comparison option, with the value "Supervisor ID."
Input field
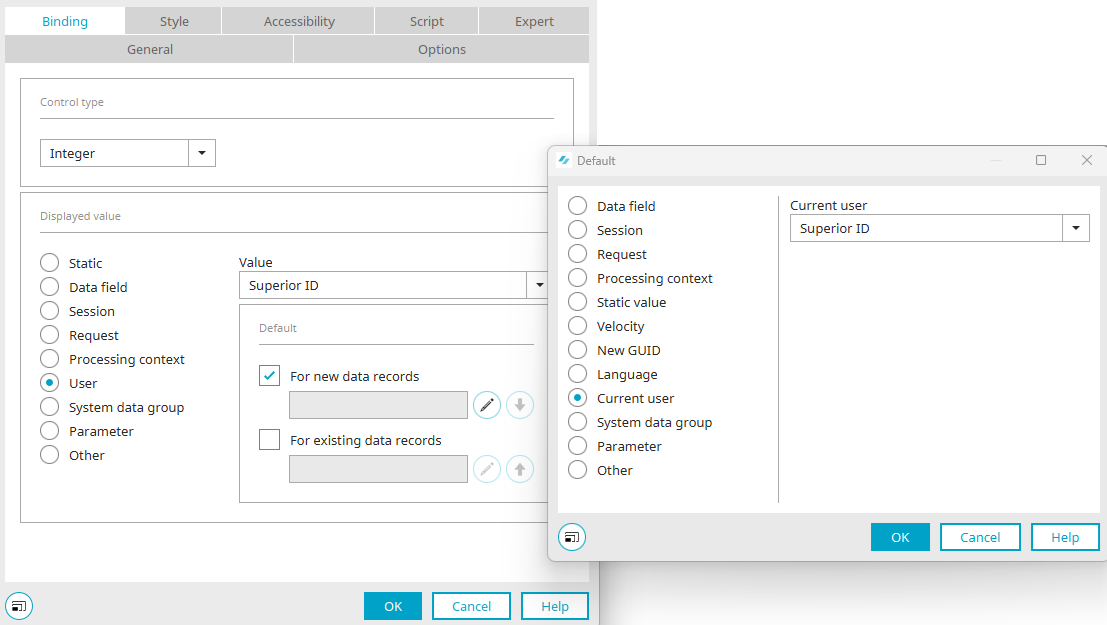
If you don't need the name to be displayed when entering data, you can simply use an input field with the "Integer" data type. By default, select the "Current User" and "Supervisor ID" options. This ensures that the input field is already populated with the current user's supervisor ID when the page loads.
View Table
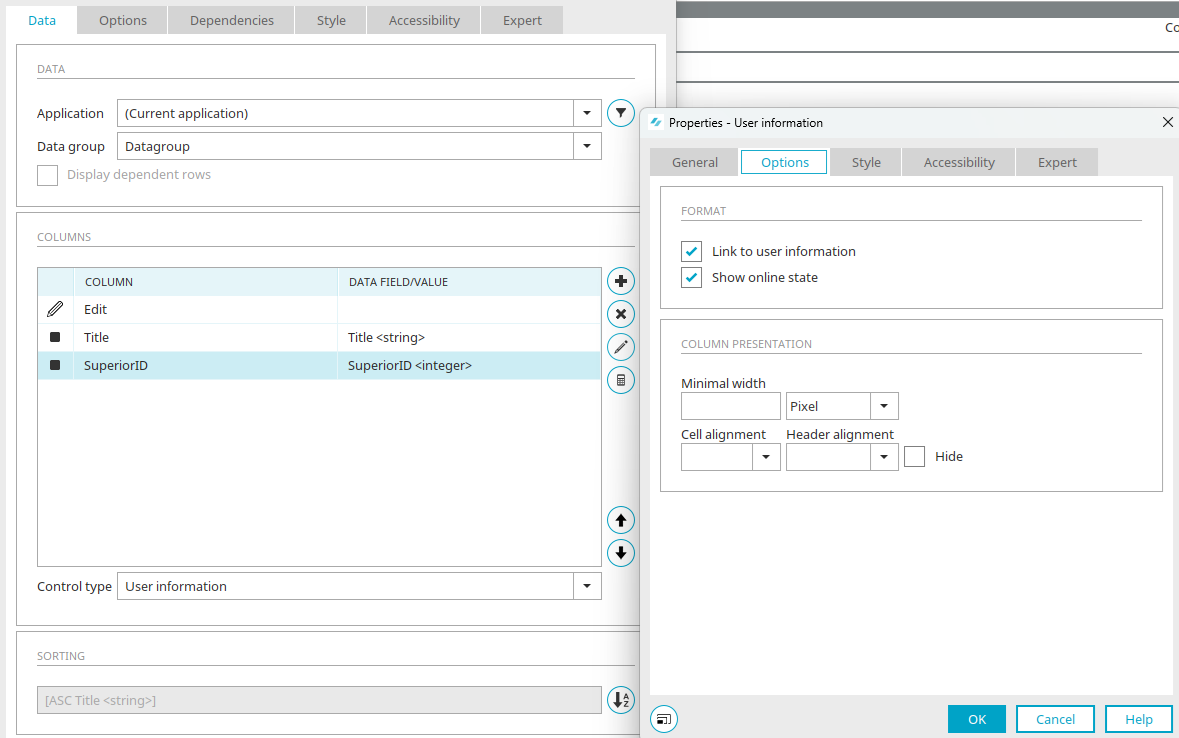
To display the supervisor's name in view tables, add the data field containing the supervisor ID as a column in the table's Properties dialog box and select the "User Information" control type. Then click "Edit Column" under " ." On the "Options" tab, select the "Show link to user information" setting.
Viewport
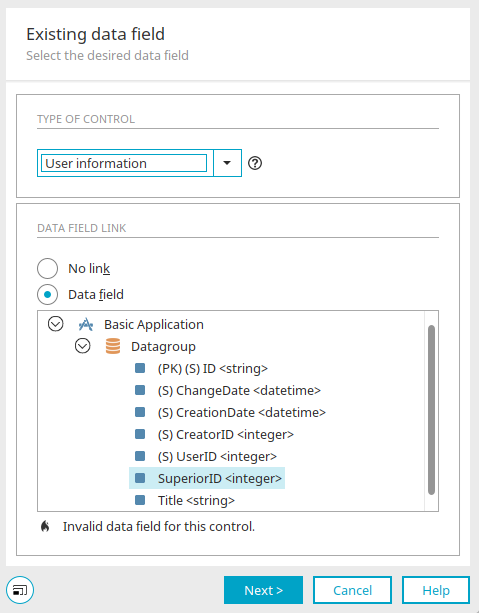
To display the supervisor's full name in view fields, select "User Information" as the control type when selecting the existing data field while creating the element.