Web service action
A web service request can be executed with a web service action. This requires a registered web service in the "Integration" module. You can find out how to configure a web service there by clicking here.
In processes, the web service action can be found in the "Elements" area. It can be dragged from there and dropped to the desired location in the process chain. General information about creating process items can be found here.
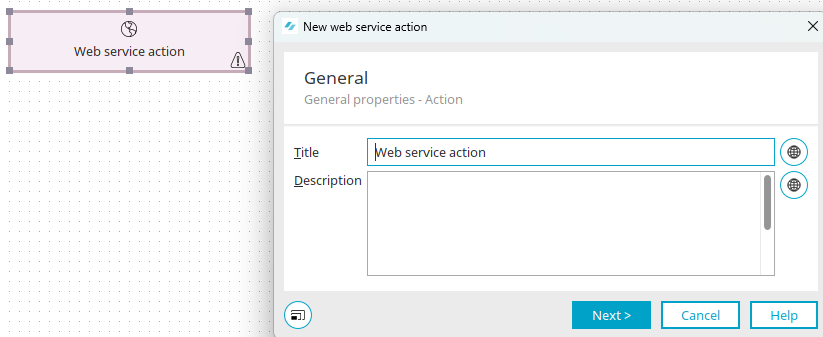
Once you have created the web service action on the workspace, open the properties dialog by double-clicking on the element.
General
Click here for detailed information about the settings in this dialog.
Web services
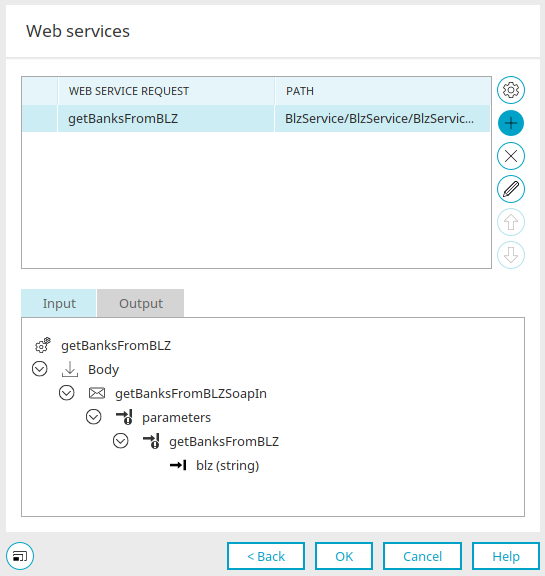
The name of the web service request and the path in the WSDL structure are displayed here.
![]() Configure web service
Configure web service
Opens a dialog where the web service can be registered.
![]() Add web service request
Add web service request
Opens a dialog in which a web service request can be selected.
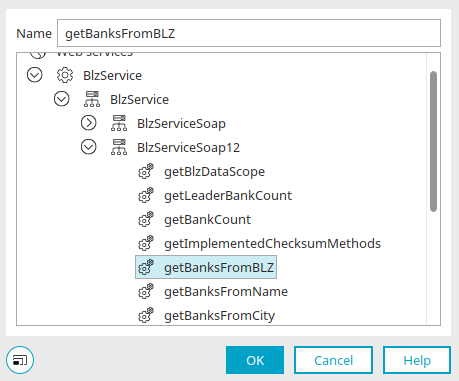
Select web service request
If provided web services are requested from other Intrexx portals, you need to log in, if the addressed portal
-
is configured with Intrexx authentication. The intrexxLogin operation is used for this.
-
Integrated Windows authentication. The login operation must be used here.
The actual web service operations can only be requested after this. In closing, the logout operation needs to be used so that the session is ended correctly.
Select the desired call and click "OK".
![]() Delete web service request
Delete web service request
Deletes an entered request.
![]() Edit
Edit
Opens the dialog for selecting the web service request, in which the structure of the web service is shown. You will also find the additional "Configuration" tab.
![]()
![]() Increase / Decrease priority
Increase / Decrease priority
The arrow buttons allow the priority to be changed when multiple requests are defined. Multiple web services will be executed one after another in sequence. The uppermost call will be started first; afterwards, all requests below it will follow in order.
"Input" tab - Parameter type
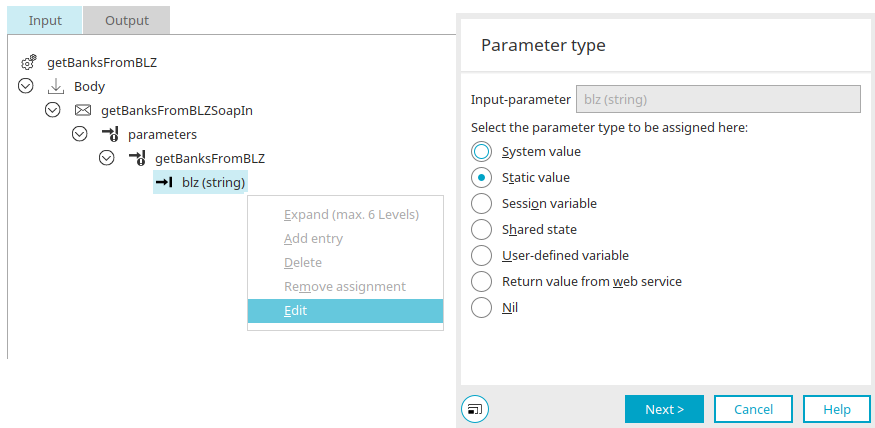
Here, the structure of the operation from the request web service is depicted. Select the method that should provide a value from the application. The "Edit" context menu can then be used to define the source of the value. The data type expected by the web service is indicated in brackets next to the method. Further information on the individual parameter types can be found here. Select the desired method and click "Next".
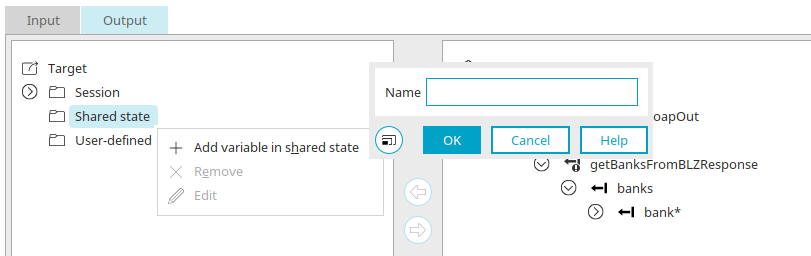
Output tab
Create session variable
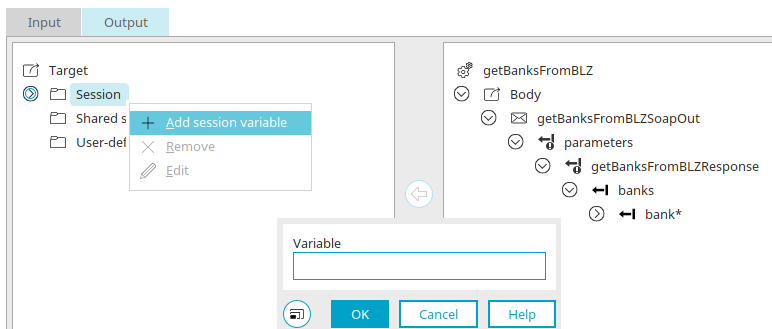
A new session variable can be created here via the context menu, which can then be assigned as a target to the value provided by the web service by clicking on the arrow buttons.
Create variable in the processing context
A new variable can be created here in the processing context via the context menu, which can then be assigned as a target to the value provided by the web service by clicking on the arrow buttons.
Create user-defined variable
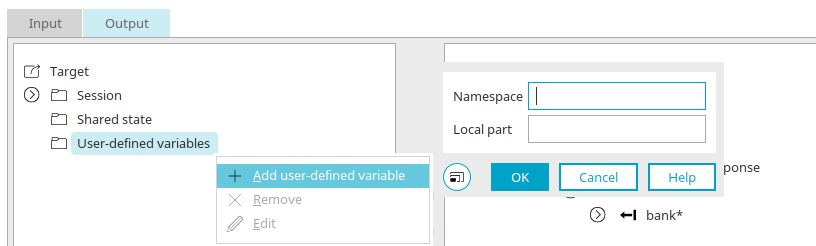
A new user-defined variable can be created here via the context menu, which can then be assigned as a target to the value provided by the web service by clicking on the arrow buttons. Information about Namespace and Local Part can be found here.
Parameter types
Here you will find an overview of the parameter types that can be selected as input.
Value from data field
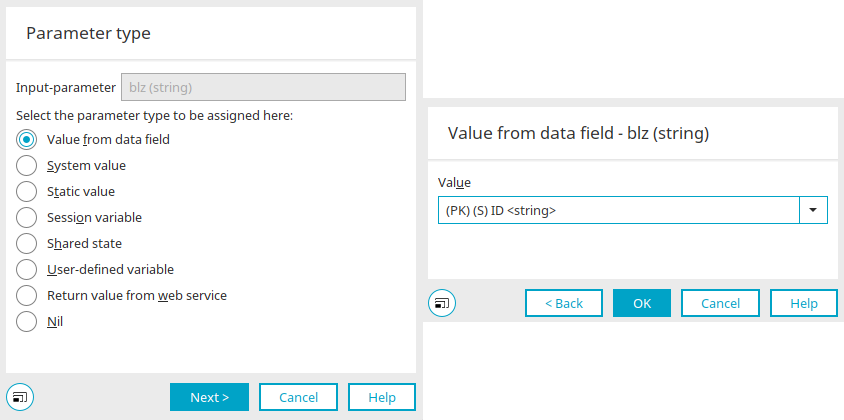
The "Value from data field" parameter type can only be selected if a data group is available - e.g. if the process chain starts with a data group event handler. After clicking on "Next", select the desired data field.
System value

System
Depending on the input parameter type, the current value of the system fields Data Set ID, Parent Data set ID, or the date value (Today (with time)), can be transferred.
User
Values from the "User" module (e.g. first name, surname, employee no., etc.) can be selected here. Their current value will be used as the input.
Static value
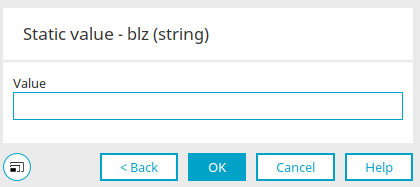
A static value can be defined as the input parameter here. For date values, please use the format yyyy-MM-ddTHH:mm:ssZ (for example, 2017- 09-12T14:45:00Z). For boolean values, please use "true" or "false". The value entered here cannot be changed via the browser.
Session variable
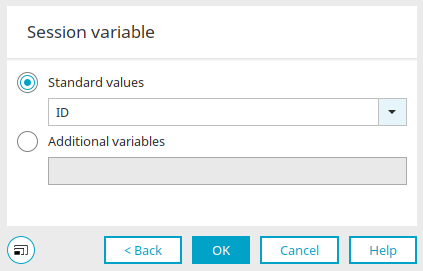
Standard values
All values that are saved in a session variable by Intrexx when visiting a page are available for selection here:
-
Session ID
-
Creation time of the sessions
-
Language
-
Timeout
-
Anonymous
Additional variables
The "Session variable" parameter type can be used if several web services are queried. For this, the return values of an already requested web service will be written to a user-defined session variable and then later used as an input in one of the subsequent web services. A user-defined session variable can be defined on the "Output" tab. The new session variable is declared there using the "Add session variable" context menu.
Processing context
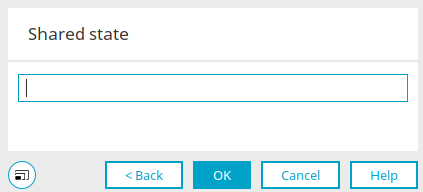
The sharedState variable name can be entered here. This name should always begin with a lower-case letter. If it consists of more than one word, the first letter of each new word should start with a capital letter.
Parameter type: User-defined variable
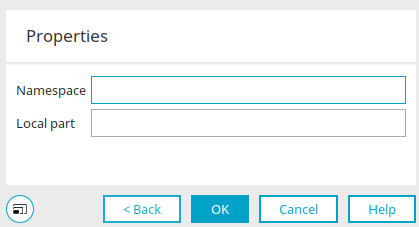
Enter the namespace and local part here.
An XML qualified name (QName) is constructed of two parts:
-
A namespace URI
-
A local part
Example
Namespace: https://schemas.domain.de/variableNames/
Local part: myValue
or
Namespace: urn:variableNames
Local part: myValue
Two qualified names are the same if both their namespace and their local name are the same. These entries are case-sensitive.
Return value from web service
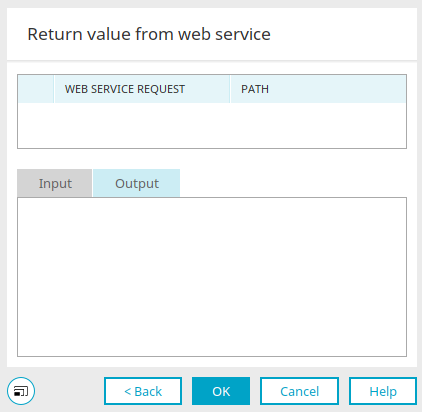
The structure of the dialog corresponds to the "Web services" tab in the properties of the web service action.
Output tab
Here, all return values of the web service that has been selected in the upper area of the dialog will be shown. This means that return values from previously submitted calls can be selected as inputs as well.
The input and output parameter types must match. The priority of the calls, which controls the sequence of requests, must also be taken into account with the "Return value from web service" parameter type.
Nil
Nothing will be assigned with this parameter type. The ability to make an explicit assignment of "nil" can be useful in certain cases in order to eliminate ambiguities in the assignment at run-time, which would otherwise lead to errors.
Configuration
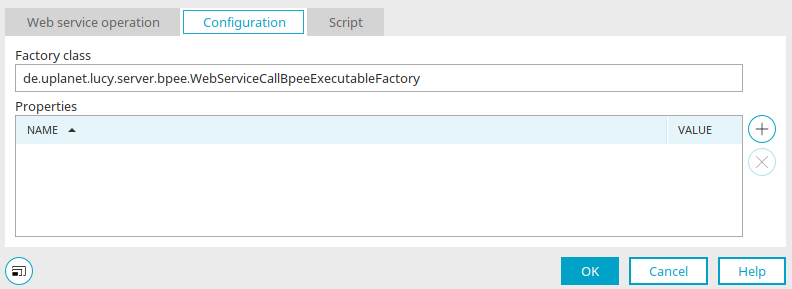
You can find the configuration if you edit a web service on the "Web services" tab in the properties of the web service action.
Factory class
Classes can be entered here, which are used at runtime in order to create objects that perform web service requests among other things. This mechanism is used, for example, to perform an Intrexx login using the class "en.uplanet.lucy.server.bpee.IntrexxLoginweb serviceCallBpeeExecutableFactory". This class performs two requests in sequence for the Intrexx login operation without making this process visible to the user.
Properties
Factories can be made into parameters, for example with timeout values for the creation of a connection and server reply.
![]() Add parameter inserts a new line,
Add parameter inserts a new line, ![]() Delete parameter deletes the currently selected parameter.
Delete parameter deletes the currently selected parameter.
"Name" column
The name of the parameter is shown here. If you click on a cell in this column, you can either select an Intrexx parameter or enter a custom parameter directly.
"Value" column
The parameter value can be edited here.
Definable parameters
When requesting a web service, the parameters mentioned here can be set.
de.uplanet.lucy.server.bpee.WebServiceCallBpeeExecutable.socketTimeout
Defines the timeout - how long to wait for a response after a successful connection. The desired time must be specified in milliseconds.
de.uplanet.lucy.server.bpee.WebServiceCallBpeeExecutable.connectionTimeout
Defines the timeout - how long the web service takes to accept the connection. The desired time must be specified in milliseconds.
de.uplanet.lucy.server.bpee.WebServiceCallBpeeExecutable.authenticator.preemptiveAuthentication
In case of HTTP Basic authentication, the credentials are sent in advance before the server sends a possible unauthorized response. The value is false by default.
de.uplanet.lucy.server.bpee.WebServiceCallBpeeExecutable.authenticator.username
Static user name that should be used for HTTP Basic authentication.
de.uplanet.lucy.server.bpee.WebServiceCallBpeeExecutable.authenticator.password
Static password that should be used for HTTP Basic authentication.
de.uplanet.lucy.server.bpee.WebServiceCallBpeeExecutable.authenticator.host
Name of the host to authenticate to.
de.uplanet.lucy.server.bpee.WebServiceCallBpeeExecutable.authenticator.port
Port of the host to authenticate to.
de.uplanet.lucy.server.bpee.WebServiceCallBpeeExecutable.transport.http.protocolVersion
The HTTP protocol version.
de.uplanet.lucy.server.bpee.WebServiceCallBpeeExecutable.transport.http.chunked
Specify whether chunked transfer encoding should be used (true/false).
de.uplanet.lucy.server.bpee.WebServiceCallBpeeExecutable.authenticator.allowedRetry
Set to true if the authentication scheme should allow retries. The value is false by default.
de.uplanet.lucy.server.bpee.WebServiceCallBpeeExecutable.authenticator.realm
Validity range of the current authentication scheme.
de.uplanet.lucy.server.bpee.WebServiceCallBpeeExecutable.authenticator.domain
Domain required for authentication.
de.uplanet.lucy.server.bpee.WebServiceCallBpeeExecutable.authenticator.authSchemes
List for authentication schemes, e.g. Digest Basic.
Script
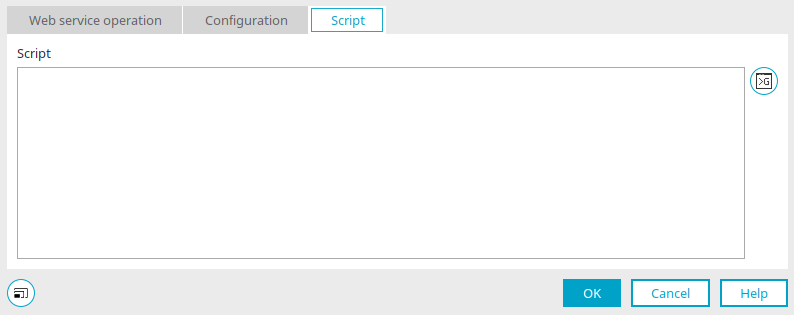
You will find the "Script" tab when you edit a web service on the "Web services" tab in the properties of the web service action.
Here, you have the option of composing Groovy script that will be performed during the web service request. The user requires the "Publish Velocity and Groovy scripts" portal permission to be able to do this.
Click on ![]() "Create Groovy script" to open the Groovy script editor.
"Create Groovy script" to open the Groovy script editor.
More information
Register or offer web service in the "Integration" module