Connector for dg archive in processes
User switch action
Since no interactive user logins to external systems are possible in processes, a login to dg archive must first take place in the process before dg archive actions are triggered. Two different options are available for this purpose, via which an additional user stored in the dg archive configuration can be selected for authentication. For timer-controlled processes, the user can be defined directly in the timer properties. Another option is the user switch action. This makes it possible to switch to the dg archive user within a process.

To do this, create a new user switch action and select "dg archive" as the action type.

The user that the subsequent actions should be performed with can be selected in the next step. Information about the settings in this dialog can be found here.
Synchronize stamp data
In contrast to files, the stamp data of a document saved in dg archive via Intrexx is saved in the Intrexx data group fields. If stamp data of a document is changed directly in dg archive, it cannot be automatically synchronized directly in Intrexx without further ado. Consequently, Intrexx automatically updates the fields of a dg archive stamp as soon as the data record is opened on a view or edit page. The user needs to click on "Save" to save the updated data in Intrexx. This process can also be automated via a process, so that the metadata of an Intrexx data group can be synchronized with the objects in dg archive at regular intervals.

To do that, create a new process that is initiated by a timer (Global timer). Select the dg archive data group in the timer configuration dialog and define a filter if required.
In the next step, you must select a user for whom static login data has been stored in the dg archive configuration.
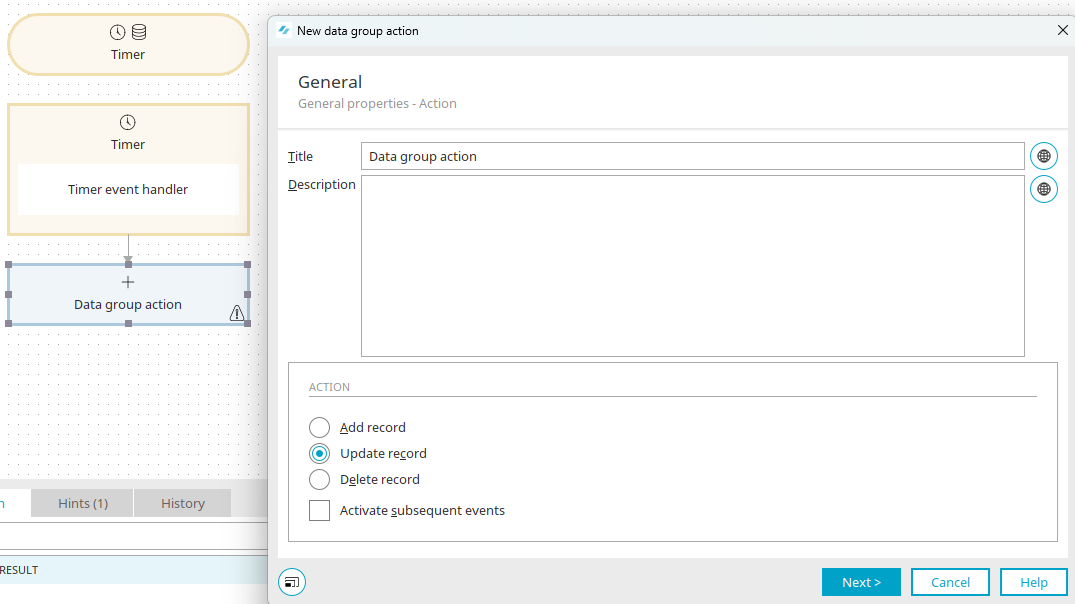
Add a new data group action to the timer event handler and select "Update record".
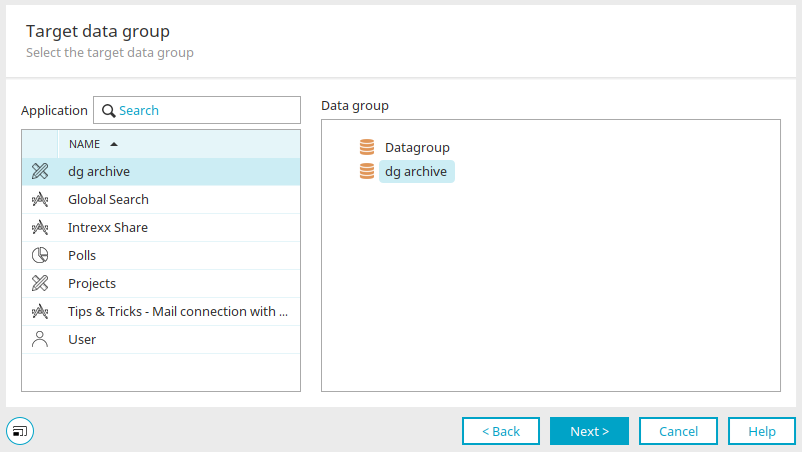
The target data group is the same as the timer's
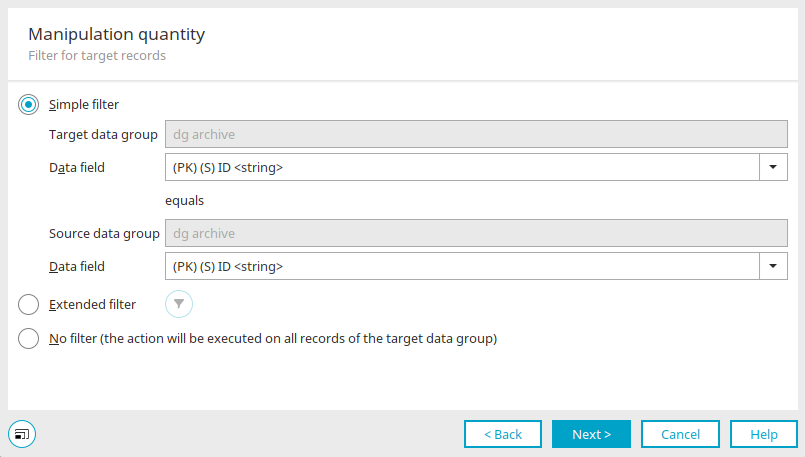
The "Simple filter" option is selected here. The two ID fields are selected as data fields in the target and source data groups.

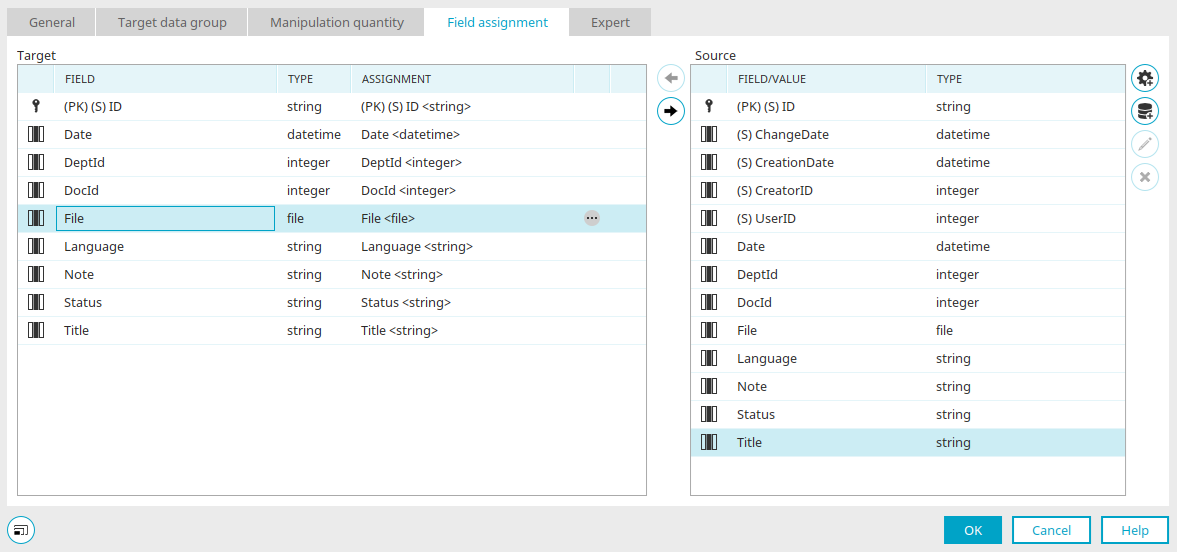
In the field assignment, you can now assign the fields from the source data group to the target data group for which the dg archive stamp data is to be re-read and saved. Please note that the file fields must not be synchronized here, otherwise a new version will be created in dg archive. Confirm the dialog with "OK" and then save the process. By importing the data records from the source data group, the data is re-read by dg archive and saved again in the assigned data fields in Intrexx in the next step.
File transfer between Intrexx and dg archive
Normally, files and documents are only physically stored on the dg archive server and loaded by Intrexx at runtime when a user accesses a dg archive file in the portal. Under certain circumstances, it can also be useful to transfer files from dg archive to Intrexx or to copy existing files from Intrexx portals to dg archive. To do so, file fields can be assigned between Intrexx and dg archive data groups in the data group actions. If information is read from a dg archive data group and written to an Intrexx data group, the files are copied from dg archive to the Intrexx Portal Server. Conversely, files can be copied from Intrexx applications to dg archive by reading from an Intrexx data group and writing to a dg archive data group. By using filters on the source data group, you can define which records (and therefore files) should be transferred to the corresponding target system. The following example illustrates the transfer of files from Intrexx to dg archive:
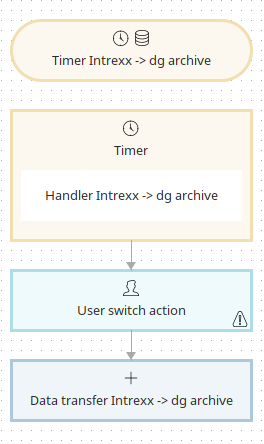
First, the data records are read from an Intrexx data group, controlled by the timer. Subsequently, a login to the dg archive server takes place via a user switch action. The files and metadata from the Intrexx data group fields are then transferred to dg archive via a dg archive data group action. The field assignment looks like the picture below:
Import and export of dg archive configurations
dg archive configurations are automatically exported with a portal export and created again on import. Should it be necessary for a single configuration to be exported to another portal, then this is currently only possible using the file system.
The configuration files are found in the portal directory internal/cfg/dghyparchive. Each configuration consists of an XML file. The file name corresponds to the configuration GUID.
If you need to transfer a configuration to another portal, then you can simply copy the appropriate file and insert it into the subdirectory of the target portal. After restarting the portal server, the configuration will be available in the Integration module.