First steps with INTREXXperience

How to test your INTREXXperience portal
Your access data contains the URL of the portal, the portal name, your username for the portal and the associated password.
|
URL |
exampleportal.intrexxperience.com |
|
Portal name |
exampleportal |
|
Username |
john.doe |
|
Password |
mypassword |
In the address bar of your browser, type the URL of your portal and press ENTER.
The login page of your portal is displayed.
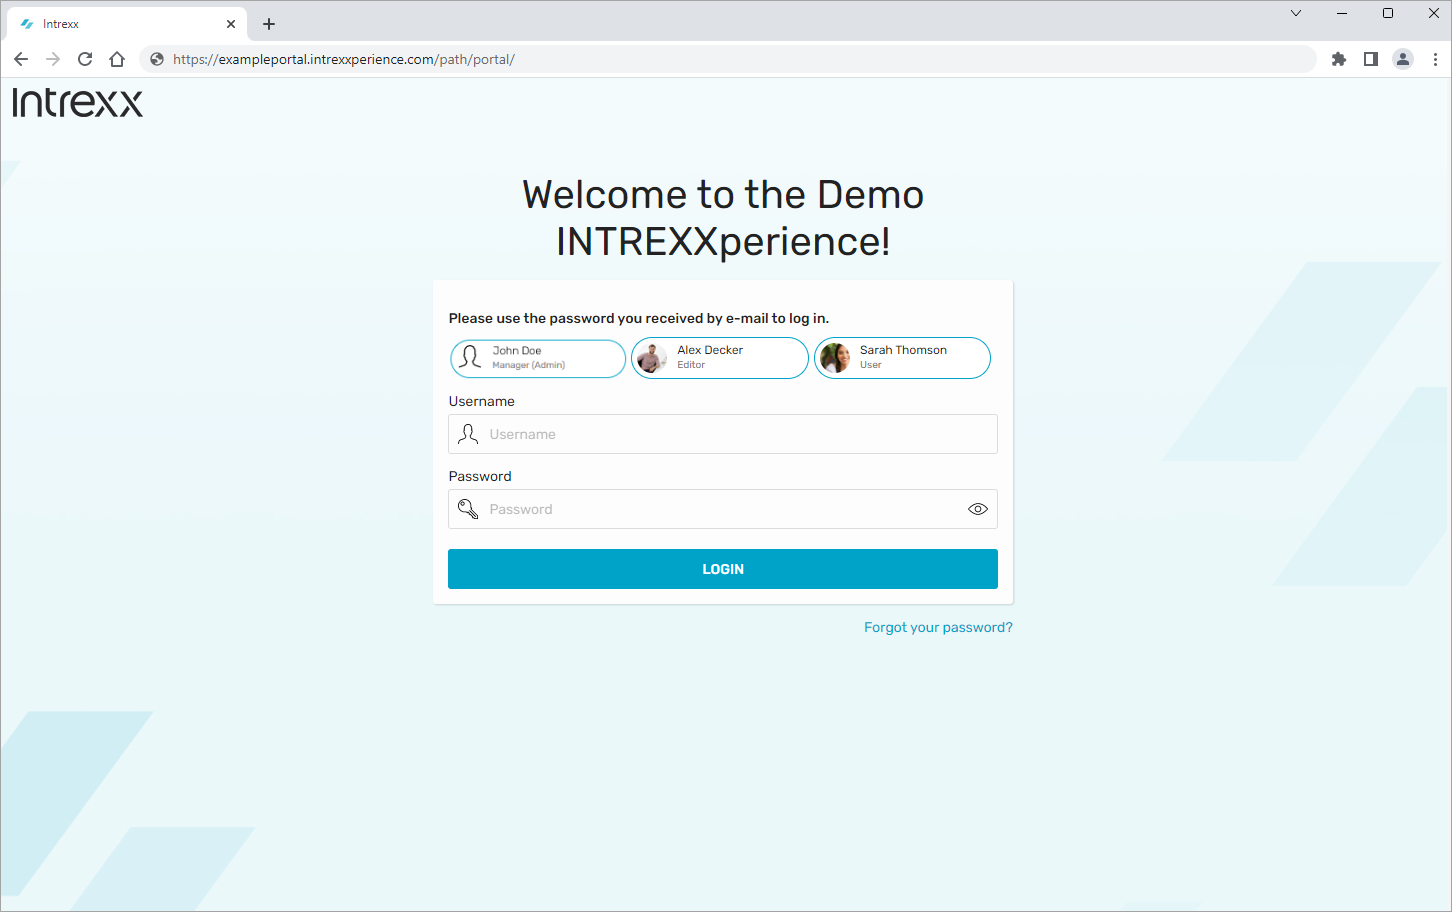
Three users with different rights
You can log in to the portal with three different users, each with different rights.
|
|
Name |
Username |
Role |
Password |
Activities in the portal |
|
|---|---|---|---|---|---|---|
|
|
You | You will find your username in the email you received from the INTREXX Ltd. |
Manager (Administrator) |
All users have the same password. This can be found in the email you received from the INTREXX Ltd. |
The "Manager" user may perform administrative tasks in the portal. For example, they can create new categories in the "News" application template. They can manage articles in the "Shop" application template. |
|
|
|
Alex Decker | AlexD | Editor | The "Editor" user can perform editorial tasks. For example, he can archive news in the application template "News". | ||
|
|
Sarah Thomson | SarahT | User |
The user "User" has the least rights. For example, in the application template "News", she can only see the news but not create it herself. In the application template "Shop", she can buy but not manage items. |
||


Further information on the different user roles can be found in section Roles and permissions for application templates.
In the login dialog, click the user you want to use to log in to the portal.
Enter the password. All users have the same password. You will find this in the email with the access data.
Click on "Log in".
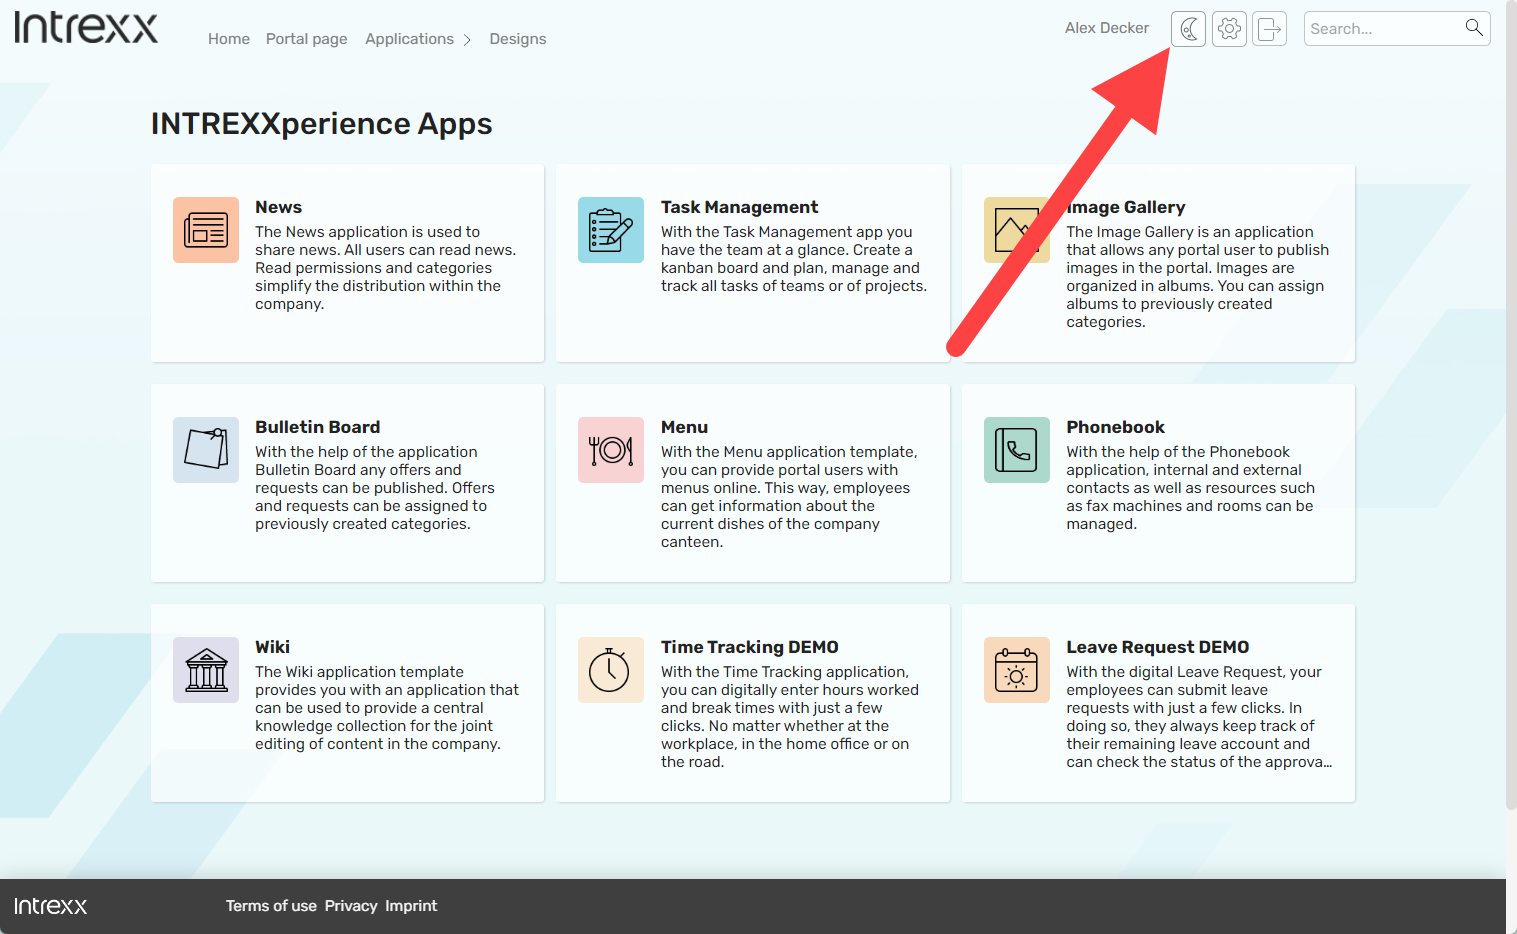
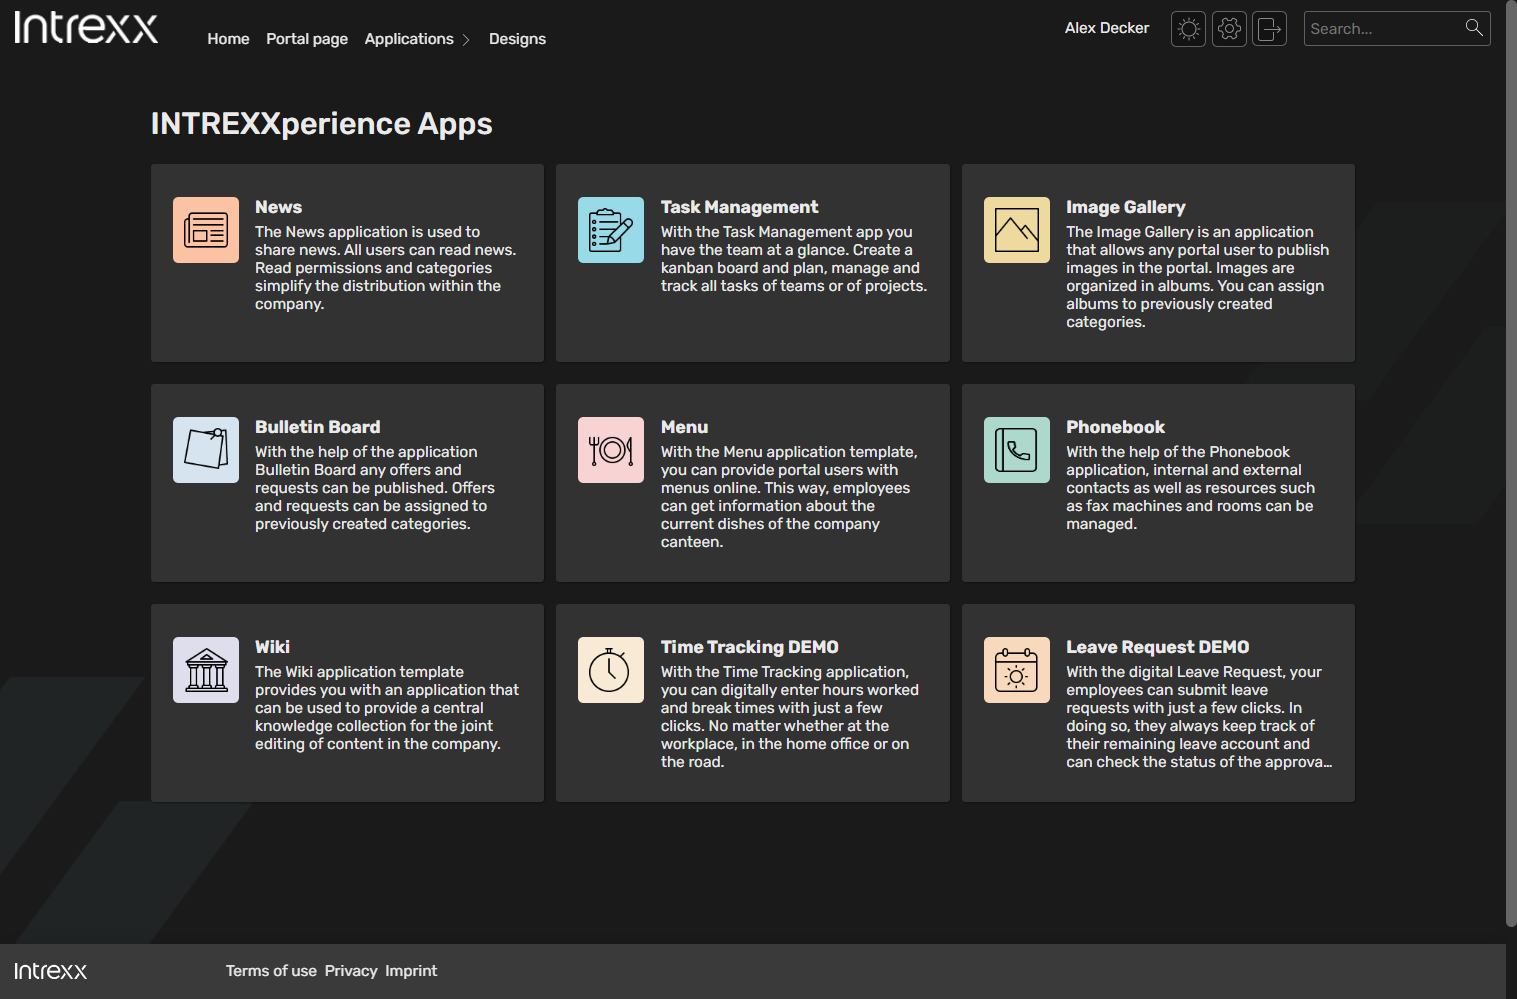
The INTREXXperience portal home page is displayed. You can find all the preinstalled apps here.
Note
In the Portal Manager, you can add more apps from the Intrexx template collection.
The start page (Home) on the INTREXXperience portal displays all the preinstalled apps.
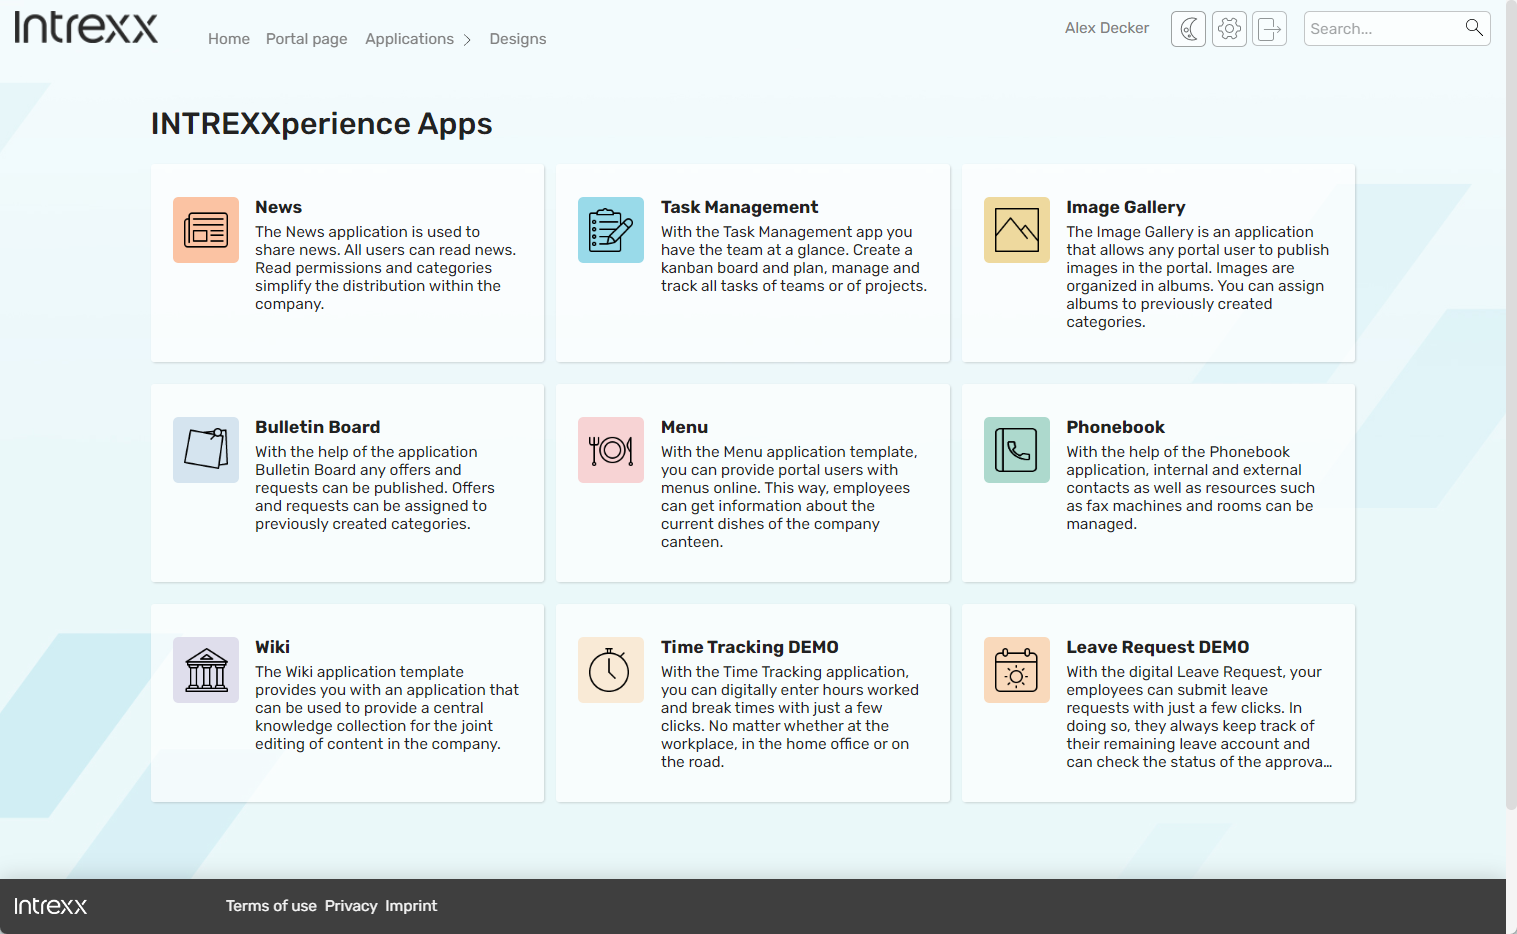
Click on one of the tiles.
The app is started.
Depending on the user role, different menu items or app functions are now available to you.
You can find an overview of all Intrexx online application templates that are available to you in Intrexx on the following page: Use application templates and solutions
Use the Intrexx Portal Manager to add more apps to your portal. You can find detailed instructions for this in section Import online application templates.
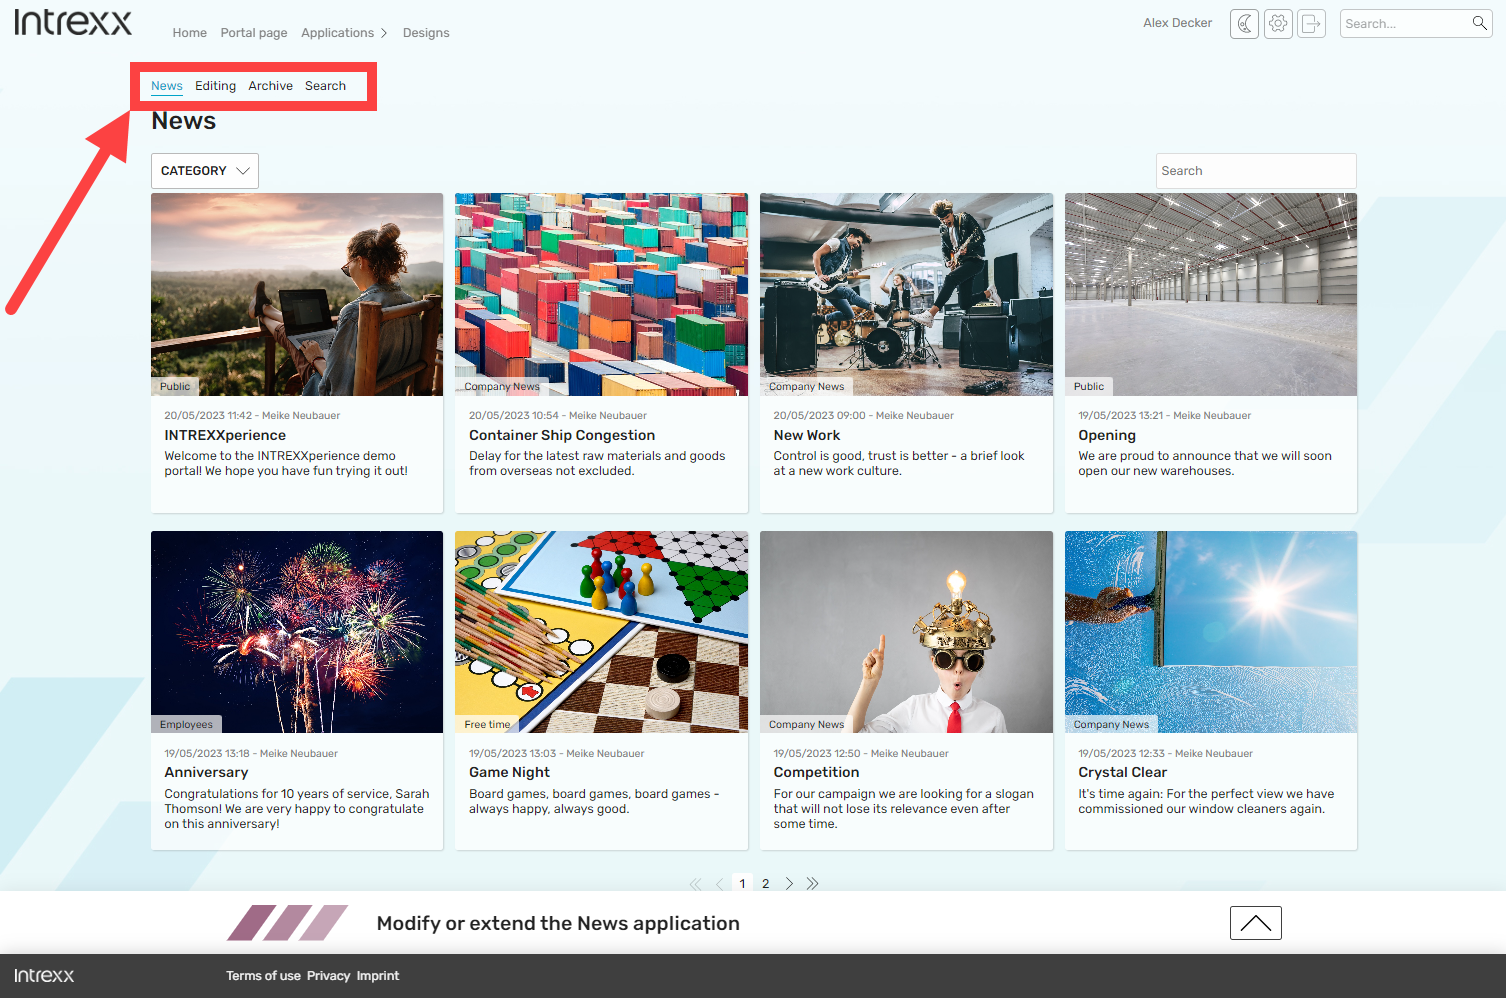
If you click on the "Portal Page" menu item, you will be shown a typical portal page. This can be an entry page for your portal. The page display can be set individually for each user.
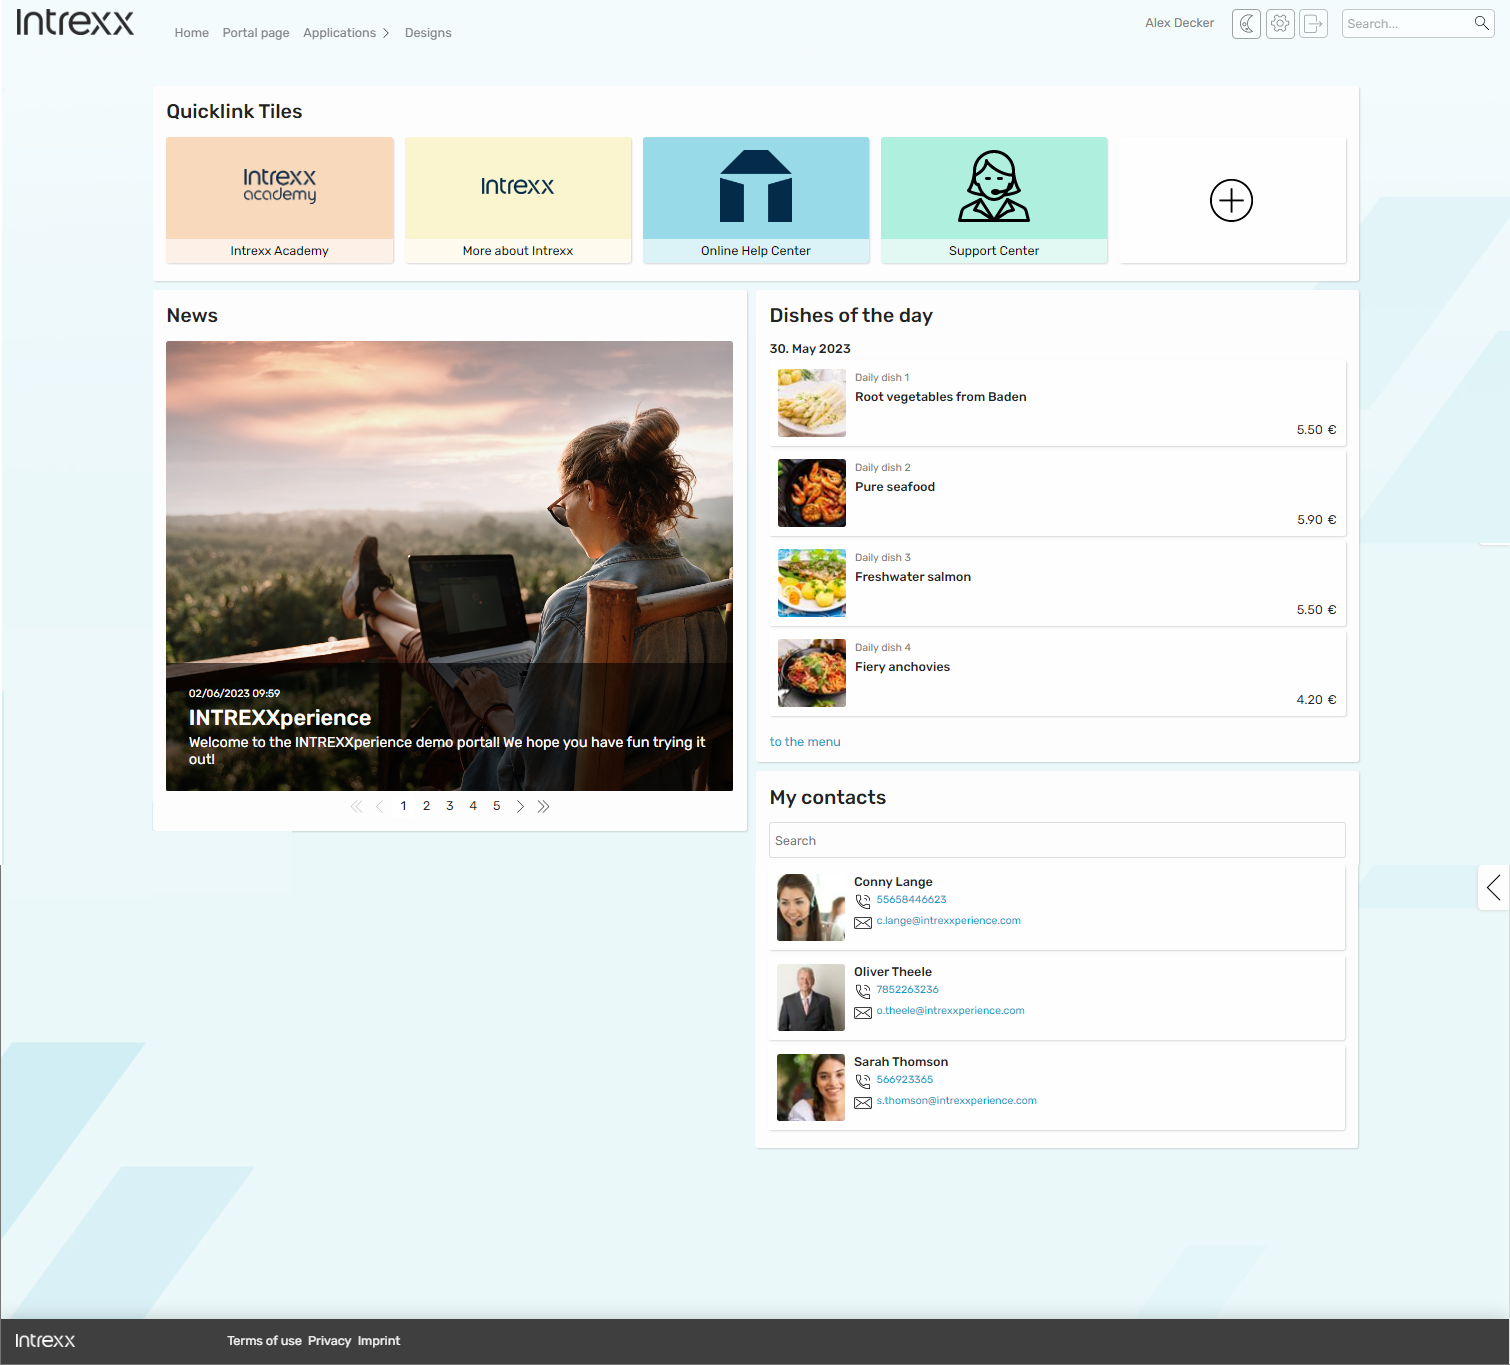
You can customize the portal page. For example, you can specify which apps should be displayed on the portal page. Since the portal page is based on a grid structure, you can also specify where the app should be placed on the portal page.
-
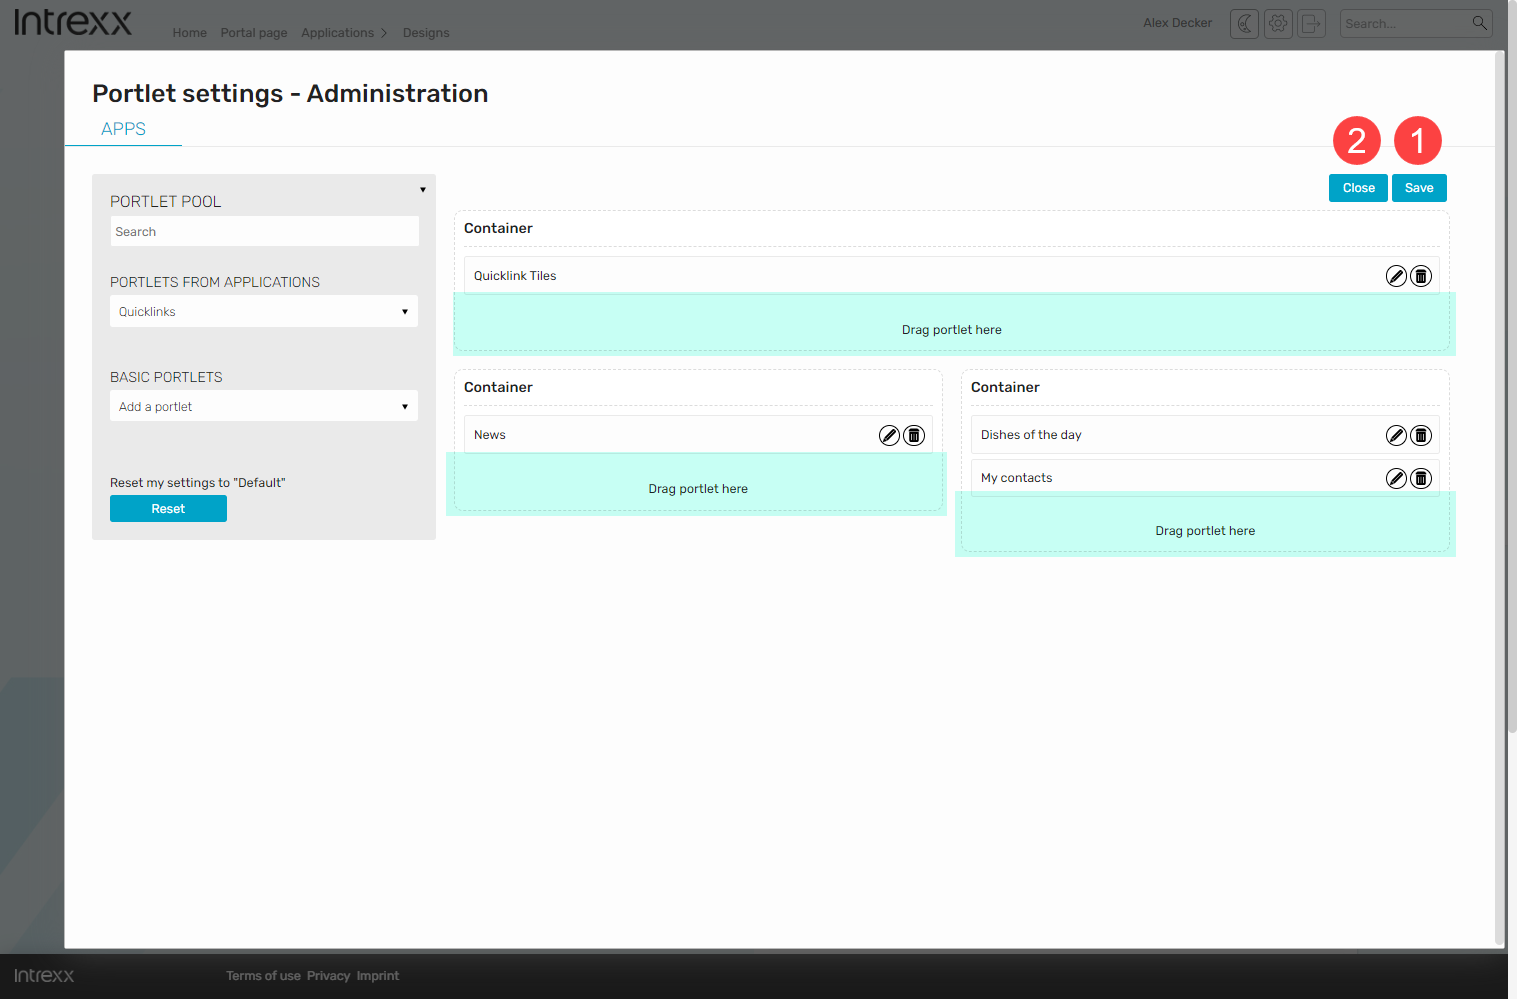
Click the arrow icon on the right margin of the browser window.
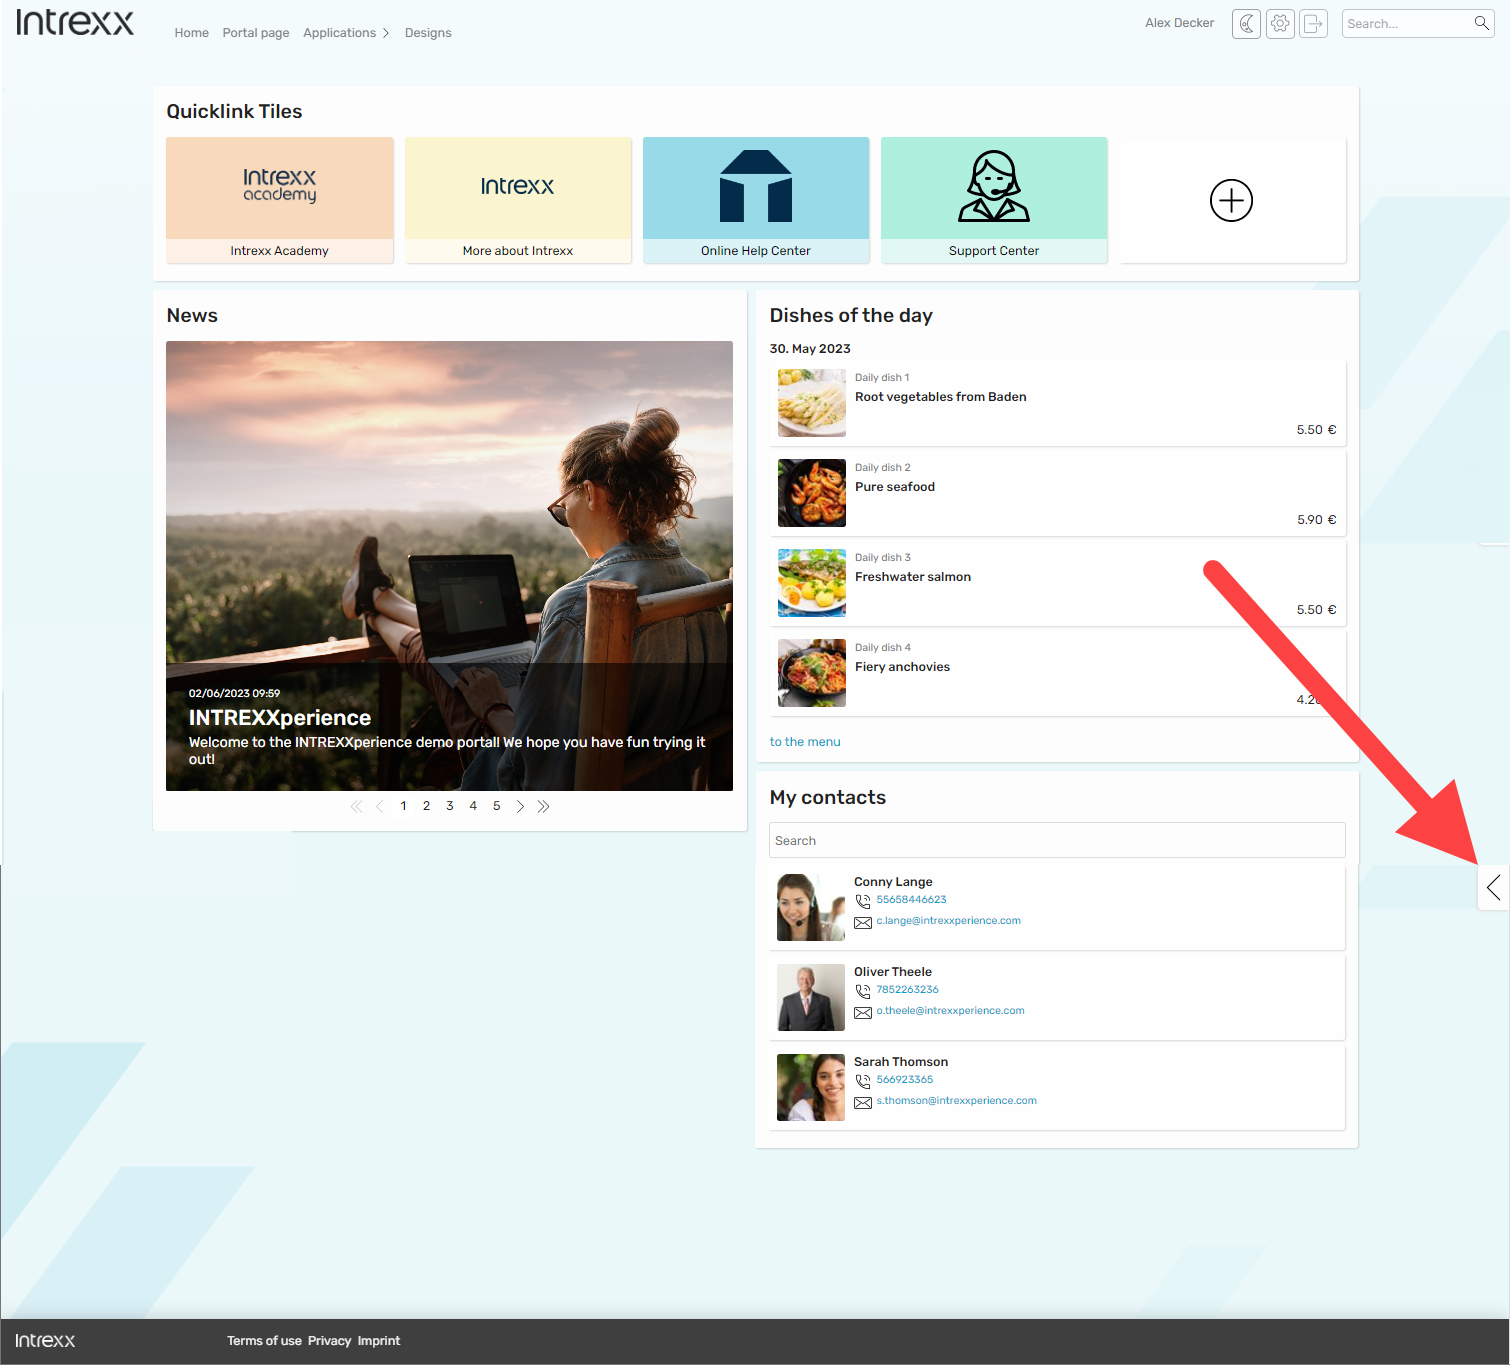
The portal customization page is displayed.
-
Drag a portlet (app) from the left pane to a designated location in the right pane.
-
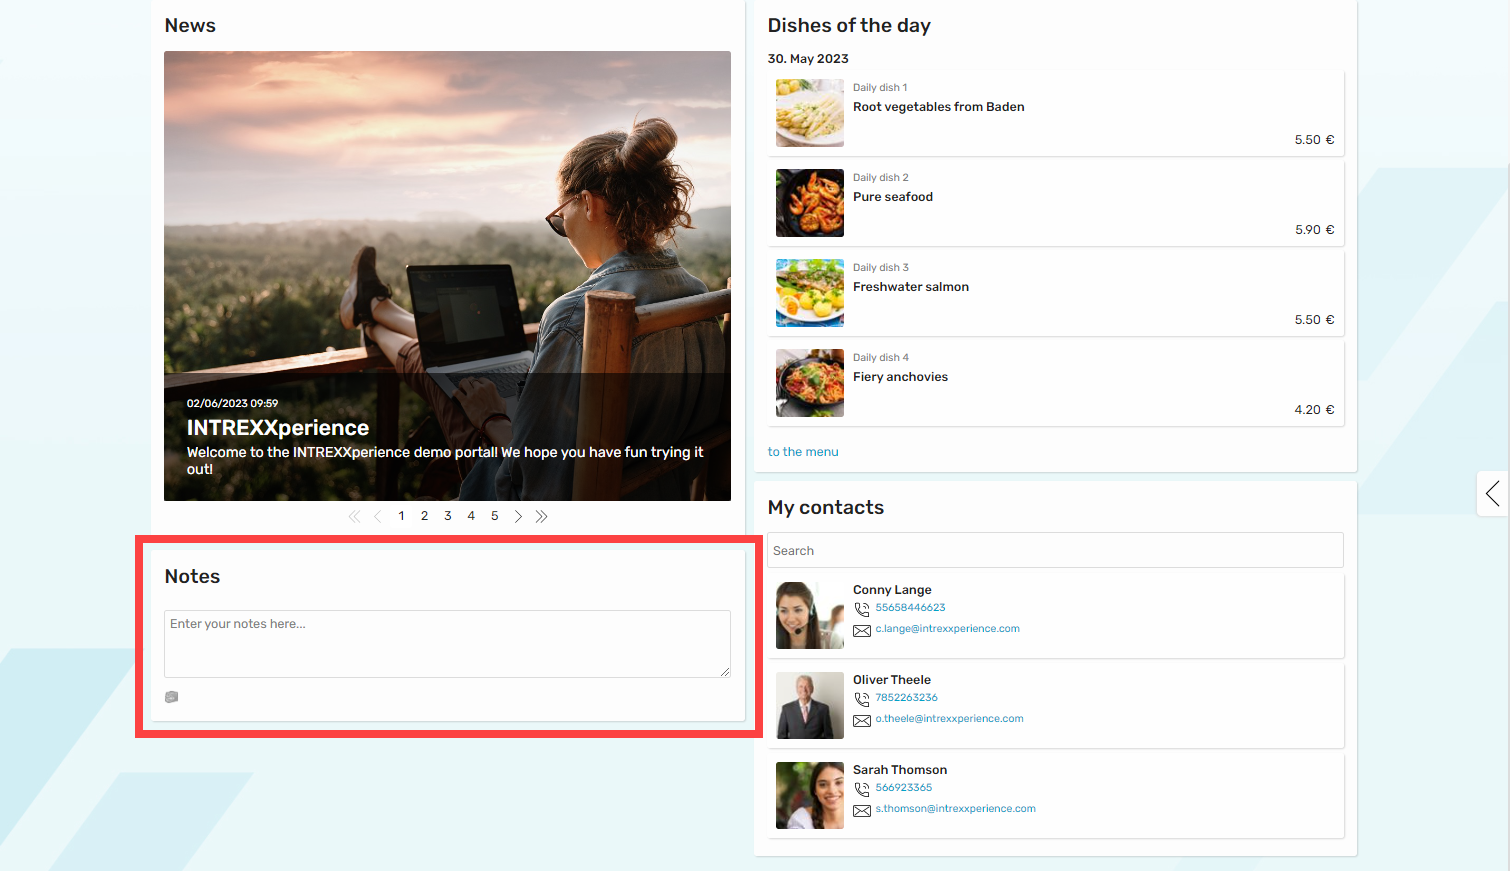
Click on Save.
-
Click on Close.
The app is now displayed on the portal page. (In the example shown, the Notes app has been added)
More information
Example - Quicklinks
You can switch between the "Light Layout" and "Dark Layout".
To switch between the two, click on the ![]() icon or
icon or ![]() icon.
icon.
Alternatively, you can also switch between the layouts via the menu ![]() (Settings).
(Settings).
Light Layout
Dark Layout - Apps
Dark Layout - News App
-
Launch the News App.
-
Click on the "Editorial" menu item.
-
Click on .
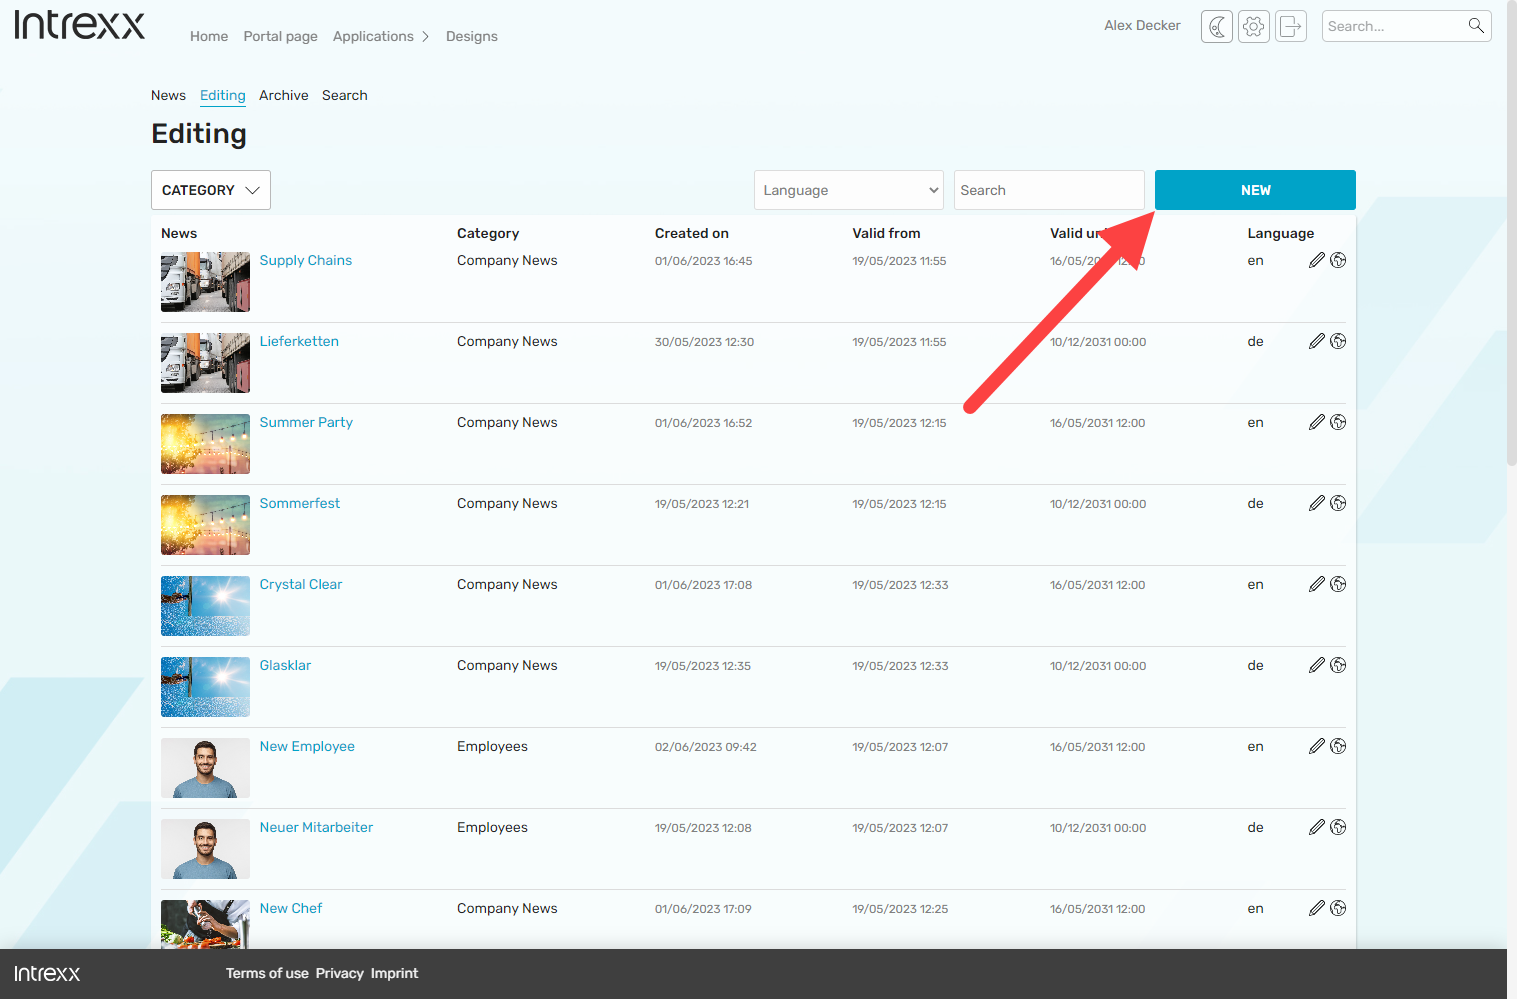
The dialog for entering the news is displayed.

-
Enter the desired information.
-
Click on .
The newly created news will be displayed in the news overview.
-
Click on the "News" menu item.
The newly created news is also displayed there.
More information
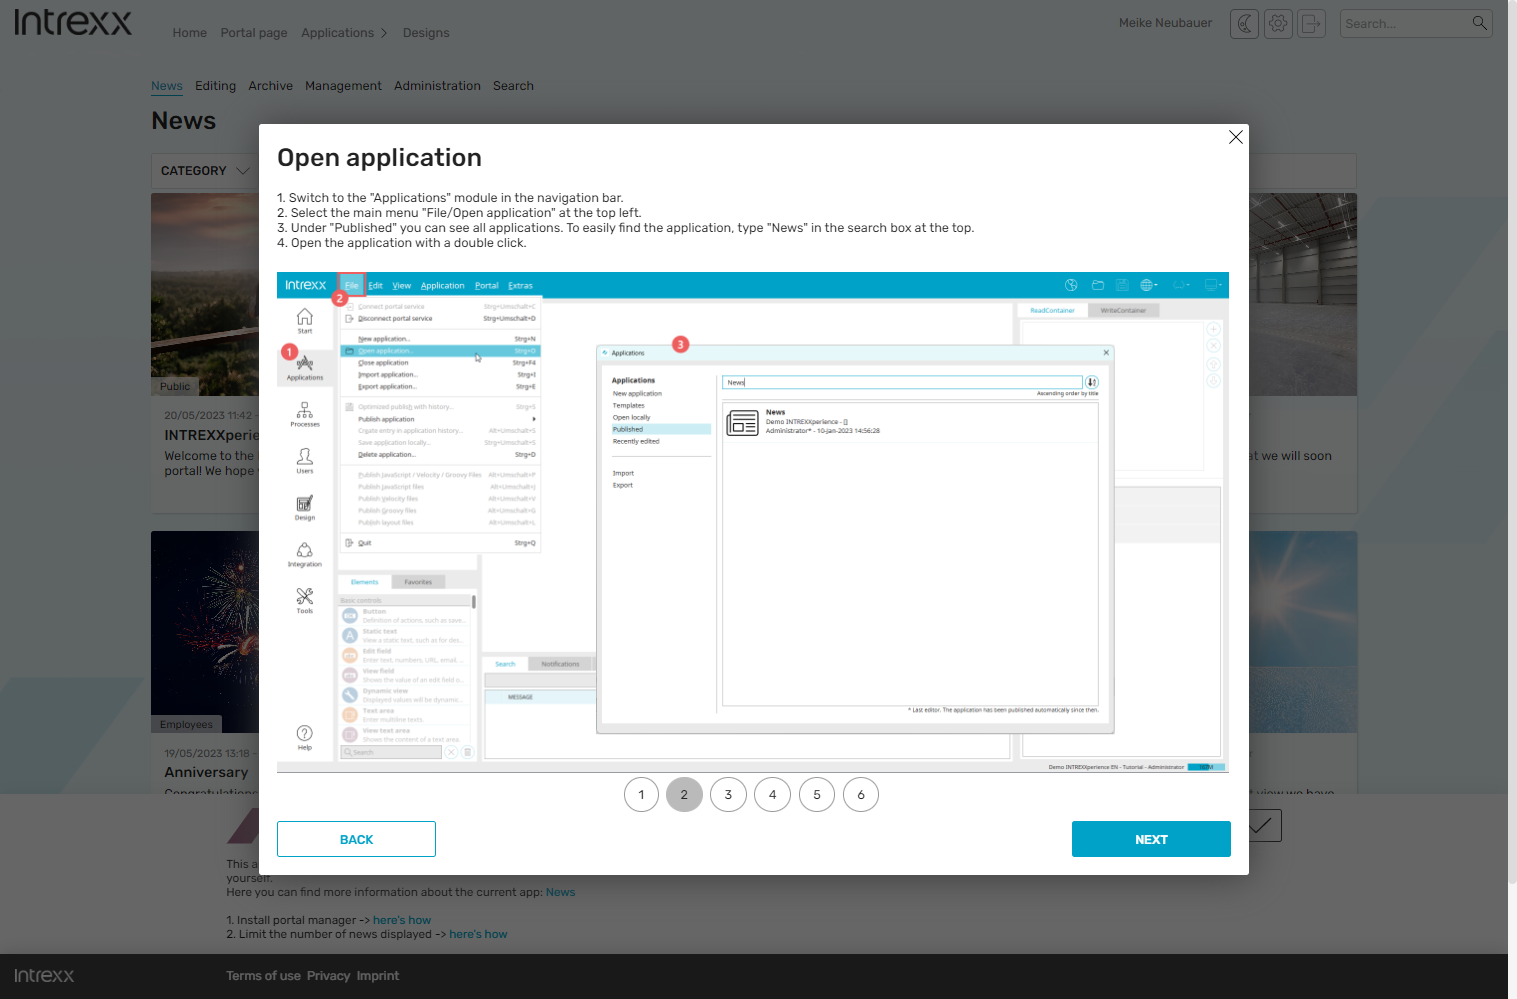
How to edit your portal with the Portal Manager
To edit your portal with the Portal Manager, you must first download it.
-
First, start your INTREXXperience portal in the browser.
-
Log in to your portal.
-
Open the menu
 (Settings).
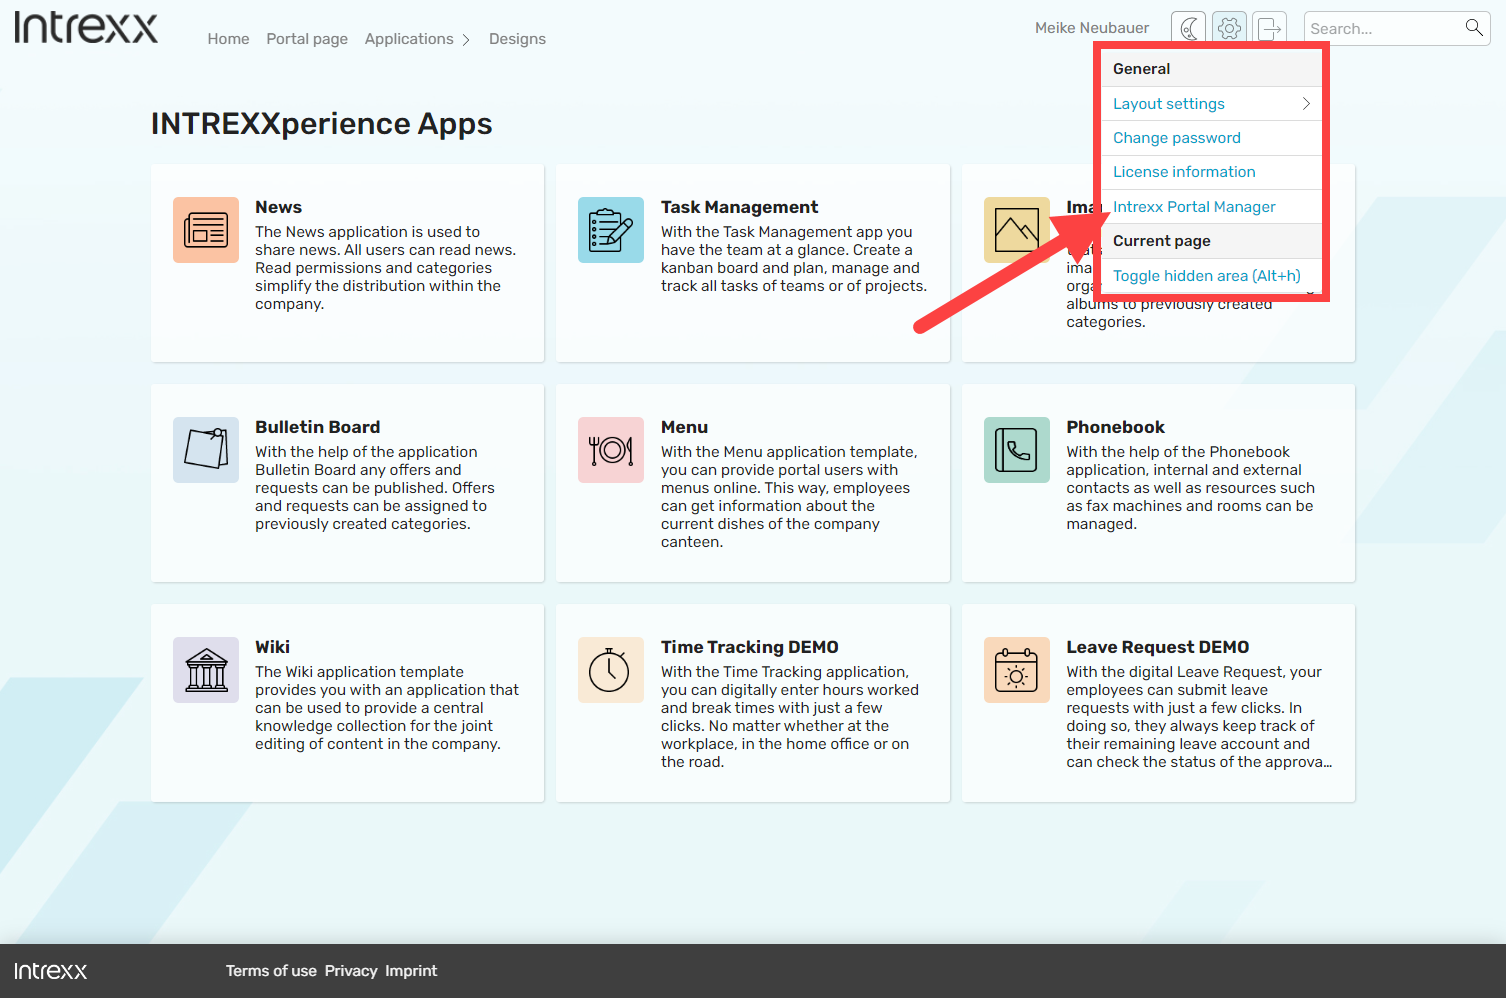
-
Click on the menu item "Intrexx Portal Manager".
The Portal Manager is downloaded.
Alternative download options
Alternatively, you can download the Portal Manager from the following locations:
Intrexx Support Center
In Intrexx Support Center , you can download the Portal Manager under Intrexx Downloads > Portal Manager.
Online Help
You can also download the Portal Manager directly from the online help here.
| Up to 12.0.4 | As of 12.1.0 | |
|
Windows |
Download | Download |
|
Linux |
Download | Download |
|
Mac |
Download | Download |
The Portal Manager does not require installation. You can start it by simply double-clicking on the file "IX-Manager.exe".
-
Open the directory where you downloaded the Portal Manager.
-
Extract the zip file.
-
Navigate to the directory "intrexx-manager".
-
Double click on the file "IX-Manager.exe".
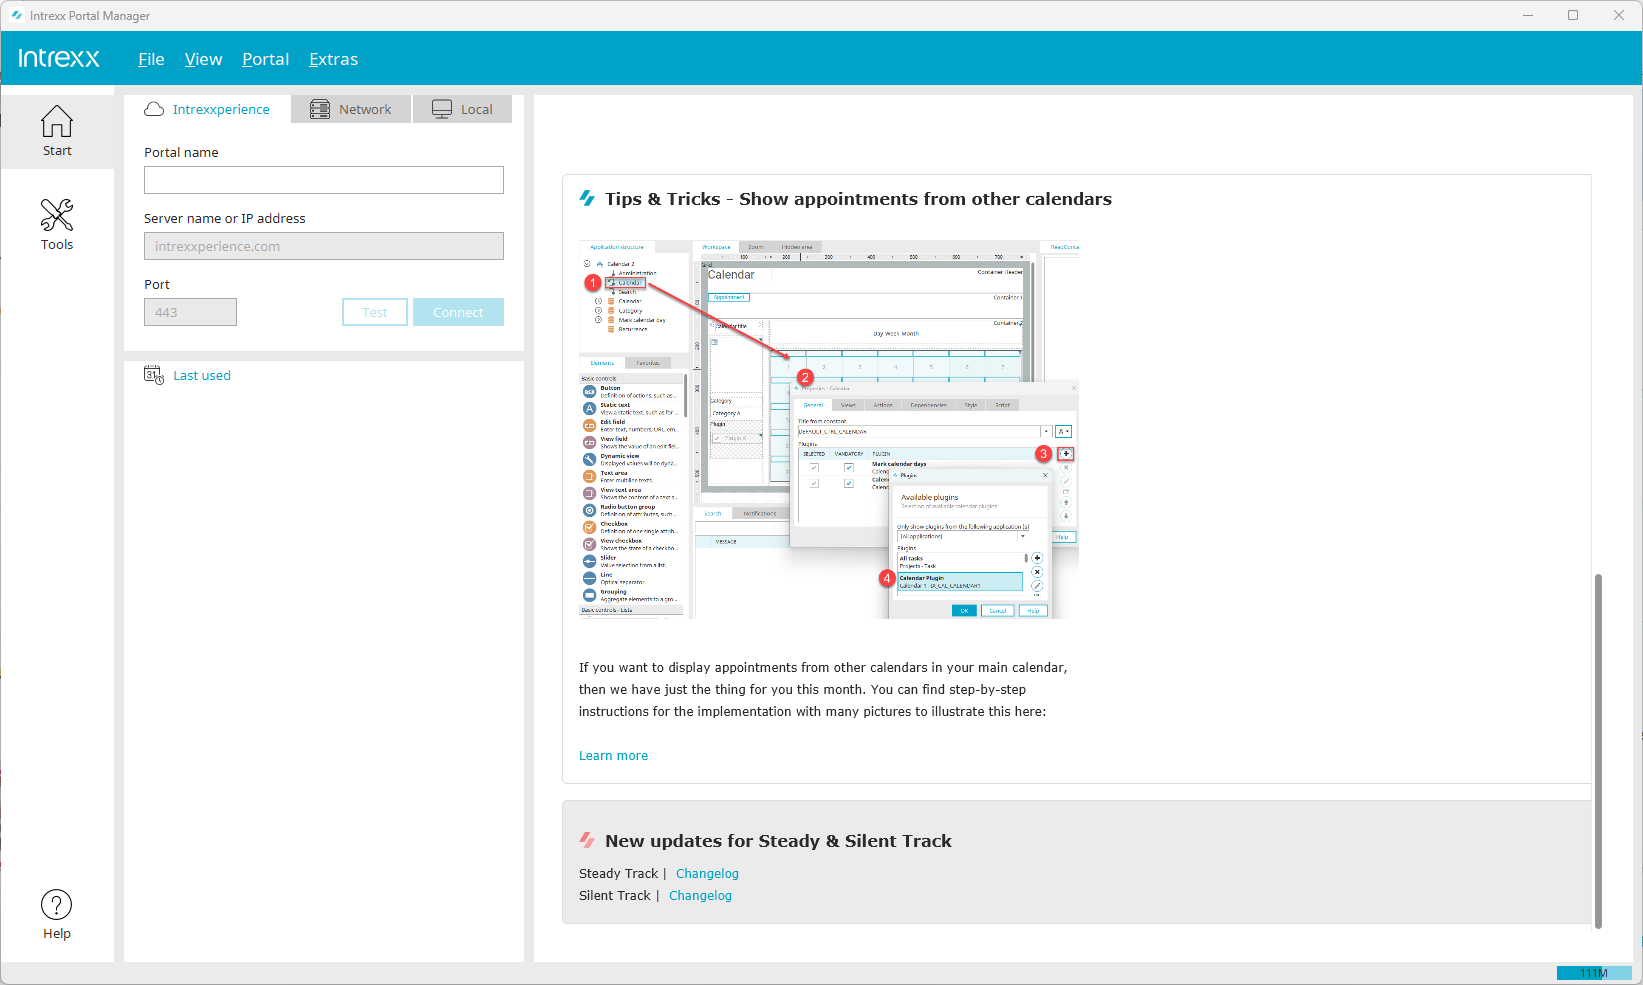
The Intrexx Portal Manager is started.
-
Start the Portal Manager.
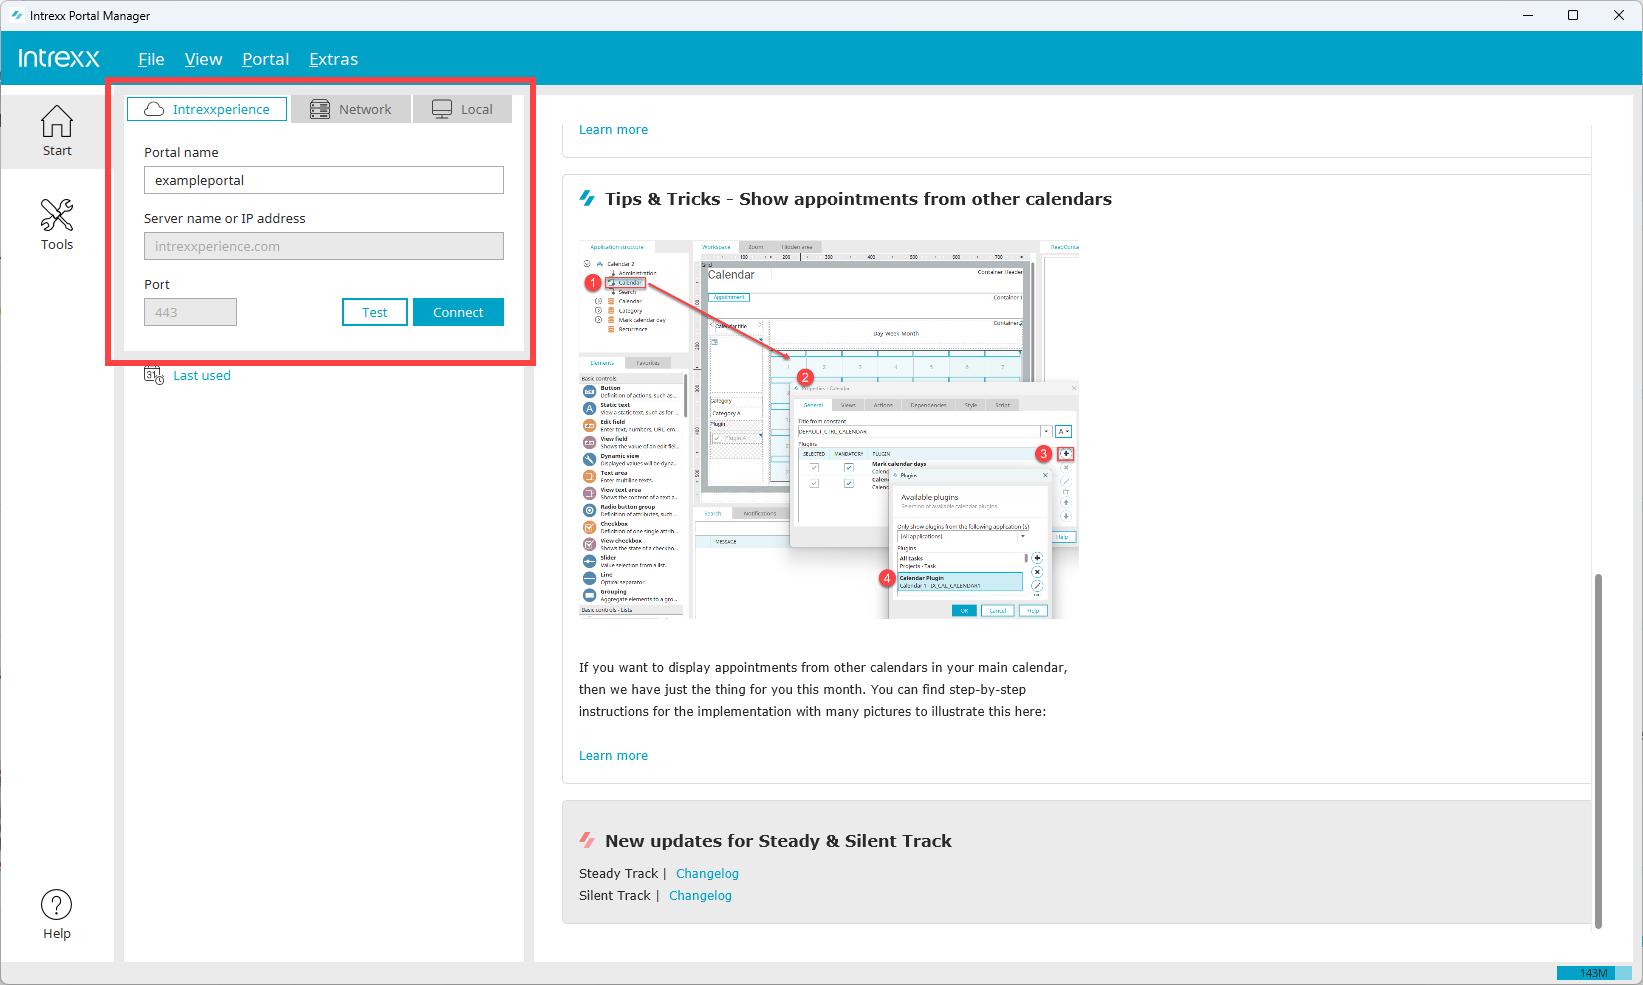
-
Enter the portal name you received in your access data.
-
Click on .
The login dialog is displayed.
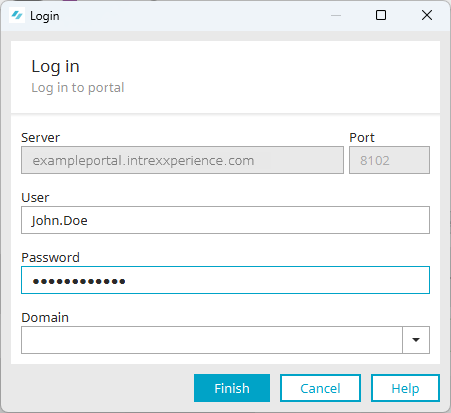
-
Enter the login data you received in your access data.
(No entry is required in the "Domain" field)
-
Click on .
The Portal Manager and all its modules and functions are displayed.
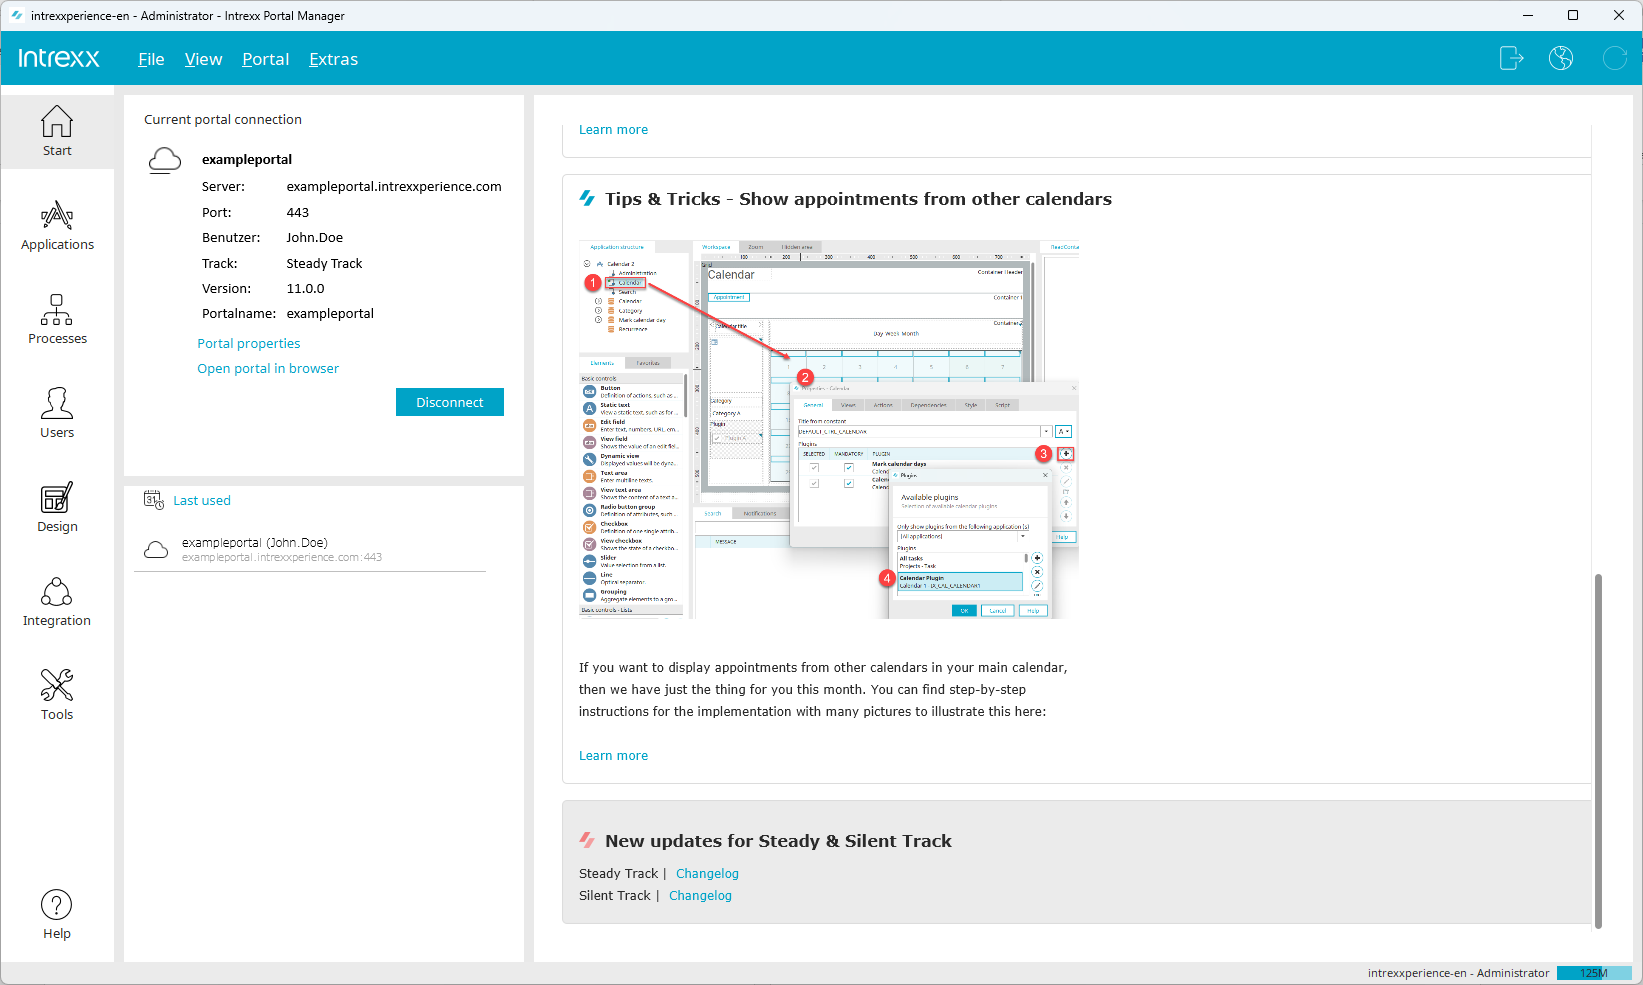
You have connected to your portal (or Portal Manager) and can now use the corresponding functions.
More information
In the INTREXXperience portal, you will find a tutorial for each app. The tutorials describe examples of how you can make changes to the respective app in the Portal Manager.
You can find the tutorial at the bottom of the browser window.
Click on the arrow icon.
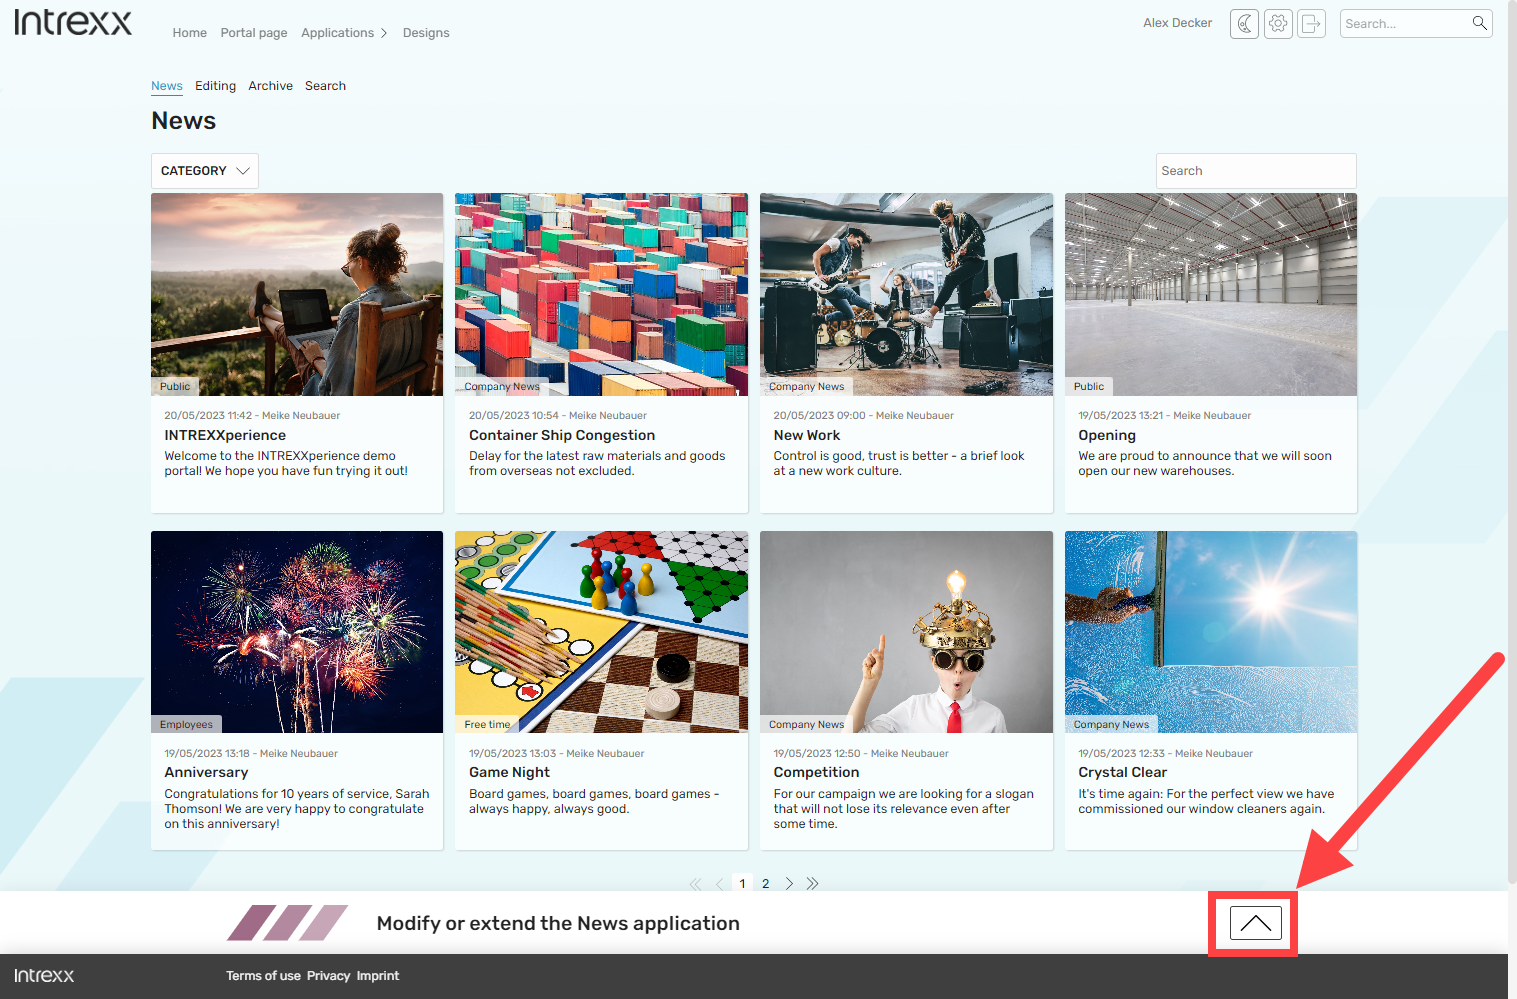
Tips and links to change the app are displayed.
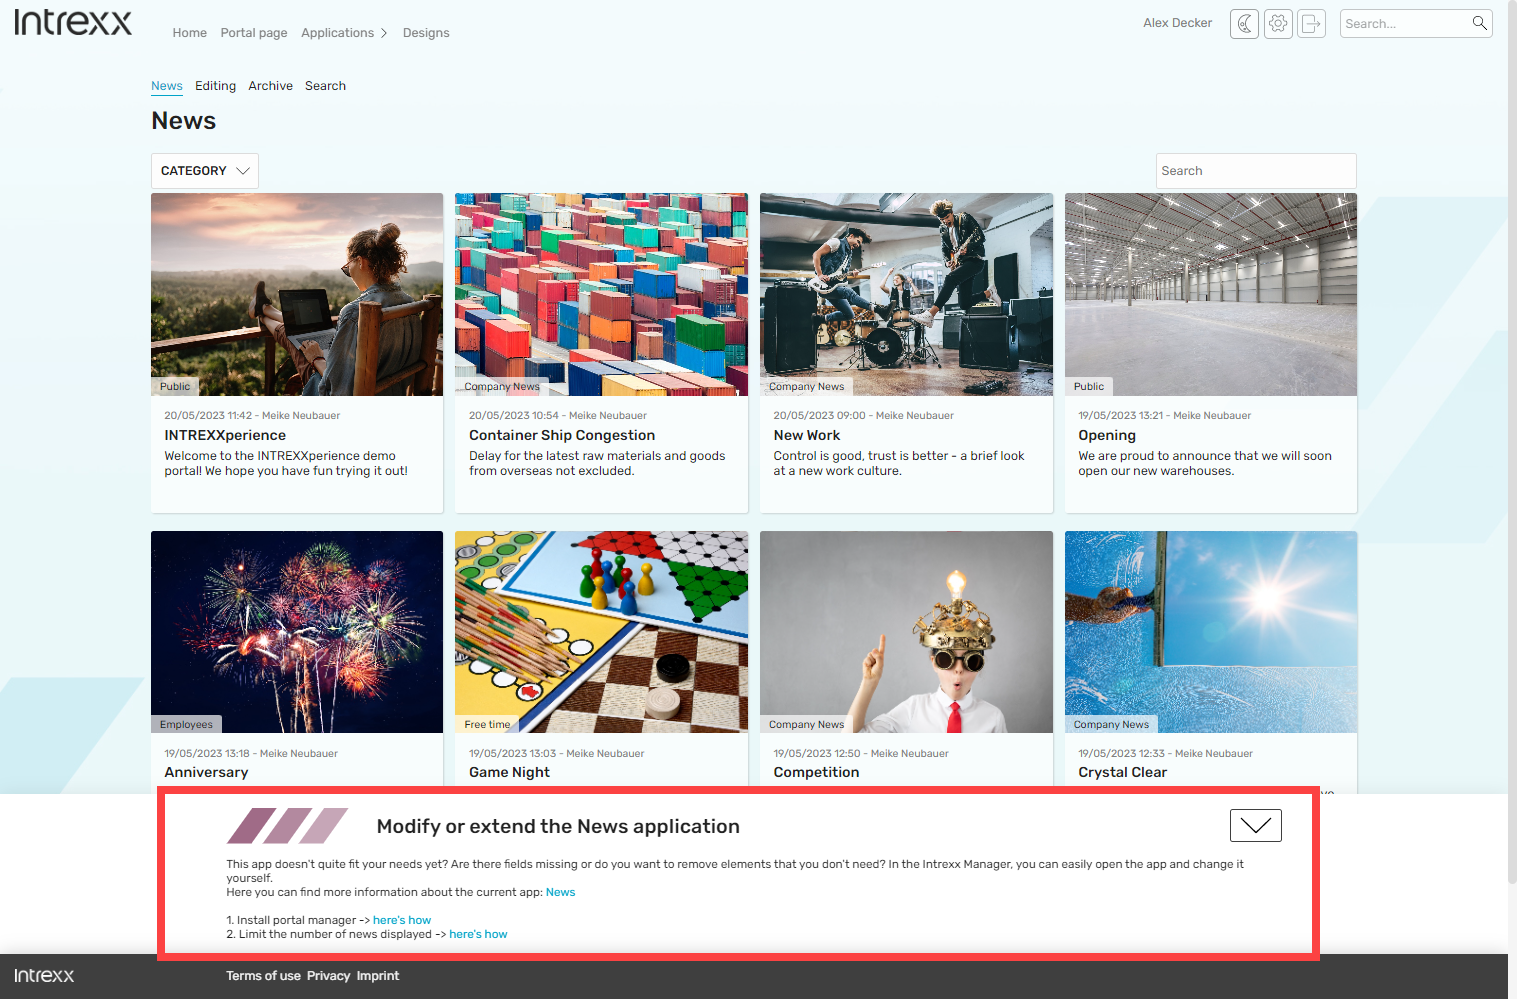
You can start the tutorial via the corresponding link.
You can make the changes to the portal using the Portal Manager while the tutorial is also displayed.
In addition to the (preinstalled) apps in the INTREXXperience portal, INTREXX Ltd offers several other apps. You can import these into the INTREXXperience portal and use them later.
The following section describes how to import the Resources app into your portal.
With the "Resources" app, portal users with appropriate rights ("User" role) can book or reserve resources such as meeting rooms or company vehicles.
Step-by-step guide
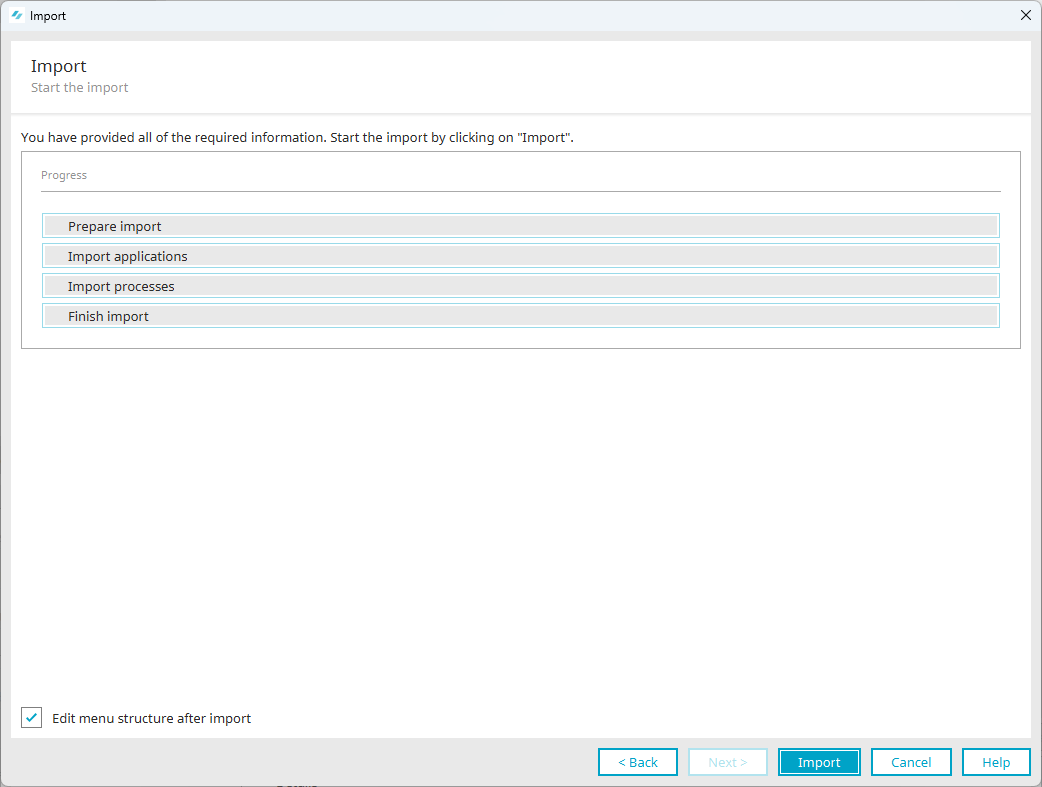
To import the "Resources" app, proceed as follows:
-
Start the "Applications" module.
-
The "Applications" dialog ("Application Manger") will appear.
-
Select the menu item "Templates".
The online application templates are displayed in the right area of the dialog.
-
Scroll down to the "Resource" app.
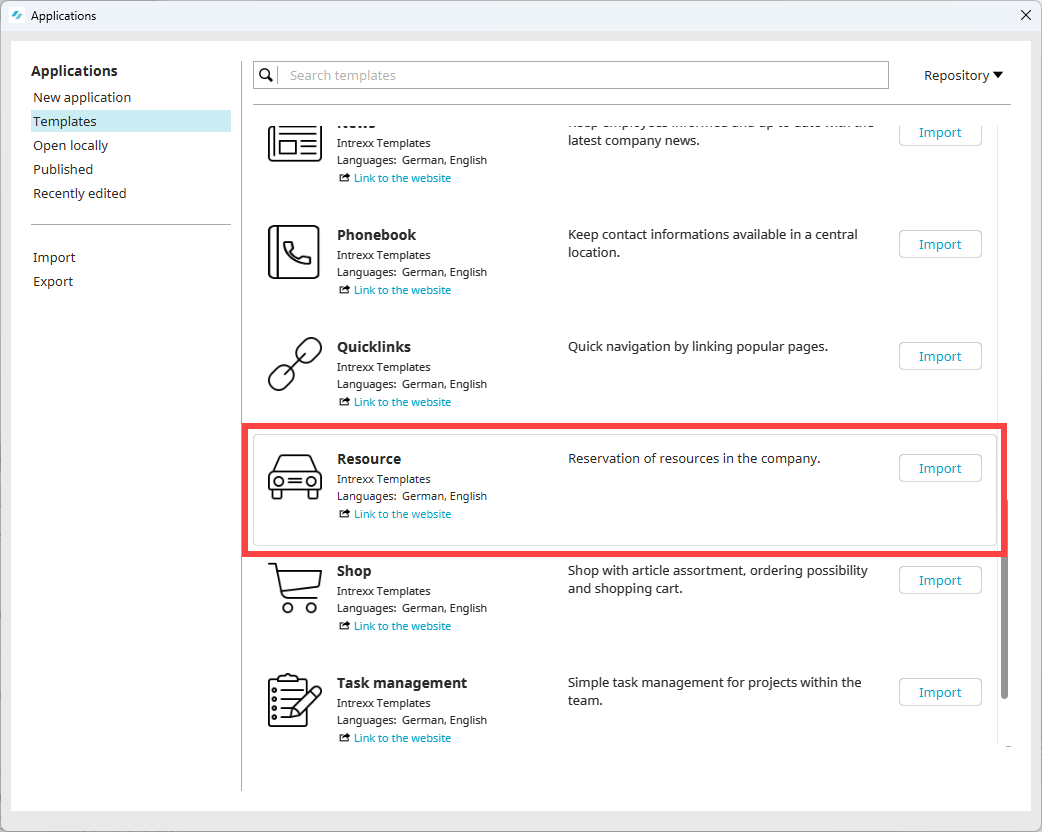
-
Click Import to the right of the Resource app.
The import process starts.
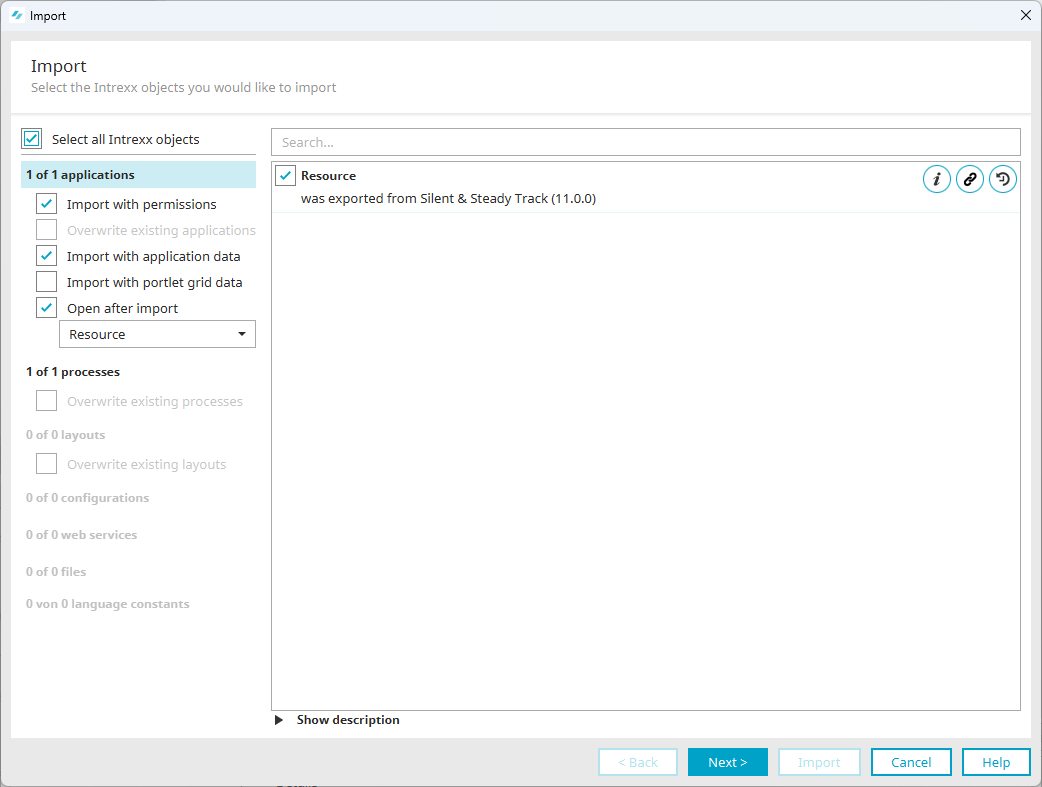
-
Click on "Next".
-
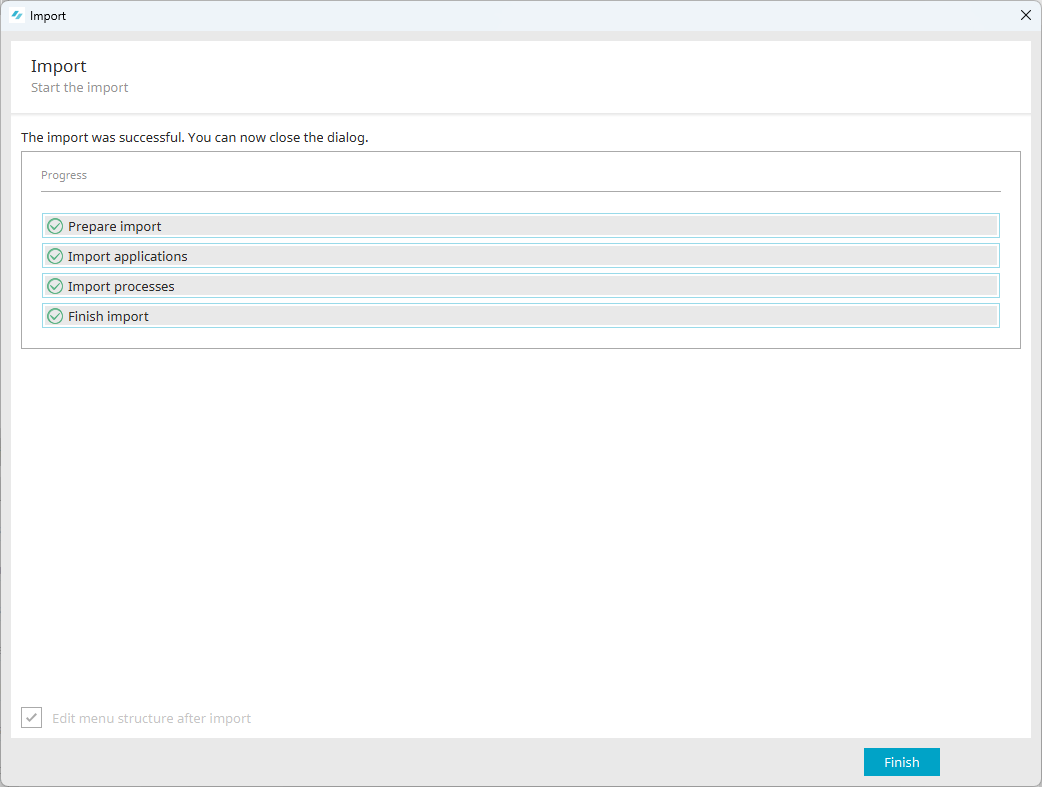
Click on "Import".
-
(Optional) Select the "Edit menu structure after import" checkbox if you want to edit where the application is added to the menu structure in the next dialog.
-
Click on "Finish".
By default, a newly created application is added under the "System" menu item.
You will now be in the Application Designer.
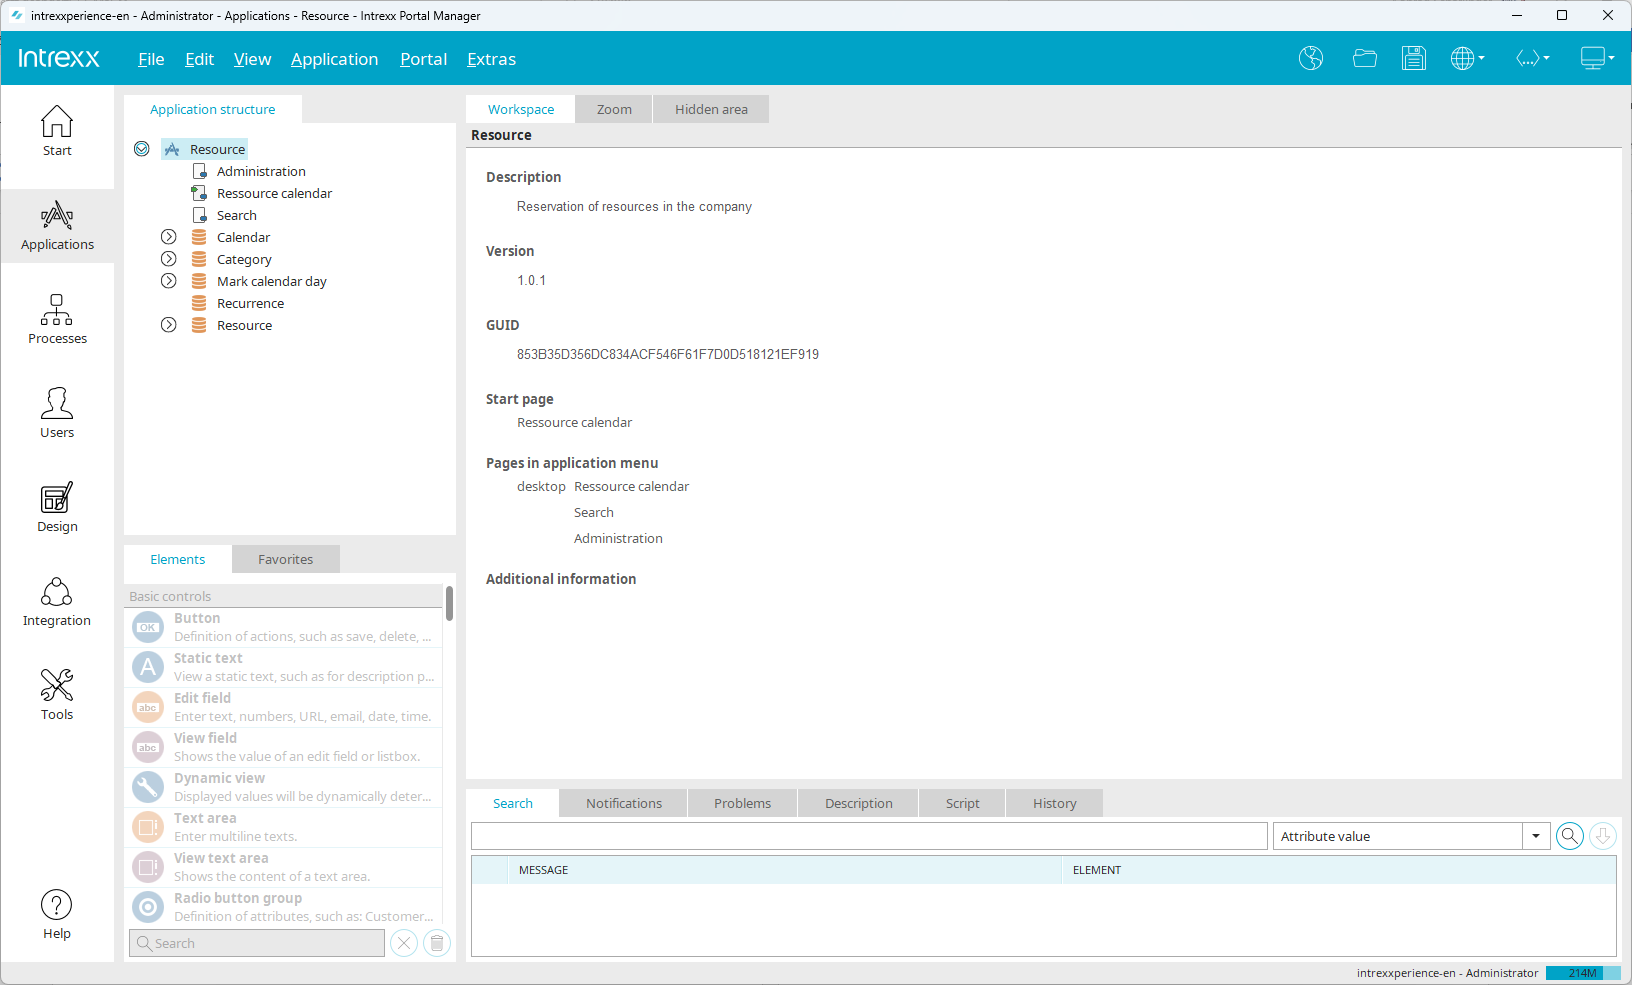
You can now edit the application.
More information
Tutorial