Create an application |
|
Starting situation
In your company, computer hardware is (still) being managed with Excel.
You have been given the task of carrying out an inventory. The aim is to determine whether employees have a PC, a laptop or a tablet.
Goal
You no longer want to use Excel. And you don't want to ask employees what device they have. Instead, employees should record which device they have themselves.
Your application could look something like this:
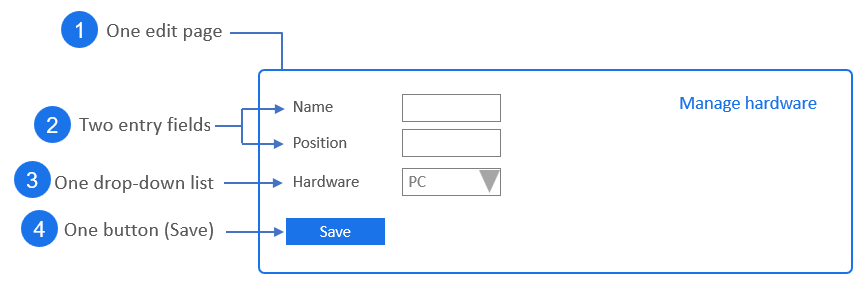
Page 1 - "Manage hardware"
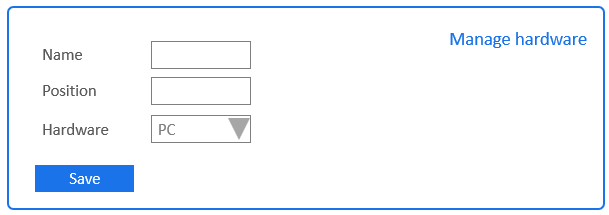
Elements of page 1 - "Manage hardware"
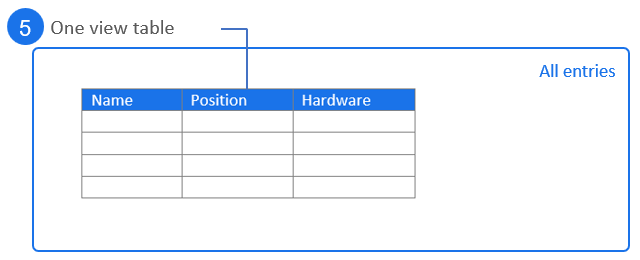
Page 2 - "All entries"

Elements of page 2 - "All entries"
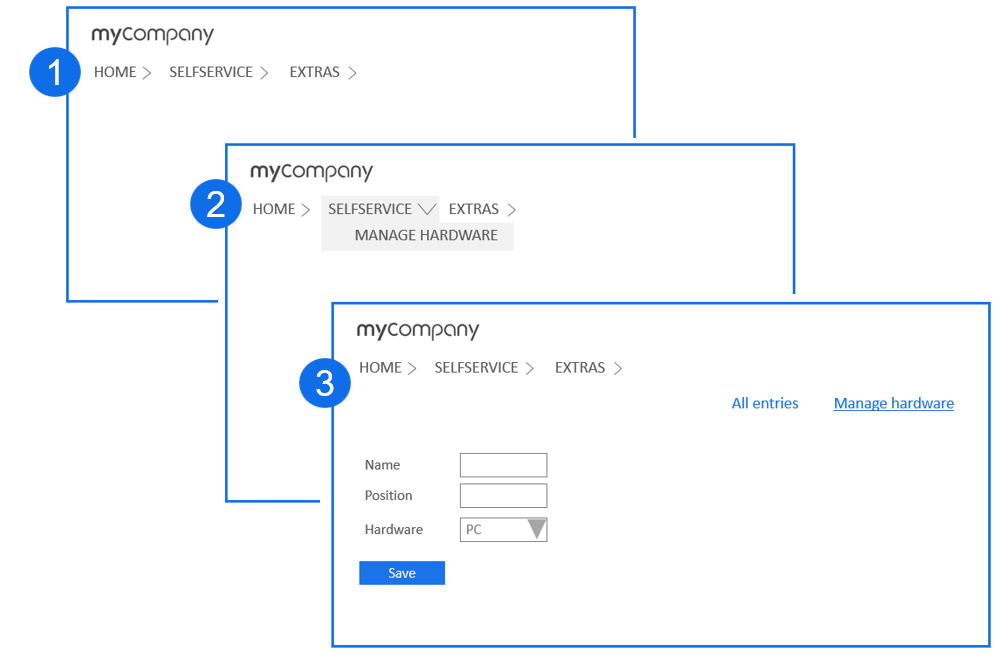
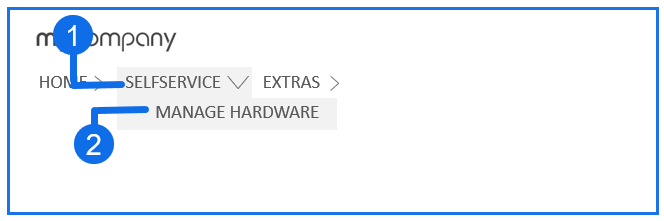
We want your application to be integrated into the enterprise portal. There, users should be able to access it via the "SELF-SERVICE" menu.
Solution
Create an application with Intrexx. All the necessary components are available to you "out-of-the-box".
The following is a ten-step guide that will walk you through the application creation process.
During this process you will create an application "from scratch", i.e. all application components will be added to blank pages.
If you do not want to start from scratch when creating an application, you can use the application templates provided by (Undefined variable: General.CompanyName-without-GMBH).
Application templates Intrexx comes with a number of application templates. They already come with a wide range of functionalities. Have a look through our templates. You may find that they already meet your requirements. Or extend the templates to make your vision a reality. The steps described in this tutorial will be of great help to you when extending the templates.
In the first step, create an "Empty Application" in Intrexx. The "Empty Application" is included in the application templates provided with Intrexx.
Step-by-step guide
-
Start the "Applications" module.
-
Select "File > New application". (Ctrl+N).
The "Applications" dialog ("Application Manger") will appear.
-
Click on next to "Empty application".
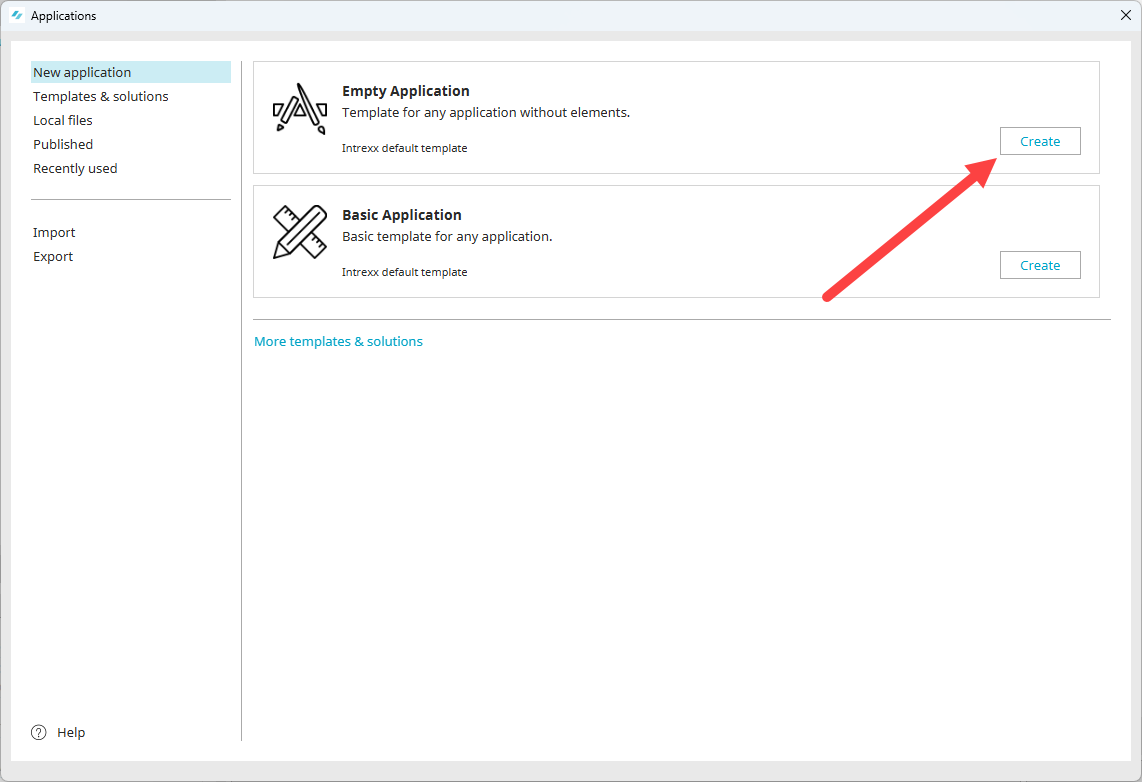
The so-called Application Designer will open. This is the graphical interface that you use to create the web application.
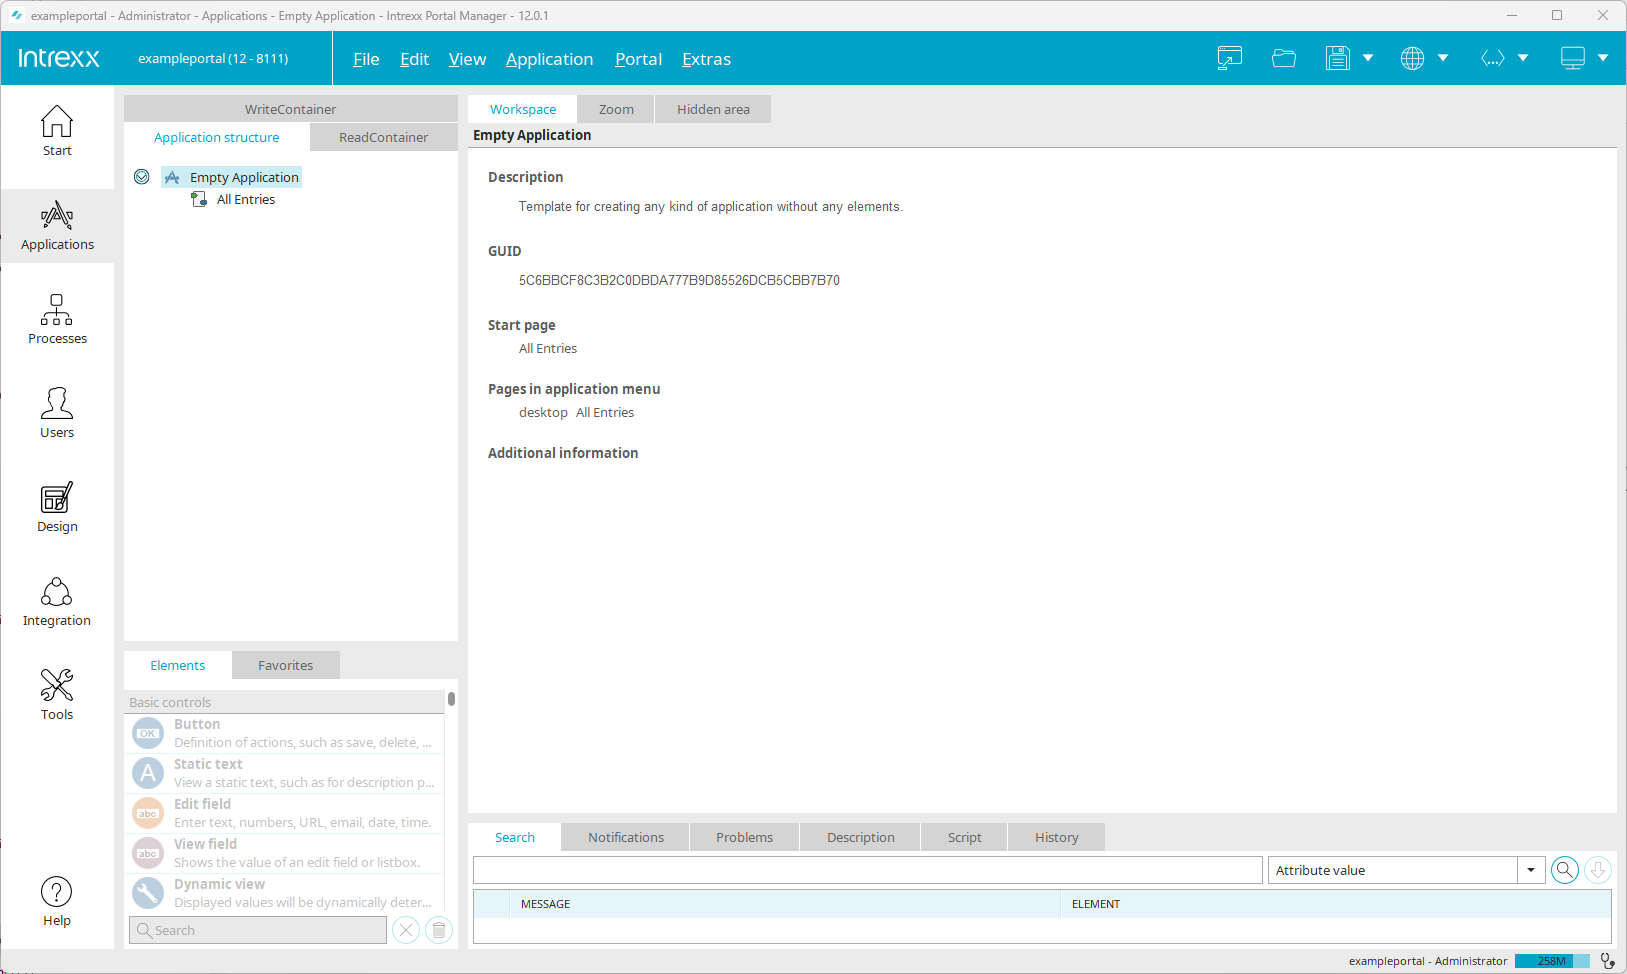
You have now already created the technical basis for the new application.
During the application creation process, Intrexx already created a (web) page called "All Entries". This will be used later for displaying the data.
-
Give the application a suitable name: "Manage Hardware".
-
Highlight the name of the application and press F2.
The name can now be edited.
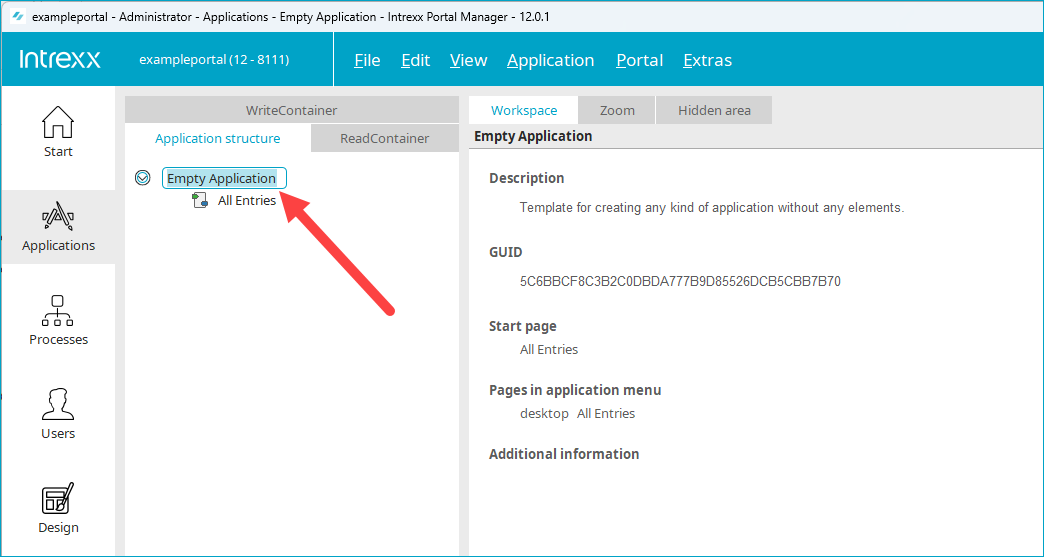
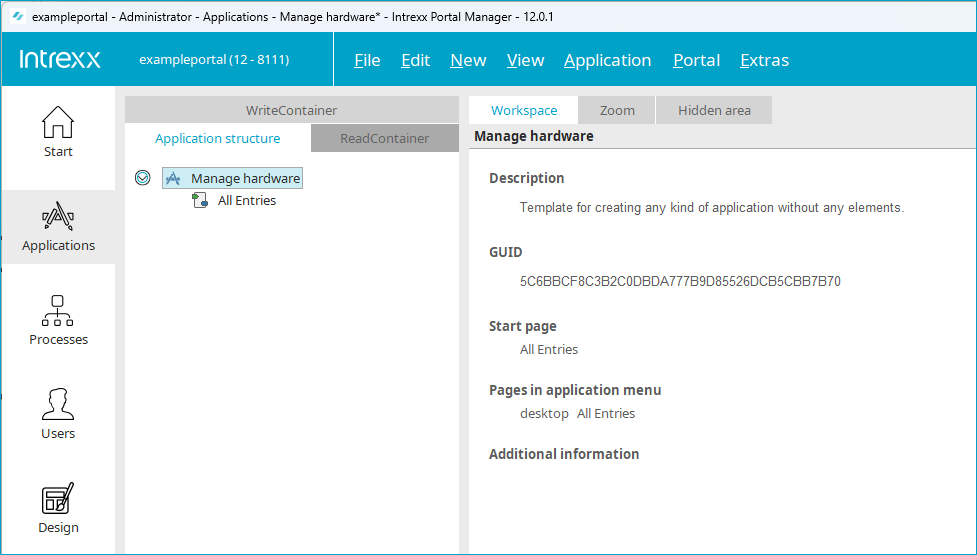
-
Change the name to "Manage Hardware".
In the second step, add a data group to the application.
Data groups are used to store data. They correspond to a table in a database or - if you like - a data sheet in an Excel spreadsheet.
The data group itself will not be displayed in the application. Later - in Step 9 - Add a view table - you will create a view table. Its job is to display the date.
Step-by-step guide
-
Select "Manage Hardware" and right-click.
-
Select "New > Data group".
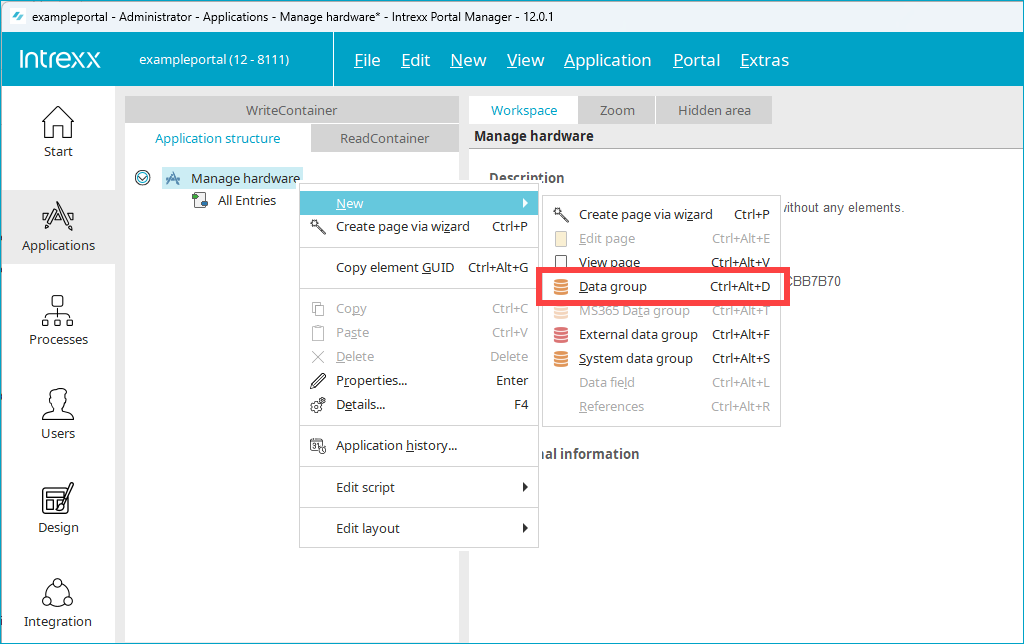
The "Properties - Data group" dialog will open.
-
Enter "Hardware" as the title. (You can also use any other title for the data group).
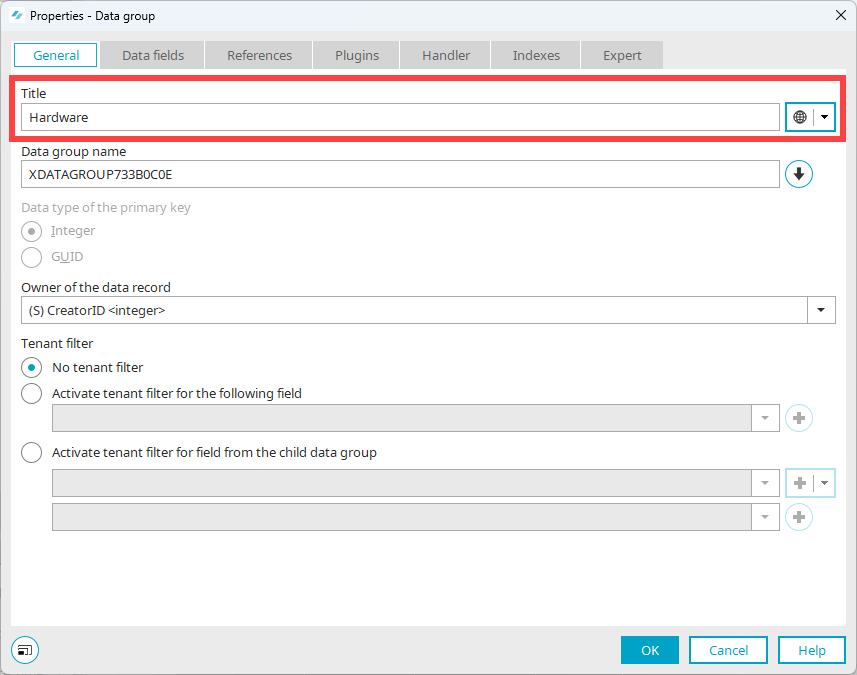
-
Click on "OK".
The data group will appear in the application.
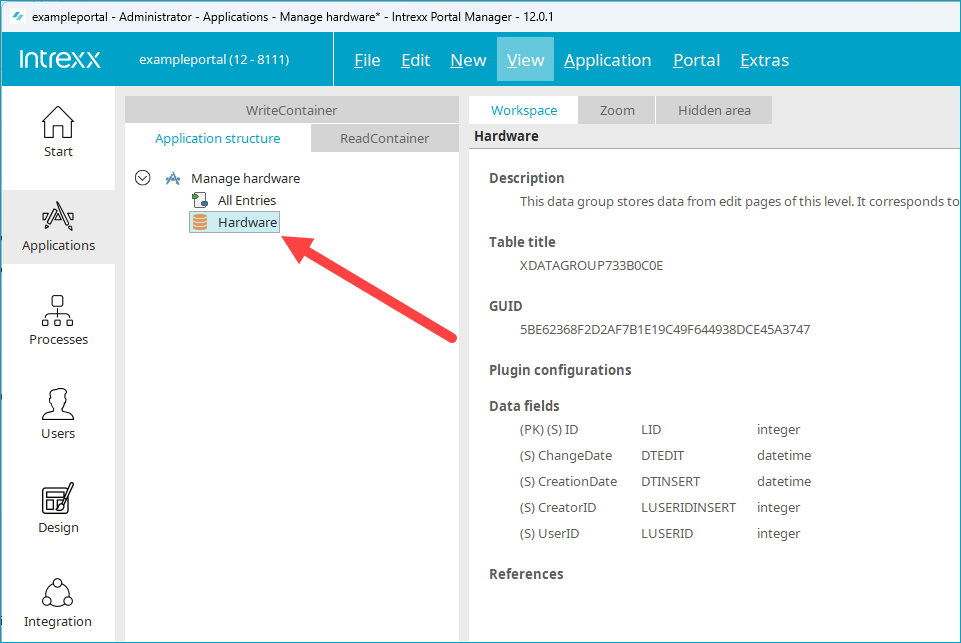
Next, you need an edit page where you can add the edit fields and buttons.
Step-by-step guide
-
Select the "Hardware" data group and right-click.
-
Select "New > Edit page".
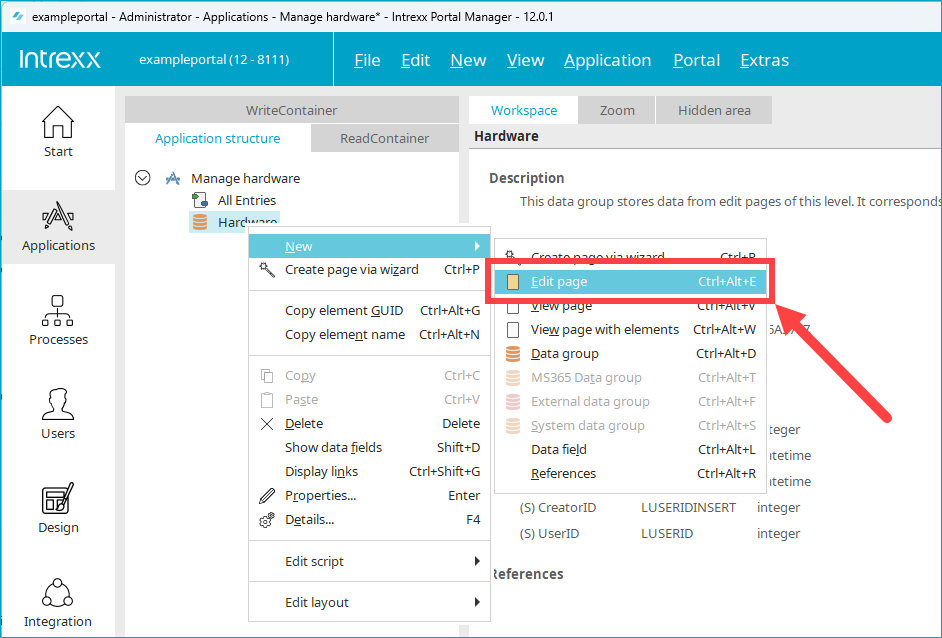
The "Properties - Edit page" dialog will open.
-
Enter "Define hardware" as the title. This title will be displayed later in the application.
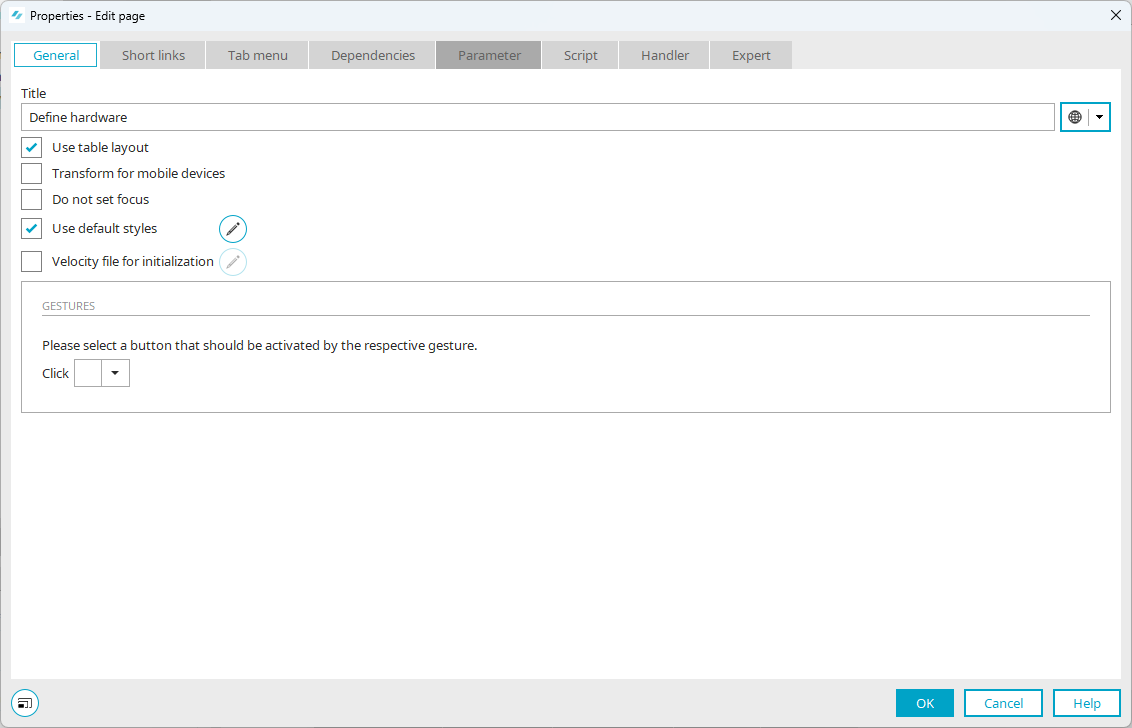
-
Click on "OK".
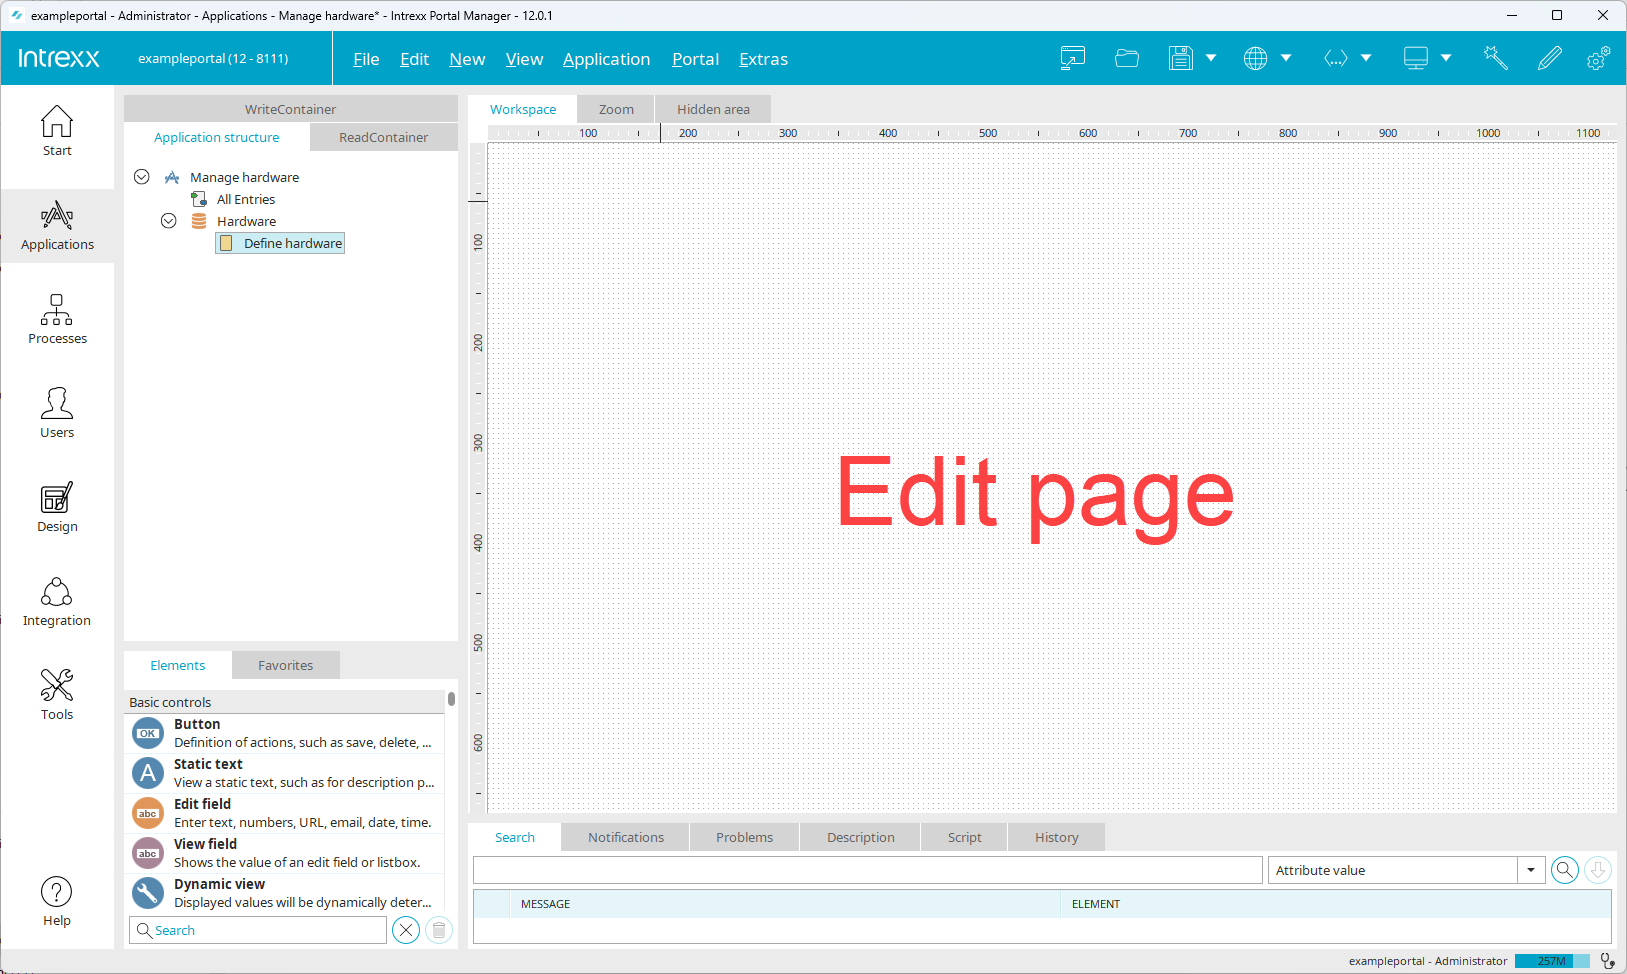
The edit page will now appear in the application.
The new pages are not immediately displayed in the portal or in the browser. They must be added to the application menu first.
Step-by-step guide
-
Select the "Manage Hardware" application and right-click.
-
Select "Properties"
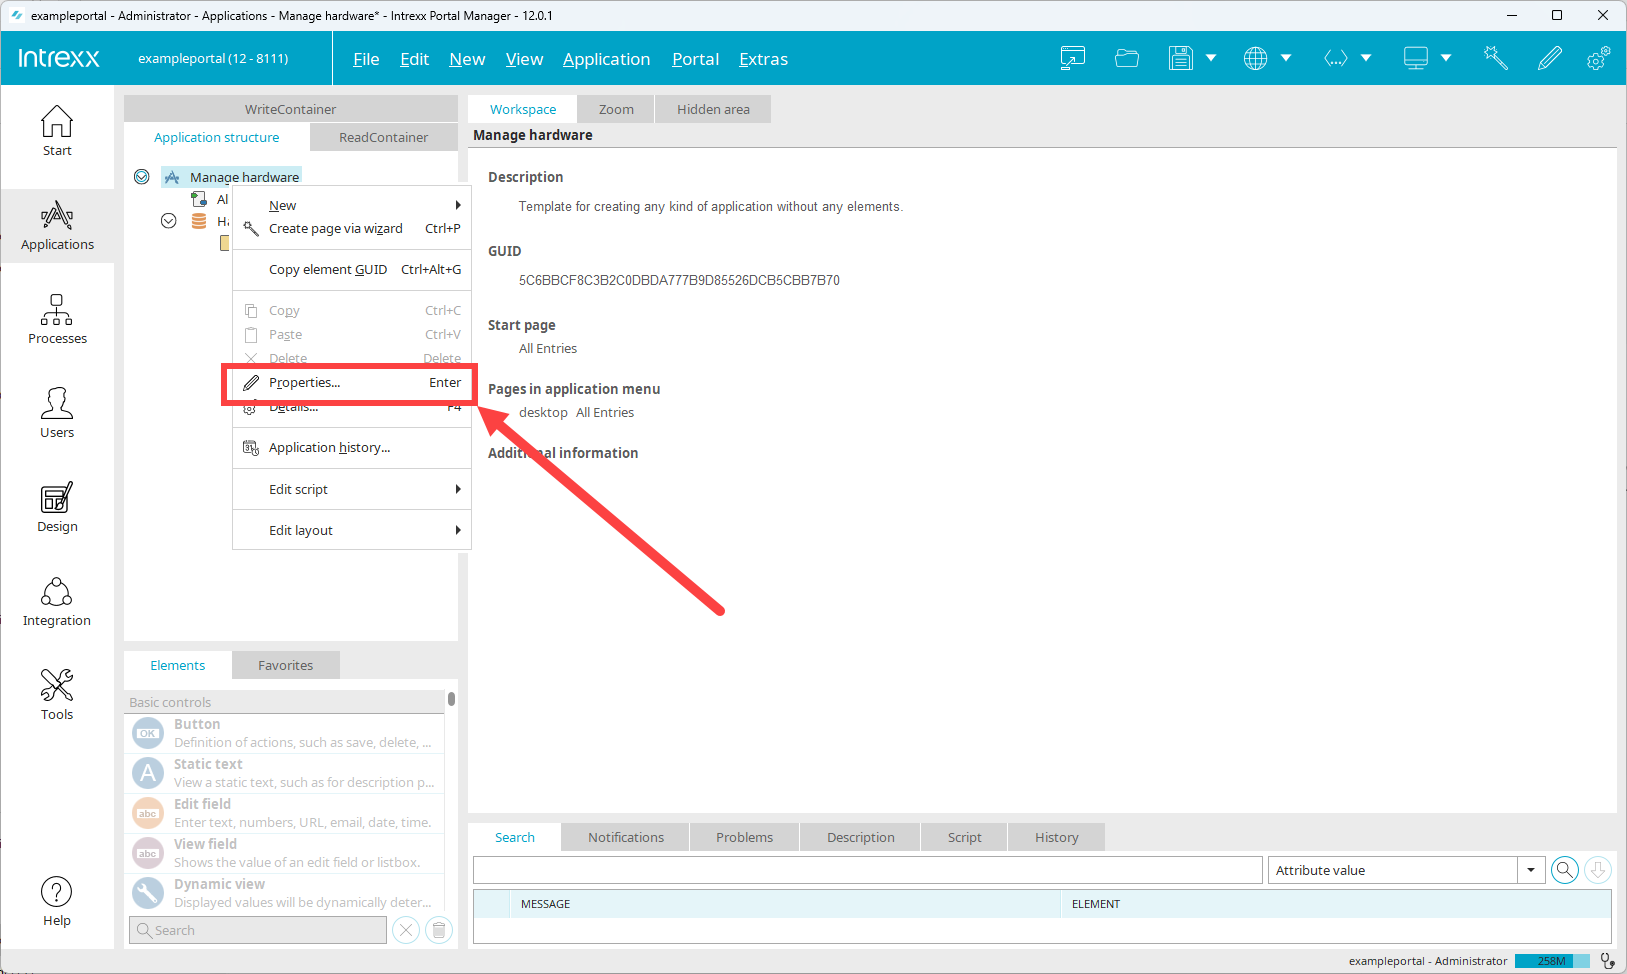
The "Properties - Application" dialog will open.
-
Go to the "Application menu" tab.
-
In the "Available pages" area, select the "Define hardware" entry.
-
Move the "Define hardware" entry to the "Selected pages" area.
To do this, click on the
 icon.
icon.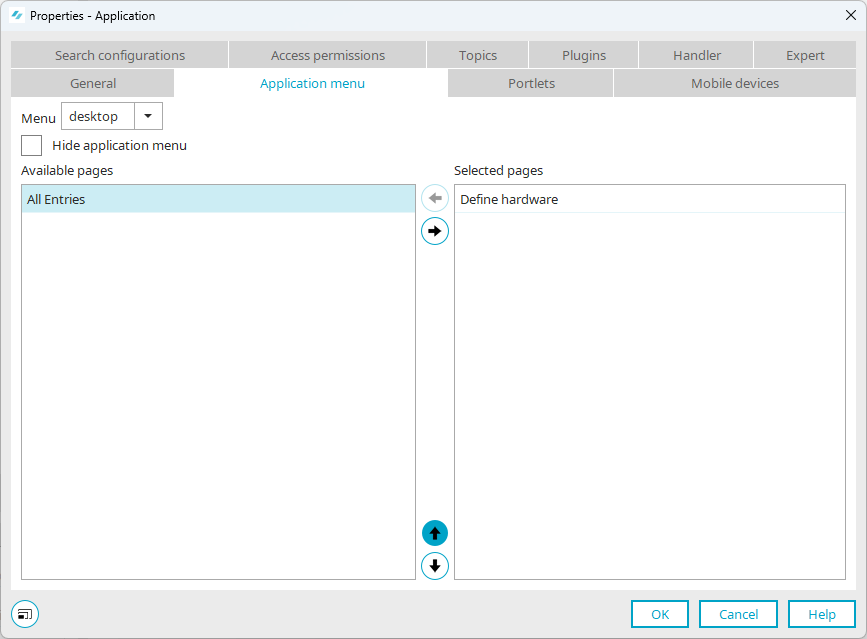
-
Click on "OK".
You will return to the Application Designer.
In the next step, we want to view the application for the first time in the portal, or rather browser. (This will help us check our work progress).
To do this, the new application needs to be published.
You can also decide to publish the application once you have completed it. If you want to do this, skip this step for now and do it instead at step 10.
In the course of publishing an application for the first time, you will be asked to specify where the application should be integrated in the portal menu.
In our case, the new application "Manage hardware" (1) should be accessed under the main menu item "SELF-SERVICE" (2).
At the moment, the portal does not have a "SELF-SERVICE" menu item. So that we have a "SELF-SERVICE" menu item, we will rename the "SYSTEM" menu item, which is in every portal by default, to "SELF-SERVICE".
Step-by-step guide
-
Click on the
 icon in the menu bar (Optimized publish).
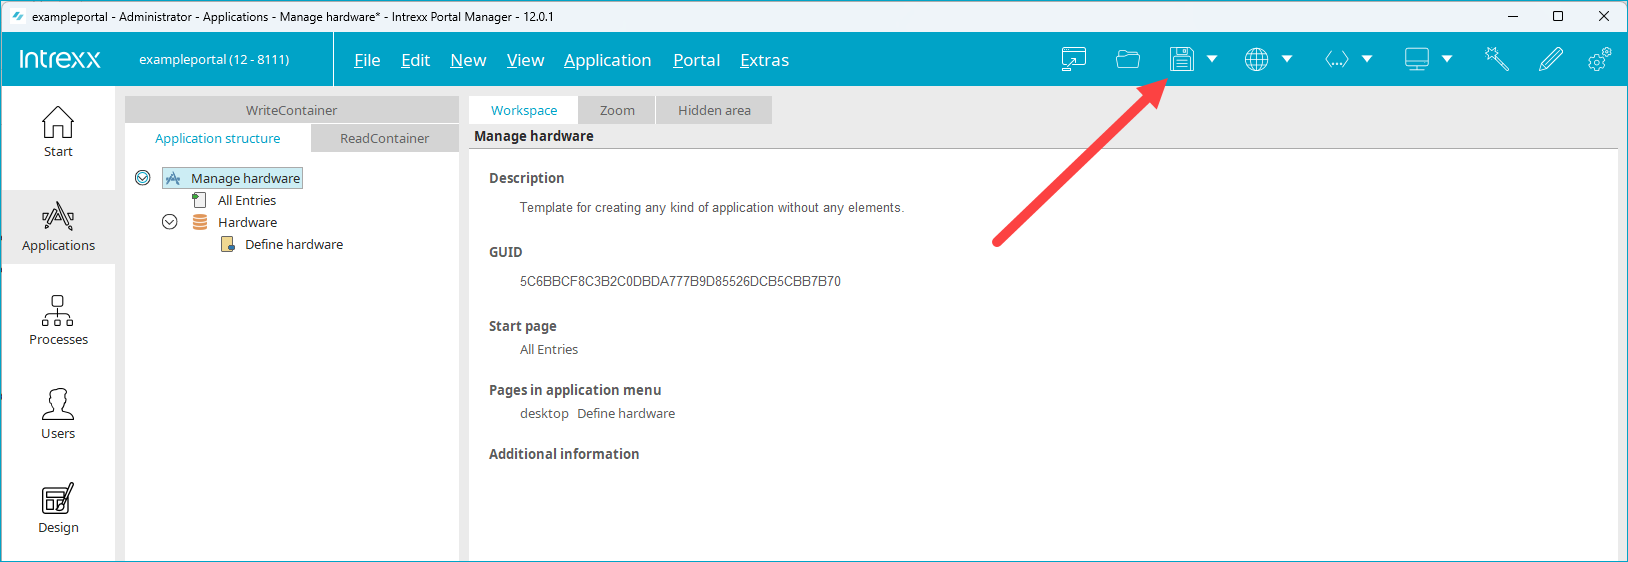
The "Edit menu" dialog will open.
The Edit Menu dialog only appears automatically when you publish the application for the first time. However, you can change the settings made here manually at any time via "Portal > Edit menu structure".
-
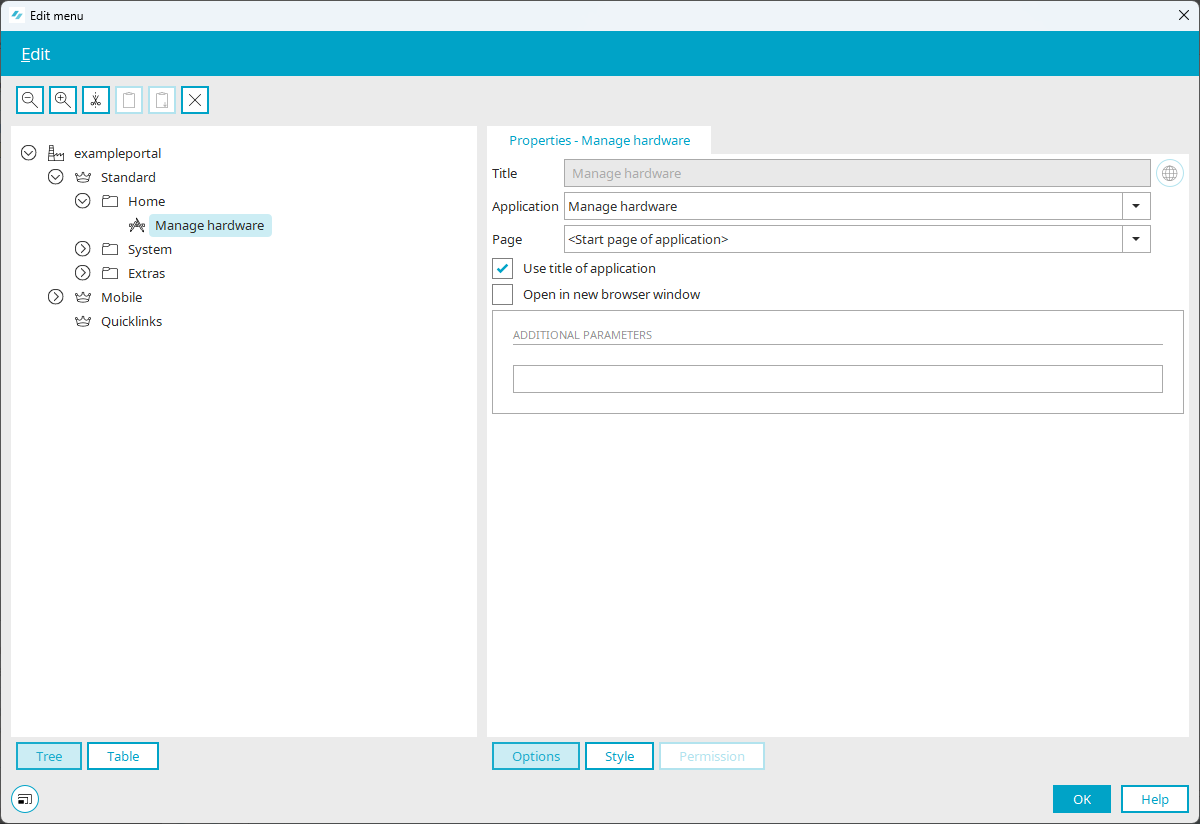
Open the "Home" menu folder in the left pane.
The new application "Manage hardware" is currently placed there.
-
Drag-and-drop the application "Manage hardware" into the "System" menu folder.
-
The dialog will look like this afterwards:
-
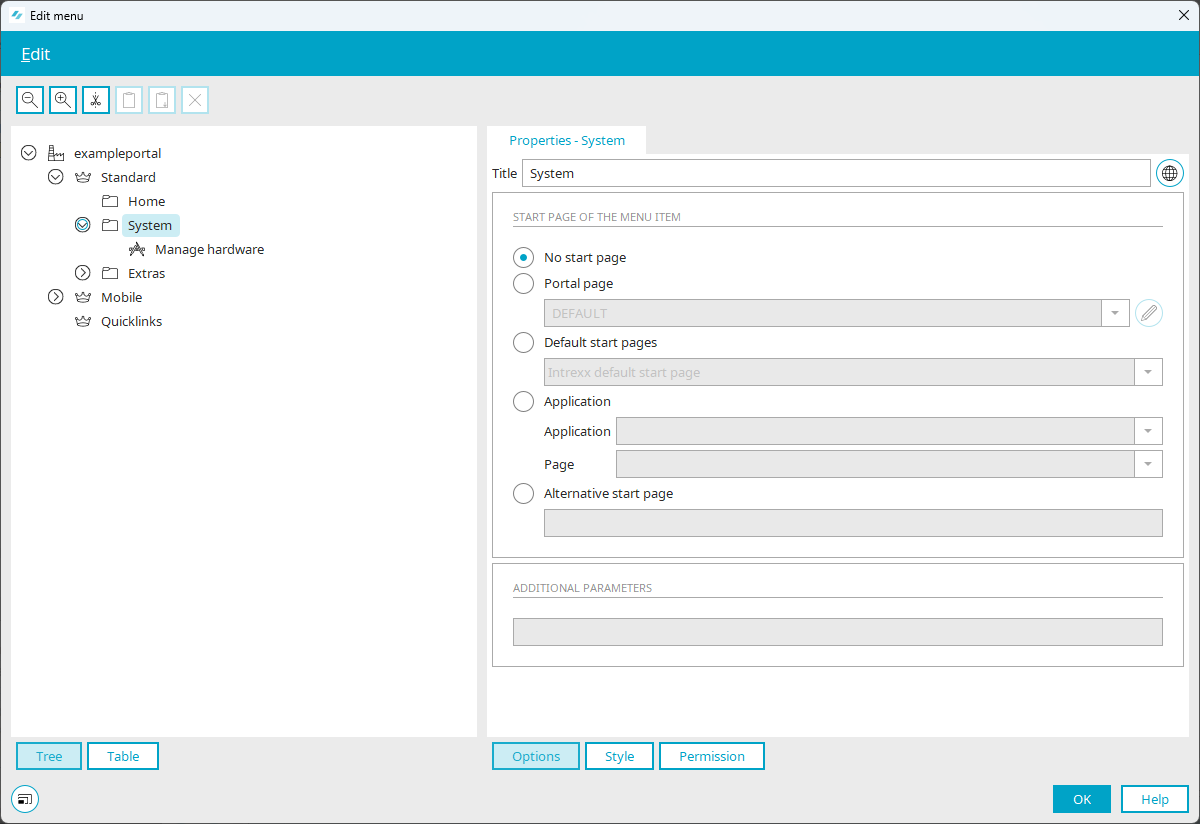
Click on the "System" menu folder.
-
In the right pane, change the title of the menu folder from "System" to "Self-service".

-
Click on "OK".
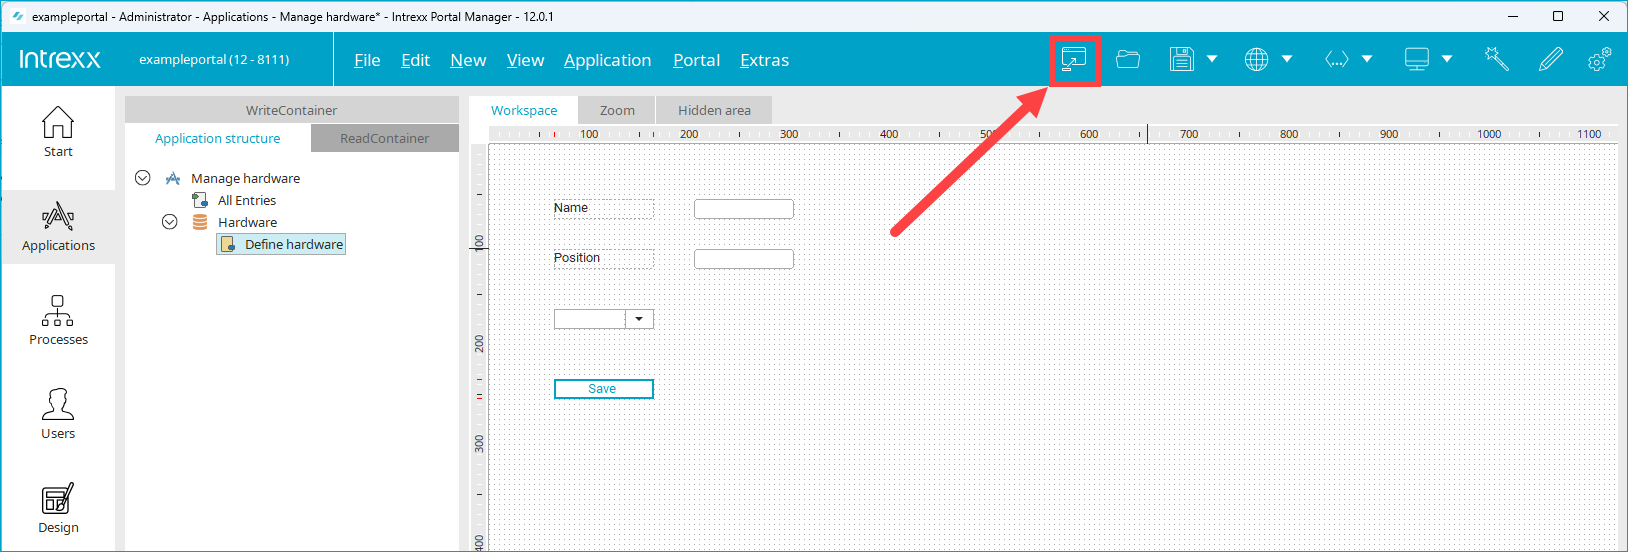
-
Click on the icon
 (Open connected portal in browser).
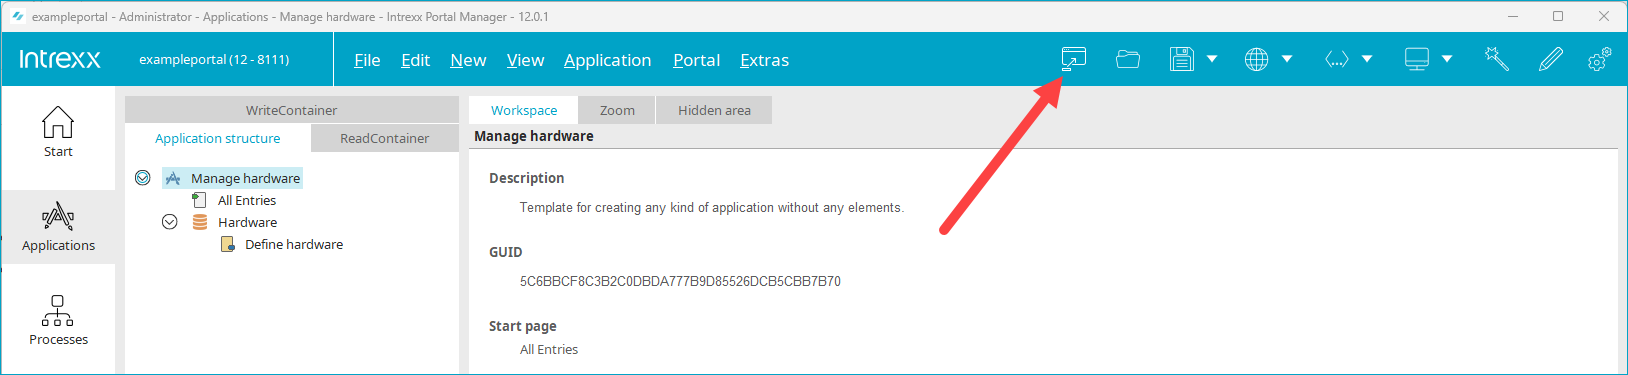
The portal will open in the browser.
-
Click on SELF-SERVICE > Manage Hardware.

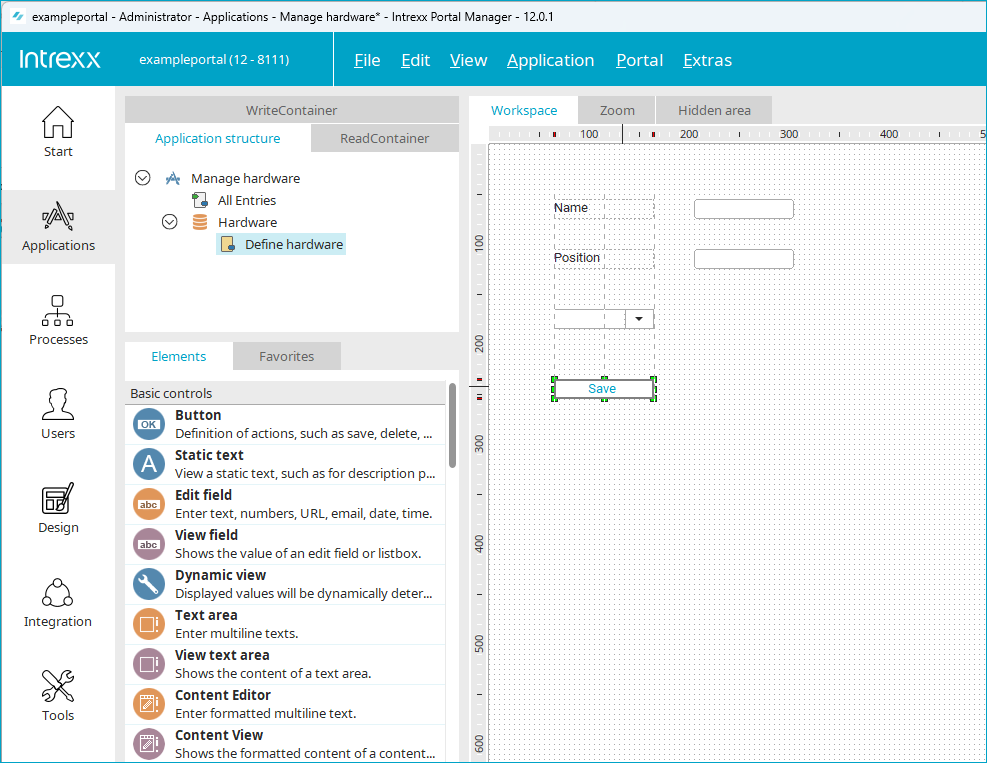
The (still empty) "All Entries" and "Manage hardware" pages are shown.

Step-by-step guide
-
Select the "Define hardware" edit page.
-
Select the "Edit field" basic control and place it on the edit page using drag-and-drop.
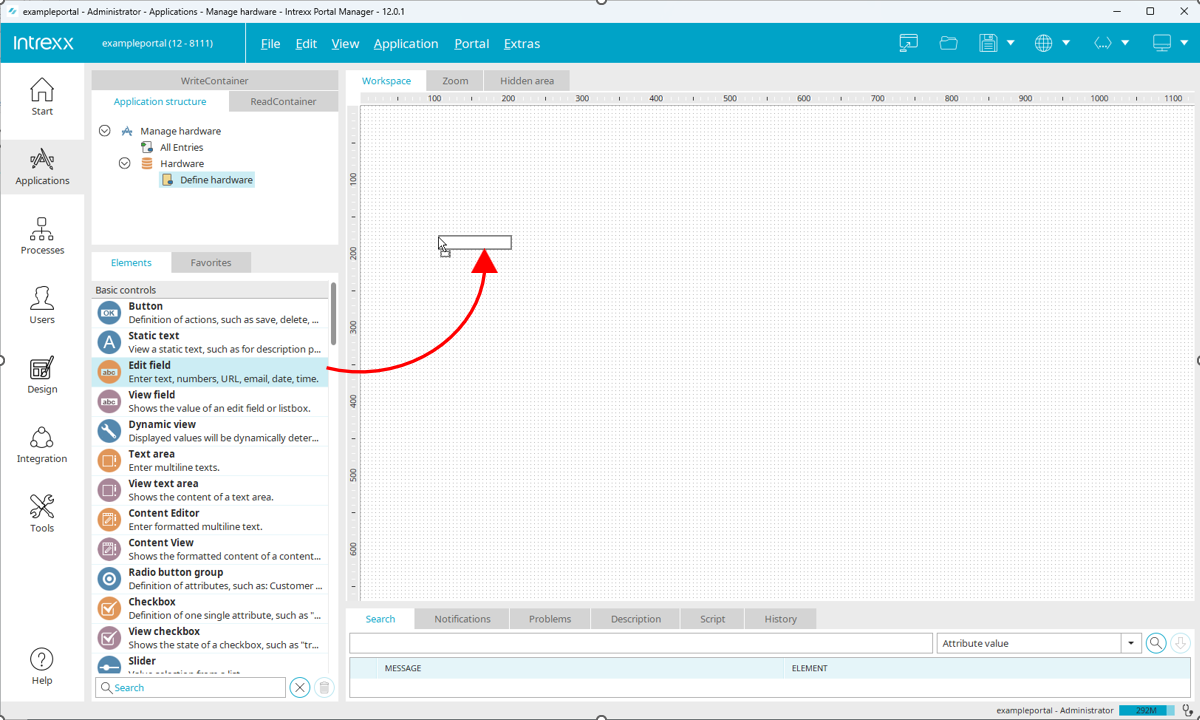
The "Properties - Edit field (New)" dialog (1) will open.
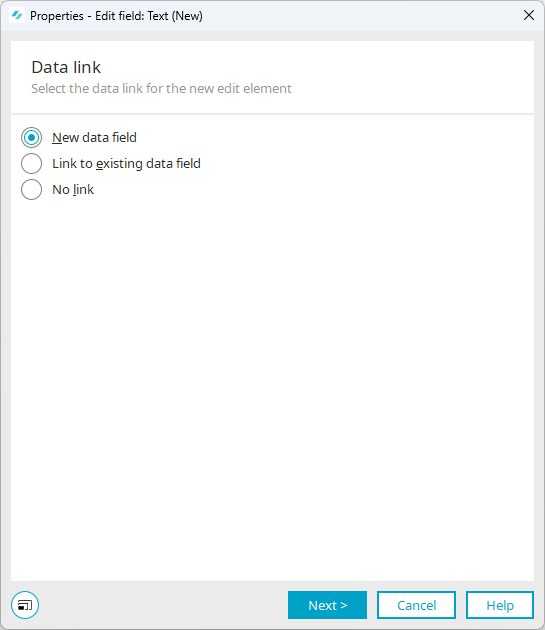
-
Click on "Next".
The "Properties - Edit field (New)" dialog (2) will open.
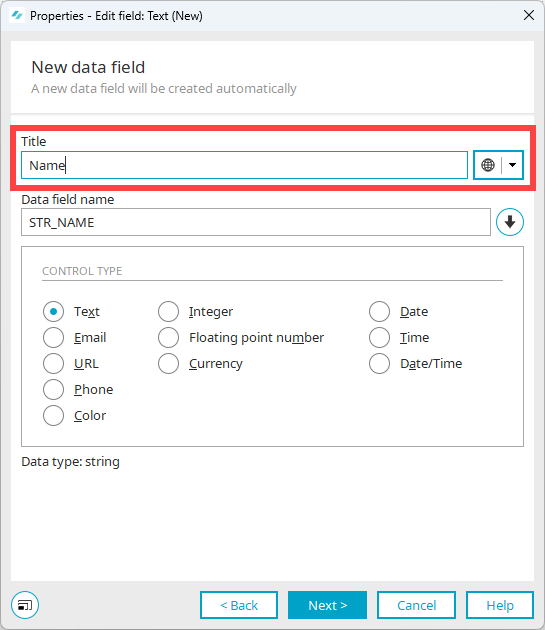
-
Enter "Name" in the Title field.
-
Click on "Next".
-
The "Properties - Edit field (New)" dialog (3) will open.
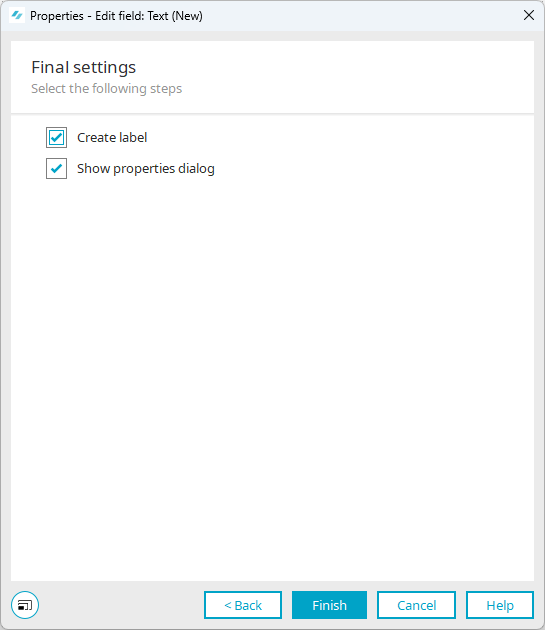
-
Click on "Finish".
The edit field is shown with the field label on the edit page.
-
You can now drag and drop the edit field and the field label to the desired location.
-
Add the "Position" edit field in the same way.
Step-by-step guide
-
Select the "Button" basic control and place it on the edit page using drag-and-drop.
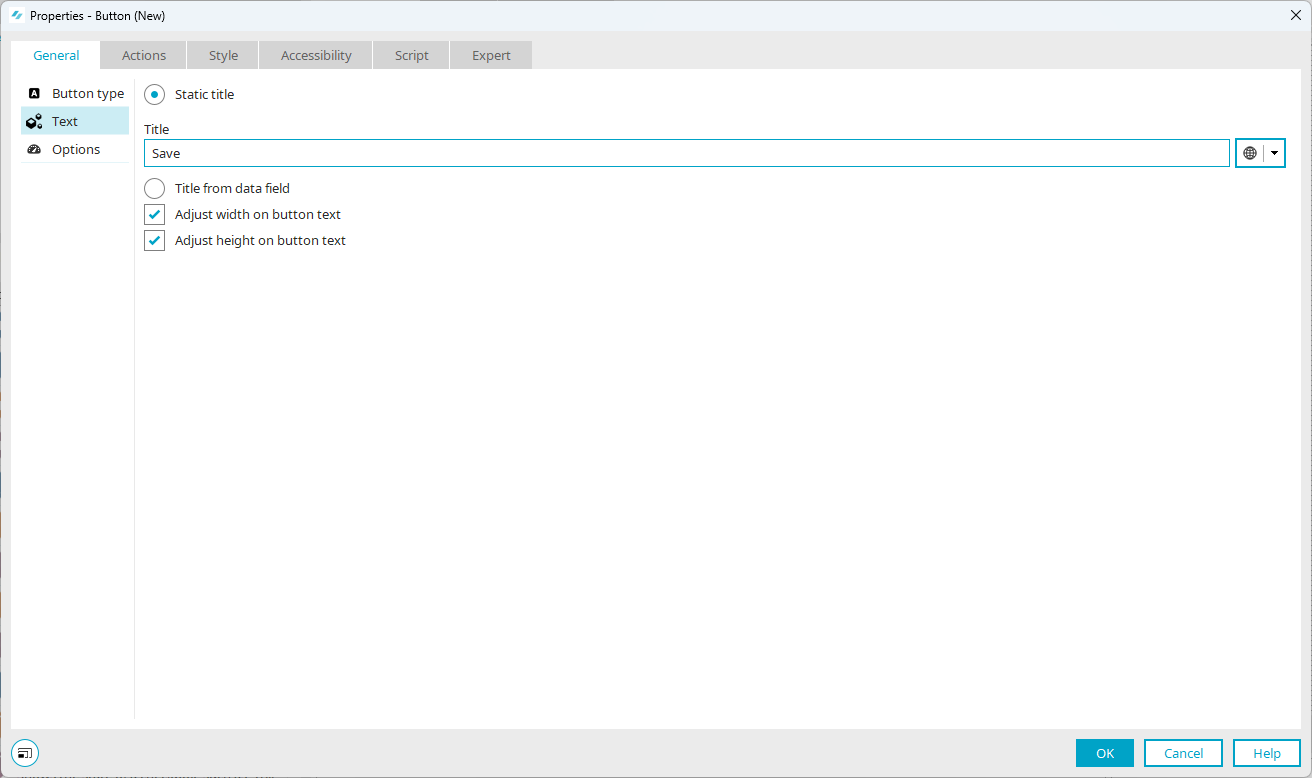
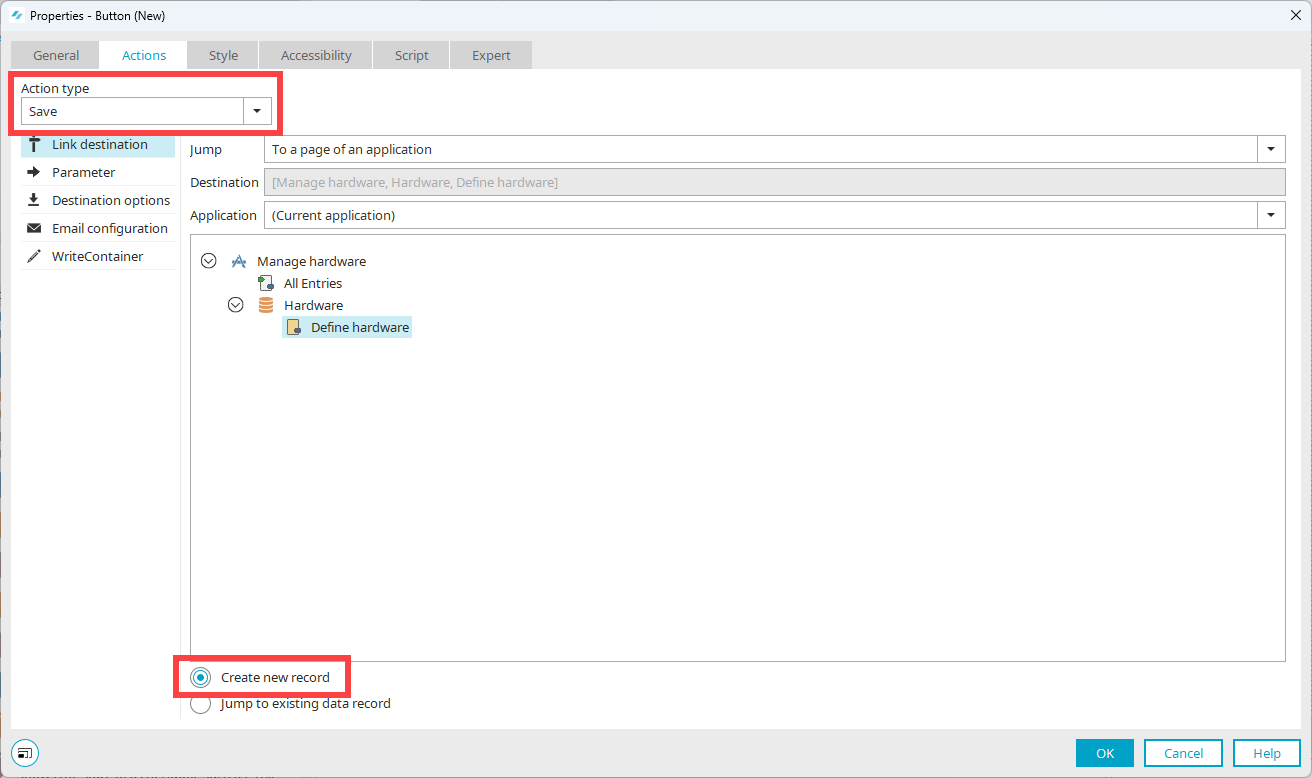
The "Properties - Button (New)" dialog (1) will open.
-
Select the "Text" menu item in the left pane of the dialog.
-
In the right pane of the dialog, enter "Save" in the Title field.
-
Go to the "Actions" tab.
-
Select the "Save" value from the "Action type" drop-down list.
-
Select the "Create new record" option in the lower area of the dialog.
-
Click on "OK".
The Save button is displayed on the edit page.
You can drag-and-drop the Save button to the desired location.
When adding a drop-down list, there are three different steps:
-
Add the "Drop-down list" element
-
Add the selectable list entries
-
Add a data field to the data group. The respective selection of the user is stored in this data field.
Data fields can be created via the context menu of the data group. However, they can also be created while adding an element.
The following step-by-step guide uses the second option.
Step-by-step guide
Add the element
-
Select the "Drop-down list" element under "Basic controls - Lists" and place it on the edit page using drag-and-drop.
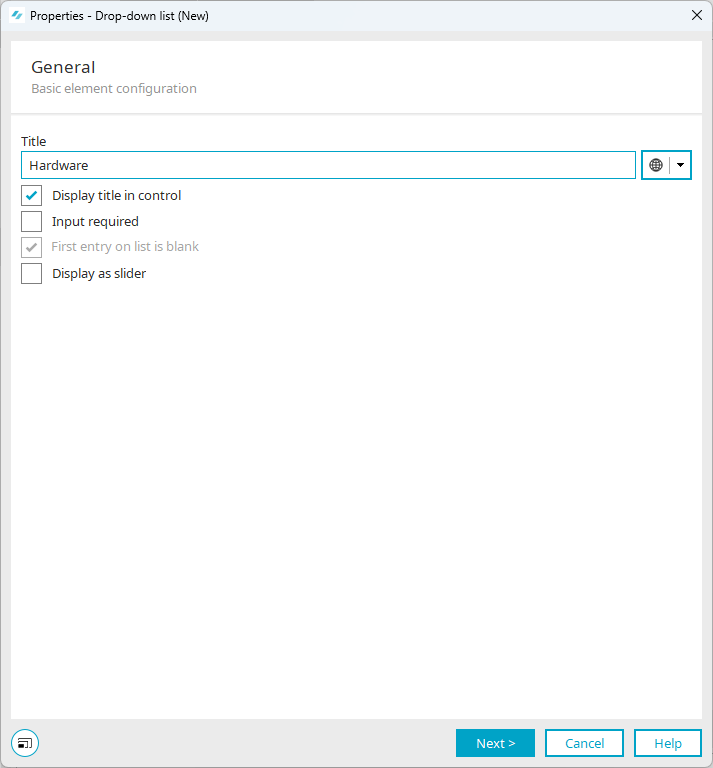
The "Properties - Drop-down list (New)" dialog (1) will open.
-
Enter "Hardware" as the title.
-
Activate the "Show title in control" checkbox.
-
Click on "Next".
The "Properties - Drop-down list (New)" dialog (2) will open.
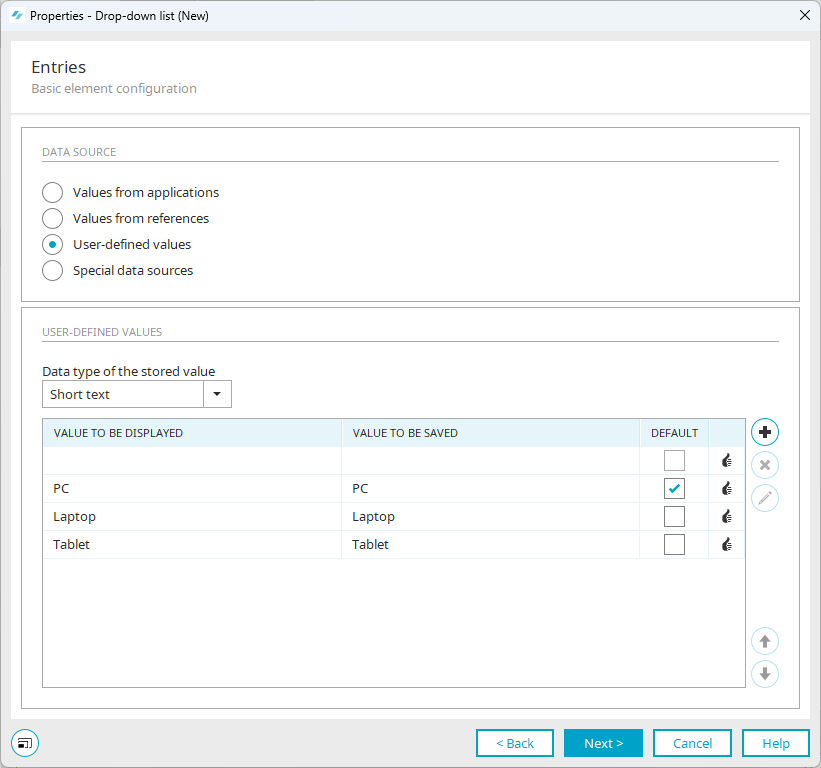
Add the entries
-
Click on the
 icon (Add new user-defined value).
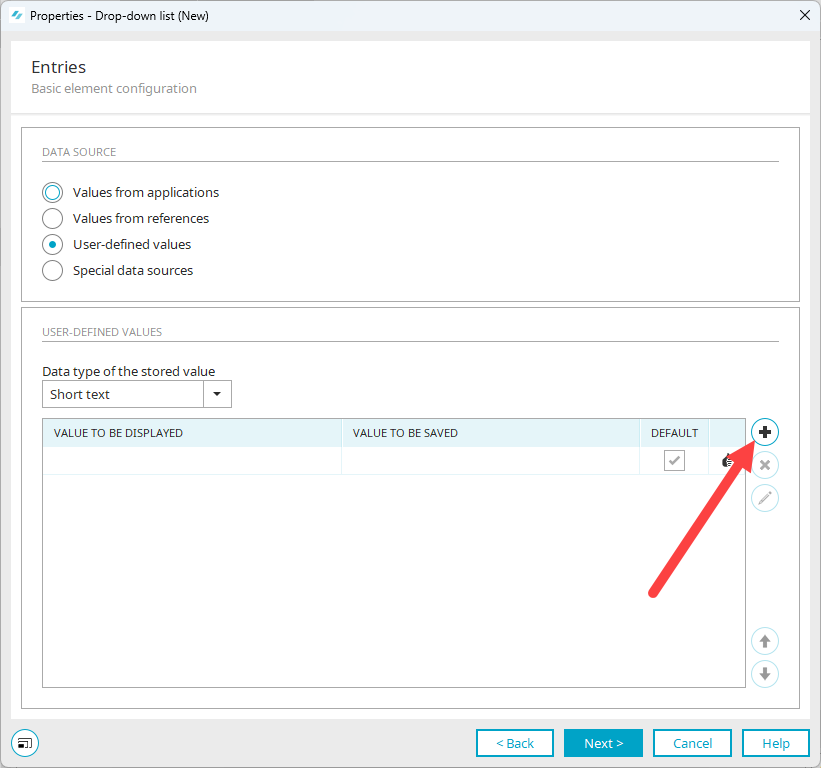
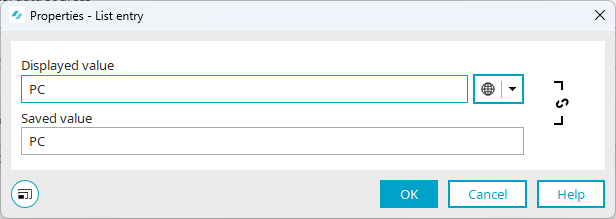
The "Properties - List entry" dialog will open.
-
Enter the "PC" in the "Displayed value" field.
The text in the "Saved value" field is filled in automatically.
-
Click on "OK".
-
Perform the same step for the "Laptop" and "Tablet" list entries.
Subsequently, the dialog looks like this:
-
Activate the "Default" checkbox in the "PC" row.
Most employees have a PC. Therefore, it is a good idea to display this value by default. Most employees then only need to confirm this value by clicking on "Save".
-
Click on "Next".
The "Properties - Drop-down list (New)" dialog (3) will open.
Add data field
-
Click on the
 icon (Create new data field).
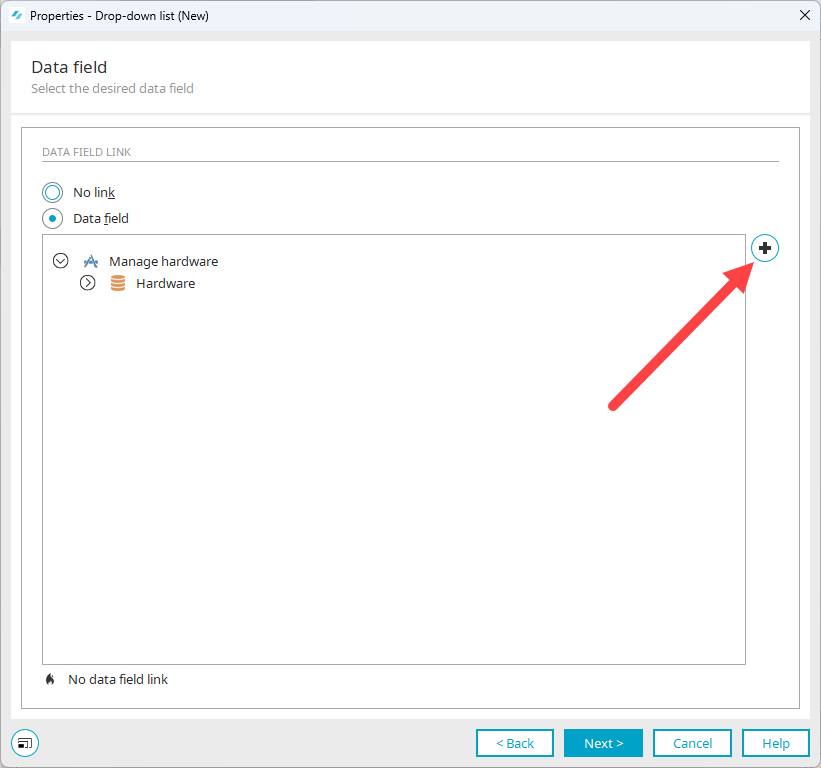
The "New data field" dialog box is displayed.
-
Enter "Hardware selection" in the Title field.
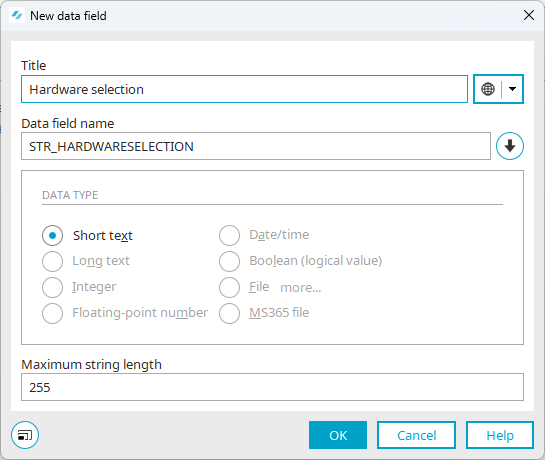
-
Click on "OK".
You will be returned to the "Properties -Drop-down list (New)" dialog.
The newly created data field is shown.
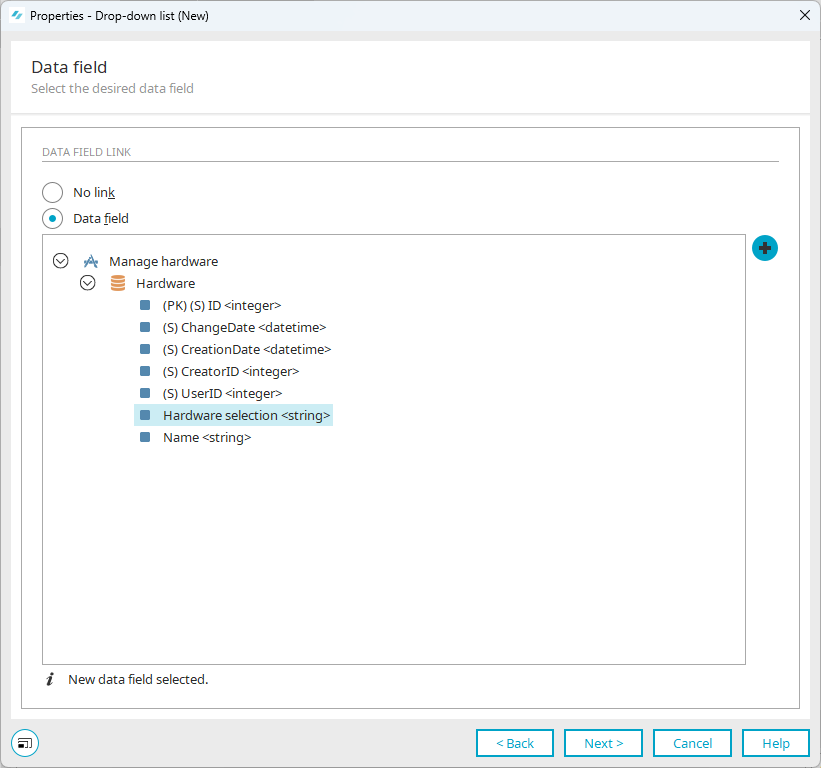
-
Click on "Next".
The next dialog will open.
-
Click on "Finish".
The drop-down list is shown on the edit page.
You can drag-and-drop the drop-down list to the desired location.
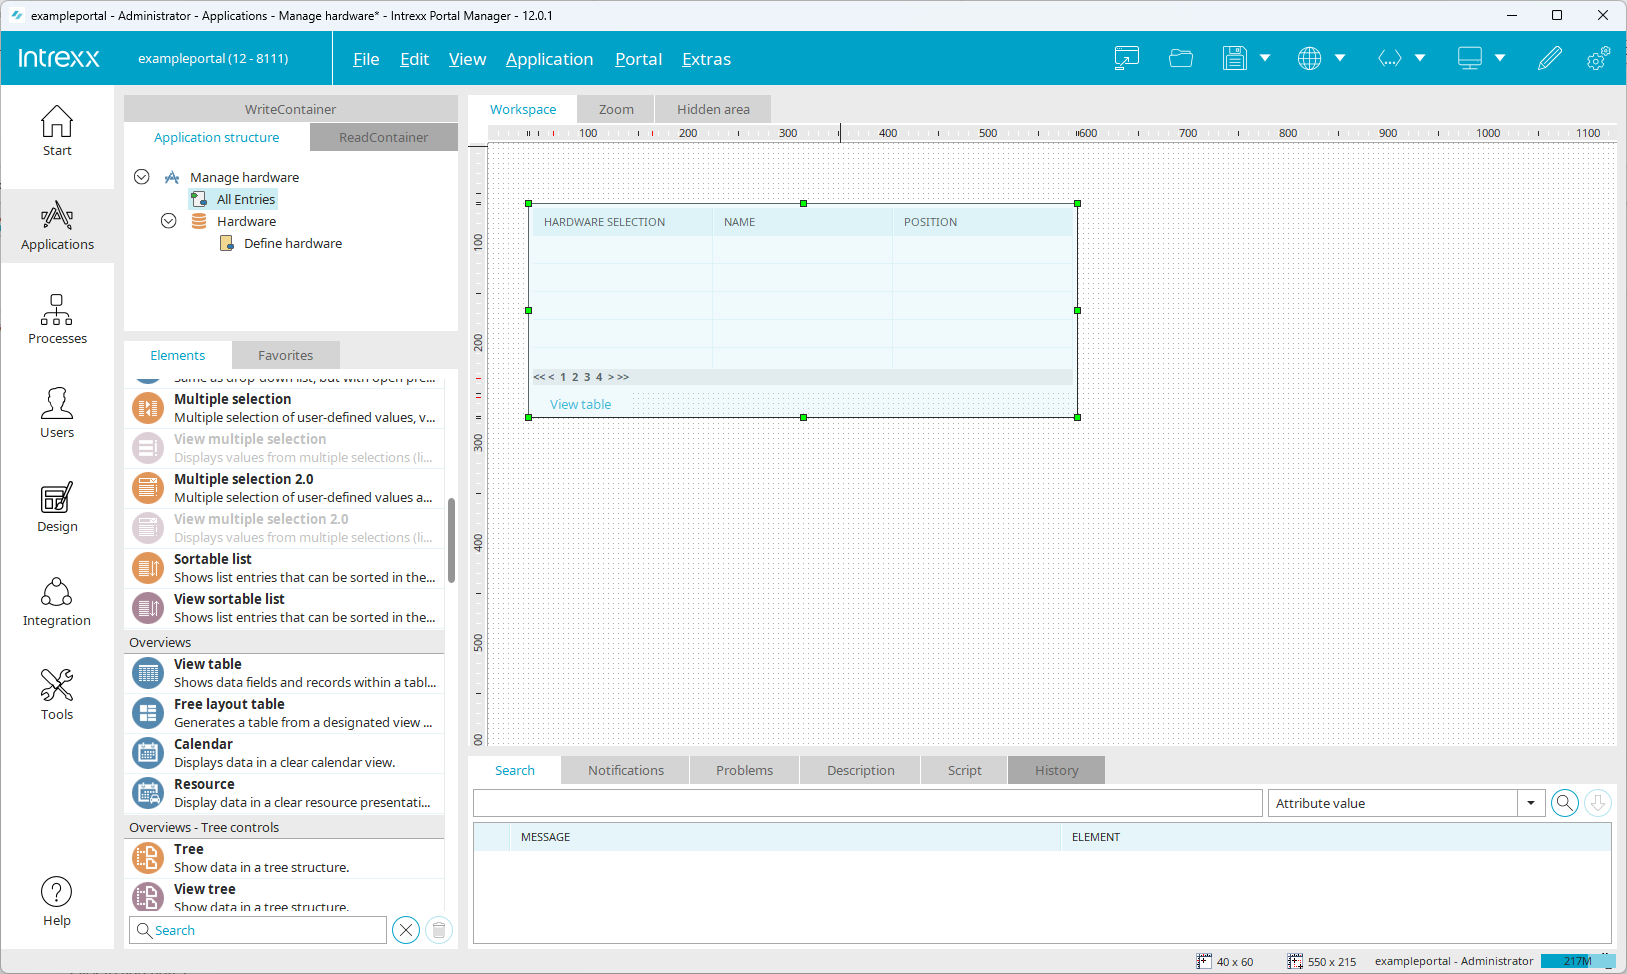
To visualize the entered and saved data, we will add a view table to the "All entries" page. There are two different steps to this:
-
Add the "View table" element
-
Define which data fields from the data group should be displayed in the view table
Step-by-step guide
Add the element
-
Open the "All entries" page.
-
Select the "View table" element in the Elements area under "Overviews" and place it on the page via drag and drop.
The "Properties - View table (New)" dialog (1) will open.
Select data fields
-
Click on the
icon. -
Select "Data field".
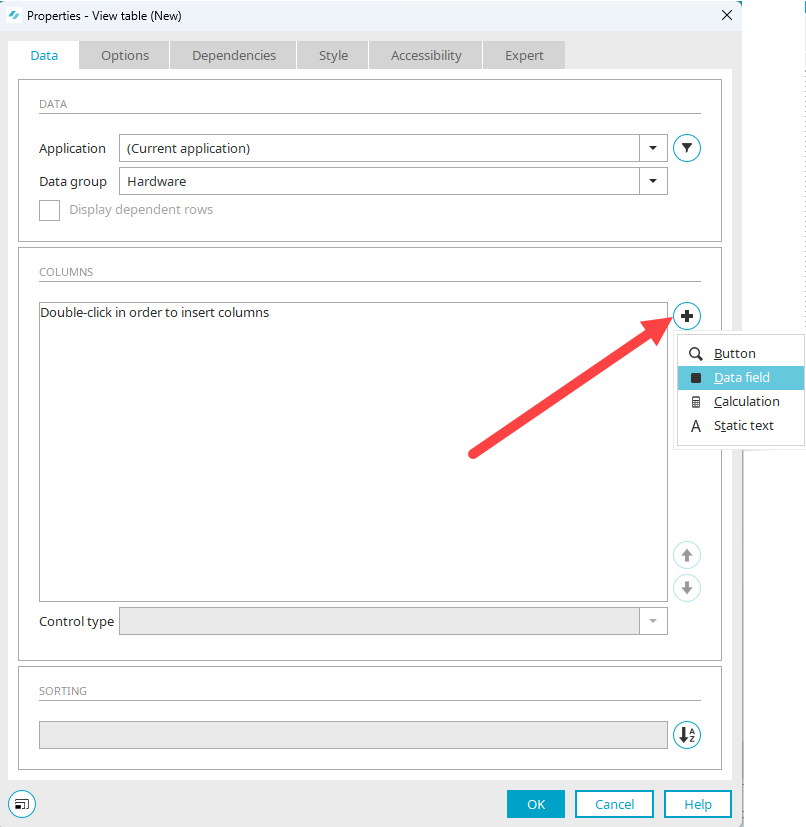
The "Select column" dialog will open.
-
Select (while holding down the control key) "Hardware selection", "Name" and "Position".
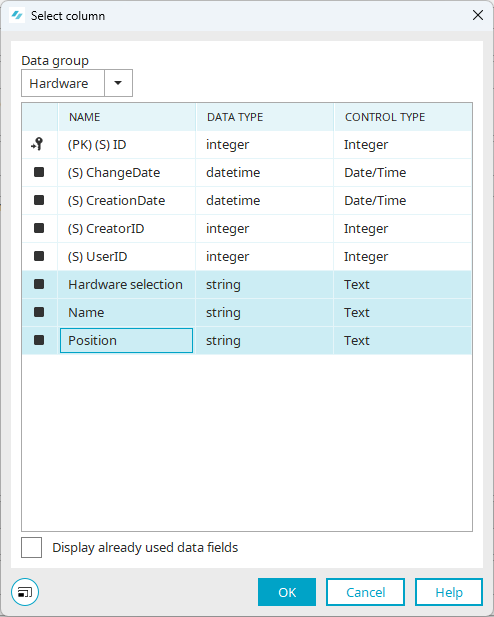
-
Click on "OK".
You will be returned to the "Properties - View table (New)" dialog.
The selected data fields are now shown.
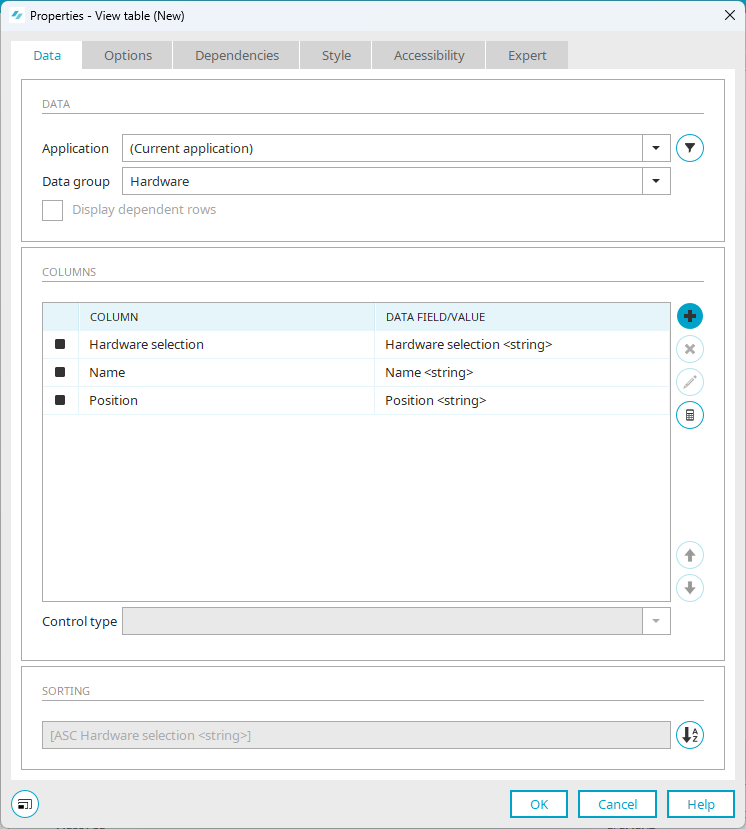
-
Click on "OK".
The view table is now shown on the "All entries" page.
You can drag and drop the view table to the desired position and also resize it.
You have finished the application with this step.
The application can now be published and used.
Step-by-step guide
-
Click on the
 icon in the menu bar (Optimized publish).
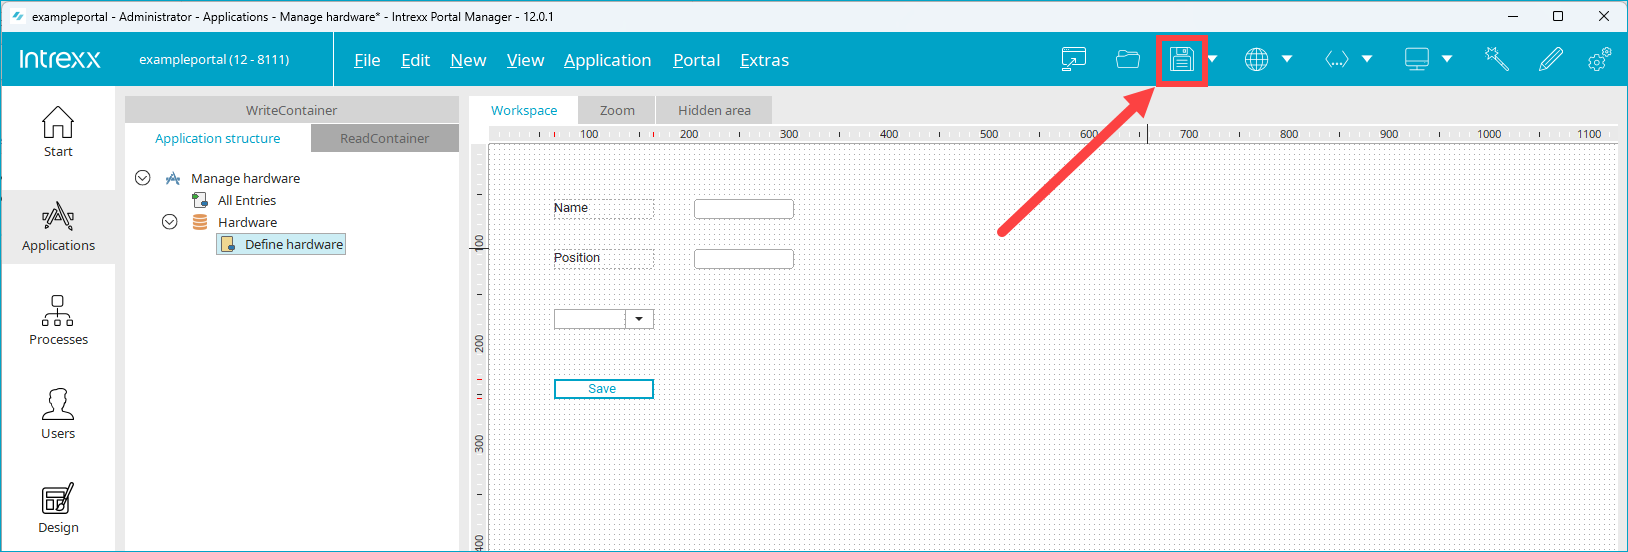
-
Click on the icon (Open connected portal in browser).
-
Click on SELF-SERVICE > Manage Hardware.
-
Go to the "Define hardware" page.
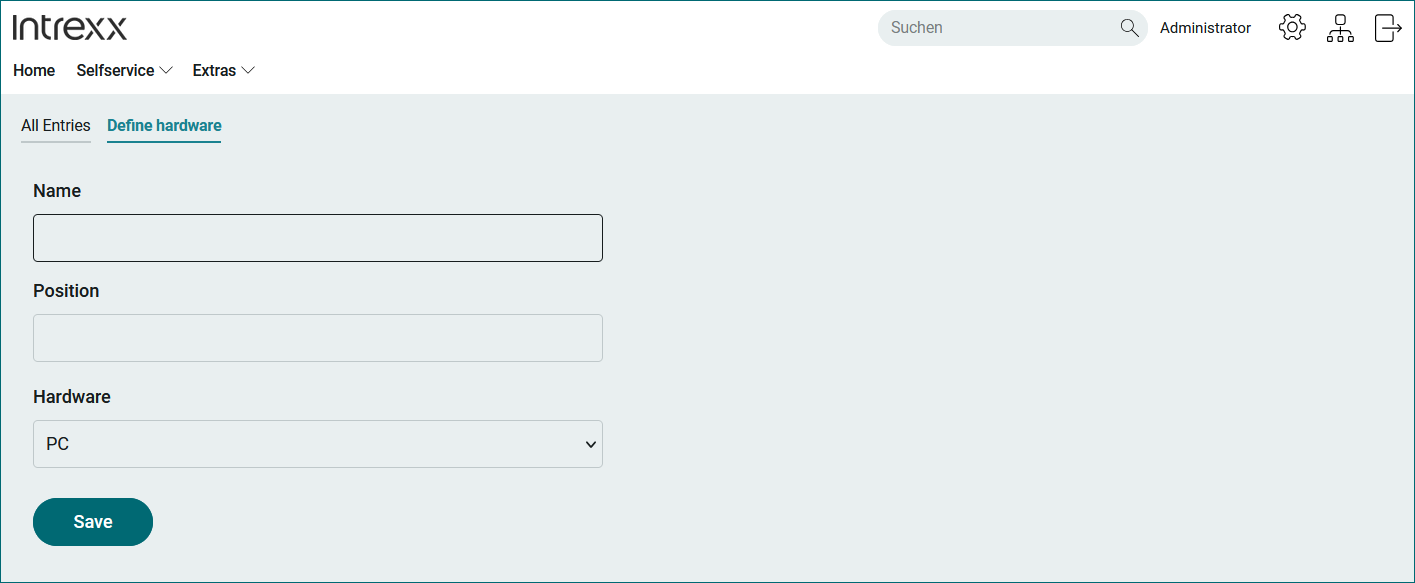
The application can now be used in a live system.
On the "All entries" page, the (respectively) updated records are displayed.
Next steps
These could be next expansion stages for your project:
-
For purchasing new hardware, you could add another drop-down list that contains the employees who are allowed to approve the hardware purchasing.
-
You could implement a purchasing and approval workflow. Such a workflow is already implemented in the free application template "Shop". You can customize this according to your needs.
-
Instead of manually entering employees, you can, for example, connect your company's Active Directory to Intrexx.
-
...