

OData Connector - Publish Data - Create a Service
Here you'll learn how to create and configure your own OData service.
To do this, a simple calendar application is used, whose events are made available via an OData service. You can find the corresponding application template in " Templates & Solutions" when you create a new application.
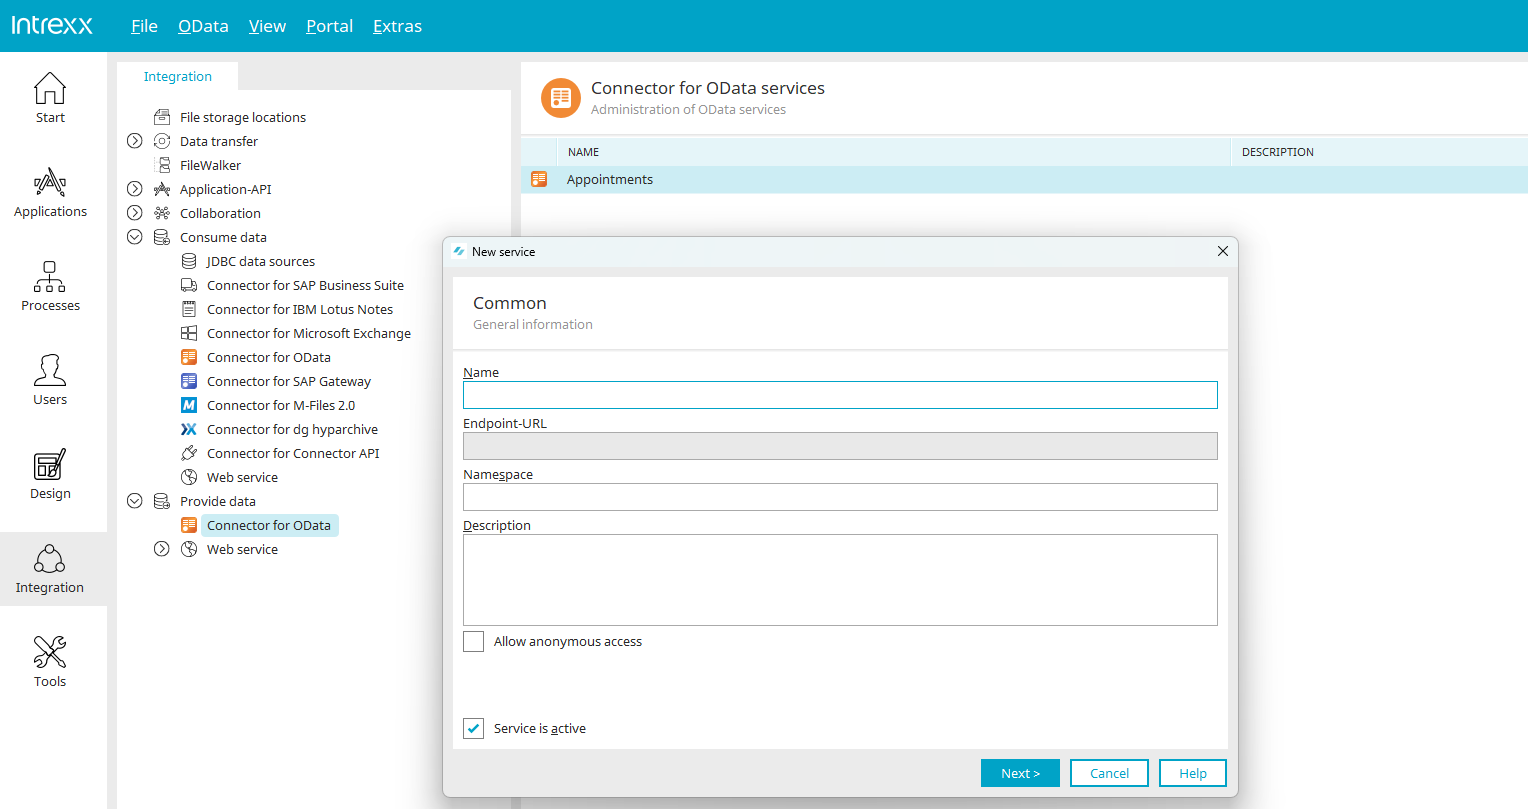
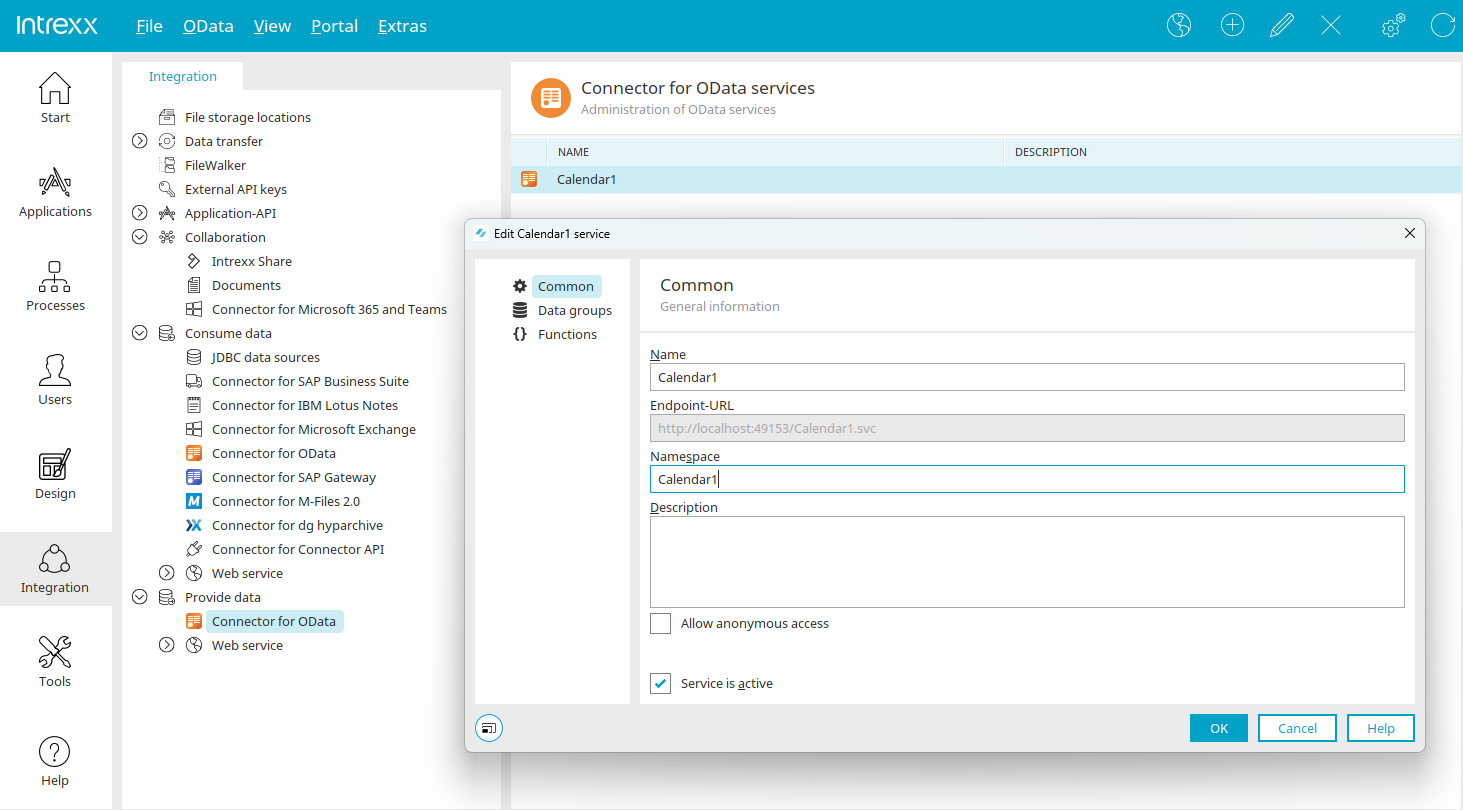
To create an OData service, select the "Connector for OData" entry in the "Integration" module under the "Provide Data" node. Then select the main menu option "OData / New Service" or the corresponding context menu.
General Information
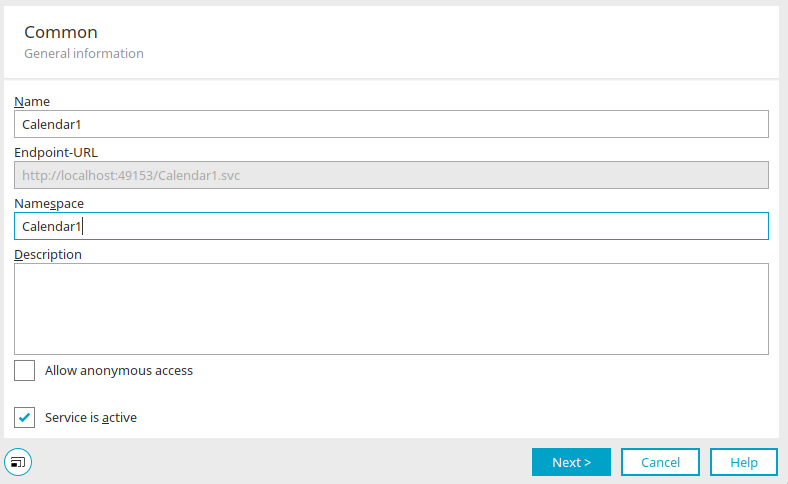
Enter the unique name of the service here. For our example, we'll use the name "Calendar1" here.
Since the name is part of the service endpoint URL, you cannot use any special characters or spaces.
The endpoint URL is generated automatically.
"Namespace" specifies the namespace to be used, to which the OData collections and types in the metadata document should be assigned. Do not use spaces or special characters here either. For our example, we'll use the name "Calendar1" here as well.
If desired, a description of the service can be entered. You also have the option to make data available without requiring a login by enabling the "Anonymous Logins" setting. Activate the service by clicking "Service is active."
Click "Next."
Data Groups

This is where the entity types and collections of the OData service and their relationships are defined. To do this, select data groups from the desired Intrexx application—in our example, the "Calendar1" application. Each data group represents an entity type and is automatically available in the service as an OData entity collection. In OData, relationships between entity types are represented using what are known as association sets and navigation properties. In this process, parent-child relationships and references can be selected to be defined as navigation properties in the respective entity types.
Click "Add Data Group" at  .
.
Selecting the Data Group
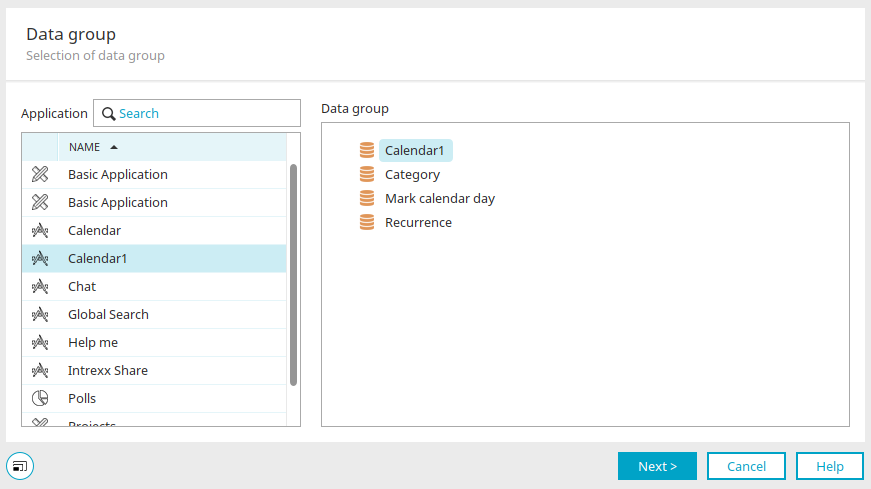
Here, you can select the desired application along with a data group. A data group may be added only once per service.
Click "Next."
Properties of the Data Group
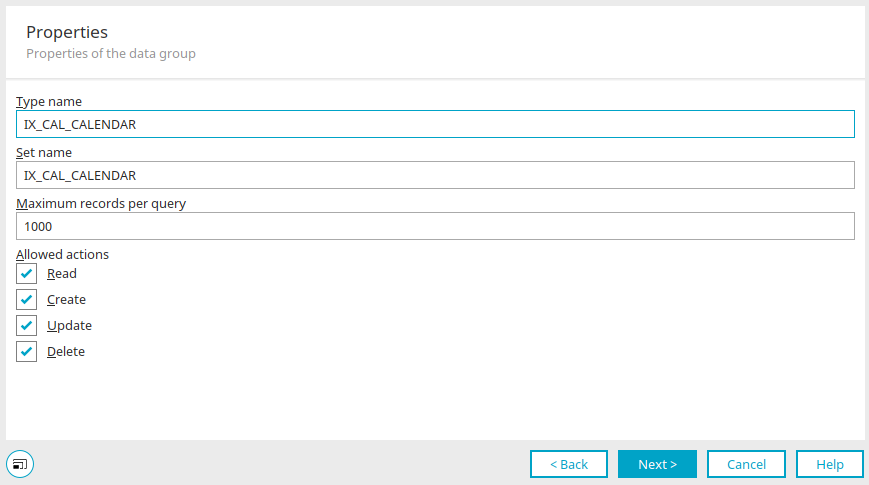
"Type Name" specifies the name of the entity type that represents the description of the data group. The name must be unique and may not contain special characters or spaces.
"Setname" specifies the name of the entity set to be used for addressing records from the data group. The name must be unique and may not contain special characters or spaces.
"Maximum Number of Records per Query" defines the maximum number of records that the service returns in response to a query.
The settings under "Allowed Actions" can be used to define the actions that are permitted to be performed on the data set via an OData service.
Click "Next."
Select Data Fields
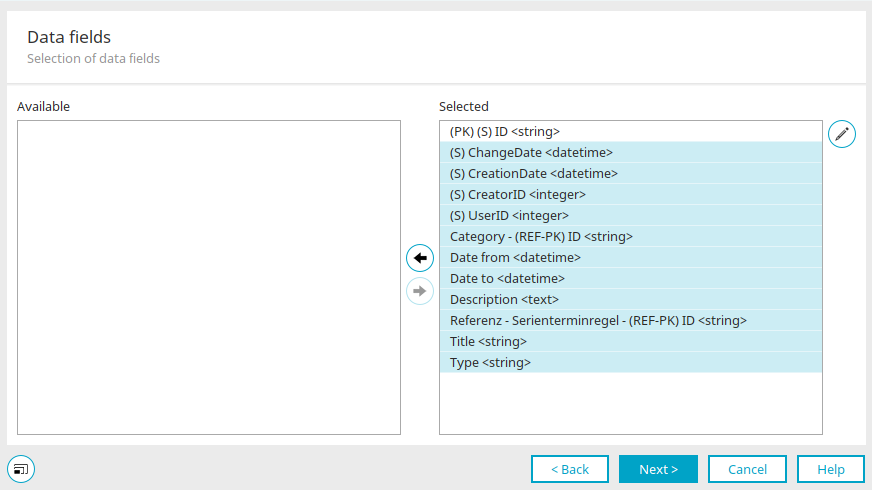
All data fields that you move from the "Available" list to the "Selected" list will be available in the service later. For our example, simply select all data fields.
 "Edit Data Field" opens a dialog box where you can edit the field properties as needed.
Data Field Properties

Under "Name," you'll find the name of the data field in the entity type. The Intrexx data field name is used by default. The name must be unique and may not contain special characters or spaces. The title, on the other hand, can be chosen freely.
Allow NULL values
Allows NULL values.
Allow pasting
Allows the data field to be used in POST (INSERT) operations.
Allow updates
Allows the data field to be used in PUT (UPDATE) operations.
Click "Finish."
Click "Next" here.
Relationships - OData Associations and Navigation Properties
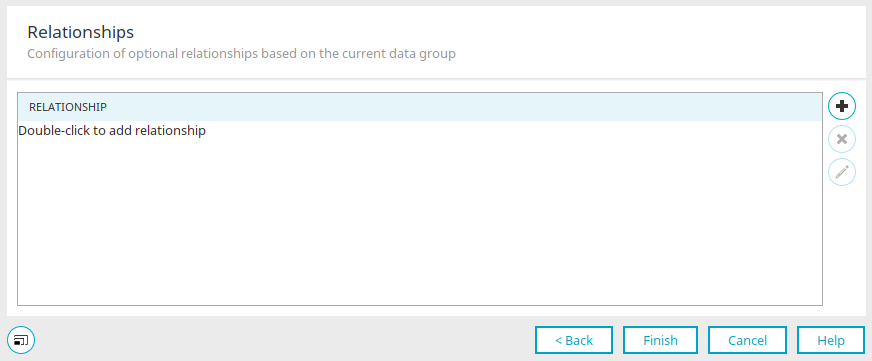
Relationships and references between Intrexx data groups are represented in OData as associations and navigation properties. In this context, 1:1 and 1:n relationships can be defined. Relationships with m:n cardinality can be represented using an m:n data set. In OData, associations define the relationships and their cardinality between entity types. Navigation properties, in turn, add properties to entity types that allow navigation from one record to a referenced record without having to explicitly add foreign key or reference fields to the entity type. This is where you configure the necessary settings. Once the data sets available to the service have been selected, the relationships between them can be defined.
No relationships are required for our example. Nevertheless, the following section will briefly explain how relationships can be configured.
"Add Relationship" opens a dialog box where you can select relationships.
Selecting a Relationship
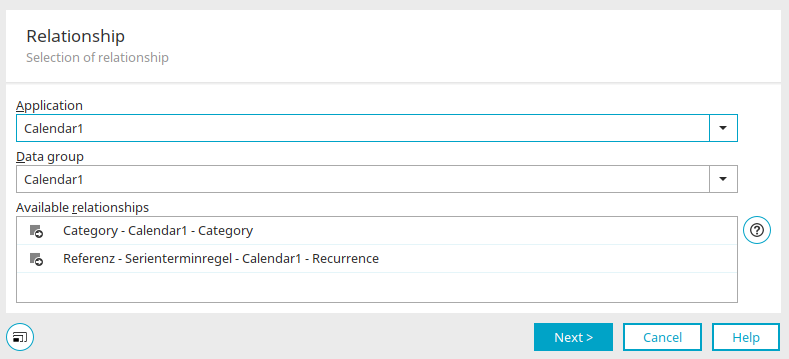
Here, you select the application and data group for which you want to define relationships. The system automatically detects relationships with other data sets and displays them here for selection. A distinction is made between references and parent-child relationships.
Click "Next."
Characteristics of the Relationship
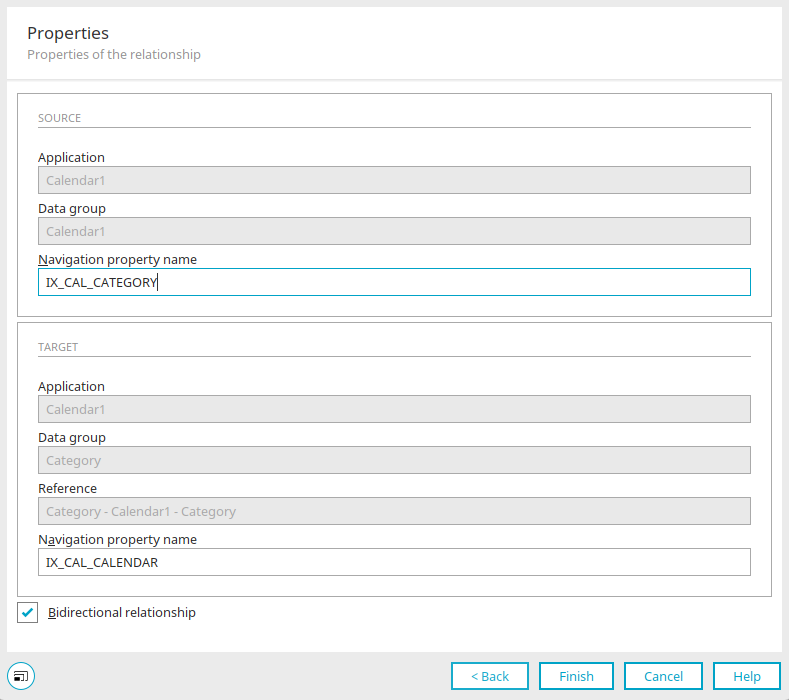
Source
Defines the source application and data group. "Navigation Property Name" defines the navigation property to be added to the entity type for this relationship. The name must not contain special characters or spaces. It should be selected so that it refers to the target data group.
Objective
Defines the referenced target application, data group, and reference. "Navigation Property Name" defines the name of the navigation property to be added to the entity type for this relationship. The name must not contain special characters or spaces and should be chosen so that it refers to the source data group.
Bidirectional relationship
As a rule, relationships are always defined as bidirectional, so that it is possible to navigate from both sides of a data set to the referenced data set. If this is to be possible only from the source data group, a unidirectional relationship can be defined. In that case, no navigation property is added to the target data group.
Click "Finish" to save your changes and close the dialog box.
Click "Finish" here as well.
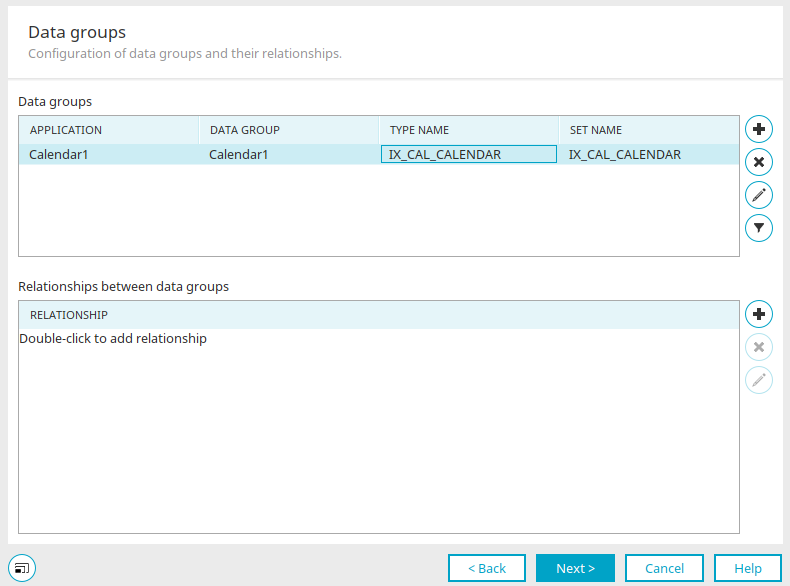
The data group configuration is now complete.
 Remove Data Group
Removes the currently selected data group.
Edit Data Group
Opens the properties of the data group for editing.
 Edit Filter
Opens a dialog box where you can create a filter for the currently selected data group. This global filter is applied to the data set for every OData query, regardless of whether a filter has already been defined in the OData query; in that case, the global filter is combined with the query filter. This ensures that, in principle, only specific data sets can be accessed via an OData service.
Click "Next."
Features
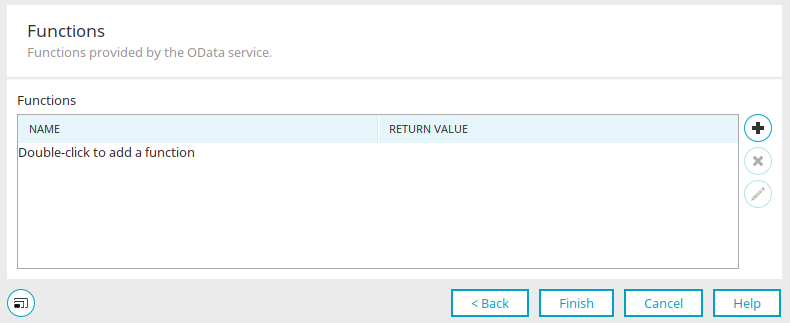
You can find all the information on this topic here. Click "Finish" here.
OData Provider Settings
Before you can use the service, you must first enable the OData provider. You can find all the information here.