

LDAP
In order for users from LDAP sources to be replicated, the LDAP server's certificate must first be imported via the portal properties. To enable user authentication against the LDAP server, user replication should be performed via Intrexx. Replication is not strictly required for authentication, but it should be considered the "preferred option." Alternatively, users can be manually created in Intrexx using the LDAP server's schema (username, domain, etc.). When logging in, the system first attempts to authenticate against the LDAP server, regardless of how the user was created.
Click here to find out where to configure an LDAP source for importing users and groups. Follow the steps described there, and then continue reading here.
Now that you have selected "LDAP" as the connection type in the previous dialog boxes and assigned a name to it, you can enter the connection details.
Connection parameters for the LDAP server
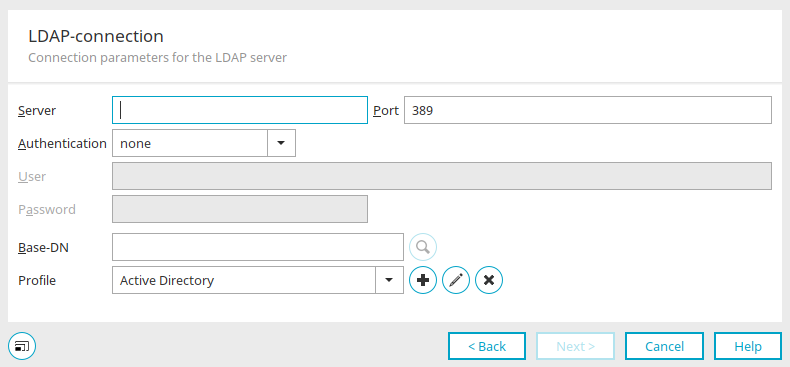
Server / Port
Enter the server name or IP address of the Active Directory server and the port. The default port for LDAP is "389," and for LDAPS it is "636."
Authentication
Simple authentication is sufficient in most cases.
Specify the user who will connect to the LDAP server (e.g., mail@example.org) and the corresponding password (the domain login password).
Base DN
The base DN (Distinguished Name) is the name of the subtree from which users and user groups are to be imported. Select the base DN by clicking "Search" under "  ."
."
Profile
Select the appropriate profile here.

 / Edit Replication Profile
Opens a dialog box where you can create a new profile.
New LDAP Replication Profile
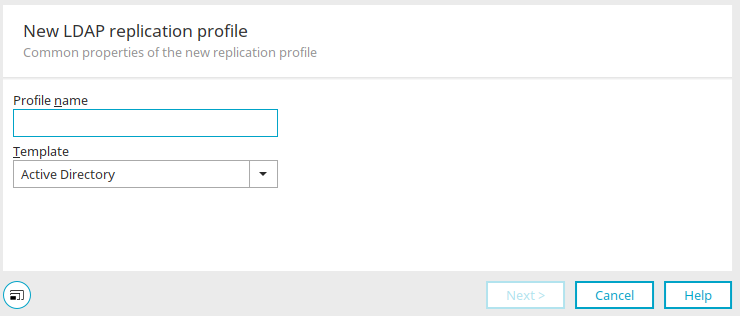
Enter a name for the new profile here.
The following templates are available:
-
Active Directory
-
Active Directory Large Groups
-
Active Directory NTLM-Compatible
-
Attribute-Based Role Sample
-
Sample Dynamic OU Path
-
Dynamic OU Sample
-
eDirectory
-
OpenLDAP - POSIX
Click "Next."
Definition of the Replication Profile
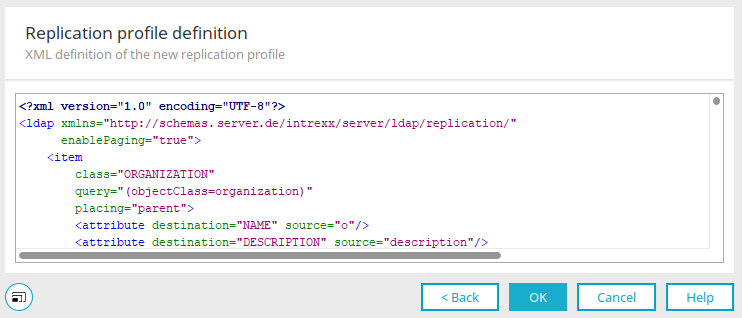
You can edit the replication profile's XML here.
Click "OK."
 Delete Replication Profile
Deletes the currently selected profile.
Click "Next."
Import Settings
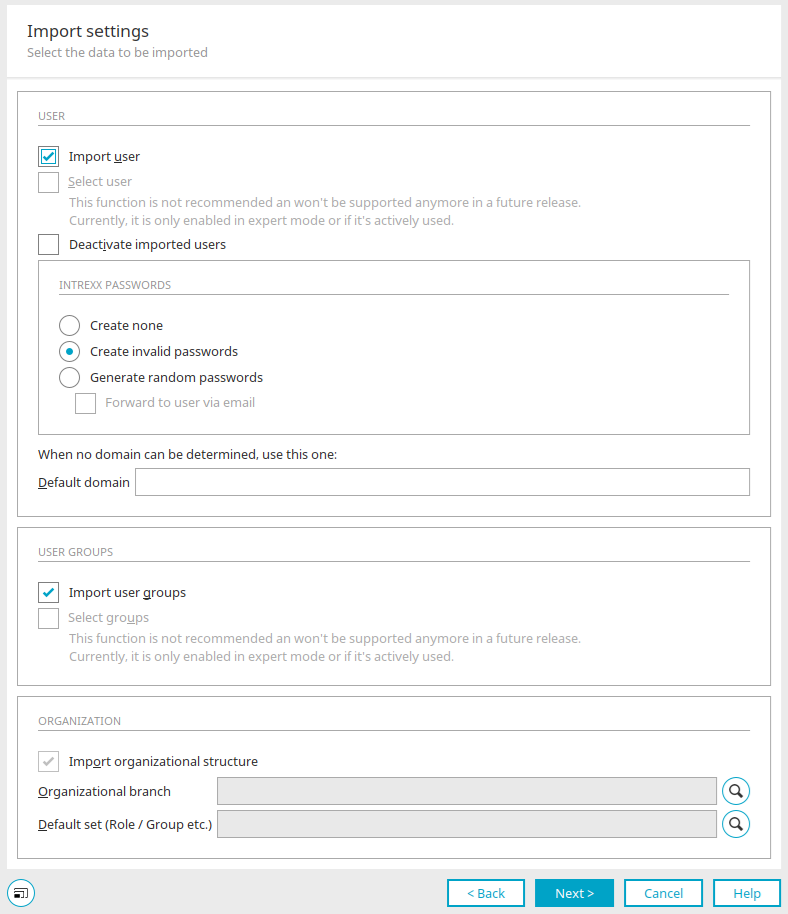
You can access this dialog for all three replication source types (LDAP, JDBC, Text). For JDBC and text sources, some settings are not available, such as the settings under "Organization."
Import Users
With this setting, all users will be imported.
Select a user
This feature is not recommended and will no longer be supported in the future. It is only active in Expert Mode or when it is already in use.
Disable Imported Users
With this setting, new users' accounts are disabled and must be enabled by the administrator.
Intrexx Passwords
Passwords cannot be imported because most source systems do not provide this functionality for security reasons.
-
Do Not Generate
With this setting, Intrexx will not automatically generate passwords during import. Users without a password can easily access the portal, since they only need to enter their username to log in.
-
Generate invalid ones
With this setting, Intrexx generates pro forma passwords and assigns them to each user. You cannot log in using these passwords, but administrators can change them in the user management section.
-
Generate Random Passwords
Ensures that a password is created for each user after the import.
-
Send to users via email
With this setting, the new password will be automatically sent via email to every user who has a work email address on file.
Default Domain
If no domain can be determined for the LDAP import, a default domain can be specified here.
Import User Groups
This setting is used to import user groups.
Select Groups
This feature is not recommended and will no longer be supported in the future. It is only active in Expert Mode or when it is already in use.
Import Organizational Structure
This setting is used to import organizational branches.
Organizational Branch
Displays the selected branch.
Select an organizational unit
Opens a dialog box where you can select the desired user object.
Standard Set (Role / Group, etc.)
If organizational units are imported from LDAP directories that do not contain any assignments of users to positions or roles, the name entered here is used as the default assignment.
Select a container
Opens a dialog box where you can select the container.
Click "Next."
Schedule
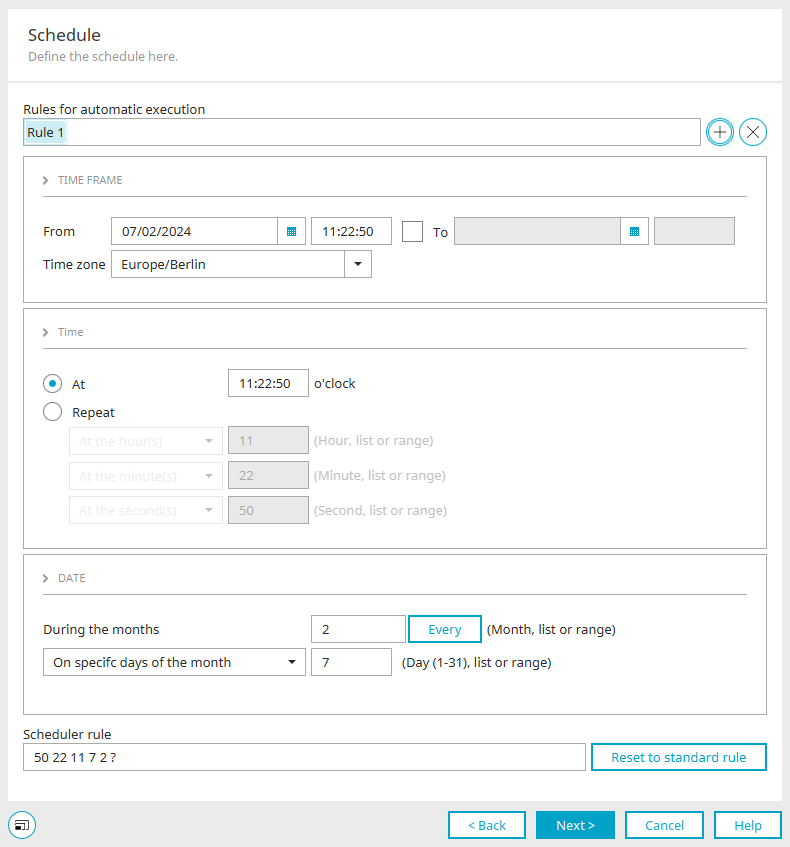
You can then set the schedule. You can find all the information about the settings for automatic replication here.
Finish
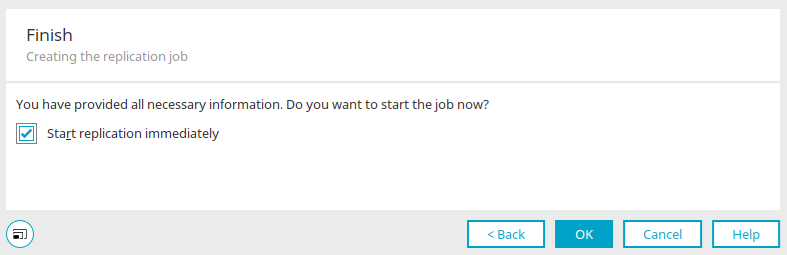
If you select "Start Replication," the user import will begin immediately after you click "OK."
Authentication Method
The authentication method used by Intrexx must be changed.
To do this, select the "Users / Configuration" main menu in the "Users" module.
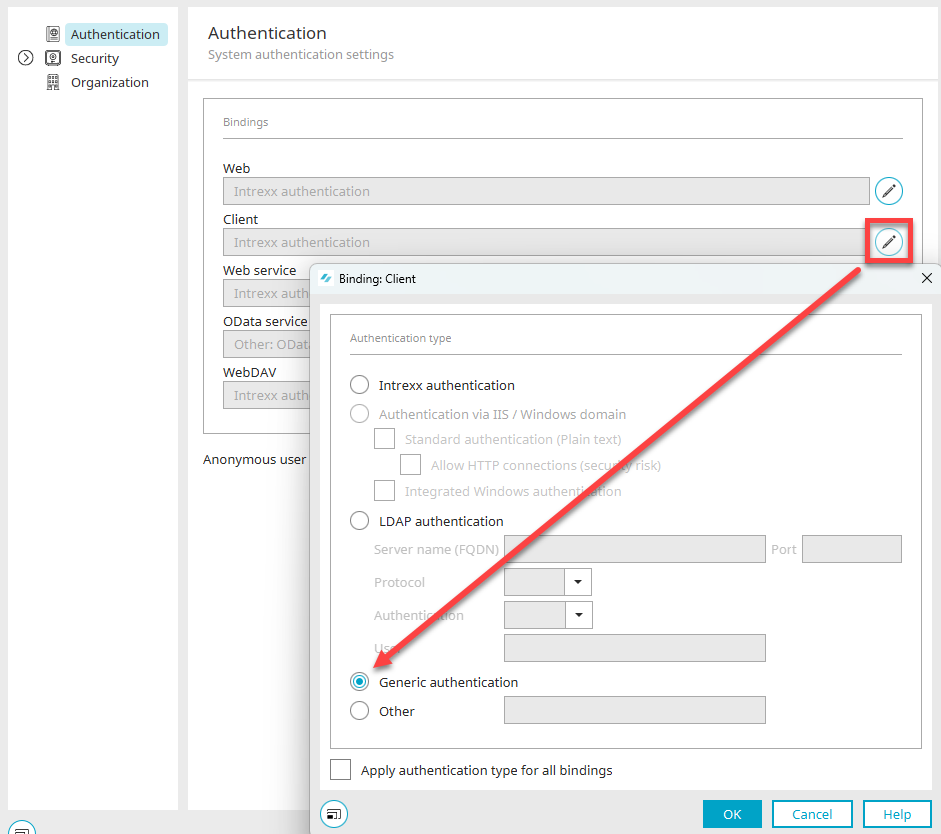
Click "Edit Client Binding" here at . Then select the "Generic Authentication" option. Close the dialog box by clicking "OK," and then log out of your portal via the main menu by selecting "Start / Disconnect from Portal Service. "
Modifying the Configuration File
Open the "LucyAuth.cfg" file in the portal directory `internal/cfg` using any text editor. You must enter the LDAP server address and other connection information in this file. Be sure to create a backup of this file before editing it. In the text editor, navigate to the following section:
            GenericAuth
{
    de.uplanet.lucy.server.auth.module.ldap.LdapBindLoginModule
    sufficient
      java.naming.provider.url="ldap://localhost:389"
      java.naming.security.authentication="simple"
      java.naming.security.principal="$[DN]"
      debug=false;

   de.uplanet.lucy.server.auth.module.anonymous.AnonymousLoginModule
   sufficient
      debug=false;
};
Depending on whether users in a portal were replicated from the LDAP server or created manually and authenticate against the LDAP server, the entry must be replaced accordingly. Once you have performed a replication, please make the following entries:
            GenericAuth
{
    de.uplanet.lucy.server.auth.module.ldap.LdapBindLoginModule
    sufficient
      java.naming.provider.url="ldap://ldapserver.example.org:389"
      java.naming.security.authentication="simple"
      java.naming.security.principal="$[DN]"
      debug=false;

   de.uplanet.lucy.server.auth.module.anonymous.AnonymousLoginModule
   sufficient
      debug=false;
};
If you are not using SSL encryption, enter "ldap" in the provider URL. Instead of "ldapserver.example.org," enter the IP address or the fully qualified domain name of the LDAP server, followed by the LDAP server's port (default: 389, default SSL: 636). The "$[DN]" setting cannot be changed once replication has been completed. This Distinguished Name should be used with OpenLDAP, Novell eDirectory, Sun ONE, and Active Directory servers. For users created manually, please change the settings as follows:
            GenericAuth
{
    de.uplanet.lucy.server.auth.module.ldap.LdapBindLoginModule
    sufficient
      java.naming.provider.url="ldap://ldapserver.example.org:389"
      java.naming.security.authentication="simple"
      java.naming.security.principal="$[LOGIN_NAME]@$[LOGIN_DOMAIN]"
      debug=false;

   de.uplanet.lucy.server.auth.module.anonymous.AnonymousLoginModule
   sufficient
      debug=false;
};
If you are not using SSL encryption, enter "ldap" in the provider URL. Instead of "ldapserver.example.org," enter the IP address or the fully qualified name of the LDAP server, followed by the LDAP server's port (default: 389, default SSL: 636). $[LOGIN_NAME]@$[LOGIN_DOMAIN] is the composite principal name. Please follow this pattern exactly as shown above. For now, registration is only available in the Portal Manager. If you want this variant to also work in the browser when accessing the portal, you must make the following change to the "initlogin.vm" file in the portal directory internal/system/vm/html/login.
            ##Initparams for Intrexx Loginbox

##Module Subdirectory, depends on Loginmodule ## default "intrexxauth"
#set($l_strModuleSubDir = "intrexxauth")
Change the line #set($l_strModuleSubDir = "intrexxauth") to #set($l_strModuleSubDir = "ldapauth").
Please note that when using LDAP authentication, login credentials are transmitted in plain text between the browser (client) and the server. It is therefore recommended that this method be used only over HTTPS.