

Tips & Tricks - Tree
In this post, we'll introduce the "Tree" application element, which is available as both an input and a view element. You'll learn how the tree works in the browser and how to configure it in the "Applications" module.
You can find the sample application here. It can be downloaded and imported into any portal as usual.
The Tree Element in the Browser
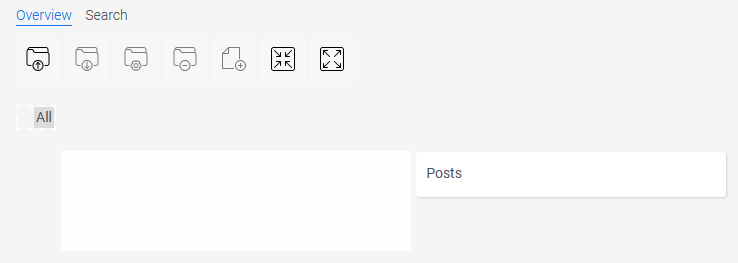
The "Tree View" element is located on the sample application's home page. If no data has yet been entered in an application with a tree view, the element appears as shown above when the page loads. As a first step, you can now create a folder at the top level.
To do this, click "Create Parent Folder" at  .
.
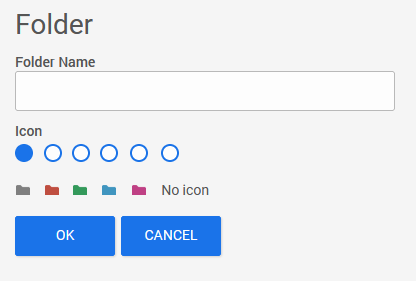
Enter a folder name here and, if desired, select an icon for the folder. Then click "OK" to save the first folder.
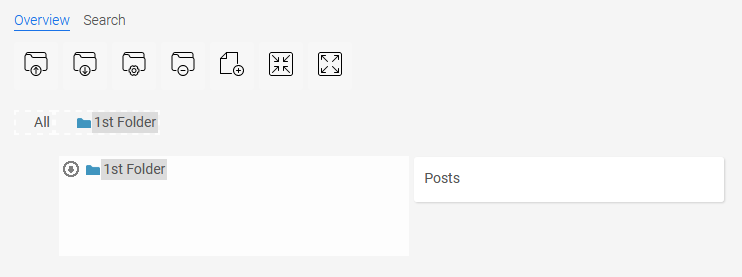
To create additional subfolders, the parent folder must be selected each time.
Then click "Create Subfolder."
In this way, you can create any number of folders and levels. All folders can be moved within the structure using drag-and-drop.
The buttons above the tree view have the following functions:
Create a parent folder
 Create a Subfolder
 Edit Folder
 Delete Folder
 "Create Post" opens the "Create Post" page.
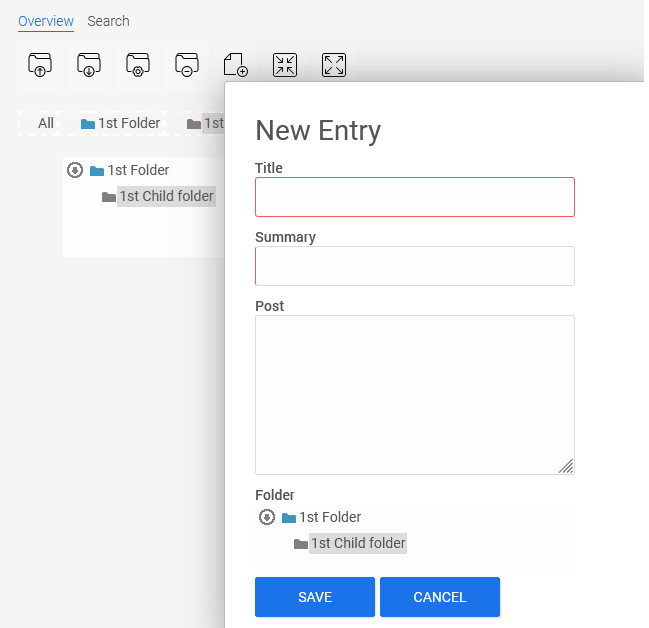
Here you can enter the title, abstract, and text of the article. If a folder was previously selected on the home page, it will already be automatically selected here in the folder structure at the bottom of the post editing page. If necessary, the post can also be moved to a different folder. To do this, simply click on the folder you want. Then save your entries by clicking "OK."
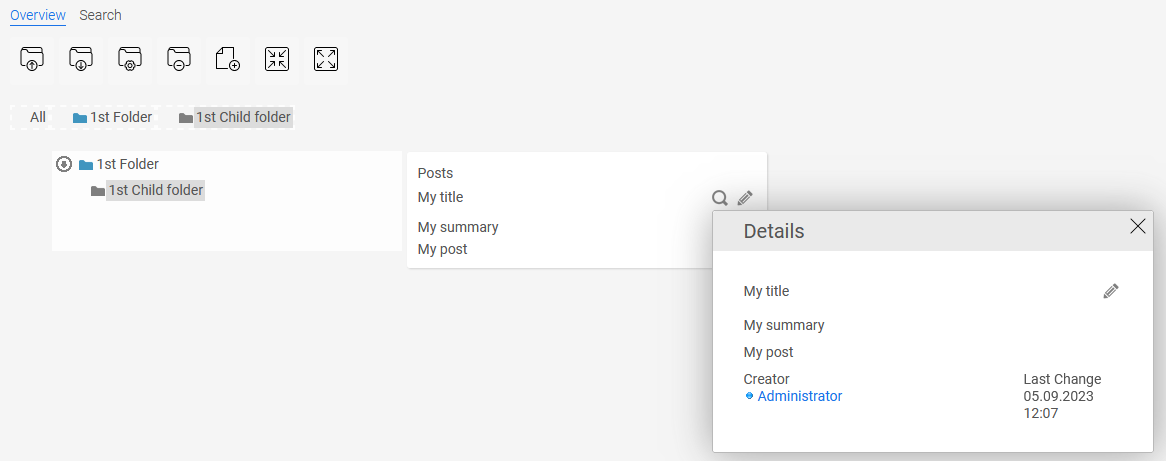
The post is now displayed on the home page in the folder. Clicking "Details" on  opens the post information, which also displays the author and the date of the last update. Click "Edit" at
  to edit the post.
Configuring the Tree Element
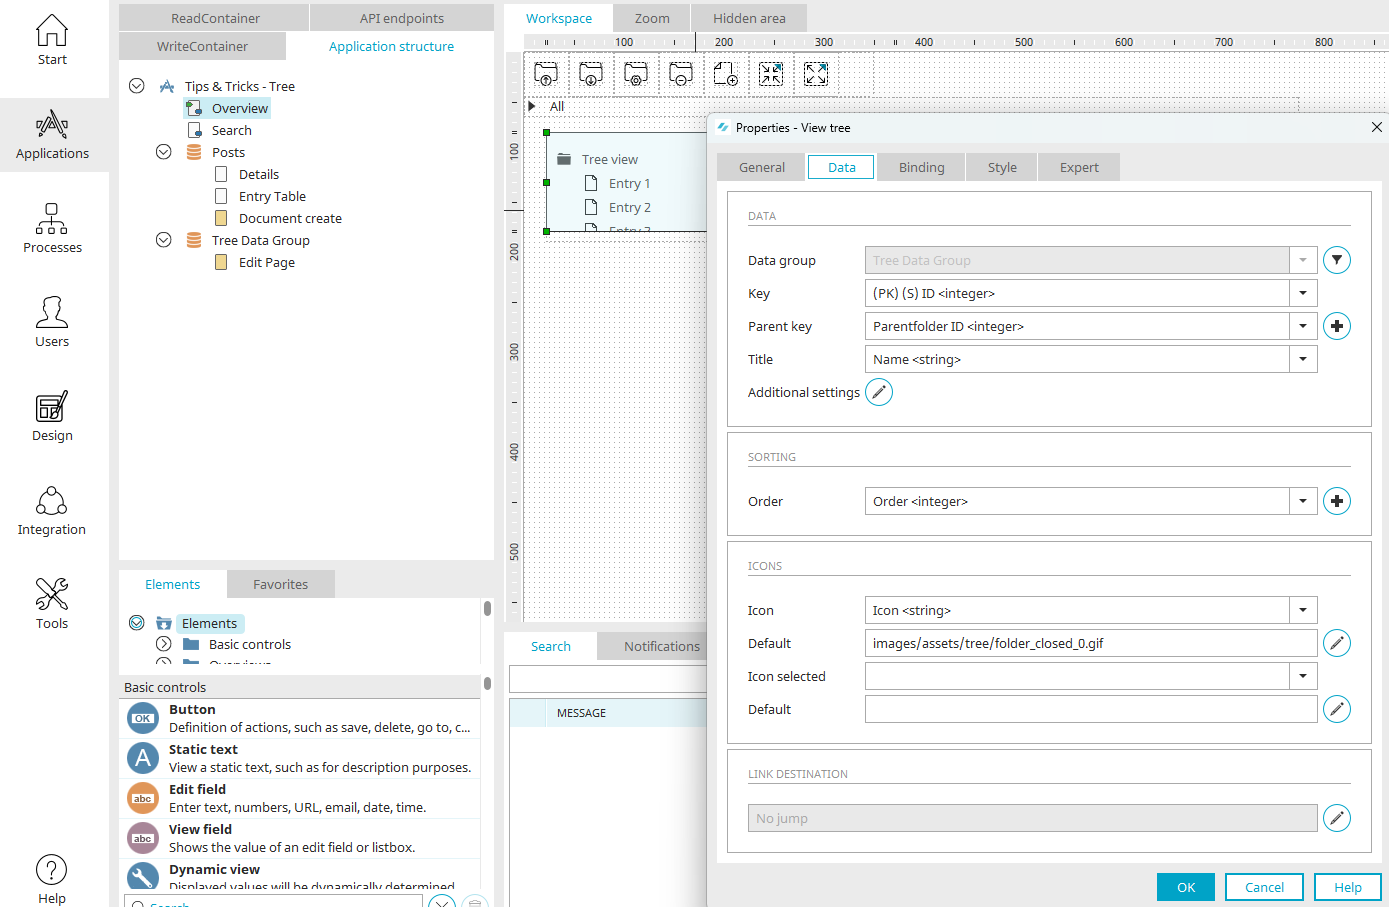
In the sample application, you'll find the "Tree - View" element on the "Overview" page. In the Properties dialog box, you can configure the tree on the "Data" tab.
Data Group
A separate data group is required for the folders in the tree. In the sample application, this is the "Tree Folders" data group. The data group requires the data fields described below.
Key
The data set should contain a field that can be used to identify a single tree node. In this example, the primary key (the field "(PK) (S) ID") is used for this purpose. It is not necessary to use the primary key of the data group; however, the key field must contain unique values and can be of the "Integer" or "String" data types. The folders are automatically numbered when they are created, and the corresponding value is entered in the key field.
Parent Key
When a new subfolder is created in the browser, the tree element automatically stores the ID of the parent folder in this field. The field for the parent key must have the same data type as the field for the key.
Title
The folder name is stored in the title field as soon as a new folder is created in the browser or an existing folder title is changed in the browser.
Order
A folder in the tree can contain any number of subfolders. In "Sorting," you can select a data field that stores the sort order of the folders on a given level. The Tree element automatically assigns sequential numbers to the folders on a level. If a folder is moved within a level in the browser using drag-and-drop, thereby changing the order of the folders in that level, the tree element automatically saves the new values for the affected folders in the "Order" field.
Generally, all values in the "Order" and "Parent Key" fields are automatically updated and managed by the tree element as soon as a folder is moved to any other location in the tree using drag-and-drop in the browser.

In the figure above, you can see a simple example folder structure on the left. To the right of that, you'll see the corresponding values for the folders in the database table of the tree data group.
Symbol
Here, you can specify relative paths to image files, which will then be displayed in the browser to the left of the folder names. The folder where the image files are stored must be located within the portal directory "external/htmlroot." The "images" folder contained there also stores, among other things, the application images that you have embedded in the application—for example, using the image element. Intrexx automatically creates the name for folders containing application images using the application's GUID as soon as an image is embedded in an application.
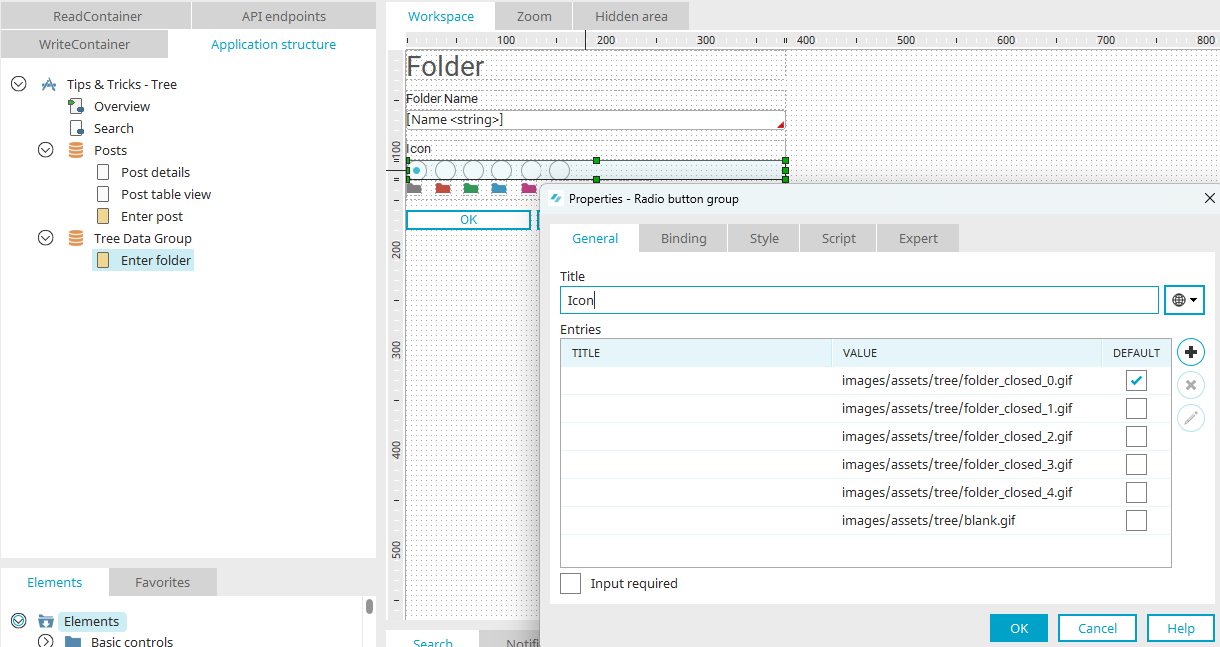
In our sample application, we use images that are already available when a new portal is created. These folder icons are located in the "images/assets/tree" directory. On the "Enter Folder" page, in addition to the folder title, the path and the filename of the folder icon are entered as the value of a radio button in the "Icon" data field.
To make it clear to the user in the browser which folder icon they are selecting when they click on an option, the images under each option are embedded using the `img` element.
In the tree element's Properties dialog, the value from the "Symbol" data field is used for both selected and unselected folders. A representative image can be set as the default. This is displayed when no icon has been assigned to a folder.
Create a post
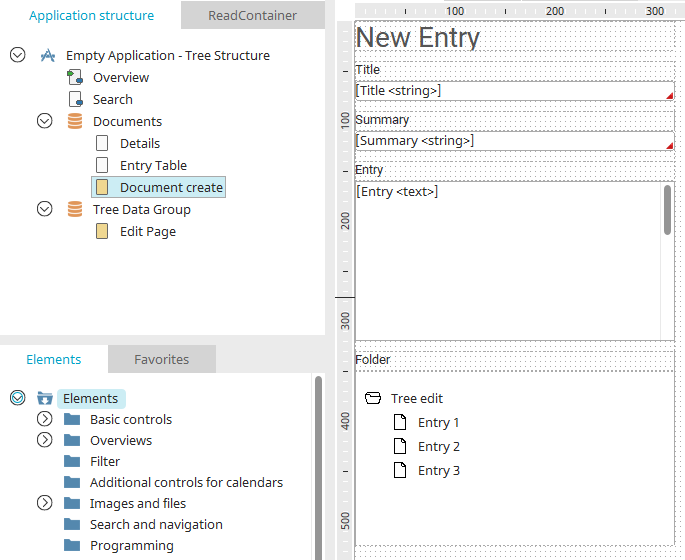
In the sample application, you can create posts for each folder in the browser by clicking the "Create Post" button. On the "Create Post" entry page, you can also assign the post to a folder in the tree right away. The "Tree Input" element is used for this purpose. The only difference from the "Tree View" element is that you cannot define a jump target here. The tree on this page also uses the data fields from the "Tree Folder" data group.
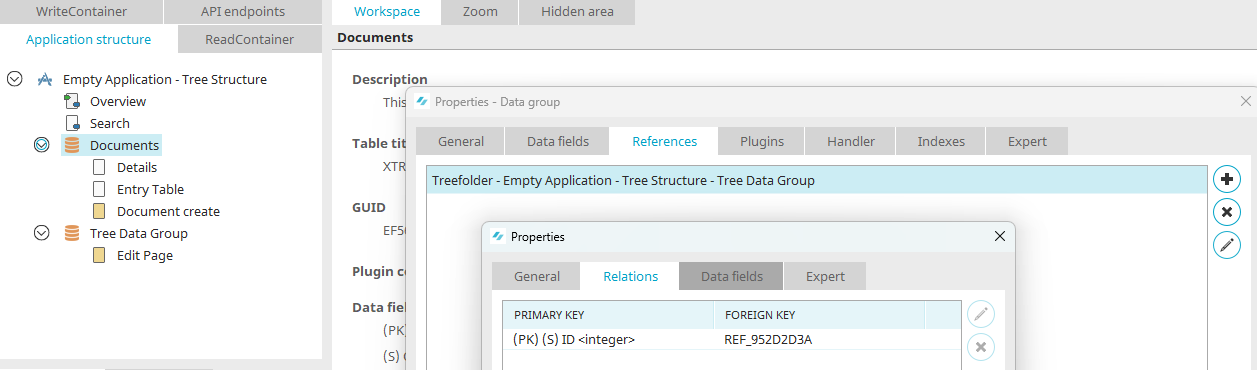
To ensure that a post is assigned to the correct folder in the tree, a reference to the "Tree Folders" data group is defined in the "Posts" data group. The folder's key field, which contains the folder's ID, is used as the reference field.
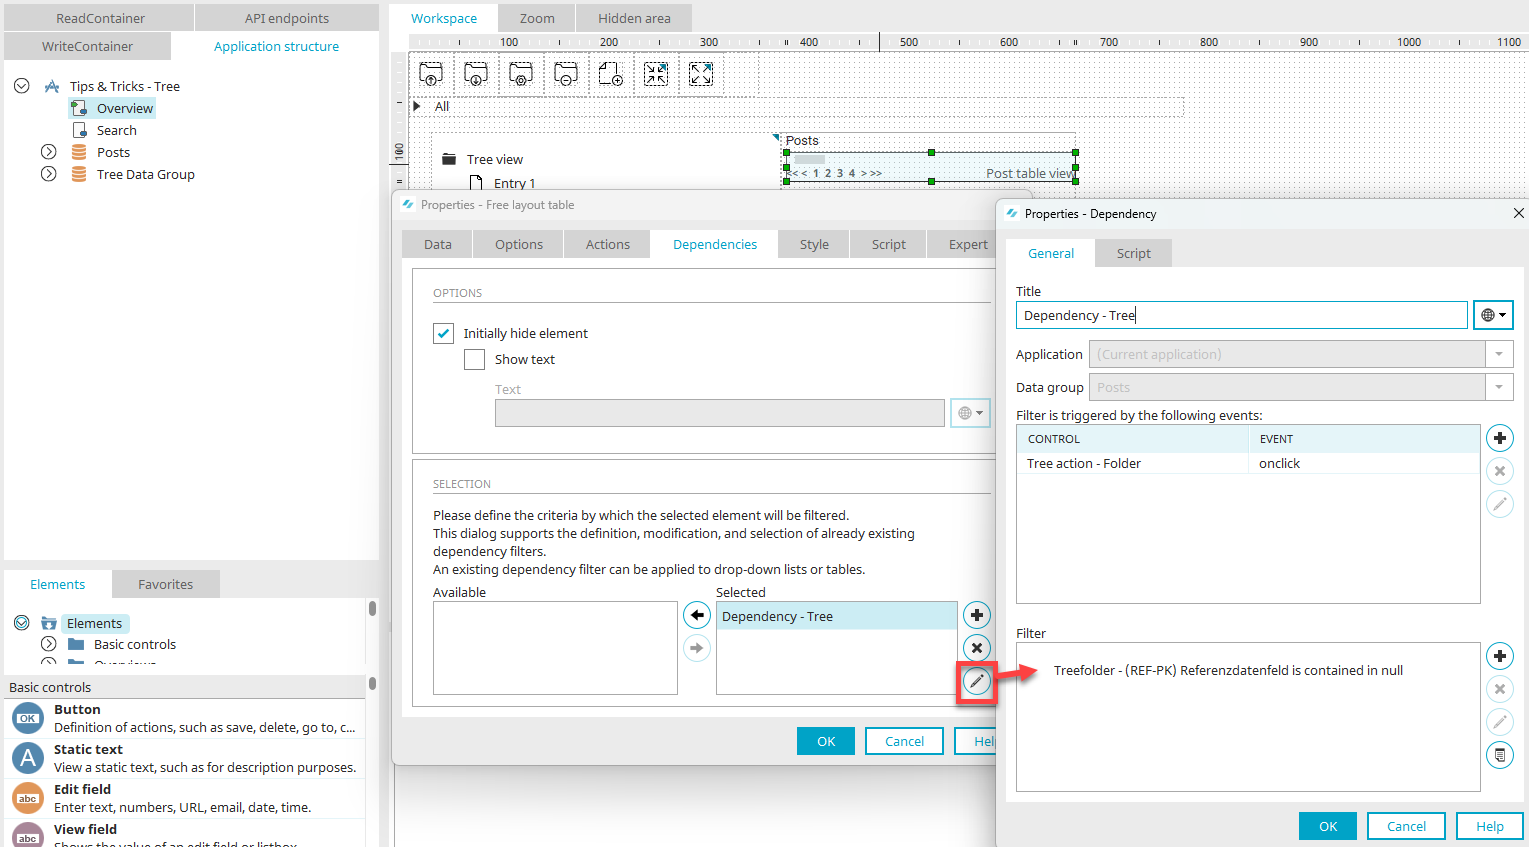
On the overview page of the sample application, the posts are displayed in a customizable table that incorporates the "Post Table View" page from the "Posts" data group. To ensure that the correct post is loaded when a folder in the table is clicked, a dependency has been defined that displays only the post whose reference key field contains the folder's ID.