Projects
In the "Projects" module, you can create and organize projects. The email service should be configured to get the most out of the application.
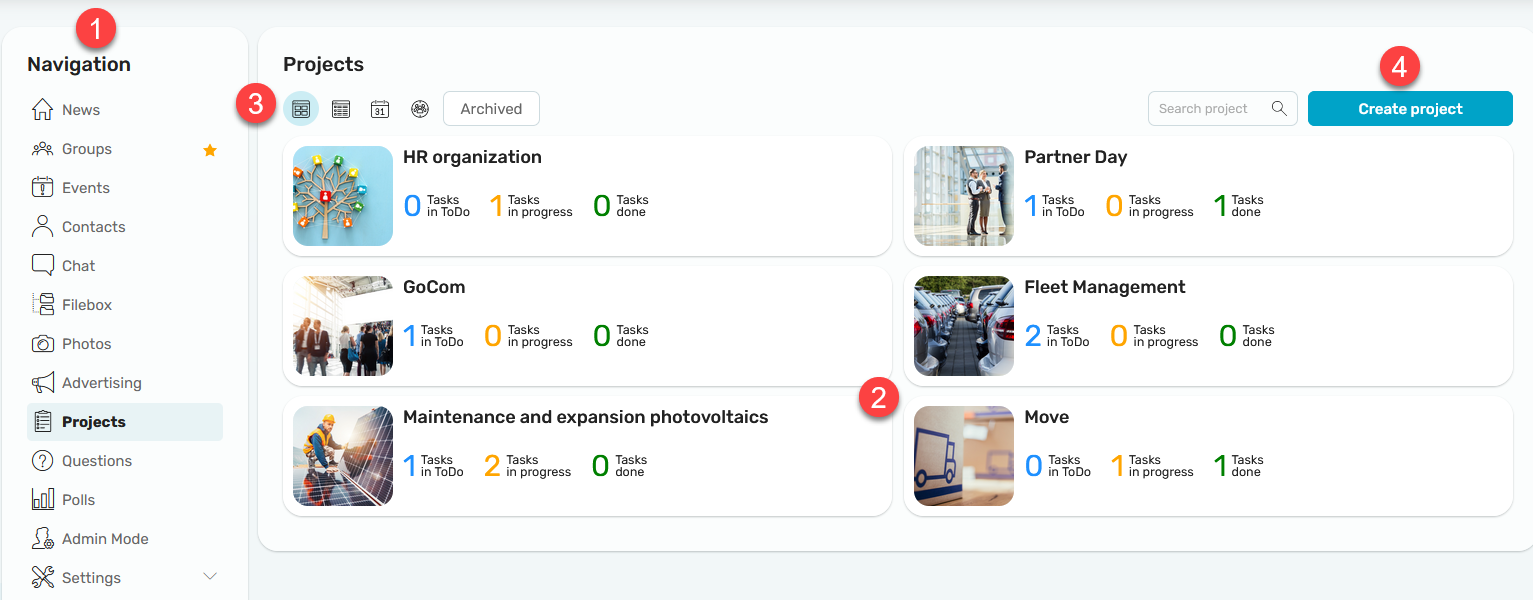
1. Navigation
Click on "Projects" in the Navigation to switch to the module.
2. Projects
Here you can see all projects relevant for you. The number of tasks with the status "To do", "In progress" and "Done" is also displayed here.
3. Views and filters
 Tile
Tile
This is the default view. All projects you are a member of are displayed in tiles.
 Lists
Lists
All projects you are a member of are displayed in a list.
 Calendar plugin
Displays all projects you are a member of in a calendar over the period from project start to project end. Click here for general information about calendar functions.
 Resource
Displays all projects you are a member of in a resource diagram over the period from project start to project end. General information about the functions of the resource element is available here.
Archived
Projects can be archived and displayed using the filter option (see Options).
4. Create project
Click on the "Create project" button to create a new project.
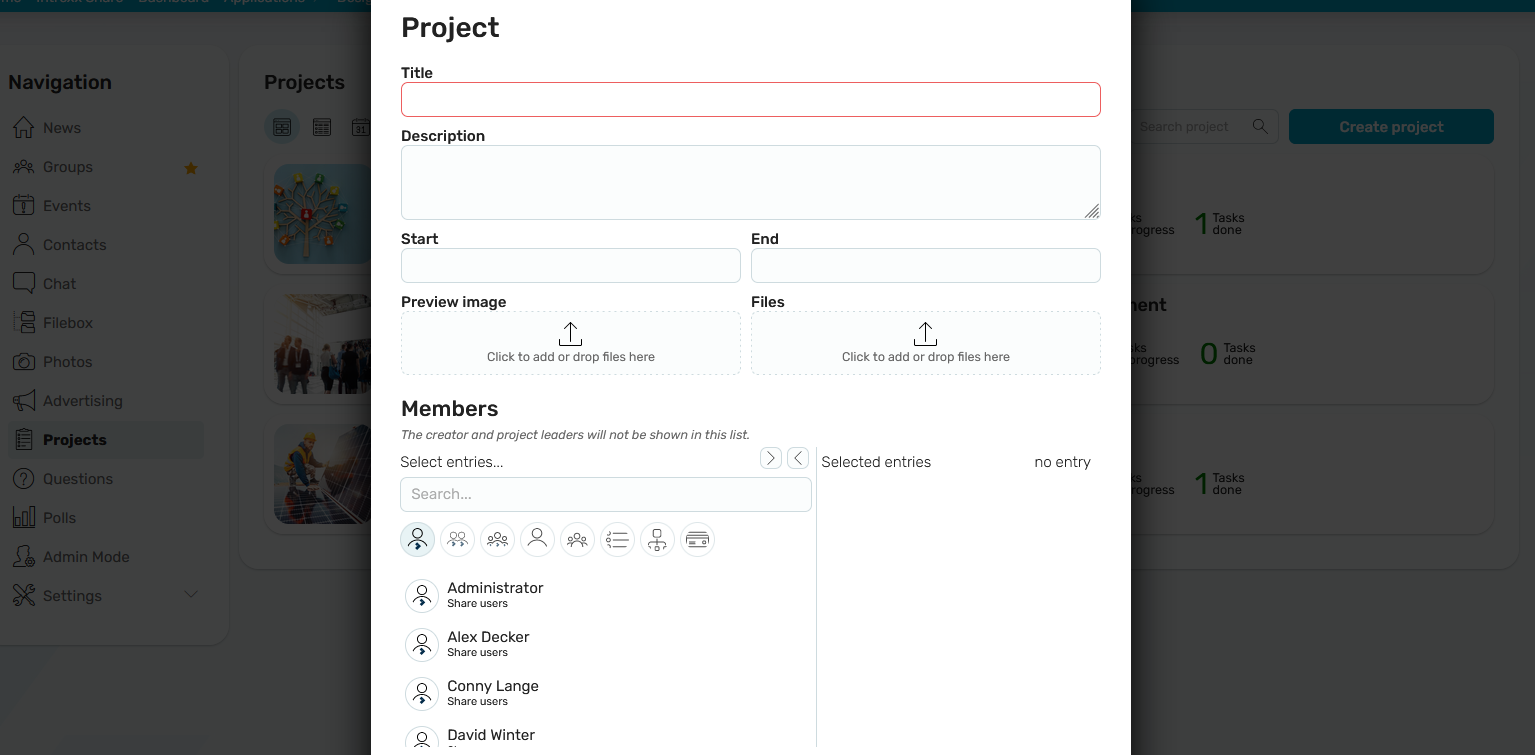
The creator of a project is automatically stored as the project manager. Enter the title, description, start and end of the project here. A preview image can be assigned to the project. You can also upload project files. Members of a project can be controlled via the Intrexx Share distribution list.
Project - detail page
Click on a project on the overview page to go to the details page.
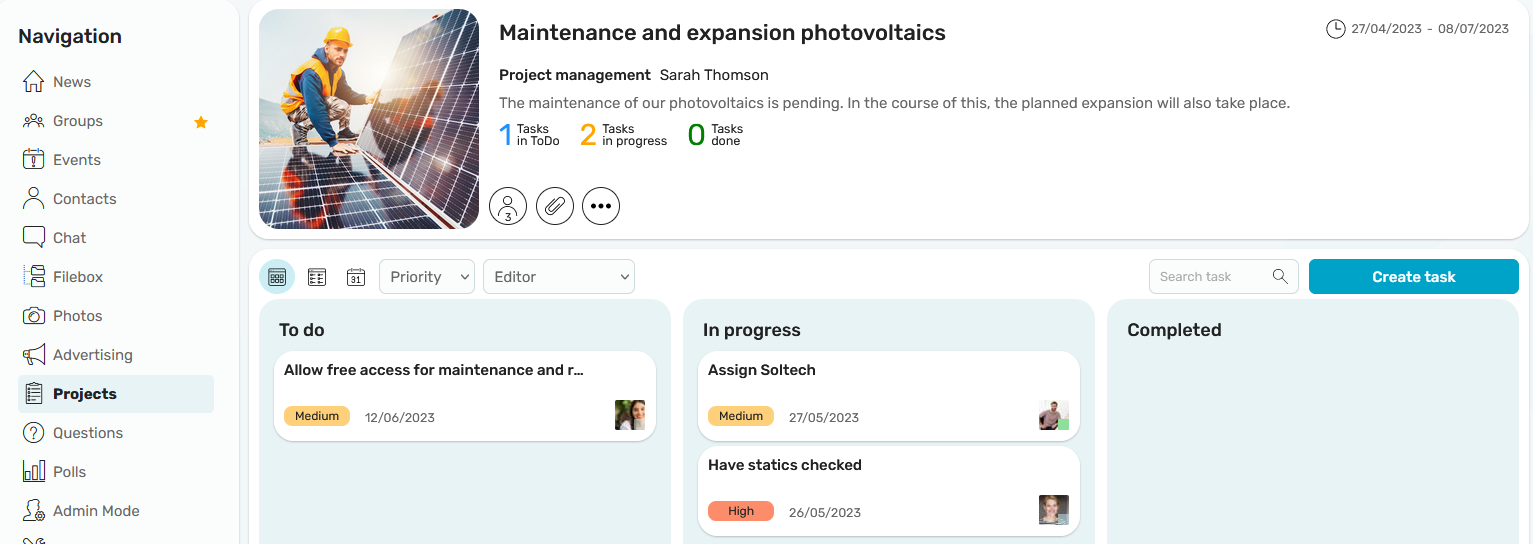
The detail page of a project is divided into two sections. In the upper section (1), all the important information about the project is displayed.
 Members
The number of project members is displayed here. Clicking on the icon opens a detail page where members and the project manager can be managed.
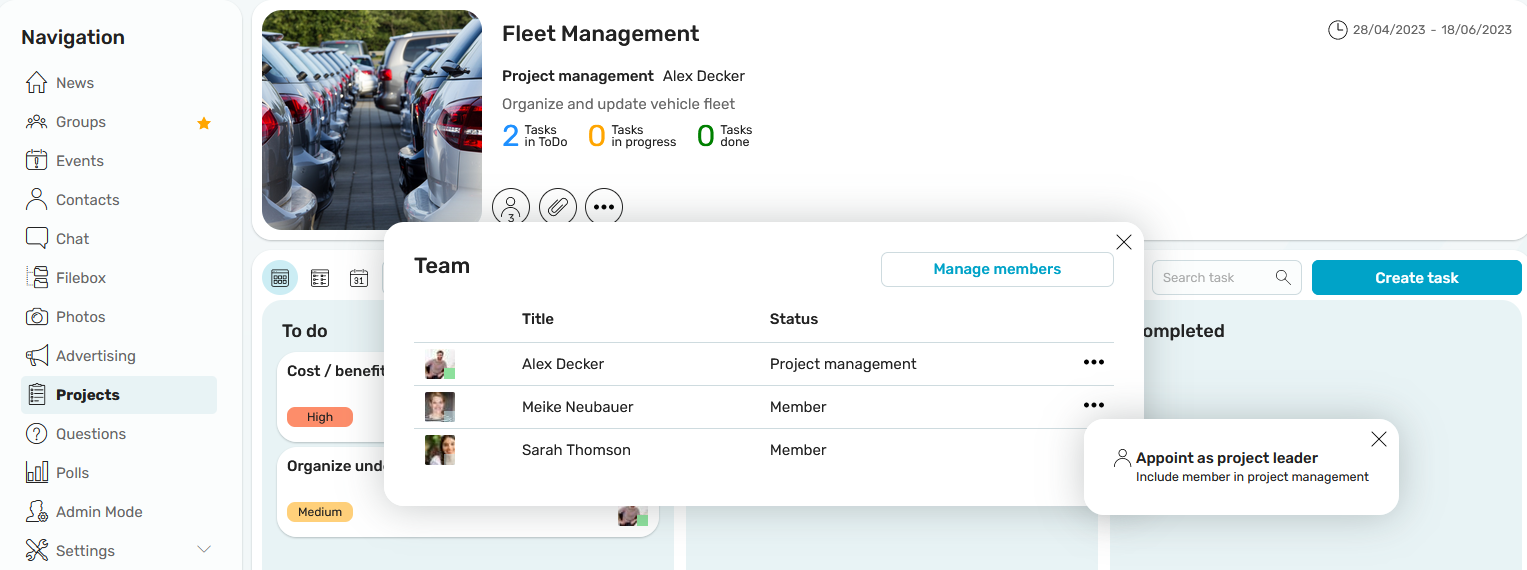
The project manager can add more members to the project or remove members from the project in "Manage members".
By clicking on ![]() "Options", the project manager can add members to the steering group. A project manager cannot leave the group until at least one project manager has been defined.
"Options", the project manager can add members to the steering group. A project manager cannot leave the group until at least one project manager has been defined.
 Files
Files
All the files you add when creating or editing projects and tasks can be accessed by clicking on the "Files" button here.
 Options
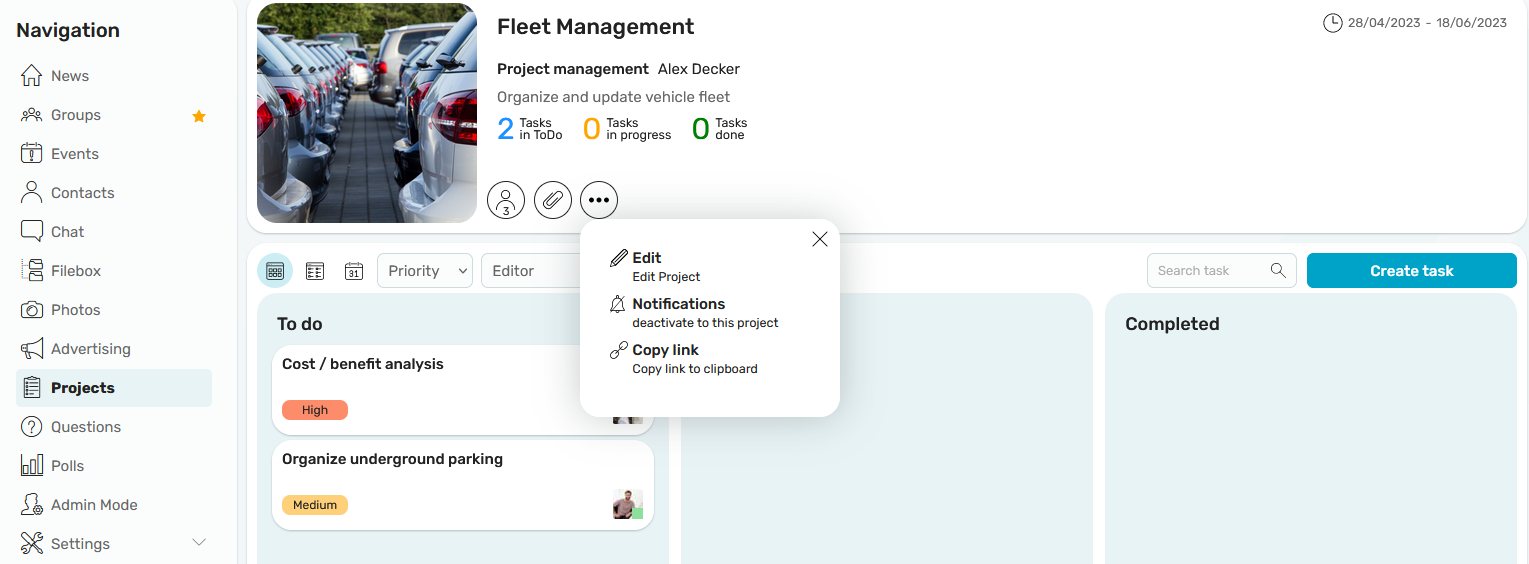
![]() Edit
Edit
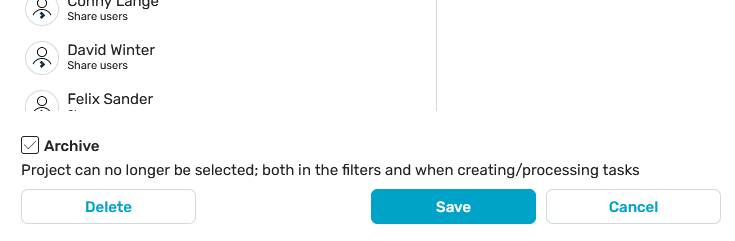
Projects can be edited by the creator or the project manager. If you are editing an existing project, you will also find the "Archive" setting at the bottom of the input page. This archives the project.
![]() Notifications
Notifications
Notifications for the project can be activated or deactivated here.
![]() Copy link
Copy link
Copies a project link to the clipboard.
Create and organize tasks in the Kanban board
At the bottom of the project, tasks can be created and scheduled in a Kanban board. The tasks view can be switched to tile, list or calendar. In addition, the tasks can be filtered by priority, agent and, in the list view, by status.
Create task
Clicking the "Create task" button opens an input page where a new task can be entered.
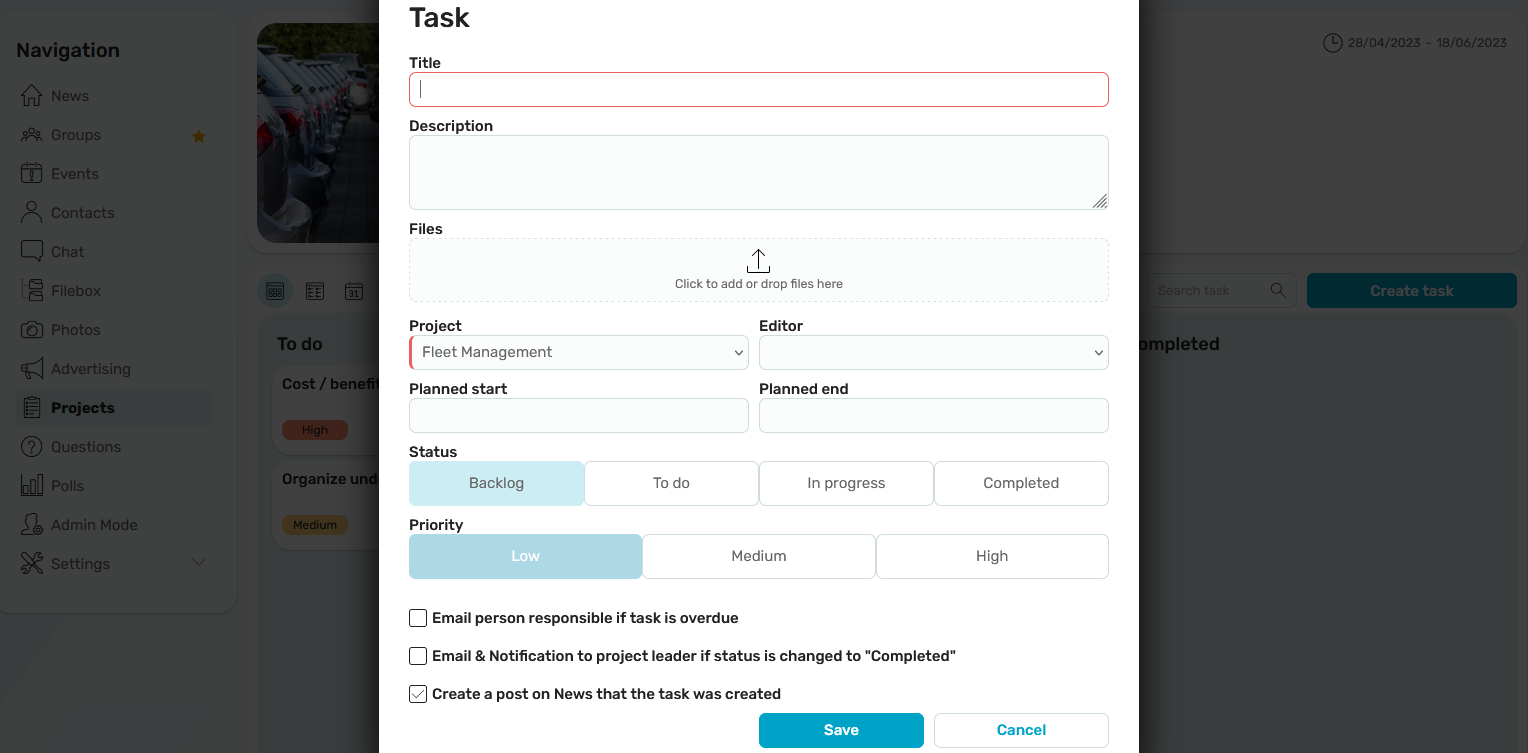
In the upper section, you can enter the title and description of the task. Files can also be uploaded. Select the project to which the task should be assigned. Select an agent who is responsible for the task. Also enter the scheduled start and end date by which the task should be completed.
Status
In the Kanban board, tasks can be assigned in different areas. The status values are predefined and cannot be extended.
-
Backlog: Tasks that still need to be completed or new tasks
-
ToDo: Tasks to be carried out
-
In progress: tasks whose processing has begun
-
Done: Tasks that have been completed.
Priority
Define the task's priority as low, medium or high. The priorities are predefined and cannot be extended.
Email responsible person if task is overdue
If the date you have entered as the planned end date is expired, an email is automatically sent to the employee you have selected as the agent.
Email project manager(s) when status changes to "Done"
If the status is set to "Done", an email is automatically sent to the project manager(s)
Create a post on News that the task was created
A new task will be displayed as a post in the news feed with this setting.
Organize tasks
Tasks are displayed in the lower section of the project. They can be dragged and dropped into the desired column and the status of the task is changed automatically. Multiple tasks can also be dragged and dropped into the desired order within each column. The backlog is accessible below the tasks. All tasks that have not yet been assigned are collected here.
View and edit task
To view the details of a task, click on the task title. The detail page of the task opens.
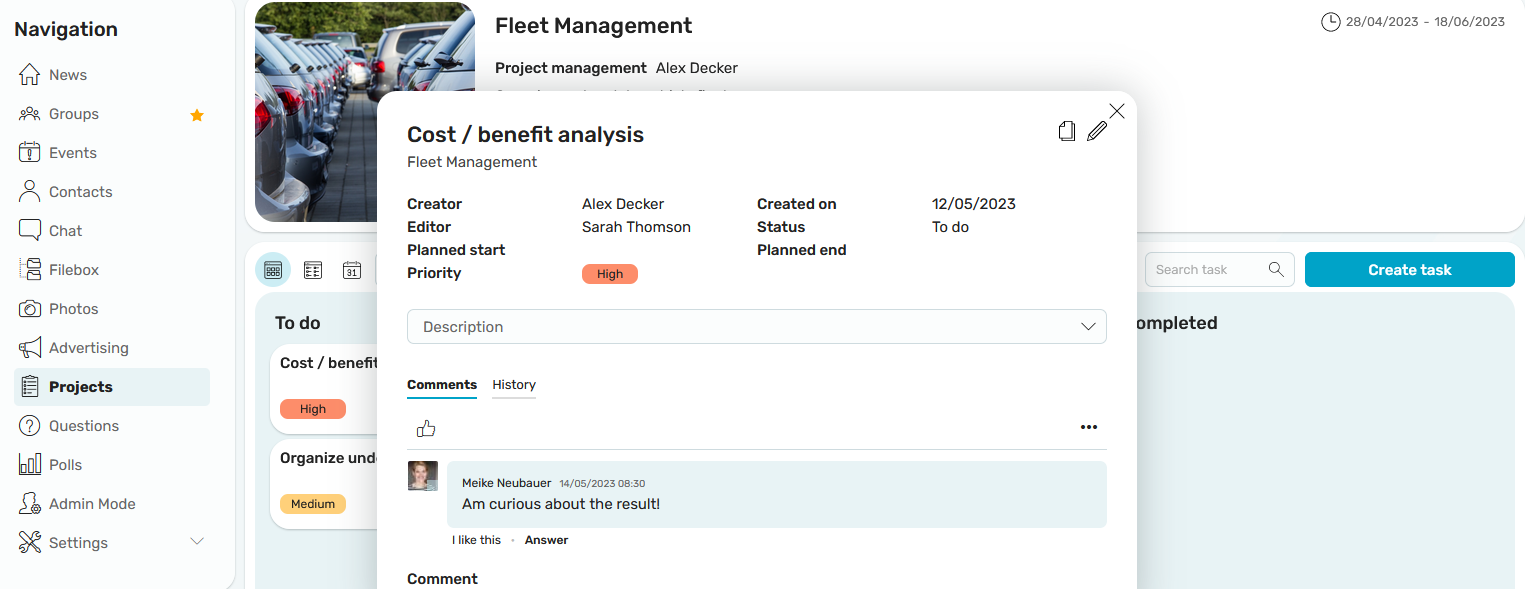
In the upper section, you will find a link to the corresponding project. If the processing date of the task is expired, the date will be marked in red. All project members can write comments and files about the task and view a task history. In the upper right section, the task can be copied if necessary. All project members can edit and view tasks.
Portlet
For the "Projects" module, a "My Tasks" portlet is available. Click here for more information.