Register connector for Microsoft 365 and Teams
Use
You must register a Connector for Microsoft 365 and Teams (again) if you want to use the following Intrexx functionalities:
-
Microsoft Teams
In connection with Microsoft Teams, you must register the Connector if you want to use the Microsoft Teams "Create team/channel", "Create Teams message action" and "Create meeting" actions (Microsoft Teams process actions).
If you want to chat and make calls in Microsoft Teams via the Intrexx portal, registration is not required (Microsoft Teams Communication).
-
Microsoft OneDrive
You must register the connector if you want to access OneDrive via the "MS365 OneDrive" application control element (see MS365 OneDrive Control).
-
MS365 data group, MS 365 data field
You must register the Connector if you want to use an MS365 data group (see Creating a Microsoft 365 data group) or an MS365 file field (see Add MS365 file field).
Step-by-step guide
To register a Connector for Microsoft 365 and Teams, proceed as follows:
-
Open the "Integration" menu.
-
Under "Collaboration" select the item "Connector for Microsoft 365 and Teams".
-
Right click.
-
Select "
 New application registration" from the context menu.
The "New registration - General" dialog box will open.
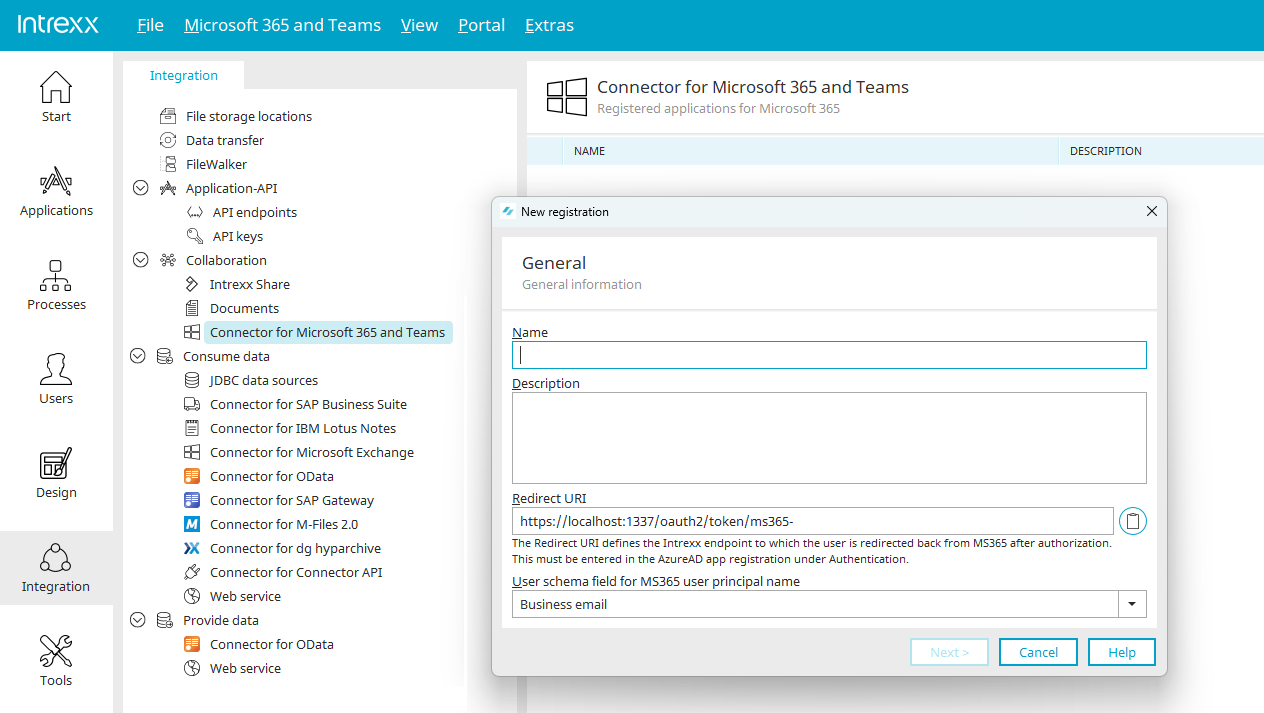
New registration - General
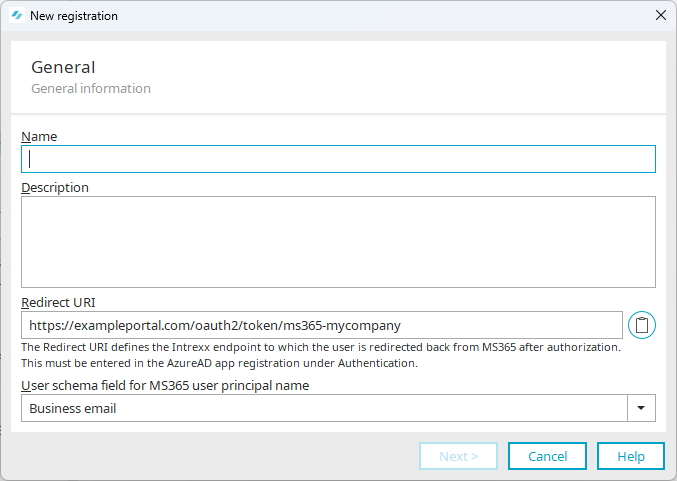
Name
Enter a name for the collaboration here. The name must be unique for each collaboration you create.
The name may only consist of letters [a-zA-Z] and numbers [0-9].
Redirect URI
The redirect URI is shown here. The redirect URI defines the Intrexx endpoint to which the Microsoft 365 user is returned after authorization.
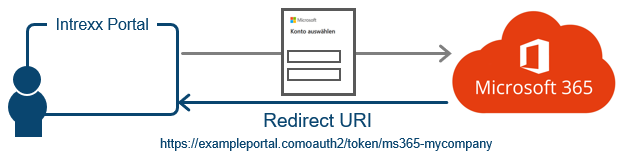
You must store the redirect URI in Microsoft Azure.
More detailed information is available in section Store redirect URIs from Intrexx .
User schema field for MS365 User Principal Name
Select here which Intrexx user field is to be used as the "User Principal Name" in Microsoft 365. This is usually the user's (business) email address. This is also commonly used for logging into Microsoft services.
If you are not using the business email address of the Intrexx user for this, you should select another field here with the correct information.
You can also define your own field via the Intrexx Schema Manager and use it for the login.
-
Click on "Next".
The "New registration - Authentication" dialog will open.
New registration - Authentication

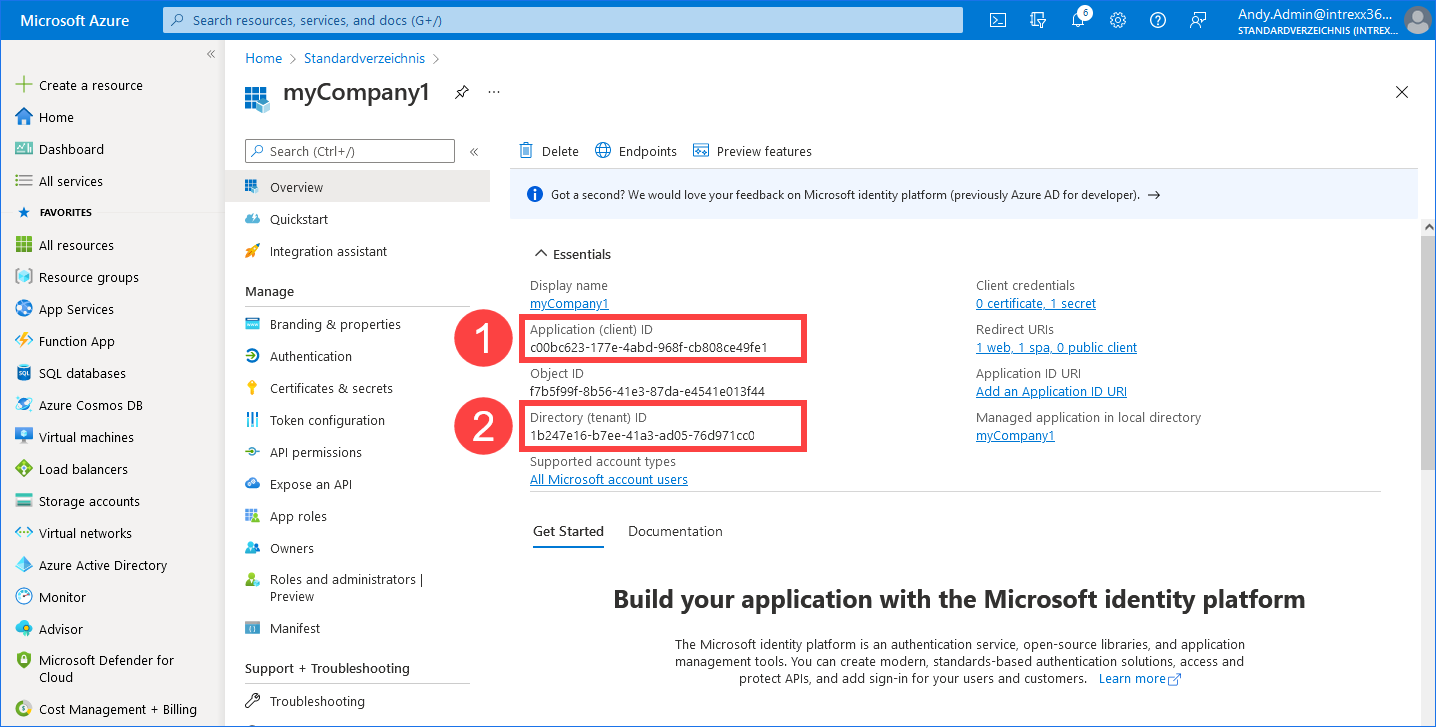
In this dialog box, you must store the details for the Intrexx authentication in Microsoft Azure. The required information was generated when you registered Intrexx as an application in Microsoft Azure. You will find it in Microsoft Azure under the "Overview" menu item.
More detailed information is available in section Register app .
Tenant ID
Enter the Tenant ID here. You can find this in Microsoft Azure in the "Directory-ID (tenant)" field (
 ).
).Application ID (client ID)
 ).
).Client secret
Enter the value (!) of the client secret here. You can find this in Microsoft Azure under the "Certificates & secrets" menu item. More detailed information is available in section Create client secret .
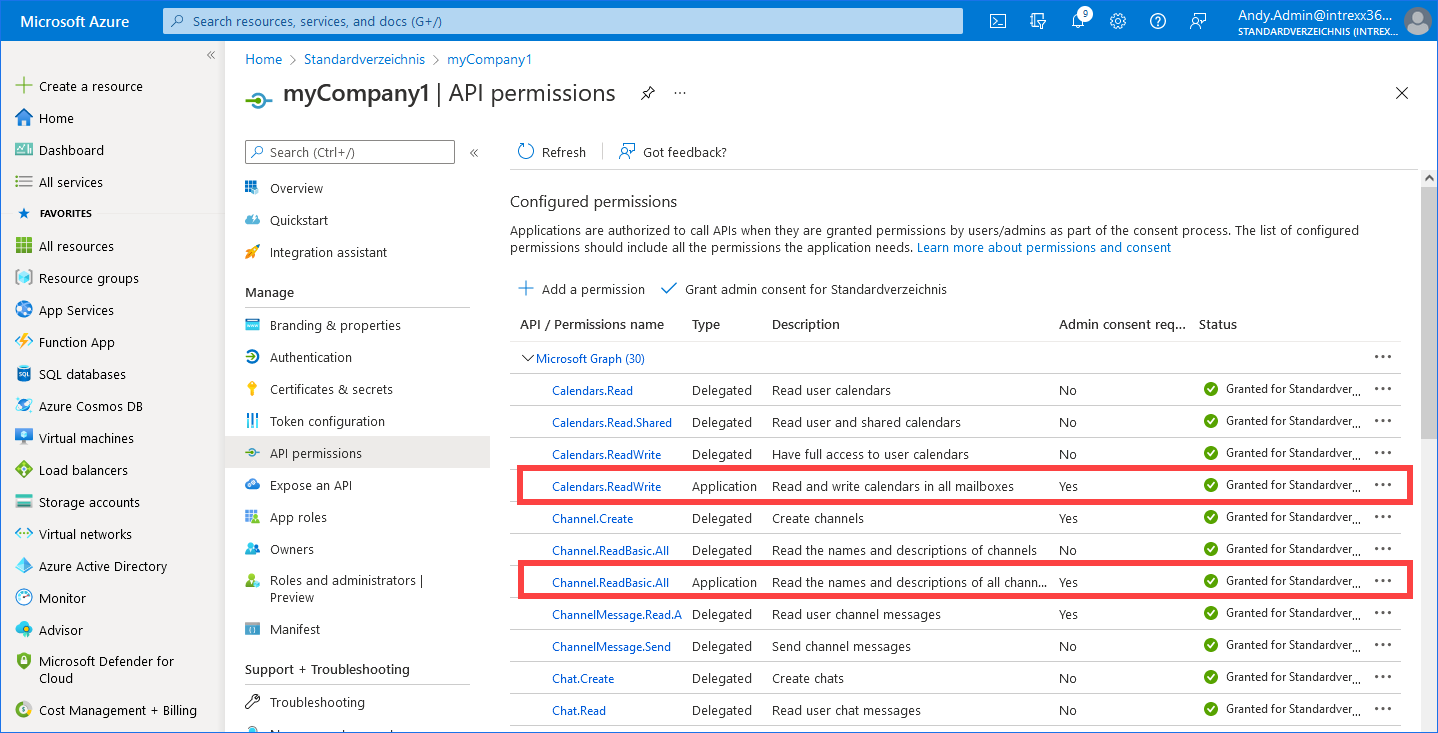
Microsoft Graph Permissions (Scope)
The entry "https://graph.microsoft.com/.default" is set here by default. If you leave this entry, Intrexx accesses Microsoft 365 with all API permissions that you have stored in Microsoft Azure under the "API permissions" menu item.
If you want to restrict the permissions, you can enter the individual API permissions you want in this field. The individual permissions must be separated by a space.
More detailed information is available in section API permissions for the Connector for Microsoft 365 and Teams.
-
Click on "Next".
The "New registration - static user accounts" dialog box will open.
New registration - static user accounts
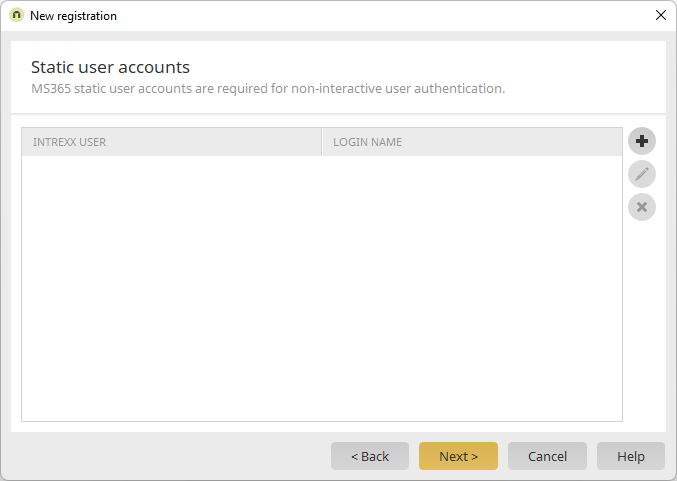
This dialog box displays the Intrexx users to whom you have assigned a Microsoft 365 user. You can create static users to log in to Microsoft 365 via Intrexx.
a. Click on
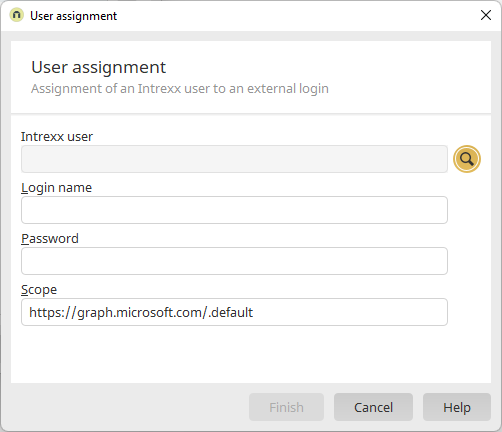
(Add user) to assign a Microsoft 365 user to an Intrexx user.b. The "User assignment" dialog box will open.
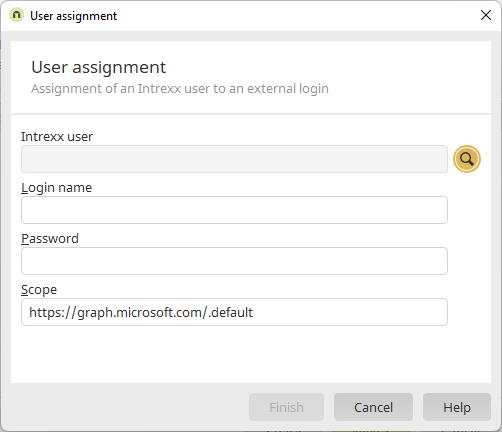
Intrexx user
Select the Intrexx user here.
Login name
Enter here the login name with which the Intrexx user is to log in to Microsoft 365.
Example
10 Intrexx portal users should be able to log in to Microsoft 365. The portal users should all log in with the same (technical) Microsoft 365 user to Microsoft 365. Enter 10 Intrexx users and assign the (technical) Microsoft 365 user to each of them.
Permissions (scope)
The entry "https://graph.microsoft.com/.default" is set here by default. If you leave this entry, the corresponding user accesses Microsoft 365 with all API permissions that you have stored in Microsoft Azure under the "API permissions" menu item.
If you want to restrict the permissions, you can enter the individual API permissions you want in this field. The individual permissions must be separated by a space.
More detailed information is available in section API permissions for the Connector for Microsoft 365 and Teams.
c. Click on "Finish".
-
Click on "Next".
The "New registration - static service accounts" dialog box will open.
New registration - service accounts
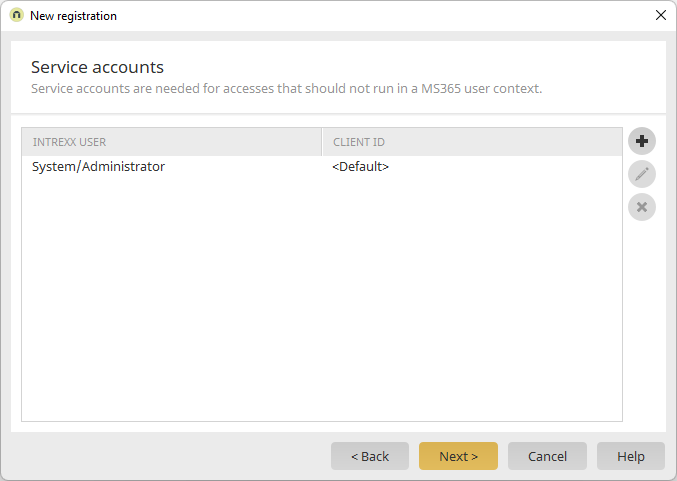
This dialog box displays the Intrexx users to whom you have assigned a Microsoft 365 service account.
For login to Microsoft 365, static user accounts or service accounts can be used. When logged in via a service account, actions in Microsoft 365 are not performed in the context of a personal user.
Service accounts can be used to perform all actions for which the permission is of the "Application" type.
In some scenarios, it is helpful, or even necessary, for Intrexx to log in to Microsoft 365 via a service account. Intrexx must log in to Microsoft 365 via a service account if data from Microsoft 365 is to be displayed in Intrexx. This is the case, for example, if a new Teams channel is to be created via Intrexx, since for the creation of a new channel, Intrexx must first determine which channels exist in Teams.
For each application registered in Microsoft Azure there is a service account in Microsoft Azure.
During registration of the Connector for Microsoft 365 and Teams, this service account is assigned to the Intrexx user "System/Administrator" by default.
a. Click on
(Add user) to assign a Microsoft 365 service account to an Intrexx user.b. The "User assignment" dialog box will open.
Intrexx user
Select the Intrexx user here.
Client ID
If the Intrexx user is to log in to the same app as in the "New registration – Authentication" dialog box, this field can be left empty.
If the Intrexx user is to log in to another app, enter the corresponding application ID (client ID) here. You can find this in Microsoft Azure in the "Application ID (client ID)" field.
Client secret
If the Intrexx user is to log in to the same app as in the "New registration – Authentication" dialog box, this field can be left empty.
If the Intrexx user is to log in to another app, enter the value (!) of the client secret here. You can find this in Microsoft Azure under the "Certificates & secrets" menu item.
Permissions (scope)
The entry "https://graph.microsoft.com/.default" is set here by default. If you leave this entry, the corresponding user accesses Microsoft 365 with all API permissions that you have stored in Microsoft Azure under the "API permissions" menu item.
If you want to restrict the permissions, you can enter the individual API permissions you want in this field. The individual permissions must be separated by a space.
More detailed information is available in section API permissions for the Connector for Microsoft 365 and Teams.
c. Click on "Finish".
-
Click on "Next".
The "New registration – Login in the Portal Manager" dialog box is shown.
New registration – Login in the Portal Manager
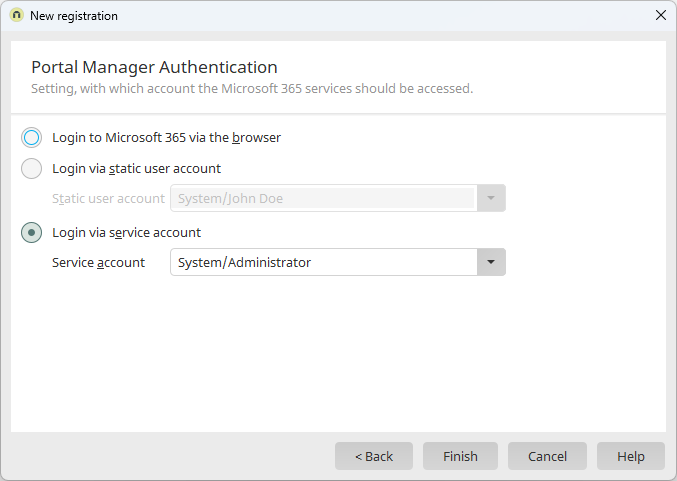
In this dialog box you can specify how Intrexx should access Microsoft 365 by default.
Login to Microsoft 365 via the browser
If you select this option, a browser window (pop-up) is displayed, in which the user must enter the required login data.
If the user is (already) logged in to Microsoft 365, the browser window is no longer displayed.

With this option, ensure that the display of dialog boxes (pop-ups) is not suppressed in the browser. If necessary, change the corresponding browser settings.
Login via a static user account
Select this option if the login to Microsoft 365 is to take place via one of the previously created static user accounts. Select the user account of your choice.
Login via a service account
Select this option if the login to Microsoft 365 is to be done via one of the previously created service accounts. Select the service account of your choice.
For more information on the different forms of logging in, see section Specify the login from Intrexx to Microsoft 365.
-
Click on "Finish".
You have registered a Connector for Microsoft 365 and Teams.