Integrate MS365 OneDrive control into application
The MS365 OneDrive control replaces the "Connector for Microsoft Office 365" in combination with the Connector for Microsoft 365 and Teams. The use of the MS365 OneDrive control element facilitates the configuration of access to Microsoft OneDrive. For example, it is no longer necessary to determine the drive ID and the folder ID via Microsoft Graph.
Requirements
To be able to use the MS365 OneDrive control, you must first register a Connector for Microsoft 365 and Teams. More detailed information is available in the section Register Connector for Microsoft 365 and Teams.
Step-by-step guide
To integrate an MS365 OneDrive control into an application page, proceed as follows:
-
In the appropriate application, open the page where you want to integrate the MS365 OneDrive control.
-
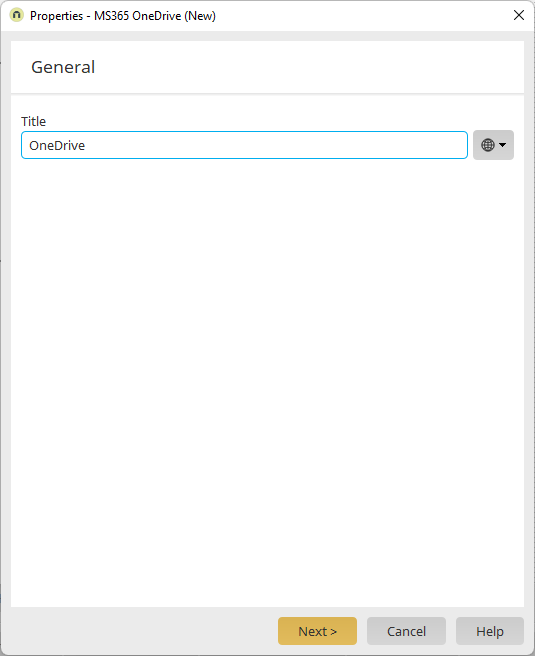
Drag the MS365 OneDrive control to the desired position on the page.
The "Properties – MS365 OneDrive – General" dialog box will open.
-
Enter a title.
-
Click on "Next".
The "Properties – MS365 OneDrive – Configuration" dialog box will open.

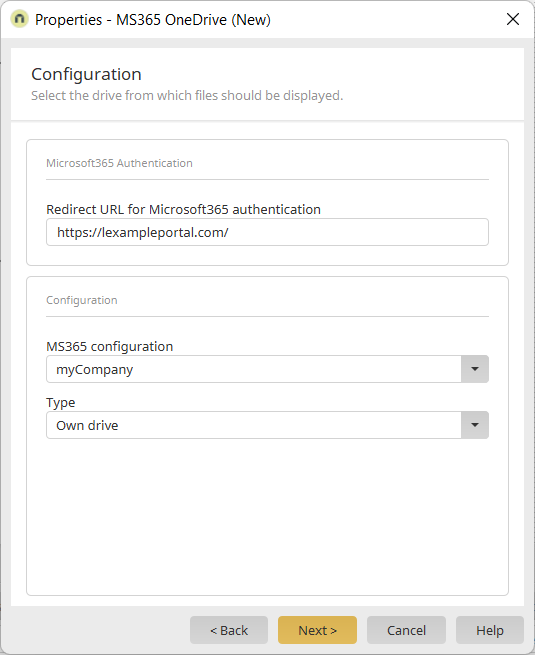
Redirect URL for Microsoft 365 authentication
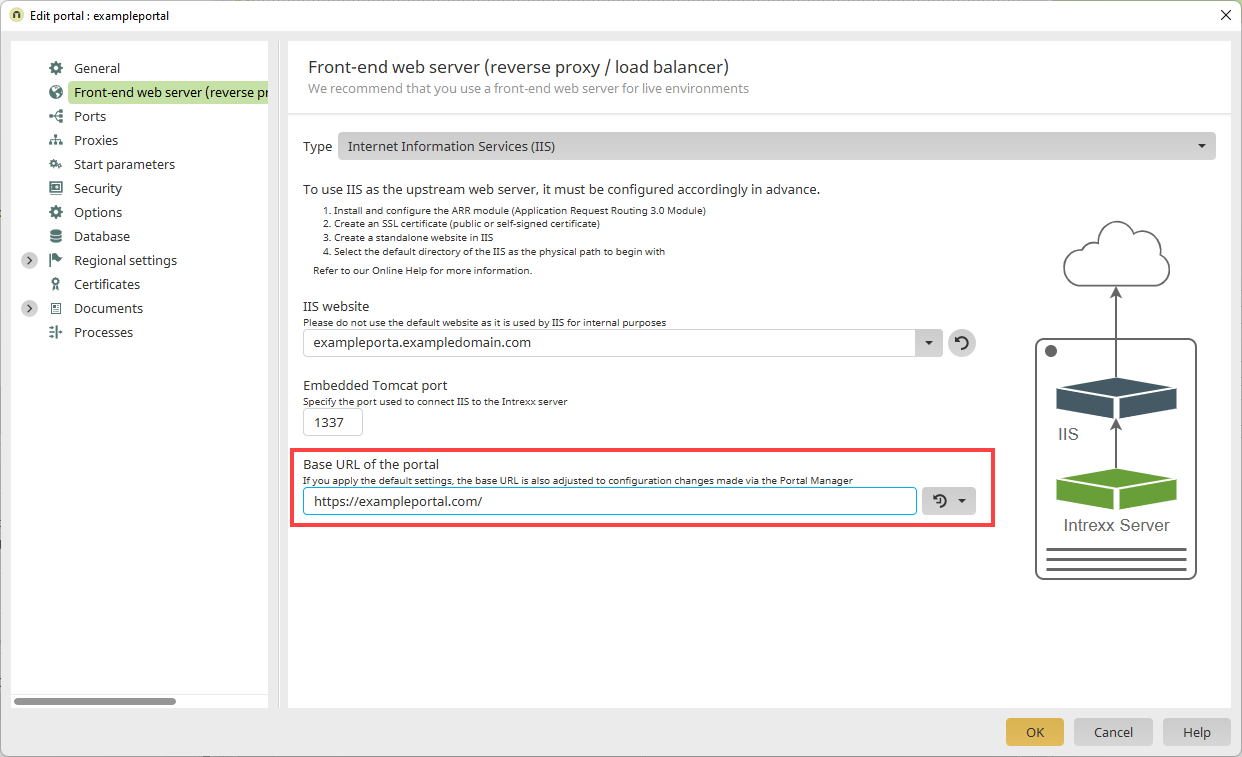
In this field, the redirect URL for Microsoft 365 authentication is preset. This corresponds to the base URL of the portal.
You can find the base URL via the "Portal" menu > "Portal properties" in the Portal Manager.
In connection with setting up Redirect URIs in Microsoft Azure, see the section Store redirect URIs from Intrexx .
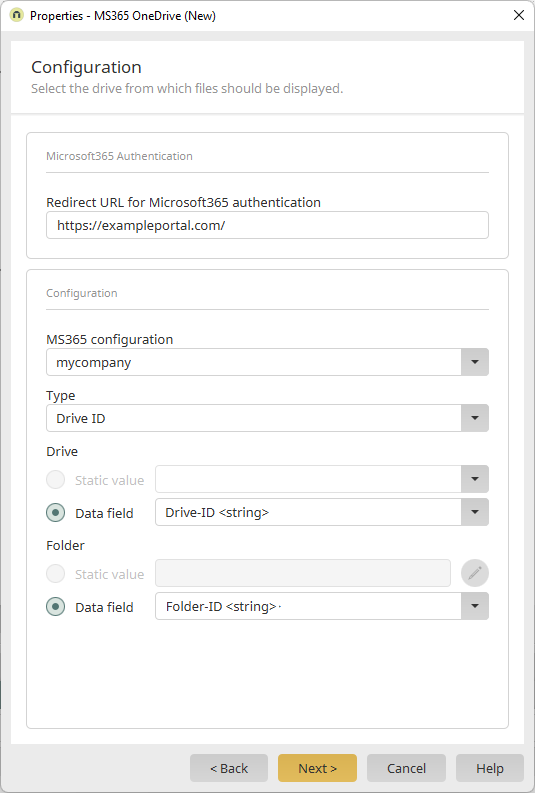
MS365 configuration
Select the desired Connector for Microsoft 365 and Teams configuration (registration) here.
The configuration specifies the permissions with which the Intrexx Portal Manager accesses Microsoft 365, among other things. Sufficient permissions must be stored in the configuration so that the Intrexx Portal Manager can determine the objects (groups, users, folders, websites) in Microsoft 365 and offer them for selection in this dialog.
Further information is available in the following sections:
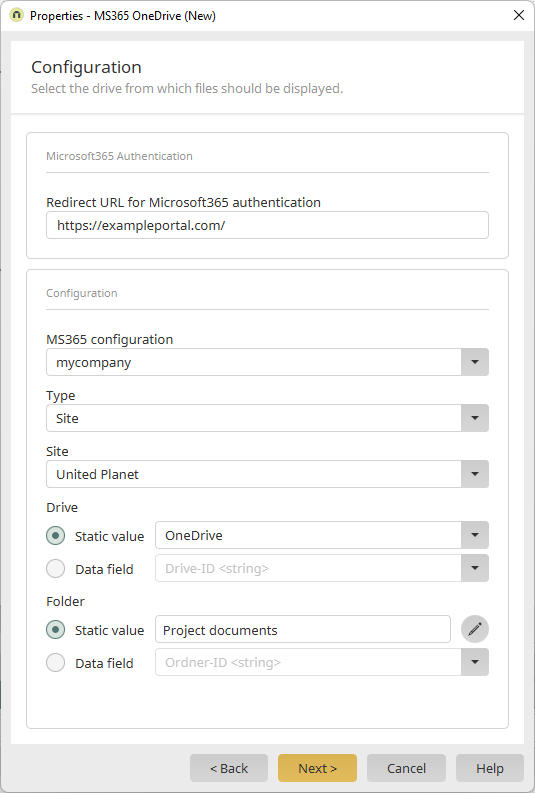
Type
Here, you can select where the files are to be stored.
The dialog box changes dynamically. Depending on the settings you have made in the Connector for Microsoft 365 and Teams and the value you select in the "Type" drop-down list, different drop-down lists are displayed.
The following selections are available depending on the setting:
-
Own Drive
-
Group
-
Website
-
User
-
Own Drive
If you select this value, the drive of the respective user logged into the Intrexx portal will be displayed in the Intrexx portal.
Group
If you also want to see the documents in the Teams group, you should not select the root folder, but the corresponding channel name of the target drive.

Website
User
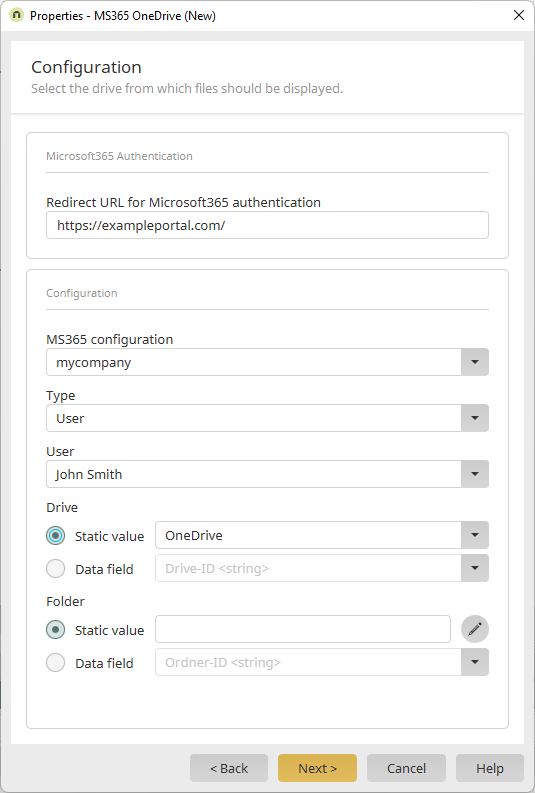
Drive ID
With the "Drive ID" type, you can access a drive by specifying the drive ID. In addition, you can access a folder by specifying the folder ID. The drive or folder ID is not stored in the MS365 OneDrive control. Instead, you only specify there in which data field, you have stored the drive ID and folder ID in the associated data group.
The type "Drive ID" is only available if the OneDrive control is inserted on a page below a data group.
Detailed information on the Drive ID can be found in section MS365 OneDrive - Dynamic access via drive ID.
-
-
Enter the desired information.
The "Properties - MS365 OneDrive - View" dialog box will open.
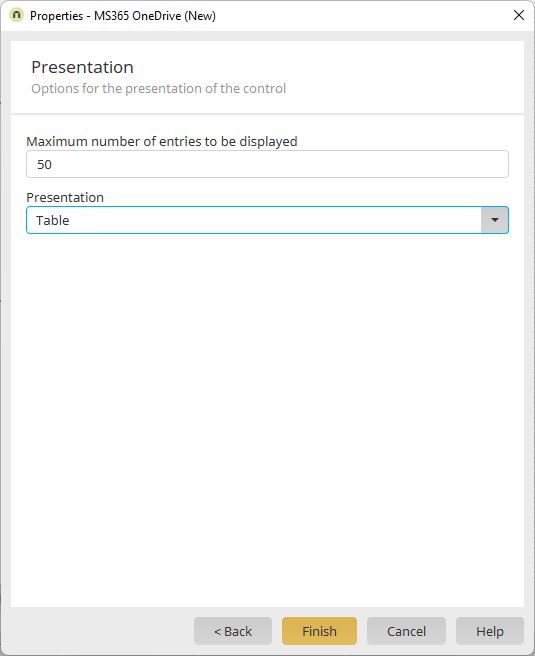
Maximum number of entries to be displayed
Here you can specify the number of entries to be displayed in the portal.
Example
If you enter the value "4", the first four elements on OneDrive are displayed.
"Show more results" is displayed below this.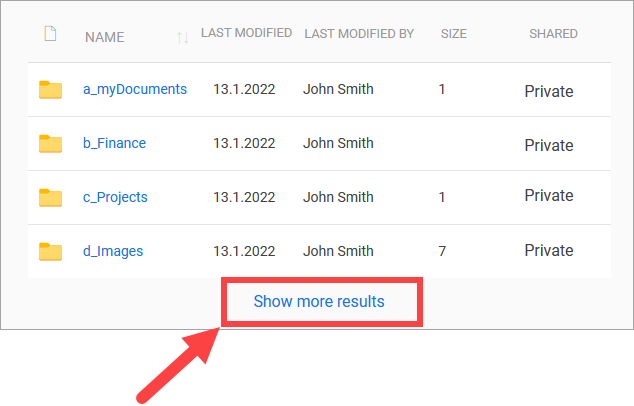
If the portal user clicks on "Show more results", the next four elements are also displayed.
View
Here you can set which view of the OneDrive elements is preset in the portal.
Table - If you select the "Table" value, the elements in the portal are displayed in table form.
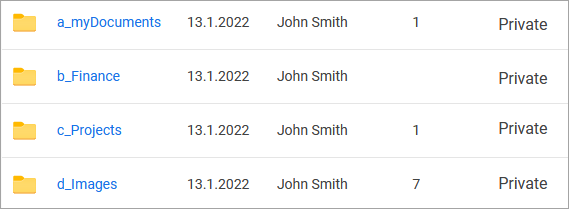
Tiles - If you select the "Tiles" value, the elements in the portal are displayed as tiles.
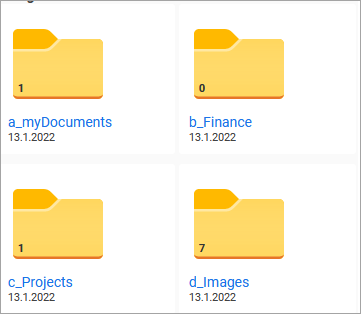
The portal user can switch between the two views in the portal at any time.
-
Click on "Finish".
You have integrated an MS365 OneDrive control into an application page.
More information