MS365 OneDrive - Dynamic access via drive ID
Overview
With the "Drive ID" type, you can access a drive by specifying the drive ID. In addition, you can access a folder by specifying the folder ID. The drive ID or folder ID is not stored in the MS365 OneDrive control. Instead, you only specify there in which data field, you have stored the drive ID and folder ID in the associated data group. When the application is running in the portal, Intrexx can dynamically access a drive in the context of a data record. This means you can connect to as many drives as you want using just one MS365 OneDrive control. And you don't have to create a new page in the application with the MS365 OneDrive control each time you want to access a drive.
Procedure - Example
Description
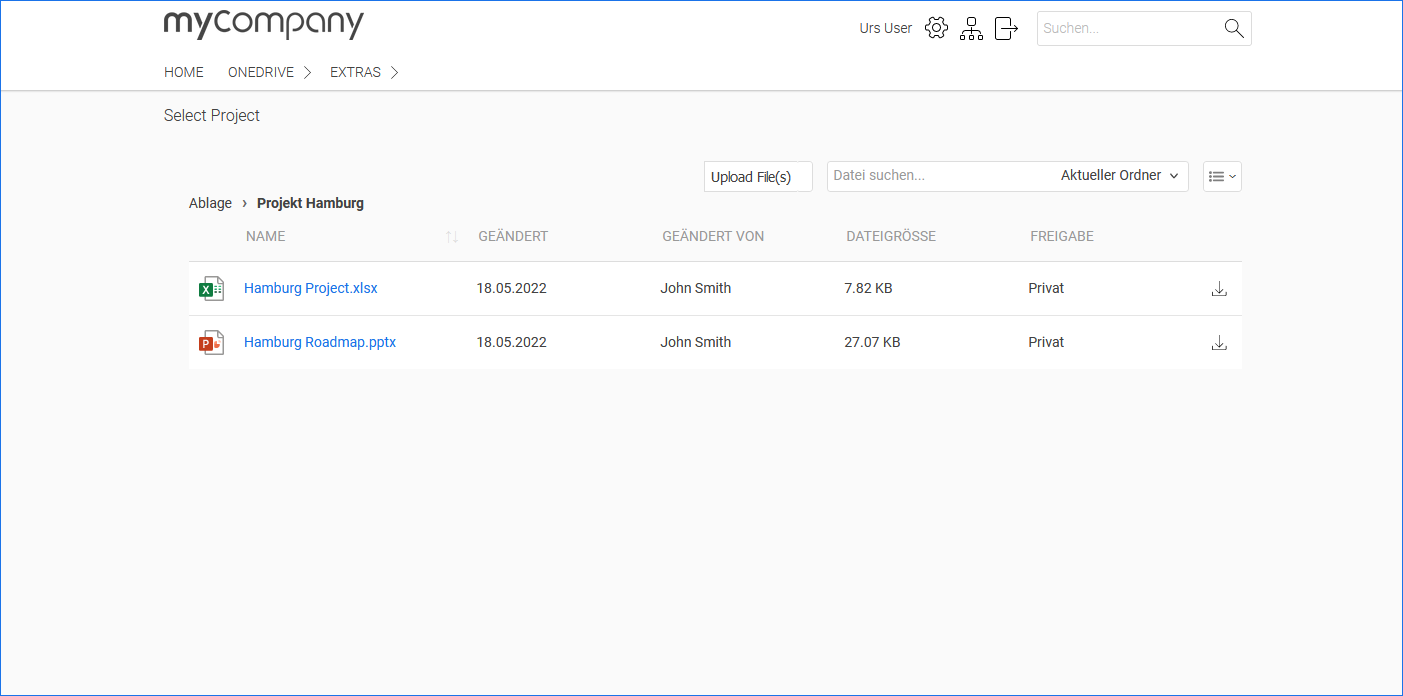
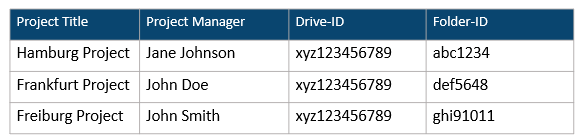
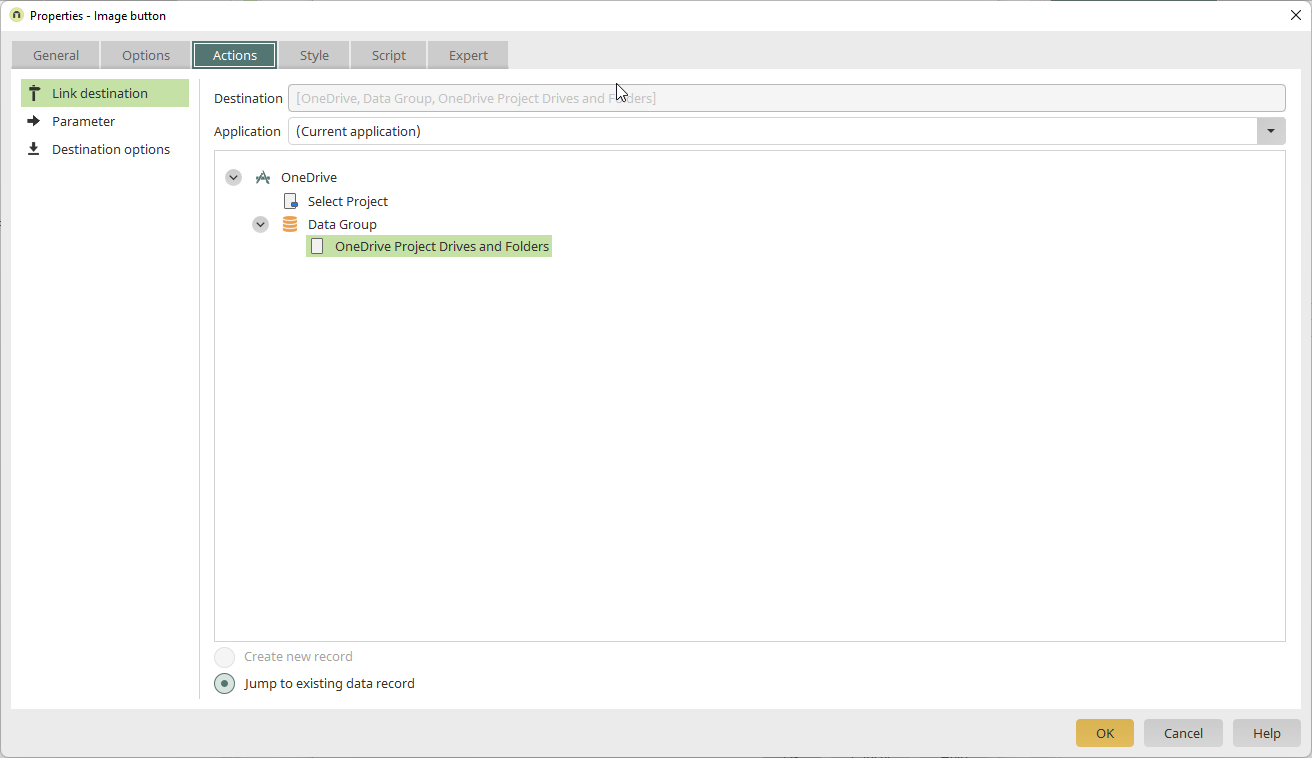
Say you manage three projects, "Frankfurt", "Freiburg" and "Hamburg". You manage the projects on one drive. For each project, there is a folder on the drive that contains all the documents related to that project. You want to create an overview page of the projects. This should include a table containing all relevant information about each project, such as project manager, project start and end dates, etc. When you click on a data record in the table (![]() ), a page with the OneDrive project directory and links to the respective documents contained there should be displayed (
), a page with the OneDrive project directory and links to the respective documents contained there should be displayed (![]() ).
).
![]()

![]()
Implementation
Prerequisite In order to be able to address a drive or a folder via an Intrexx data field, you must store the ID of the drive or the folder in the data field. You need "Microsoft Graph" to determine the IDs.
The individual steps for a possible implementation of the example are outlined below.
-
Create or add a data group
Create a data group in which you create data fields for the drive ID and folder ID.
Alternatively, you can add the data fields to an existing data group.
-
Fill data fields with content
Now fill the data fields with content.
As a rule, it is a good idea to fill the data group with values automatically. This can be done using an Intrexx process, for example.
-
Create view page
Create a view page below the data group.
-
Insert an MS365 OneDrive control
Place an MS365 OneDrive control on the view page.
-
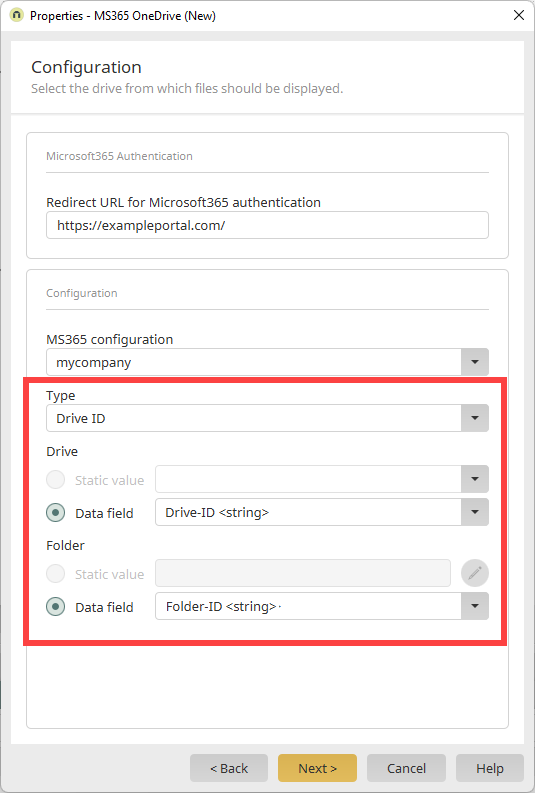
Configure the MS365 OneDrive control
Activate the "Data field" option and select the data field where the drive ID and (optionally) the folder ID are stored.
-
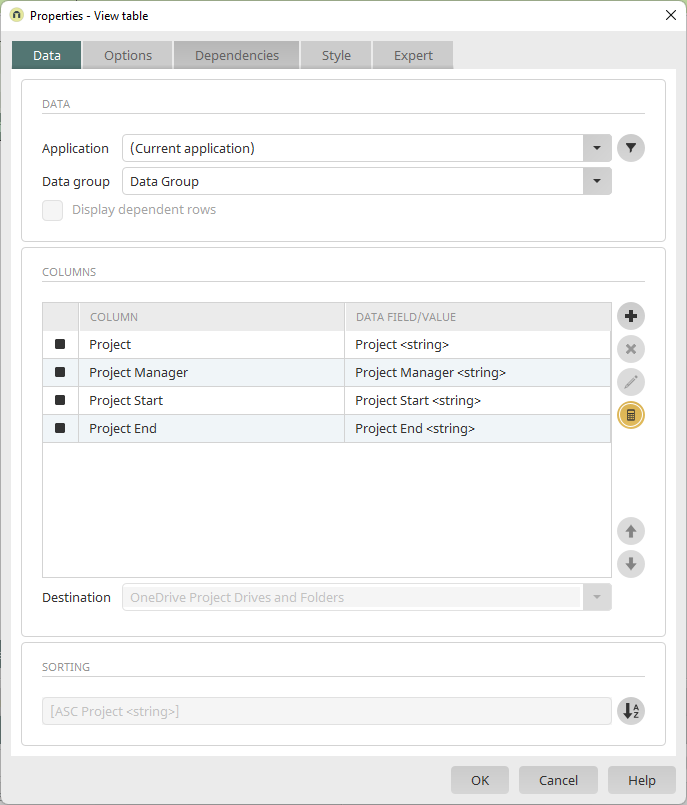
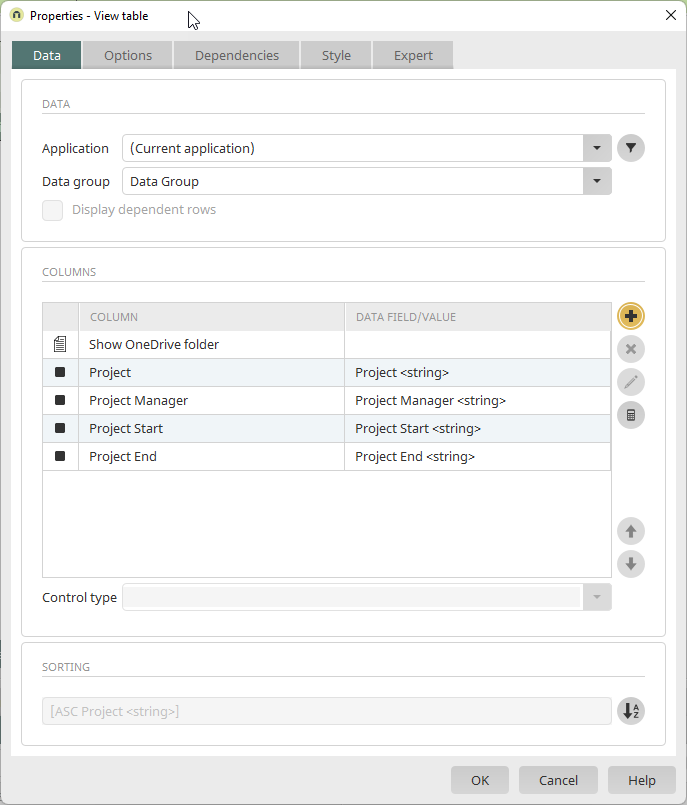
Insert view table
Create a view page above the data group and insert a view table.
Add the desired data fields to the view table.
-
Button with jump to view page
In the view table, add a button with a jump target to the view page with the MS365 OneDrive control.
The overview of the columns then looks like this:
-
Save and publish the application.
More information