Set up "Register as a user" as an administrator
"Welcome portlet"
To enable a person to register on a portal, you must drag and drop the "Welcome portlet" (![]() ) to the start page for the user (
) to the start page for the user (![]() ).
).
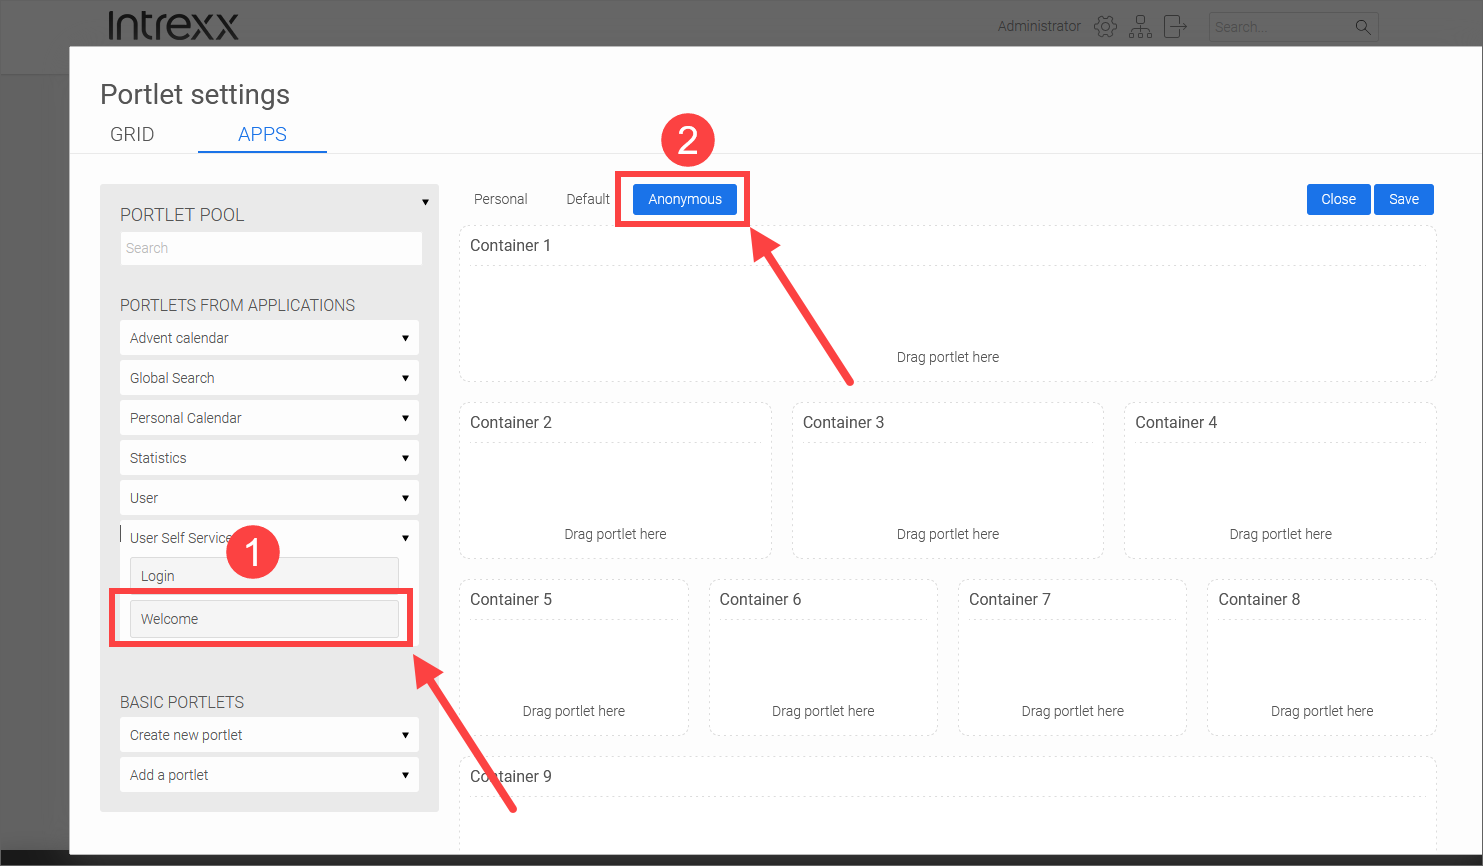
Detailed information on portlets can be found in section Portlet and grid settings.
Define registration process – "Administration" page
As an administrator, you can organize the registration process for (future) portal users in different ways. For example, you can specify that you as the administrator must first confirm a registration request before the portal user can complete registration. You can also specify whether the portal user can assign a password for themselves or whether this is generated automatically and sent to them by email.
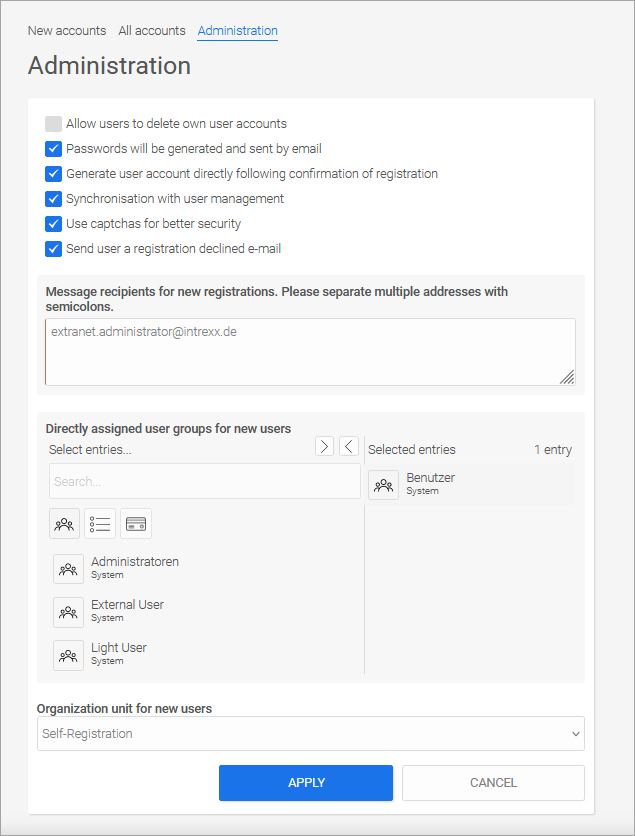
Determine the settings on the "Administration" page.
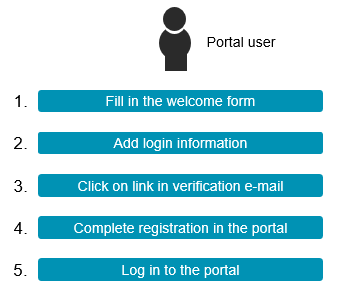
Below you will find a brief example of the registration process with and without verification by the administrator.
At the end of this section, you will find a tabular overview of all the possible settings in connection with the registration process.
Self-registration without verification by the administrator
You can set up registration by the user so that you as the administrator do not have to actively intervene in the registration process.
The advantage of this option is that the user alone carries out all the actions. Registration takes place immediately, without any delays for the (future) portal user.
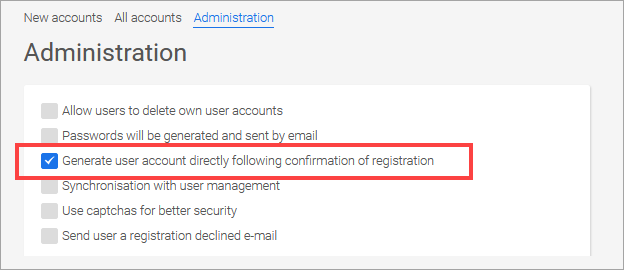
For self-registration to take place without verification by the administrator, you must enable the "Create user account immediately after confirming registration" checkbox on the "Administration" page.
Self-registration with verification by the administrator
You can set up registration by the user in such a way that you as the administrator must intervene in the registration process. For this option, you will first receive a registration request, which you as an administrator can confirm or reject. Only after confirmation can the (future) portal user complete registration on the portal.
The advantage of this type of registration is that you as the administrator actively control who can register as a portal user. The (future) portal user may experience delays in the registration process if you do not process registration requests promptly.

Detailed information on processing registration requests can be found in the sections Confirm registration request as administrator; create user account and Delete or reject a registration request as an administrator.
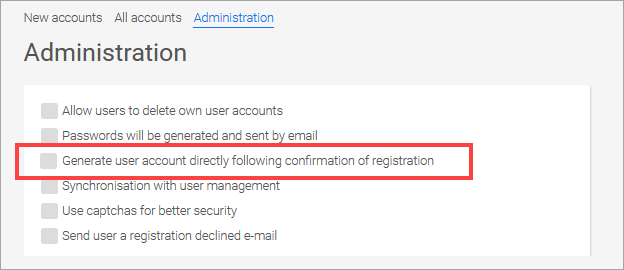
For self-registration with verification by the administrator, you must disable the "Create user account directly after confirming registration" checkbox on the "Administration" page.
Self-registered users in the Intrexx User Manager
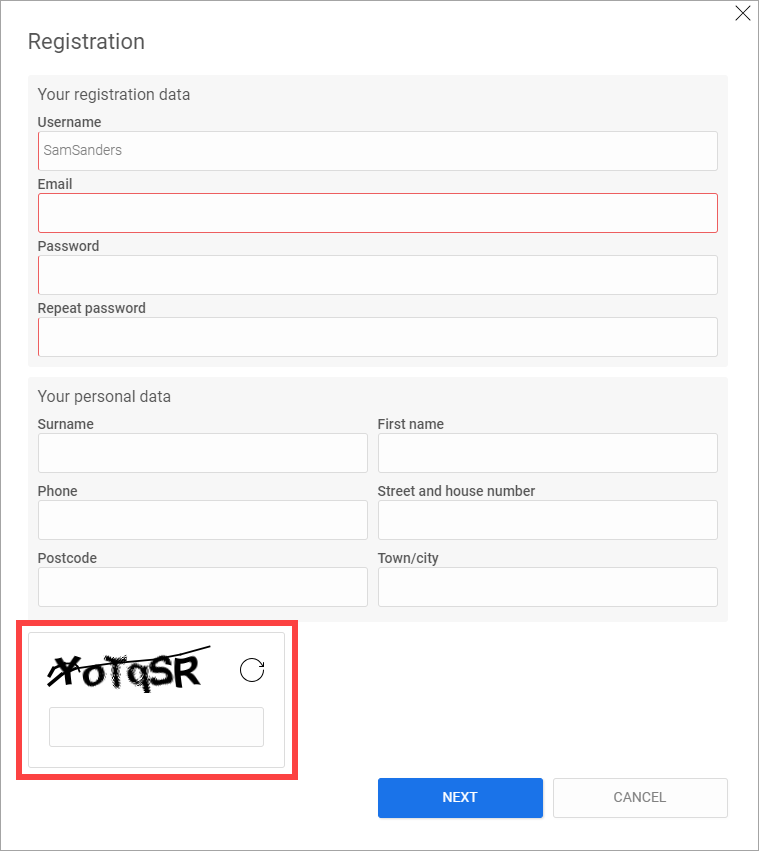
If users self-register on a portal, they must enter their login details (username, email and password). You can also enter personal data (surname, first name, telephone, street, house number, zip code and city). All these details are (also) saved in the Intrexx User Manager.
It then looks like this, for example:
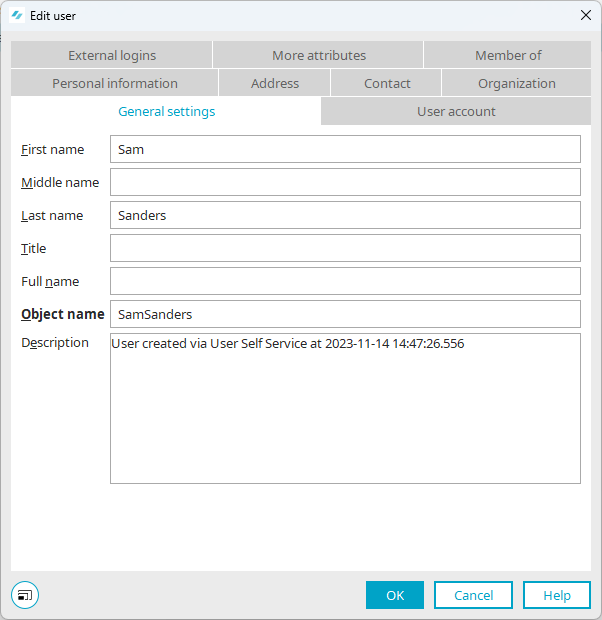
In the "Description" field, you will also find a notification stating that the user has self-registered.
Synchronization with the Intrexx User Manager
The data that the portal user enters during self-registration is automatically saved in Intrexx User Manager.
The "Synchronization with User Manager" option is also available on the "Administration" page.
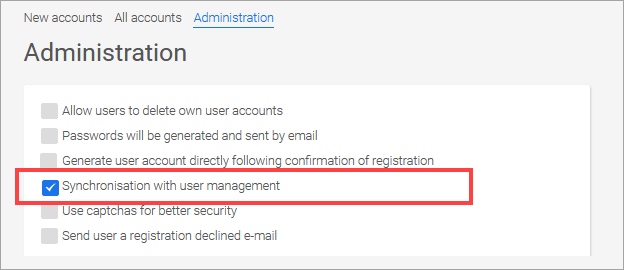
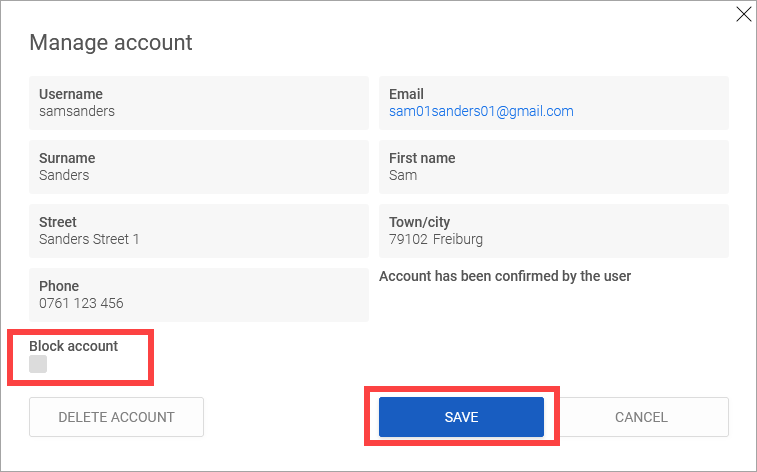
If you enable this option, blocking or deleting a user in the Intrexx User Manager will result in the portal user no longer being able to log in to the portal.
In this case, administrators have the option of blocking or deleting users both in the Intrexx User Manager and in the User Self Service.
Further settings and overview
Below you will find an overview of all the (additional) settings that are relevant for the self-registration of portal users.
Passwords are generated and sent by email
If you enable this checkbox, the portal user does not have the option of choosing a password when registering. Instead, a password is generated automatically. This will be sent to the user by email.
The password guidelines are taken into account when generating the password (see Security guidelines).
Create user account directly after confirming registration
If you enable this checkbox, a user account is created as soon as the portal user has registered.
If you do not enable this checkbox, the administrator first receives a registration request, which they must confirm. In this way, you have (extended) control over who wants to register as a user on your portal.
Synchronize with User Manager
If you enable this option, blocking or deleting a user in the Intrexx User Manager will result in the portal user no longer being able to log in to the portal.
In this case, administrators have the option of blocking or deleting users both in the Intrexx User Manager and in the User Self Service.
Use CAPTCHAs for increased security
If you activate this checkbox, a CAPTCHA is displayed to the user during registration and password change. In this way, you can prevent unwanted registration by bots, for example.
Send email if registration was rejected
If you enable this checkbox, the user whose registration for the portal has been rejected or deleted will receive a notification by email.
Notification recipient for new registrations.
You can be notified by email of new portal registrations. Enter one or more email addresses here to which the notification email should be sent.
Directly assigned user groups for new users
Here you can specify the user groups and distribution lists in which a new portal user should be included. You can also specify which roles the portal user should have.
To do this, select the relevant groups, distribution lists or roles in the left pane and move them to the right with the arrow button.
You can find more information on the topic of user groups in the section User groups and users.
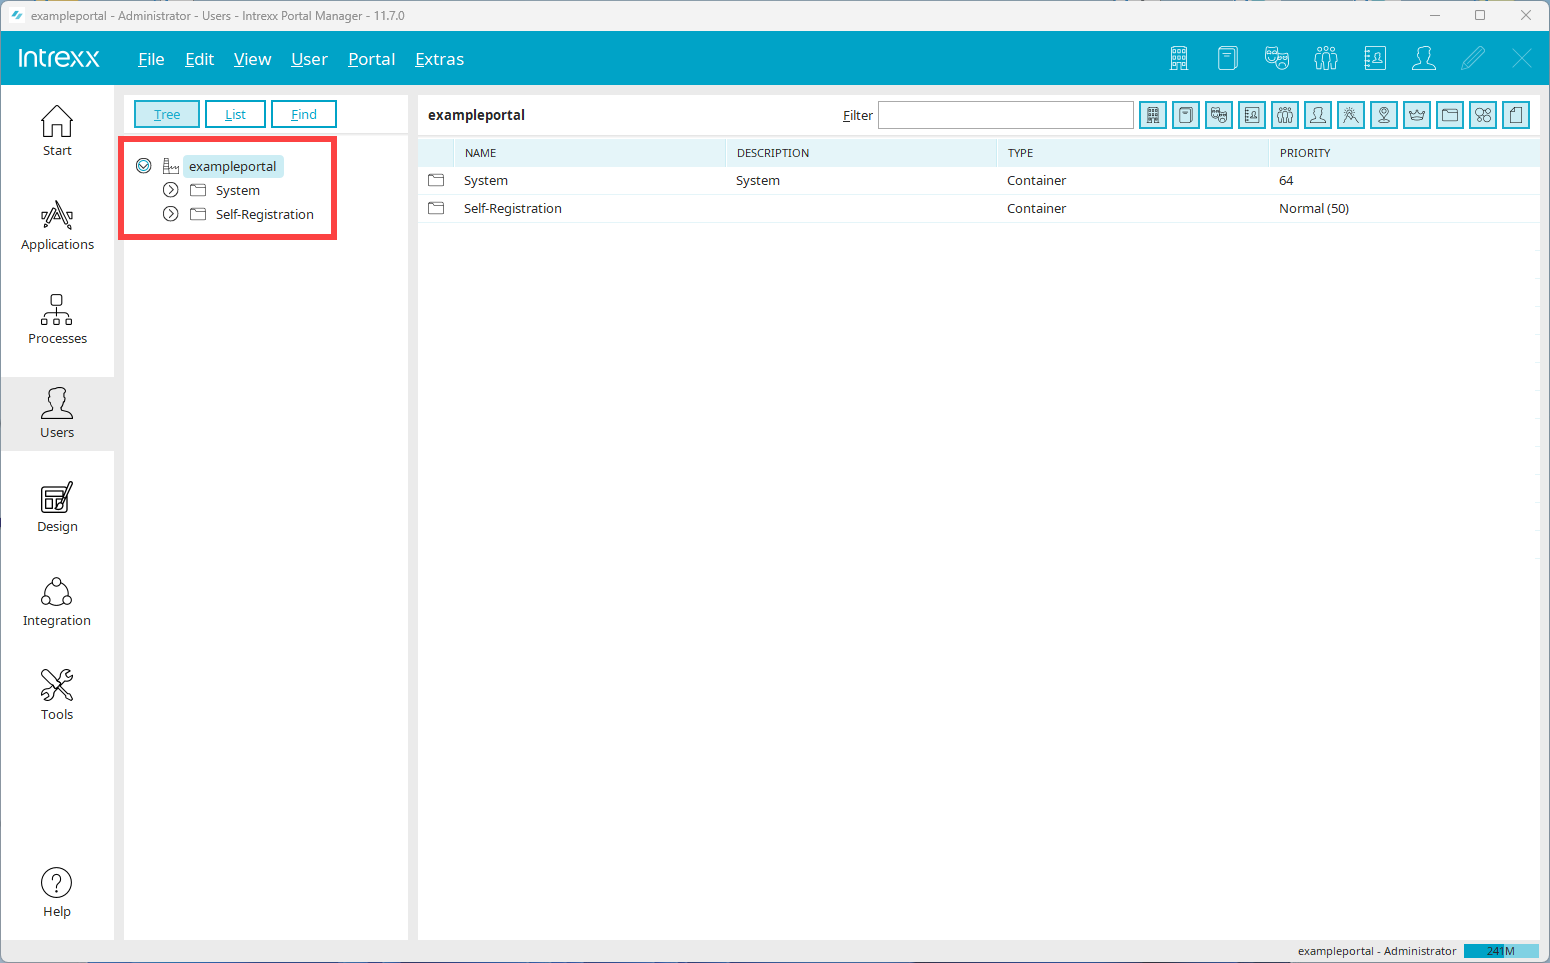
Organization area for new users
Here you can specify the organizational area (container) in which the portal user is to be created.
Containers can be found in the Portal Manager in the "Users" module.
Further information on the topic of organizational areas or containers can be found in section Objects, Classes and Attributes.