

Create a Connector for DRACOON
Requirements
To set up the Intrexx connector for DRACOON, you should have the following information from the DRACOON Web App:
-
Client ID
-
Client Secret
In addition, you should have the following:
-
Dracoon Root URI (e.g., https://example.dracoon.software.com)
Step-by-Step
To create the " Intrexx DRACOON Connector," follow these steps:
-
Launch the "Integration" module.
-
Under "Consume Data," select "Connector for Connector API."
-
Right-click.
-
Select "+ New Data Source."
The "General" dialog box appears.
General Information
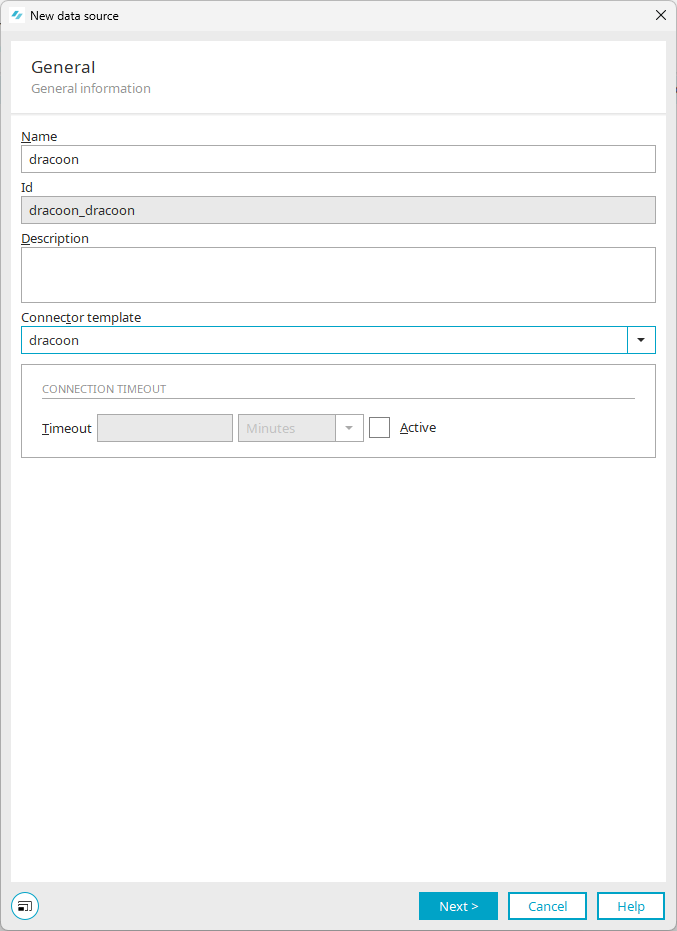
Name
Enter the name of the connection here. The name may only contain the letters [a-zA-Z] and numbers [0-9], as well as underscores and hyphens.
Id
The ID of the connector or connection is displayed here. This is automatically generated by Intrexx.
Description
You can enter a description of the connector here.
Connector Template
Select "dracoon" here.
Timeout
Here, you can enter the number of milliseconds, seconds, minutes, or hours for the timeout. Select the time unit from the drop-down list to the right of the timeout field.
Active
If you set this option, the timeout settings are enabled.
-
Click "Next."
This will take you to the "Data Groups" dialog box.
Data Groups
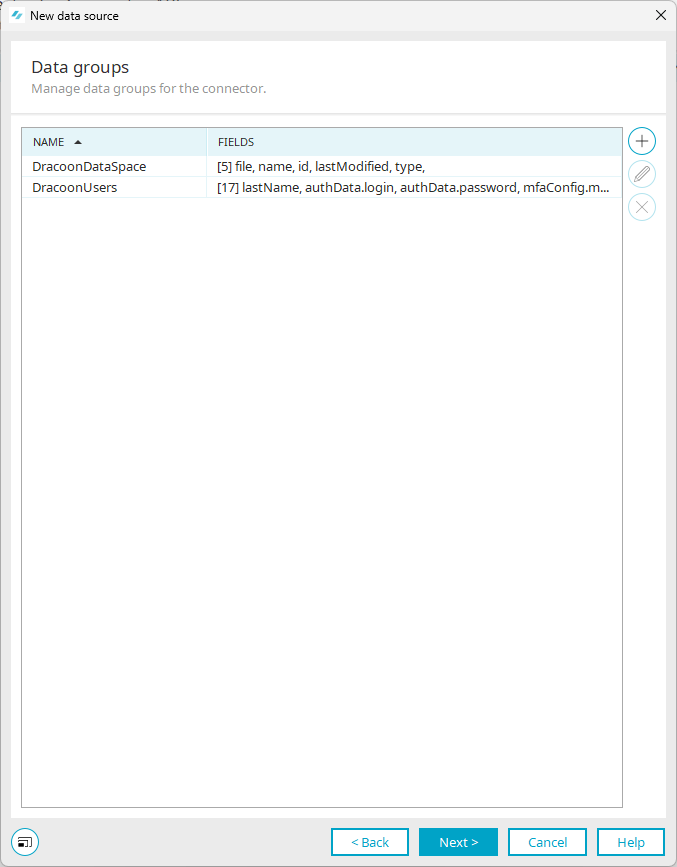
The following data groups are available by default:
-
DracoonDataSpace
-
UserRoles
For detailed information on these and other data groups and their use, see the " Standard Data Groups in the Intrexx DRACOON Connector" section .
Enter the data room ID and folder ID
To access a data room or a folder, you need its ID.
You can find this ID in the URL of your DRACOON Web App.

When you click on a data room or folder with your mouse, the ID appears at the end of the URL. The ID always follows "/node/".
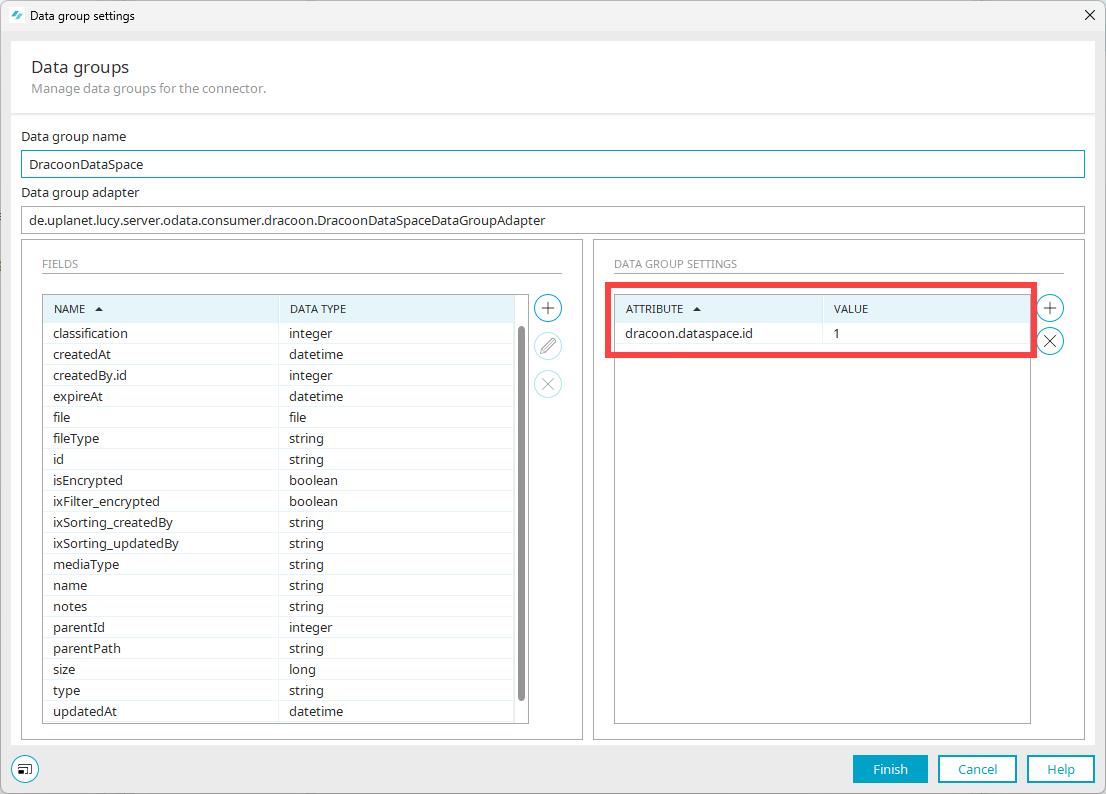
The data space ID or folder ID is required in Intrexx for the data group attribute "dracoon.dataspace.id" or the parameter "parentId."
-
-
Select a data group.
The "DracoonDataSpace" data group is used as an example for the following steps.
-
Click the "
 " icon.
The "Data Groups" dialog box appears.
-
In the data group settings, enter your data room ID or folder ID for the "dracoon.dataspace.id" attribute.
The value specified here serves as a fallback value. You can adjust the fallback value in the external data group in the Intrexx application. See the section " Adjusting the Fallback Value for the Data Room ID" for more information .
If you do not enter a value here, the contents of the top-level data room will be loaded.
-
Click "Next."
This will take you to the "Authentication" dialog box.
-
Under "Authentication Type," select "OAUTH2."
The fields containing the required information for "OAUTH2" are displayed.
Authentication
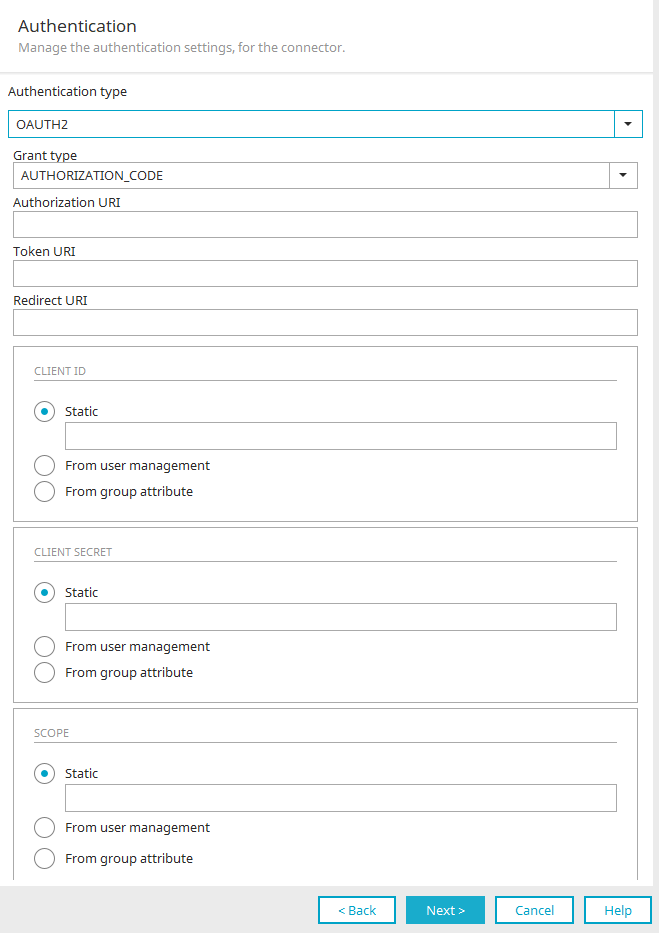
Authentication Type
Select "OAUTH2" here.
Grant Type
Select "AUTHORIZATION_CODE" here.
Authorization URI
Enter the authorization URI here.
The authorization URI is structured as follows:
<DracoonRootURI>/services/oauth/authorize
Example
https://example.dracoon.software.com/services/oauth/authorize
Token URI
Enter the token URI here.
The token URI is structured as follows:
<DracoonRootURI>/services/oauth/token
Example
https://example.dracoon.software.com/services/oauth/token
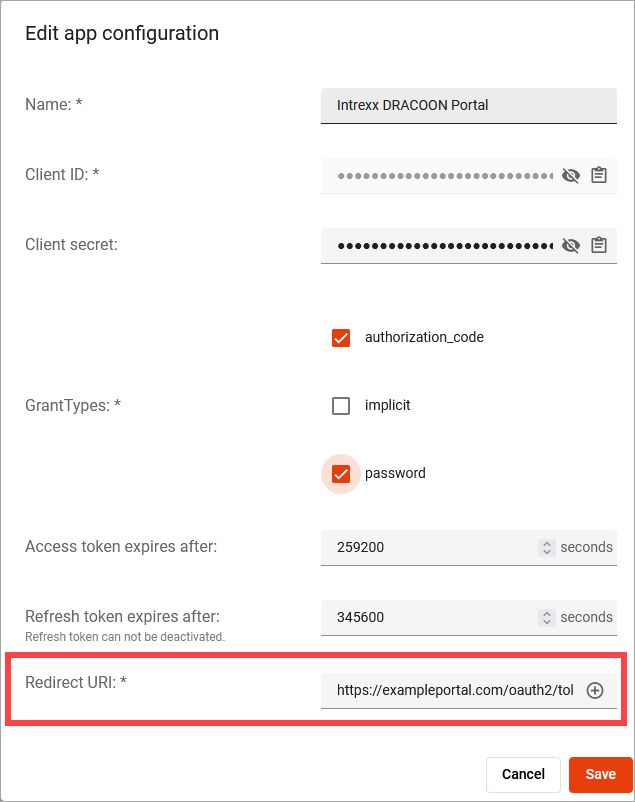
Redirect URI (Redirect URL)
Here, the redirect URI is set automatically by Intrexx.
The redirect URI is composed as follows:
<BaseURL>/oauth2/token/<GUID of the Intrexx DRACOON Connector>
Example:
https://exampleportal.com/oauth2/token/1234560DEA655234B087EFC539FA0106789
Base URL You can find the base URL in the main menu under "Portal > Portal Properties > Frontend Web Server."

You must specify the redirect URI in the app configuration in the DRACOON Web App.
For a description of this, see the section " Configure the Redirect URI in DRACOON."
Client ID
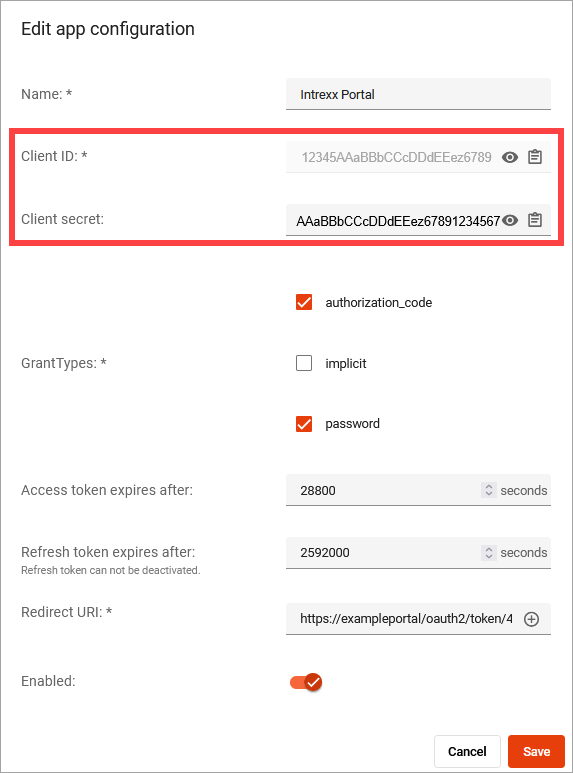
Static: Enter the client ID from the portal registration in DRACOON here (see " Register the Intrexx Portal as an app in DRACOON").
Client Secret
Static: Enter the client secret and client ID from the portal registration in DRACOON here (see " Register the Intrexx Portal as an app in DRACOON").
Scope
Static: Enter the value "all" here.
The value entered here refers to the OAuth scope in DRACOON.
-
Click "Next."
This takes you to the "Service User" dialog box.
User Services
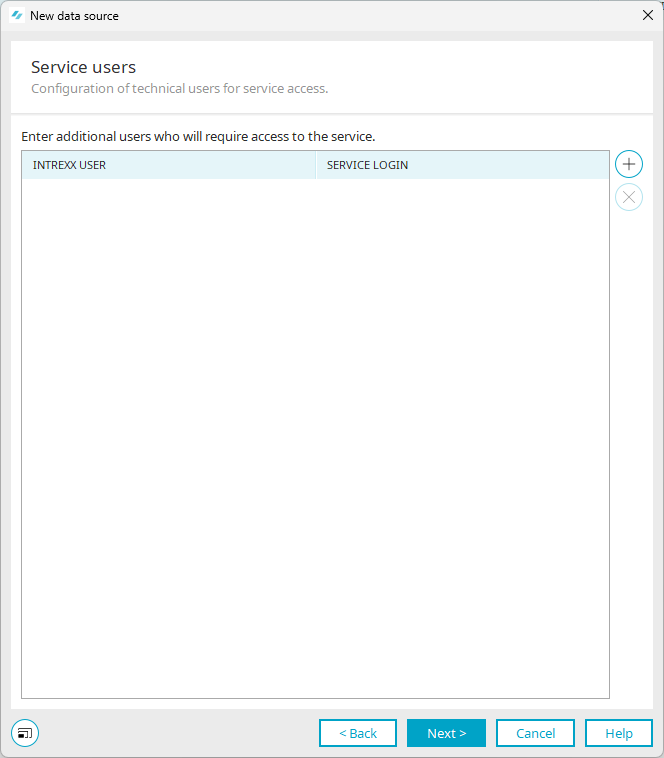
Service users can log in to DRACOON without using a personal user account. A service user is useful, for example, when processes need to log in to DRACOON automatically during execution. It is also possible to configure an external data group so that users log in to DRACOON via a service account.
For detailed information on creating and using service users, see the following sections:
-
Click "Next."
This will take you to the "Expert Settings" dialog box.
Expert Settings
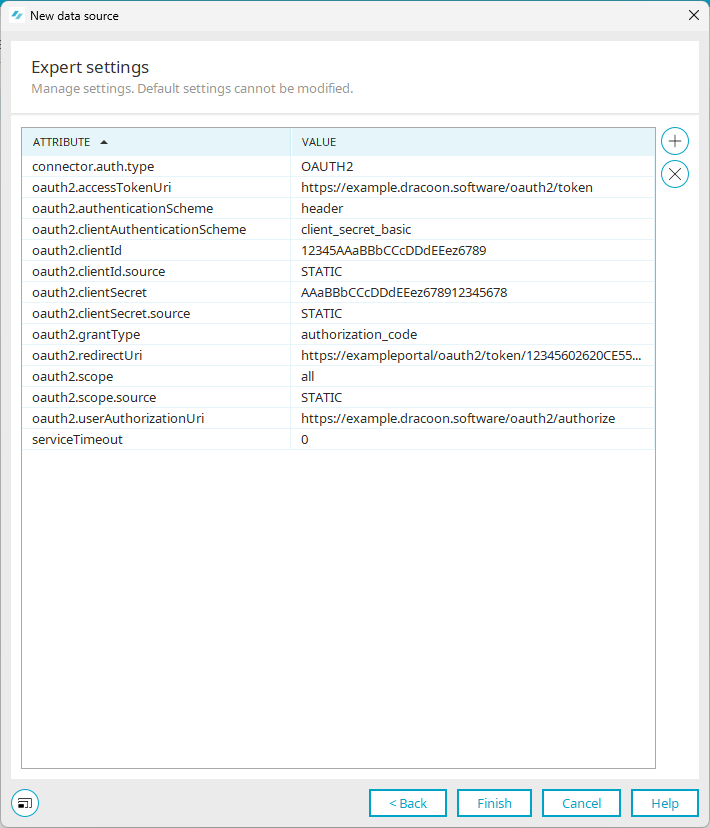
Here you will find the following information:
Attribute Value connector.auth.type OAUTH2 oauth2.accessTokenUri https://example.dracoon.software/oauth/token oauth2.authenticationScheme header oauth2.clientAuthenticationScheme client_secret_basic oauth2.clientId 123456789XYZ123456789 oauth2.clientId.source STATIC oauth2.clientSecret ABCDEFG123456789 ABCDEFG oauth2.clientSecret.source STATIC oauth2.grantType authorization_code oauth2.redirectUri https://exampleportal/oauth2/token/12345FE97543051C90DC647A95E99A6789 oauth2.scope all oauth2.scope.source STATIC oauth2.userAuthorizationUri https://example.dracoon.software/oauth/authorize serviceTimeout 0 -
Add the following attribute with the corresponding value:
Attribute Value dracoon.service.root.uri https://example.dracoon.software (Example) -
Click the "
" icon.A line is inserted.
-
Enter the appropriate value in the "dracoon.service.root.uri" line.
-
-
Click "Finish."
The connector is displayed.
