Tips & Tricks - Generate ICS calendar file
This workshop shows you how you can write appointment values (from, to, location, title, description) to an iCalendar file and save this in a file field of the same data record. The iCalendar file can, for example, be sent via email or downloaded in the portal application.
Application
You can download our sample application (as of Intrexx version 12.0.0) with process here and then import it as usual. The included process is deactivated during import - it must be activated either directly during the import or later in the "Processes" module via the main menu "Process" option so that the application functions as desired.
When you open the "Tips & Tricks - Generate ICS calendar file" application in the "Applications" module, you will find the following edit fields on the edit page, which are linked to the corresponding data fields:
-
Title
-
Place
-
Start (type: Date & Time)
-
End (type: Date & Time)
-
Description
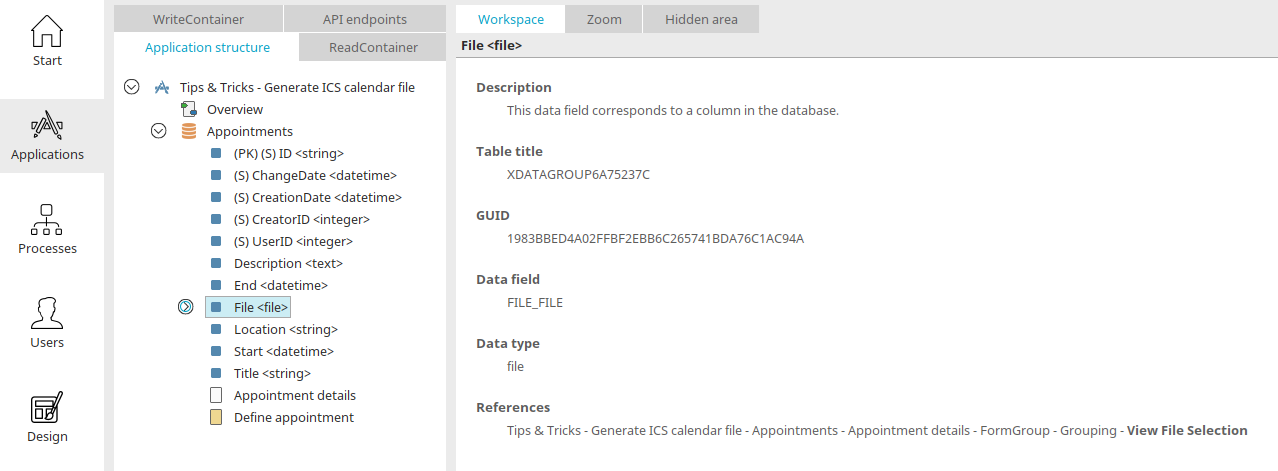
For the sake of simplicity all edit fields are mandatory. In this way, NULL values do not need to be handled in the process. Additionally, the data group contains the file field "File" where an .ics file for each generated data record is stored.

Furthermore, the application contains the view page "Appointment details" which can be opened in the browser by clicking on the title of a data record in the table on the "Overview" page. The .ics file can be downloaded from this view page.
Process

Open the process "Tips & Tricks - Generate ICS calendar file" in the "Processes" module. The first element in the process chain is a Data group event handler which responds when data records are added or edited in the application.
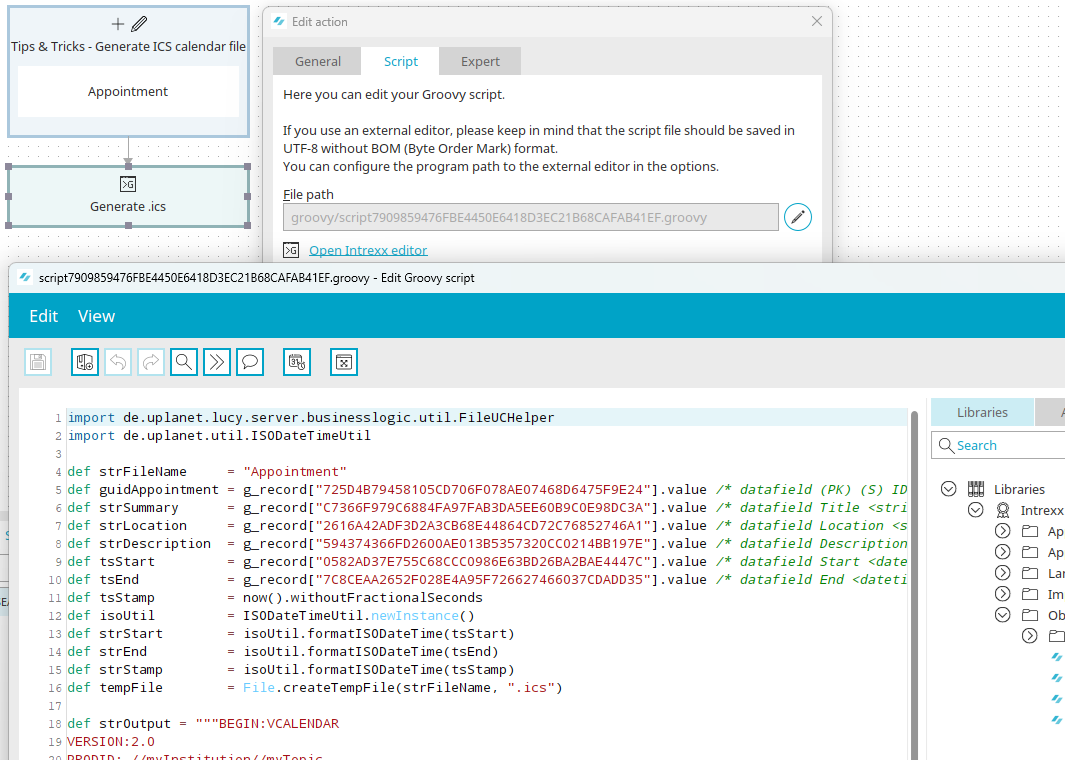
The second process element is a Groovy action. The following script is performed here:
            import de.uplanet.util.ISODateTimeUtil

def strFileName     = "Appointment"
def guidTermin      = g_record["725D4B79458105CD706F078AE07468D6475F9E24"].value /* datafield (PK) (S) ID <string> */
def strSummary      = g_record["C7366F979C6884FA97FAB3DA5EE60B9C0E98DC3A"].value /* datafield Title <string> */
def strLocation     = g_record["2616A42ADF3D2A3CB68E44864CD72C76852746A1"].value /* datafield City<string> */
def strDescription  = g_record["594374366FD2600AE013B5357320CC0214BB197E"].value /* datafield Description<text> */
def tsStart         = g_record["0582AD37E755C68CCC0986E63BD26BA2BAE4447C"].value /* datafield Begin <datetime> */
def tsEnd           = g_record["7C8CEAA2652F028E4A95F726627466037CDADD35"].value /* datafield End <datetime> */
def tsStamp         = now().withoutFractionalSeconds
def isoUtil = ISODateTimeUtil.newInstance()
def strStart        = isoUtil.formatISODateTime(tsStart)
def strEnd          = isoUtil.formatISODateTime(tsEnd)
def strStamp        = isoUtil.formatISODateTime(tsStamp)
def tempFile = File.createTempFile(strFileName, ".ics")

def strOutput = """BEGIN:VCALENDAR
VERSION:2.0
PRODID:-//myInstitution//myTopic
METHOD:PUBLISH
BEGIN:VEVENT
SEQUENCE:0
UID:${guidTermin}
SUMMARY:${strSummary}
DESCRIPTION:${strDescription}
DTSTAMP:${strStamp}
LAST-MODIFIED:${strStamp}
DTSTART:${strStart}
DTEND:${strEnd}
LOCATION:${strLocation}
END:VEVENT
END:VCALENDAR
"""

tempFile.withWriter("Cp1252") {out ->    out.append(strOutput)
}

def strExportfileFieldGuid     = "1983BBED4A02FFBF2EBB6C265741BDA76C1AC94A" /* datafield File <file> - GUID of the datafield*/


g_dgFile.copy(guid: strExportfileFieldGuid, id: guidTermin, file: tempFile.getAbsolutePath(), name: strFileName + ".ics",  mode: "replace",
    triggerWorkflow: false)

tempFile.delete()
If required, replace the GUIDs stated here with the corresponding GUIDs from your application. You can identify and insert these GUIDs directly in the editor via the application structure area. Then save the process.
The application in the browser

A list of all created data records is shown here. Click on the title of a data record to open the view page where the ICS file can be downloaded or opened.
iCalendar
Of course, you can add more iCalendar properties to your output object and add a reminder function to your appointment, for example. Numerous iCalendar tutorials provide examples of this.