

Azure Active Directory is now Microsoft Entra ID
Please note that Microsoft has renamed "Azure Active Directory" to "Entra ID."
For more information on this topic, please visit the following links:
To access the various Microsoft 365 applications (OneDrive, Exchange, SharePoint, etc.) from your Intrexx portal, you must first register them as apps with Microsoft Azure.
When you register your Intrexx portal in Microsoft Azure, a client ID (application ID), a tenant ID (directory ID), and a secret client key are generated.
You will need this information—or part of it—later to set up a corresponding data source in Intrexx Portal Manager.
Step-by-Step
To register an Intrexx portal in Microsoft Azure, follow these steps:
-
Sign in to Microsoft Azure (https://portal.azure.com or https://entra.microsoft.com/) using your Microsoft 365 credentials.
You will be taken to the Microsoft Azure home page.
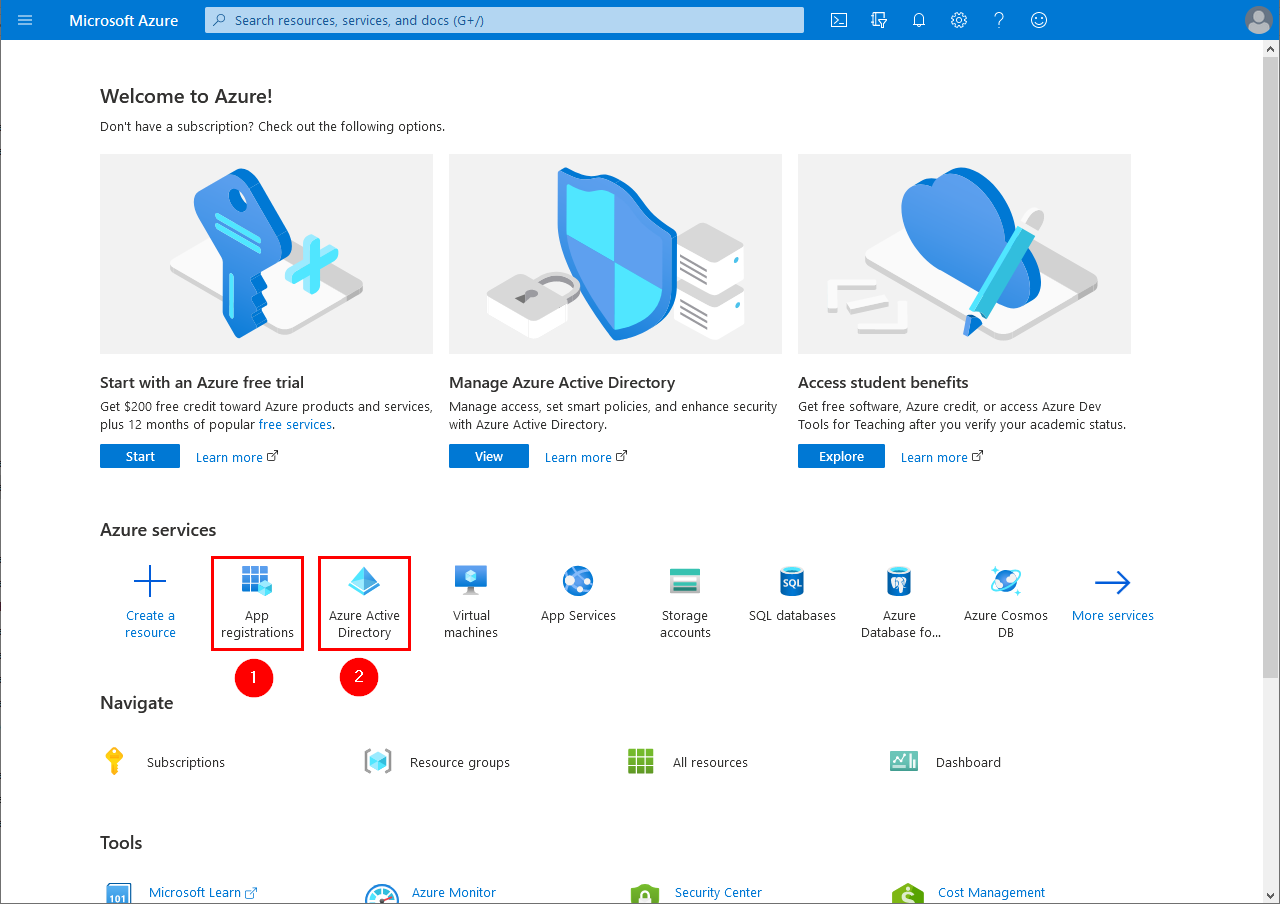
You can register your Intrexx portal as an app via the "
 " menu item under "App Registrations" or via
  Azure Active Directory.
Below is a description of Azure Active Directory.
- Click " " in Azure Active Directory.
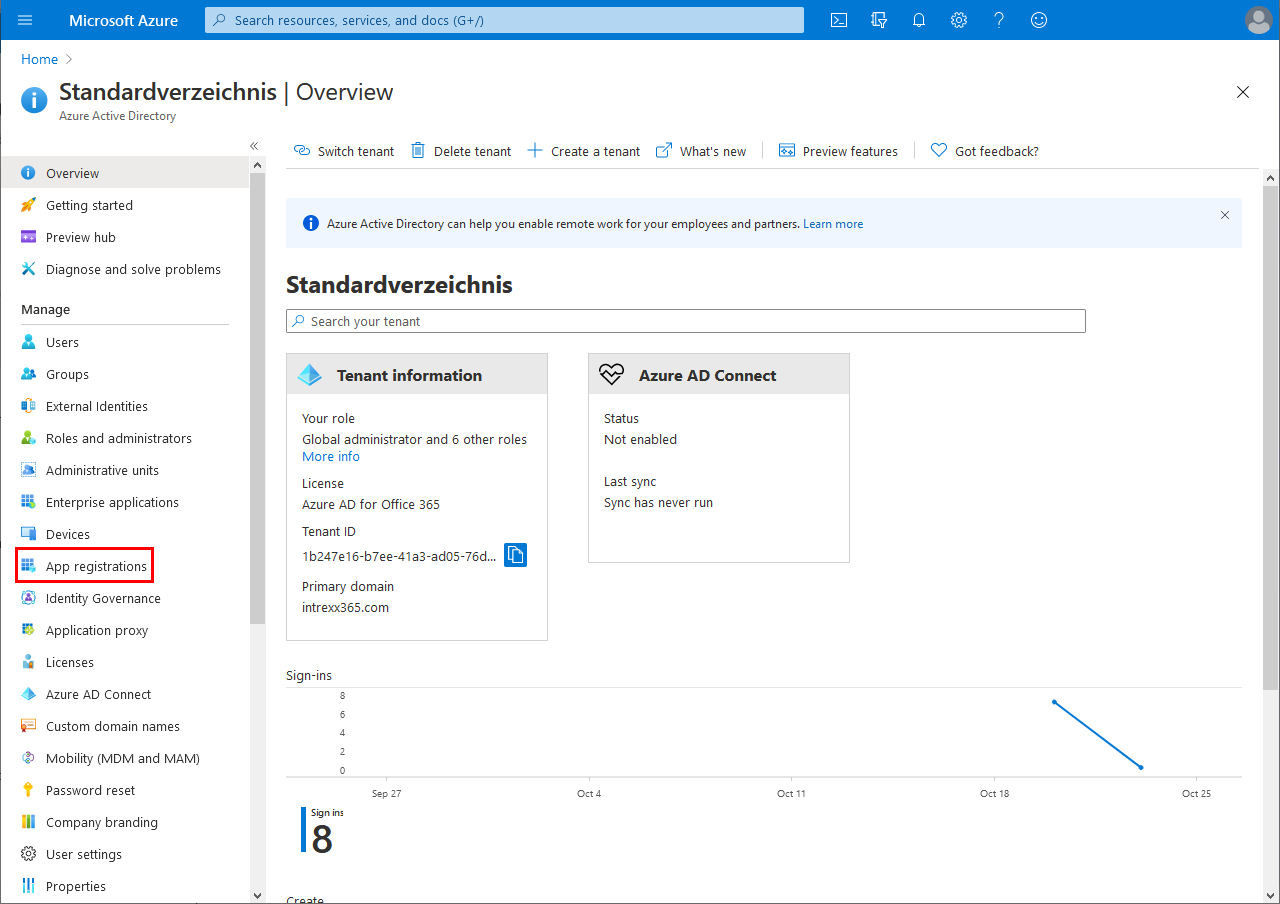
You will be taken to the Azure Active Directory home page.
-
Click the "App Registrations" menu item.
You will be taken to the "App Registrations" page.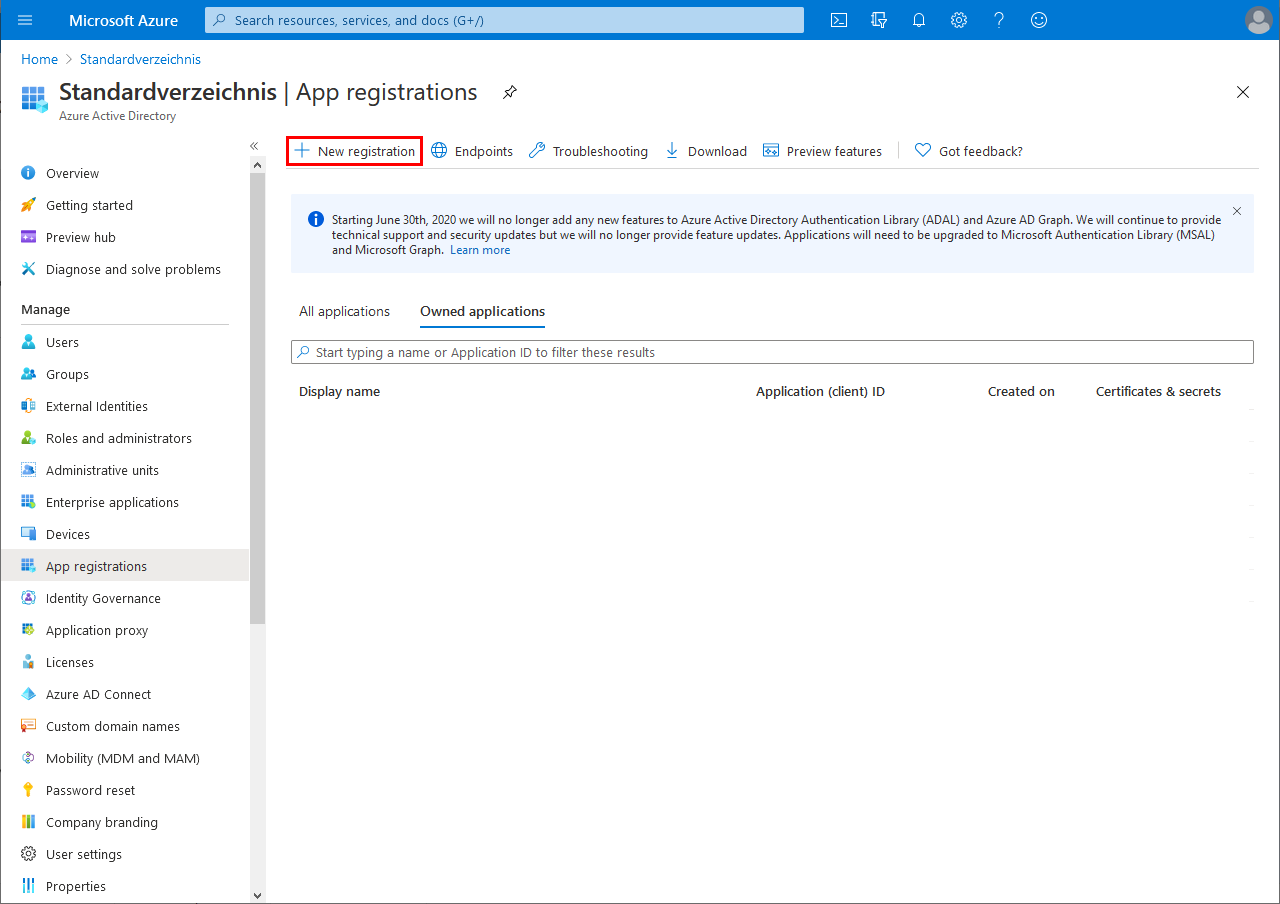
-
Click "New Registration."
You will be taken to the "Register Application" page.

Name
Description
Name
Enter the name under which your portal will be registered in Microsoft Azure. You can choose any name you like.
Supported Account Types
Select here which account types can access Intrexx. See also the "Decision Guide" that Microsoft provides on this page.
Redirect URI (optional)
Select "Web" from the drop-down list.
Enter the redirect URI here. It is composed as follows:
Base URL/service/oauth2/authorizeRedirect URI
The redirect URI is composed as follows:
<Base URL>/oauth2/token/msexchange
The redirect URL for the base URL "https://exampleportal.com/" is as follows:
https://exampleportal.com/oauth2/token/msexchange
Note: You can find the base URL in the main menu under "Portal > Portal Properties."

-
Click "Register."
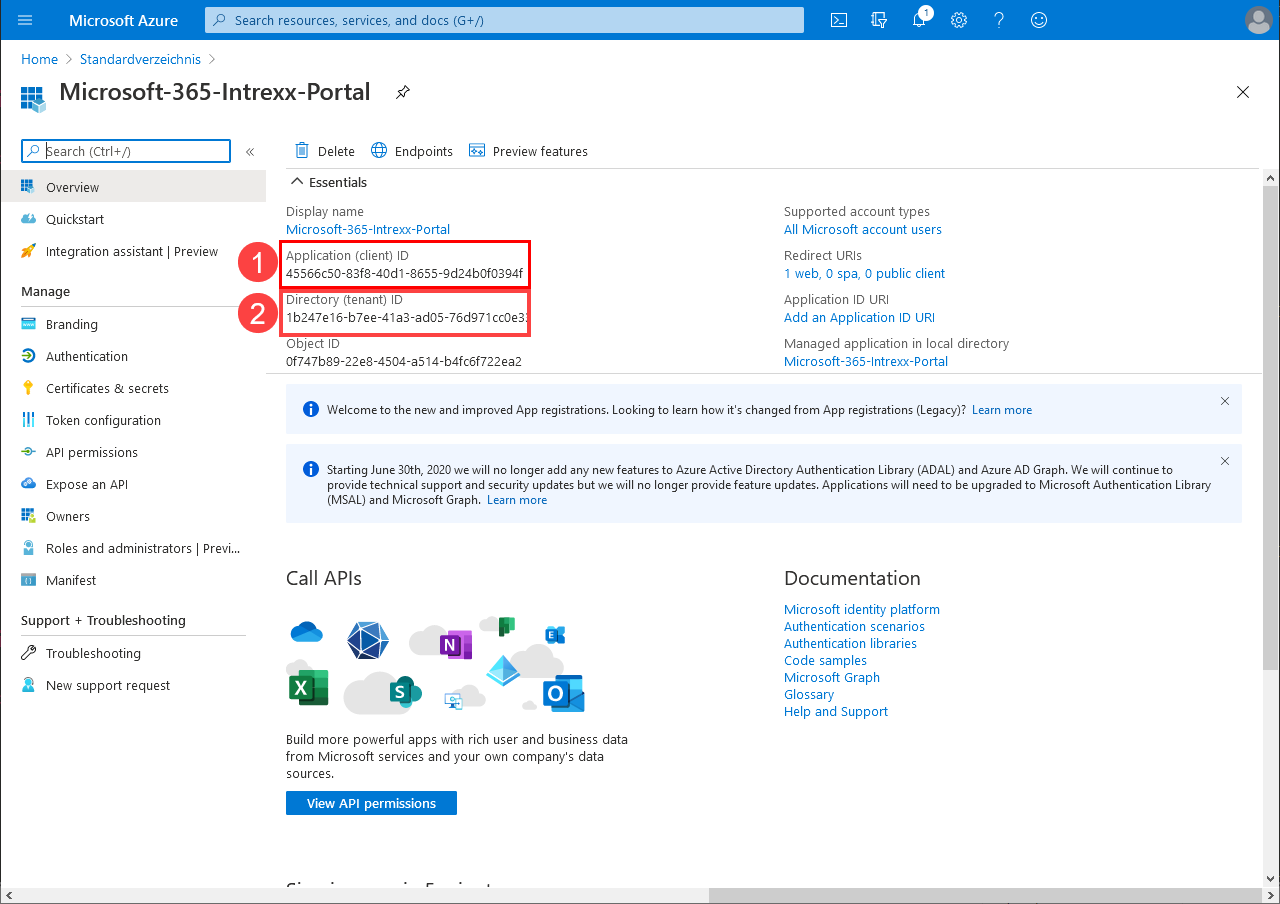
You'll be taken to the page where you can find all the relevant information about the app you created.
Here you will find the client ID (
) and the tenant ID ().To set up the Intrexx Office 365 Connector, you only need the client ID.
To set up the Intrexx Exchange Connector, you'll need both the client ID and the client ID.
For more information, see the following sections:
Copy the client ID and, if necessary, the tenant ID.
-
Click the "Certificates and Secrets" menu item.
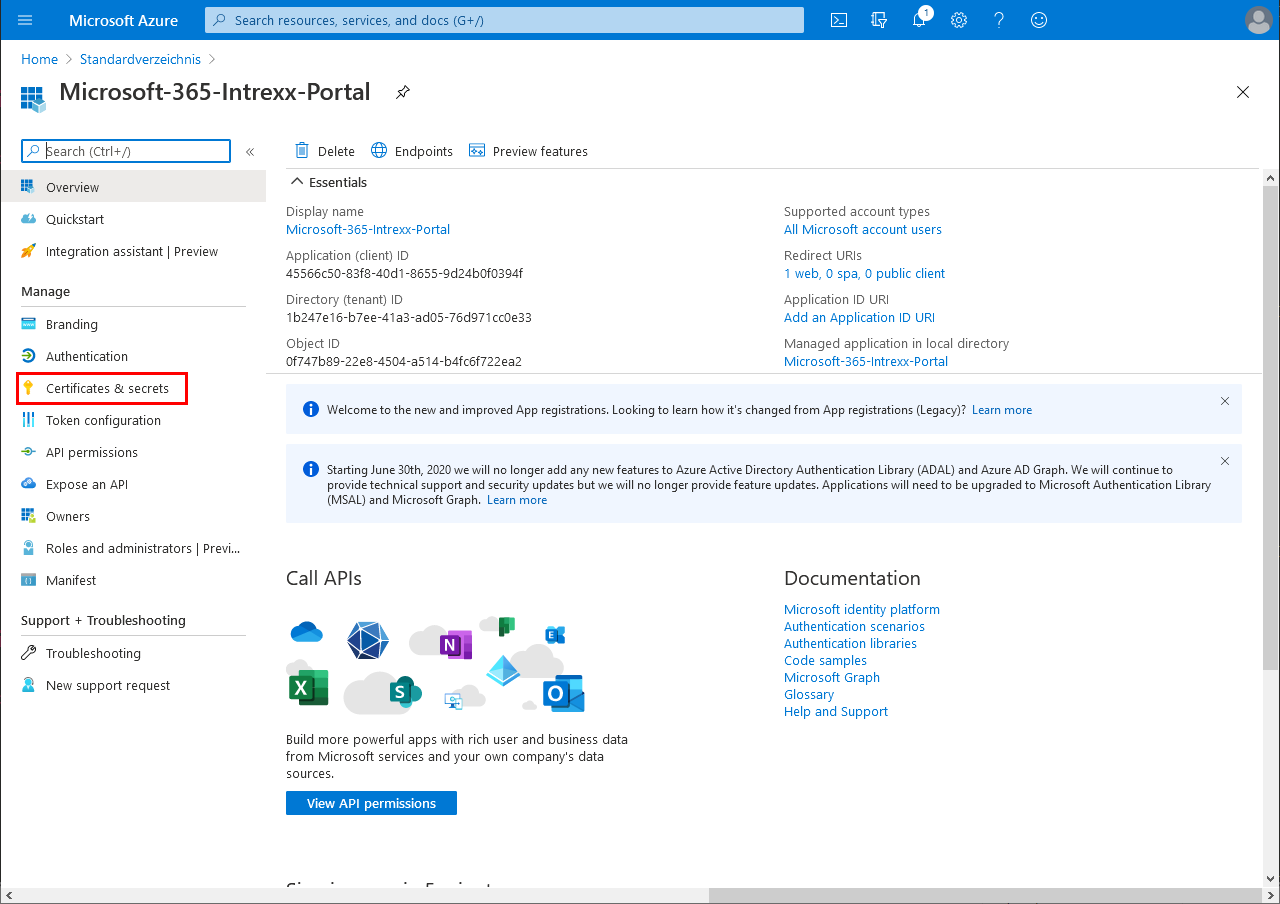
You will be taken to the "Certificates and Secrets" page.
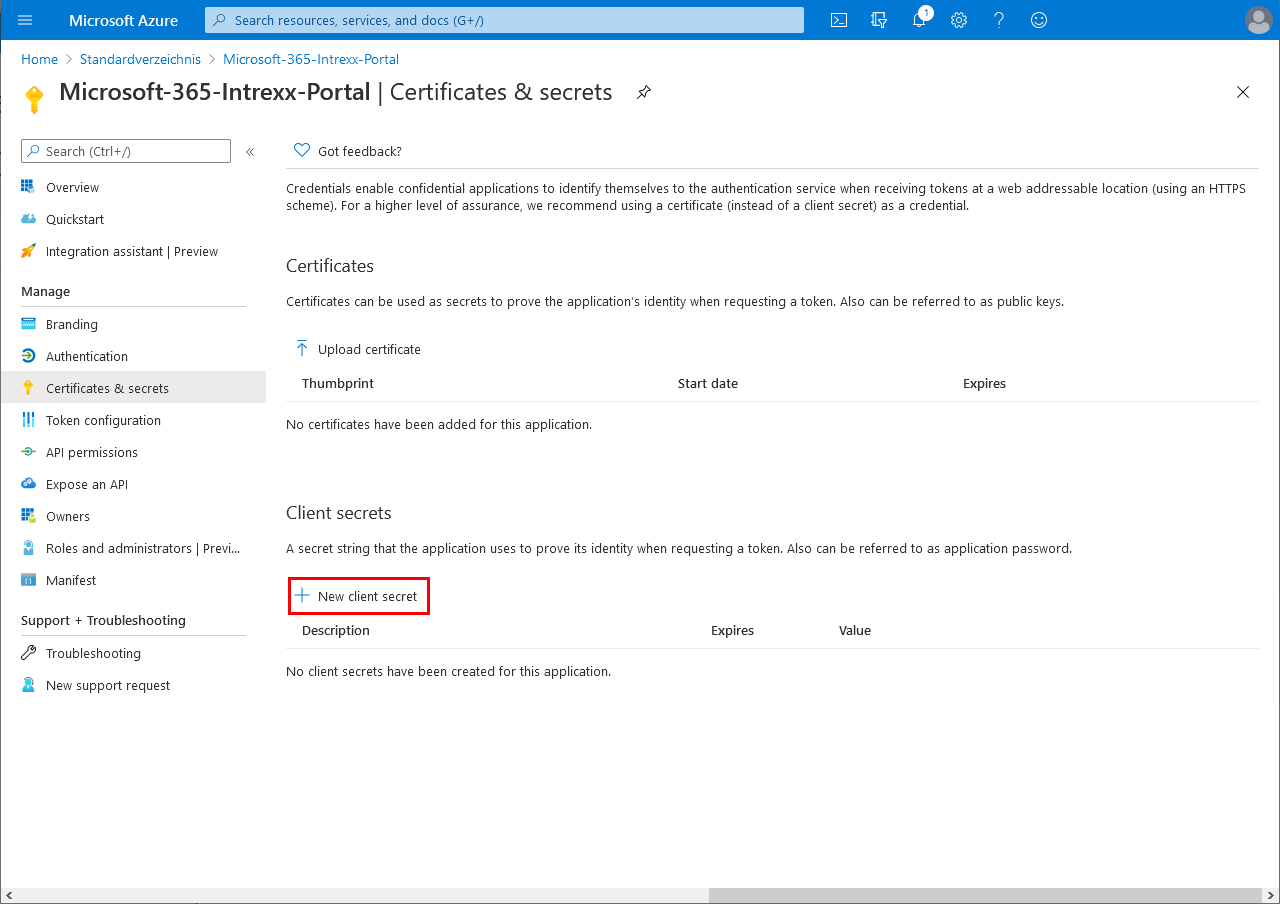
-
Click "New Secret Client Key."
The "Add Secret Client Key" window appears.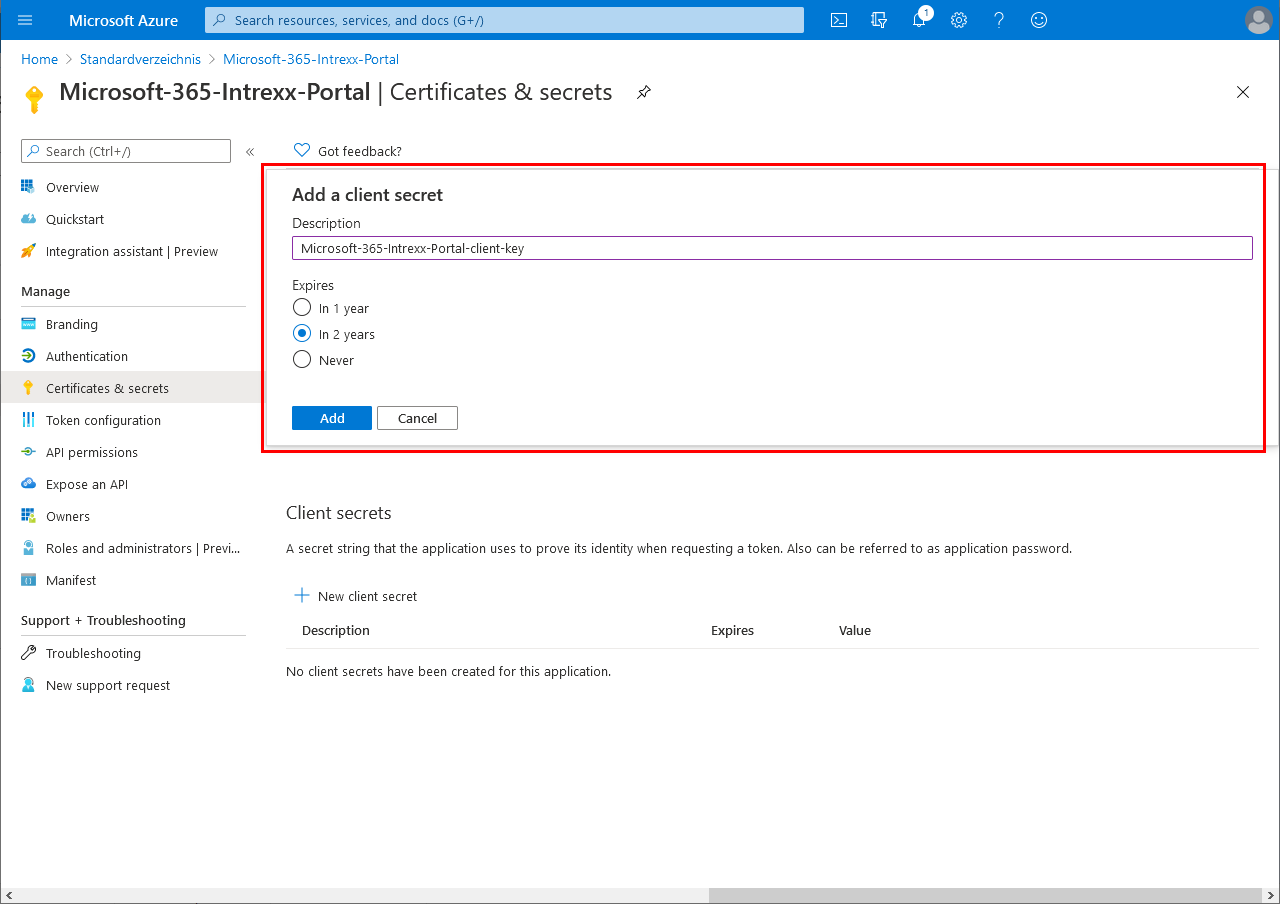
-
Enter a description for the secret client key and specify the client key's validity period.
-
Click "Add."
You will be taken back to the "Certificates & Secrets" page.
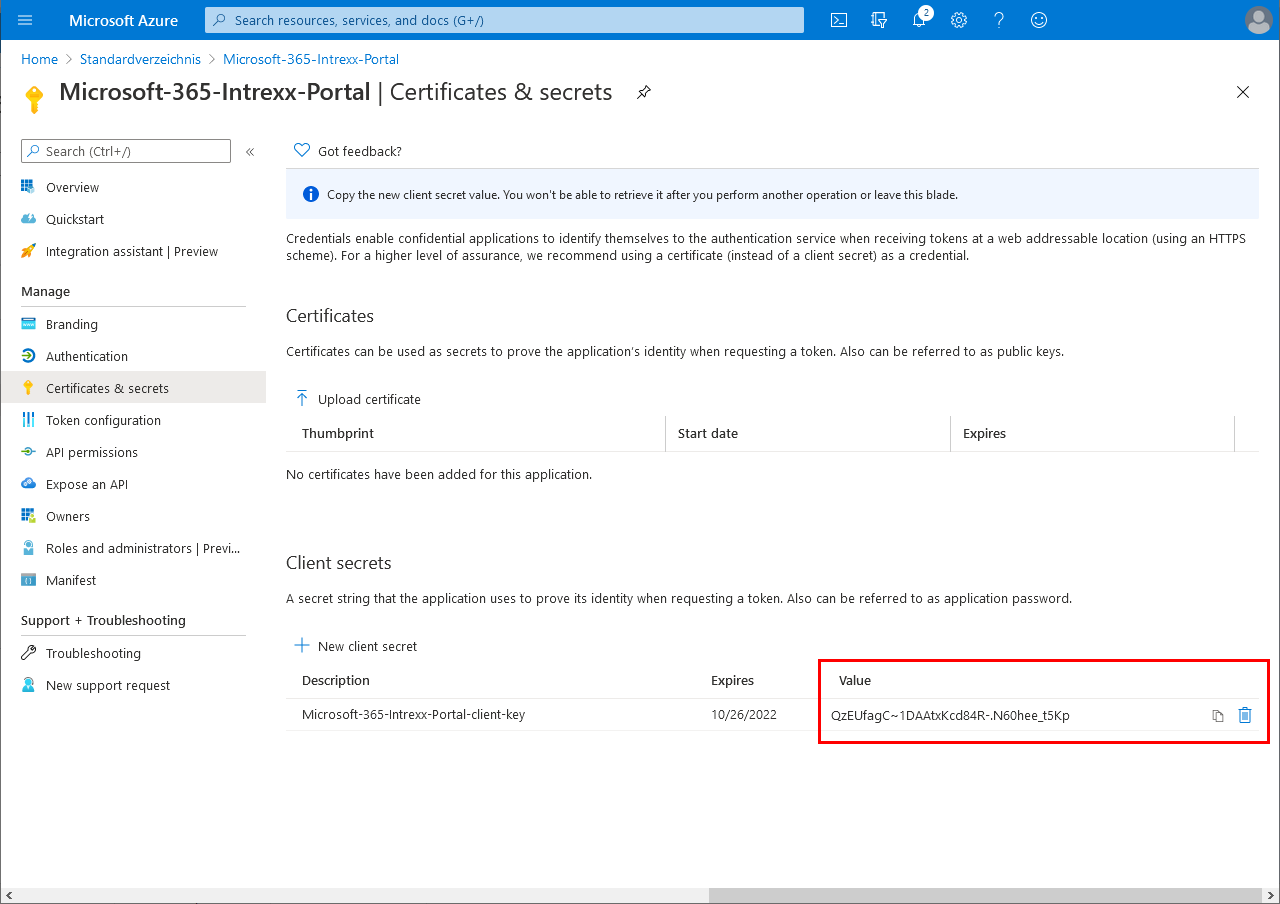
The secret client key is displayed in the lower-right corner.
You'll need this later to set up the data source in Intrexx Portal Manager.
For more information, see the following sections:
-
Copy the secret client key.
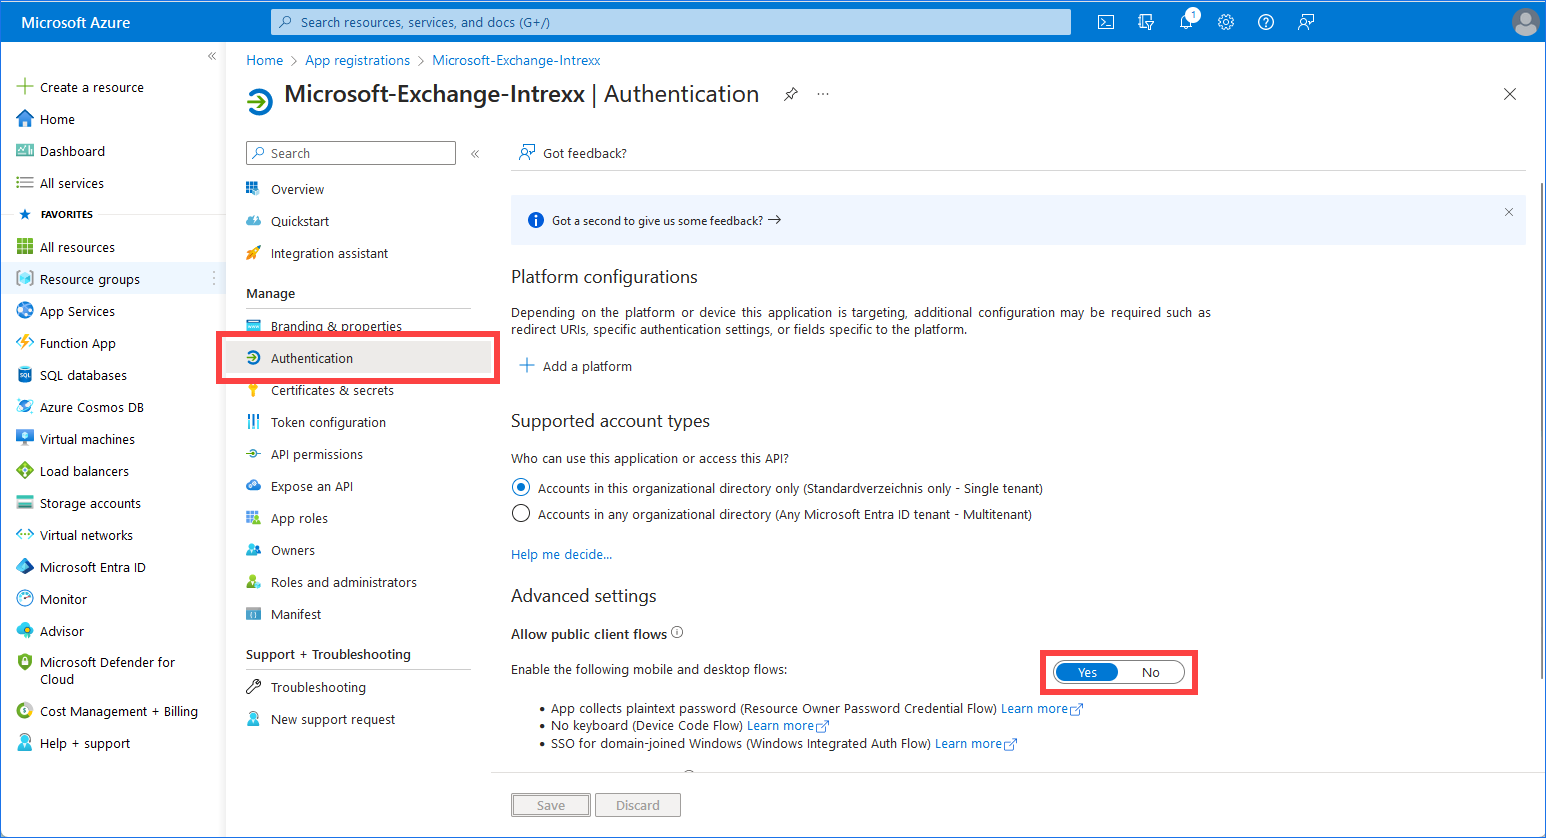
- Click the "Authentication" menu item.
-
Under "Allow public client flows," click "Yes."
-
Click "Save."
You have registered an Intrexx portal in Microsoft Azure.
At the same time, you generated and copied the client ID, the client ID, and the secret client key.
More Information
Connector for Microsoft Exchange in Applications