Security incidents
Critical cases can be reported and weighted using the "Security incidents" application. The corresponding solutions can also be recorded. An evaluation determines the incidents per month or per year and their criticality.
Installation
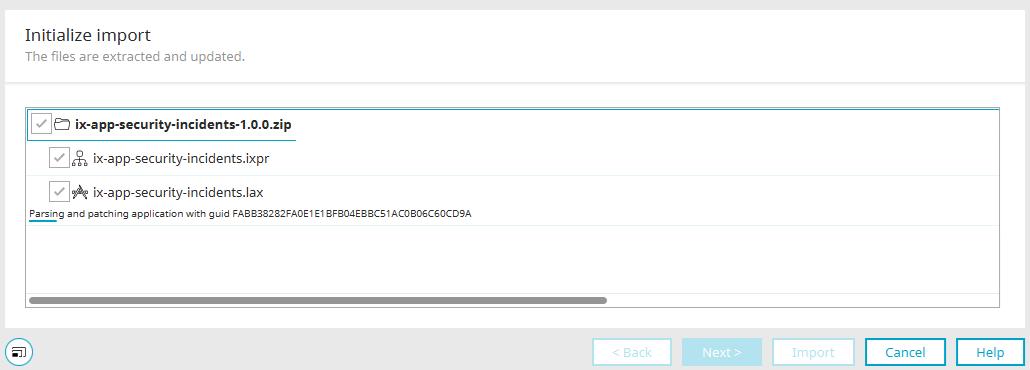
To install the template, it simply needs to be imported. You can find general instructions here.
The import package contains
-
Language constants (constants.xml)
-
Process (security-cases.ixpr)
-
Application (security-cases.lax)
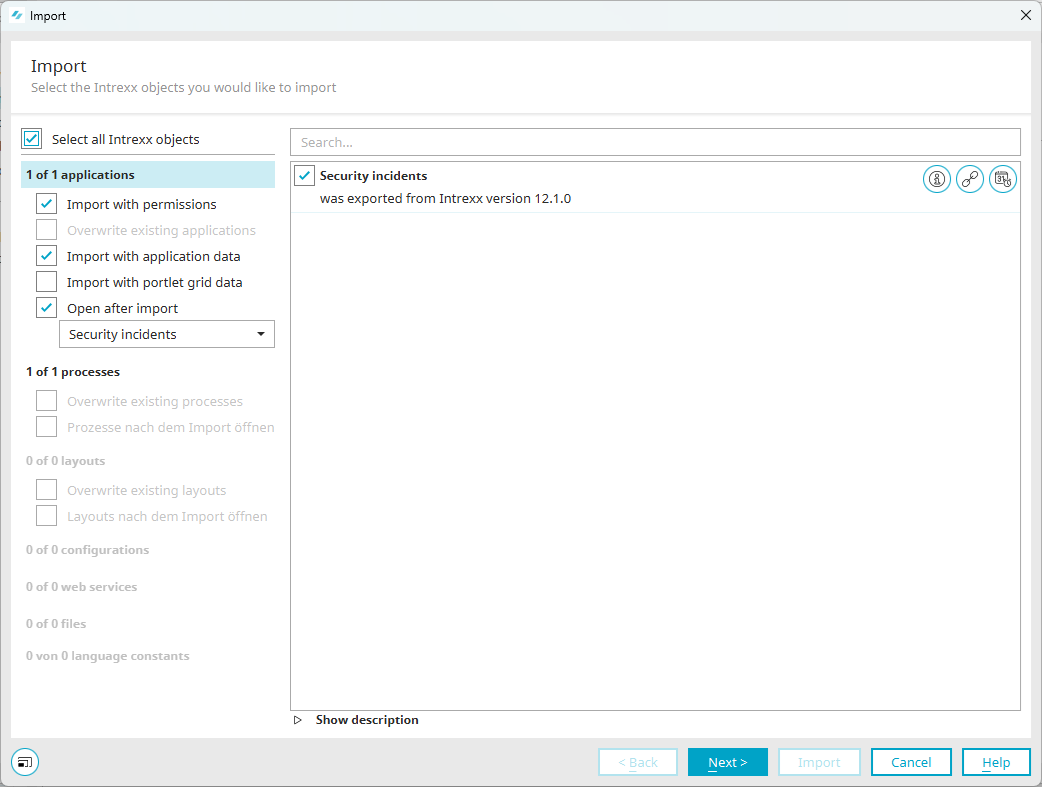
Import the application with data and rights.
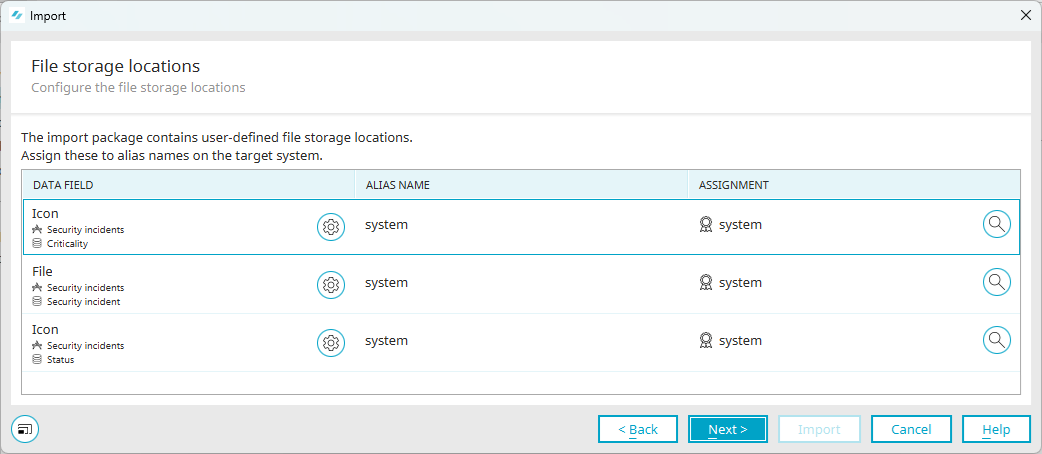
The file storage locations are imported in this step. Accept these settings as they are.
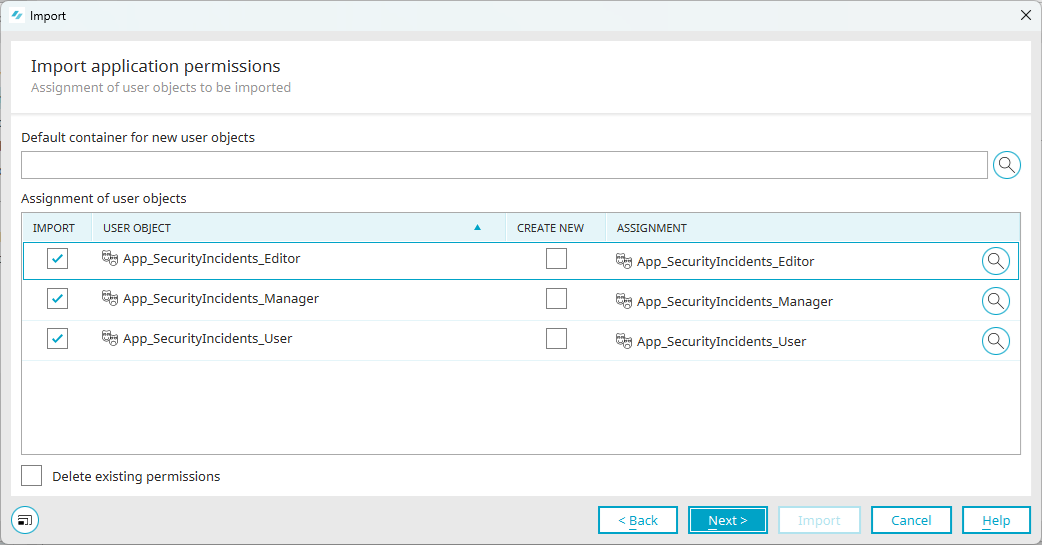
The user roles that you will find later in the user administration are imported here. These roles are used to control the rights in the application.
Accept the settings and click "Next" until the import is complete.
Roles and permissions
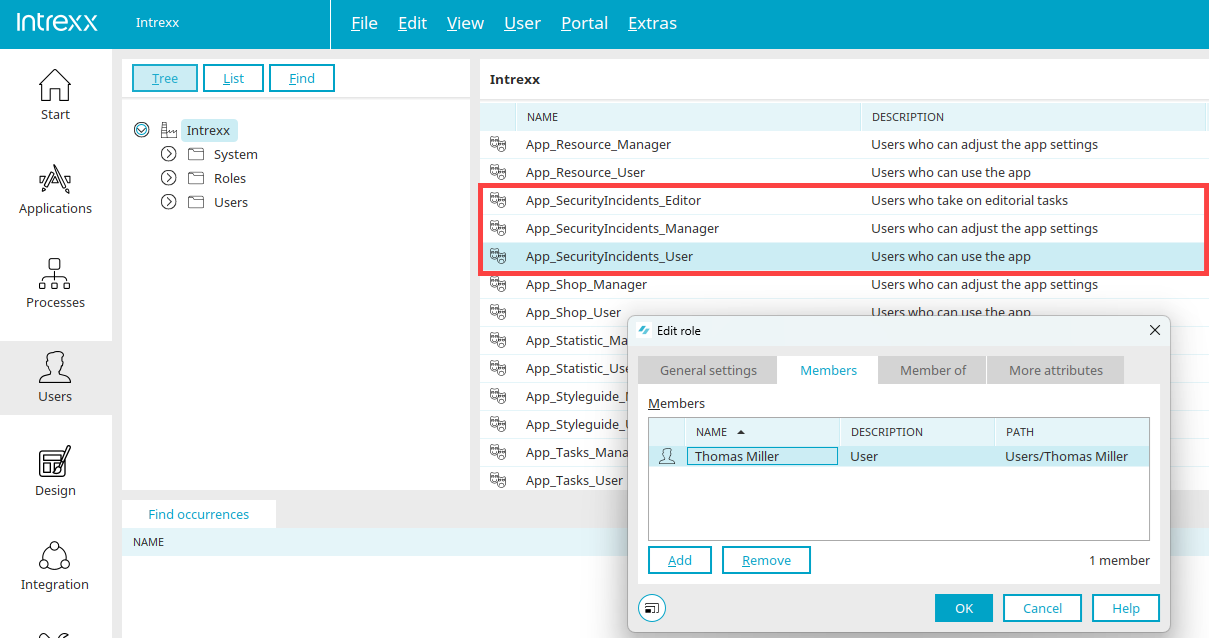
After the import, you will find three new roles in the user administration.
App_SecurityIncidents_User
Members of this role have access to the "Overview" and "Incidents in progress" pages. You can create incidents on the "Overview" page and view your own incidents that are being processed on the "Incidents being processed" page. Role members are hereinafter referred to as "users".
App_SecurityIncidents_Editor
Members of this role have all the rights of the "App_SecurityIncidents_User" role. In addition, criticalities can be entered and responsibilities defined via the "Open incidents" page. Role members are referred to below as "editors".
App_SecurityIncidents_Manager
Members of this role have all the rights of the "App_SecurityIncidents_Editor" role. They also have access to the "Administration" page, where important master data for the app can be maintained. The information groups to be informed and the status of the solutions are also defined there.
Include your users as members in one of these roles in order to grant the application rights accordingly.
Overview" page
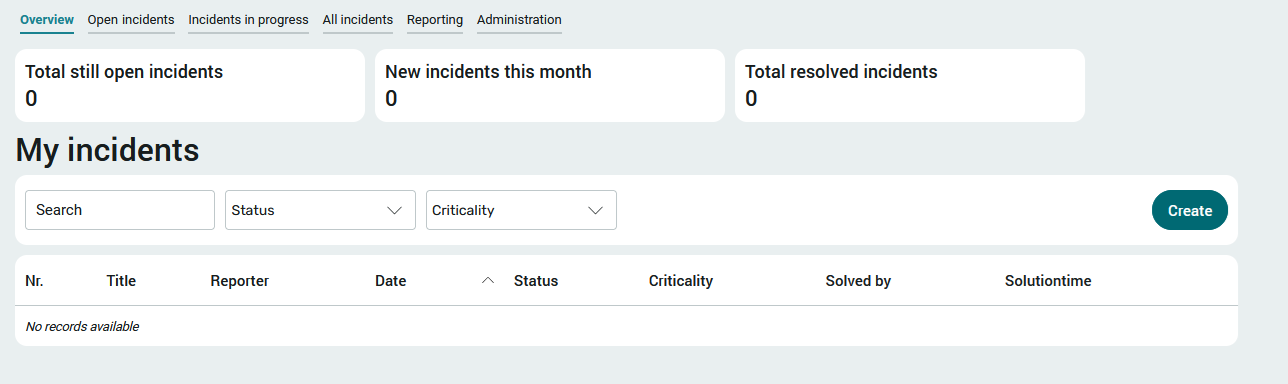
On this page, the start page of the application, users have an overview of their own
-
total open incidents
-
new incidents of the current month
-
total number of closed incidents
To create a new incident, click on "Create".
Create incident

Enter the title, description and date of the incident here and click "Save".
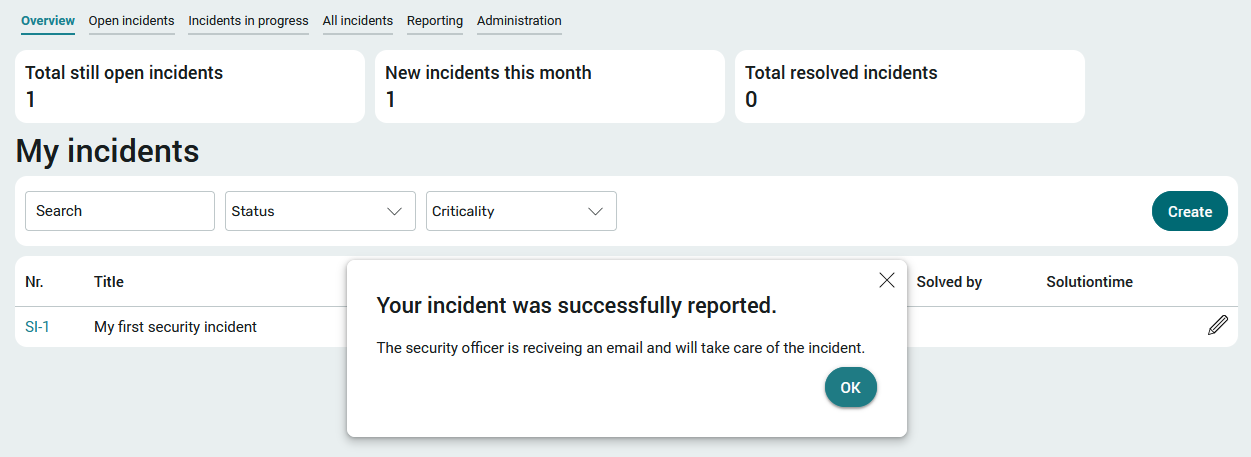
The editors then receive a notification of the incident by e-mail.
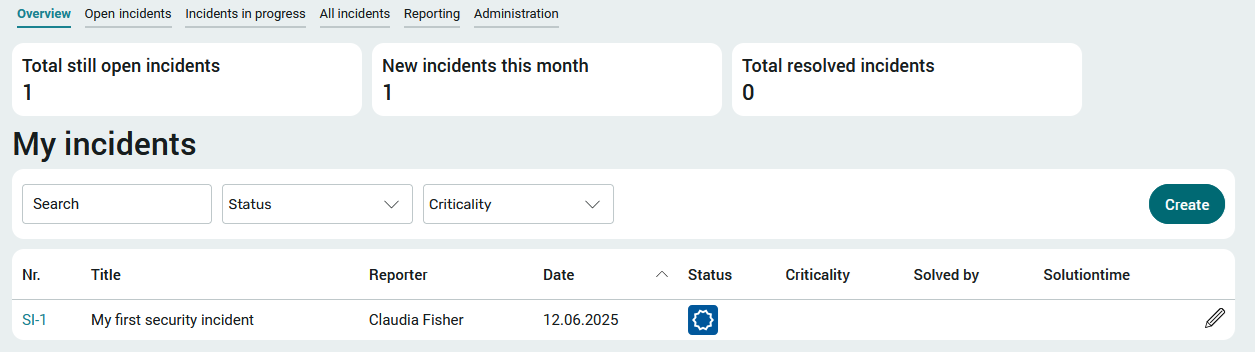
The incident is now displayed with the corresponding status on the "Overview" page. Existing incidents can be changed by clicking on ![]() "Edit".
"Edit".
A number is automatically assigned for each incident, which you can find in the table on the far left.
Clicking on the number opens a page with the details of the case.
Details page
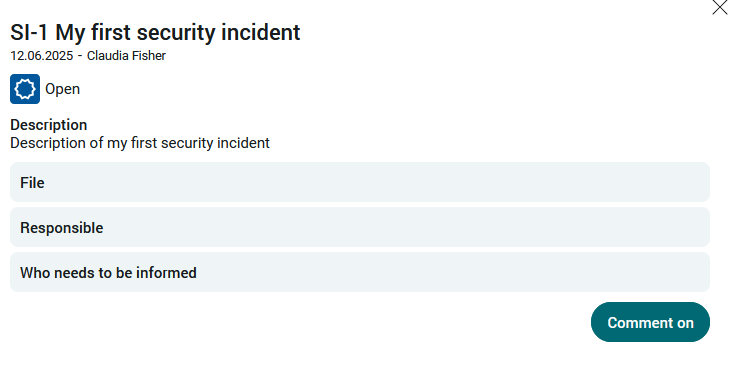
You can find the processing status here. Depending on the status, the person responsible and the employee to be informed are also displayed here.
An incident can also be commented on here if required. This page is continuously updated depending on the status, so that you can keep up to date at all times.
Open incidents
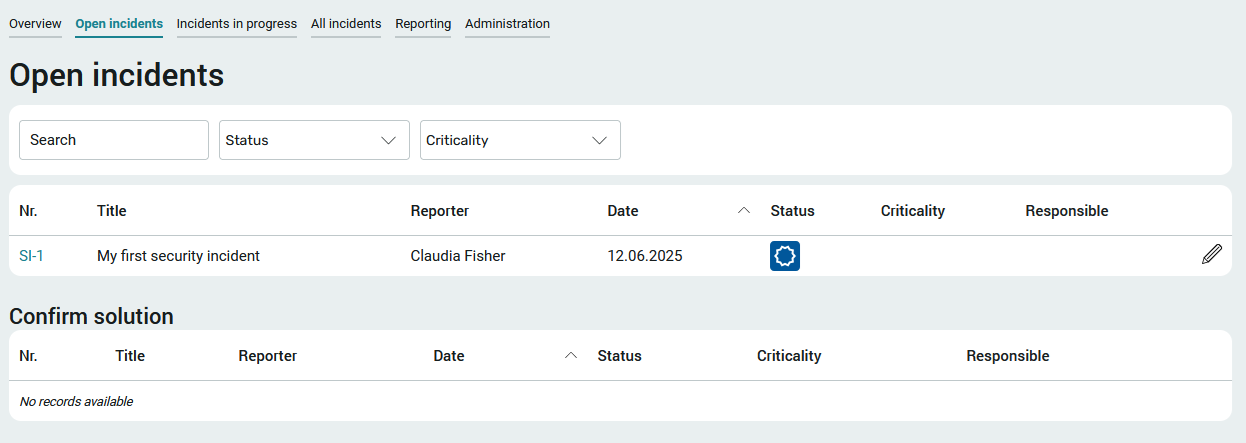
Editors and managers can check open incidents on this page. A click on ![]() "Edit" opens a page on which the criticality and the persons responsible can be assigned.
"Edit" opens a page on which the criticality and the persons responsible can be assigned.
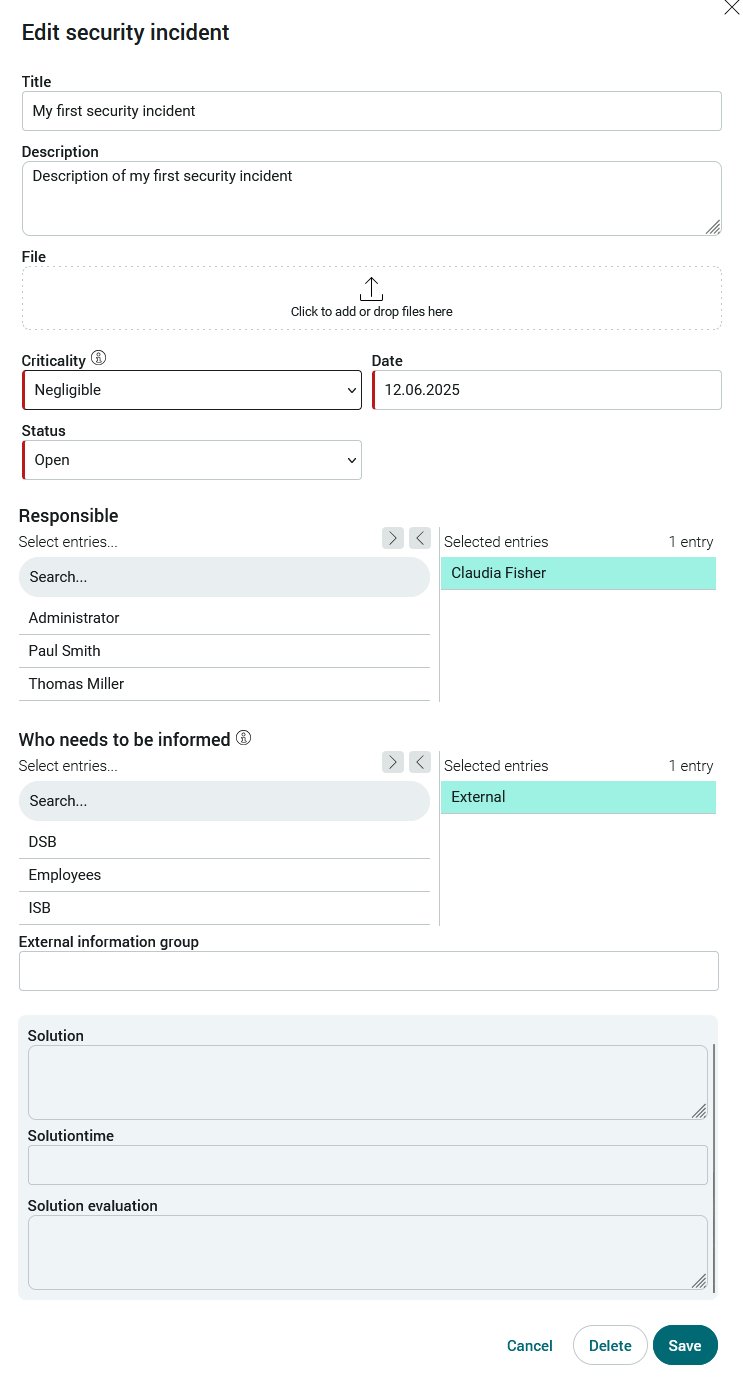
You can also select who needs to be informed about the incident in the lower section. If "External" is selected here, the "External information group" input field is also displayed, in which the relevant groups/persons can be entered.
The registered groups are not automatically notified. The "Who must be informed" section is for documentation purposes only.
If the incident is saved by clicking on "OK", it will no longer be displayed on the "Open incidents" page.
A security incident can also be rejected by clicking on the corresponding button.
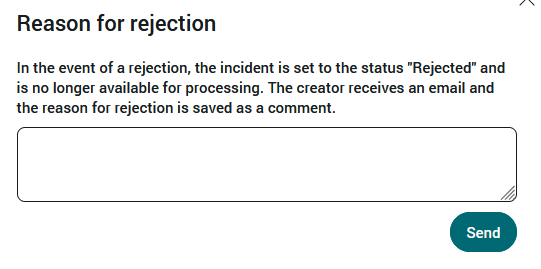
In the event of a rejection, a reason should be entered here. Then click on "Send". The case is then no longer available for processing. The creator of the case sees the rejected case with the corresponding status on the "Overview" page and can view the reason for rejection on the details page of the case.
The criticality can be selected from a selection list.
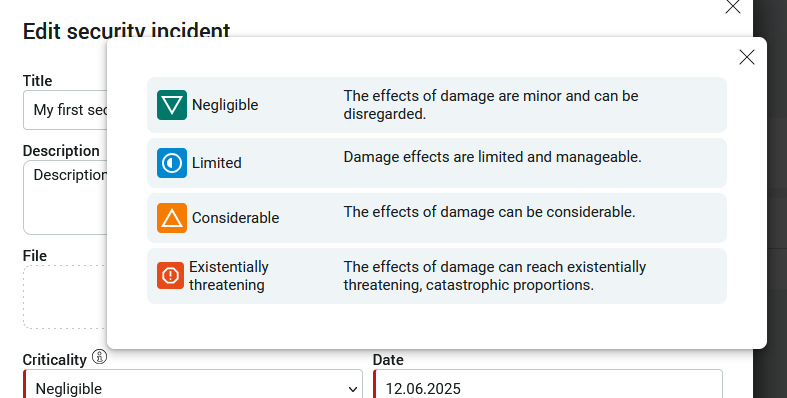
If you need information about the definition of a criticality, click here on ![]() Help. The description of a criticality is thus displayed. The respective description can be found in the administration, where it can also be edited.
Help. The description of a criticality is thus displayed. The respective description can be found in the administration, where it can also be edited.
Incidents in progress
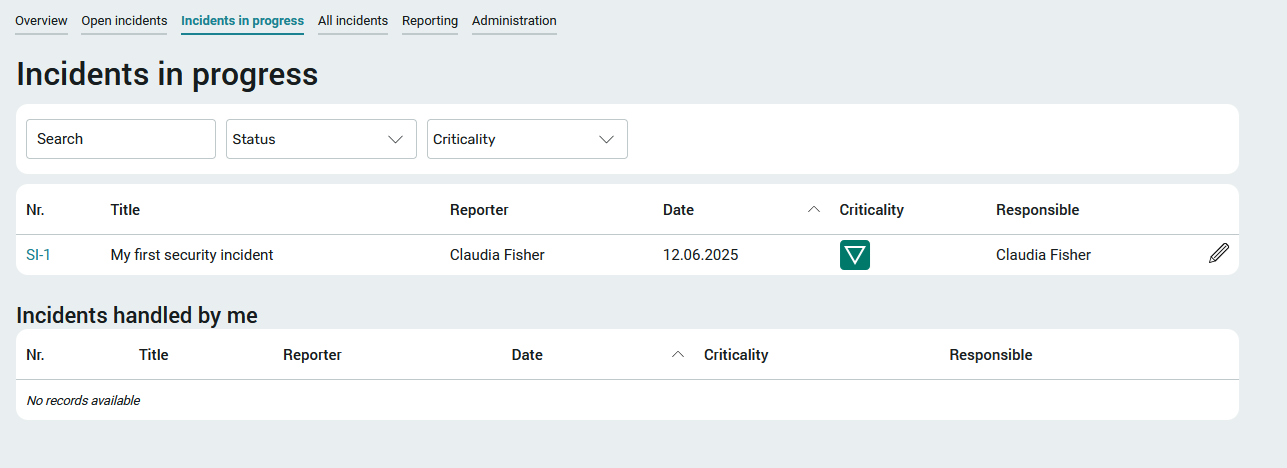
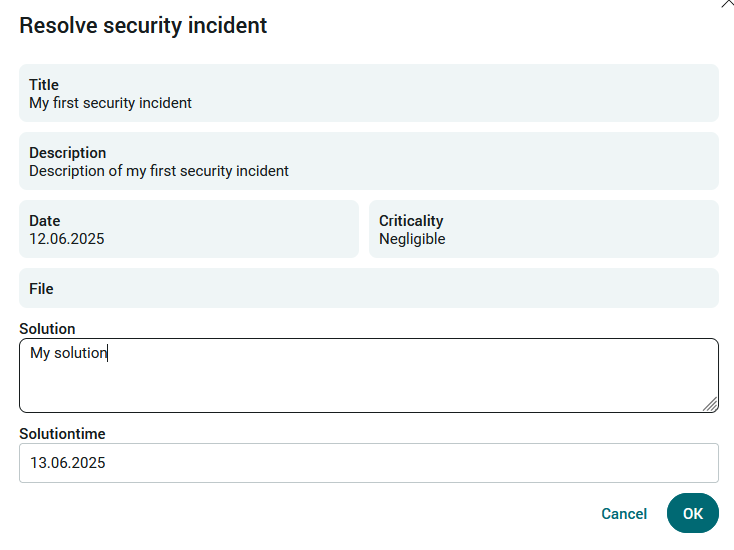
All incidents that are currently being processed are listed on this page. Editors and managers can enter a solution for resolved security incidents here. To do this, click on ![]() "Edit".
"Edit".
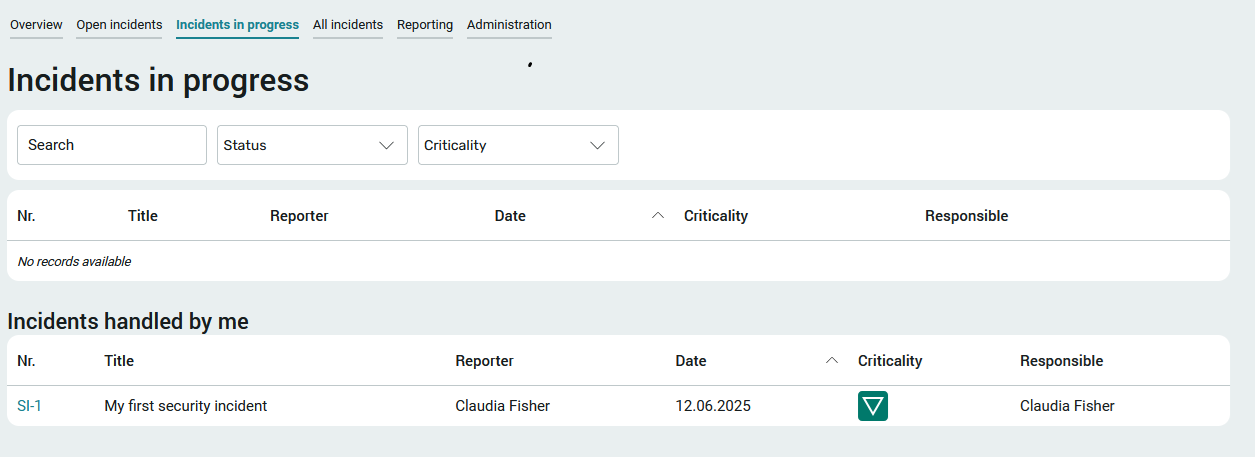
Resolved security incidents are displayed in the "Incidents processed by me" table.
All incidents
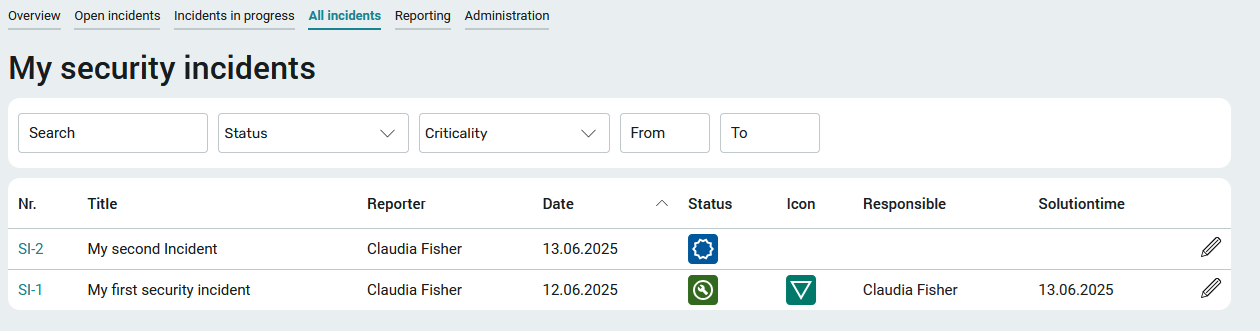
All security incidents are listed on the "All incidents" page, regardless of their status. The page is accessible for managers and editors.
Evaluation
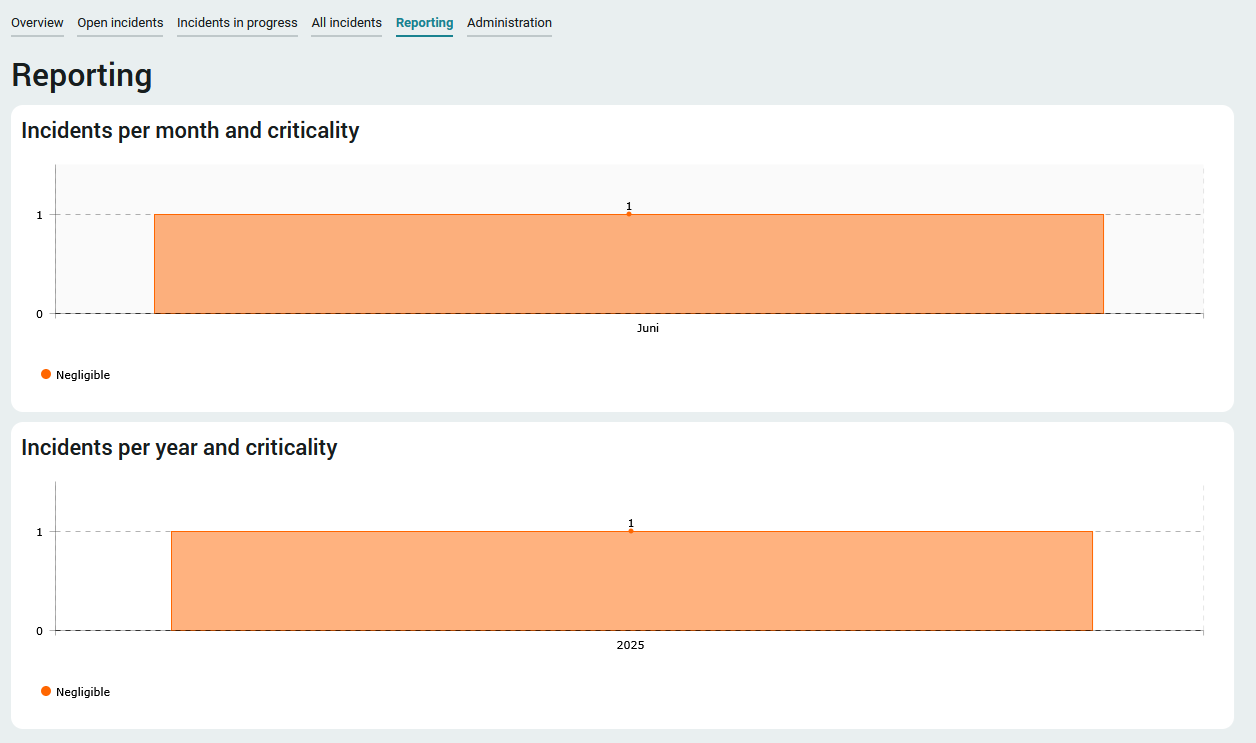
In the evaluation you will find a graphical overview of the incidents per month or year and criticality.
Administration
Status
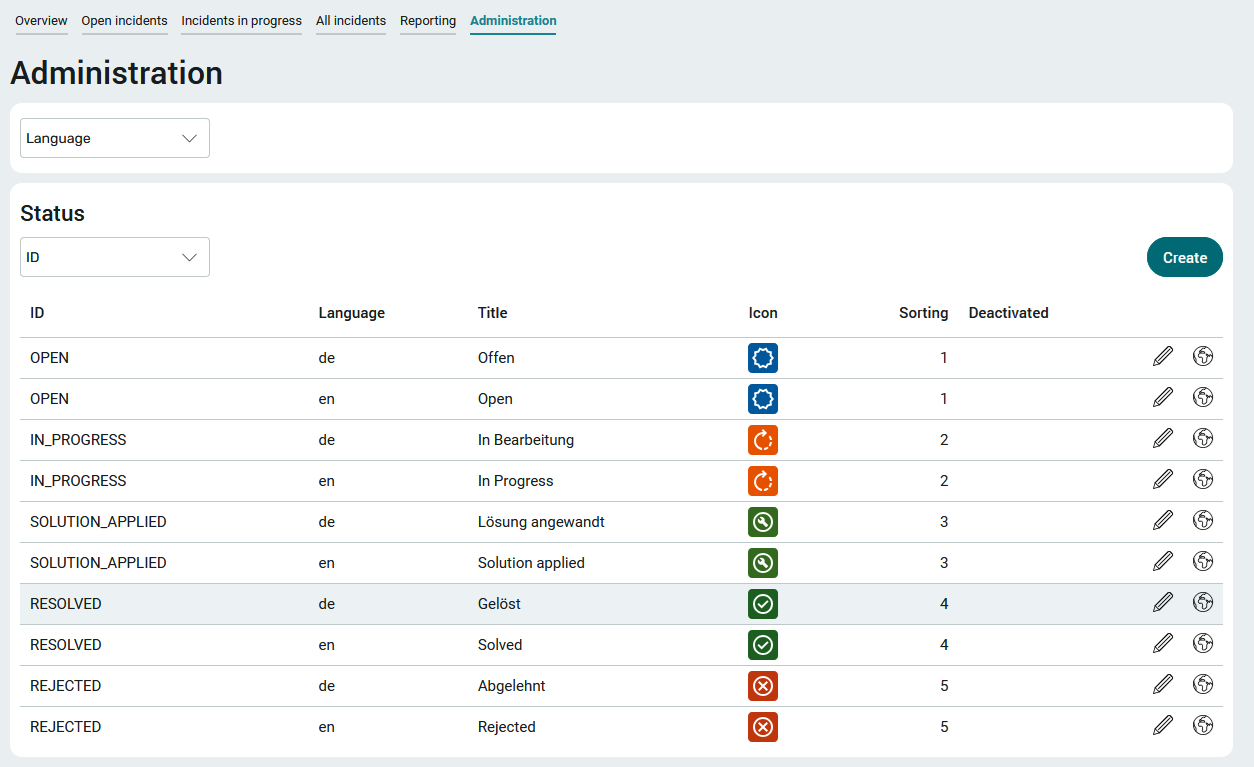
All entries on the administration page can be filtered by language using the "Language" selection list.
Here you will first find the statuses that mark the processing status of an incident.
A status can be edited by clicking on ![]() "Edit".
"Edit".
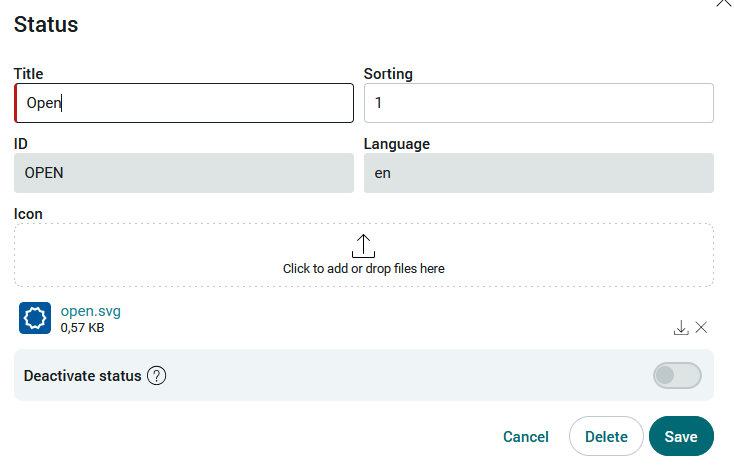
In addition to the title and sorting, you will also find the language abbreviation, the image representing the status and the ID. The ID should always be written in capital letters for better differentiation.
A status can also be deactivated here and can then no longer be used when processing incidents.
Criticality
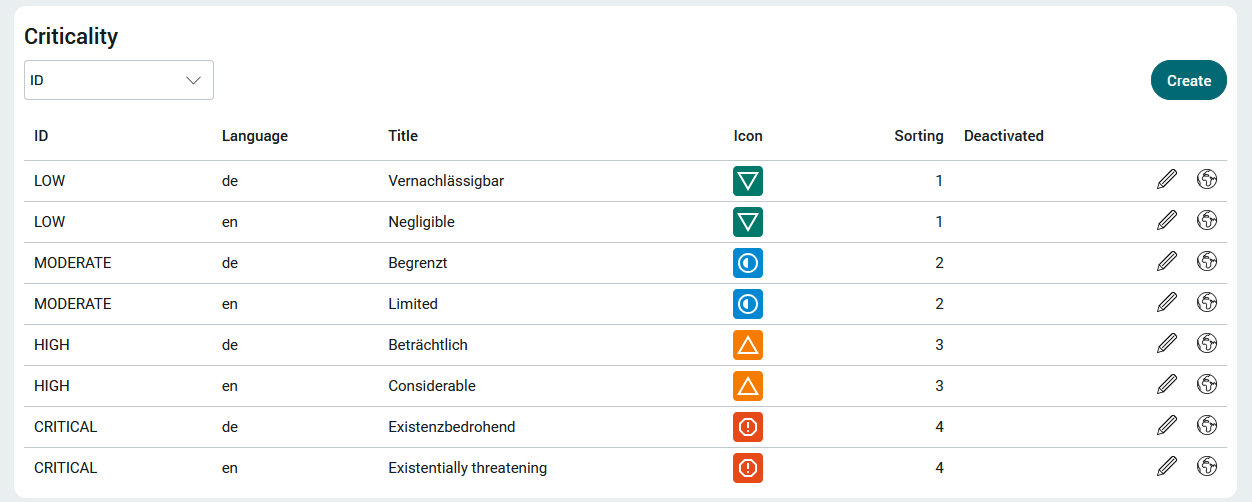
The criticality determines the priority of processing the individual security incidents.
A criticality can be edited by clicking on ![]() "Edit".
"Edit".
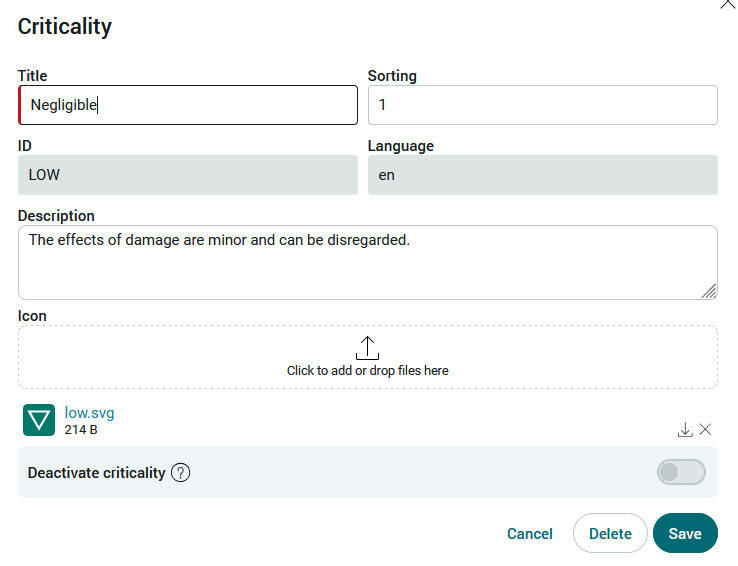
Here you will also find a more detailed description of the criticality, which is helpful for the assessment of a case.
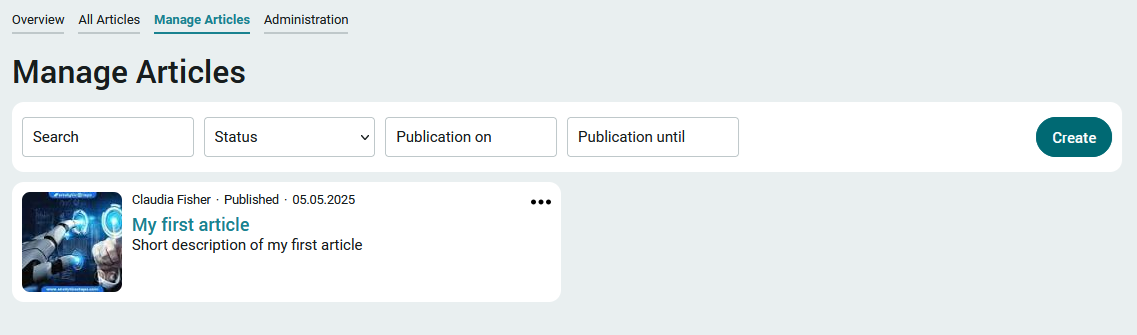
Multilingual data records
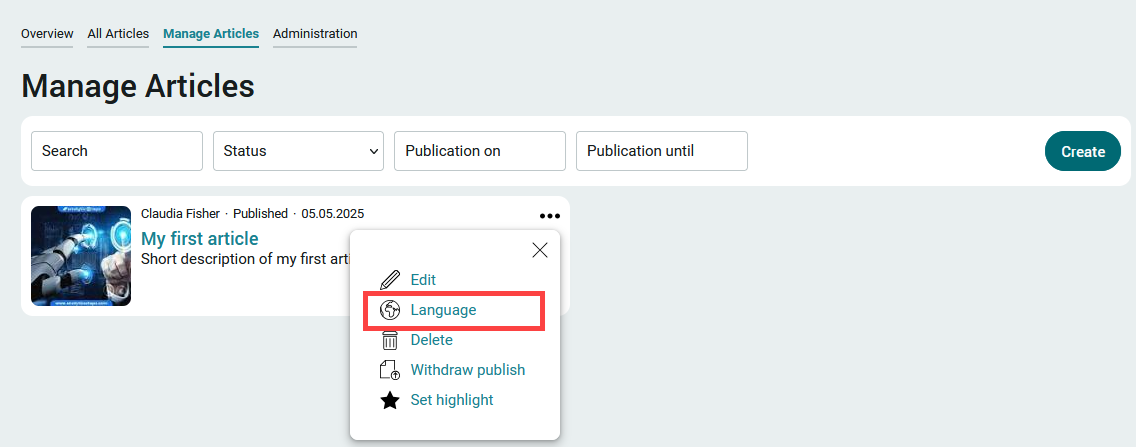
All articles can be created in multiple languages on the "Manage articles" page via the ![]() options menu.
options menu.
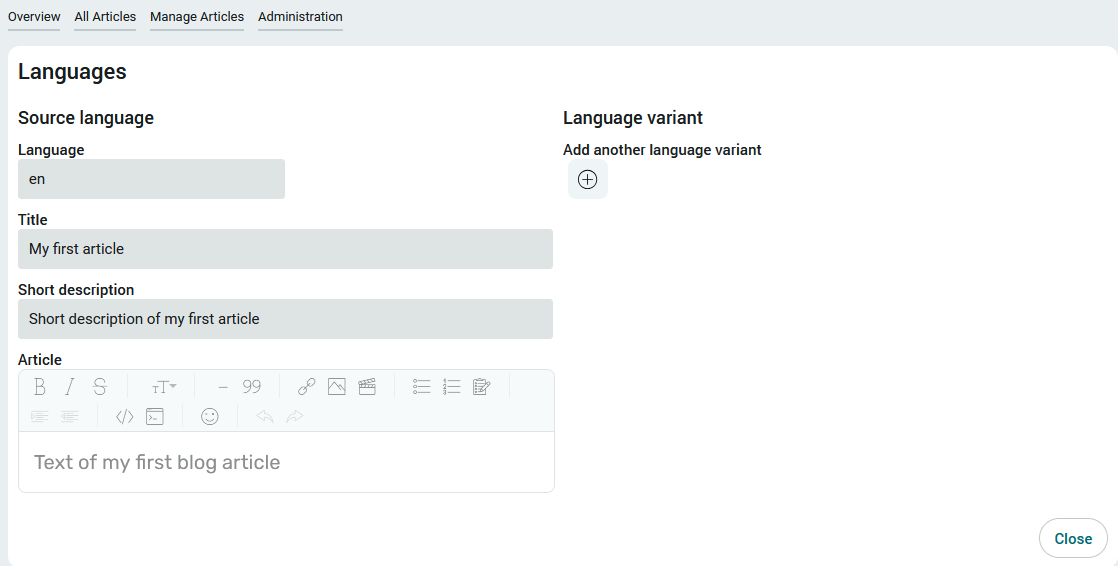
Click on  "Add another language variant" to display the area for the translation.
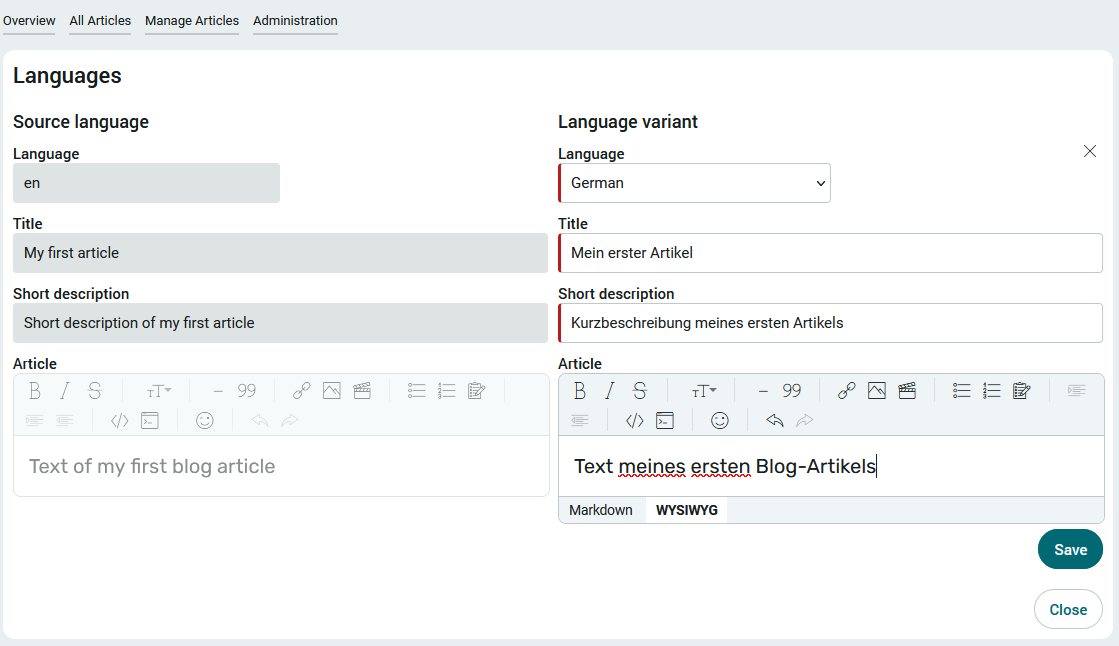
All active portal languages can be selected here. Click on "Save" to apply the changes and close the dialog.
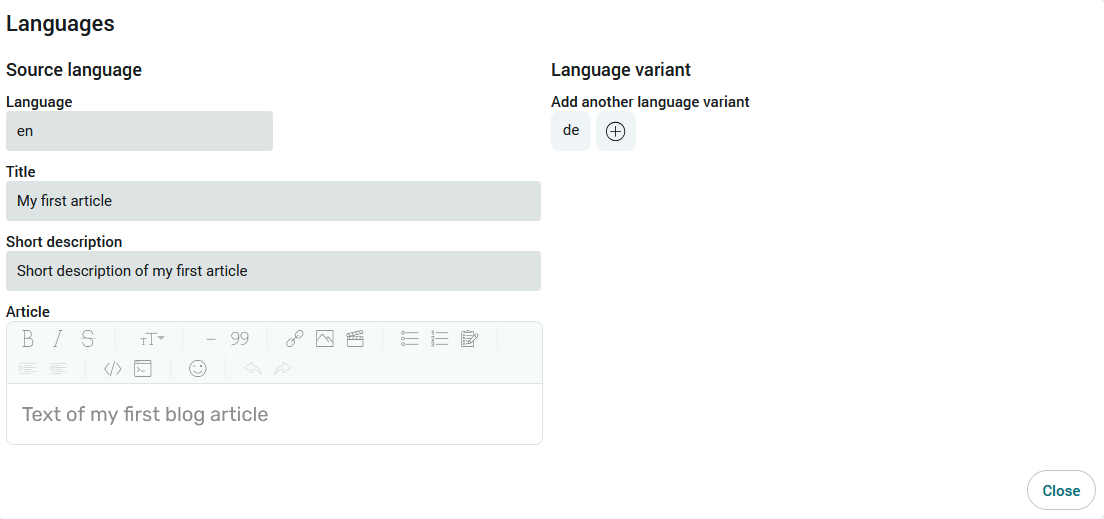
Click on "Add another language variant" to create translations for other languages.
A click on the language abbreviation (here e.g. "en") opens the corresponding translations.
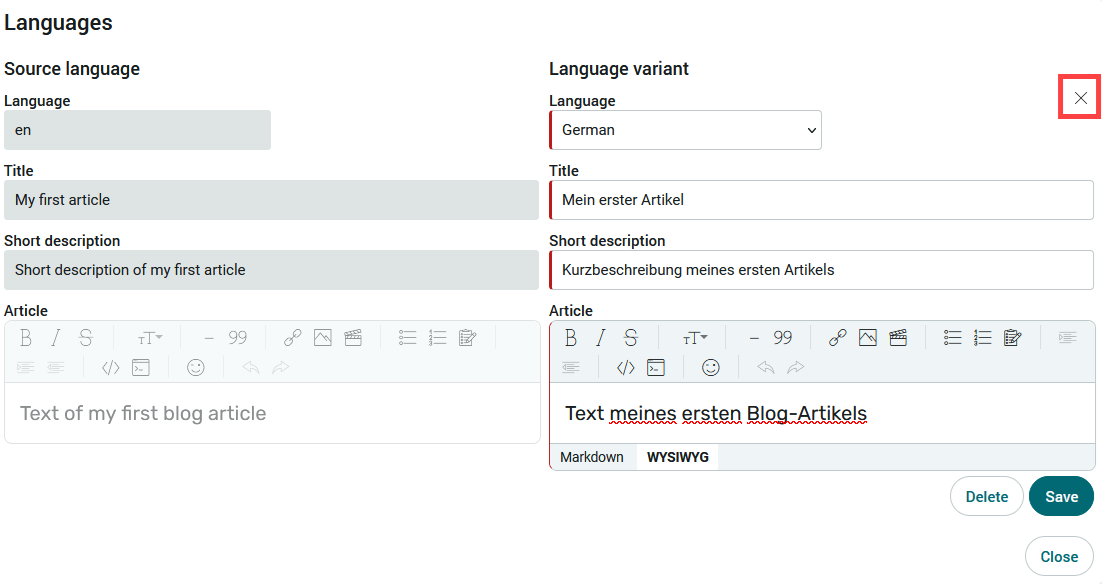
The language variant can be closed with the close symbol. You will then return to the previous page.
When switching languages in the browser, the texts are displayed in translation. New entries can be written in the current language.