Recurring tasks
The "Recurring tasks" application makes it possible to manage and delegate regularly recurring tasks with subtasks.
It is primarily intended for the maintenance and control of IT system tasks.
In addition to the reminder functions, the documentation of completed tasks is a central feature. This is necessary for various compliance requirements in the area of data protection and IT security.
Work carried out is recorded in the form of a log.
All tasks can be created in multiple languages.
Installation
To install the template, it simply needs to be imported. You can find general instructions here.

The import package contains
-
Language constants (constants.xml)
-
Process (Recurring tasks.ixpr)
-
Application (Recurring tasks.lax)
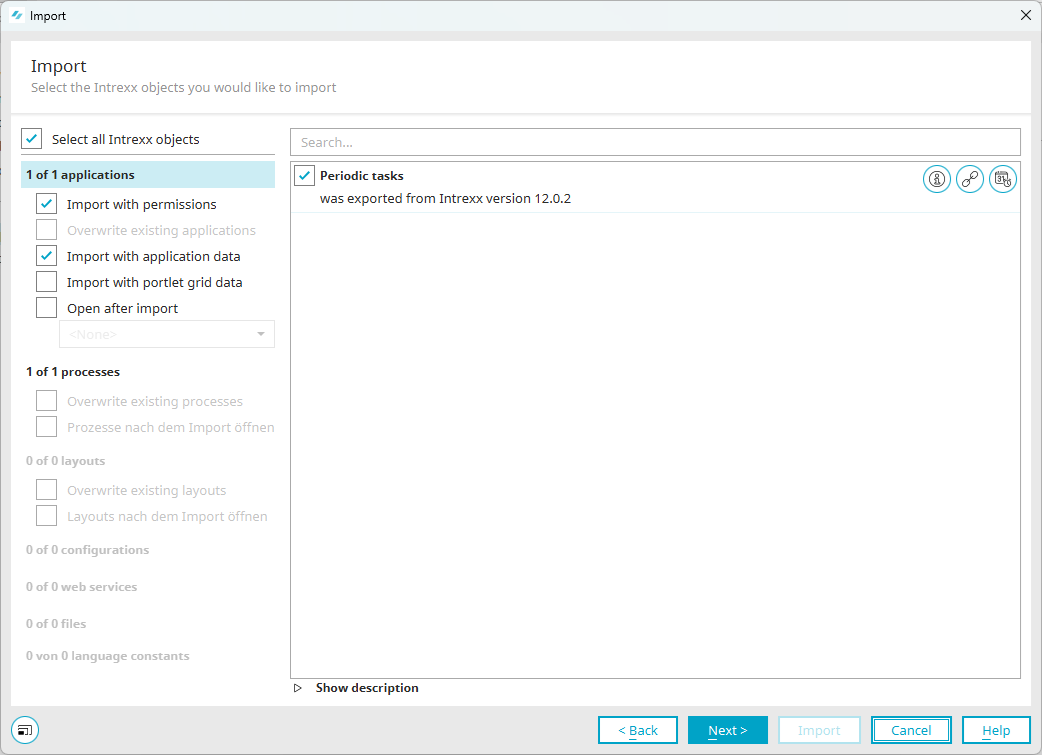
Import the application with data and rights.
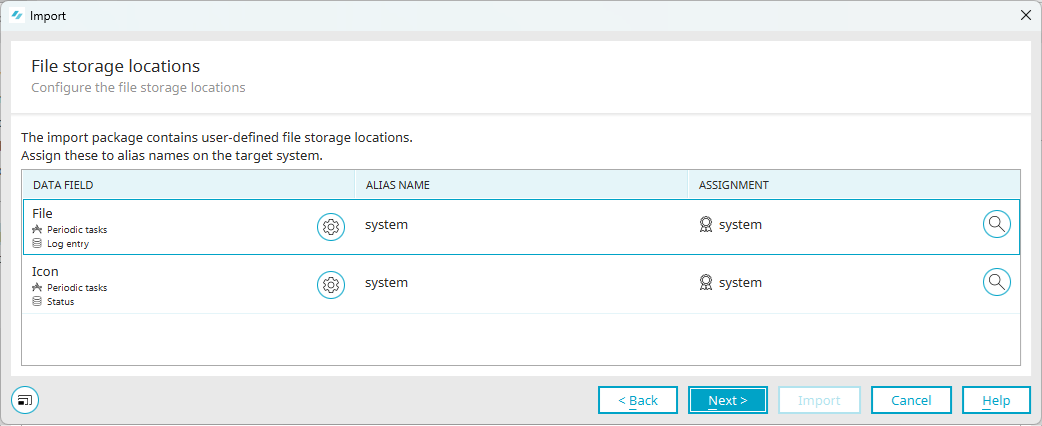
The file storage locations are imported in this step. Accept these settings as they are.

The user roles that you will find later in the user administration are imported here. These roles are used to control the rights in the application.
Accept the settings and click "Next" until the import is complete.
Roles and permissions
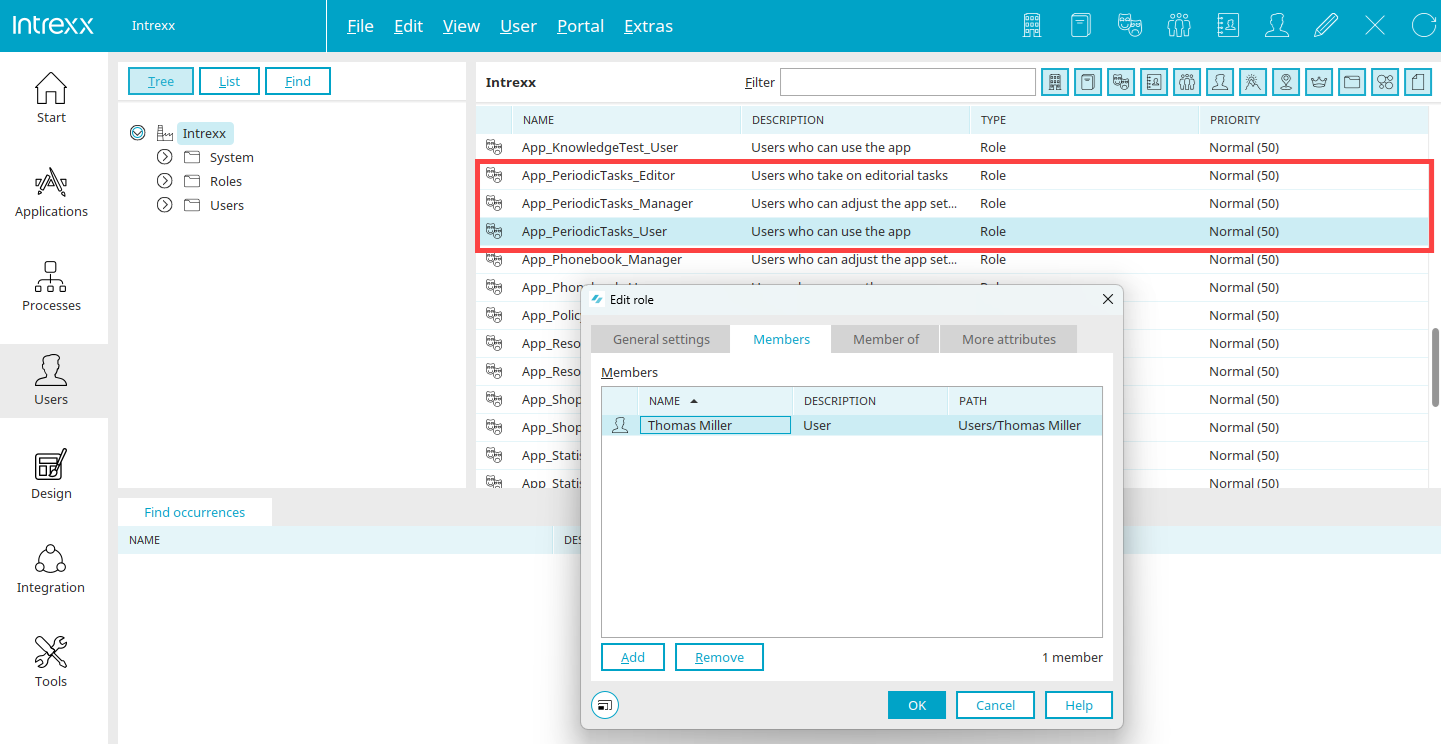
After the import, you will find three new roles in the user administration.
App_PeriodicTasks_User
Members of this role can read their own tasks on the "My tasks" page. They are reminded of their own tasks when they are due. Role members are hereinafter referred to as "users".
App_PeriodicTasks_Editor
Members of this role have all the rights of the "App_PeriodicTasks_User" role. They can also create tasks. Editors have access to all application pages - except the administration area. Role members are referred to below as "editors".
App_PeriodicTasks_Manager
Members of this role have all the rights of the "App_PeriodicTasks_Editor" role. You can also edit the administrative data (task type / status). Role members are hereinafter referred to as "managers".
Include your users as members in one of these roles in order to grant the application rights accordingly.
We will show you the structure and functions of the application using the example "Server maintenance". Three different servers are to be maintained regularly.
Create task
Editors can create tasks on the "All tasks" page. You can access this page via the application menu of the same name. In our example, we have logged into the portal with the user "ClaudiaF" - ClaudiaF is a member of the user role "App_PeriodicTasks_Editor".
Click on the "Create" button to create a new task.
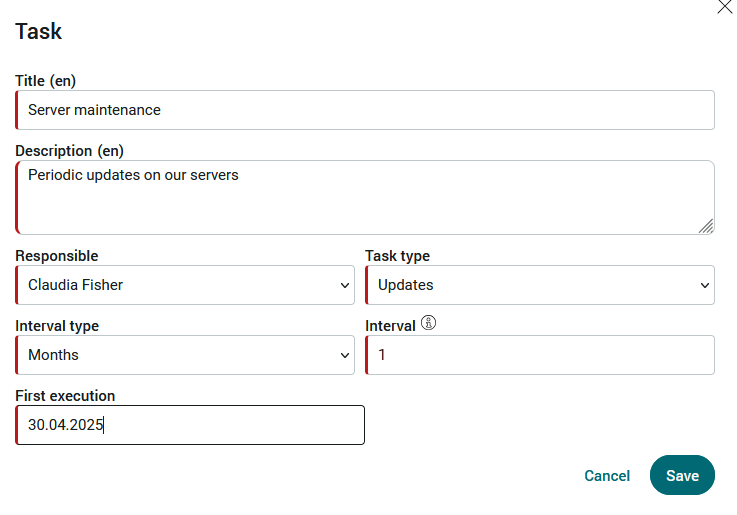
For our example, we enter "Server maintenance" as the title and a corresponding description.
Claudia Fisher is responsible for the task.
Updates" is selected as the task type.
You can select "Days", "Weeks" or "Months" as the interval type. Our servers should be maintained on a monthly basis. The desired number for the frequency of execution is entered in the "Interval" field. In our case a "1", as the servers are to be supplied with updates once a month.
The start date for the regular reminder is set in "First execution".
The date for all subsequent executions is automatically calculated by the process belonging to the application based on the specified interval.
Click on "Save" to create the new task.
The new task is then displayed in the task list.
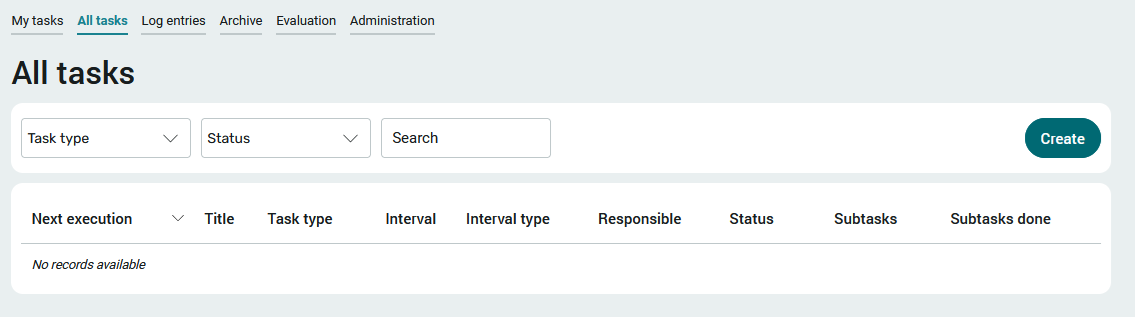
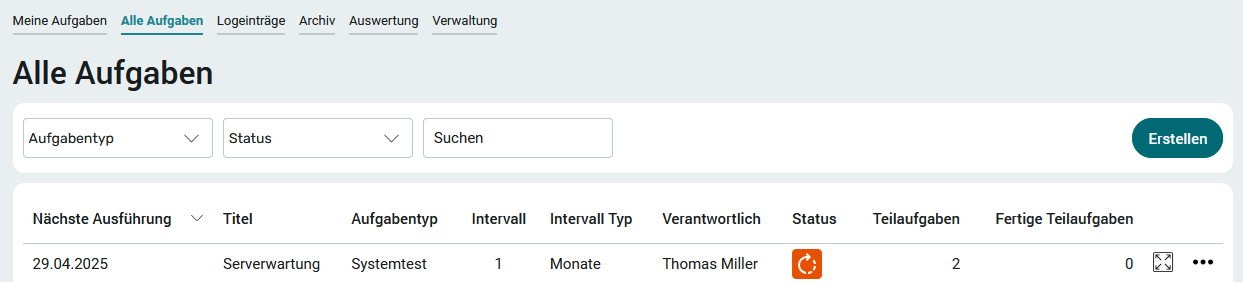
All tasks

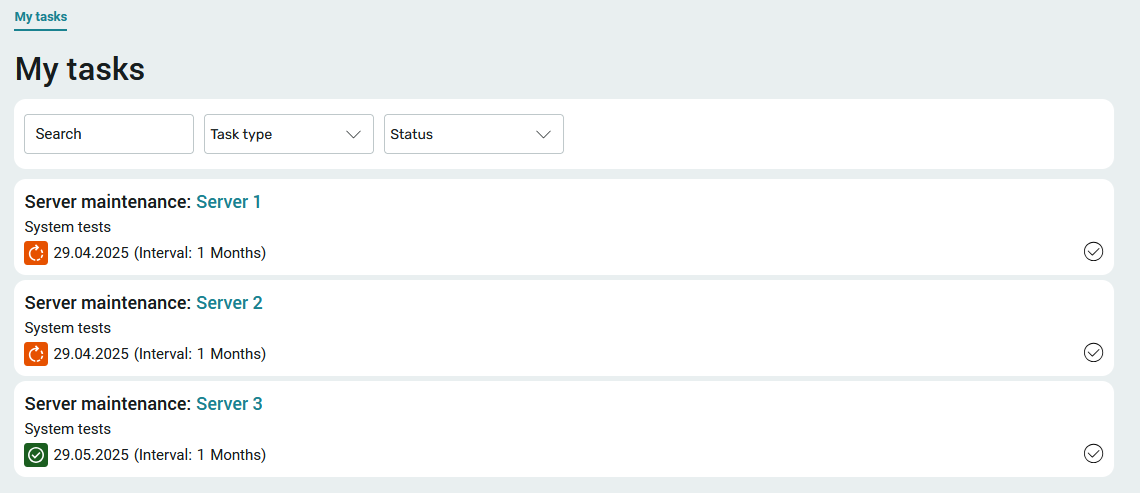
All tasks are listed on this page, which you can access via the application menu if you have sufficient authorization (editors / managers).
At the top you will find filters that can be used to restrict the task list according to task type, status or search terms.
In the "Status" column of the task list, a symbol indicates whether a task is
 not yet due or
 is due.
The button ![]() "Options" opens a menu that can be used to complete the task once it has been completed.
"Options" opens a menu that can be used to complete the task once it has been completed.
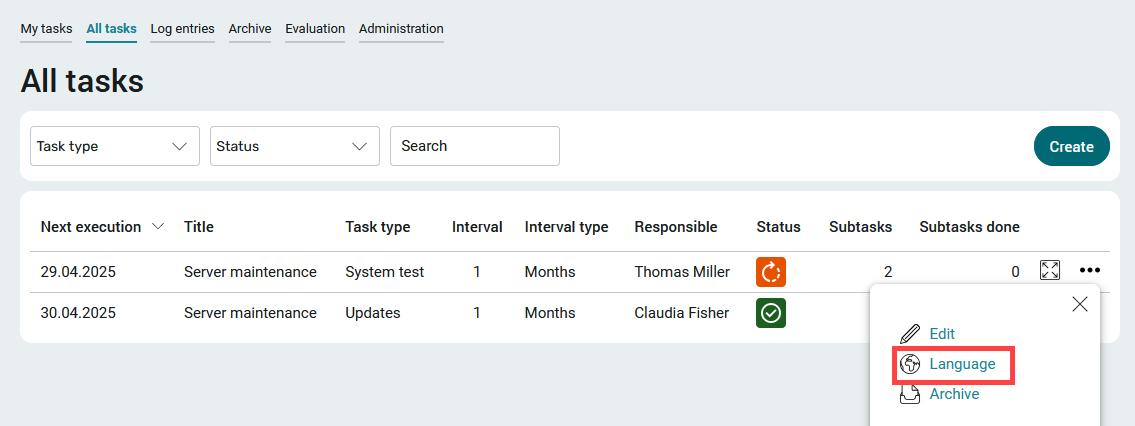
The task can also be edited again or archived via the menu. During processing, all task data can be changed except for the execution date.
We will go into the "Language" menu item in more detail later.
In addition to the ![]() "Options" button, you will also find the
"Options" button, you will also find the  "View" button for each task in the list. Click on this button to switch to the detailed view of the task.
Subtasks
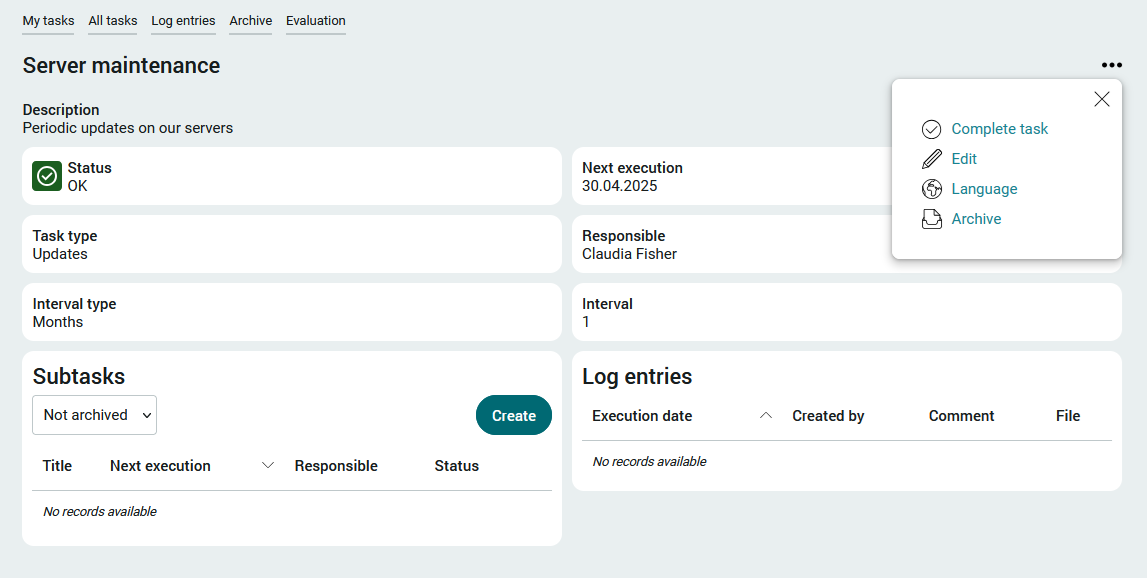
In the detailed view of a task, subtasks can be created which are then automatically linked to the parent task. However, this is not absolutely necessary - tasks can also be managed without subtasks and then run through the same workflow as tasks with subtasks.
At the top right you will find the ![]() "Options" menu, which you already know from the "All tasks" page.
"Options" menu, which you already know from the "All tasks" page.
Clicking on the "Create" button opens the input page that is used to create a subtask.
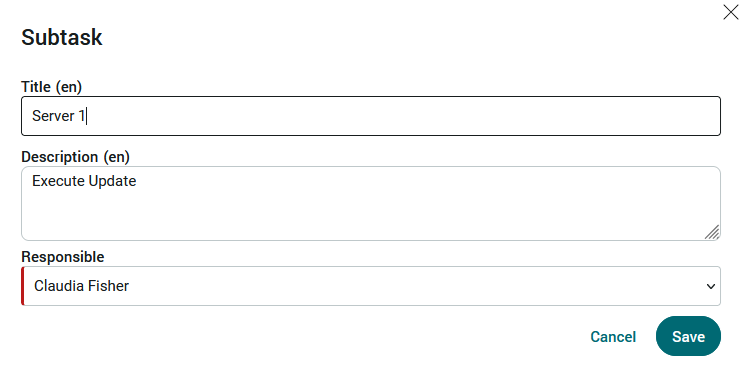
The current execution time and the status of a subtask are inherited from the parent task. Click on "Save" to create the new subtask and close the input page.
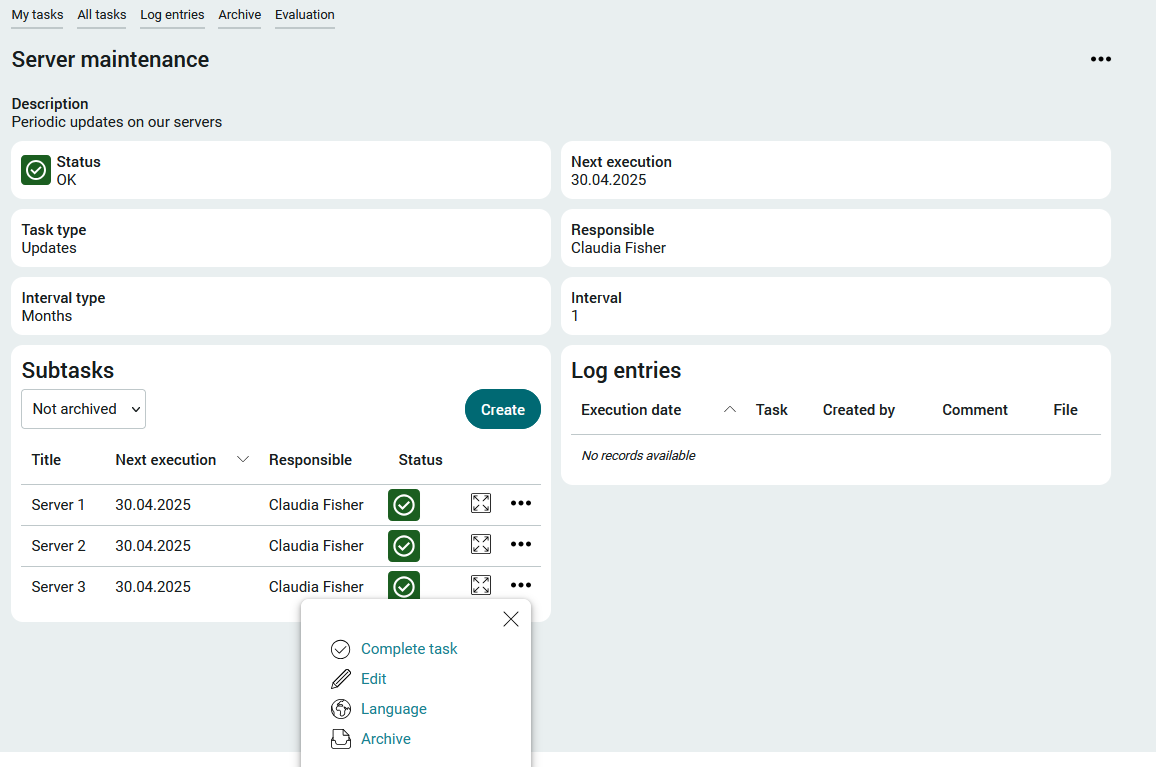
Here, too, you will find the ![]() "Options" menu for each subtask, which you can use to access the "Complete task", "Edit", "Language" and "Archive" functions. All functions in this menu refer to the respective subtask, not to the higher-level task.
"Options" menu for each subtask, which you can use to access the "Complete task", "Edit", "Language" and "Archive" functions. All functions in this menu refer to the respective subtask, not to the higher-level task.
Click on the button "View" to open the detail page of the subtask.
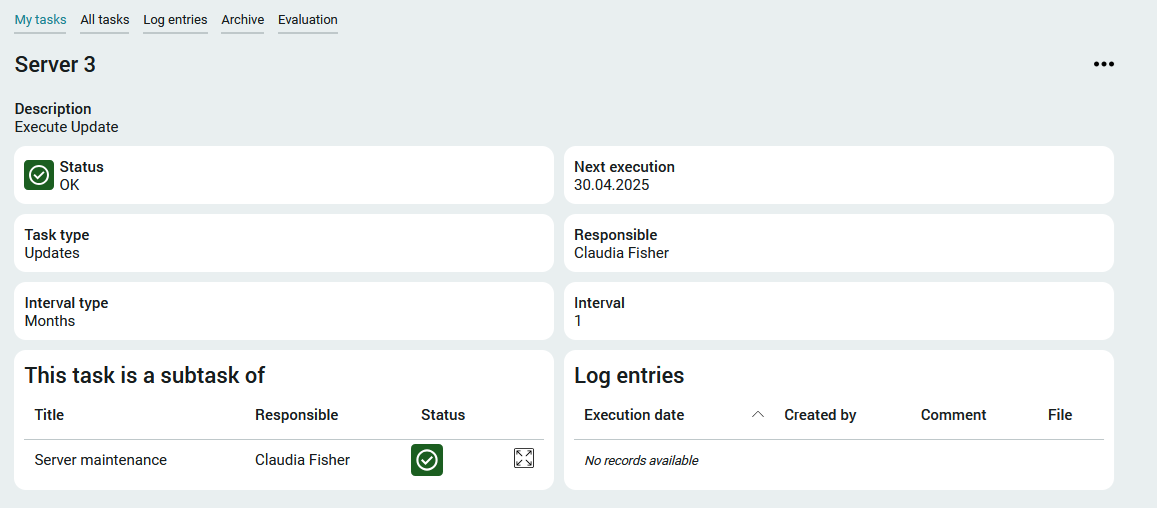
If you click on "View" here, you will return to the detailed view of the higher-level task.
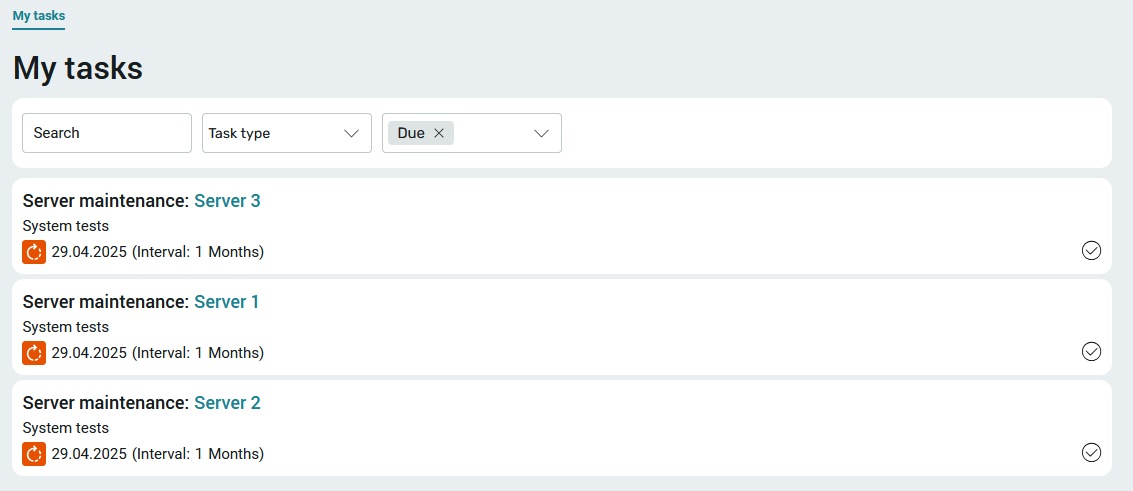
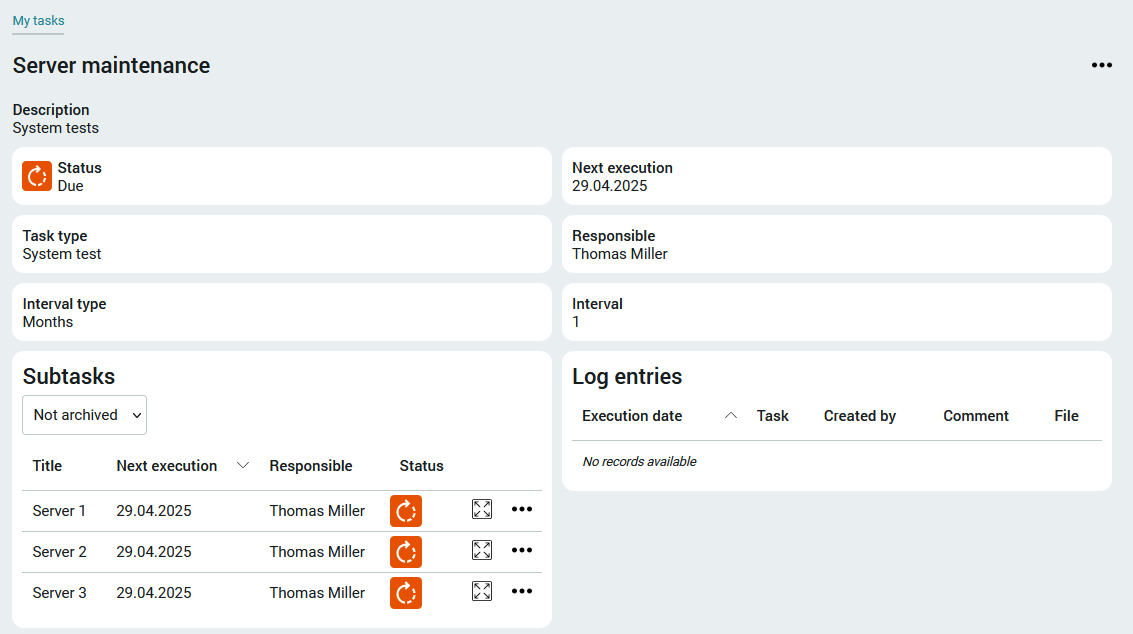
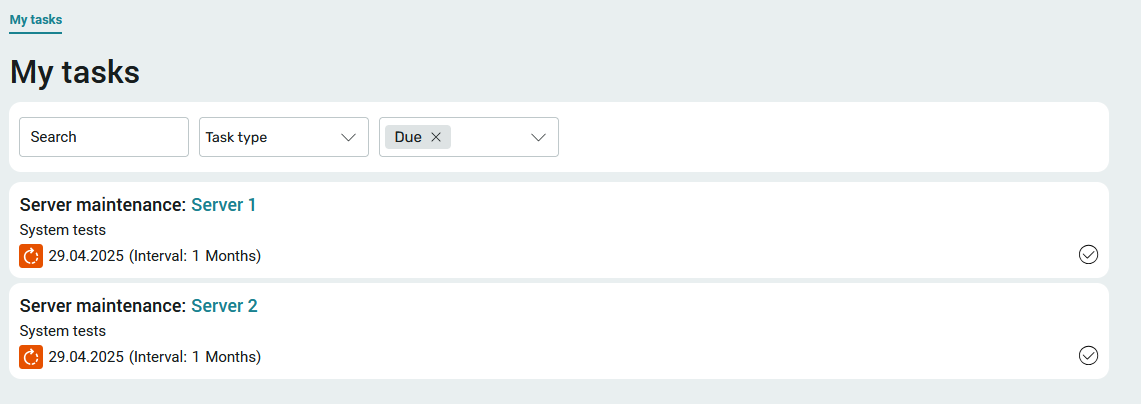
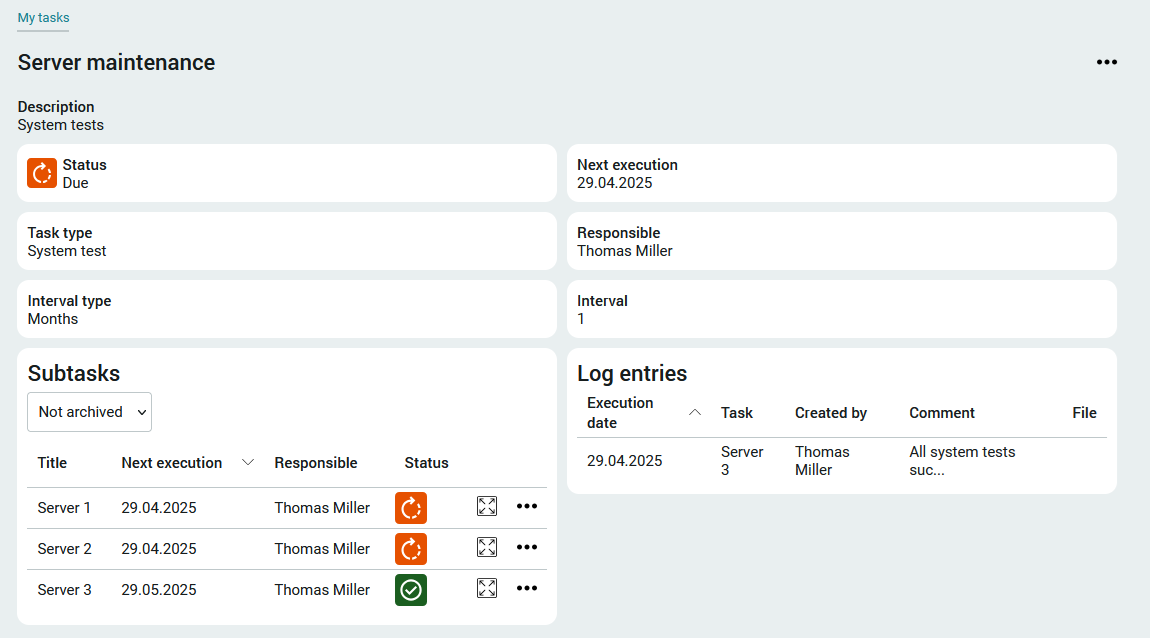
My tasks
The "My tasks" page, which is also the start page of the application, shows all tasks and subtasks for which the currently logged-in user is entered as the person responsible.
Initially, the filter for the "Due" status is set here, which means that only the tasks that are currently due are listed. Without this filter, the tasks that are not yet due are also displayed.
In our example, the user "Thomas Miller" is responsible for regular system tests as part of server maintenance. He is a member of the "App_PeriodicTasks_Users" role and only has access to the "My tasks" page. Task and subtasks were created by the user "Claudia Fisher".
The task, including the subtasks, is due and has already been completed in practice. Click on ![]() "Complete task" to complete a task or subtask.
"Complete task" to complete a task or subtask.
As you can see, one line is displayed for each subtask. If a task has no subtasks, it is also displayed in a separate line. For subtasks with a superordinate task, the title of the task is followed by the title of the subtask - both titles are links.
Clicking on the title of the task opens the detailed view of the task.
A member of the "App_PeriodicTasks_Users" role has read-only rights here. Tasks can be completed by clicking on ![]() "Complete task".
"Complete task".
If you click here on "View", the detailed view of the subtask will open.
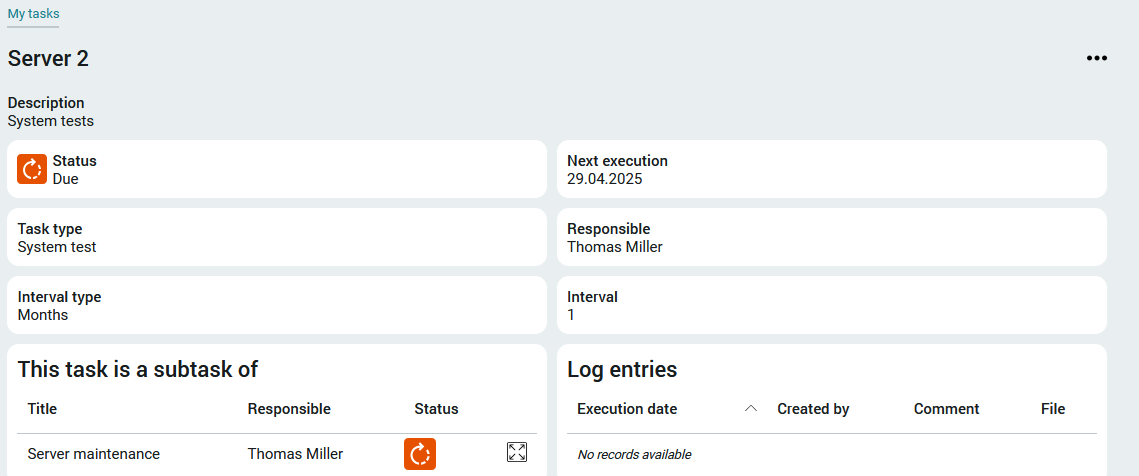
You can also access this page directly from the "My tasks" start page by clicking on the title of a subtask.
Complete task
In the example, we click on ![]() "Complete task" for the subtask "Server maintenance: Server 3".
"Complete task" for the subtask "Server maintenance: Server 3".
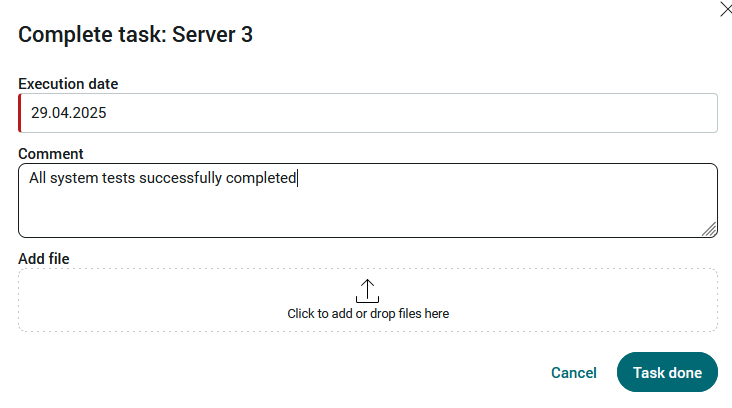
Click on "Task completed" to save the change and close the page.
The subtask is no longer displayed in the list if the "Due" filter is active.
If the filter is deactivated, the subtask is displayed with the automatically reset execution time.
The new execution time is calculated by the process according to the specified interval and the actual time at which the task was completed. The status of the subtask indicates that it is not yet due.
Log entries
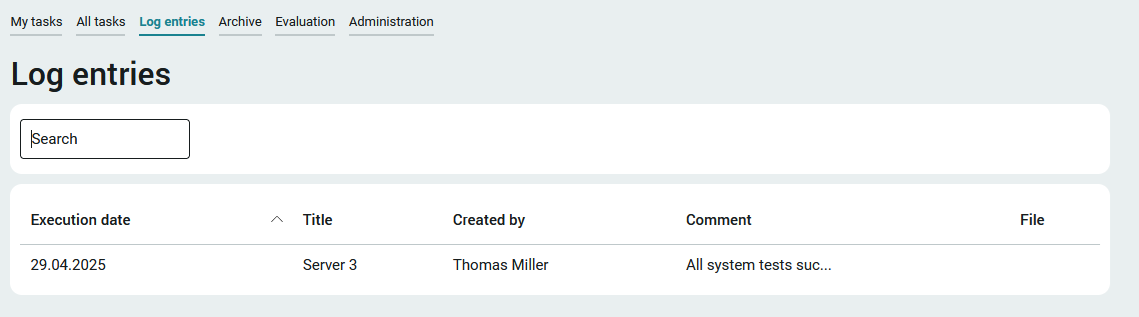
Log entries are created automatically when tasks are completed. Editors and managers can find an overview of all existing log entries on the "Log entries" page.
The log entries are also listed on the details page of a task. A member of the "App_PeriodicTasks_User" role can also see the log entries for the tasks for which they are responsible here.
Evaluation
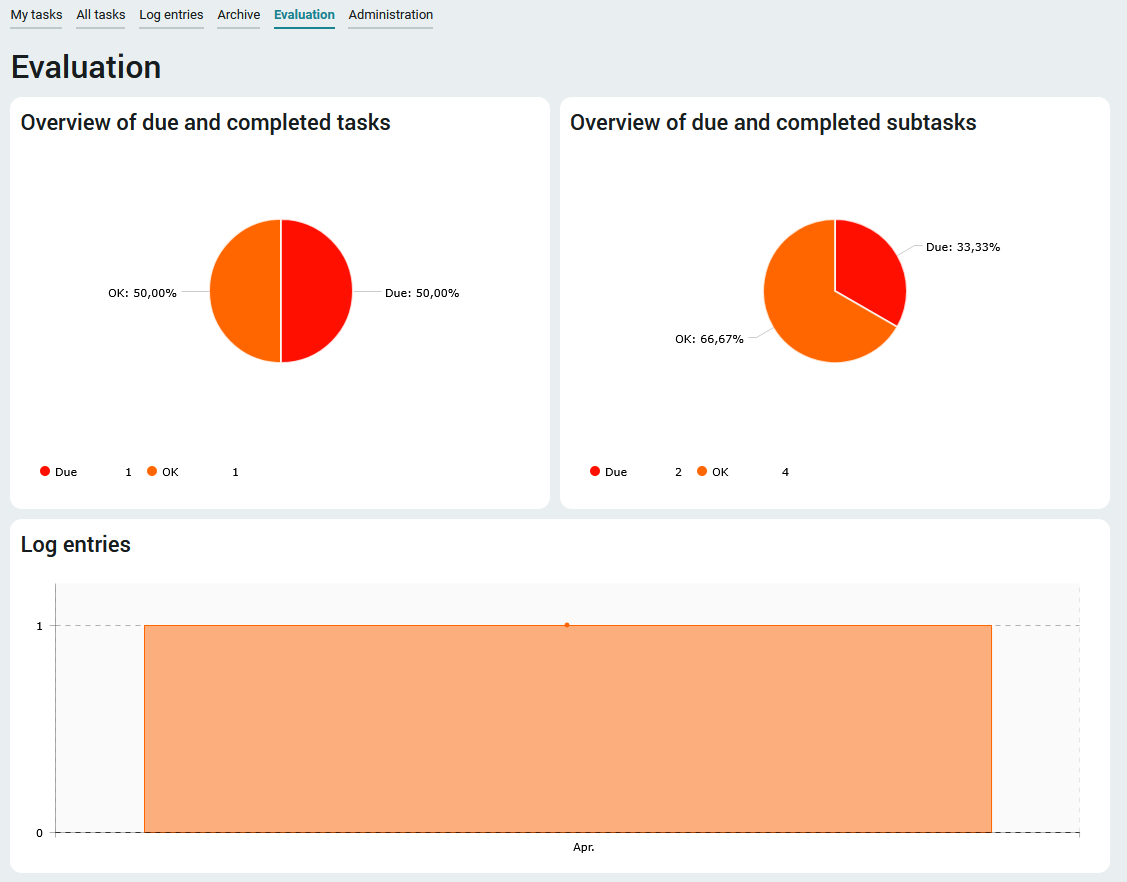
On this page, editors and managers can find a graphical overview of due and completed tasks or subtasks. The number of log entries per month is displayed in the lower area.
Administration
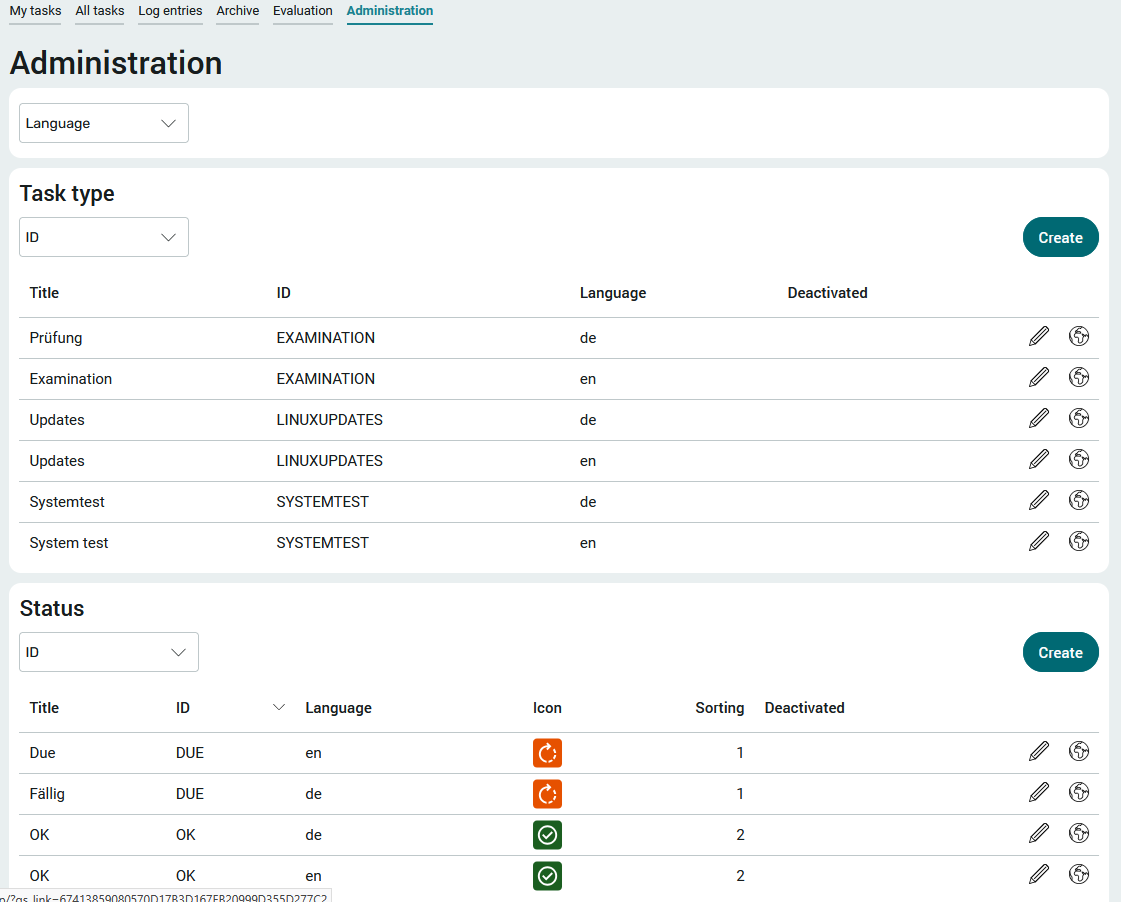
This page is only accessible to managers. The task type and status are defined here. We generally recommend using capital letters for the IDs in the administration, as this makes it easier to distinguish them from normal entries (e.g. title) in filters and similar. easier.
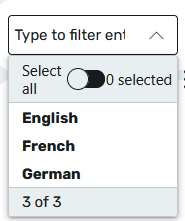
Clicking on the "Language" selection list at the top of the page opens a menu in which the desired language can be selected in order to filter the entries under "Task type" and "Status". All languages with which task types or statuses were created are available as filters.
Task type
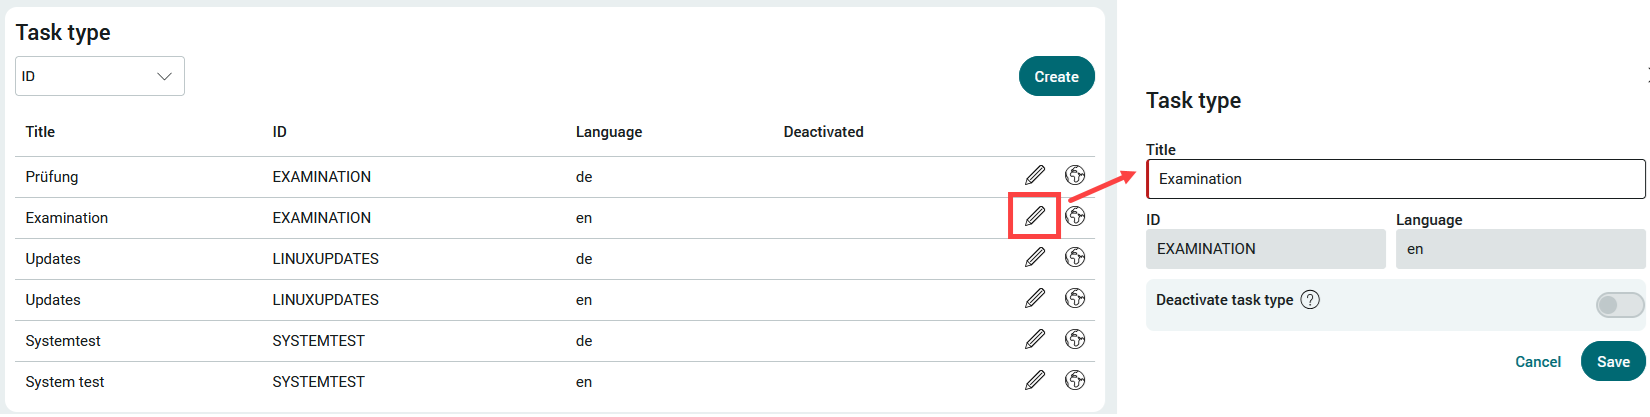
The standard task types are "Check", "Updates" and "System test". Click on ![]() "Edit" to change the data if required - with the exception of the ID, which you can only define and edit when creating a new task type. If a task type is deactivated, it no longer appears in the list and can no longer be selected in tasks. It is automatically deleted when there are no more references to the task type.
"Edit" to change the data if required - with the exception of the ID, which you can only define and edit when creating a new task type. If a task type is deactivated, it no longer appears in the list and can no longer be selected in tasks. It is automatically deleted when there are no more references to the task type.
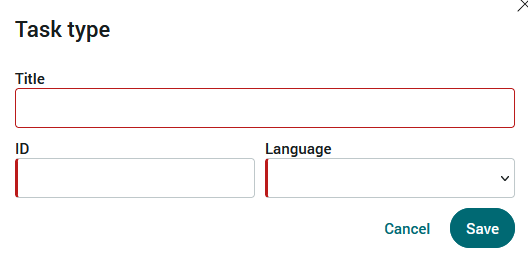
If you create a new task type by clicking on the "Create" button, enter a new ID in capital letters if possible. The title is freely selectable. All active portal languages can be selected as the language.
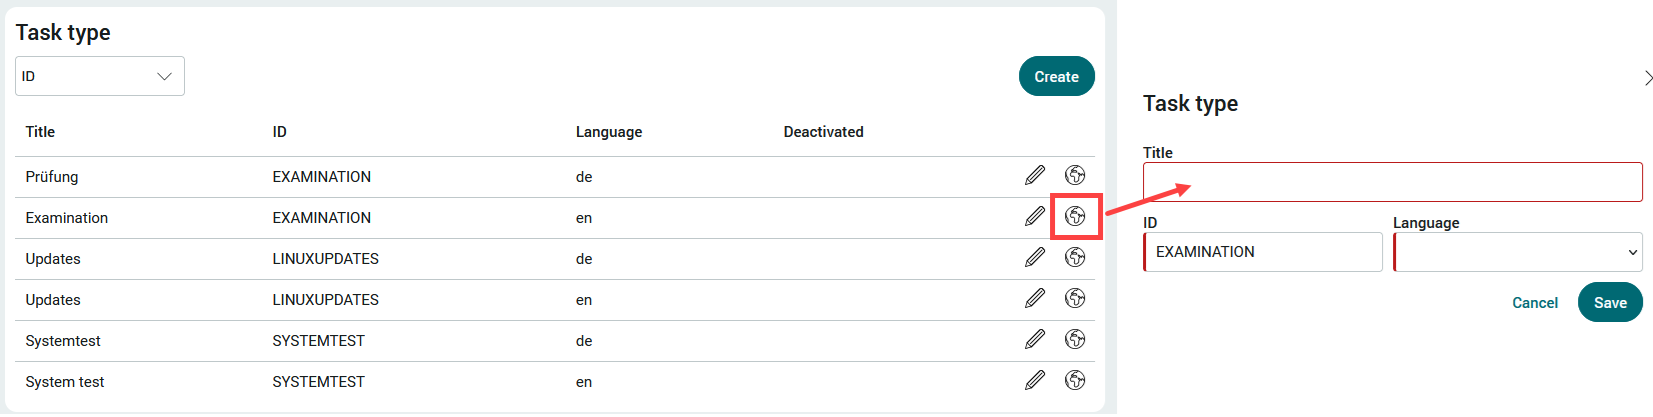
If you want to create a new language variant for a task type, click on  "Add another language variant". For example, the task type "Exam" can also be stored in French if this language is also activated as the portal language. The ID is retained.
Status
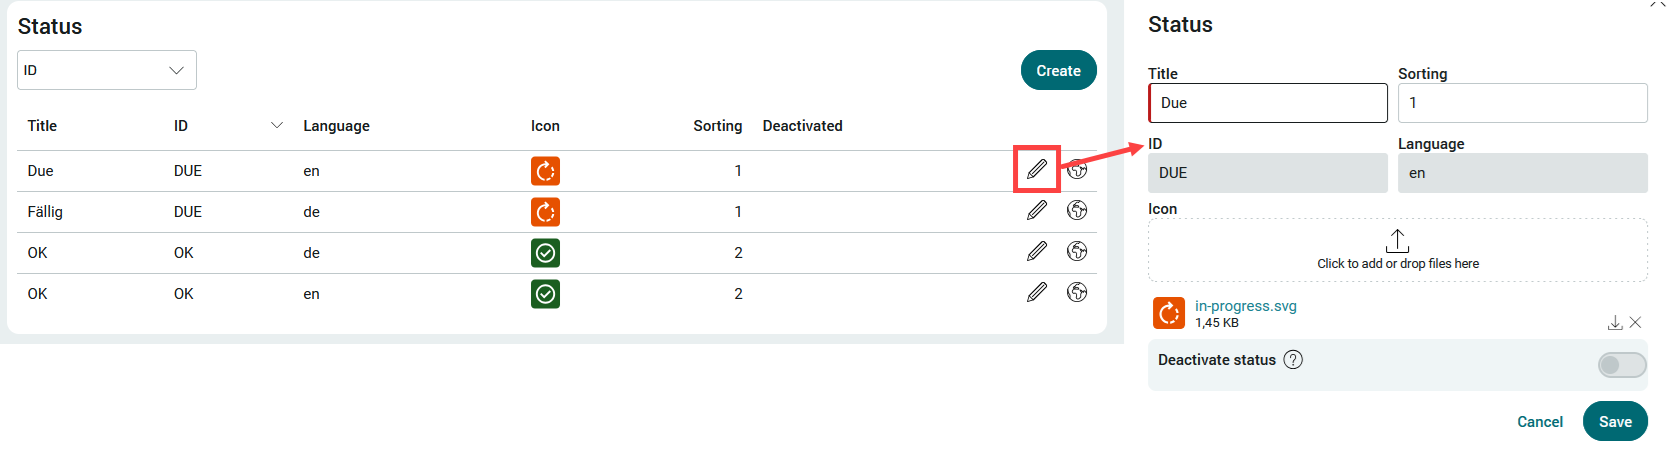
In addition to the data that is also relevant for task types, a sort order is also specified when processing a status. This influences the order within the status list in the administration and also the order of the tasks on the "My tasks" page - the start page of the application. An icon representing the status in the task lists should also be uploaded.
Archive
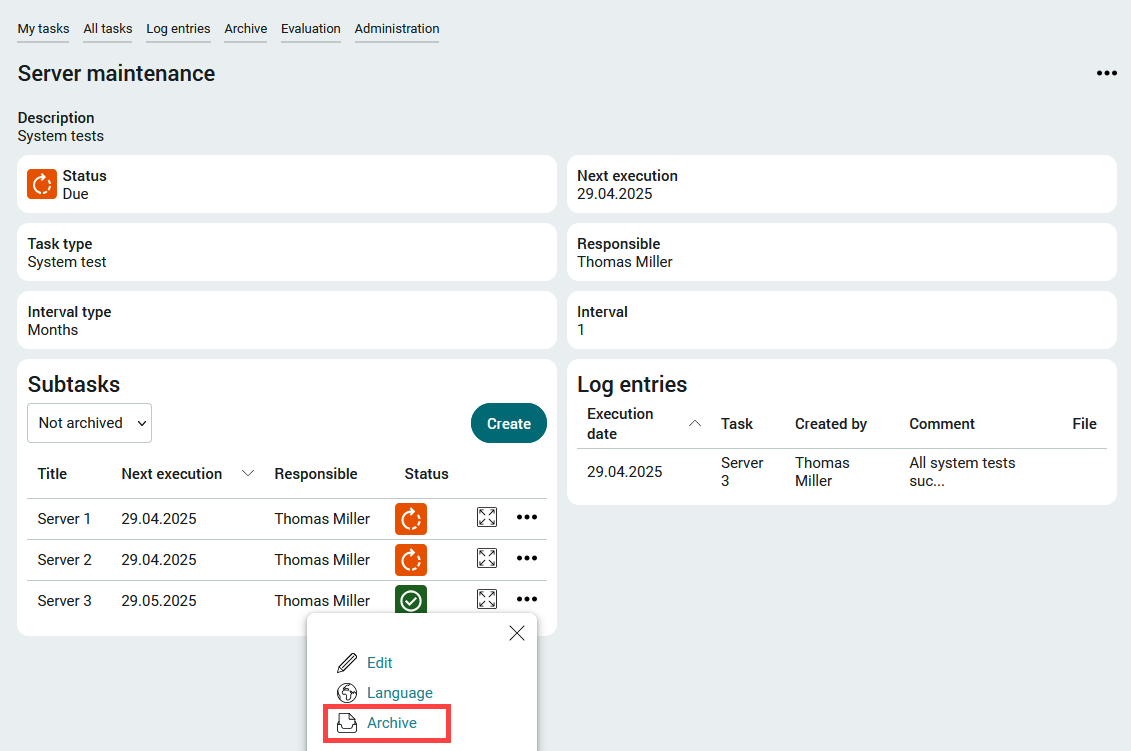
Managers and editors can archive both complete tasks and individual subtasks via the menu, which can be accessed by clicking on ![]() "Options".
"Options".
The task is then no longer displayed for the person responsible. He is also no longer reminded by e-mail. The interval of the task is also no longer continued.
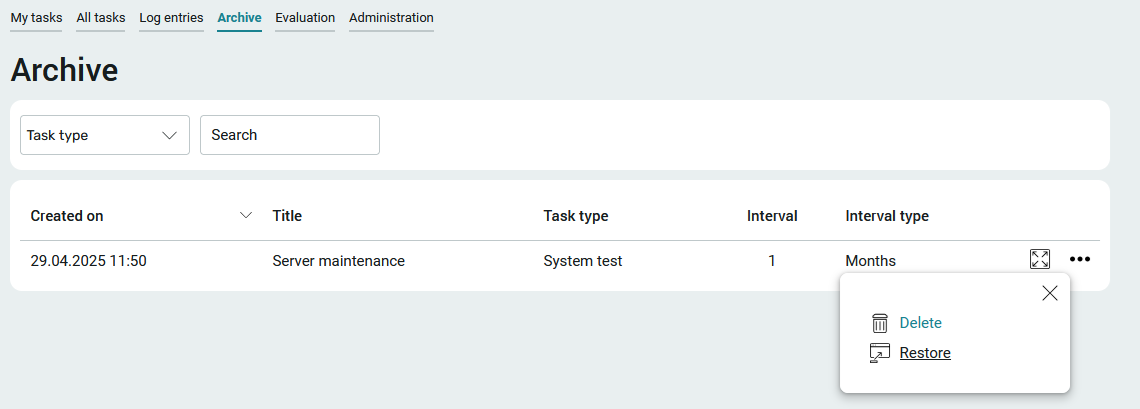
Managers and editors have access to the "Archive" page, which can be accessed via the application menu. The creator can delete or restore their task here via the ![]() options menu.
options menu.
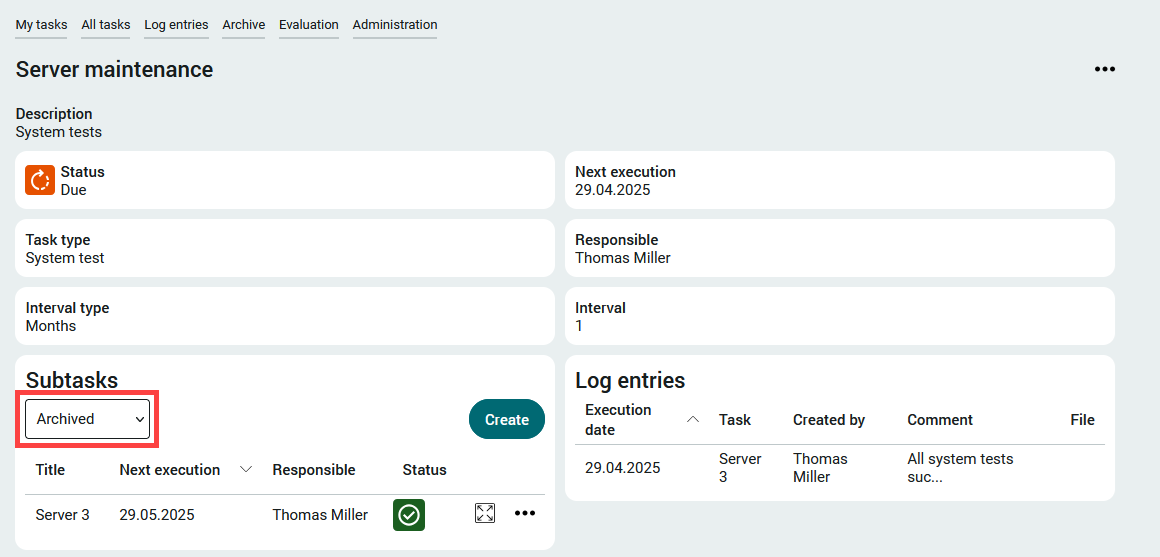
Archived subtasks can be found in the detailed view of a task. There, the list of subtasks can be filtered by "Archived / Not archived".
Multilingual data records
All tasks and subtasks can be created in multiple languages via the ![]() options menu.
options menu.
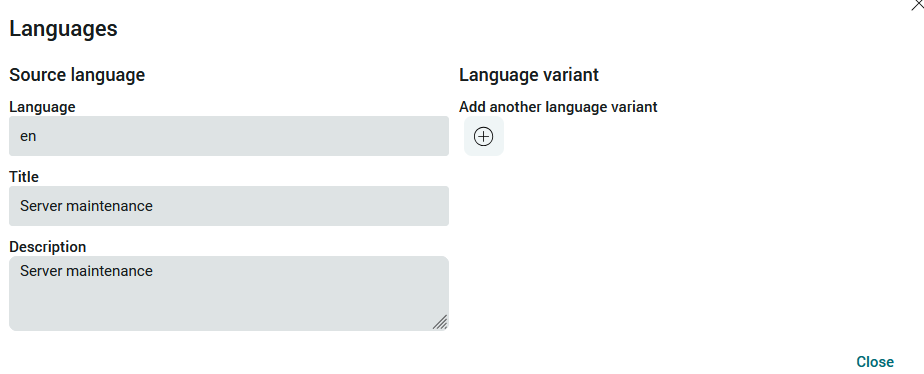
Click on  "Add another language variant" to display the area for the translation.
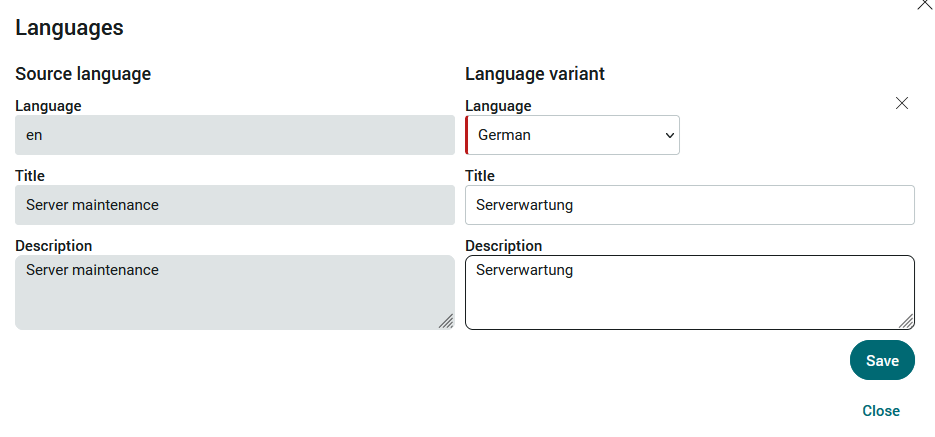
All active portal languages can be selected here. Click on "Save" to apply the changes and close the dialog.
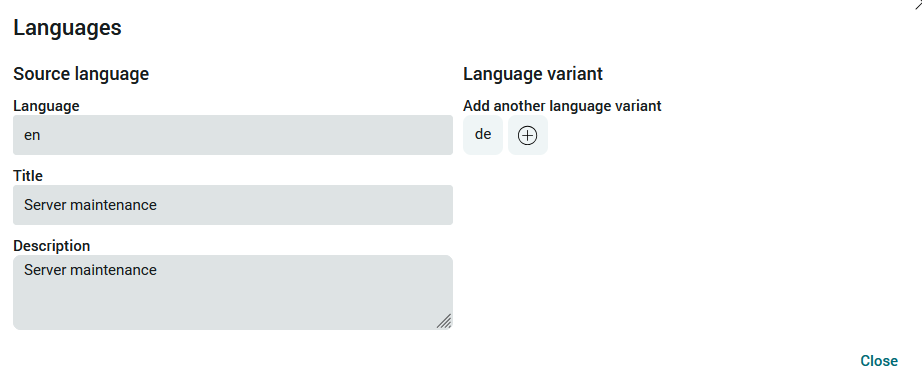
Click on "Add another language variant" to create translations for other languages.
A click on the language abbreviation (here e.g. "en") opens the corresponding translations.
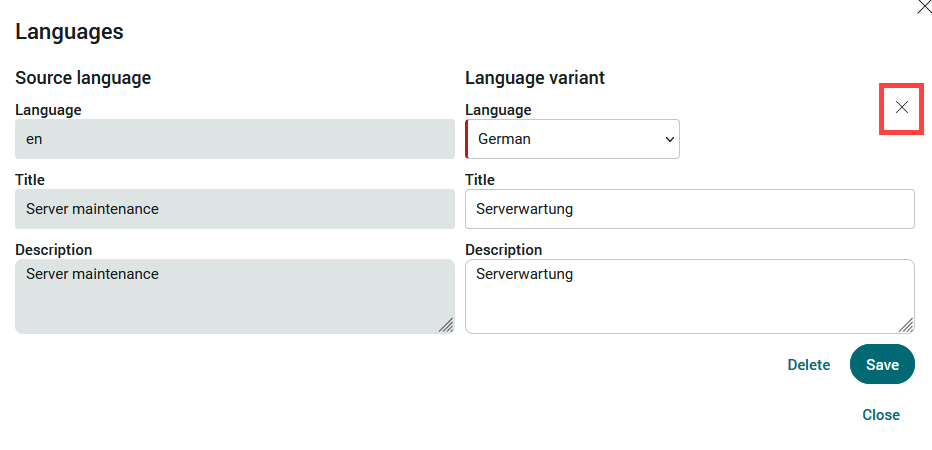
The language variant can be closed with the close symbol. You will then return to the previous page.
When switching languages in the browser, the texts are displayed in translation. New entries can be written in the current language.
Process
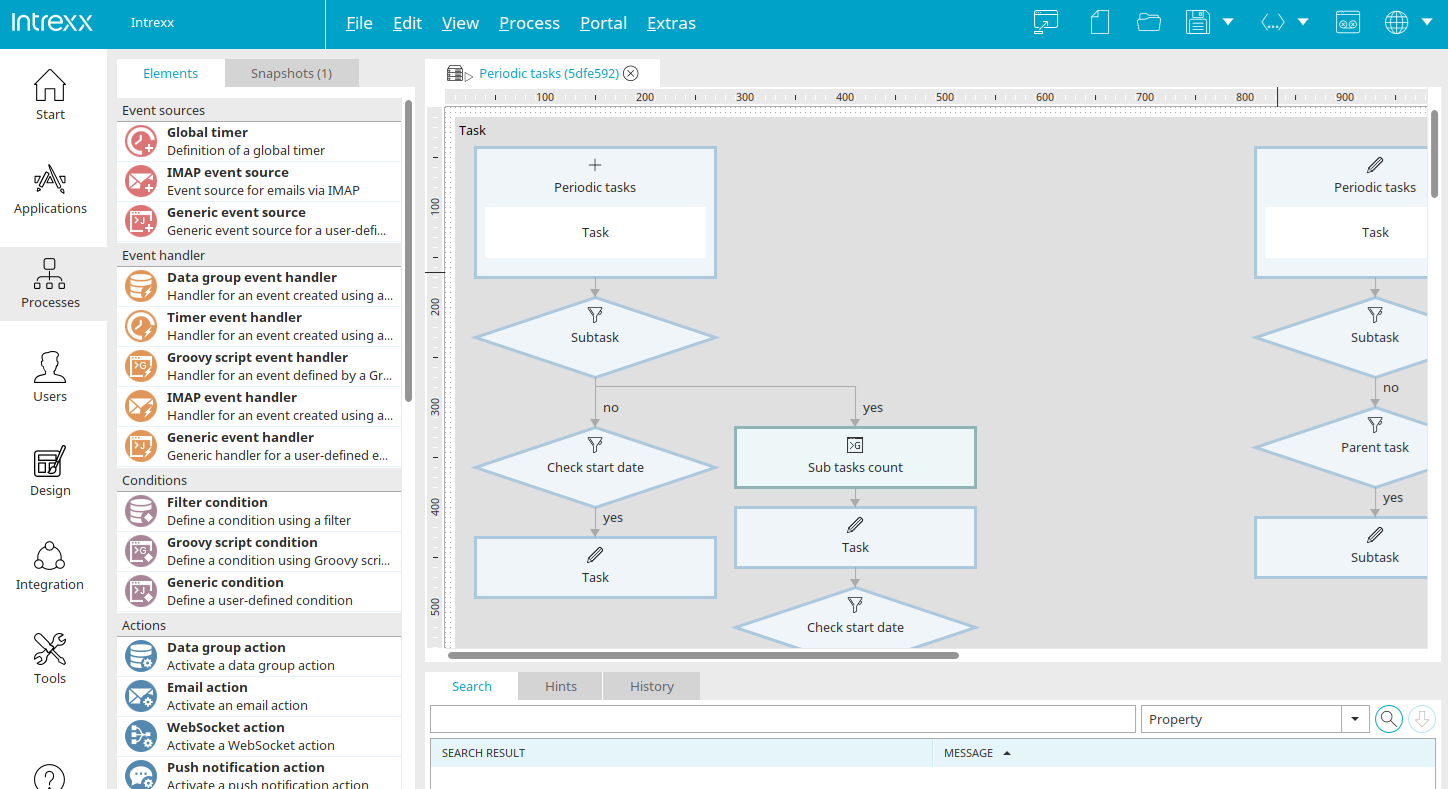
In the associated process, the frequency of reminders of due tasks sent by e-mail can be edited.

You will find the relevant part of the process if you scroll down a little further. The global timer "Send reminder" is available here. You will find the corresponding setting in the data group filter in the properties of the timer. In the expression "Last email <= Today (with time) [customized]", the default "Day - 5" can be changed accordingly. If the reminder is to be sent once a month, for example, enter the value "-1" for "Month".