Knowledge test
Multiple-choice tests can be carried out with the "Knowledge test" application. The result of a test is calculated automatically and can then be viewed directly by the participant. Optionally, a certificate can also be created.
All tests can be made available in multiple languages.
Installation
To install the template, it simply needs to be imported. You can find general instructions here.
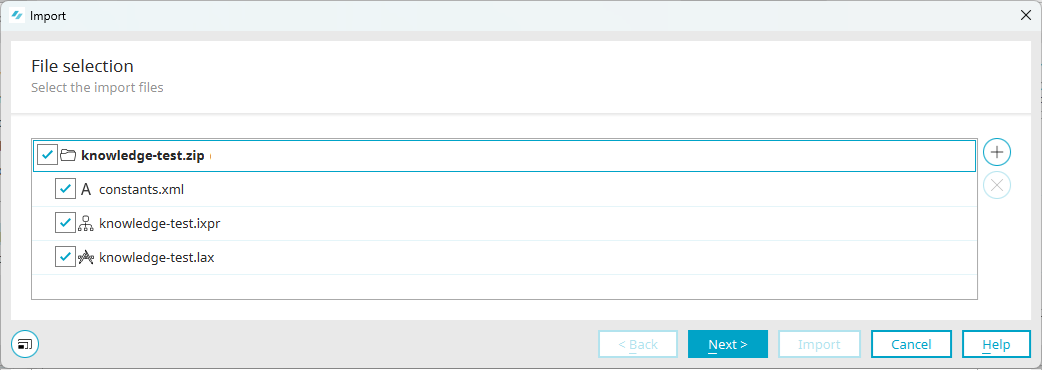
The import package contains
-
Language constants (constants.xml)
-
Process (knowledge test.ixpr)
-
Application (knowledge test.lax)
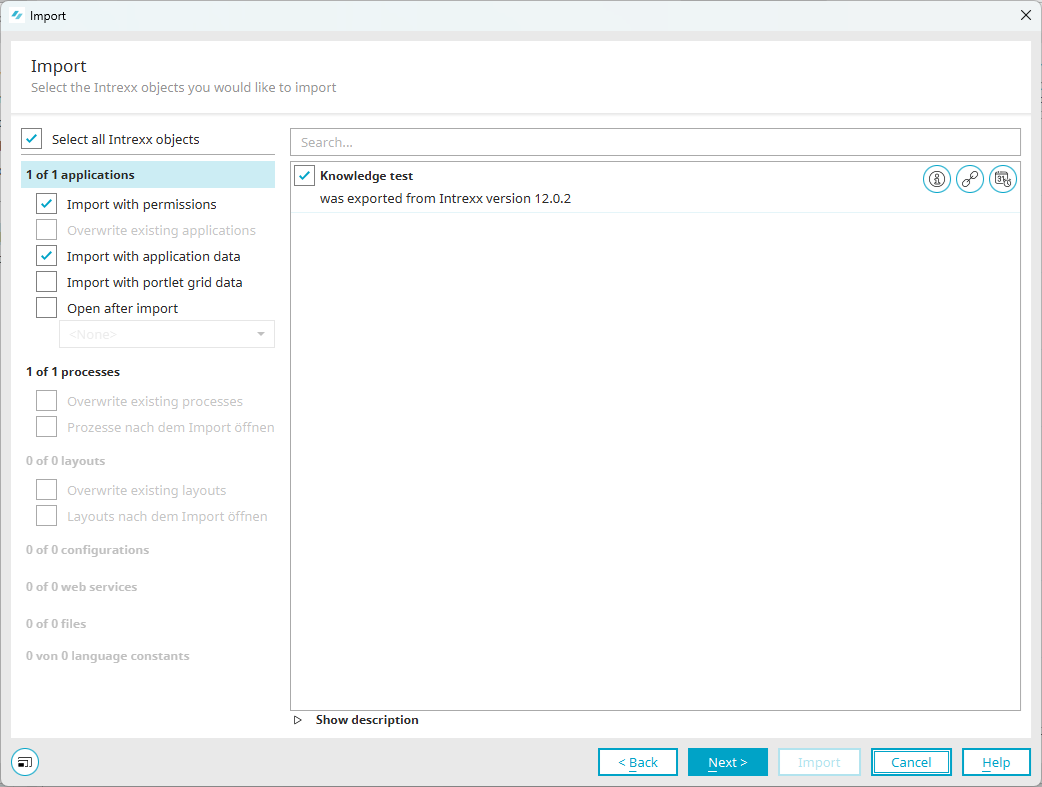
Import the application with data and rights.
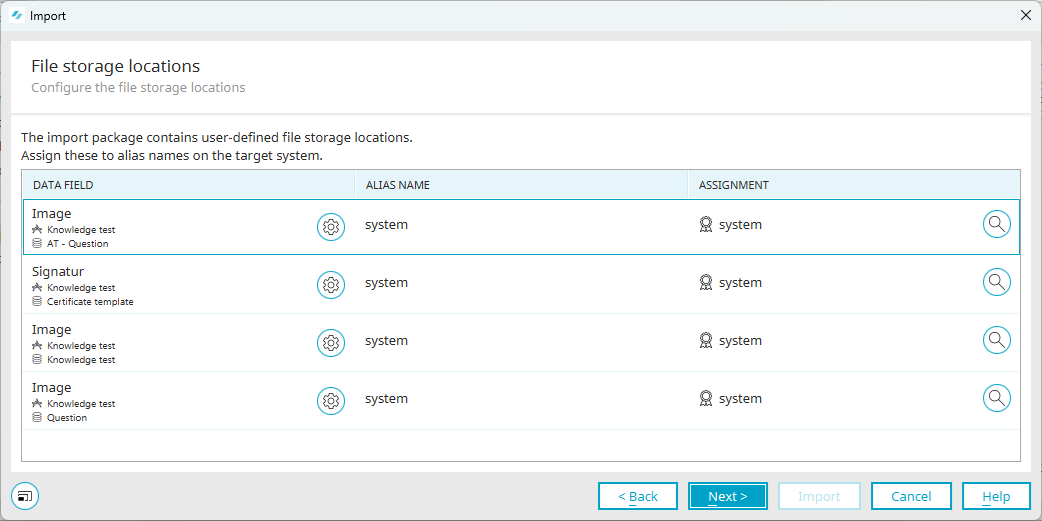
The file storage locations are imported in this step. Accept these settings as they are.
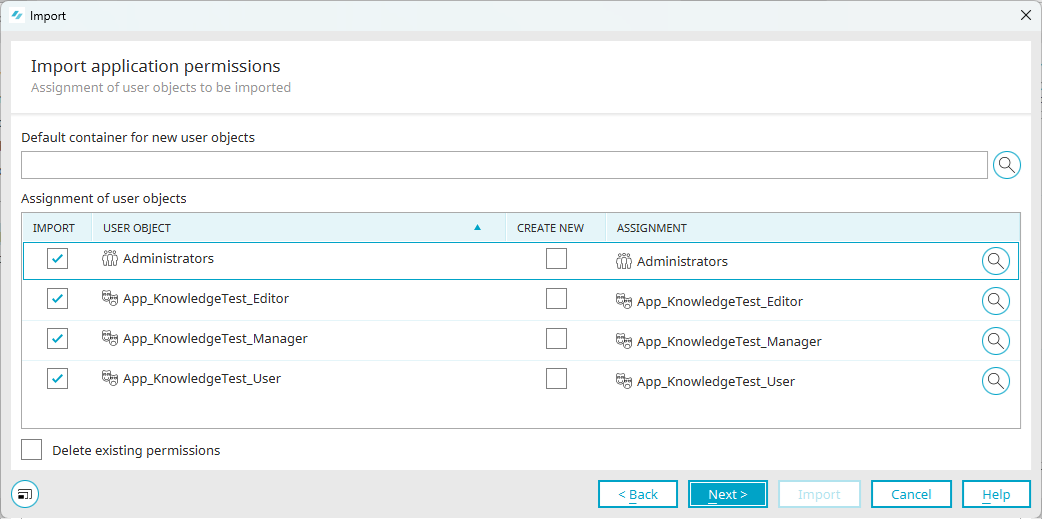
The user roles that you will find later in the user administration are imported here. These roles are used to control the rights in the application.
Accept the settings and click "Next" until the import is complete.
Roles and permissions
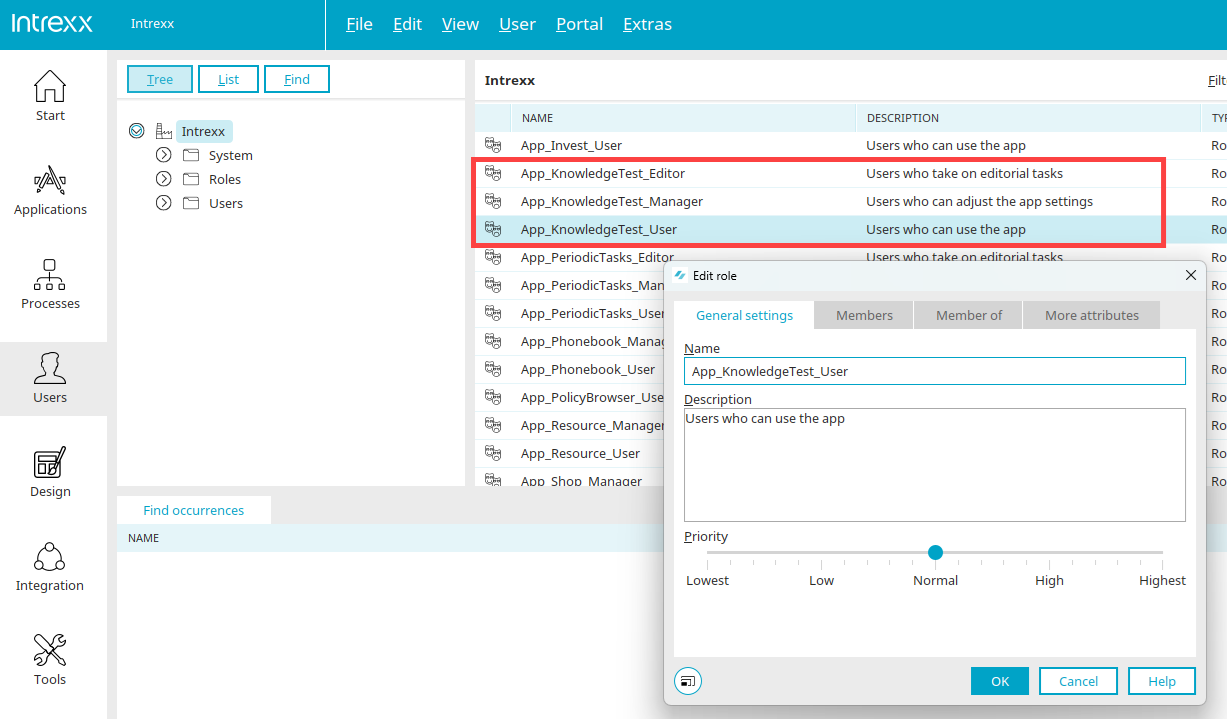
After the import, you will find three new roles in the user administration.
App_KnowledgeTest_User
Members of this role can take part in tests, view their previous participation and create certificates. Role members are hereinafter referred to as "users".
App_KnowledgeTest_Editor
Members of this role have all the rights of the "App_KnowledgeTest_User" role. They can also create and manage tests. Role members are referred to below as "editors".
App_KnowledgeTest_Manager
Members of this role have all the rights of the "App_KnowledgeTest_Editor" role. You can also create and manage certificate templates. Role members are hereinafter referred to as "managers".
Include your users as members in one of these roles in order to grant the application rights accordingly.
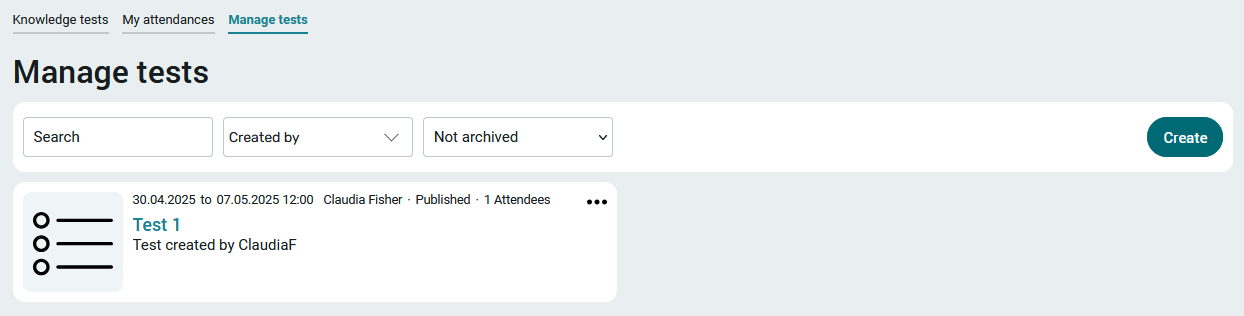
Create test

Editors can create tests on the "Manage tests" page. You can access this page via the application menu of the same name. In our example, we have logged into the portal with the user "ClaudiaF" - ClaudiaF is a member of the user role "App_PeriodicTasks_Editor".
Click on the "Create" button to create a new test.
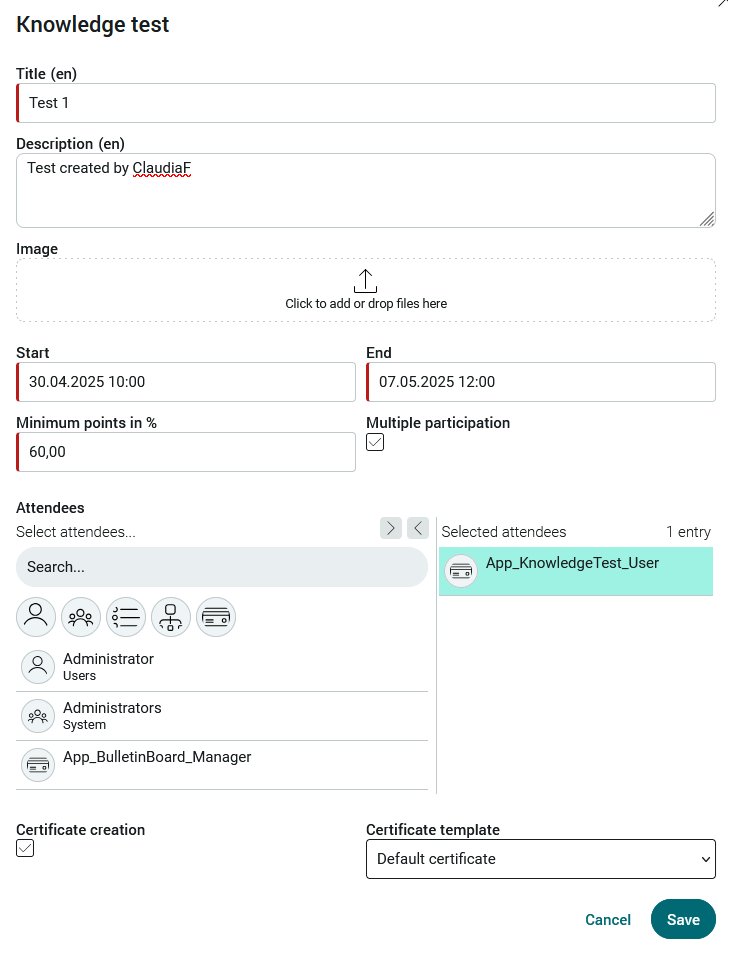
The title and description of the test are entered here. If desired, a picture can also be uploaded.
Start / End
A time period can be specified when creating a test. You can only take part in a published test during this period.
Minimum points in %
The number entered here indicates the percentage of the test that must be successfully completed in order to pass the test.
Multiple participation
If this setting is activated, a participant who has already taken part in this test can repeat it.
Participants
Only users who have been moved to the "Selected participants" list can take part in the test.
Certificate
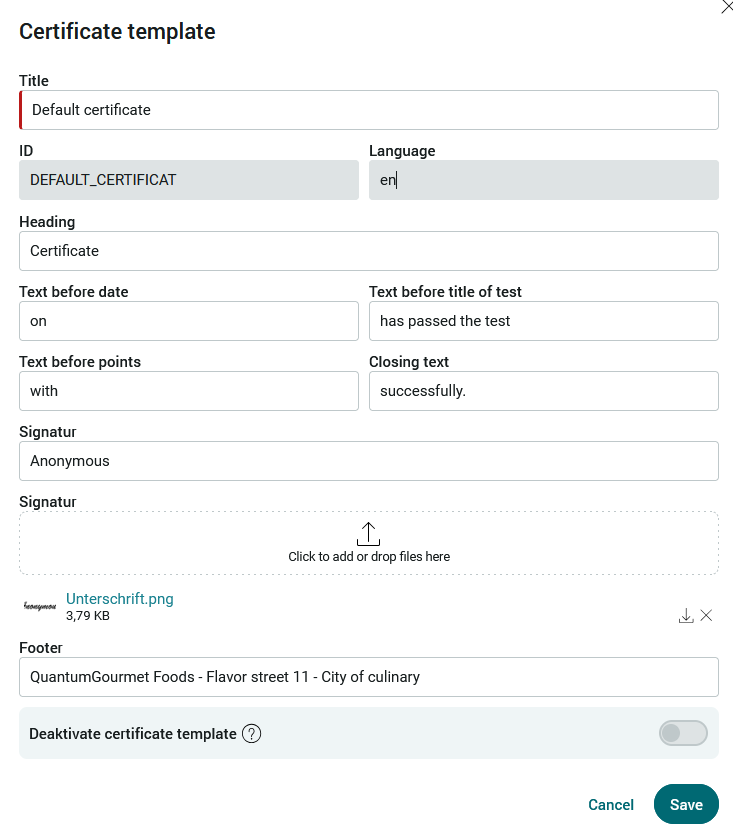
Certificate creation can be activated at the bottom of the page. The prerequisite is that a certificate template is selected in the selection list on the right. Certificate templates are stored in the administration.
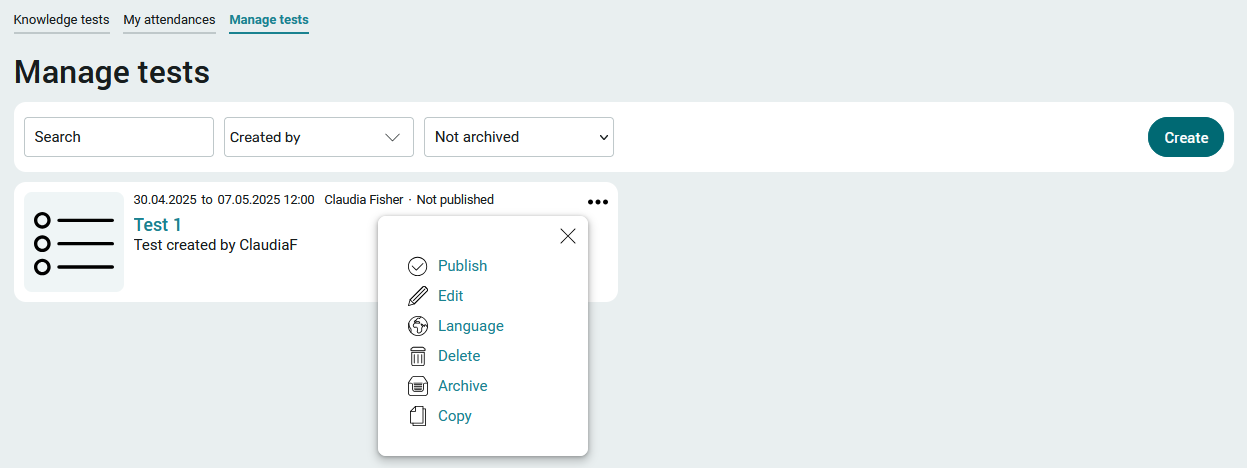
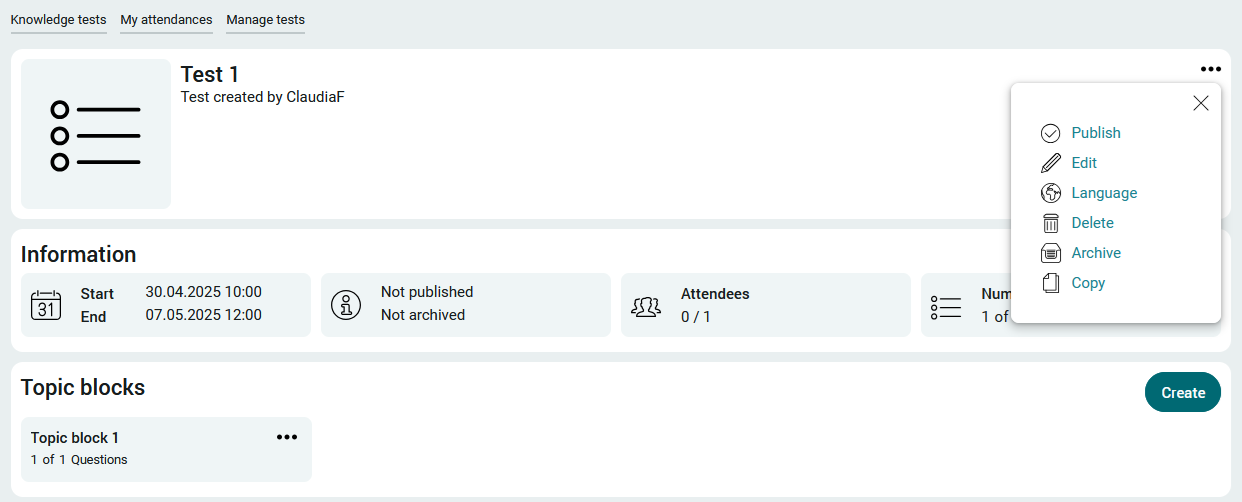
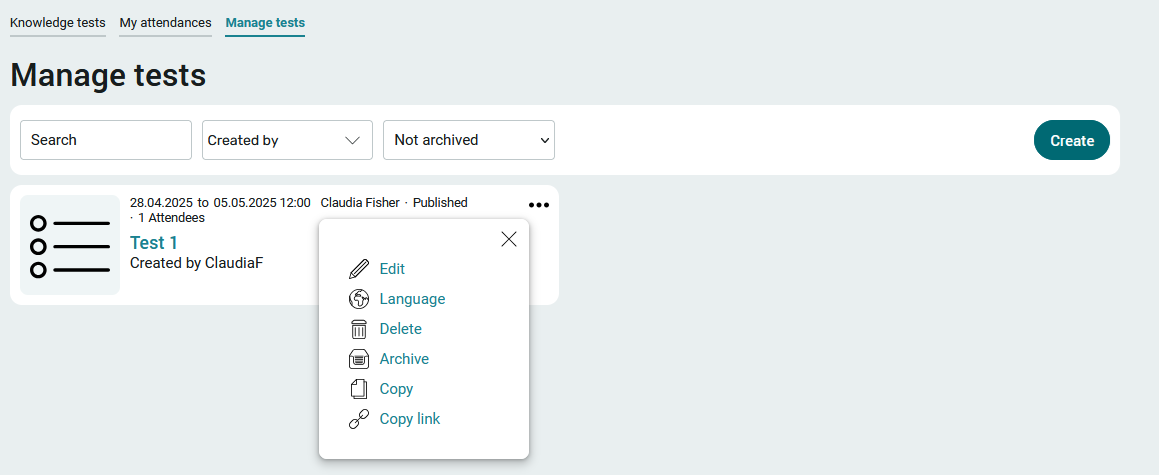
The test is displayed on the "Manage tests" page once it has been created.
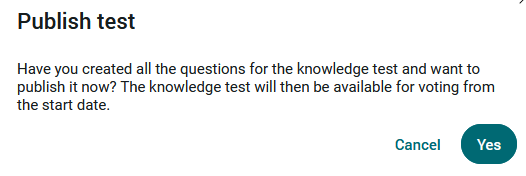
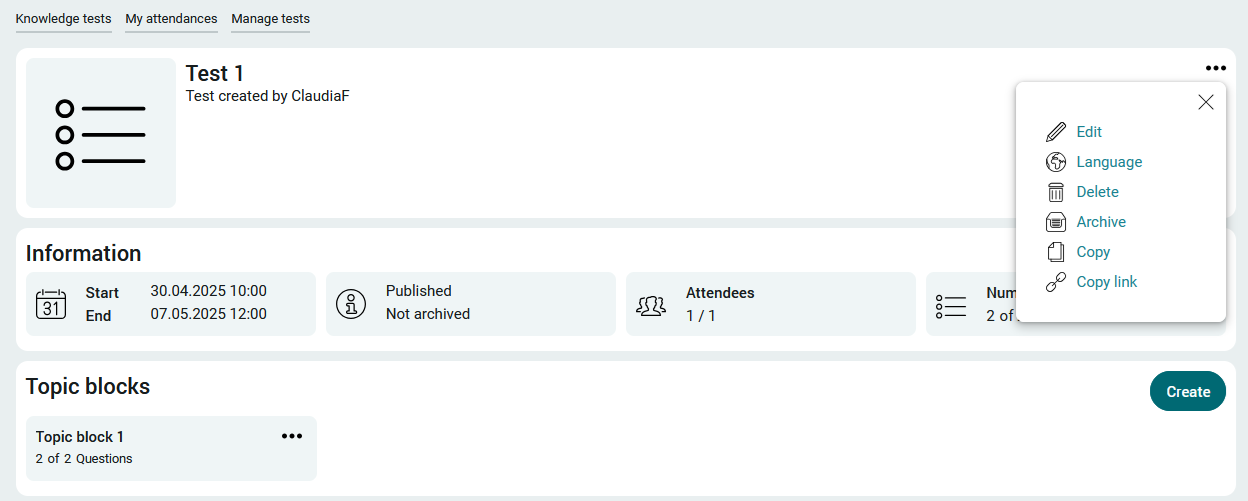
The button ![]() "Options", which you will find with every test, opens a menu via which the test can be published. It is then visible to all authorized users. Only publish the test once you have created topic blocks or questions. We describe how to do this in the next section.
"Options", which you will find with every test, opens a menu via which the test can be published. It is then visible to all authorized users. Only publish the test once you have created topic blocks or questions. We describe how to do this in the next section.
The test master data can also be edited via the menu.
The test can be created in multiple languages with "Language". Click here for more information.
Furthermore, a test can be deleted, archived and copied and thus duplicated including all questions.
Click on the title of the test to open the details page of the test.
Topic blocks and questions

You will also find the ![]() "Options" button at the top right of the test details page, which you already know from the "Manage tests" page. All relevant information about the test is also displayed here.
"Options" button at the top right of the test details page, which you already know from the "Manage tests" page. All relevant information about the test is also displayed here.
Click on the "Create" button to create a topic block.

In addition to the title of the topic block, the "Number of selected questions" is indicated here. If nothing is entered here, all questions of the test will be used later. You can also limit the number of questions from this topic block in the test by entering a number. If there is a limit, the questions are selected at random.
Click on "Save" to apply the changes and close the dialog again.
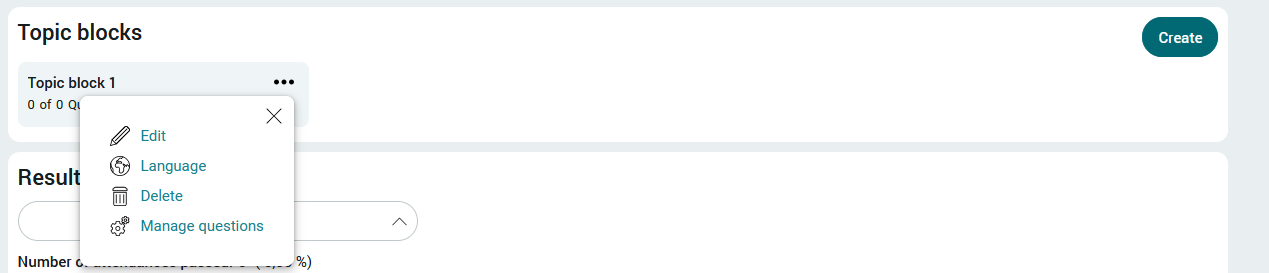
Click on the ![]() "Options" button to open a menu. Click on "Manage questions" to create the actual questions.
"Options" button to open a menu. Click on "Manage questions" to create the actual questions.
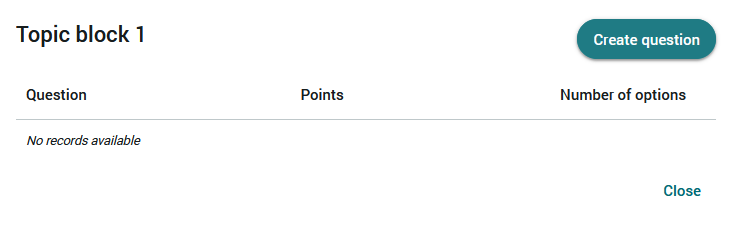
Click on "Create question" to open the input page.
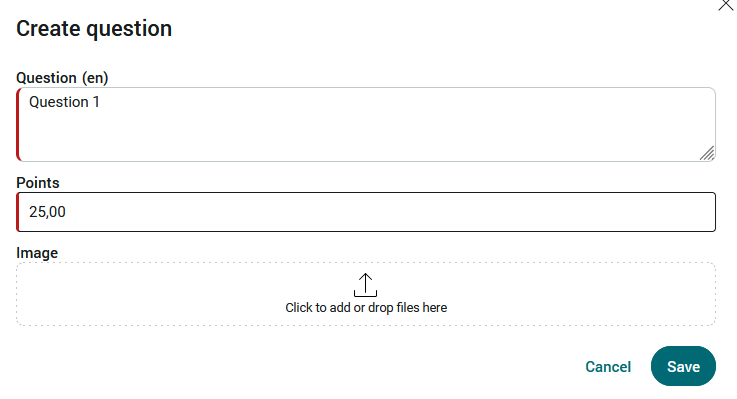
The number of points a participant receives for a correct answer is entered next to the question.
In order to weight questions of varying difficulty, different points can be assigned to the questions. If a question is answered correctly, the participant receives the points for this question. Ultimately, it is the percentage of points entered in the test that determines whether the participant has collected enough points to pass the test.
One image can be uploaded per question.
Click "Save" to create the question and close the page.
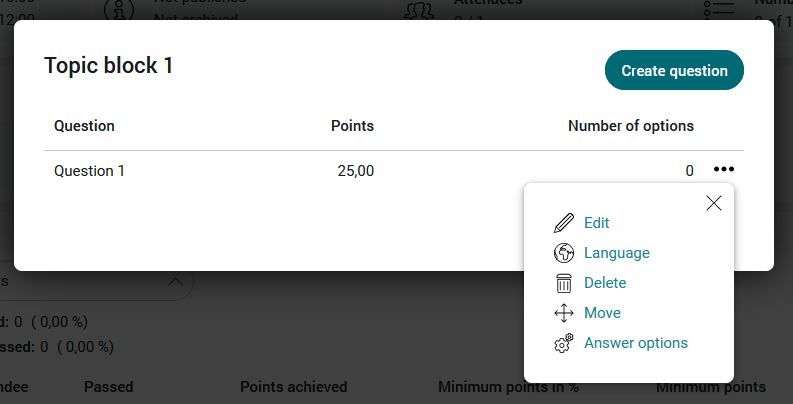
Answers are created via the ![]() options menu "Answer options".
options menu "Answer options".
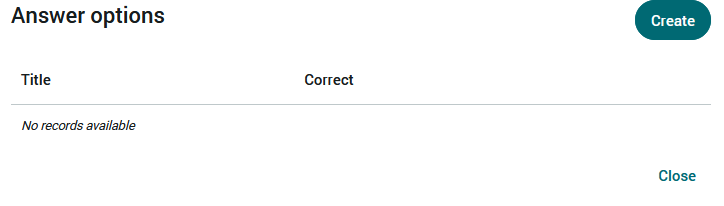
Click on "Create" here.
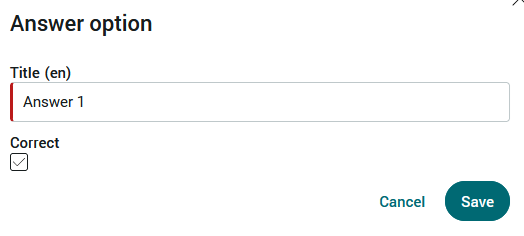
In this way, any number of answers can be written. Deselect the "Correct" checkbox if it is an incorrect answer, otherwise select it.
Once all answers have been created, click on "Close".
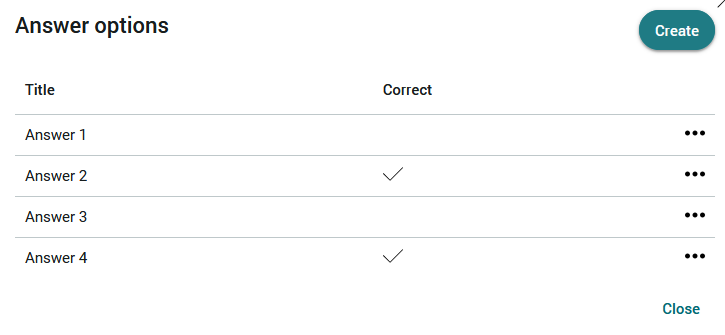
The number of answers is displayed here under "Number of options". The questions can be edited again via the ![]() options menu. Click on close when all questions and answers have been created.
options menu. Click on close when all questions and answers have been created.
Click on "Close".
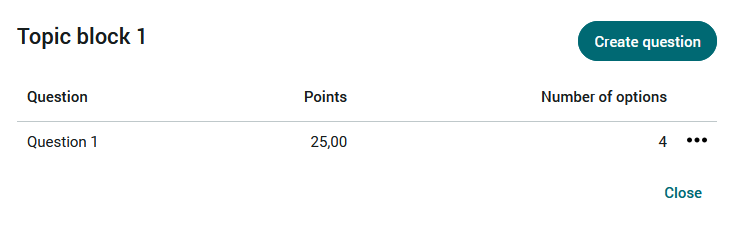
You are now back in the detailed view of the test. The number of questions is displayed in the "Topic blocks" area.
A test can contain any number of topic blocks and questions within the topic blocks.
Once the test is complete, it can be published via the ![]() options menu.
options menu.
Attendance
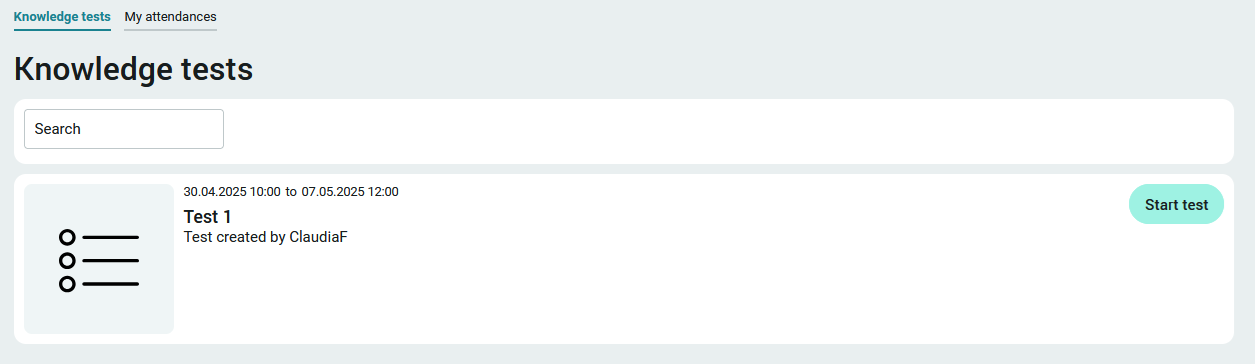
Members of the "App_KnowledgeTest_User" role can only access the "Knowledge tests" and "My participations" pages. All users who are approved for the test can start the test by clicking on the "Start tests" button on the "Knowledge tests" page.
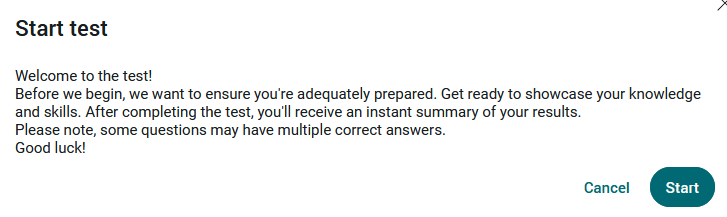
Click on "Start" to access the first topic block.
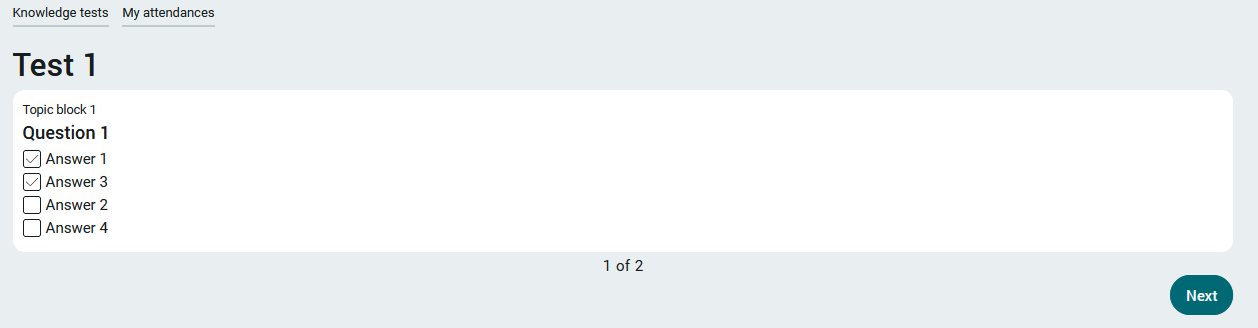
Click "Next".
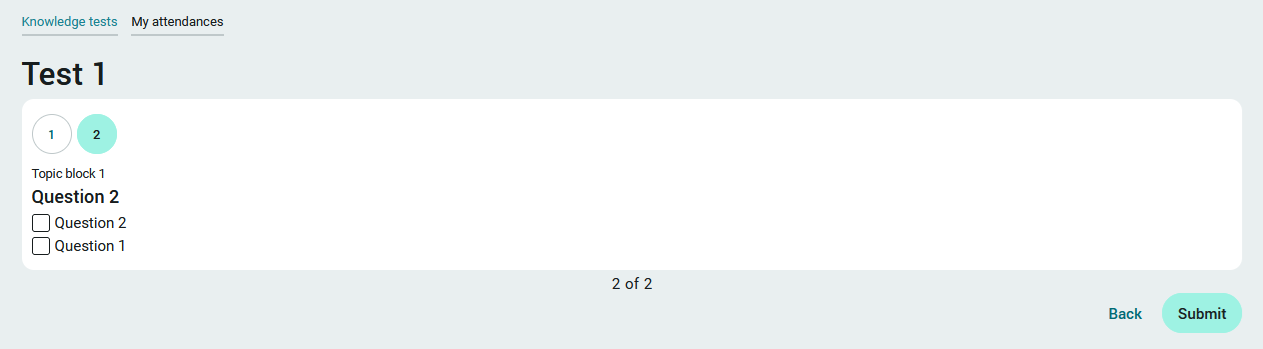
For the last question, a navigation bar is also displayed above the question so that individual questions can be displayed again. In addition, the "Back" button is displayed at the bottom right, which can be used to navigate backwards through the questions.
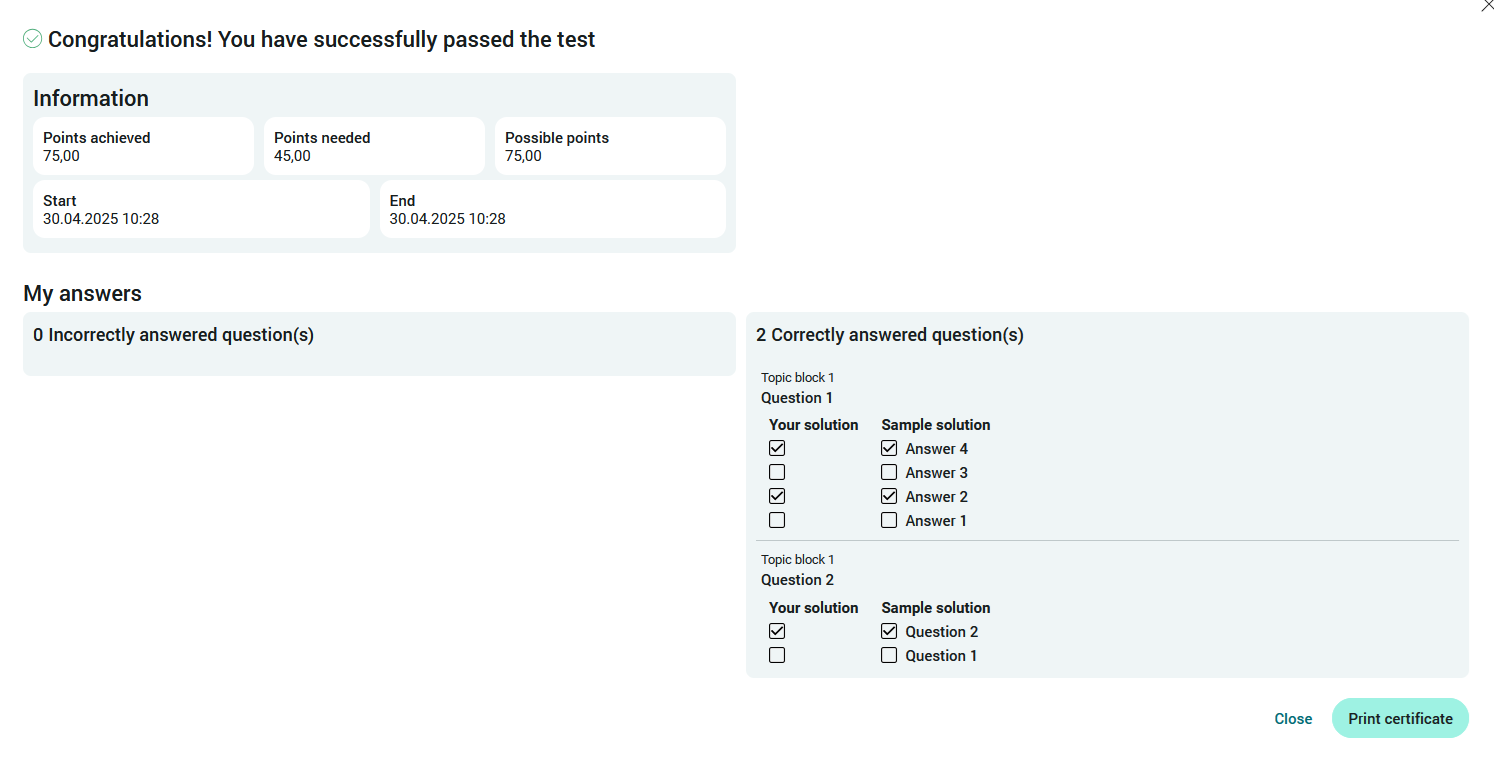
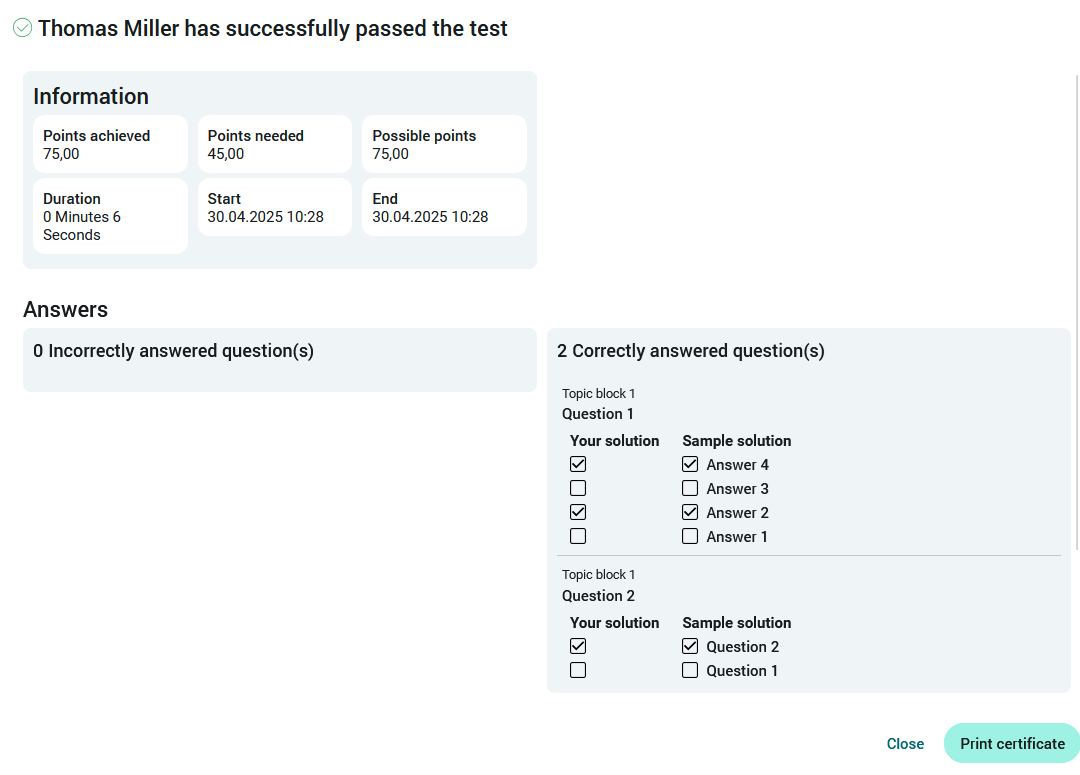
Once you have completed all the topics and questions in the test, click "Submit" to end the test.
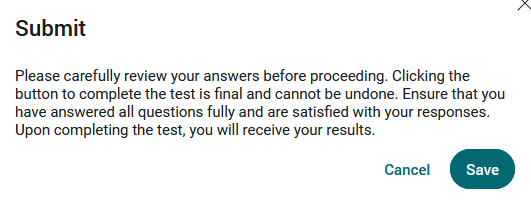
The participant is informed that the test is finalized by clicking on "Save" and can no longer be changed. The test result is then displayed.
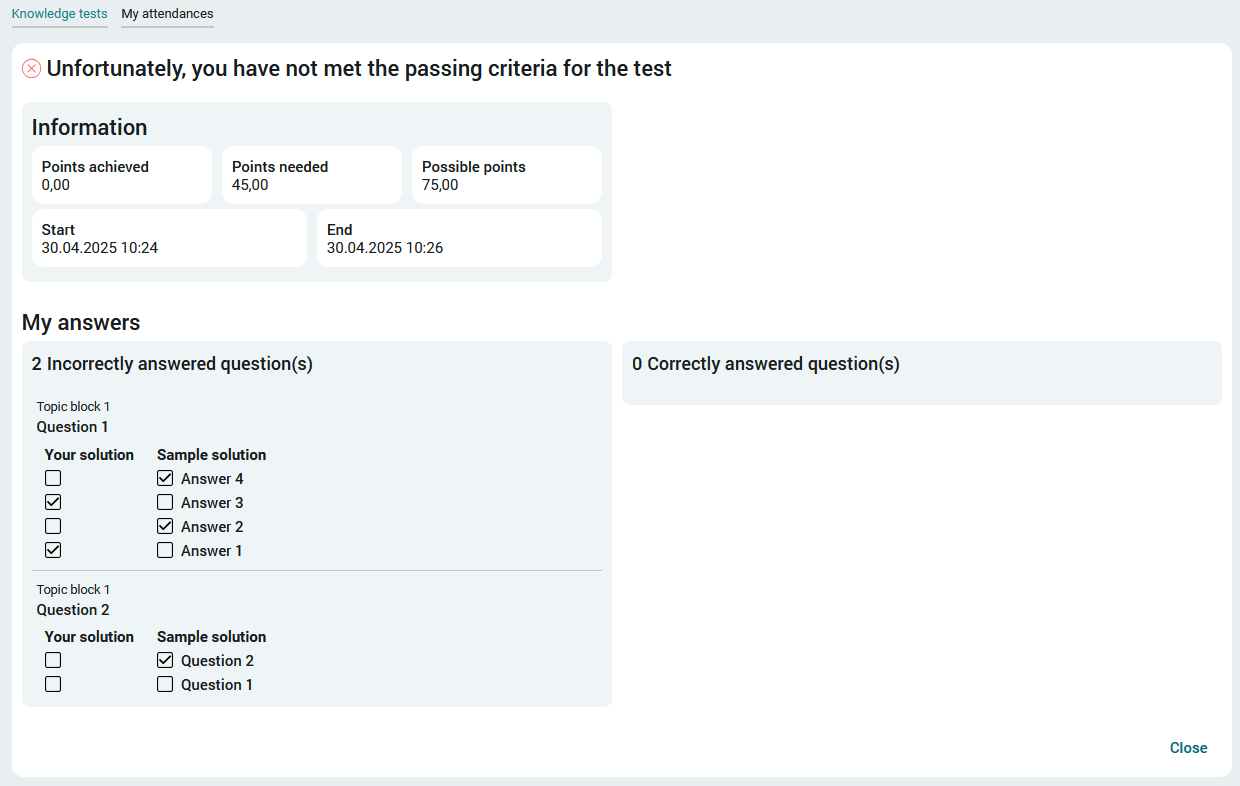
If the participant has not achieved the prescribed percentage of correctly answered questions, the test is deemed to have been failed.
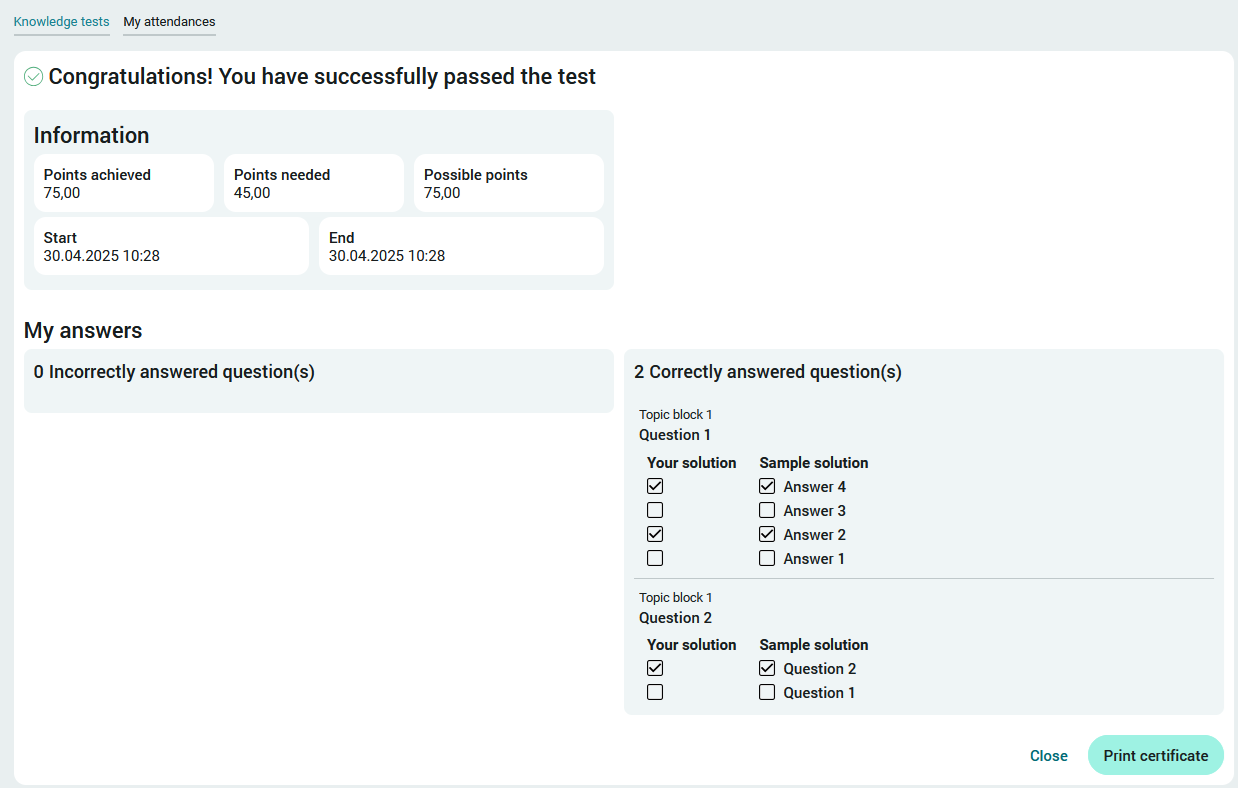
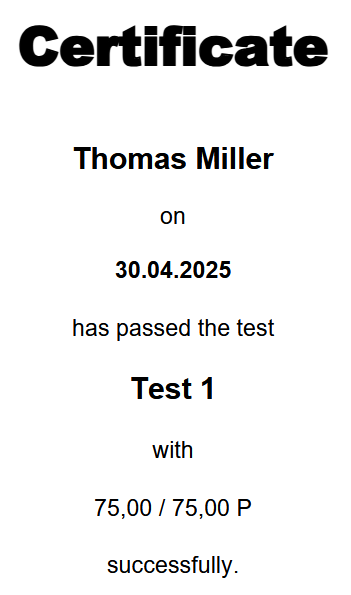
If the text is answered correctly, the certificate can be printed out here.
My participations
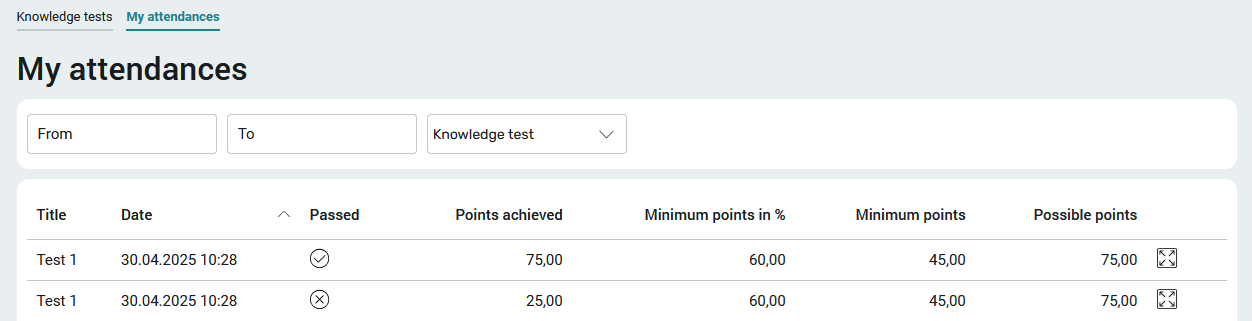
All tests in which the currently logged-in user has participated can be accessed on this page. Click on  "View" to display the details page.
Tests that could not be completed, e.g. due to a connection failure, can also be accessed here and can be processed further. A certificate can also be printed out from here.
Manage tests
Editors and managers can access the test results here by clicking on the title of a test.
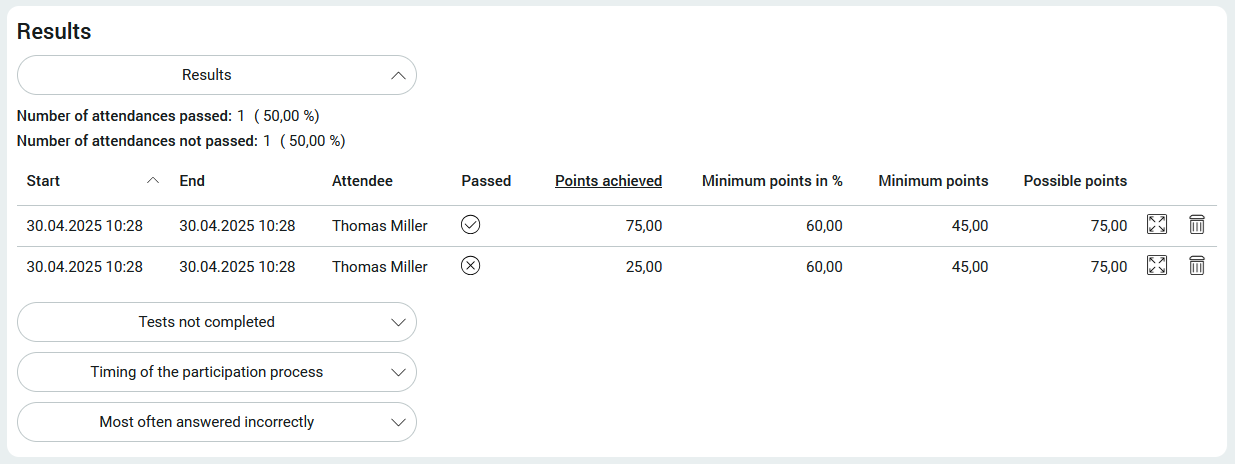
The current results are displayed at the bottom of the test detail page. The test result can be displayed in detail by clicking on the button "View". To the right of it, you will find a trash can icon that can be used to delete the test result.
A certificate can also be printed out from here.
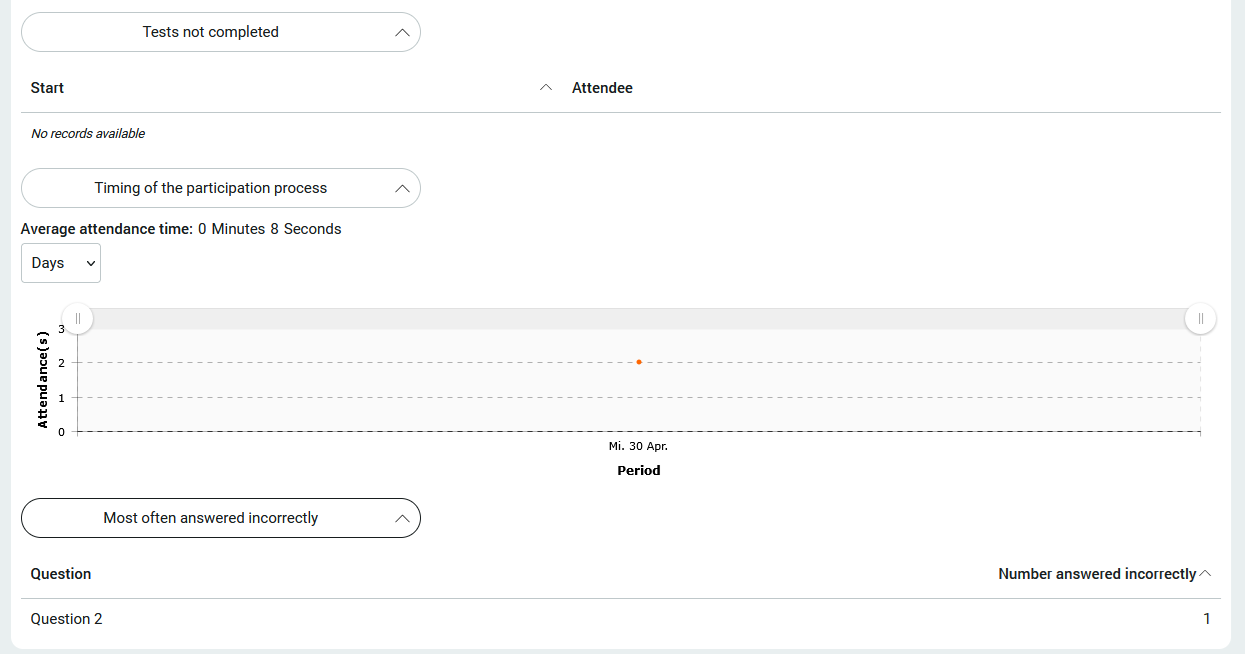
At the bottom of the test detail page, there are three different evaluations that can be accessed by clicking on the
-
Tests not completed
-
Timing of participation
-
Most frequently answered incorrectly
can be displayed. Tests that have not been completed are triggered, for example, by a browser crash or similar. caused. Here you have the option of deleting them.
Archiving is possible via the ![]() options menu at the top of the test details page. A direct link to a test can also be copied.
options menu at the top of the test details page. A direct link to a test can also be copied.
Administration
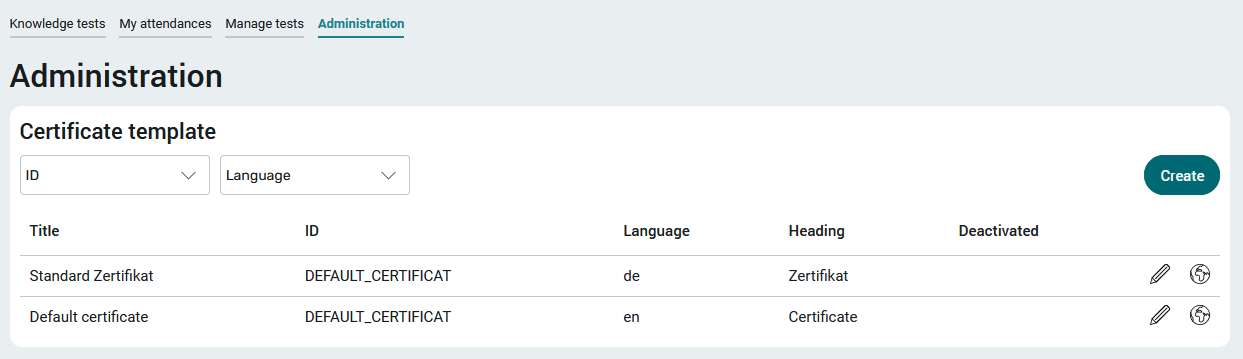
This page is only accessible to managers. Certificate templates with texts and signatures for the editors can be stored here. They can then save their template in their test.
Clicking on the "Language" selection list at the top of the page opens a menu in which the desired language can be selected in order to filter the entries under "Task type" and "Status". All languages with which task types or statuses were created are available as filters.
Multilingual tests
Tests, questions and answers can be recorded and made available in multiple languages.
On the "Manage tests" page, you will find the "Language" menu item in the ![]() options menu of a test.
options menu of a test.
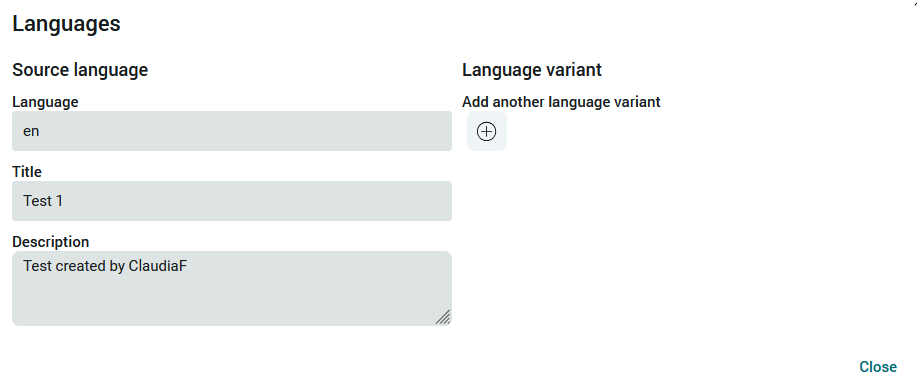
Click on  "Add another language variant" to display the area for the translation.

All active portal languages can be selected here. Click on "Save" to apply the changes and close the dialog.
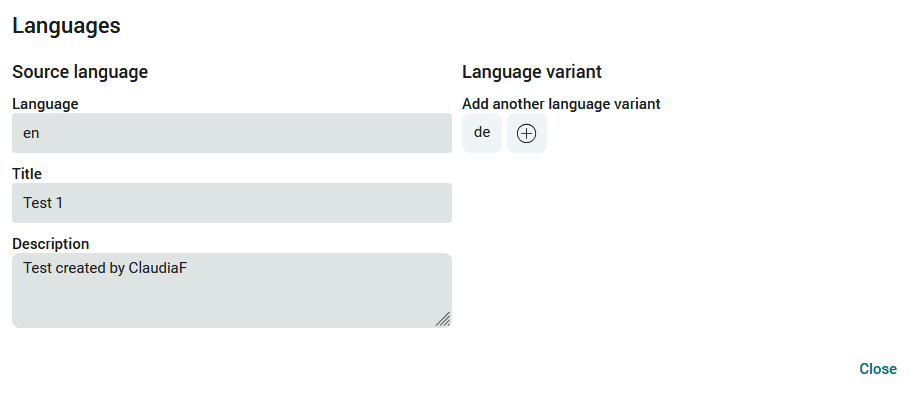
Click on "Add another language variant" to create translations for other languages.
A click on the language abbreviation (here e.g. "en") opens the corresponding translations.
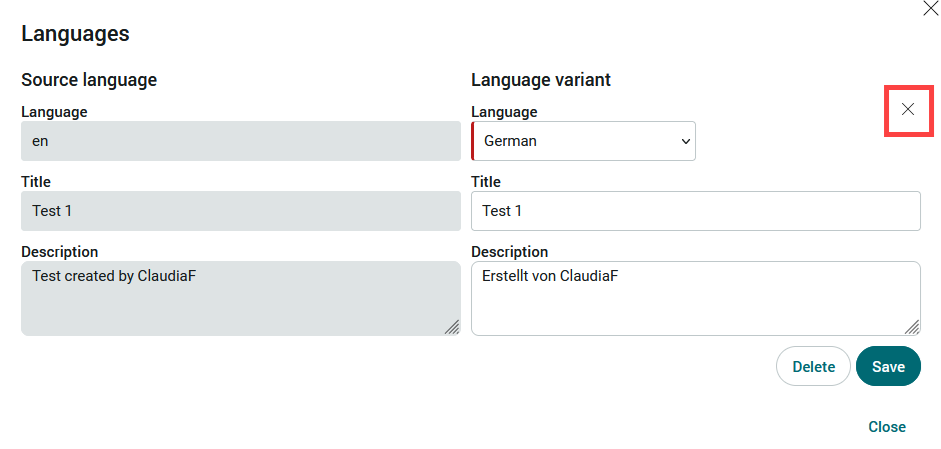
The language variant can be closed with the close symbol. You will then return to the previous page.
When switching languages in the browser, the texts are displayed in translation. New entries can be written in the current language.
Topic blocks, questions and answers are made available in several languages using the same procedure. You will also find the "Language" menu item in the ![]() options menu.
options menu.