Tips & Tricks - Custom presentation of search results
This workshop demonstrates how custom VM files can be integrated for presenting search results. In addition to the modified display and sequence of the data, the term found is also highlighted.
The example application can be downloaded here and imported into your portal as usual. When importing the application, make sure to activate the setting "Import with application data".
Create the VM file
Copy the file "application.vmi" in the portal directory "internal/system/vm/common/search/result". Create a new folder in the same directory with the name "custom" and save the copied file there under the name "my-application.vmi". The example file uses the following data fields in the search results:
-
Title
-
Description
-
Change date
-
Publication date
-
Source
The name "My search" should be displayed as the origin rather than the application name.
Modify the VM file
Open the file "my-application.vmi" in a text editor. The value from the corresponding data field in the application should be shown for the change date.

Rows 199 to 202 can be commented out or deleted as the change date is defined later in its own block.
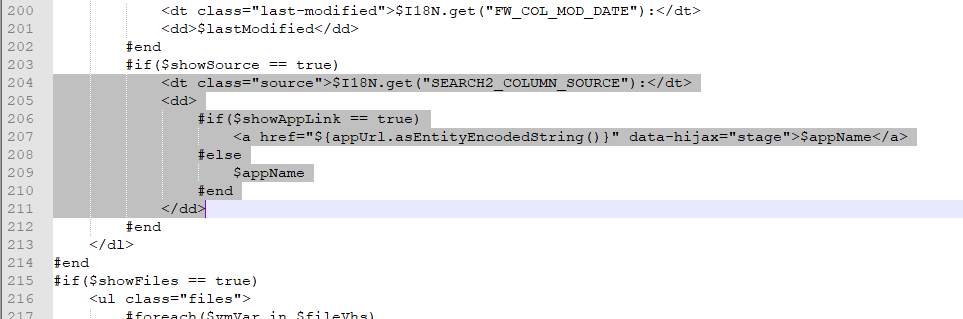
Rows 204 to 211 are replaced by the following code.
            ## Individual modification
<dt class="source">$I18N.get("SEARCH2_COLUMN_SOURCE"): My search</dt>	##Guid of current data group
	#set ($dgguid = $recordInfo.getDGGuid())
	##ID of current data record
	#set ($myrecid = $recordInfo.getRecId())

	##IF GUID of current data group == GUID of data group of search configuration
	#if($dgguid == "054713578DA3050A194EC5B23E7981CAC7C63483")
	##SELCET query for the desired data fields
	#set($statement = $PreparedQuery.prepare($DbConnection, "SELECT STR_TITEL_6A585D30, TXT_BESCHREIBUNG, DT_VEROEFFENTLICHUNGSDATUM, DT_AENDERUNGSDATUM FROM XDATAGROUP00D1A21861 WHERE LID = ?"))
	$statement.setInt(1, $myrecid)
	#set($rs = $statement.executeQuery())
	#foreach($element in $rs)
		##TITLE
		#set($title = $!element.getStringValue(1))
		##DESCRIPTION
		#set($text = $!element.getStringValue(2))
		##PUBLICATION DATE
		#set($dtpublish = $!element.getTimestampValue(3))
		##EDIT DATE
		#set($dtchanged = $!element.getTimestampValue(4))
		#set($pubDay = $DtUtil.wrap($dtpublish))
		#set($chgDay = $DtUtil.wrap($dtchanged))
		##Current timezone
		#set($timeZone = $User.getTimeZone())
		<dt>Published on $normalRenderer.renderDateTime($pubDay)    Last edited on $normalRenderer.renderDateTime($chgDay) </dt>		#end
		$rs.close()
		$statement.close()
		#end
## End individual modification
Please note: The names of the data fields and data groups come from the example application and have the corresponding German names (e.g. "TXT_BESCHREIBUNG"). These need to be adjusted to your own names, if you have created your own application. Save the changes and close the file.
In the example application, the modified VM file is already integrated in the properties dialog of the search configuration.
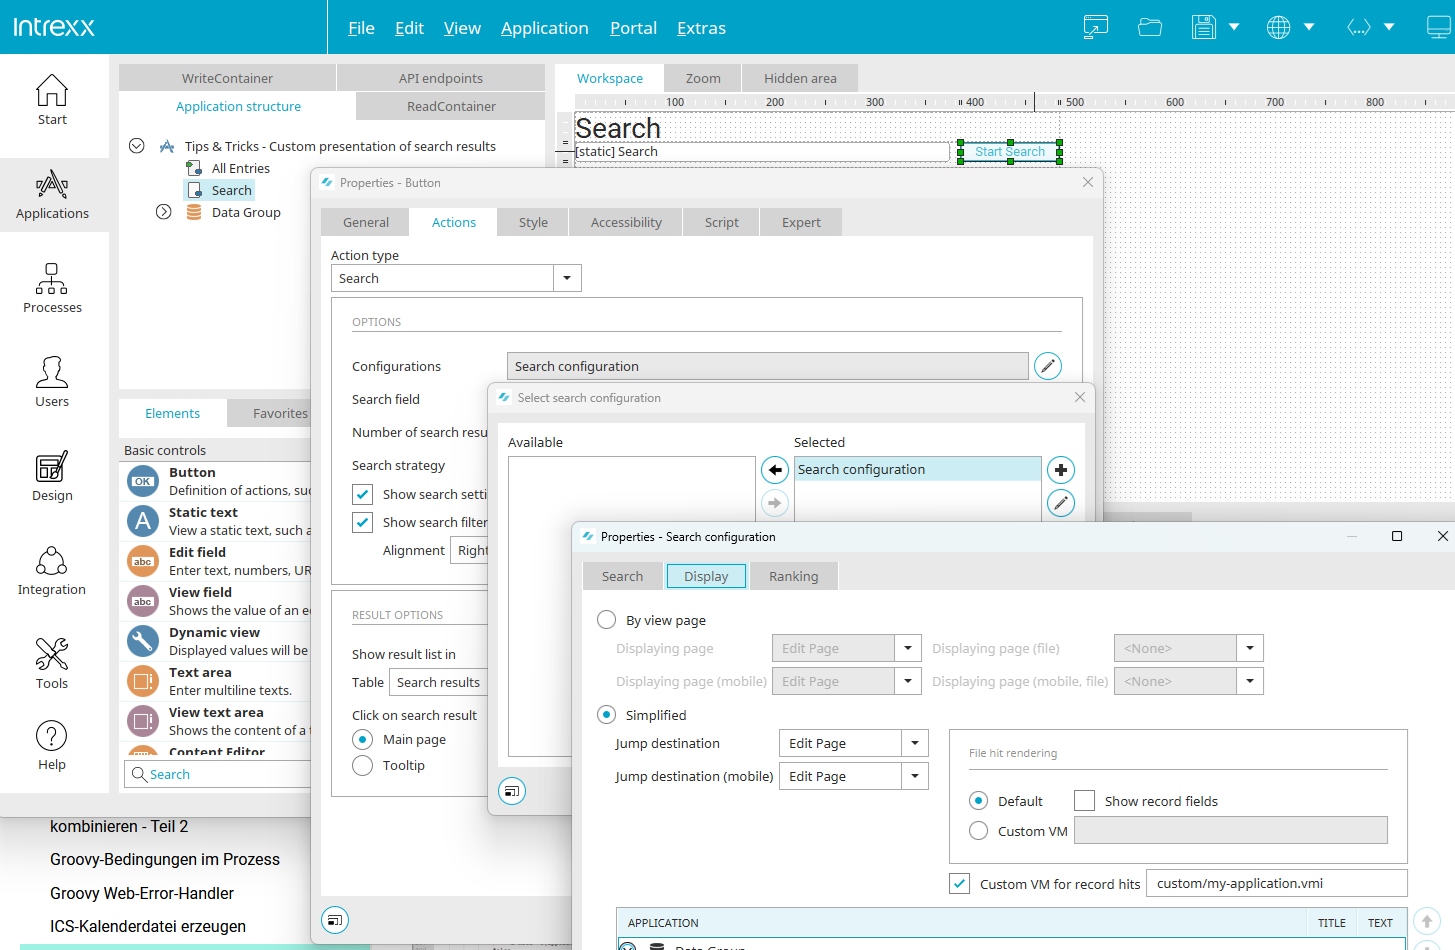
In the figure above you can see the sequence of dialogs that can be used to include custom VM files via the properties dialog of the search button. On the Actions tab, you can edit the search configuration by clicking on ![]() "Edit". Select the desired search configuration in the next dialog and then click on
"Edit". Select the desired search configuration in the next dialog and then click on ![]() "Edit search configuration". On the Display tab in the properties of the search configuration, you can customize how the search results are displayed with a custom VM file.
"Edit search configuration". On the Display tab in the properties of the search configuration, you can customize how the search results are displayed with a custom VM file.
Click here for more information about the configuration.
Customize search hits in the "Design" module
Now the format of the search term will be modified in the Design module. Open the current portal layout.
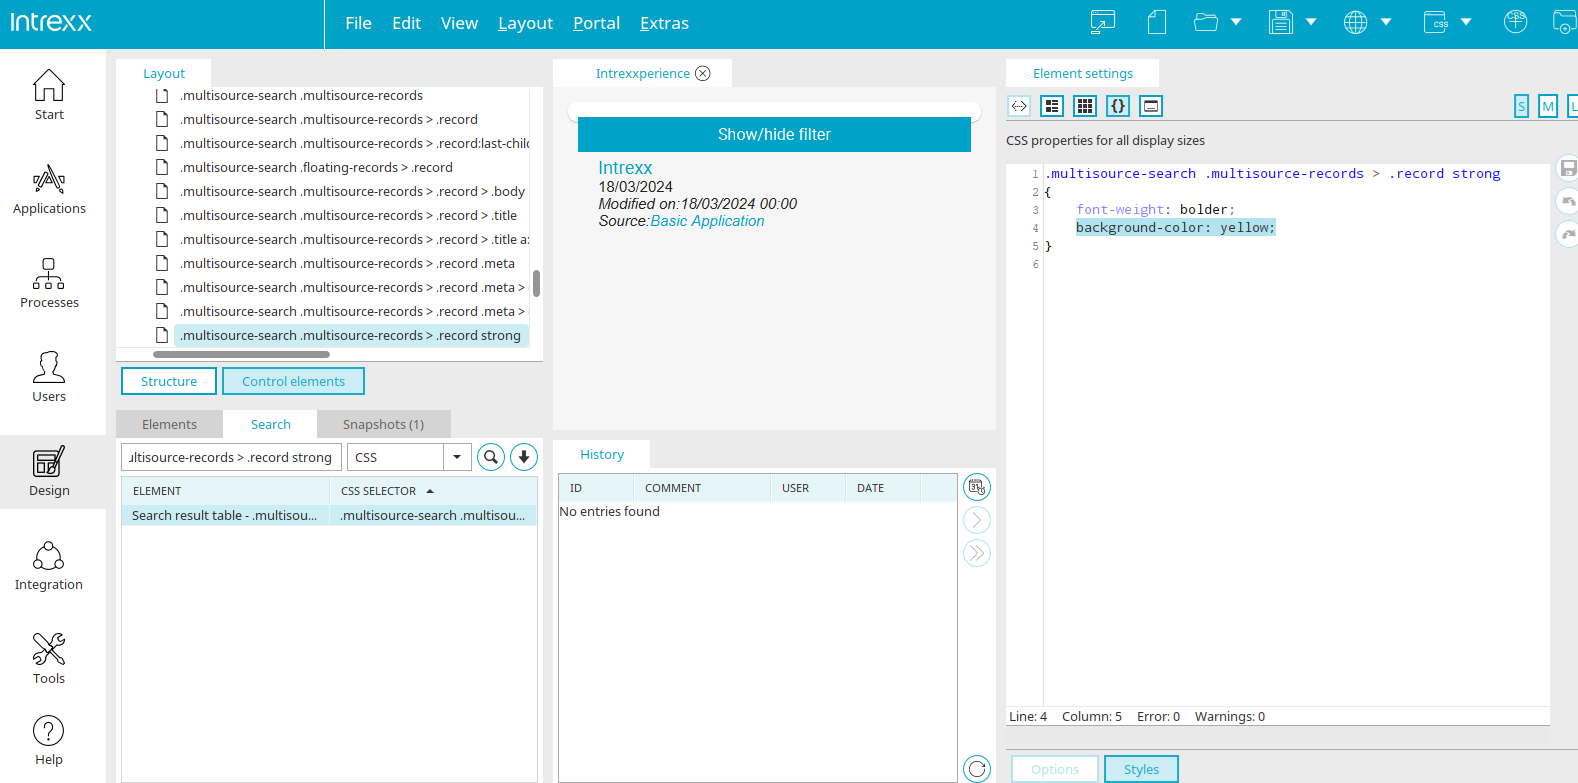
In the "Search" area, search for ".multisource-search .multisource-records > .record strong". When you double-click on the search hit, the Element settings will load. The yellow background can now be defined in the CSS.
            .multisource-search .multisource-records > .record strong
{
	font-weight: bolder;
	background-color: yellow;
}
Save the layout and open the application in the browser.
Result in the browser
Search for "Title" here. The search results will be displayed according to the changes made.