

Events
In the "Events" module, you can send invitations to events and keep track of the participants.
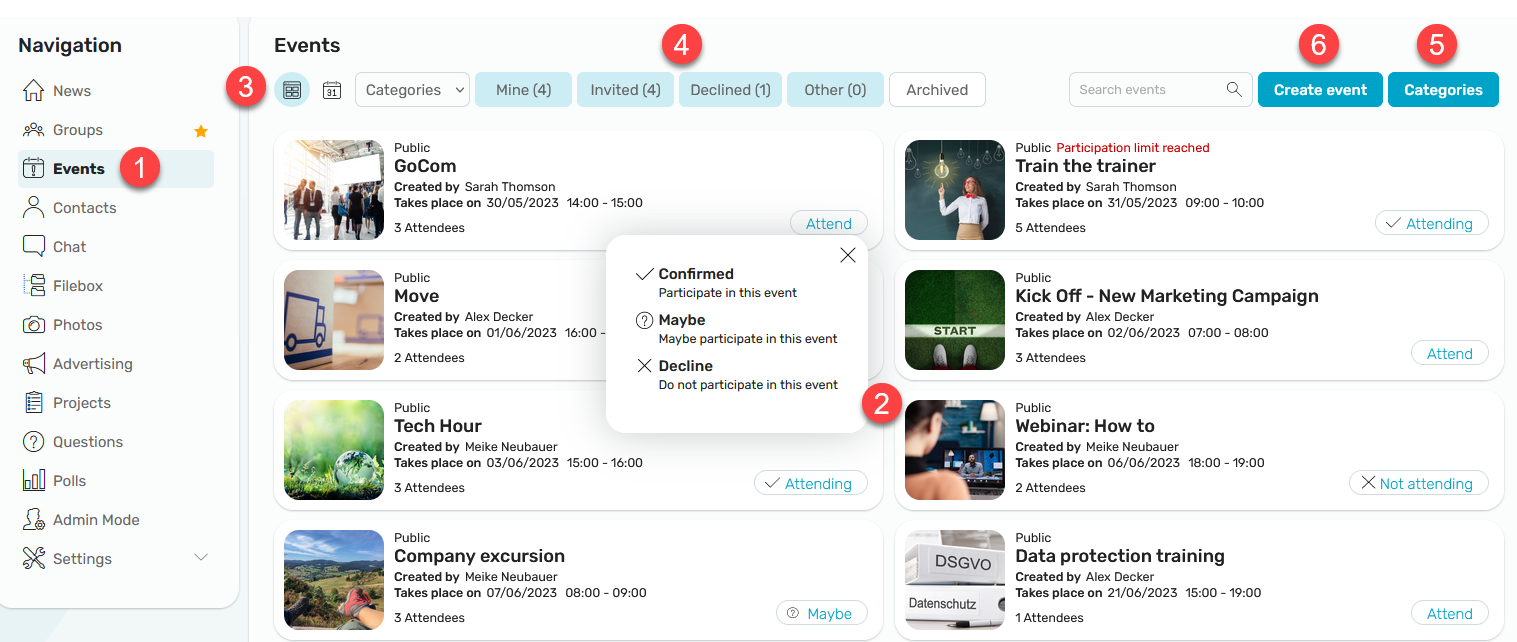
1. Open the module
Click "Events" in the navigation bar to go to the module.
2. Events
The overview page displays all events that are visible to you. Use the "Attend" button to the right of an event to RSVP, decline, or indicate "Maybe."
3. Views
You can use the buttons on the left above the events to switch between the tile view and the calendar view.
4. Filter
Here, you can filter events by "My" (Created or Attending), "Invited," "Declined," and "More." Past events can be viewed under "Archived."
5. Categories
6. Create an Event
To create a new event, click "Create Event."
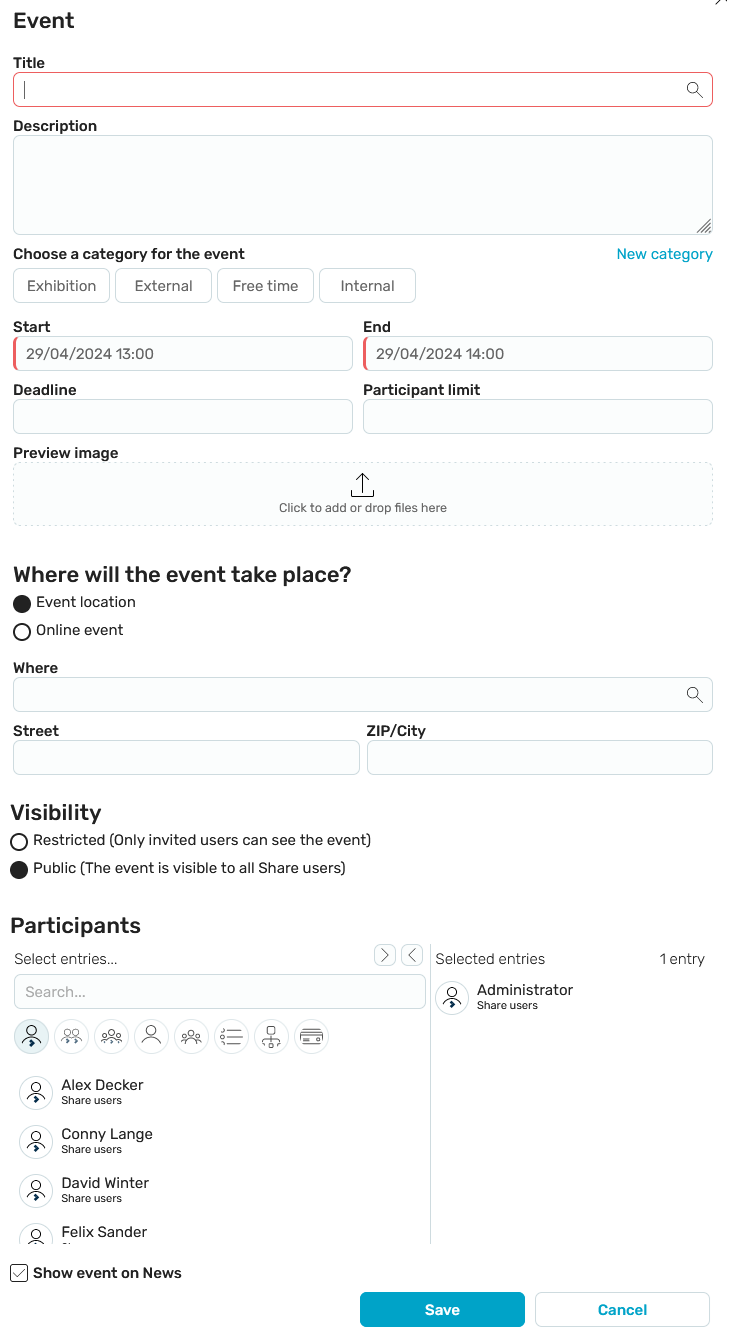
At a minimum, the title, start time, and end time of the event must be specified here. All other information is optional. An event can be assigned to a category. The "New Category" link is visible only to the administrator.
Registration Deadline
A registration deadline can be set for events. For users who have clicked "Decline," the "Decline" button will be hidden after the registration deadline. If the status is "Maybe" or "Attending," users can still decline the event even after the registration deadline.
Participant Limit
A participant limit can be set for events. Once the participant limit has been reached, it will no longer be possible to participate in the event.
Online Event
If the "Online Event" option is selected, you'll see an input field here where you can enter a link to an online session. Participants can then join the meeting directly via a link.
Visibility
Events can be made public to all Intrexx Share users or restricted to a select group of people. If you share the event with an Intrexx Share group (restricted), the users in that group will be kept up to date on the event.
Participants
Select the desired participants here. The event creator is preselected as a participant but must confirm their participation in order to attend.
Notify me when there's news that the event has been created
For the "News" module, a corresponding post is generated when an event is created.
Event - Details Page
An event's details page is divided into two sections. All information about the event is displayed in the upper section. You can post comments and replies about the event in the section below. You can find all the information on this topic here.
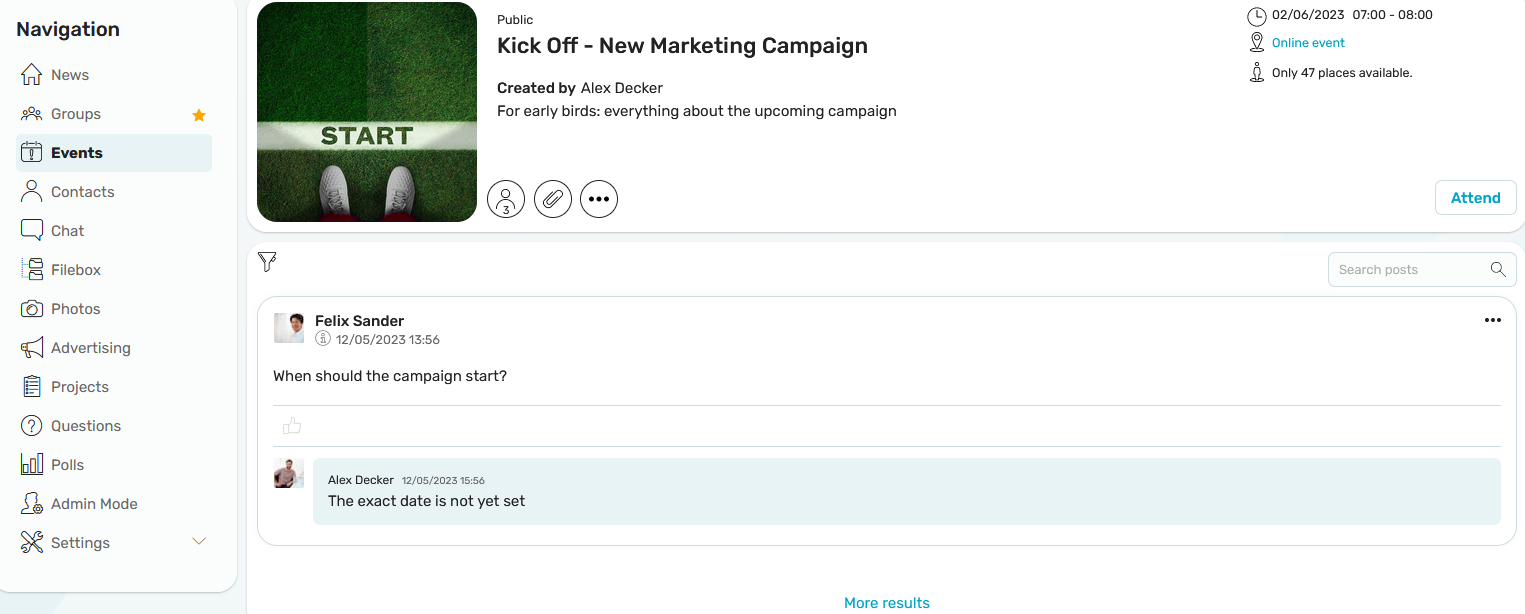
In the upper-right corner, you'll see the event dates, which you can export as an .ics file by clicking the "Export Date" link.
Please note that a change to the calendar in which you use the ICS file will not affect the Intrexx Share event. No synchronization takes place.
 Participants
The number of participants is displayed here. Clicking this button opens a page where you can manage participants. In addition, you can print out a list of participants there.
 Files
Files
All files added to posts and comments can be accessed here with a single click.
 Options
Here you'll find a menu with the following options:
 Edit
Edit
Events can be edited or deleted here by the creator. If an event is deleted, participants will not be notified. The event is initially marked as deleted and will later be deleted as part of a scheduled process.
 Unsubscribe from the event
Here, you can enable or disable the display of event posts in the News section.
 Memories
Select this menu option if you, as the event creator, would like to remind participants about the event. To create a reminder, you must provide both a reminder message and specify when the reminder should be sent. The available options for the time are "Custom" (default), "Now," "One week in advance," and "Three days in advance." The time frames "One week before" and "Three days before" refer to the start date of an event. For each reminder, a notification is sent to the event attendees (for the "Attending," "Maybe," and "Declined" statuses).
 Cancel Event
You can cancel the event here. The relevant notifications are sent automatically to the participants. Canceled events are not moved to the archive until the event has ended.
 Copy link
Copies a link to the group to the clipboard.
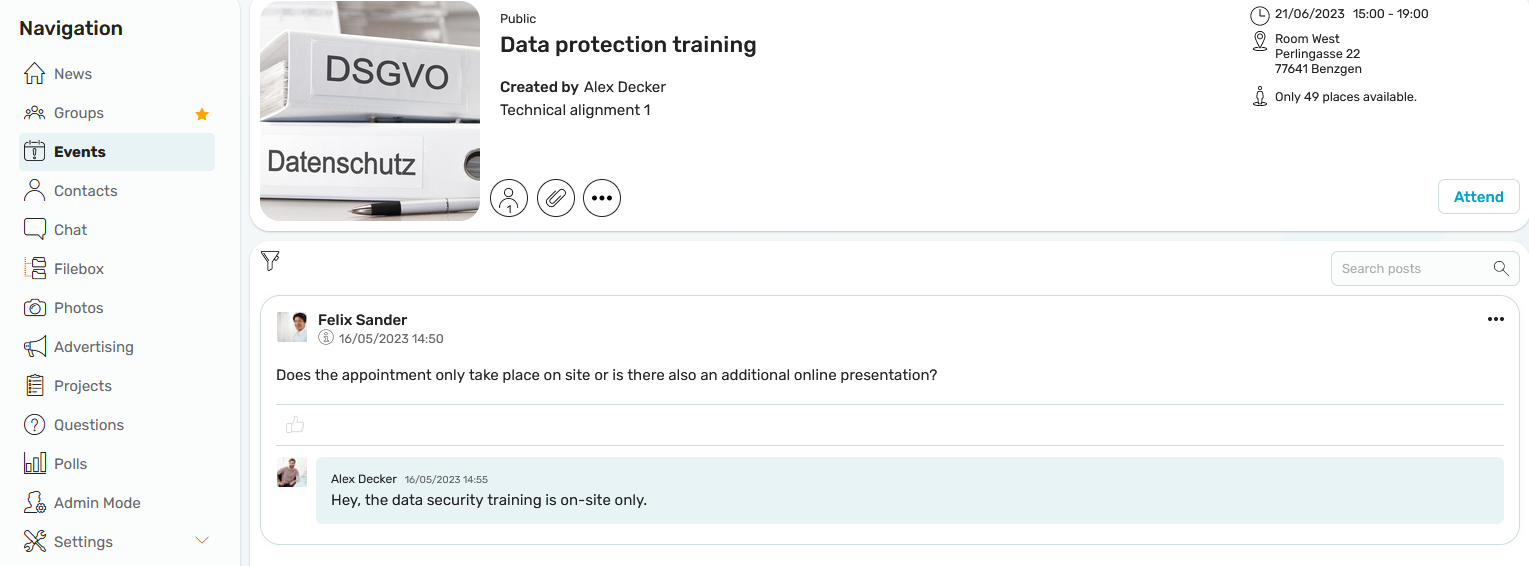
News Feed Events Plugin
You can find all the information about plugins here.