You will find a quick guide to creating an application in Salesforce below. The settings that are relevant for the Intrexx Salesforce Connector are discussed there.
Detailed information on creating applications in Salesforce can be found under the following link in the Salesforce online help: Konfigurieren der grundlegenden Einstellungen für verbundene Anwendungen
Step-by-step guide
Proceed as follows to create an application ("New connected application") in Salesforce:
-
In Setup, enter "Application" in the quick search field and select "Application Manager".
-
Click on "New connected application".
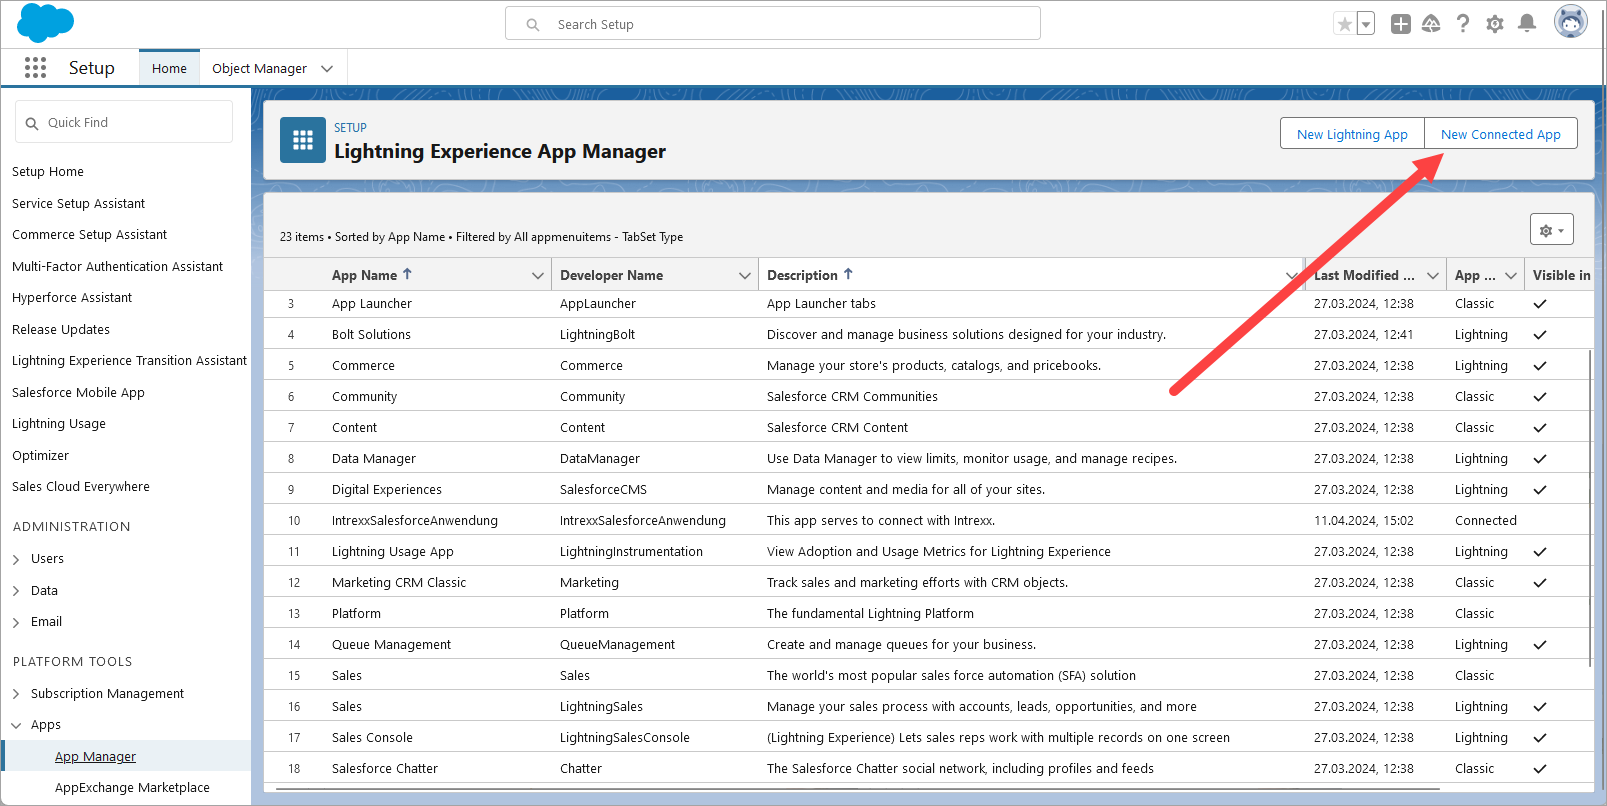
The "New connected application" page is displayed.
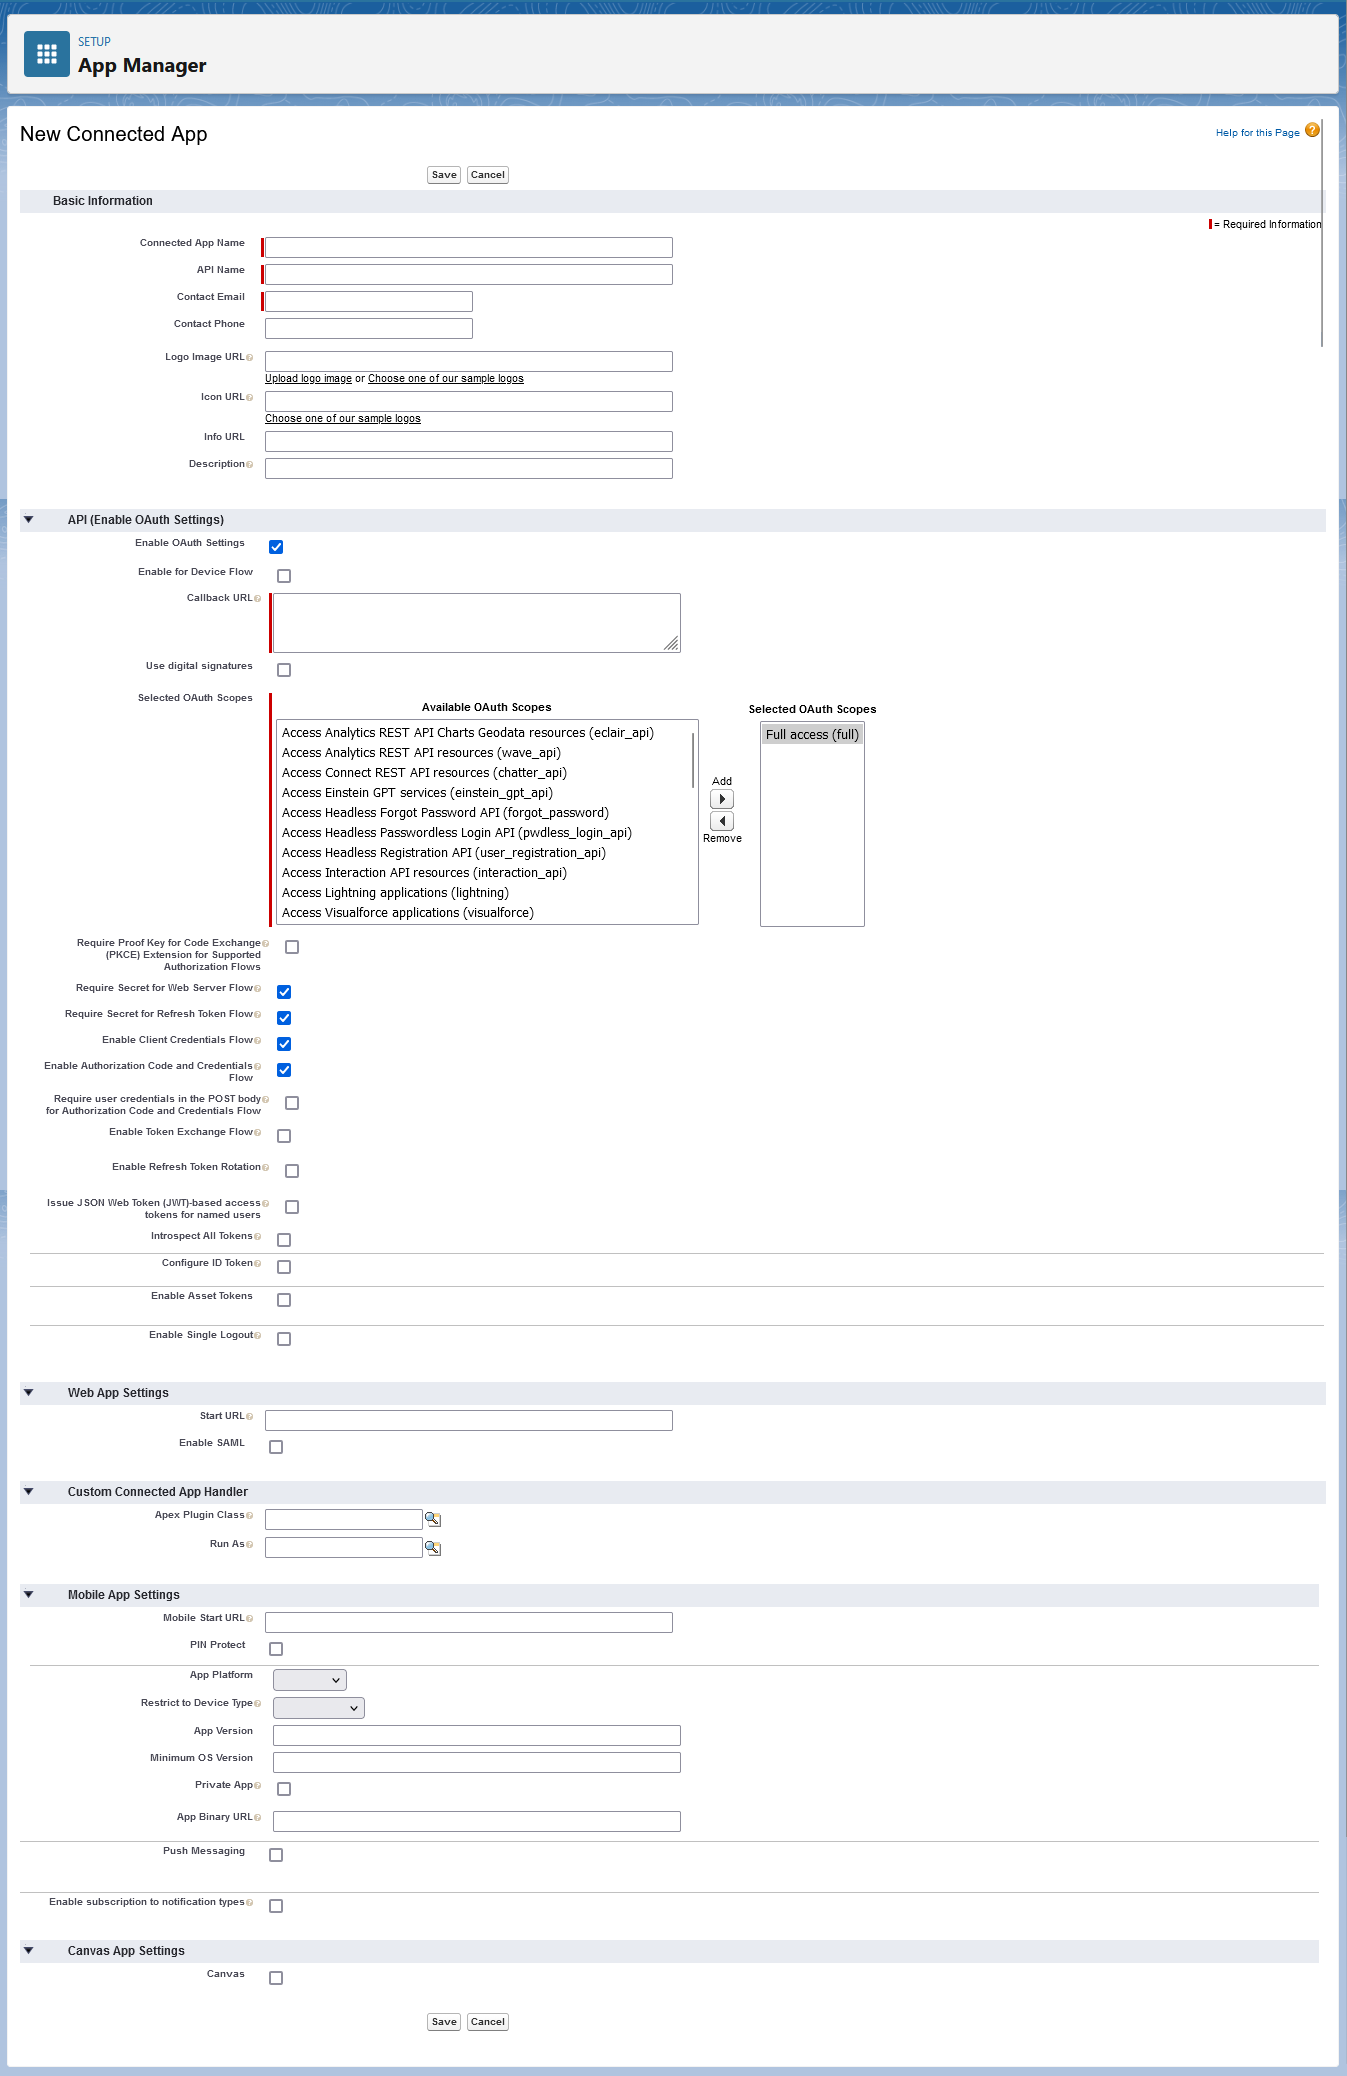
Name of the connected application
Enter a name for the connected application. The name must be unique within your organization.
API name
Salesforce suggests the name of the connected application given above as the API name. You can leave this as it is. However, you can also assign a different API name.
Make a note of the API name. You will need this to set up the external data group in Intrexx (Create external data group in Intrexx application).
Contact email
Enter the email address at which you would like to receive notifications from Salesforce.
Enable OAuth settings
Select this checkbox. The fields required to configure OAuth2 are then displayed.
Feedback URL
Enter the feedback URL here. This corresponds to the redirect URI in the Intrexx Salesforce Connector.
You can only enter the feedback URL (redirect URI) after you have created the Intrexx Salesforce Connector.
Detailed information on the redirect URI can be found in the section Redirect URI.
Selected OAuth scopes
Select the desired scope here.
Detailed information on OAuth scopes can be found under the following link in the Salesforce online help: Enable OAuth Settings for API Integration
Deactivate the following checkbox:
-
"Request extension "Proof Key for Code Exchange (PKCE)" for supported authorization flows"
Select the following checkboxes:
-
"Secret required for web server flow"
-
"Secret required for update token flow"
-
"Activate flow for client credentials"
-
"Activate flow for authorization code and credentials"
-
-
Click on "Save".
Your next steps