Image Editor
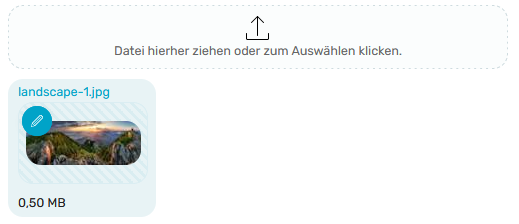
With the Image Editor, you can easily edit images that you have uploaded by means of a File selection directly in the browser.
The Image Editor is available in two versions: An editor for cropping, rotating and scaling an image and an editor for drawing, labeling and annotating within the image.
Any images in the JPEG and PNG formats can be edited.
Crop, rotate and scale
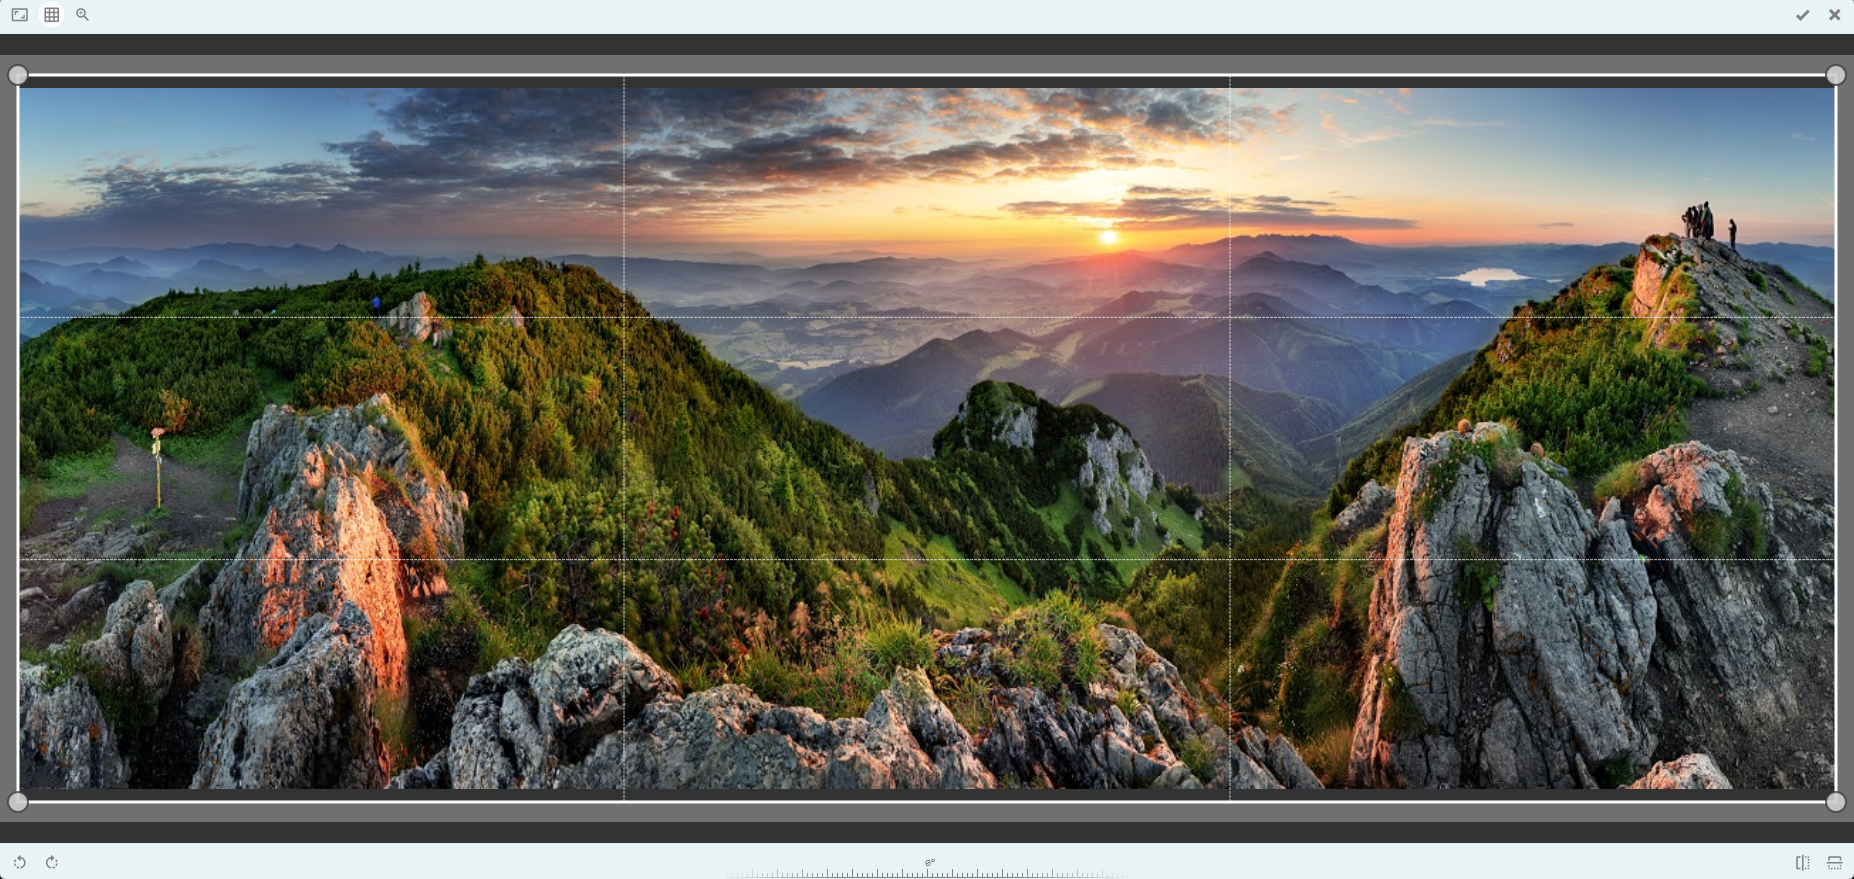
At the top left of this editor you will find buttons for setting the aspect ratio, showing and hiding the grid and for zooming in and out.
At the bottom left you will find buttons for rotating the image to the right or left.
At the bottom right, the image can be mirrored horizontally or vertically.
All changes are saved when you click on ![]() "Save and close" at the top right. Clicking on
"Save and close" at the top right. Clicking on ![]() "Close" discards all changes.
"Close" discards all changes.
Draw, label and annotate
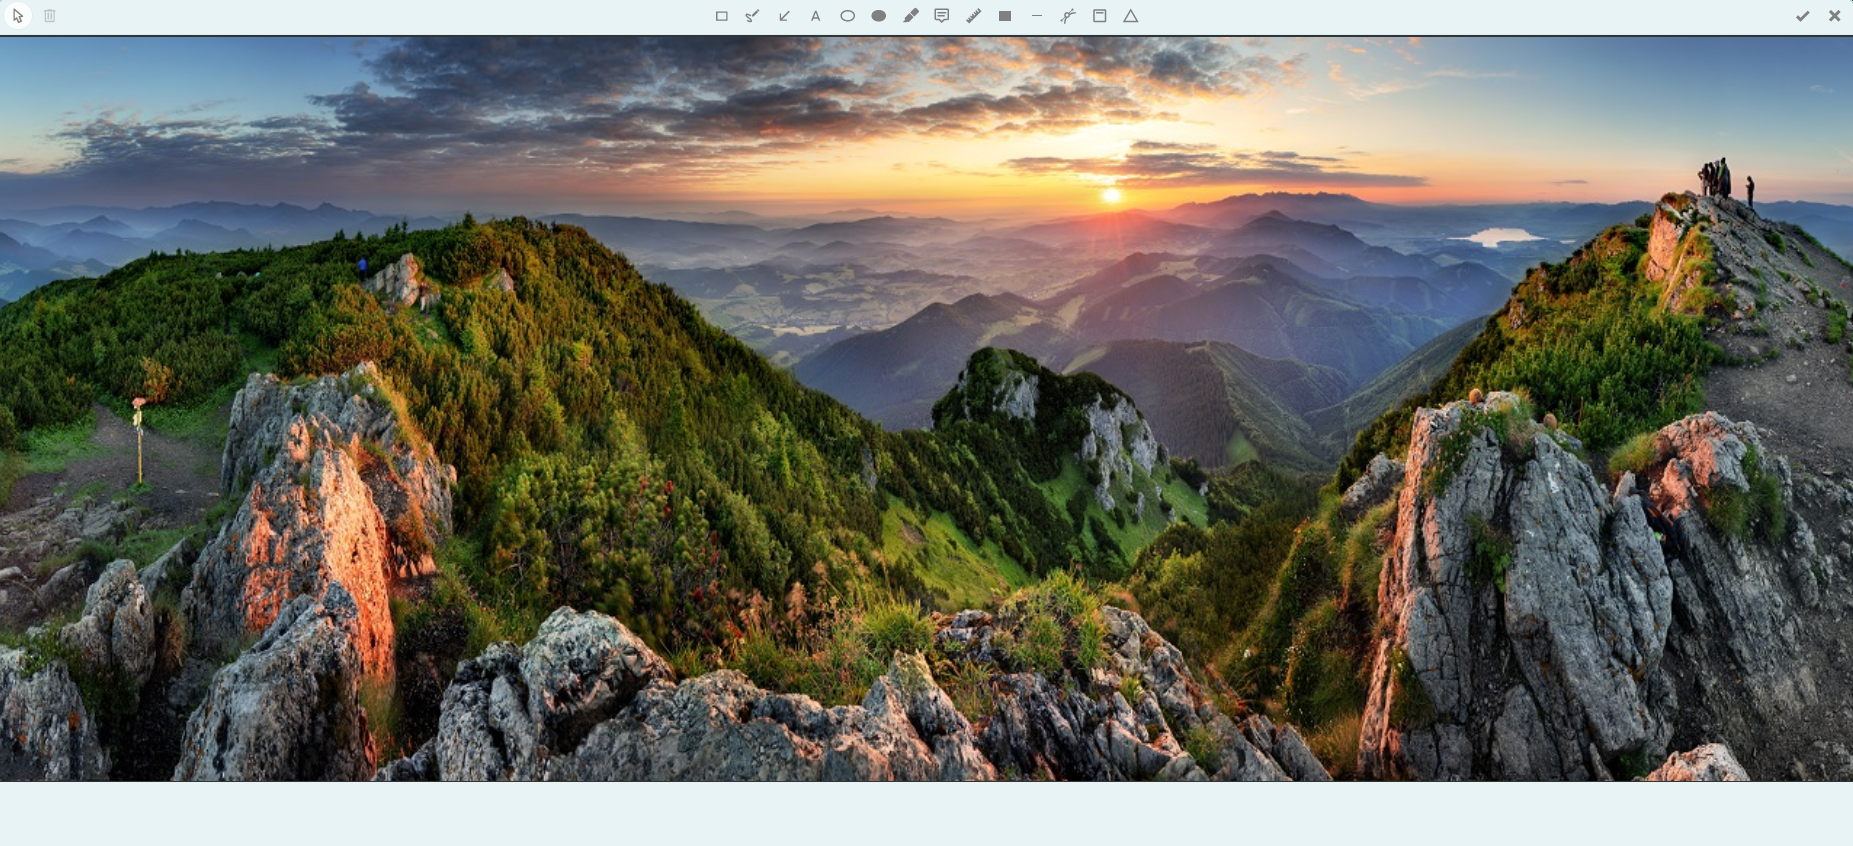
In this editor, you will find tools for image editing above the image – e.g. to mark or label parts of the image. You can define the available tools in the configuration of the editor. Here too, all changes can be saved or discarded using the buttons at the top right.
Configuration in the properties of a file selection
The Image Editor is not a separate application element. It can be activated by making the appropriate settings in the file selection properties. Here you will find general information on creating and configuring a file selection. The special functions and settings of the Image Editor are described below.
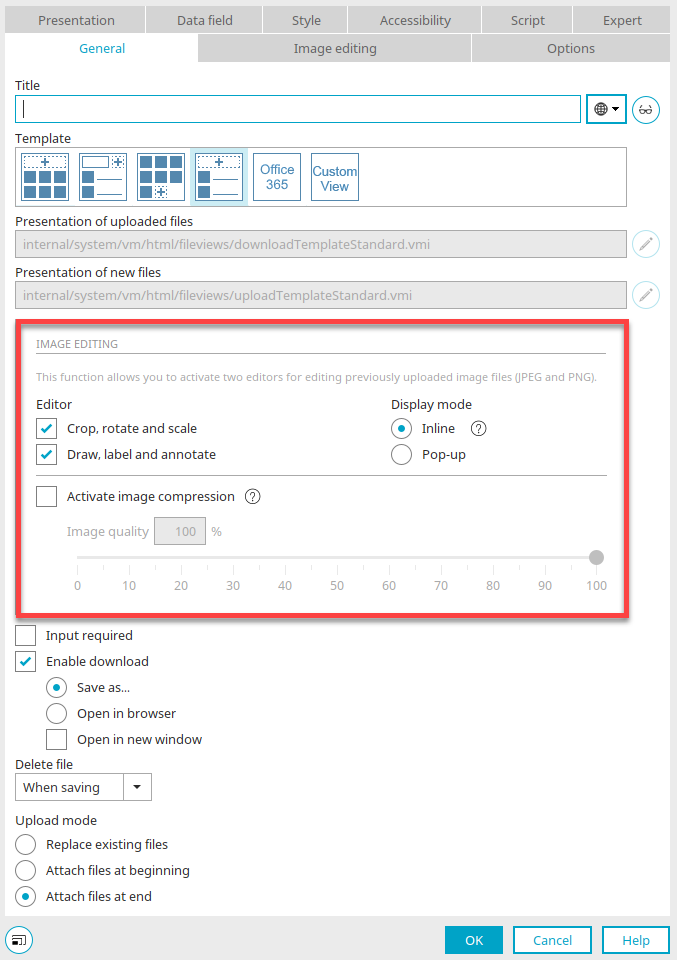
The settings for the Image Editor can be found in the properties dialog of the "File selection" application element on the "General" tab in the "Image editing" area. Under "Editor" you can activate the two editors with the following settings:
-
Crop, rotate and scale
-
Draw, label and annotate
Under "Display mode", you can decide whether the image editing should be opened inline or in a popup. If the images are too small, the image editing is always opened in a popup.
Image compression can be controlled via a slider or the corresponding input field. The higher the image quality, the larger the file size of the image. Image compression only works with images of the type "JPEG".
Image editing
If you have activated the "Draw, label and annotate" editor on the "General" tab, you will also find the "Image editing" tab in the properties of the file selection.
Tools
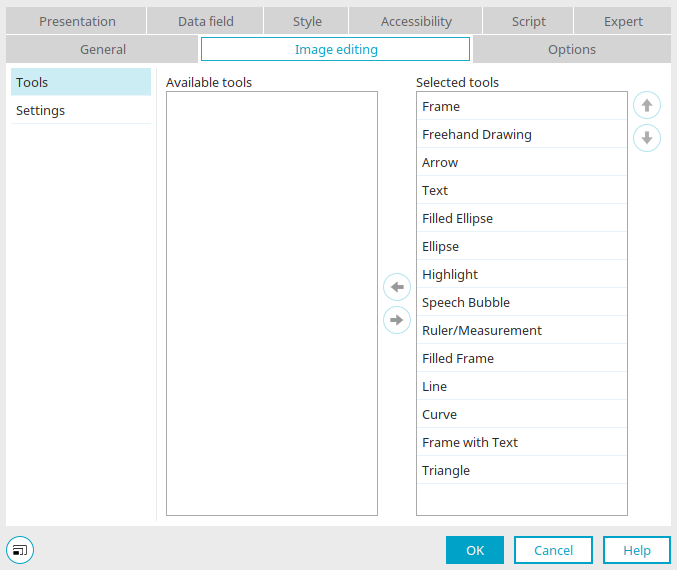
The tools for image editing can be set here.
All tools in the "Selected tools" list are available on the web. The order of the tools is also taken into account. The arrow buttons can be used to move tools from one list to another and also to change the order.
Options
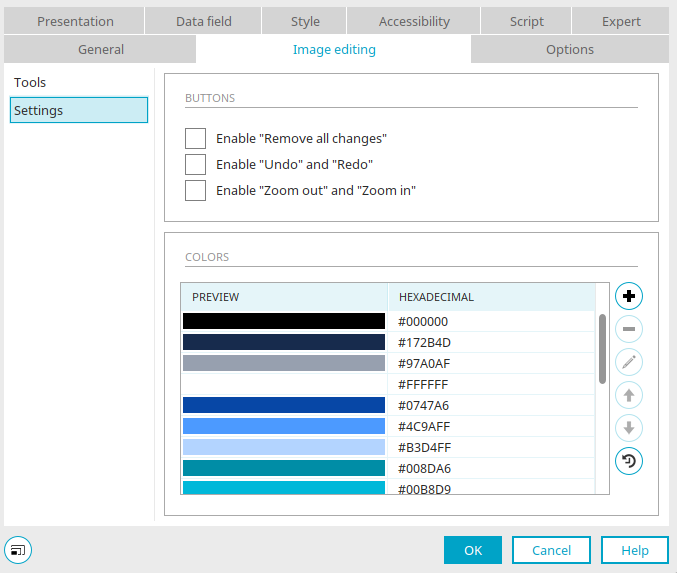
If you click on "Options" on the left-hand side of the dialog, the following general editor buttons can be selected as needed:
-
Activate "Delete all changes"
-
Activate "Undo" and "Redo"
-
Activate "Zoom out" and "Zoom in"
Click on ![]() "Add color" or
"Add color" or ![]() "Edit color" to open a dialog in which the desired color can be selected.
"Edit color" to open a dialog in which the desired color can be selected.
A preselection of colors is included as delivered, which can be selected again using the button ![]() "Restore default colors".
"Restore default colors".
JavaScript
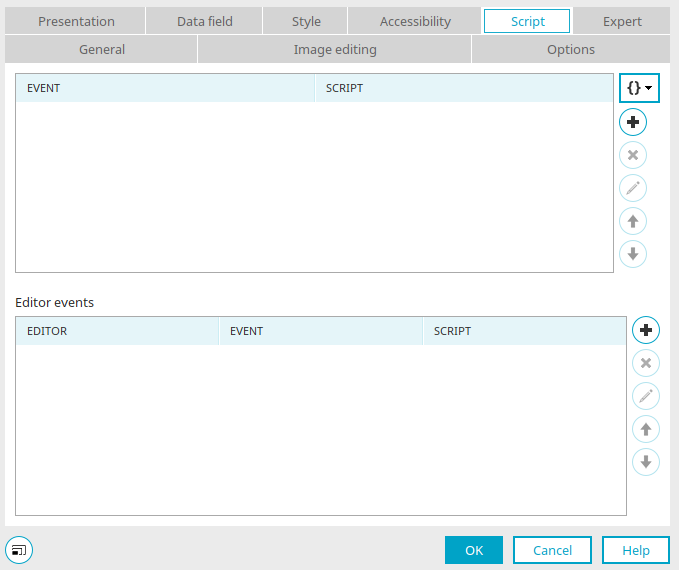
If you have already familiarized yourself with scripting in Intrexx, you may be familiar with the "Script" tab, which you can find in the properties of all JavaScript-enabled application elements.
In the properties of a file selection with activated image editors, you will find the second area called "Editor events" on the "Script" tab, in which the function for the script call can be selected. There, click on ![]() "Add new script call".
"Add new script call".
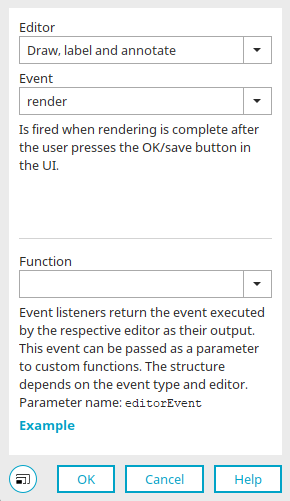
Editor
Here, select the editor for which the event is to be configured. The list of available events changes depending on the selected editor.
Function
Select the desired function here. Click here to learn how to create functions.
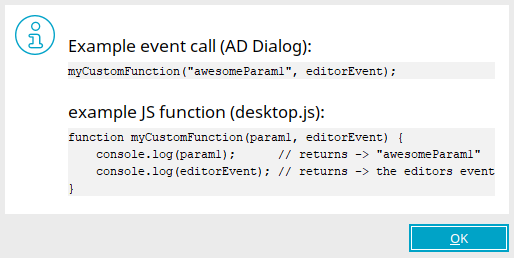
Click on "Example" to open a dialog in which you will find example scripts.
Opening the editors via the file selection

The "File selection" application element offers various templates for displaying the element in the browser. The buttons that you can use to open the Image Editor in the browser also change accordingly. General information on the settings in the file selection properties can be found here.
Template 1 and Template 3
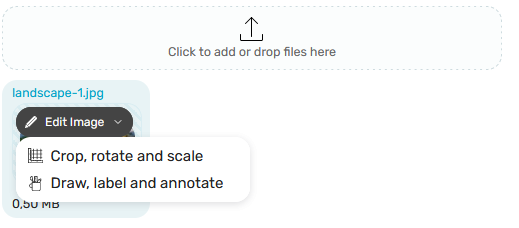
If you have selected template 1 or template 3, you can click on ![]() "Edit image" to open a menu from which you can select one of the two image editors.
"Edit image" to open a menu from which you can select one of the two image editors.
Template 2 and Template 4

If you have selected template 2 or template 4, you can open the first editor by clicking on ![]() "Crop, rotate and scale". You can open the second editor by clicking on
"Crop, rotate and scale". You can open the second editor by clicking on ![]() "Draw, label and annotate".
"Draw, label and annotate".
Layout
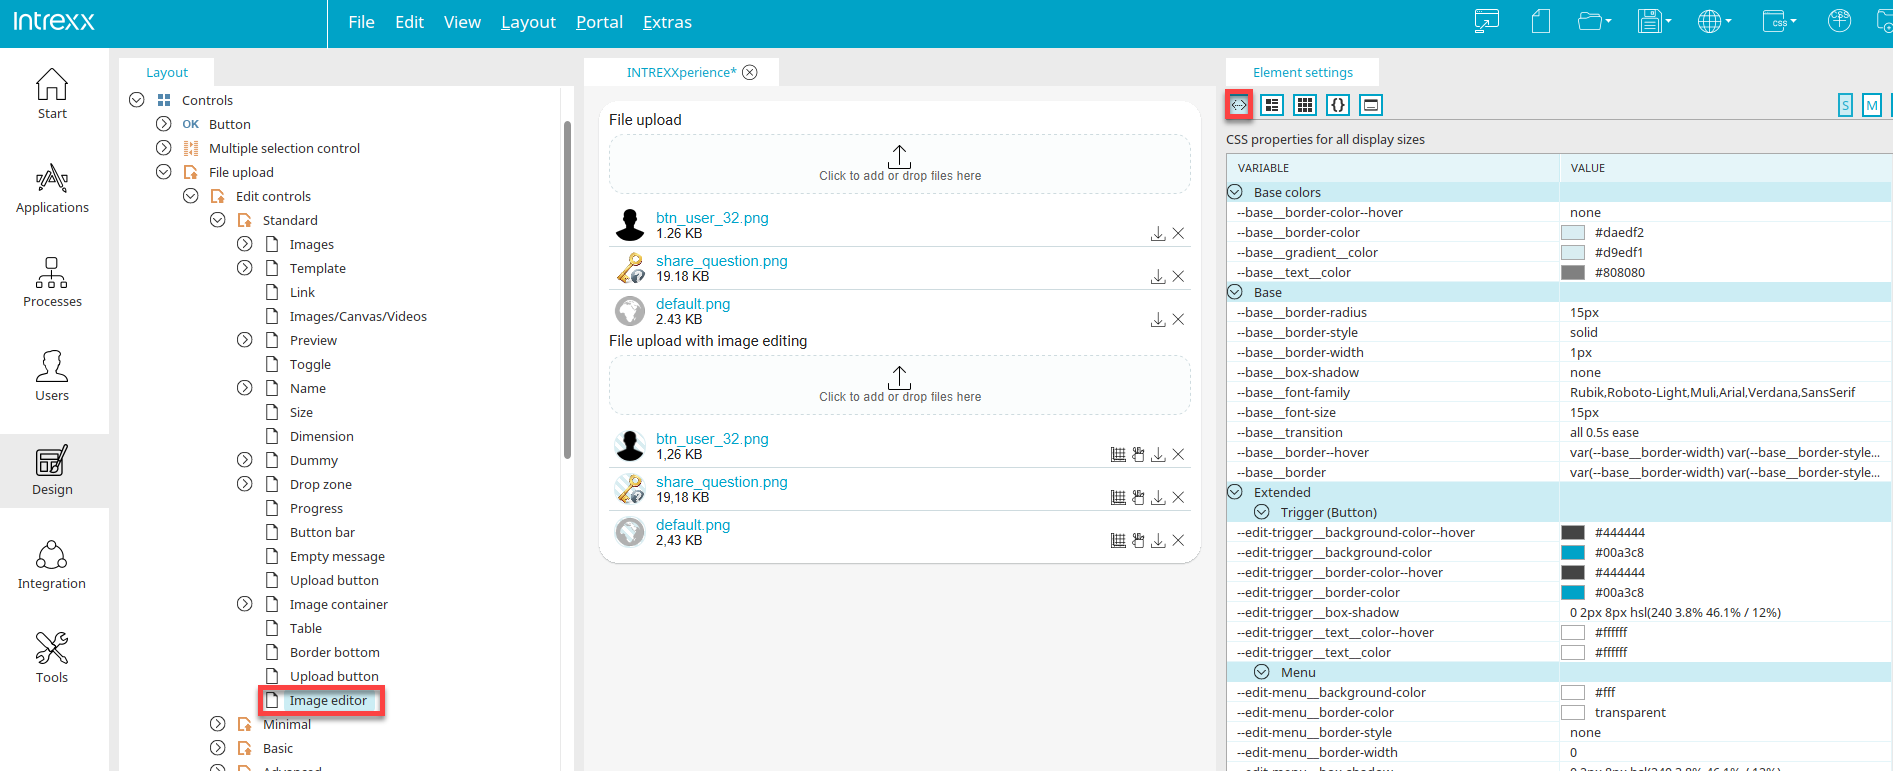
In the "Design" module, the "Image editor" control element is provided in every layout. You will find it in the "Control elements" area below the "File upload / Edit control" node. The layout of the Image Editor can be edited here for all templates of the file selection in which the editor is available (Standard, Minimal, Basic, Advanced).
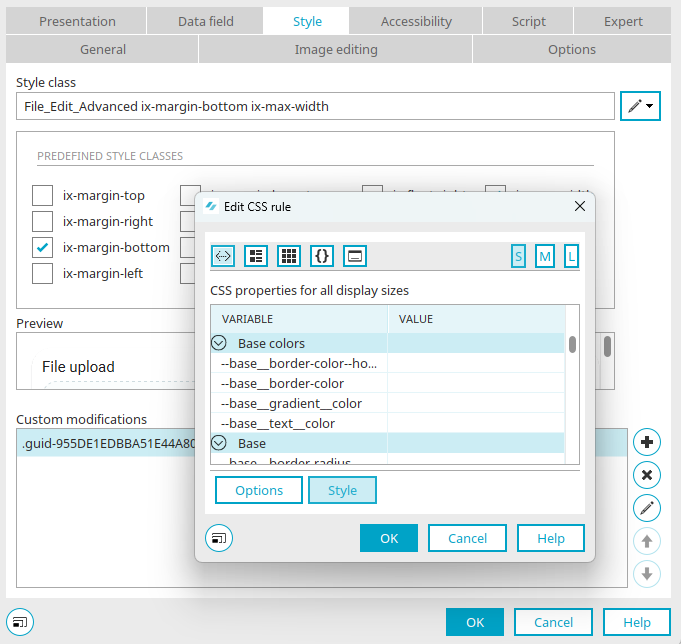
If the "Image Editor" control element is selected in the "Control elements" area, click on ![]() "Show CSS variables" in the "Styles" area on the right-hand side of the "Design" module. The variable values can be conveniently edited here in the "Value" column.
"Show CSS variables" in the "Styles" area on the right-hand side of the "Design" module. The variable values can be conveniently edited here in the "Value" column.
All changes are displayed right away in the preview in the center panel of the "Design" module. The following illustration provides an overview of the components of the Image Editor and the associated variable groups.
Template 1 and 3

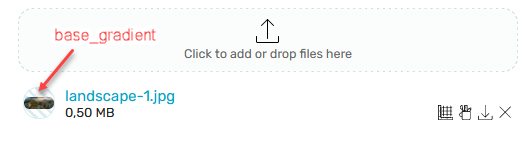
The illustration above shows the layout of the Image Editor when template 2 or 4 is selected in the file selection properties. The area occupied by the Image Editor lies within the frame colored red here. The surrounding elements – here the non-hatched background, filename, file size and the area for selecting a file in the upper area – belong to the file selection.
The layout of the frame style and hatched area of the Image Editor can be edited using the "Basis colors" and "Basis" variables. These two variable groups are fundamental for the variables that you will find in the "Advanced" category.
The layout of the button that you can use to open the Image Editor is defined via the variables in the "Advanced / Trigger (button)" area.
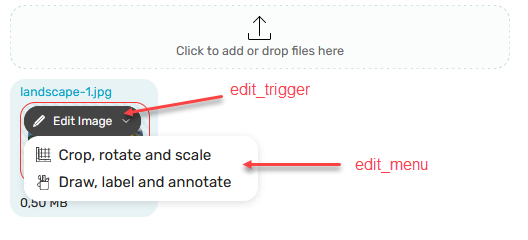
The button displays the "Edit image" area when the mouse is over it and, when clicked, the two menu items for the editors, provided that both editors have been activated in the properties of the file selection. If only one of the editors is activated, it is opened immediately when the button is clicked and no further menu is opened. The layout of the button can be edited using the variables in the "Advanced/ Trigger (button)" area, and the menu and menu items using the variables in the "Menu" and "Menu item" category.
Template 2 and 4
With templates 1 and 4, you can access the editor via two ![]()
![]() buttons provided by the file selector. This means the layout of the buttons cannot be edited using variables. The layout of the hatched area here in the illustration can be changed via the corresponding variables, as with templates 1 and 3 – with the exception of the Edit button, which is omitted here.
buttons provided by the file selector. This means the layout of the buttons cannot be edited using variables. The layout of the hatched area here in the illustration can be changed via the corresponding variables, as with templates 1 and 3 – with the exception of the Edit button, which is omitted here.
Editor layout - Background and buttons
The layout of the toolbar in the editor can be edited using the variables in the "Advanced/ Toolbar" area. Variables for the background and variables for the layout of the buttons are available.
Assigning variables in the application
As usual, new "Image Editor" control elements can be added in the "Control Elements" area in all layouts and their appearance can be edited by changing the values for the variables.
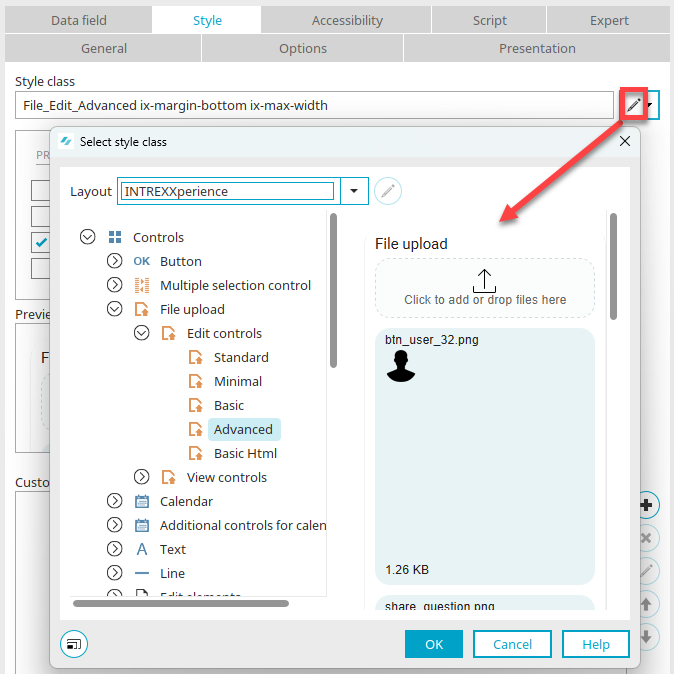
The control elements can then be assigned to the file selection elements in applications via the style class on the "View" tab in the Application Designer.
The appearance of the Image Editor can be changed through individual customization. Customization overwrites the values of the CSS variables. The individual customization is only valid for the currently edited Image Editor and has no effect on other Image Editors that are also included in the application.