Investment Request
The "Investment request" application template provides you with an application that portal users with the "User" role can use to submit investment requests. These can then be approved or rejected by appropriately assigned portal users with the "Editor" role.
The application template with the available sample data is designed for Investment Requests. You can also use the application for requests of any kind that are required to go through an approval procedure with different statuses, and adapt the application accordingly.
For example, portal users with the "Manager" role can create any status that an application should pass through.
Actions in the portal
Creating an Investment Request
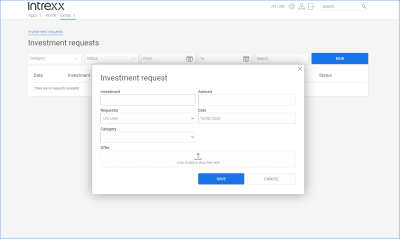
In the "User" role, you have access to the "Investment application" page. You can create Investment Requests on this page.
![]()
Investment
Enter a title or short description here for the investment you would like to apply for.
Applicant
Select the applicant here. The user who is currently logged in to the portal is preselected.
Category
Select the category your Investment Request falls into here.
Amount
Enter the amount of the Investment Request here.
Amounts below a set amount must not be approved. The amount is determined by portal users with the "Manager" role.
Date
Enter the Investment Request date here. The current date is preset.
Offer
Here you can add the tender (or another document) to the Investment Request.
Deleting an Investment Request
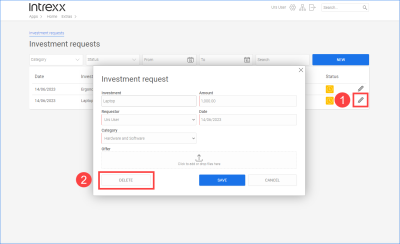
In the "User" role, you can delete your own investment applications.
![]()
Click on the pencil icon (![]() ).
).
Click on (![]() ).
).
Checking Investment Requests – approving and declining requests
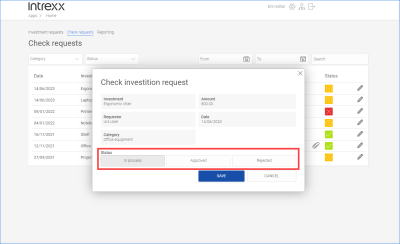
In the "Editor" role, you have access to the "Check applications" page. There you can change the status of the investment application by clicking on the corresponding button (e.g. "Approved", "Rejected").
Which buttons are displayed depends on which statuses have been created on the "Administration" page (see Add status).
![]()
Reporting – checking Investment Requests
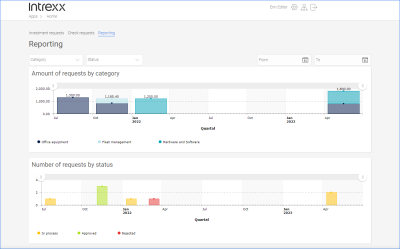
In the "Editor" role, you have access to the "Reporting" page. There you will find a graphical overview of the Investment Requests submitted.
![]()
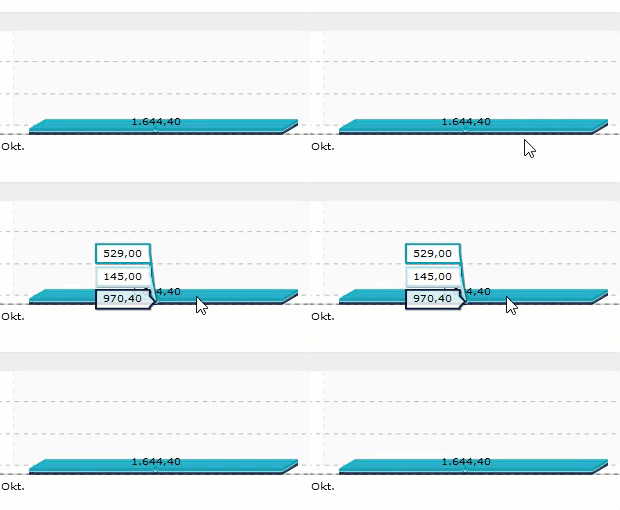
The individual Investment Requests – divided into categories – are added up.
If you position the mouse on the individual bars, the totals of the individual investment applications are displayed.
Processing an Investment Request
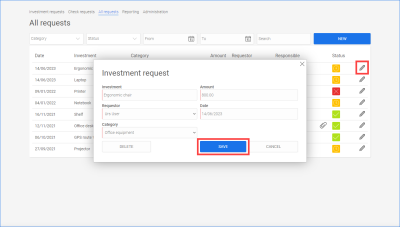
In the "Manager" role, you have access to the "All applications" page. On that page you can process Investment Requests.
![]()
Click on the pencil icon (![]() ).
).
Make the changes you want.
Click on (![]() ).
).
Add category
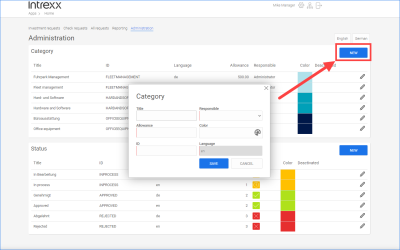
In the "Manager" role, you have access to the "Administration" page. You can create new categories there. When Investment Requests are entered in the portal, they must be assigned to a category.
![]()
Click on the button to create a new category.
Title
Enter a title for the category here.
Allowance
Enter the allowance here. No approval or status change is required for the Investment Request up to and including the amount entered here.
Responsible person
You can select a responsible person here.
A responsible person can check and approve Investment Requests or change the status of the Investment Request.
Color
Select a color for the category here.
ID
Provide the category with an ID. You can use any characters for the ID.
The ID cannot be changed once it has been saved.
Delete category, deactivate category
Categories cannot be deleted manually. They must be deactivated first. The deletion will then be carried out automatically by Intrexx.
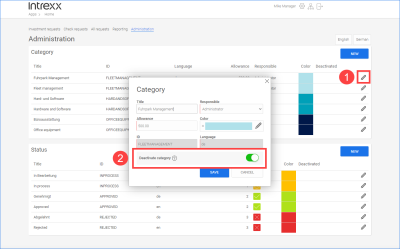
In the "Manager" role, you can deactivate categories on the "Administration" page.
To do this, click on the pencil icon (![]() ).
).
Activate the "Deactivate category" toggle switch (![]() ) in the dialog box.
) in the dialog box.
![]()
Add status
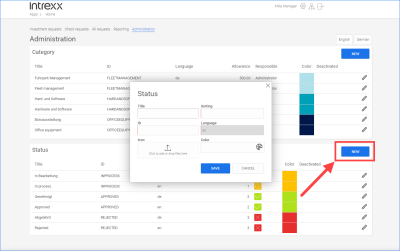
In the "Manager" role, you have access to the "Administration" page. You can create a new status there.
You can use the status, among other things, to help you map a workflow for handling investments. If you want to define the approval process for an investment application in great detail, you can enter a corresponding number of statuses here.
![]()
Click on the button to create a new status.
Title
Enter a title for the status here.
ID
Enter an ID for the status here. You can use any characters for the ID.
The ID cannot be changed once it has been saved.
Sort
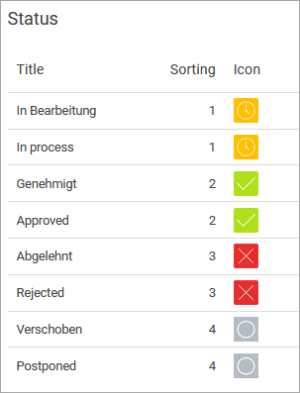
You can sort the different statuses by entering integers. This can be used to map the approval workflow. This could look like the example below:
The statuses are sorted numerically.
Icon
Enter an icon for the status here.
Color
Select a color for the status here.
Deleting statuses, deactivating statuses
Statuses cannot be deleted manually. They must be deactivated first. The deletion will then be carried out automatically by Intrexx.
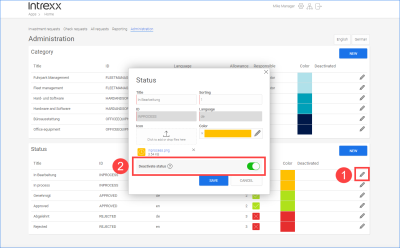
In the "Manager" role, you can deactivate statuses on the "Administration" page.
![]()
To do this, click on the pencil icon (![]() ).
).
Activate the "Deactivate status" toggle switch (![]() ) in the dialog window.
) in the dialog window.
More information
