Calendar plugin
The "Calendar" application template provides you with a calendar in which all portal users with the appropriate rights ("User" role) can enter appointments.
Portal users with the "Manager" role can create categories and highlight or mark calendar days. Categories must be assigned to an appointment when it is created. Using and assigning categories makes it easier to search for and find appointments.
You can mark calendar days. These are color-coded in the calendar.
Actions in the portal
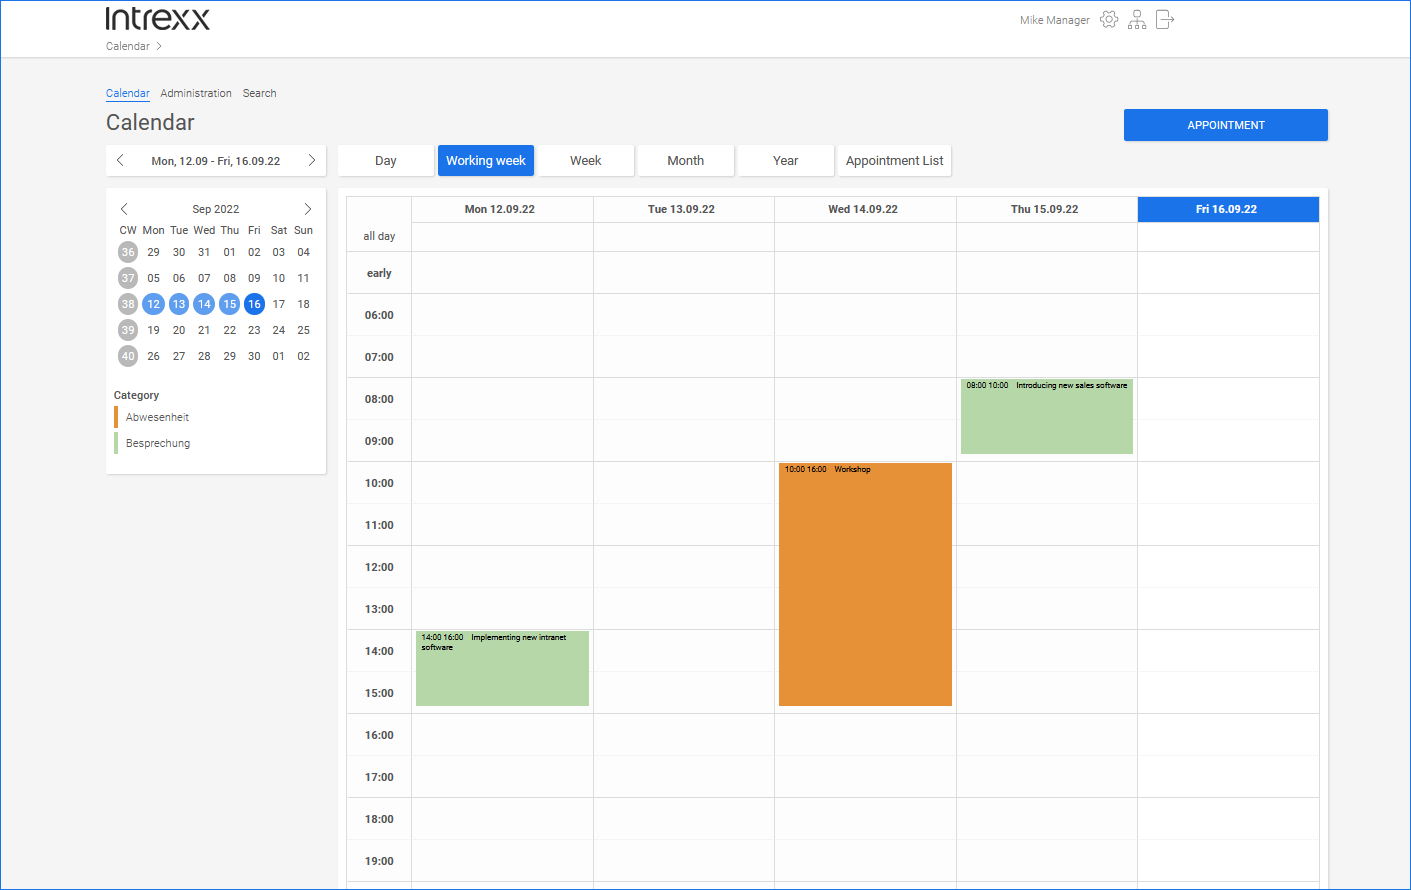
Enter appointments
In the "User" role, you have access to the "Calendar" page. You can enter appointments there.
![]()
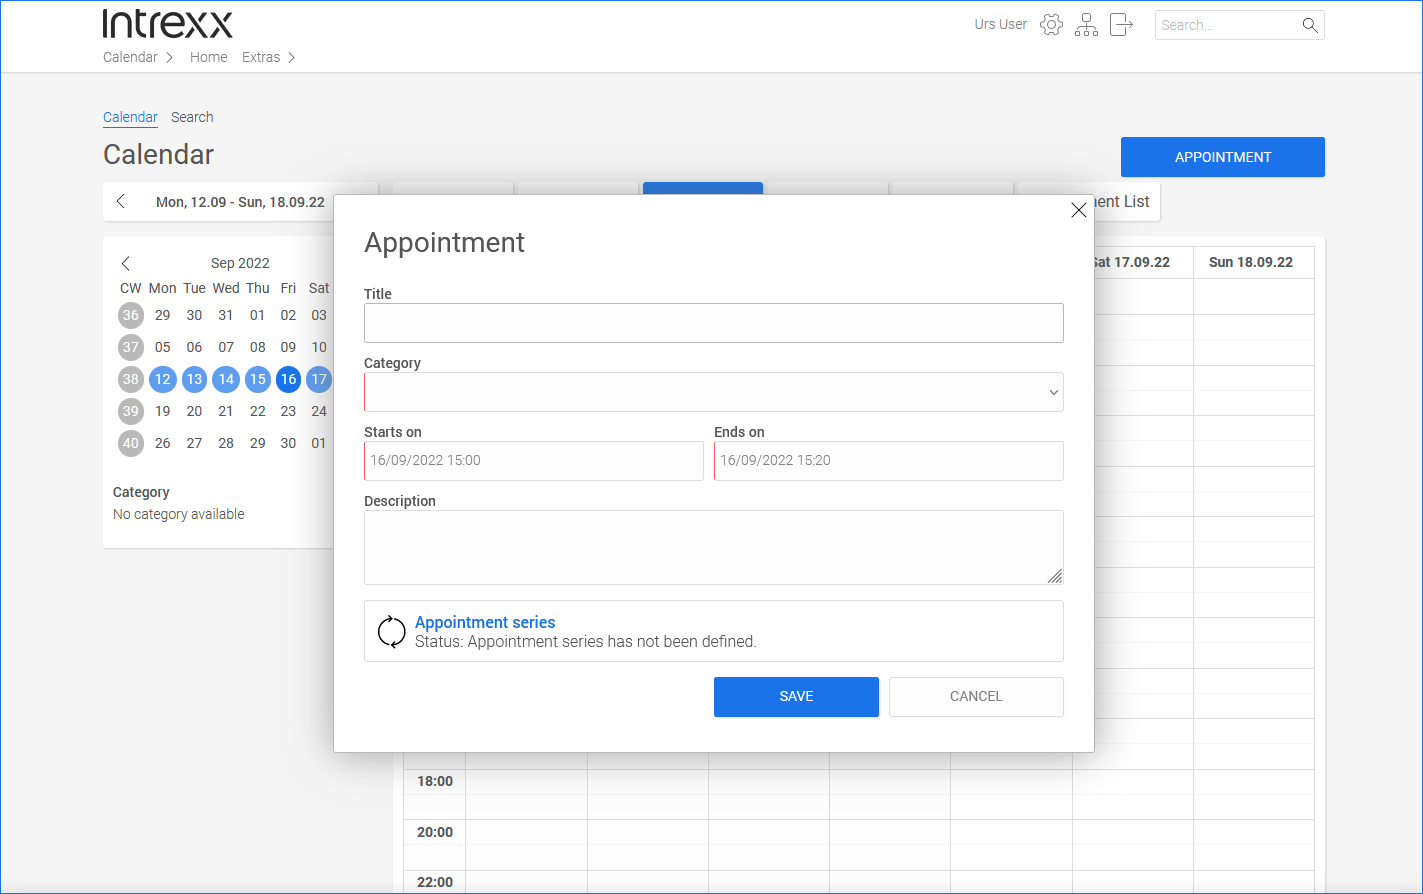
Title
Enter a title for the appointment here. This will be displayed later in the calendar.
Category
Assign a category to the appointment. The category will be displayed later in the calendar. Specifying a category makes it easier to find appointments via the "Search" page.
Starts on - End on
Enter the start and end date of the appointment here.
Description
(Optional) Here you can enter more detailed information about the appointment.
Appointment series
You can also create a series of appointments. Click on the word appointment series.
Detailed information on this can be found in section Create appointment series
Click on the button to enter an appointment.
You can also click on a calendar field with the left mouse button. Afterwards, the window with information required for the appointment will be displayed. The previously selected date is then preset.
Create appointment series
Click on the button to enter a series of appointments.
![]()

Click on the word appointment series.
![]()
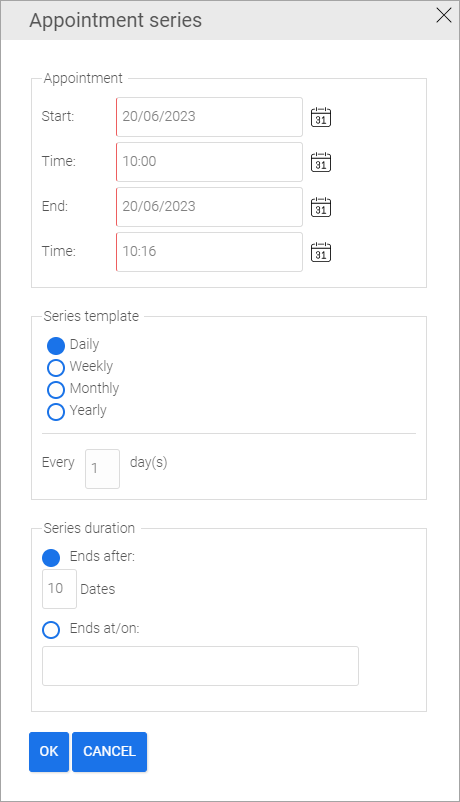
Enter the appropriate information.
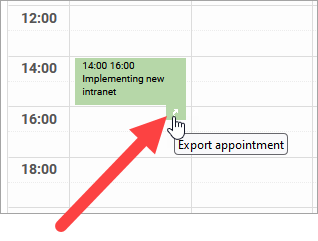
Export appointment
You can export appointments in Outlook format (.ics). To do this, click on the arrow icon in the displayed appointment.
![]()
Delete appointment
Left-click on the appointment you want to delete.
The window with the appointment details will be displayed.
Left-click on the appointment you want to delete.
The window with the appointment details will be displayed.
![]()
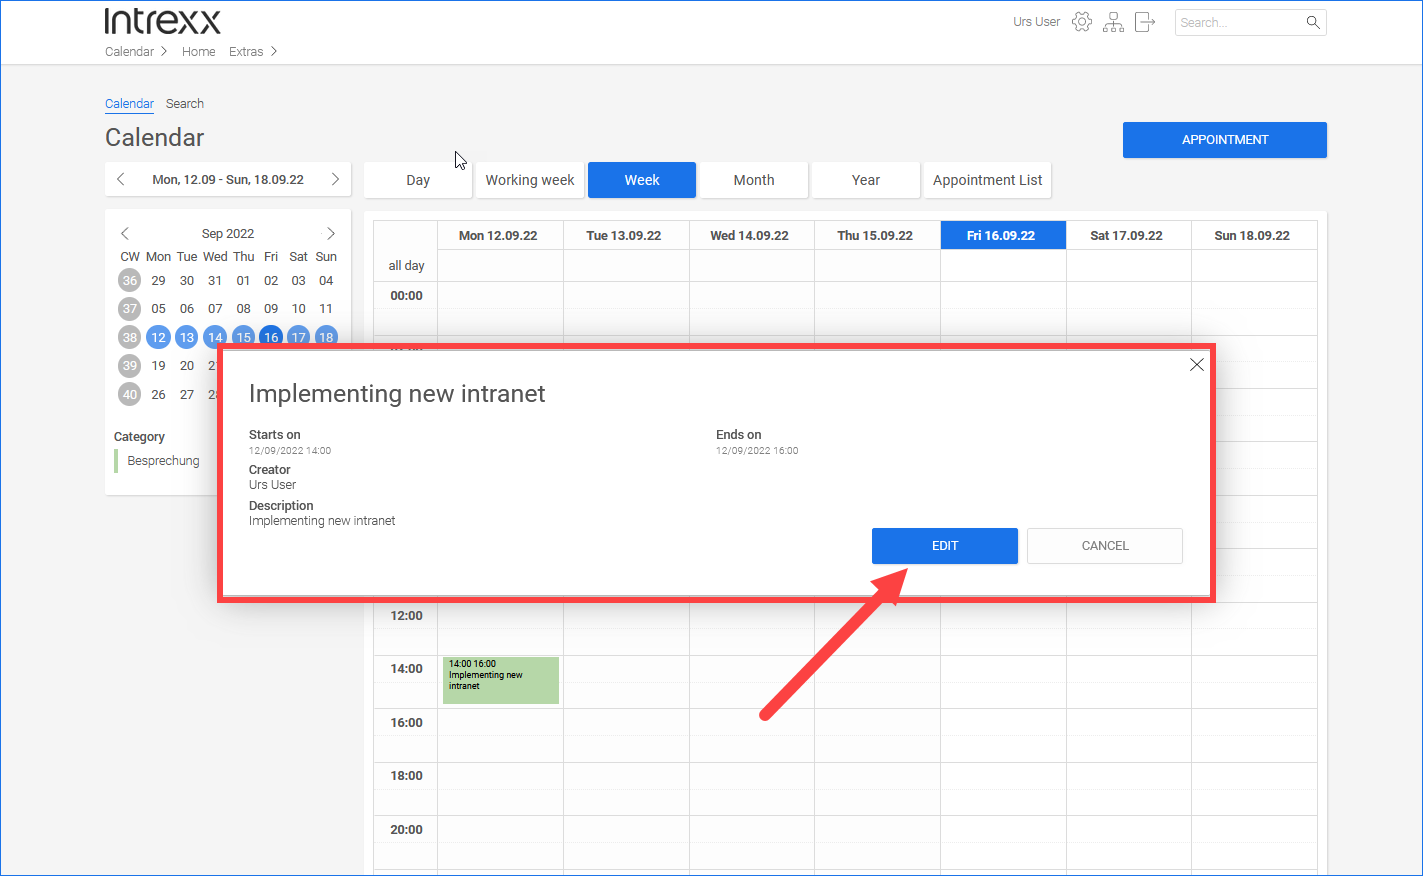
Click on .
This takes you to the page for editing the appointment.
![]()
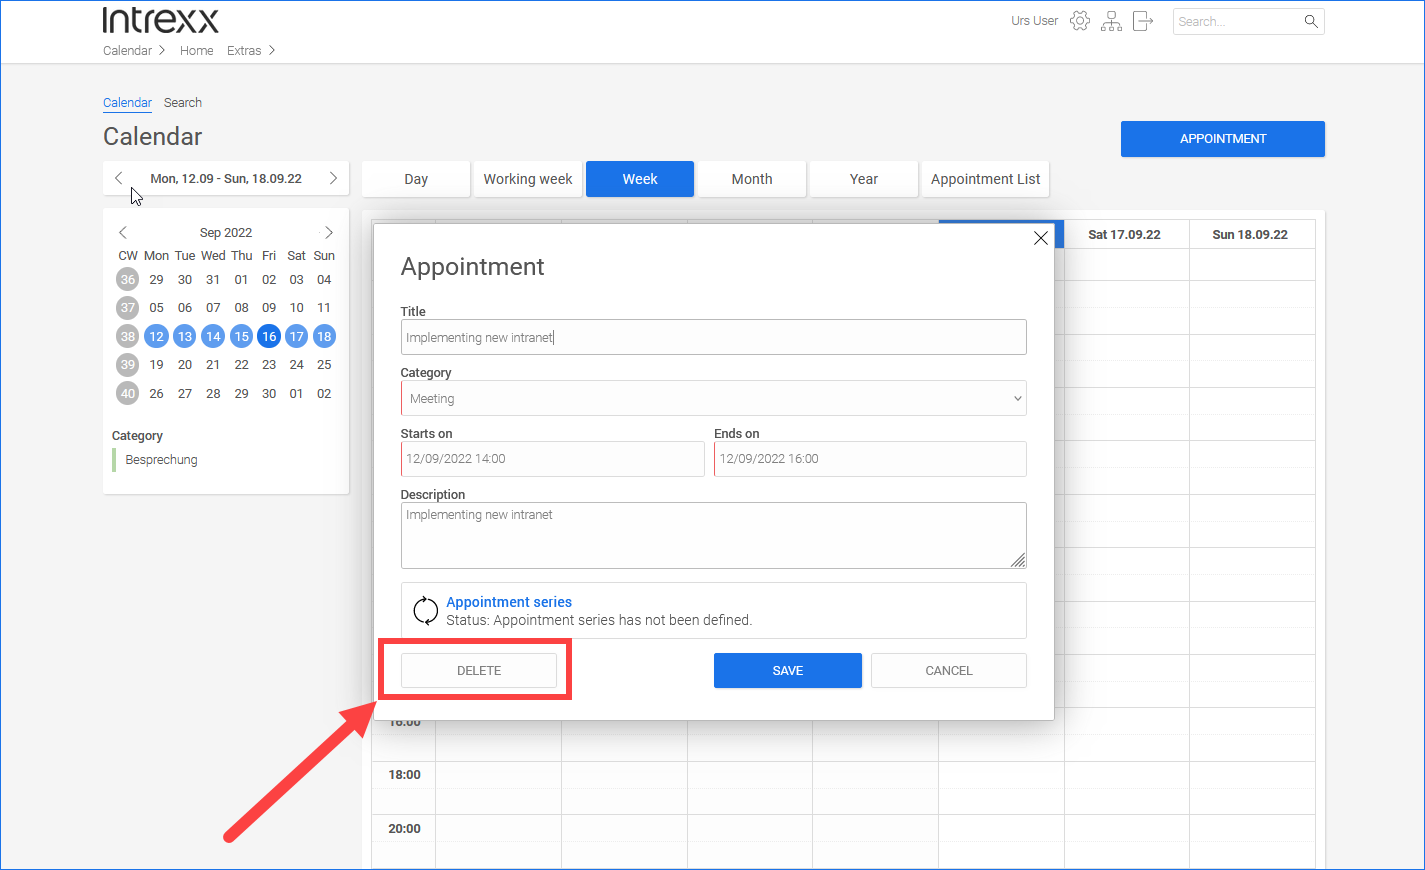
Click on the Delete button.
Then confirm that you want to delete the appointment.
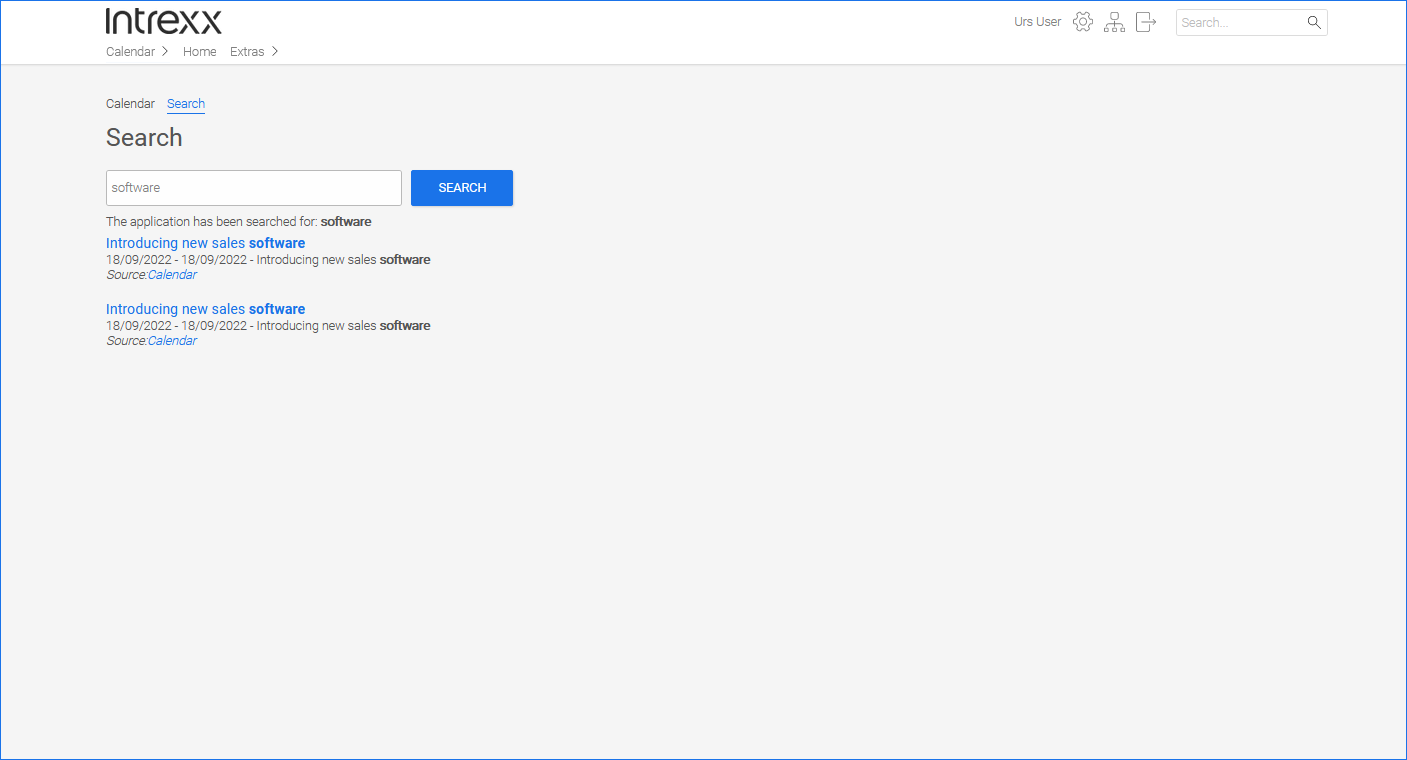
Search for appointments
In the "User" role, you have access to the "Search" page. There you can search for appointments.
The title, category and description are included in the search.
![]()
Add category
In the "Manager" role, you have access to the "Administration" page. You can create new categories there. When you create appointments, you must assign them to a category. This makes it possible to sort and find individual appointments.
![]()
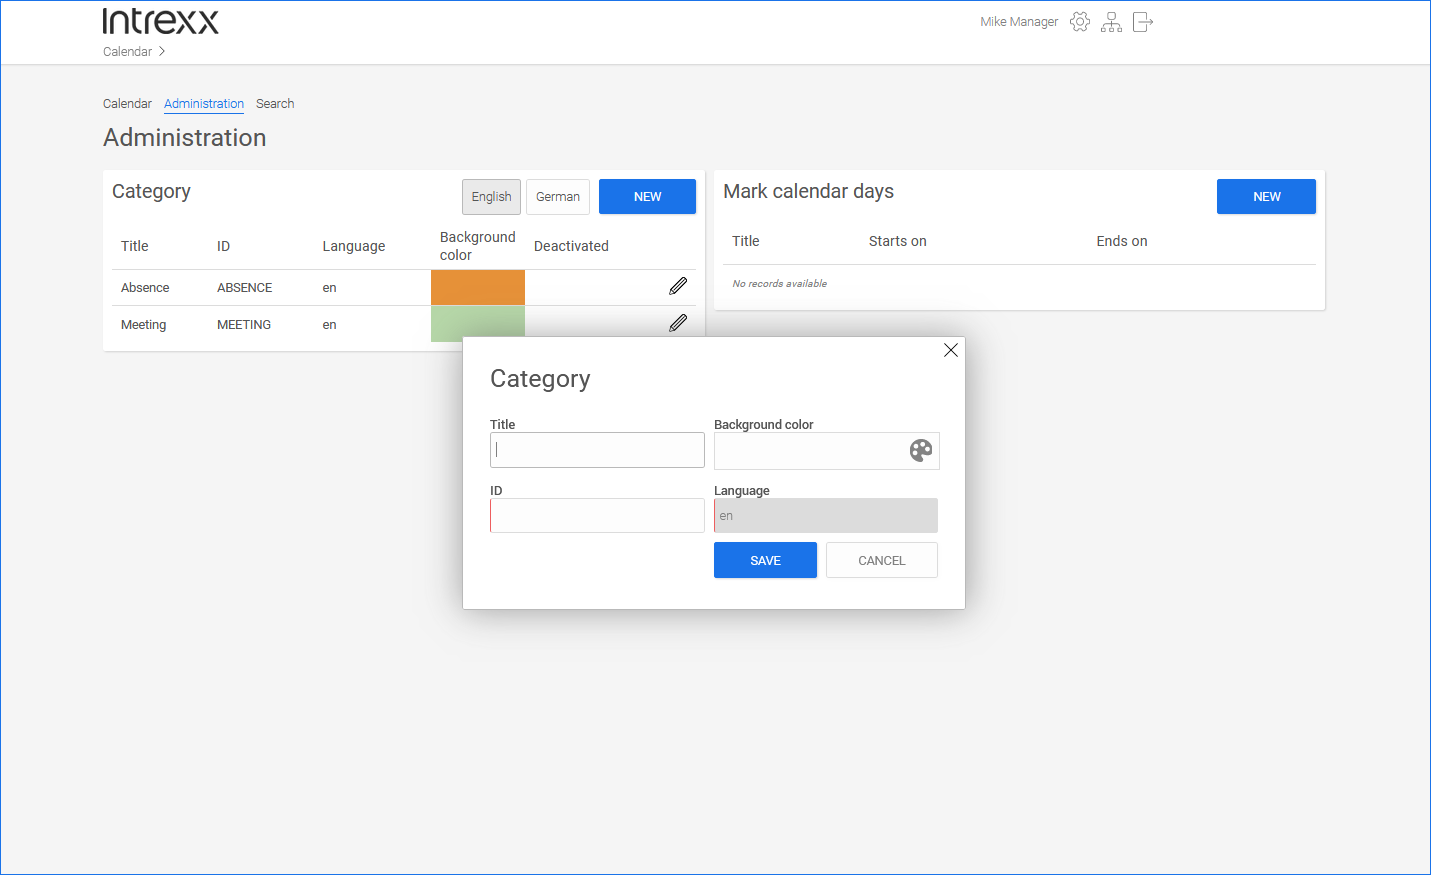
Click on the button to create a new category.
After saving, the ID can no longer be changed.
Delete category, deactivate category
Categories cannot be deleted manually. They must be deactivated first. The deletion will then be carried out automatically by Intrexx.
In the "Manager" role, you can deactivate categories on the "Administration" page.
To do this, click on the pencil icon (![]() ).
).
Activate the "Deactivate category" toggle switch (![]() ) in the dialog box.
) in the dialog box.
![]()
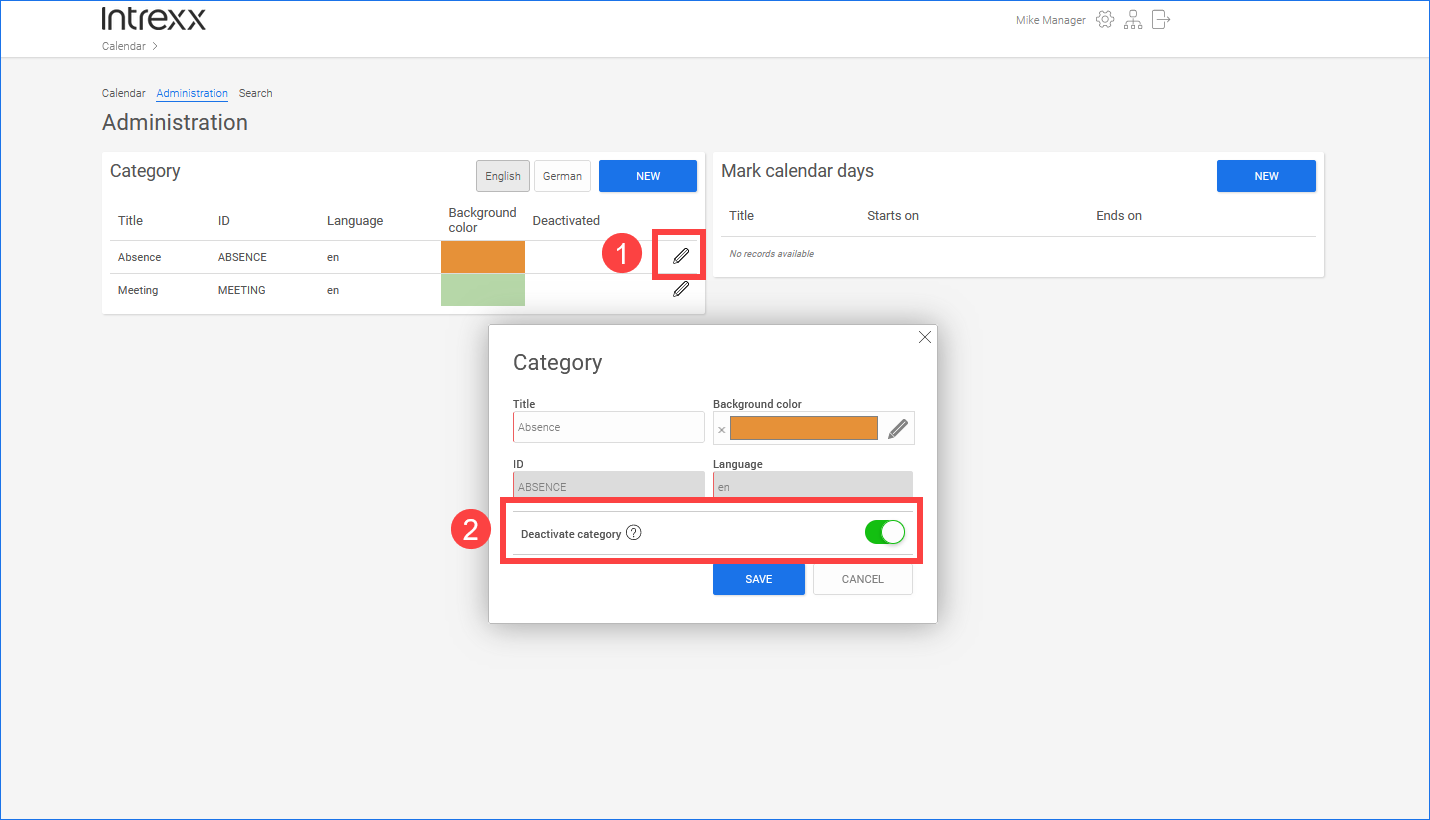
Deactivated categories are automatically deleted by a background job at regular intervals.
Highlight calendar days
In the "Manager" role, you have access to the "Administration" page. You can highlight calendar days there. Usually, these are holidays or other days that are relevant company-wide.
![]()

Click on the button to enter a calendar day.
Enter a title, and a start and end date.
Save your entries.
Delete calendar days
In the "Manager" role, you can delete calendar days on the "Administration" page.
To do this, click on the pencil icon (![]() ).
).
![]()
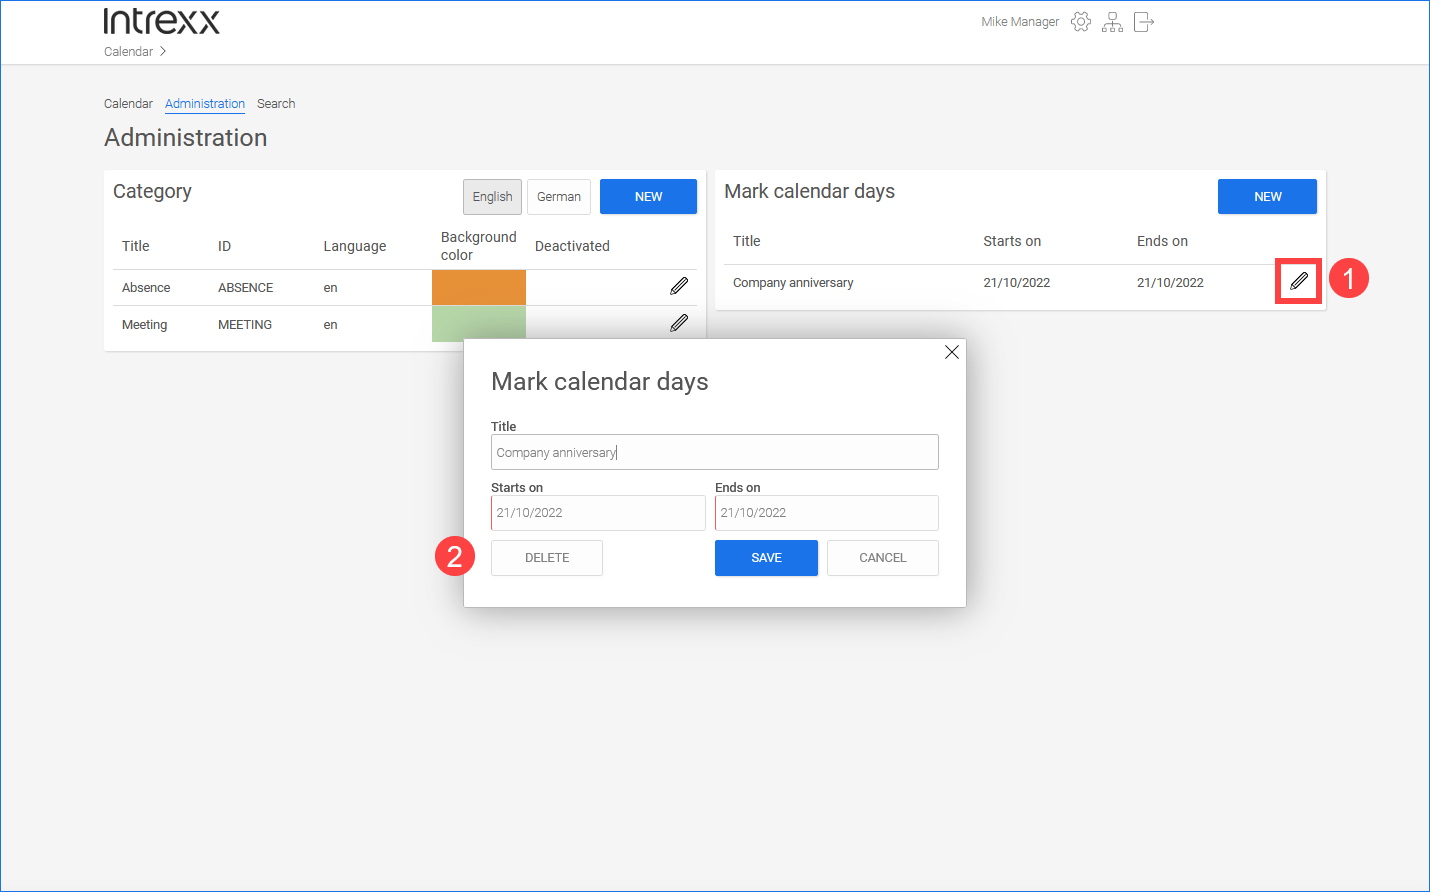
Click on the button (![]() ).
).
Then confirm that you want to delete the calendar day.
More information