Create an API endpoint for an application
Starting situation
You use the "Task Scheduler" application to manage your projects.
The application "Task Scheduler" is one of many application templates available free of charge in Intrexx. For more information, see the following sections:
There are three teams in your company: Finance, Marketing and Sales.
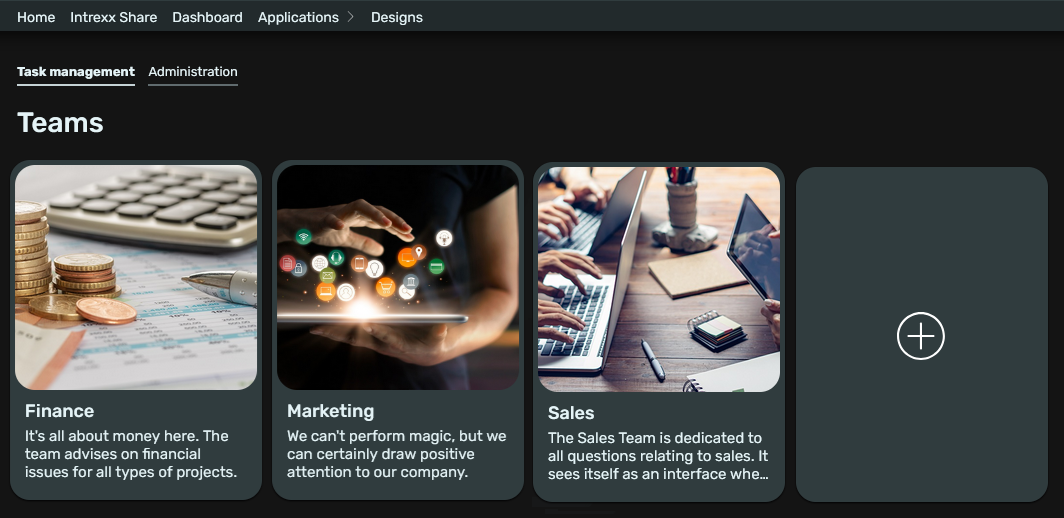
You (David Winter) are part of the Sales team.
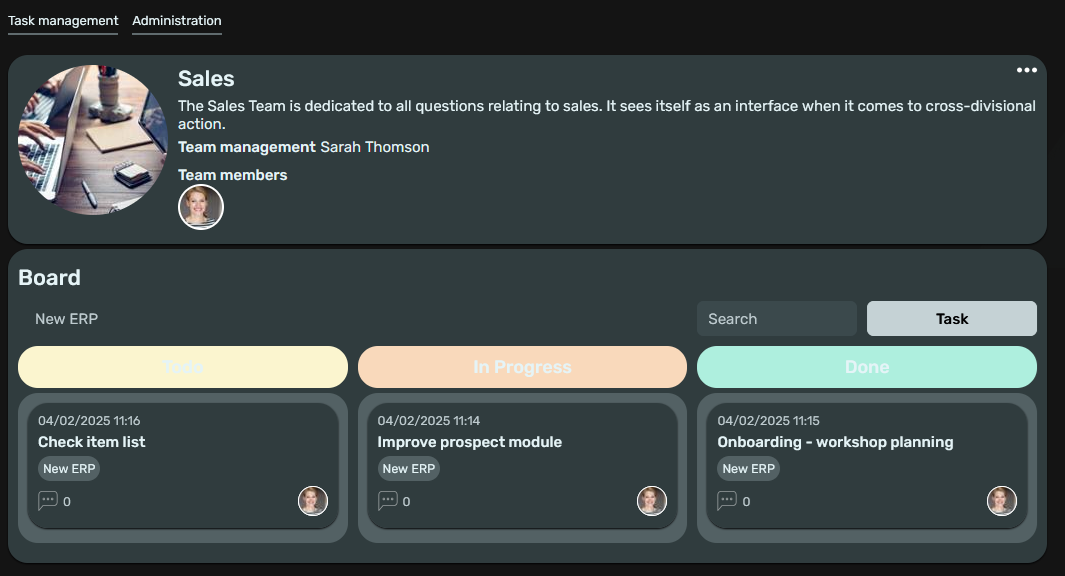
Currently, your team is working on the "New ERP" project. Three tasks have been created for your team. One task has the status "To-do", the other "In progress" and the other "Completed".
Goal
As a member of the Sales team, you will be traveling a lot. You also want to get a quick overview of teams on the go via a mobile app or other "external software". The solution for this is described in this tutorial.
You will create a REST interface for task scheduling with the Intrexx Application API. This provides all the data you require. They can then be consumed from an APP or cloud product.
The Intrexx Application API gives you the option of generating OpenAPI compatible documentation (Swagger documentation). You can use this to create an APP or pass it onto a third-party provider.
Tutorial content
This tutorial describes in detail how you can create a REST interface for the "Task Scheduler" application in Intrexx. As part of the process, the required data group endpoints are created, the corresponding rights are assigned and an API key is generated for authentication.
It then describes how to generate the Swagger documentation.
As an API consumer, "Postman" is used in this tutorial as a proxy for an APP or cloud product.
Preparatory tasks
-
Create demo portal or import "Task Scheduler" application into existing portal
This tutorial describes how to create the REST API interface based on the Intrexx demo portal. You can find out how to create a new portal using the Intrexx demo portal as a template in the following section: Using Intrexx Demo Portal as a Portal Template
Alternatively, you can import the "Task Scheduler" application template into an existing portal. The corresponding procedure is described in the following section: Import online application templates.
-
Create user "David Winter".
In the tutorial, the user for the REST API interface is named David Winter. He has the "User" role.
In the Intrexx demo portal, this user is created by default.
-
Download Postman or use online
Install the Postman Client or use "Postman for the Web".
Create data group endpoint - Read multiple records
Step-by-step guide
-
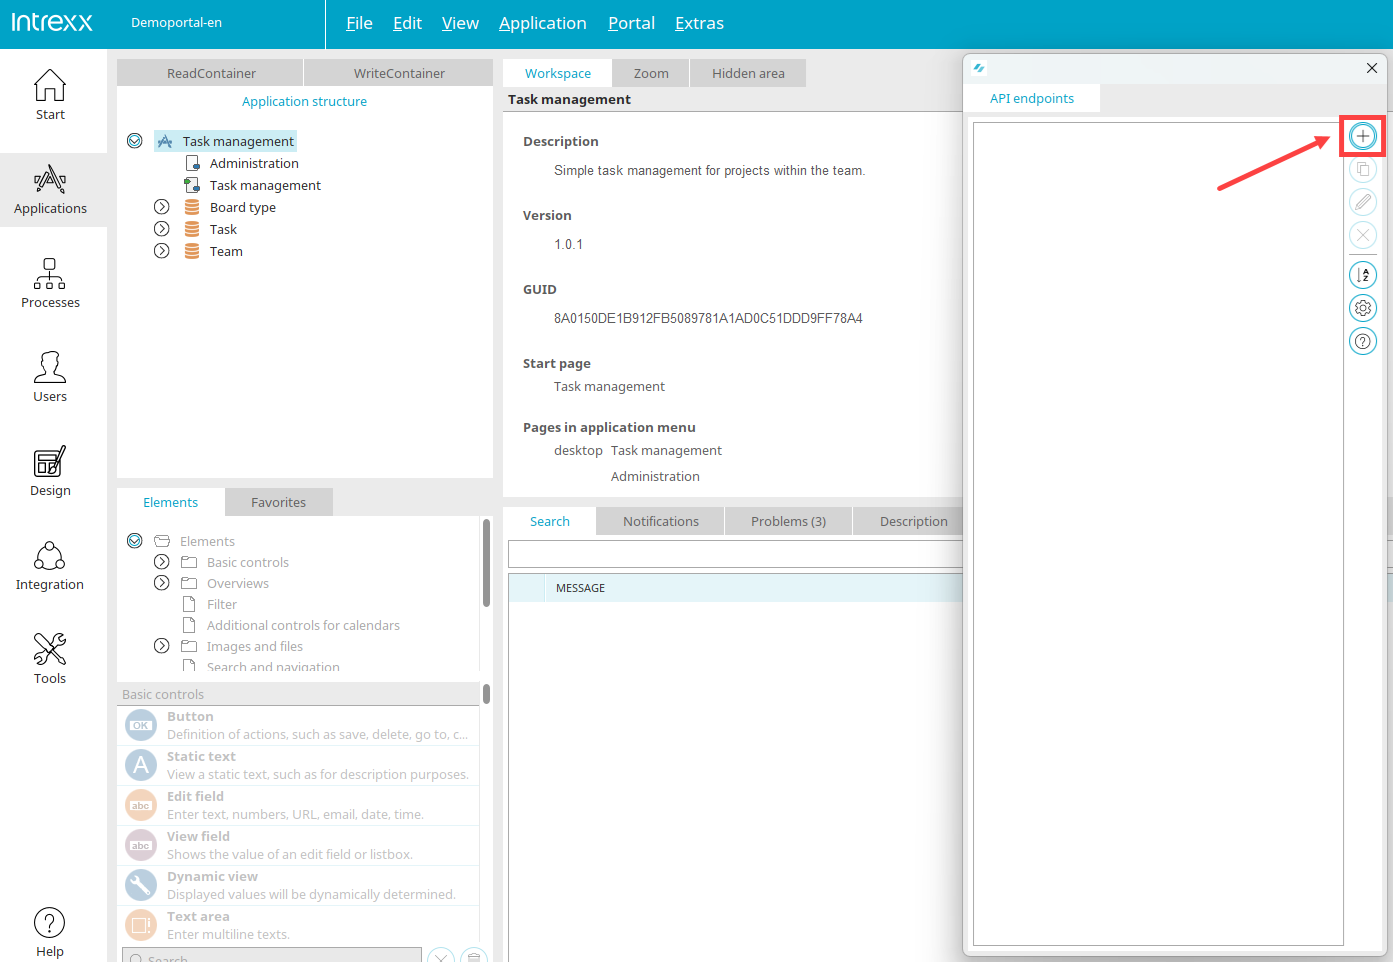
Open the "Task Manager" application.
Click
 (Create new endpoint).
In order for the "API endpoints" area to be displayed, you must activate the "API endpoints" checkbox in the main menu under "View" Activating the "API Endpoints" view.
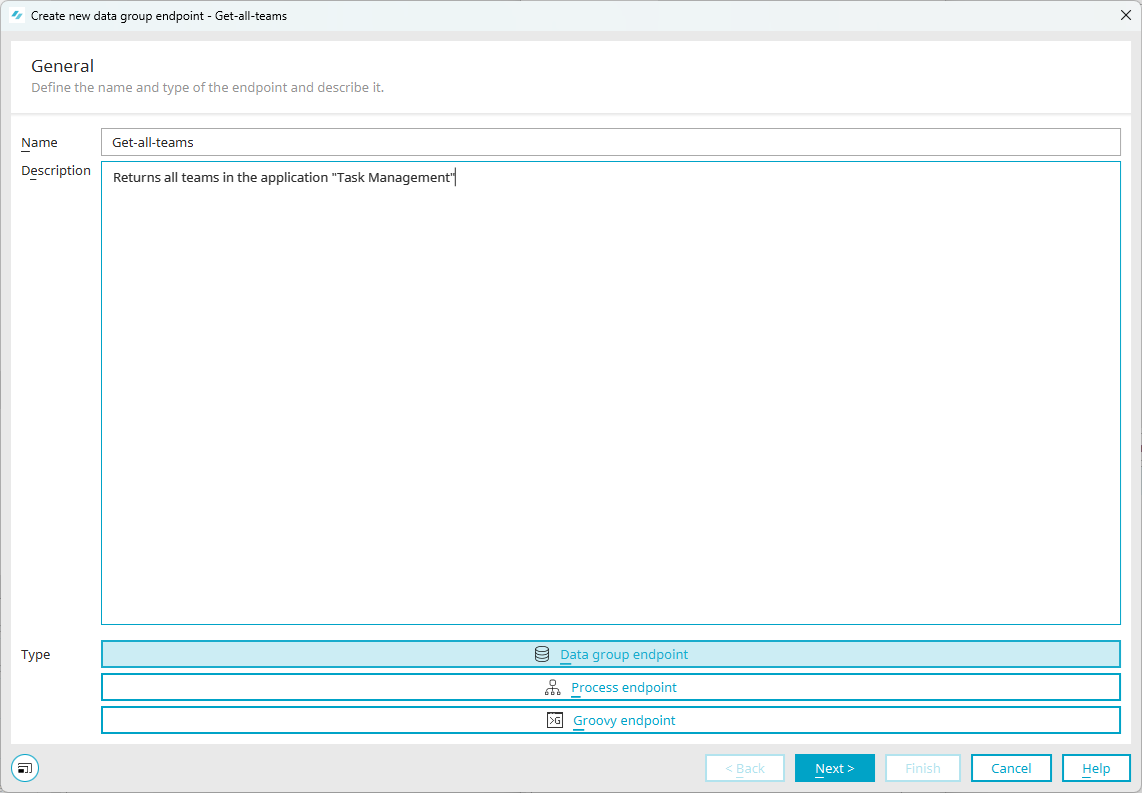
The "General" dialog step appears.
-
Enter a name and description for the endpoint.
The name must be unique, consist of at least two characters and start with a letter. Only alphanumeric characters, hyphens, underscores and periods are allowed.
The texts captured in the dialogs enter the Swagger documentation. Therefore, it is highly helpful for you and a potential service provider if you choose meaningful terms and follow a naming convention.
-
Click "Data group endpoint".
-
Click on "Next".
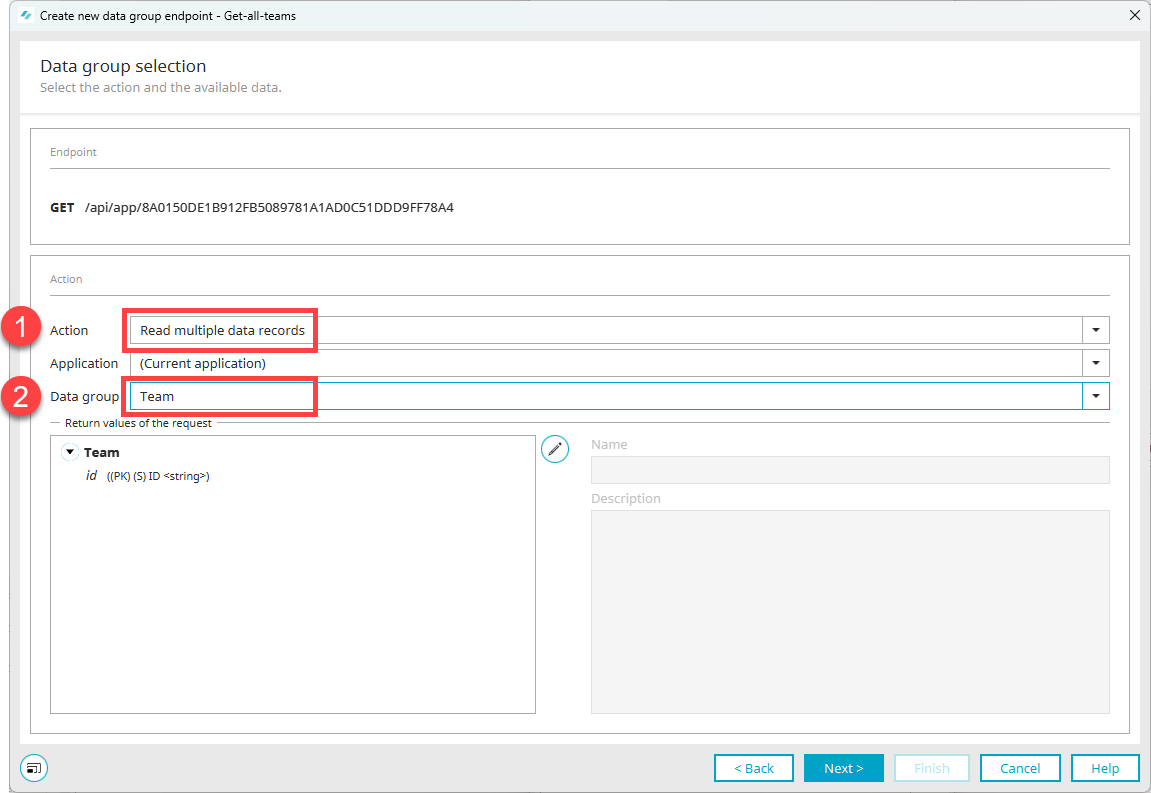
The "Data group selection" dialog step appears.
-
In the "Action" selection field, select the "Read multiple records" value.
-
In the "Data group" selection field, select the "Team" value.
Step-by-step guide
-
Click on the
 icon.
icon.The "Add Data Fields" dialog box is displayed.

-
Clear the checkbox "(PK) (S) (ID)" <string>
-
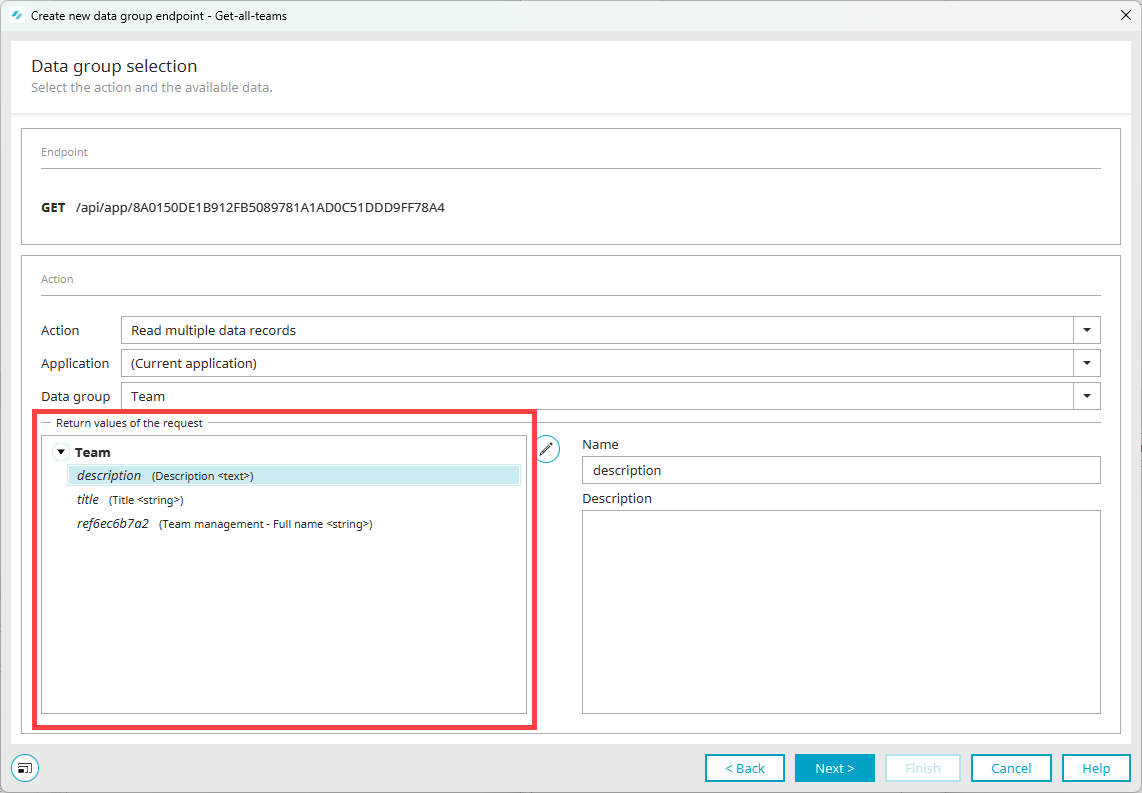
Select the following checkboxes:
-
Description <text>
-
Title <string>
-
Team leader - Full name <string>
-
-
Click on "OK".
You will return to the "Data group selection" dialog step.
The previously selected data fields will be displayed in the "Query return values" area.
For better readability of the return values and the Swagger documentation, we recommend that the return values are renamed.
-
In the "Query return values" area, select a return value.
-
In the right pane, enter a name and description for the return value.
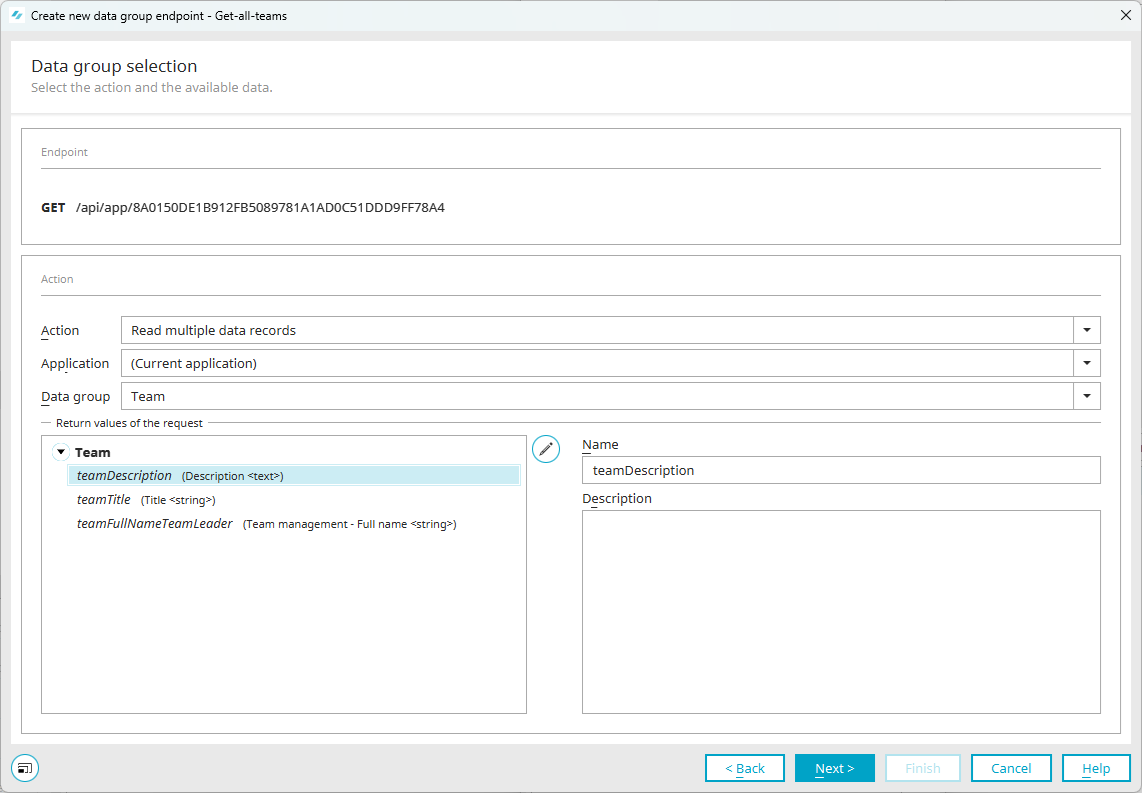
We use "Camel notation" in our example. The first part of the name indicates the application or resource.
-
teamDescription
-
teamTitle
-
teamFullNameTeamLeader
-
-
Rename all return values.
-
Click on "Next".
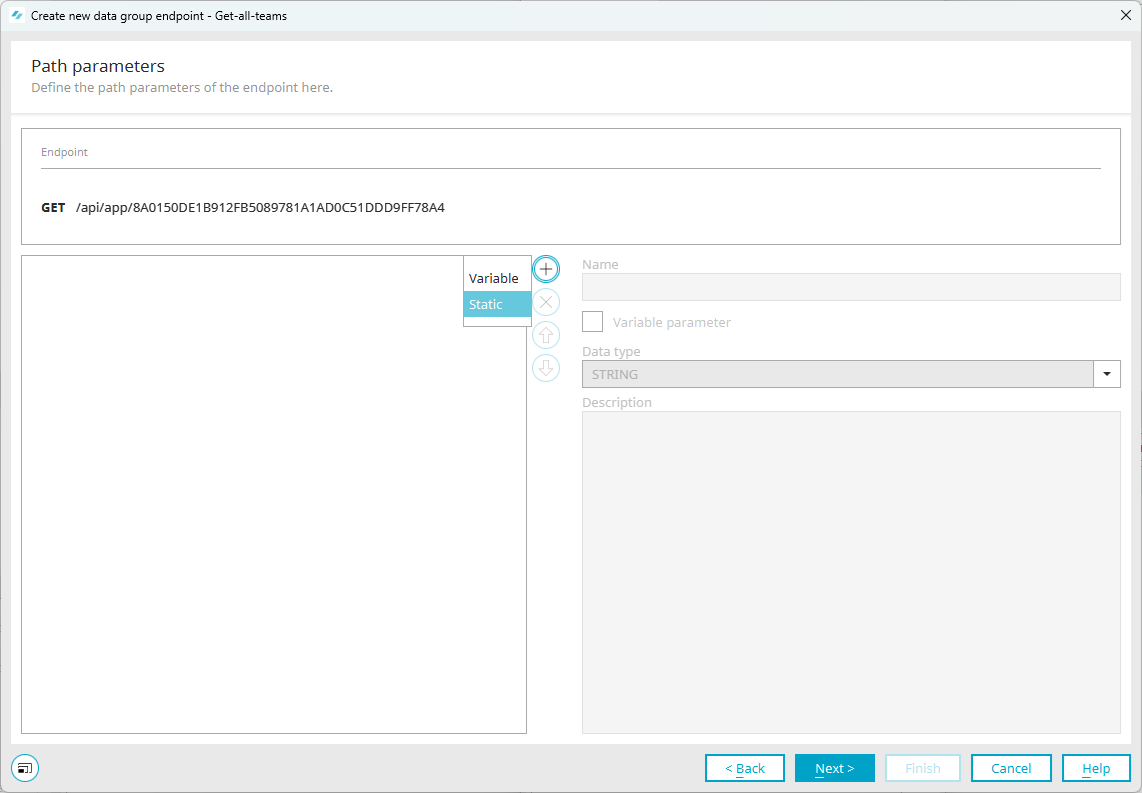
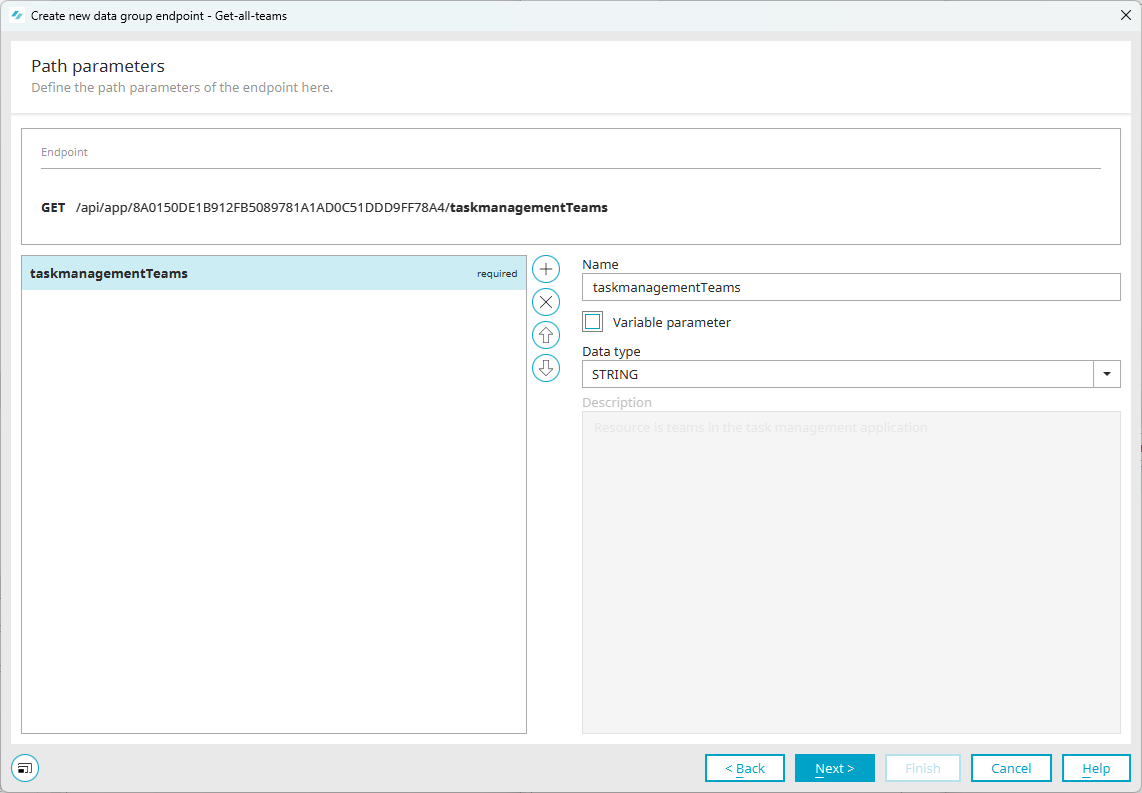
The "Path parameters" dialog appears.
The specification of a path parameter is mandatory. We use a static parameter. We use the static path parameter to specify the resource.
Step-by-step guide
-
Click on the
icon. -
Click "Static".
-
Enter the name "taskmanagementTeams" and a meaningful description.
-
Click on "Next".
The "Query parameters" dialog step appears.
In the Query parameters dialog step, no specifications or queries are required, since we want to determine all teams.
Click on "Next".
You are taken to the "Filter and sort" dialog.
In the dialog step "Filter and sort”, we define how return values are sorted. It is to be done on the basis of the team title.
Step-by-step guide
-
Click on the
icon.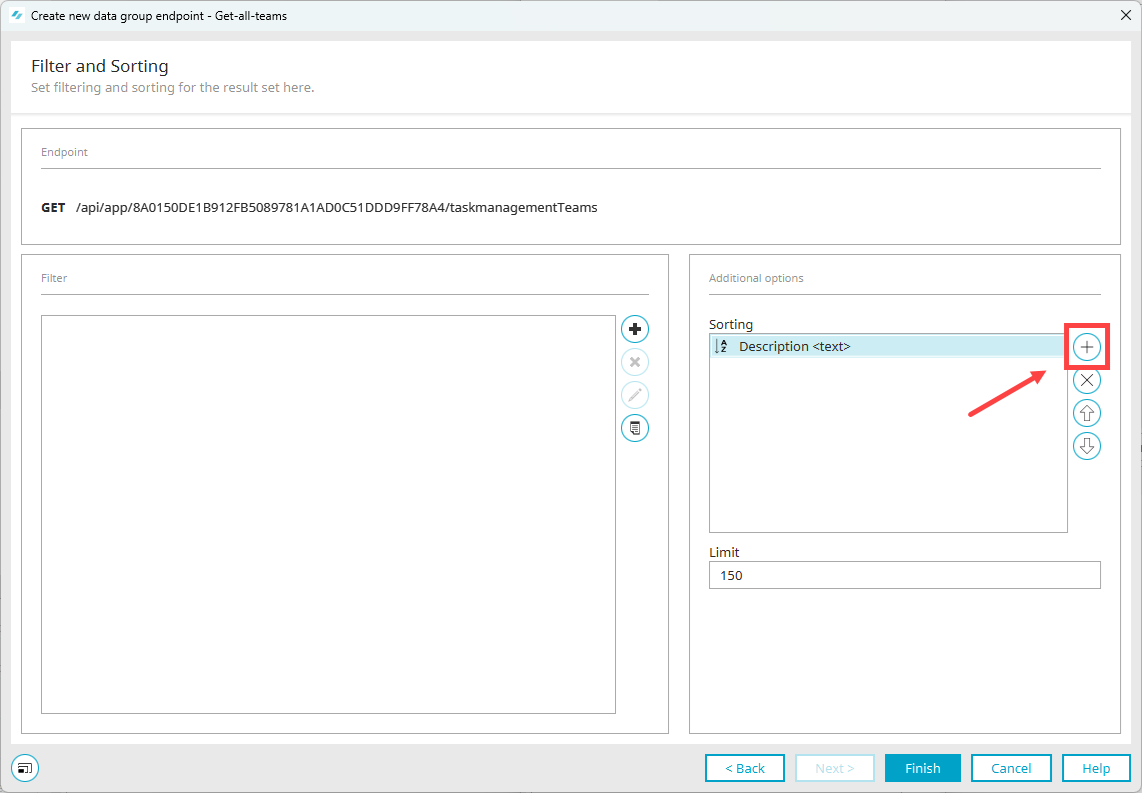
-
Select "Team > Title <string>".
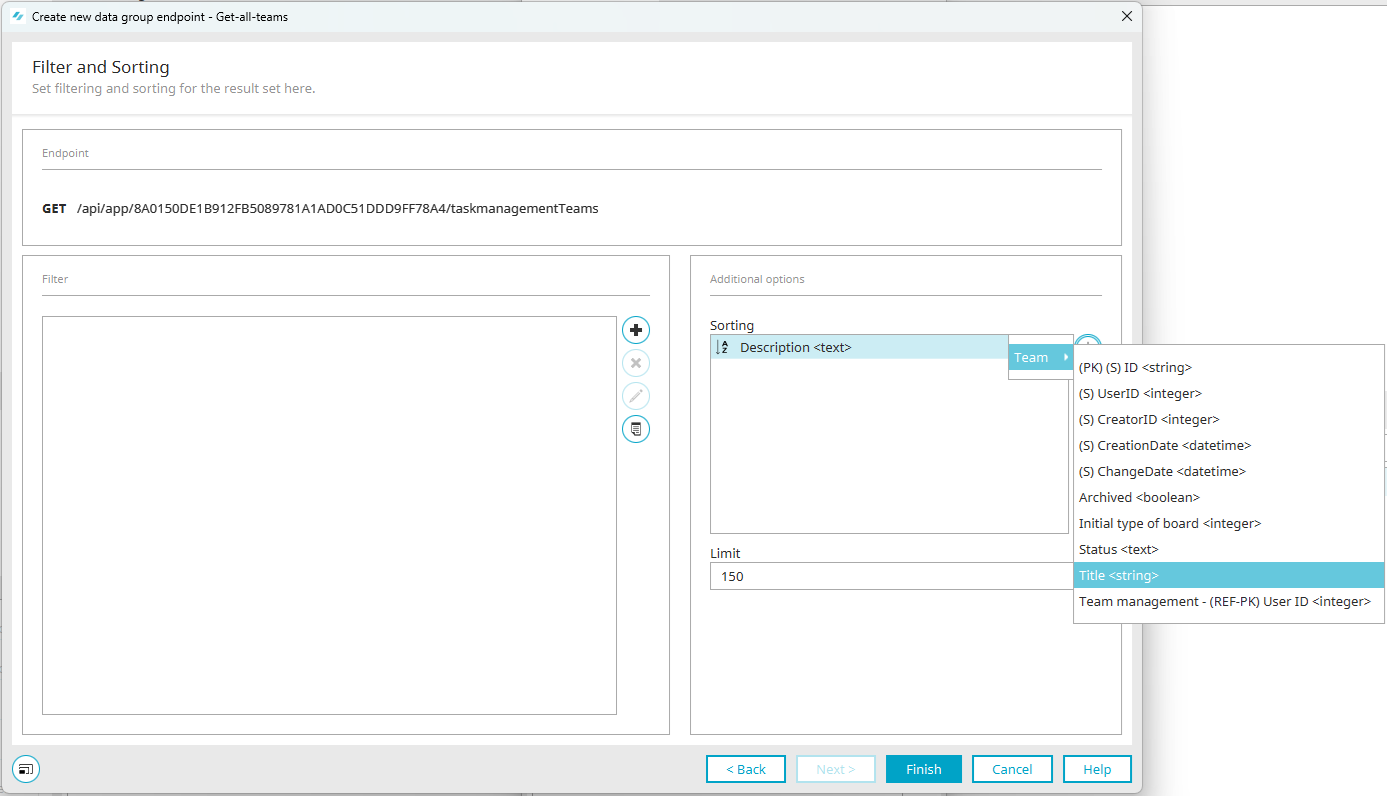
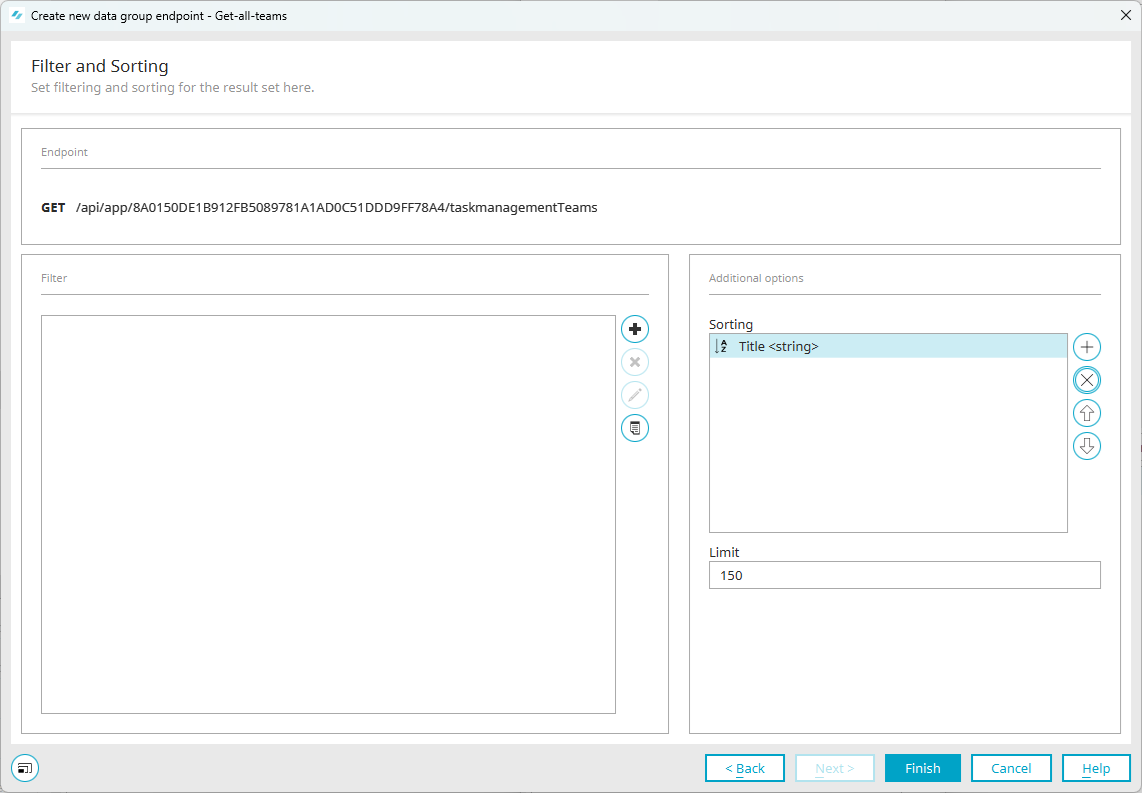
The selected sort is displayed.
-
Remove other sorts, if available.
-
Click on "Finish".
The newly created endpoint is displayed in the API Endpoints area.
-
Click on the
 icon (Publish application completely).
In this step, we grant the user David Winter the right to use the previously created endpoint.
In the following step, we assign the API key to the user David Winter, so that he has all the necessary rights to use the API endpoint.
Step-by-step guide
-
Open the properties dialog for the "Task Management" application.
To do so, highlight the application and press "ENTER".
Or
Select the application and click the right mouse button.
Click on "Properties" in the context menu.
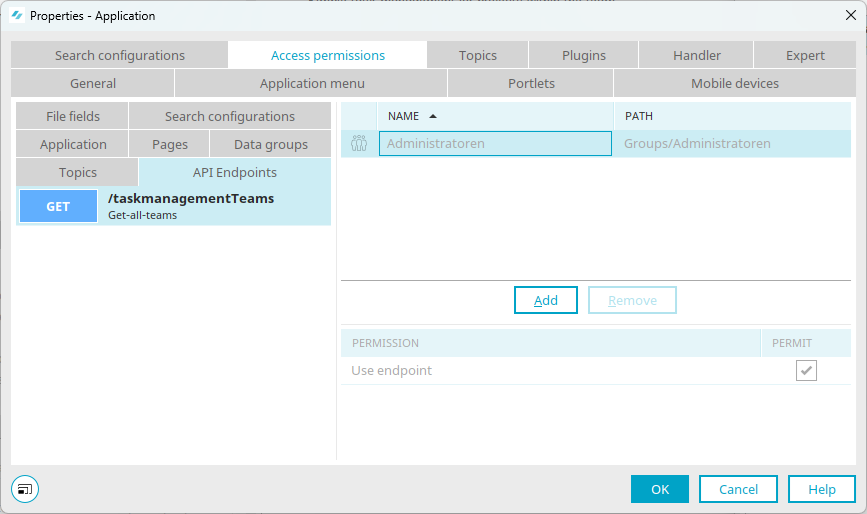
The "Properties - Application" dialog is displayed.
-
Go to the "Permissions" tab.
-
In the left pane, go to the "API Endpoints" tab.
Select the endpoint "/taskmanagementTeams".
-
Click on "Add".
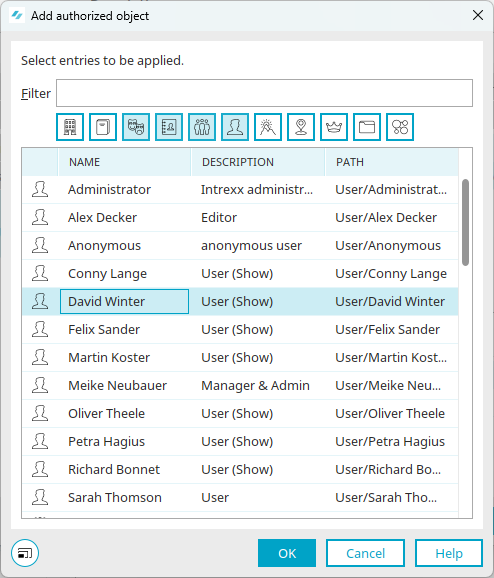
The "Add authorized object" dialog appears.
-
Select the user "David Winter".
-
Click on "OK".
The user "David Winter" is displayed.
He has the "Use endpoint" right.
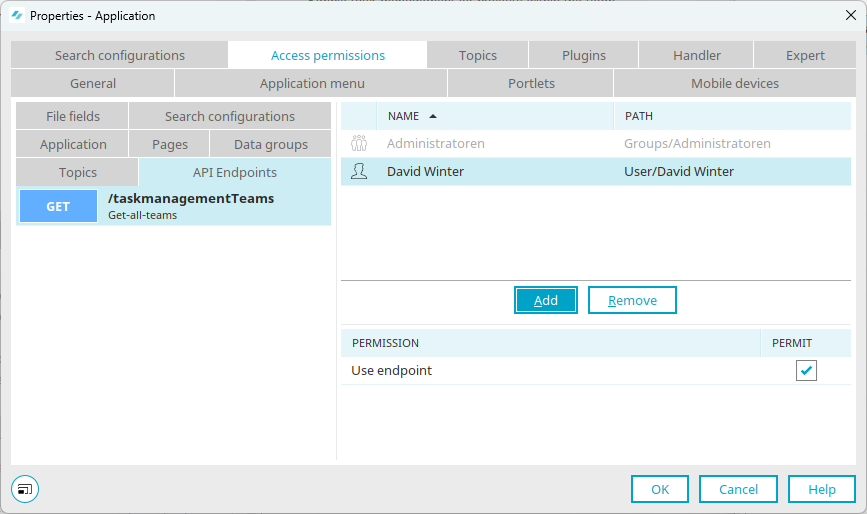
Click on "OK".
You will return to the application.
-
Click on the
icon (Publish application completely).
Step-by-step guide
-
Start the "Integration" module.
-
Click on "Application API" > "API Keys".
-
Right-click on "API keys without role".
A context menu is displayed.
-
Click on "Create new API key".

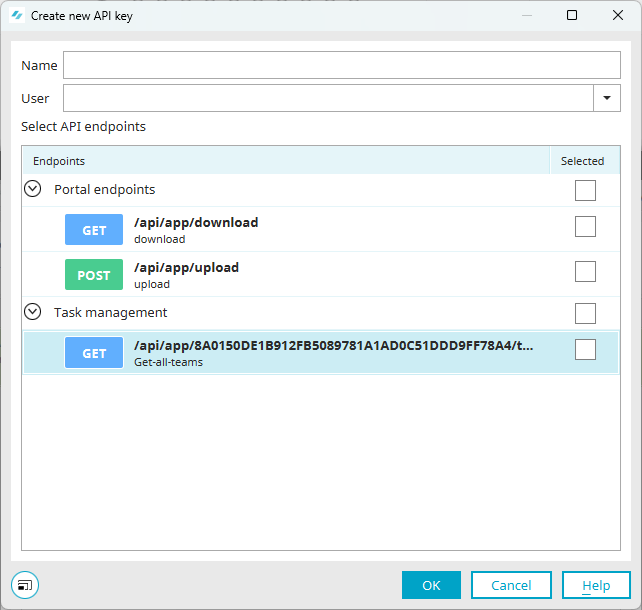
The "Create new API key" dialog box is displayed.
-
Enter a descriptive name for the API key in the "Name" field.
-
In the "User" selection field, select the user "David Winter".
-
Activate the "Task scheduler" checkbox.
This automatically enables the API endpoint as well.
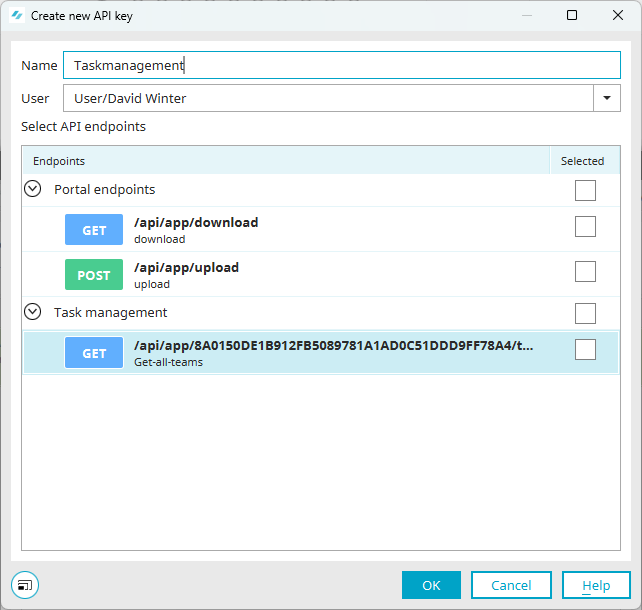
-
Click on "OK".
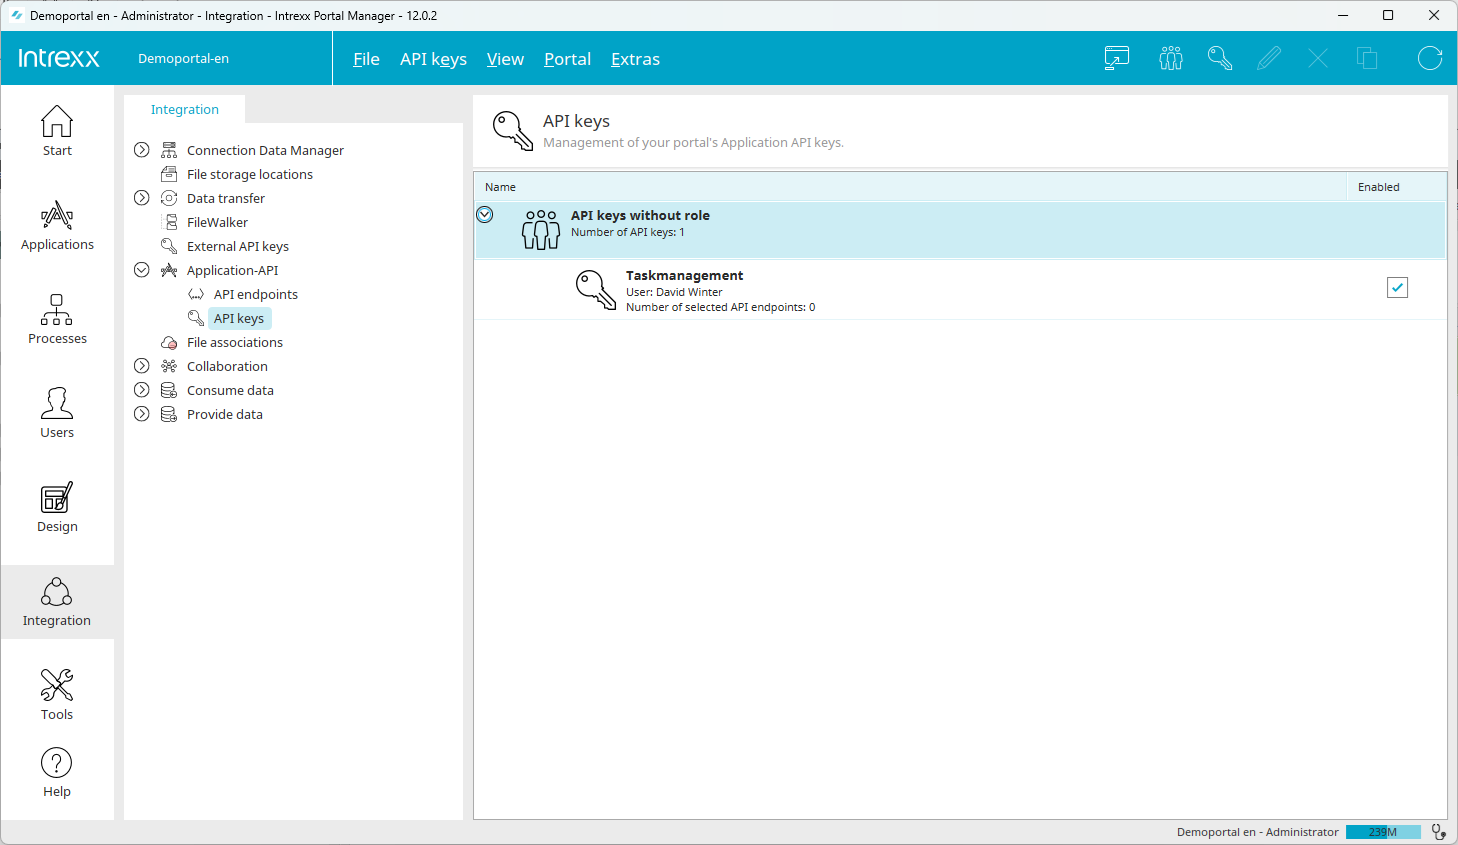
The API key entry is displayed below "API keys without role".
Step-by-step guide
-
Select the API key that you have created.
-
Press the right mouse button.
A context menu is displayed.
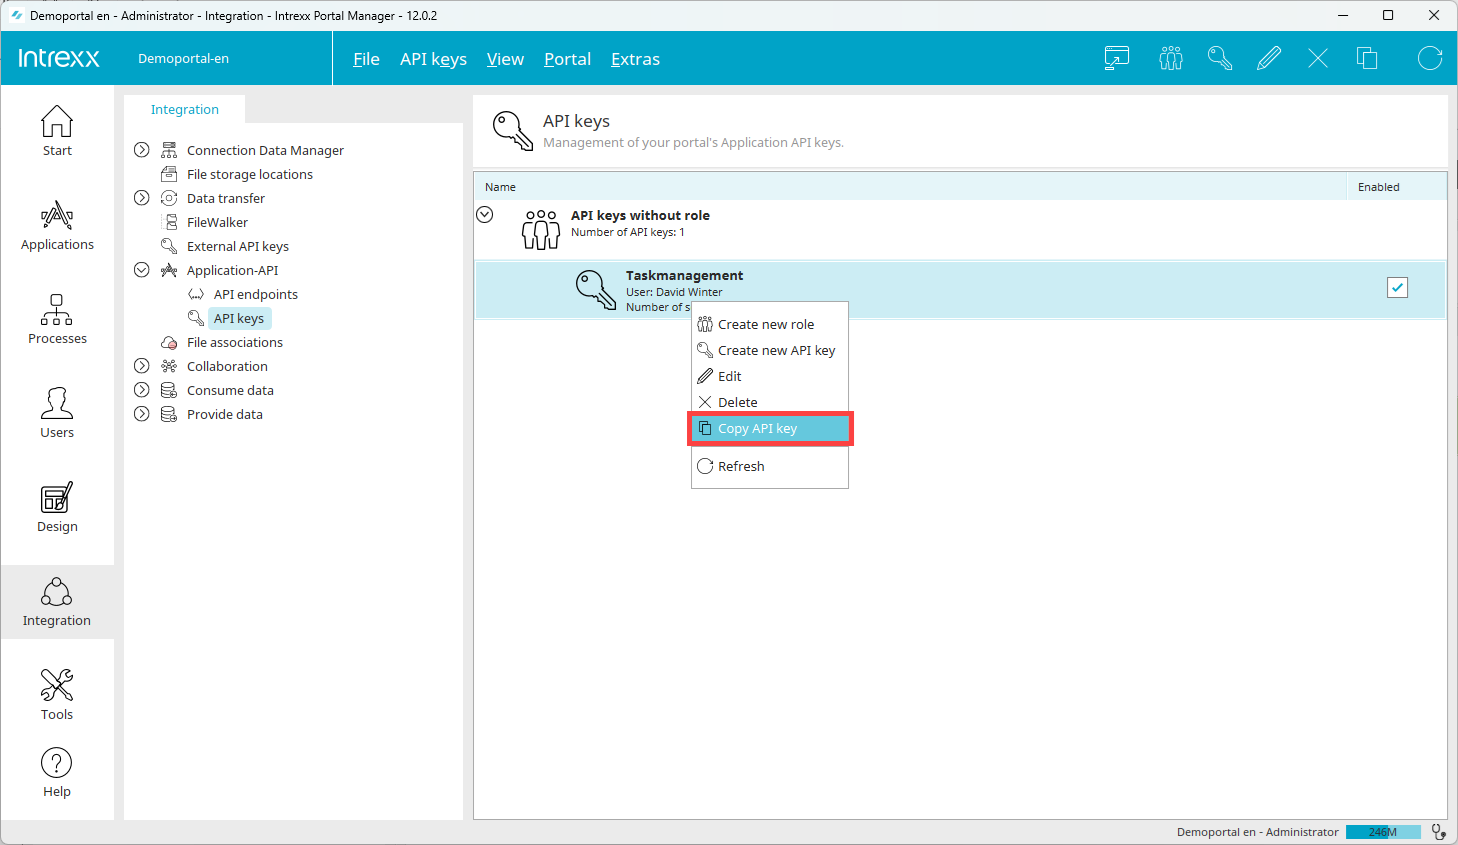
-
Click Copy API Key.
The API key is now on the clipboard.
It is a good idea to insert the API key into Notepad, for example.
Step-by-step guide
-
Start the "Integration" module.
-
Click "Application API" > "API Endpoints".
-
Select the application for which you want to create Swagger documentation.
-
Right-click on it.
A context menu is displayed.
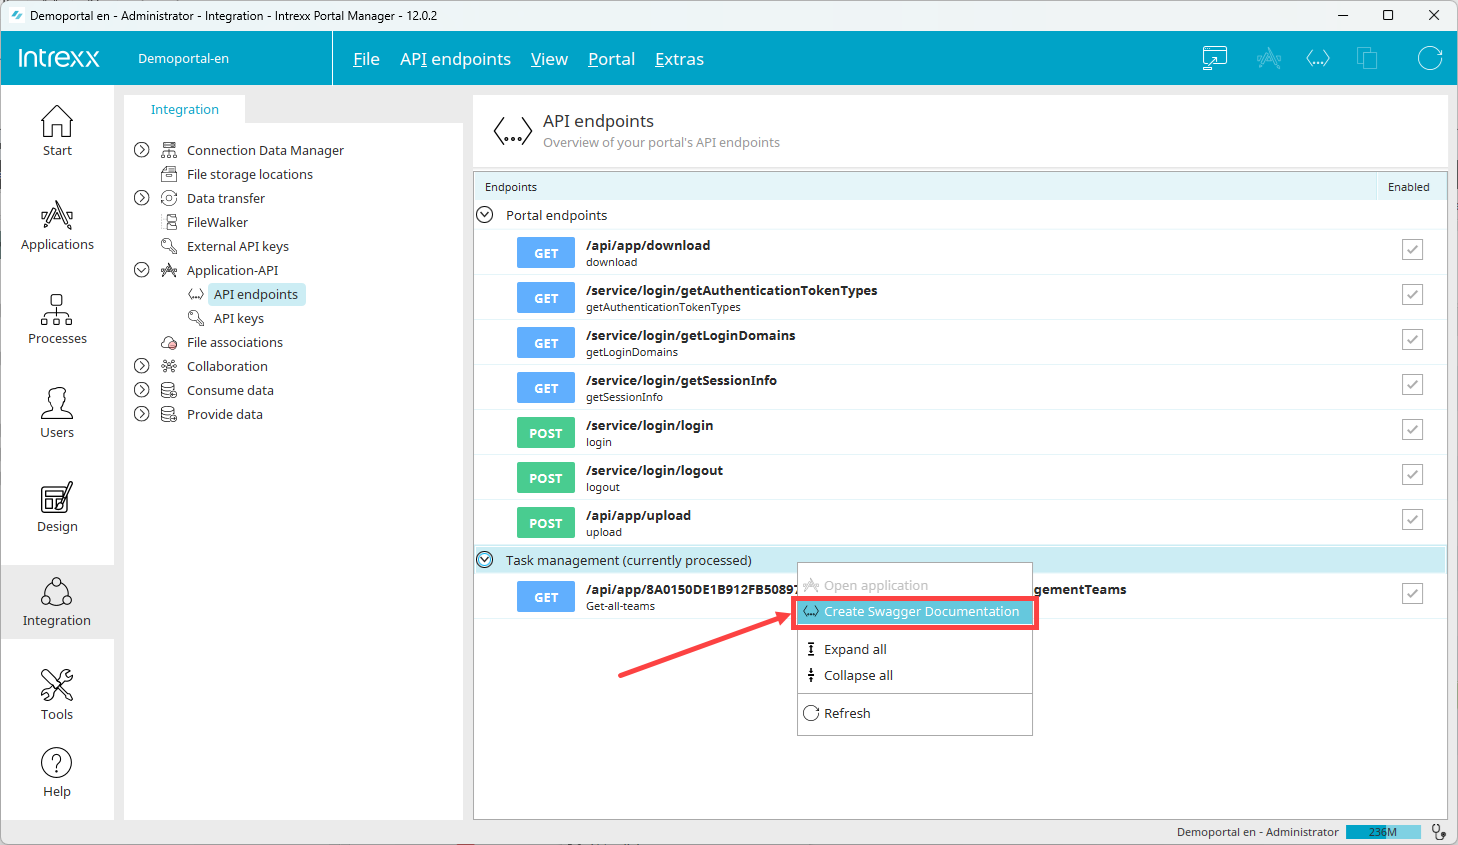
-
Click on "Create Swagger documentation”.
-
Save the Swagger documentation.
The Swagger documentation is stored in "yaml" format ("taskmanagement.yml").
Step-by-step guide
-
Launch Postman.
-
Click on the "APIs" menu item in the left navigation area.
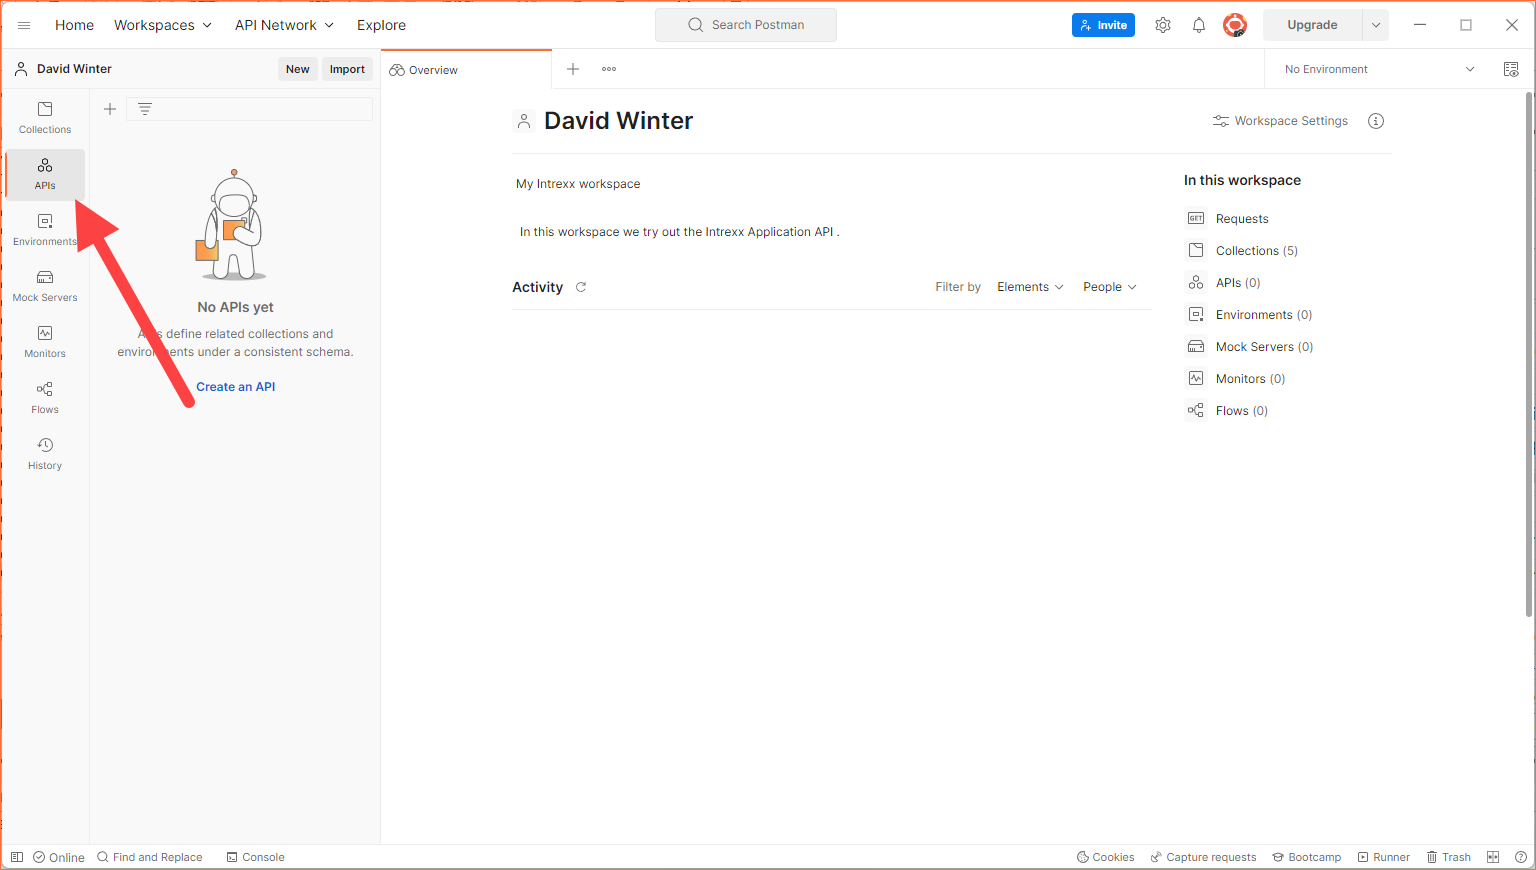
-
Click on "Import".
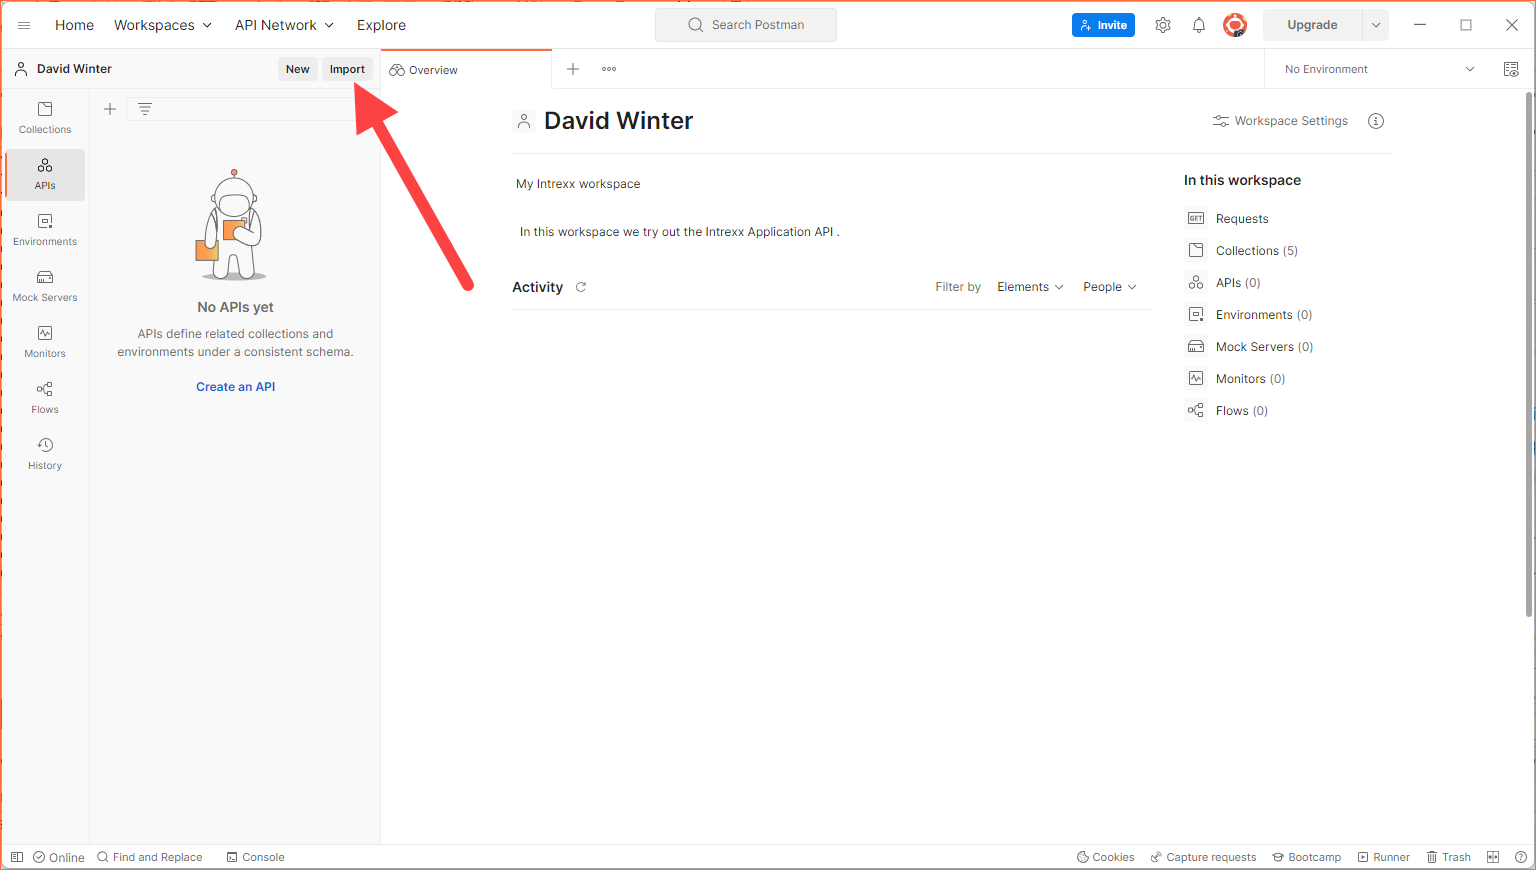
An import dialog is displayed.
-
Select the previously saved .yml file ("taskmanagement.yml").
-
Click on "Import".
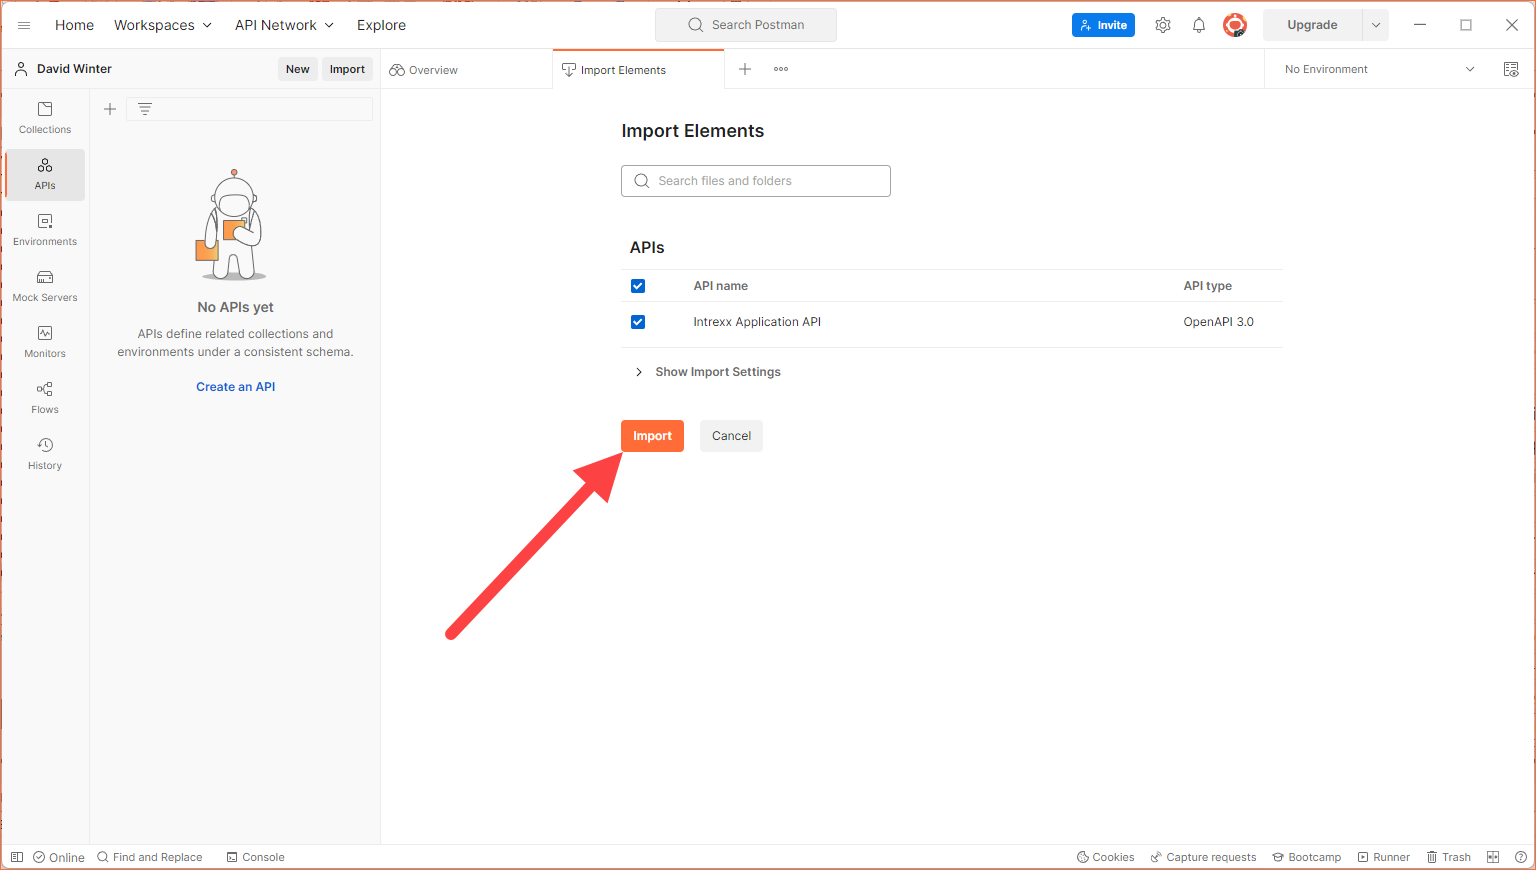
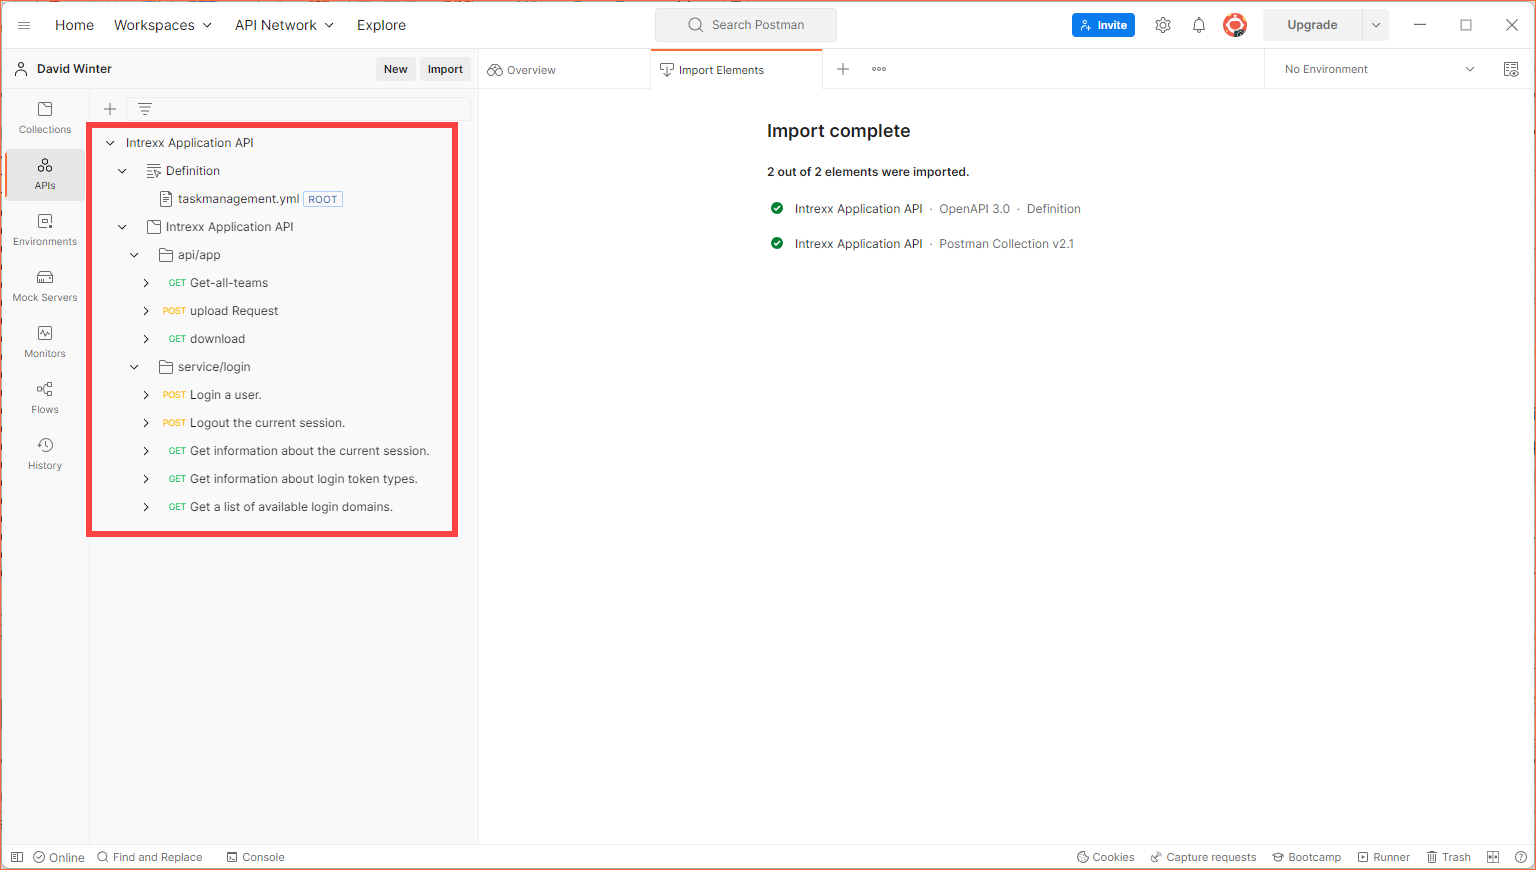
A dialog confirming the import will be displayed.
The Intrexx API is displayed.
Step-by-step guide
-
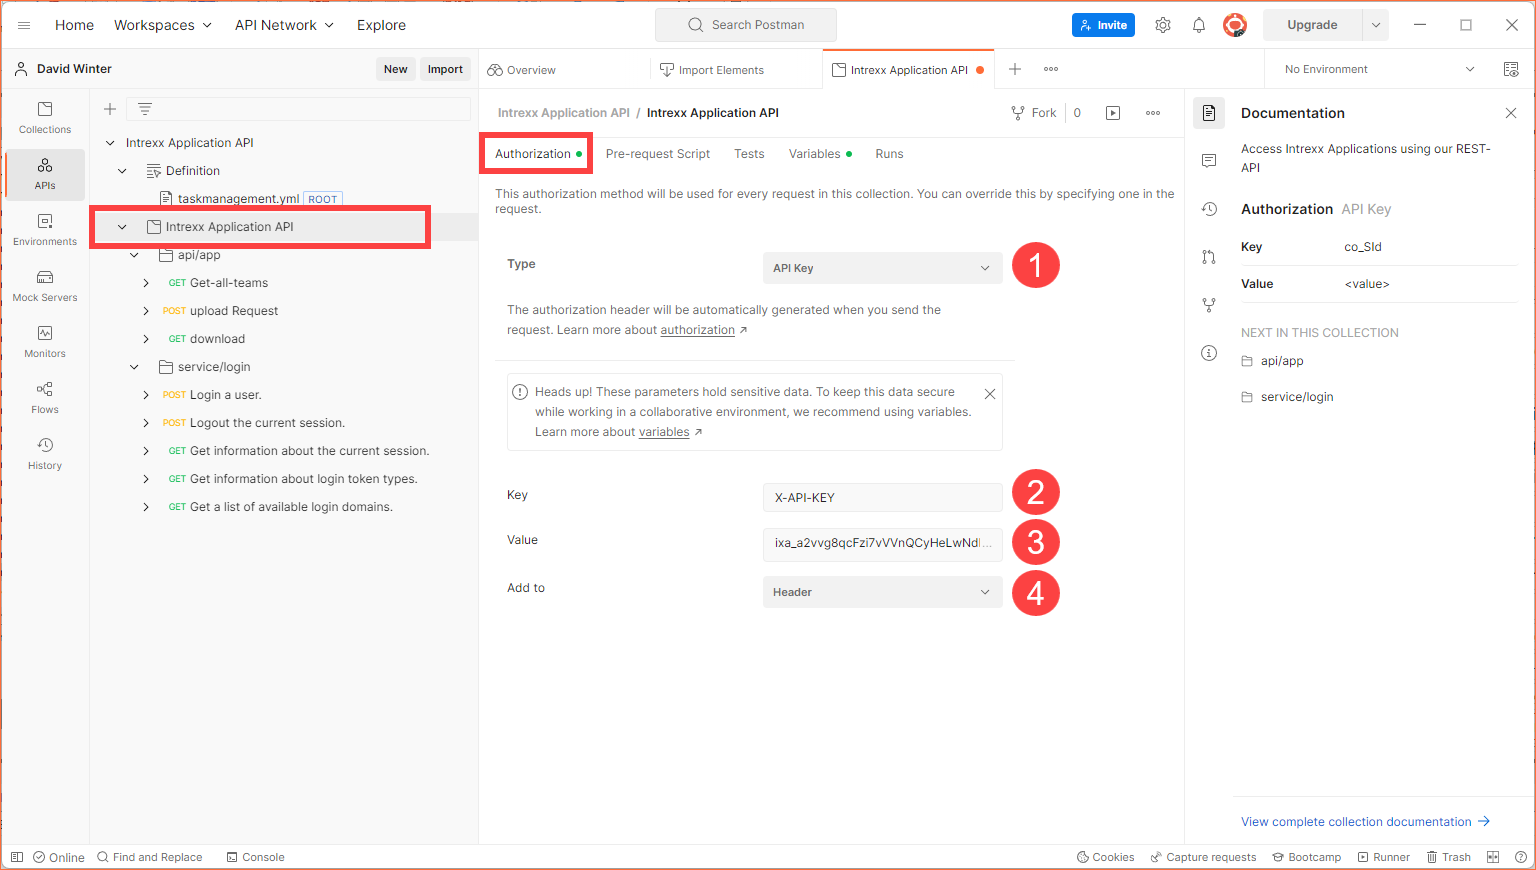
Click the directory with the name of the imported Swagger documentation.
-
Click the Authorization tab.
-
In the Type drop-down list, select the "API Key" value (
 ).
). -
Enter the value "X-API-KEY" in the "Key" input field (
 ).
). -
In the "Value" input field, enter the API key that you copied from Intrexx (see Step 8 - Copy API key)(
 ).
). -
In the "Add to" selection field, select the "Header" value (
 ).
). -
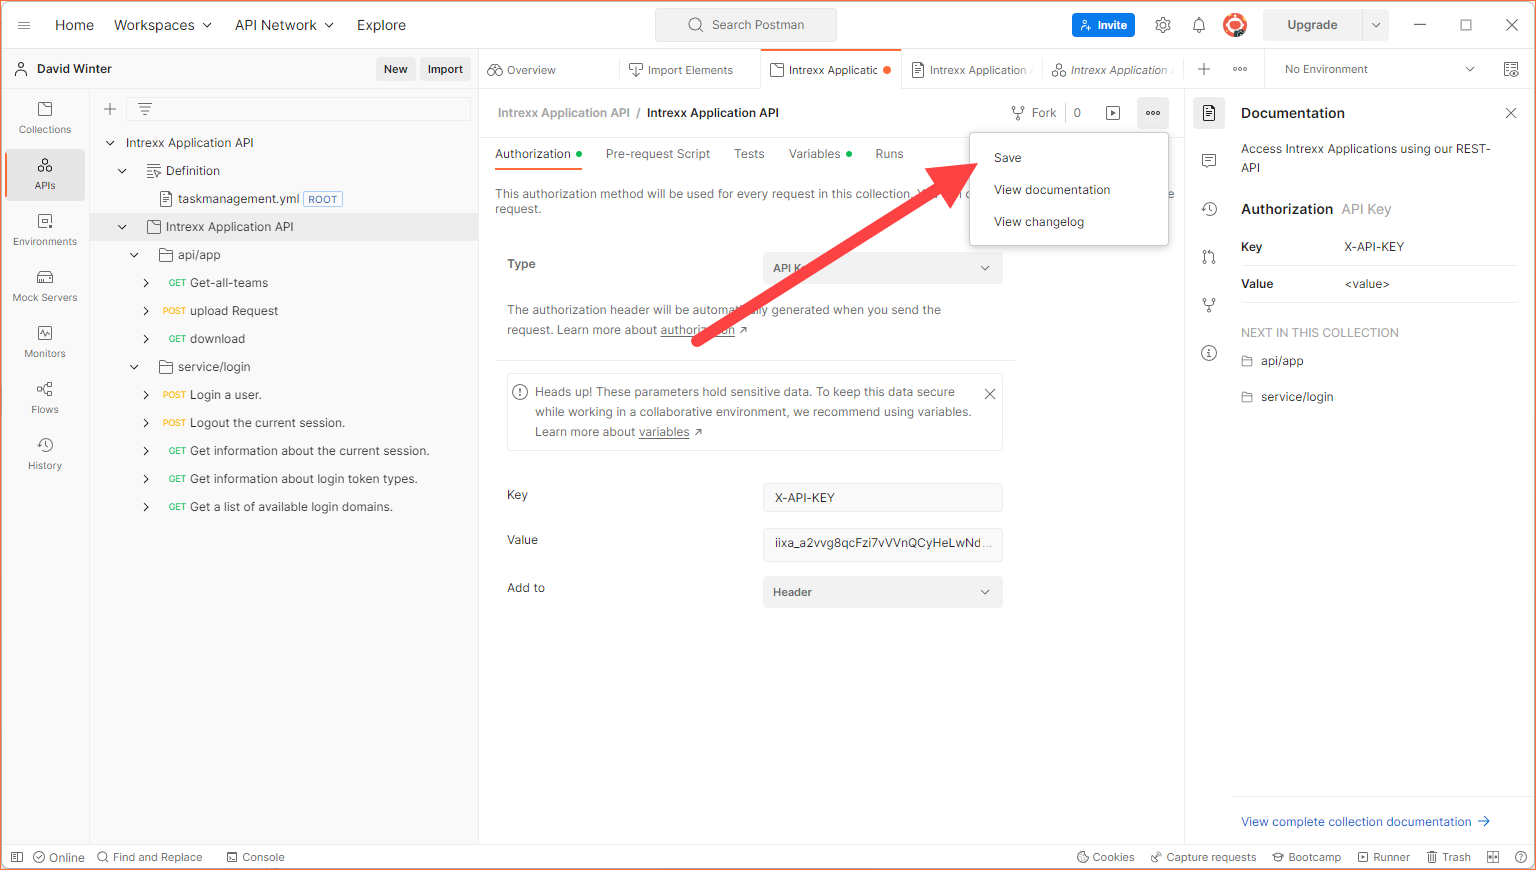
Save the information.
Step-by-step guide
-
Click the Get-all-teams API endpoint (
). -
On the "Params" tab, disable the Query Params KEYs (
). (The settings are controlled by the Swagger documentation)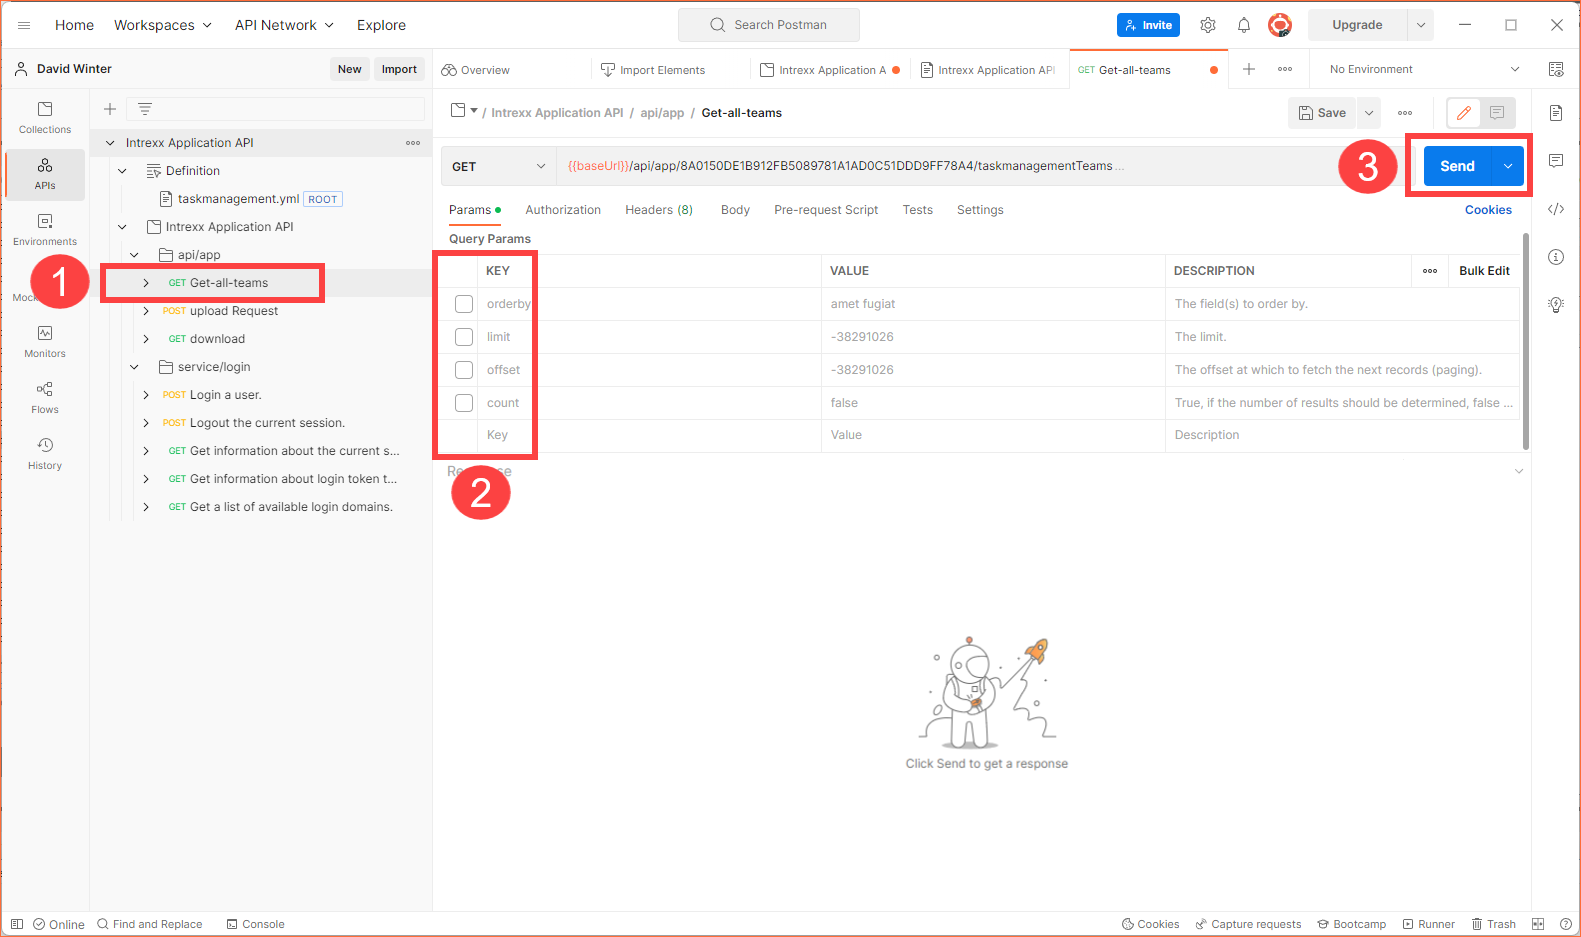
-
Click "Send".
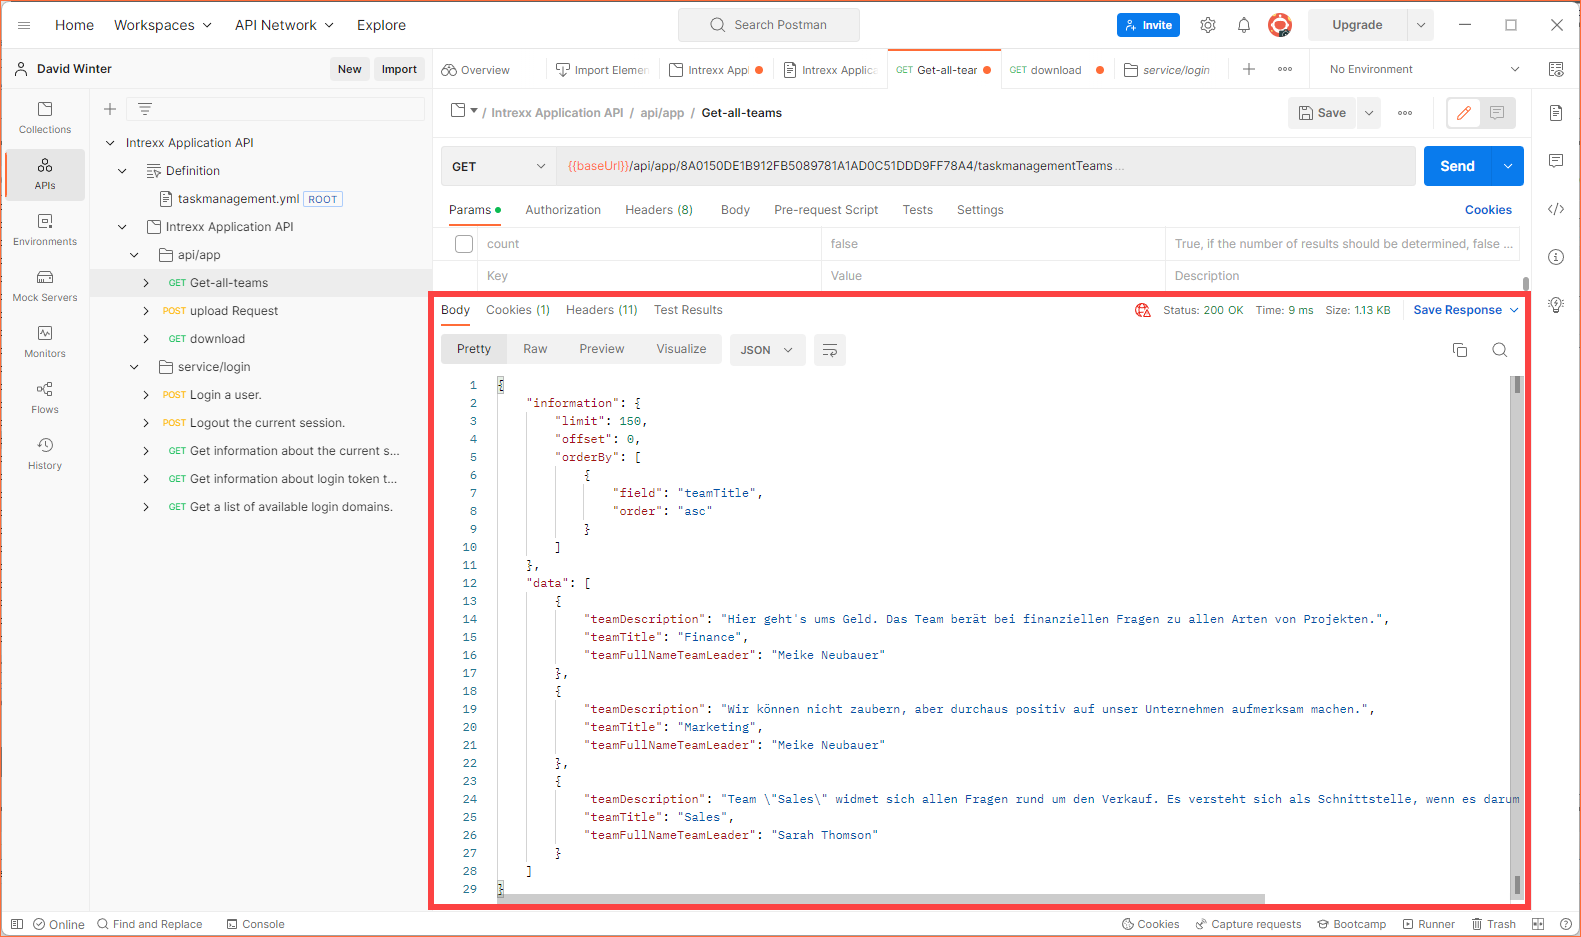
The return values you define are displayed under "Body".
Display on the "Visualize" tab
Postman offers the option of displaying the JSON data in HTML format via the Visualize tab.
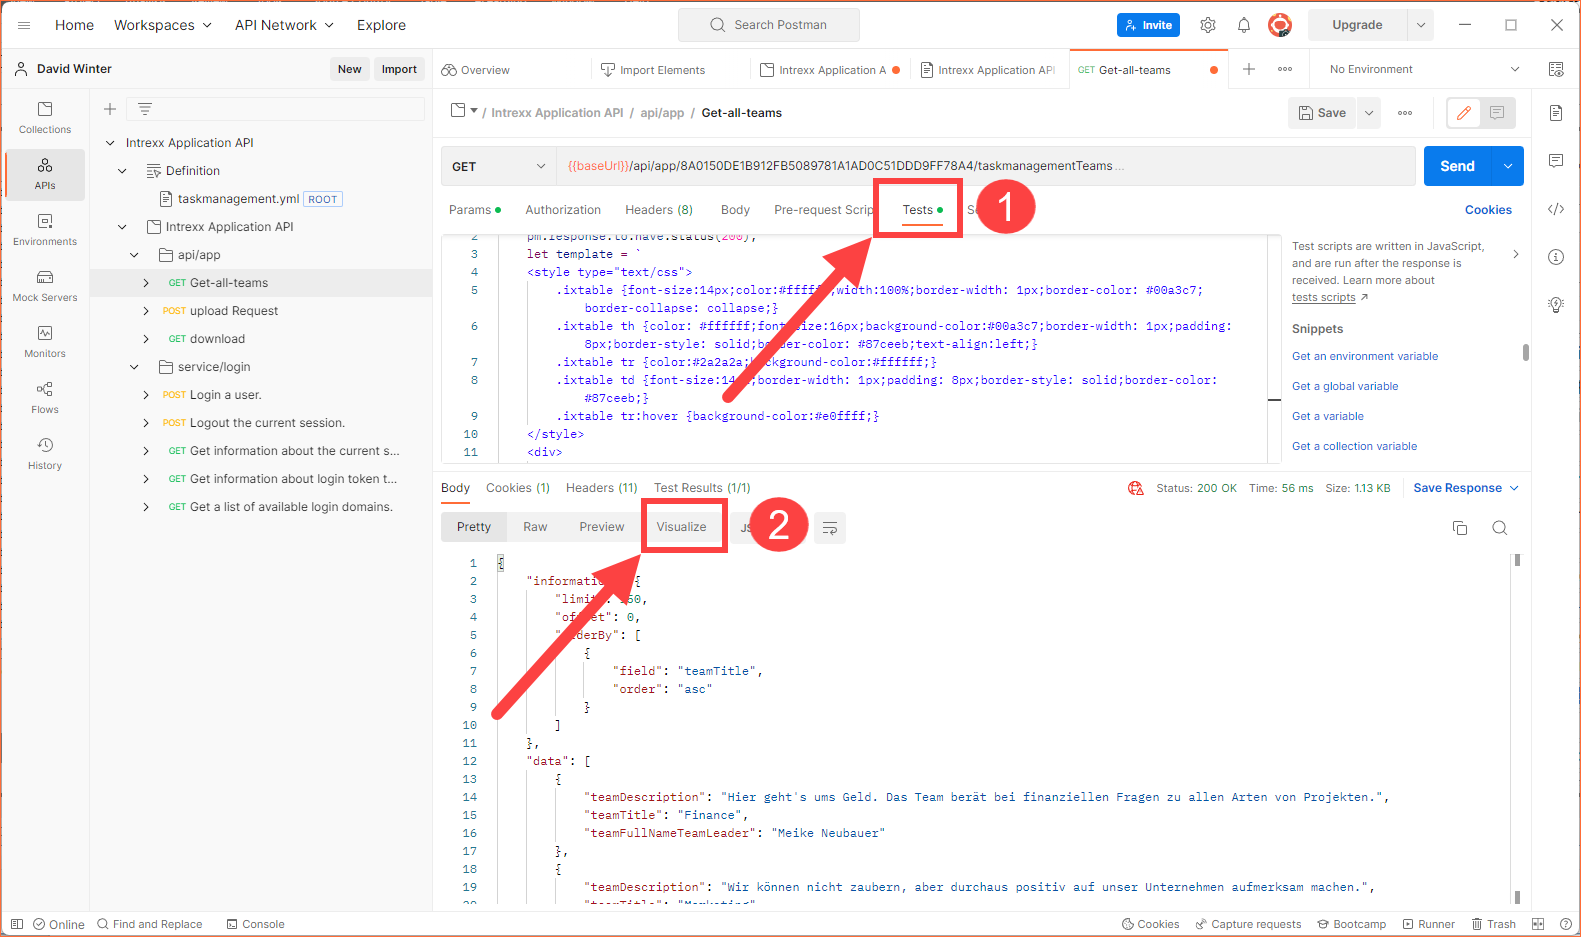
To display the data, you must store a corresponding code on the "Tests" tab (
). You can find detailed information on this under the following link: Postman Learning Center - Visualizing responses.If you run the request again and switch to the "Visualize" tab (
), the data will be displayed as they might in an app or cloud solution.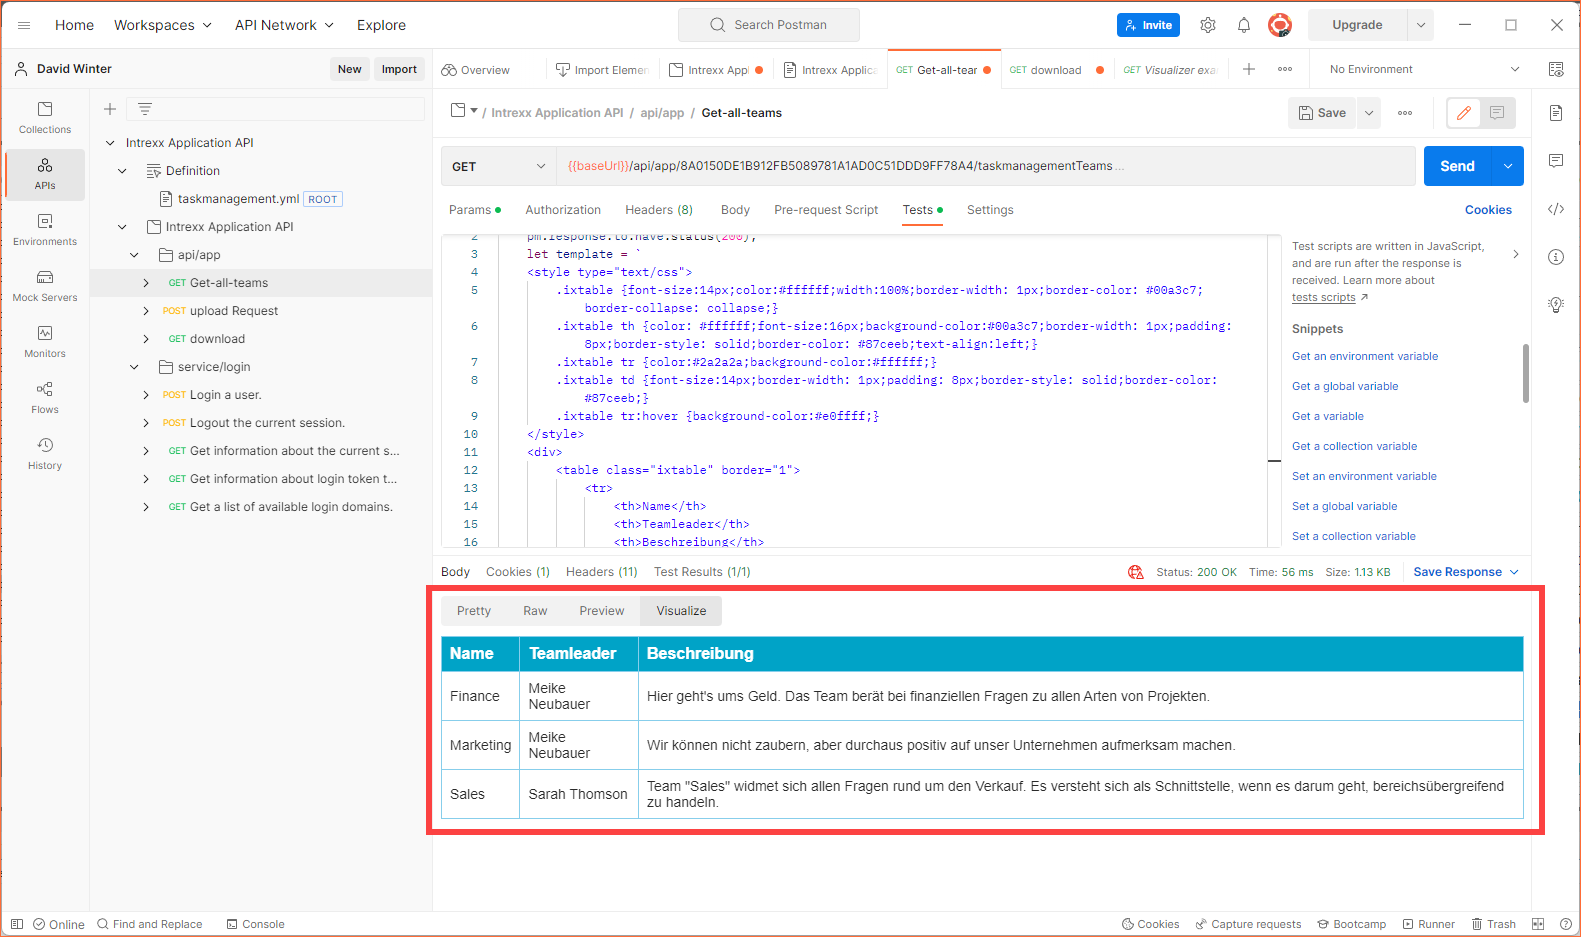
Below you can find the code used in the "Tests" tab.
 Sample code
pm.test("Status code is 200 and Present in Tabular form", function () {
    pm.response.to.have.status(200);
    let template = `
	<style type="text/css">
        .ixtable {font-size:14px;color:#ffffff;width:100%;border-width: 1px;border-color: #00a3c7;border-collapse: collapse;}
        .ixtable th {color: #ffffff;font-size:16px;background-color:#00a3c7;border-width: 1px;padding: 8px;border-style: solid;border-color: #87ceeb;text-align:left;}
        .ixtable tr {color:#2a2a2a;background-color:#ffffff;}
        .ixtable td {font-size:14px;border-width: 1px;padding: 8px;border-style: solid;border-color: #87ceeb;}
        .ixtable tr:hover {background-color:#e0ffff;}
    </style>
    <div>
        <table class="ixtable" border="1">
            <tr>
                <th>Name</th>
                <th>Teamleader</th>
                <th>Beschreibung</th>
            </tr>
            {{#each .}}
            <tr>
                <td>{{teamTitle}}</td>
                <td>{{teamFullNameTeamLeader}}</td>
                <td>{{teamDescription}}</td>
            </tr>
            {{/each}}
        </table>
    </div>`;
    let response = pm.response.json();
    pm.visualizer.set(template, response.data);
});