

Configure Authentication and Headers
In this step, you must specify the authentication method and, if necessary, configure one or more headers.
The following authentication options are available:
-
None/Custom
-
Basic Authentication
-
API Key
-
Bearer Token
You can add any entries (key/value pairs) to the header. For detailed information on this, see the " Add a Header" section.
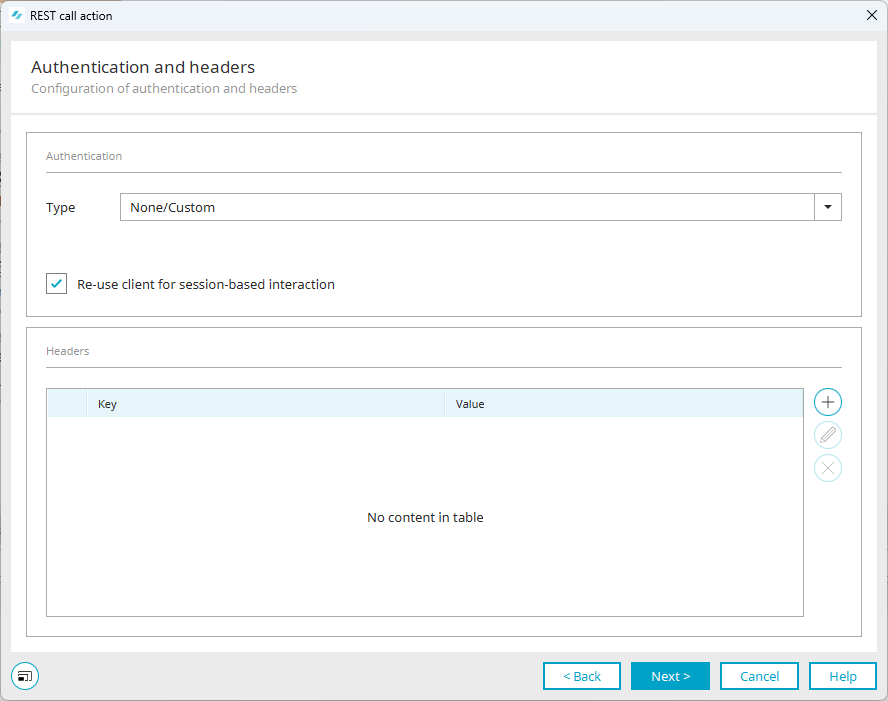
Type
Select the type of authentication here.
Dynamic Dialogs: Please note that, depending on the authentication method selected, different input and selection fields will be displayed, as required for that specific authentication method.
Below is a description of the various authentication options.
None/Custom
Use the "None/Custom" type if no authentication is required or if authentication is handled through other means, such as by setting a custom header with credentials.

Reuse the client for session-based requests
If you select the "None/Custom" type, the "Reuse client for session-based interaction" option becomes available.
Enabling this option is particularly useful when logging in to an API, especially if the API uses session cookies. The REST API client can store this and reuse it in subsequent REST call operations within the same process.
Background: Intrexx uses "Apache HTTP Client 5" as its REST API client. This is generated for every REST call and deleted after the call is executed. You can prevent the REST API client from being deleted by selecting the "Reuse client for session-based requests" option. In this case, the client is stored in an Intrexx internal registry. When additional REST call operations are performed within the same process, Intrexx checks the registry to see if a properly configured client already exists. If this is the case, Intrexx automatically uses this client.
Since the client stores and sends session cookies, a login remains valid until the end of the respective process.
When a client is reused, this is indicated in the log file with the message "Getting retained Client ...".
Basic Authentication
Use the "Basic Authentication" type if the API requires Basic Authentication.
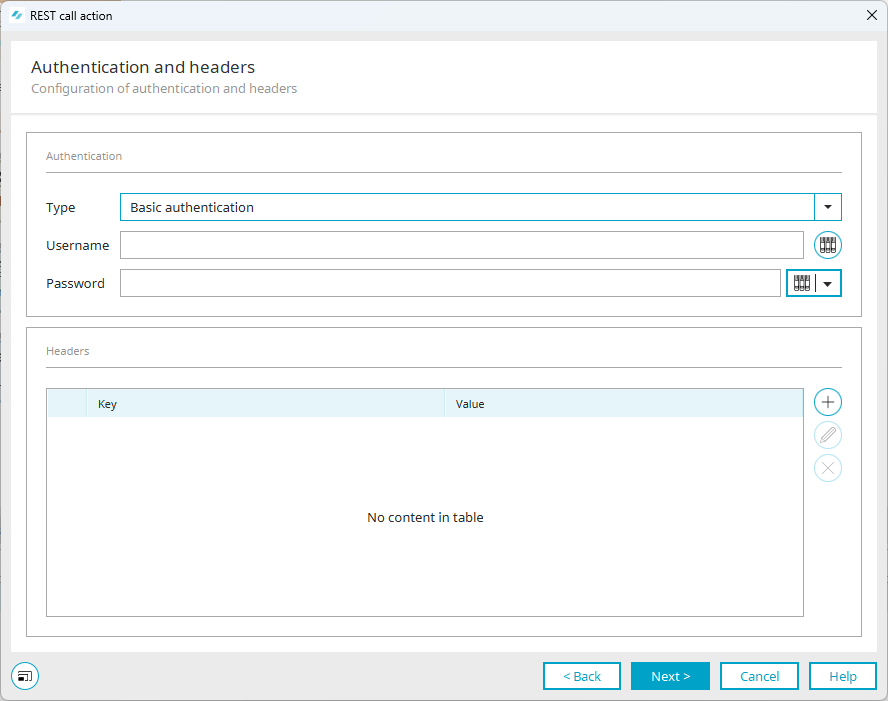
Username
You can enter the username freely, retrieve it from the resource mapping, or combine both methods.
Password
You can enter the password manually, retrieve it from the credentials store (Credentials Store), or obtain it via resource mapping.
 Here's how you can retrieve the password from the login information store or via resource mapping
Step-by-Step
To retrieve the password from the login information store or via resource mapping, follow these steps:
-
Click the down arrow at the end of the password field.
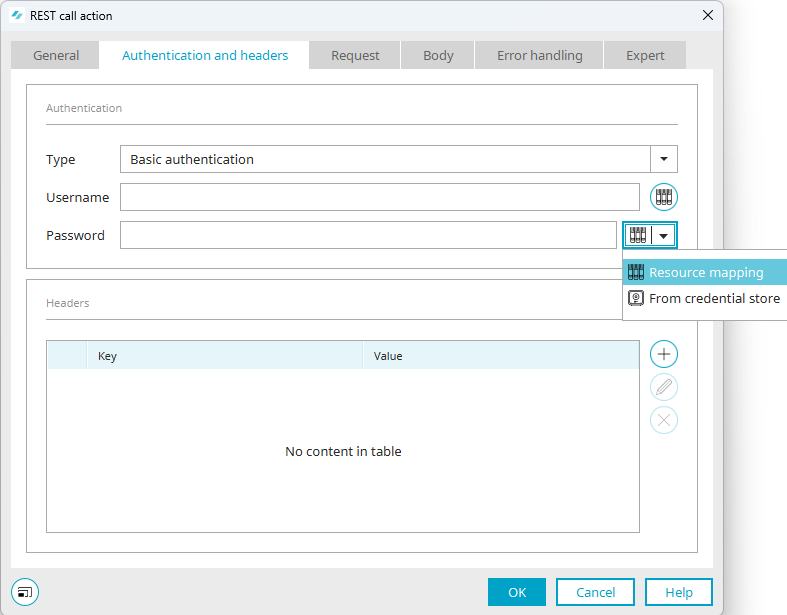
The "Resource Mapping" and "From Credential Store" options are displayed.
-
Select the option you want.
If you have selected the "Resource Mapping" option, the "
 " icon will appear.
If you have selected the "From Credential Store" option, the
 icon will appear.
 -
Click on the icon you want.
-
In the next dialog box, select the desired entry.
Avoid storing passwords as static text in resource mapping and then using them for authentication with the API.

API Key
Use the "API Key" type if the API requires an API key and the associated information.

Token
The token or API key can be entered manually, retrieved from the resource mapping, or be a combination of both.
Authorization Header
Here, you can select which header to use for the API key. The following options are available:
-
Authorization: API key
-
X-API Key
For the "Authorization: Apikey" and "X-API-Key" options, the selected option is displayed in the table in the "Header" section, and the token is automatically inserted. The entry you created cannot be manually deleted from the table in the Header section. When the REST call is made, the corresponding header is generated.
-
Custom
If you select the "Custom" option, you'll need to create the header yourself.
Bearer Token
Use the "Bearer Token" type if the REST call requires authentication with a bearer token.
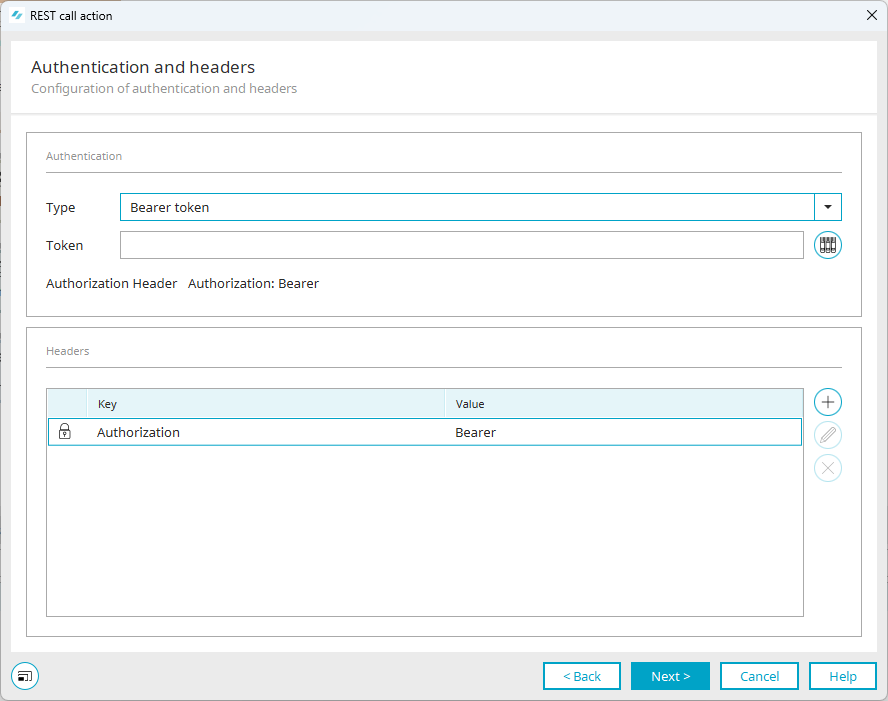
Token
The token can be entered freely, retrieved from the resource mapping, or be a combination of both.
With this option, an entry with the key BEARER_TOKEN is always added to the header table. This entry cannot be manually deleted from the header table. When sending the call, the REST API client uses the Authorization: Bearer header.
Add a header entry
The headers for the request are entered into the header table. In default mode, Apache automatically generates the headers, so in most cases you don't need to write your own headers. If headers are still required (e.g., for custom authentication), you must enter the header entries as key/value pairs. If headers are set in the dialog, they override default headers with the same key. Resource mapping is applied to both the keys and the values of the headers, so dynamic headers are possible. A typical use case would be to include a dynamically generated token in a header (unless this is already covered by the API key or Bearer token options).
Step-by-Step
To add a header entry, follow these steps:
-
Open the REST call action.
-
Go to the "Authentication and Headers" tab.
-
Click the "
 " icon.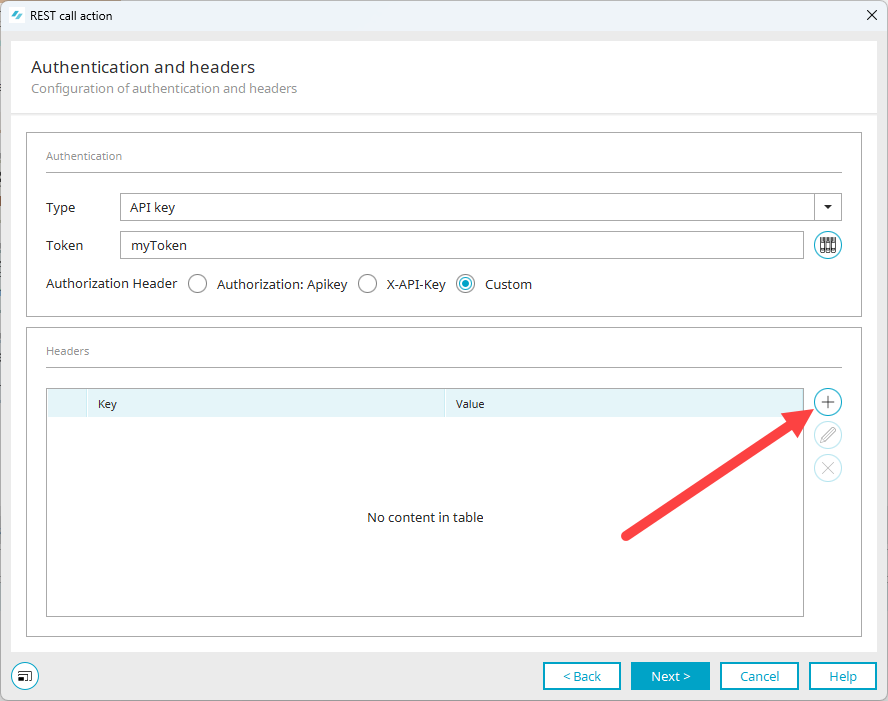
The "Add Header Entry" dialog box appears.

-
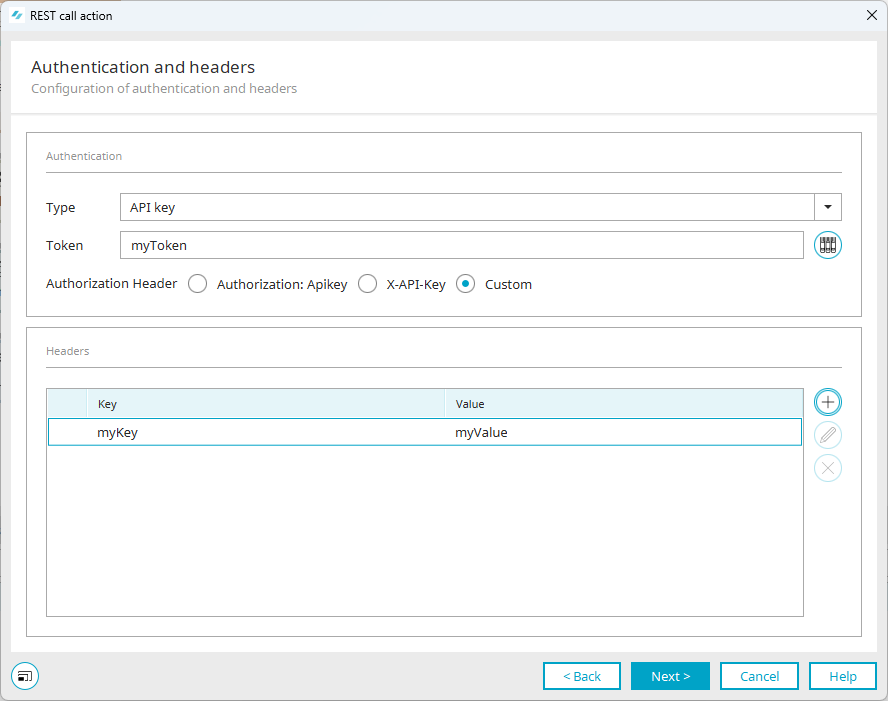
Enter a key and a value. You can enter the value manually, retrieve it from the resource mapping, or use a combination of both.
-
Click "OK."
The added header entry is displayed.
Your Next Step