

Example 2 - Retrieving Lab Data
Description of the Scenario
This example describes how you can use a REST call action to automatically retrieve data from one Intrexx instance to another at defined intervals. In this process, the REST call action calls an endpoint that was created using the Intrexx Application API.
In this example, we assume that there is a laboratory and a clinic, both of which use Intrexx. The laboratory provides services to the clinic and regularly receives patient samples from it. These are examined by the laboratory. The result is either positive or negative.
The key factor now is how the clinic receives the lab results. The clinic does not want the lab results to be sent by mail or email. Instead, the results should be transmitted automatically. In this process, the lab results are automatically assigned to the corresponding patients in the hospital's patient directory.

Solution - Overview
The lab stores the results in a database. At the same time, the lab provides access to the database via an application or an application API endpoint.
The clinic sets up a process with a REST call action that automatically checks the lab's API endpoint every 30 minutes to see if any new results are available. If this is the case, the result for the corresponding patient is automatically entered into the clinic's own patient management system.

Portal View
In the portal view, this might look something like this:

Please note that the example does not describe a "full-fledged" solution for data exchange between a laboratory and a hospital. Rather, it is intended to illustrate basic uses of the REST call action. At the same time, you can use this example as a starting point for your own expansion stages.
Key Actions
To create the example described here, you must perform the following key actions in Intrexx:
Laboratory
1. Creating an application to record the results
To record the results along with the associated patient data, you need an application ("lab application"). To do this, you must create the required data fields. In our example, patient data and the result are entered using an input form.
2. Creating an API endpoint that allows you to retrieve the results
To allow the clinic to retrieve or access the results, you must create an API endpoint that provides access to the data set where the patient data and results are stored. To do this, we use the Intrexx Application API.
Clinic
3. Developing an application to collect patient data, including laboratory results
To save the results from the lab, you need an application ("clinic application"). The data fields correspond (for the most part) to those in the lab app.
In our example, the entries in the data fields are used to match patients so that the correct results are assigned to the respective patients.
4. Creating a process that executes a REST call at regular intervals
Finally, you need to create a process that starts automatically at scheduled intervals. The process includes a REST call action that accesses the API endpoint of the lab app. If any data has been updated there, it will be transmitted to the clinic. The process saves the retrieved data in the clinic app.
1. Create a lab application
There are no special considerations to keep in mind when creating the lab application.
Portal View
The lab application appears as follows in the portal view:
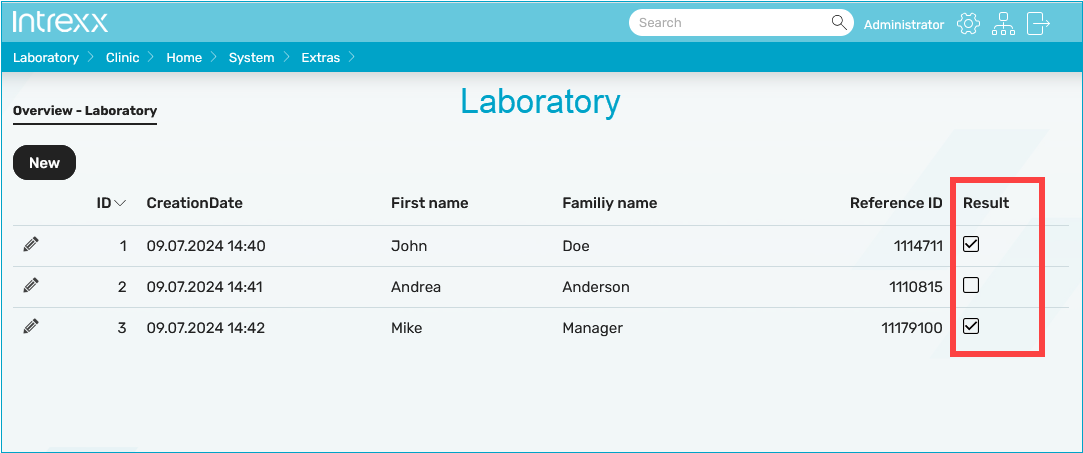
It consists of an overview page where the entered patient data, including the test results, can be viewed and edited.
The input dialog looks like this:
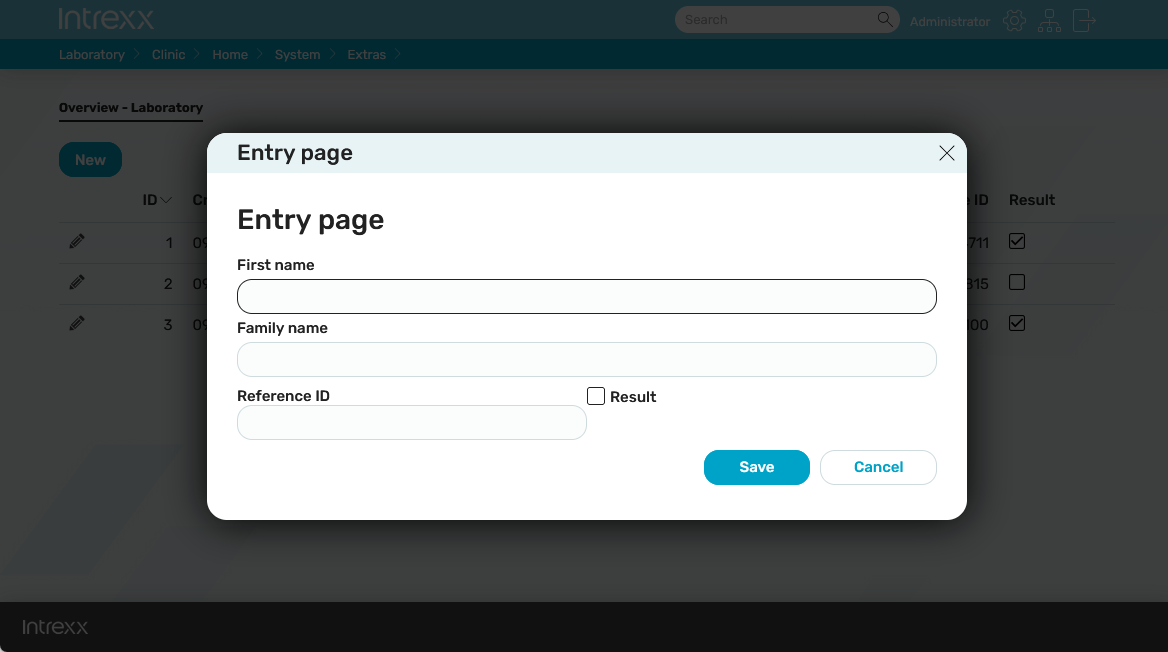
Portal Manager
Data Group
The lab application requires a data set with the following data fields:
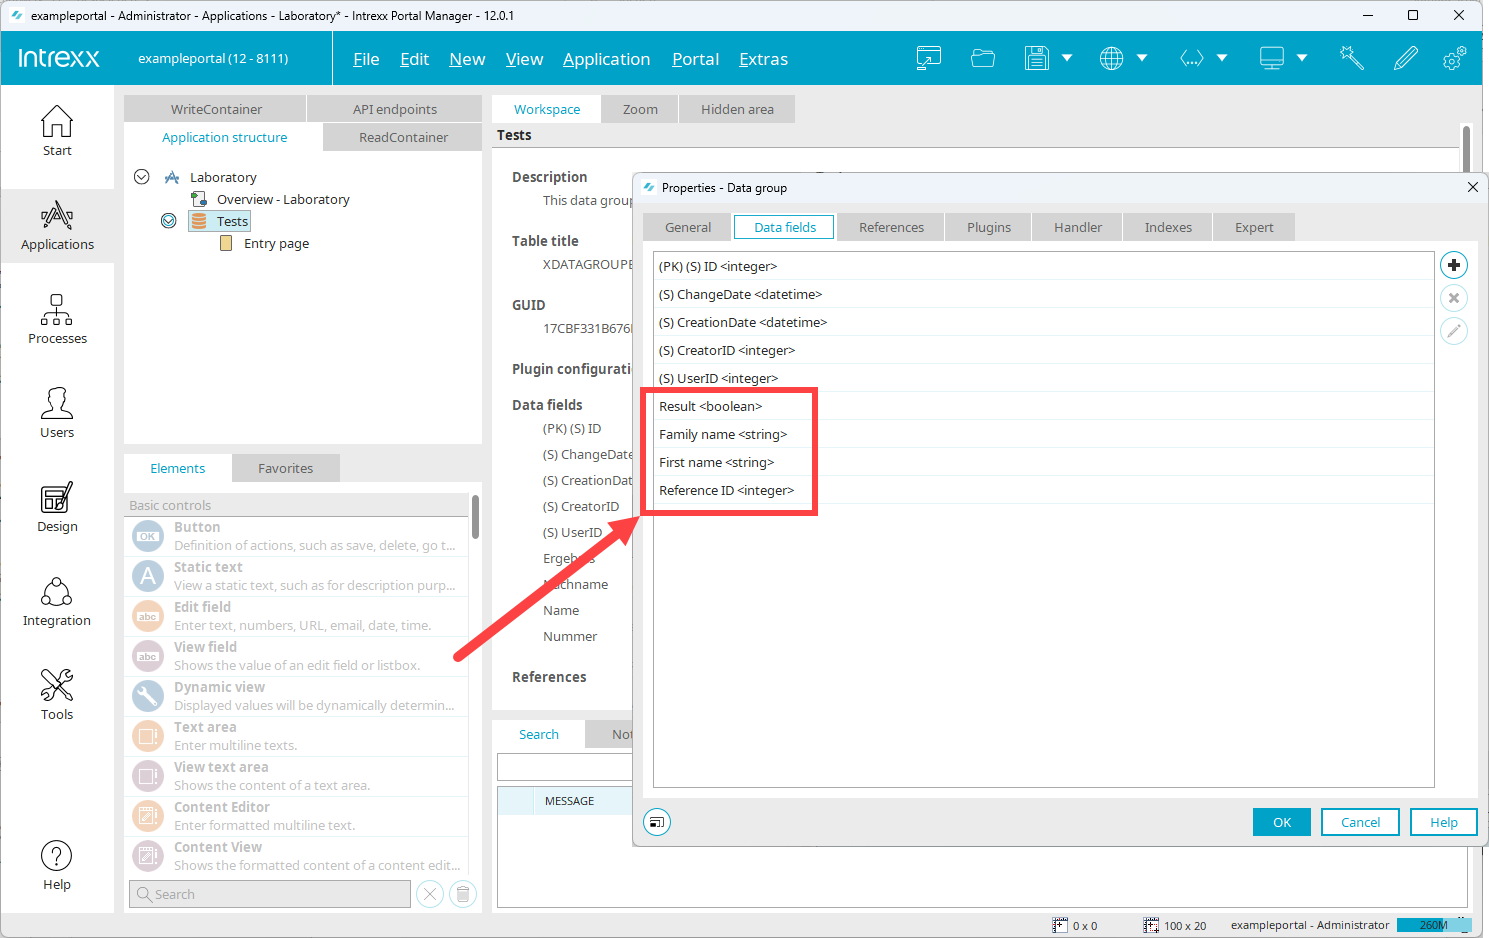
First Name (String), Last Name (String)
Enter the patient's first and last name here.
First and last names are used to match records between the laboratory and the hospital.
Reference ID (Integer)
Enter a unique ID here.
In the example described here, the clinic must also know this ID, since it is used in addition to the first and last names to identify the patient and ensure accurate data matching.
Result (Boolean)
Enter the test results here.
In the example described here, a checkbox (Boolean) is used to indicate the result. The result can be either positive or negative. In a future version, additional "statuses" such as "Result pending," etc., would be possible here.
Input Page
Create an input page for the data fields.

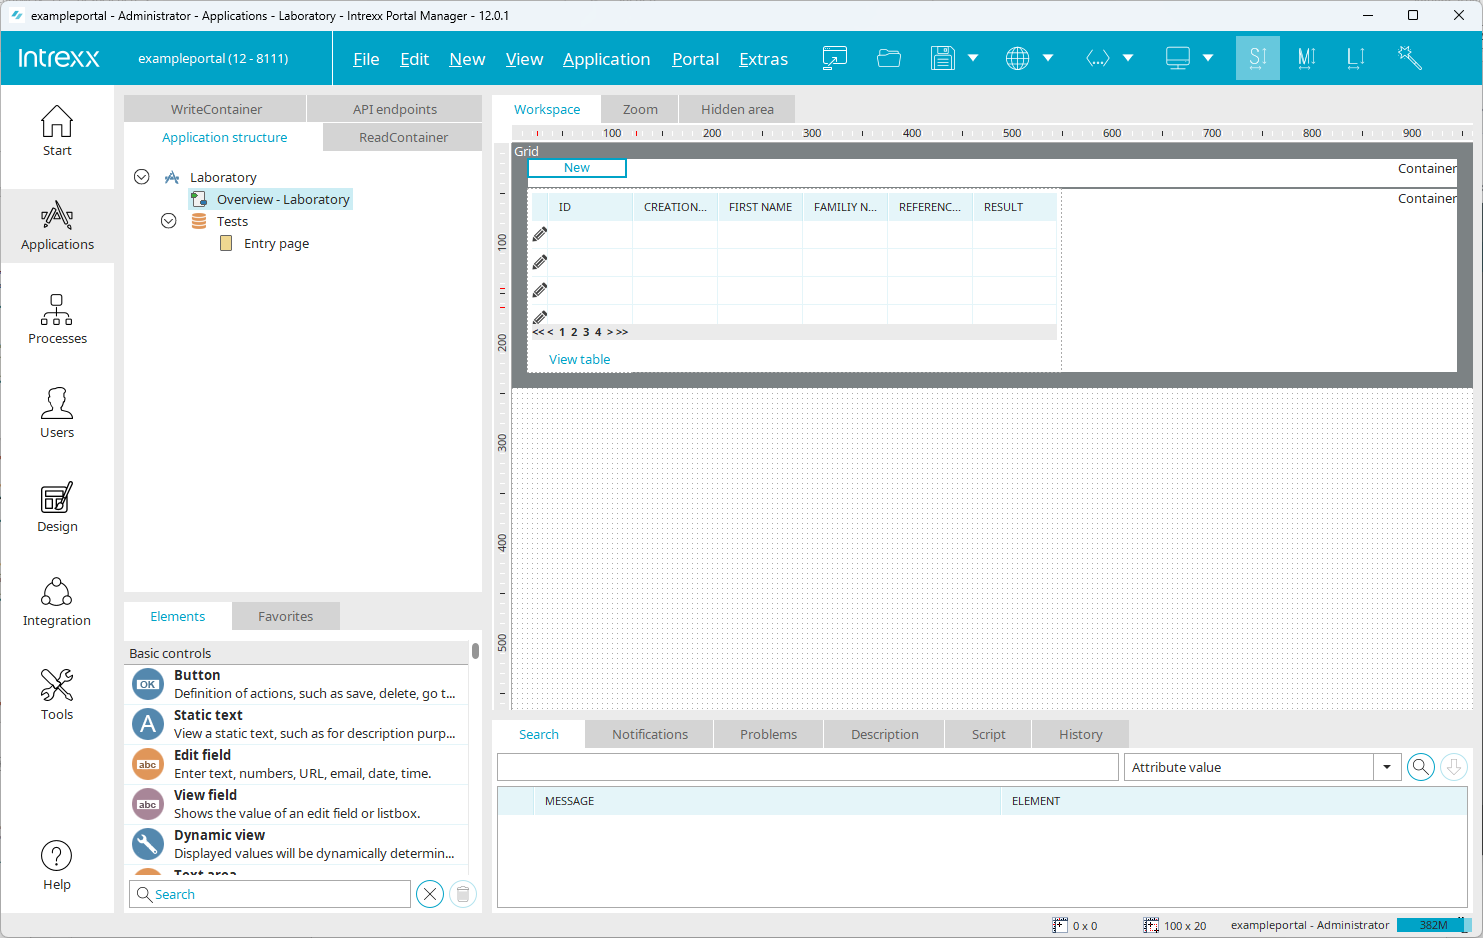
Overview Page
Create a summary page with a table that displays the entries.
2. Create an API endpoint
For detailed information on creating API endpoints based on the Intrexx Application API, see the " Intrexx Application API" section
The following section describes the key steps required to implement our example.
-
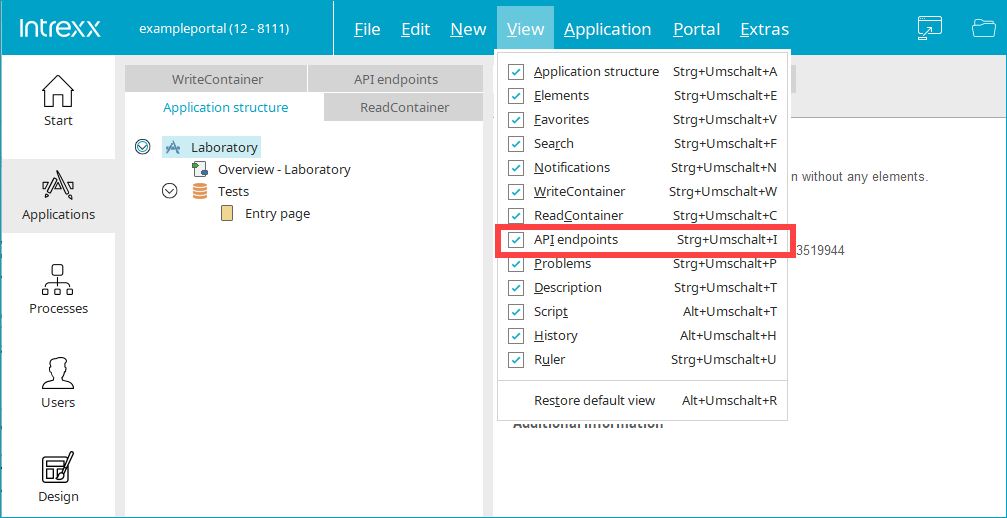
In the "View" menu, select the "API Endpoints" checkbox.
-
Go to the "API Endpoints" tab.
-
Click the - icon.

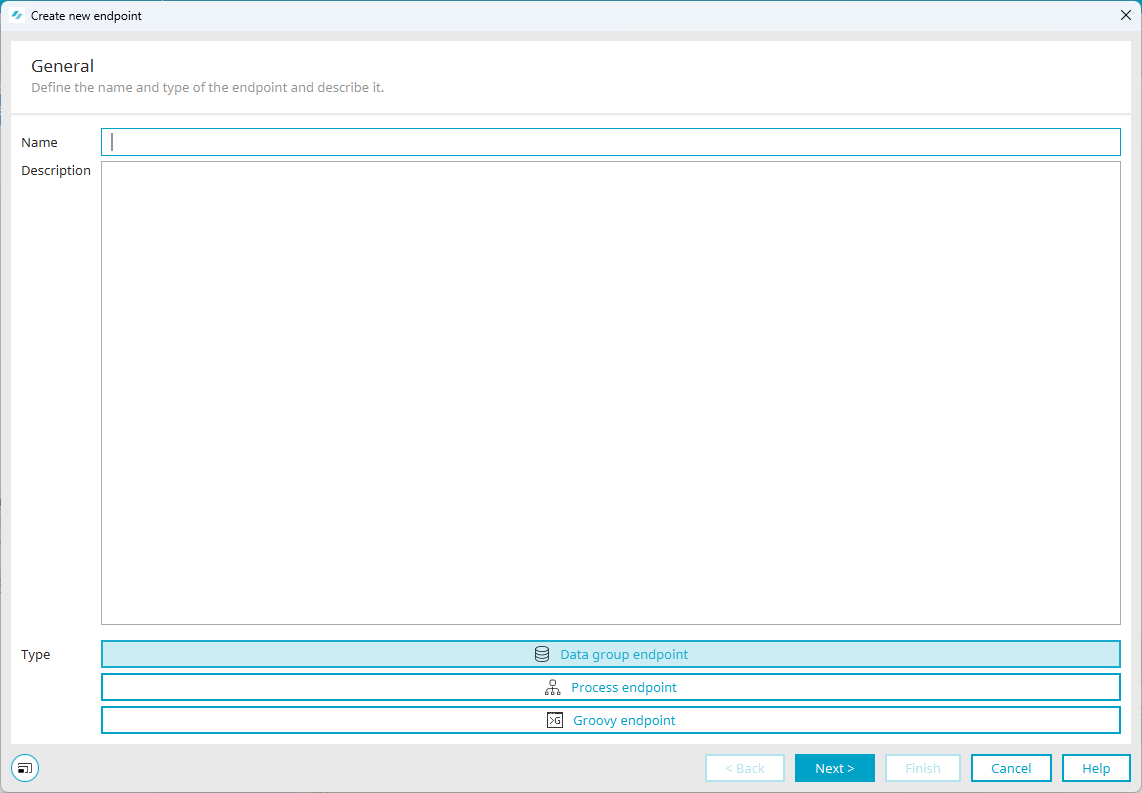
The "General" dialog box appears.
-
Enter a name and select the "Data Group Endpoint" button under "Type."
-
Click "Next."
The "Data Group Selection" dialog box appears.

"GET" is already preset for "Endpoint." Leave this setting as is.
Promotion
Under "Action," select "Read multiple records." This is necessary because, during an API query, all patient data is checked for changes to existing records and for the presence of new records.
Application
Select the value "(current application)" here.
Data Group
Select the "Tests" data group here.
Query Return Values
Add the following data fields here:
-
first name
-
last name
-
number
-
result
-
created
-
-
Click "Next."
This takes you to the "Path Parameters" dialog box.
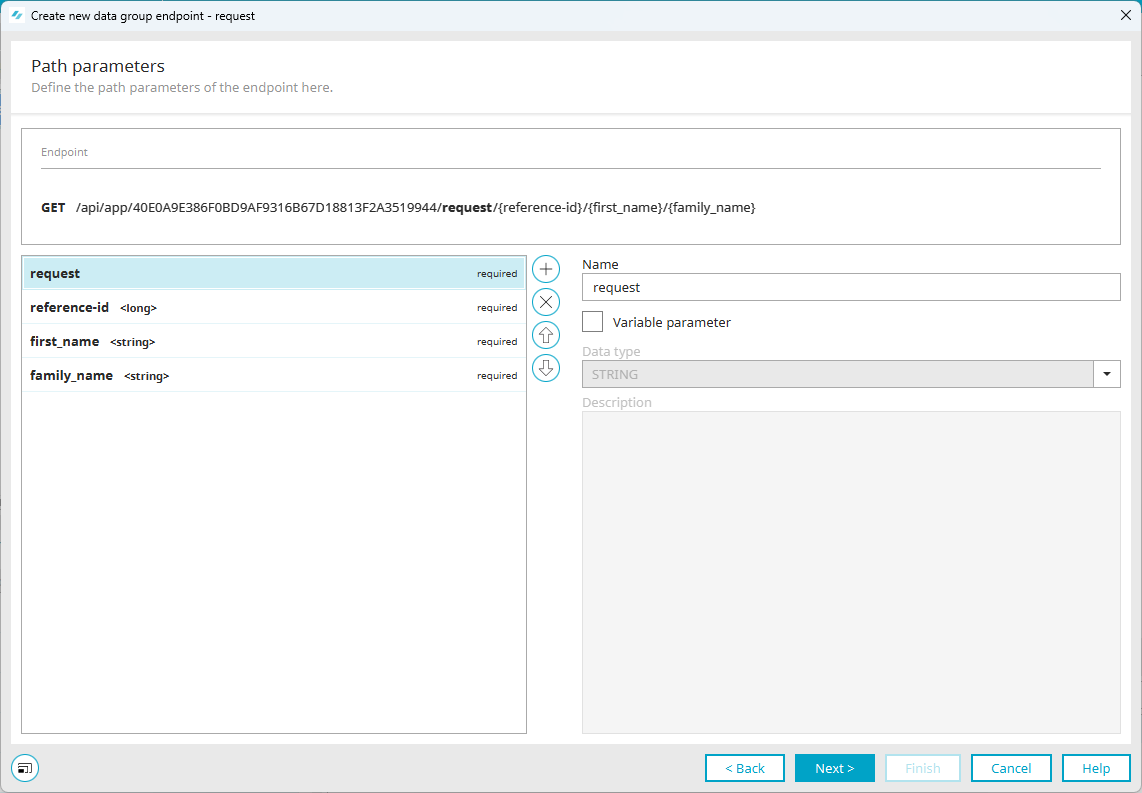
Enter the following path parameters:
-
query
-
reference-id
-
first name
-
last name
-
-
Click "Next."
The "Query Parameters" dialog box appears.
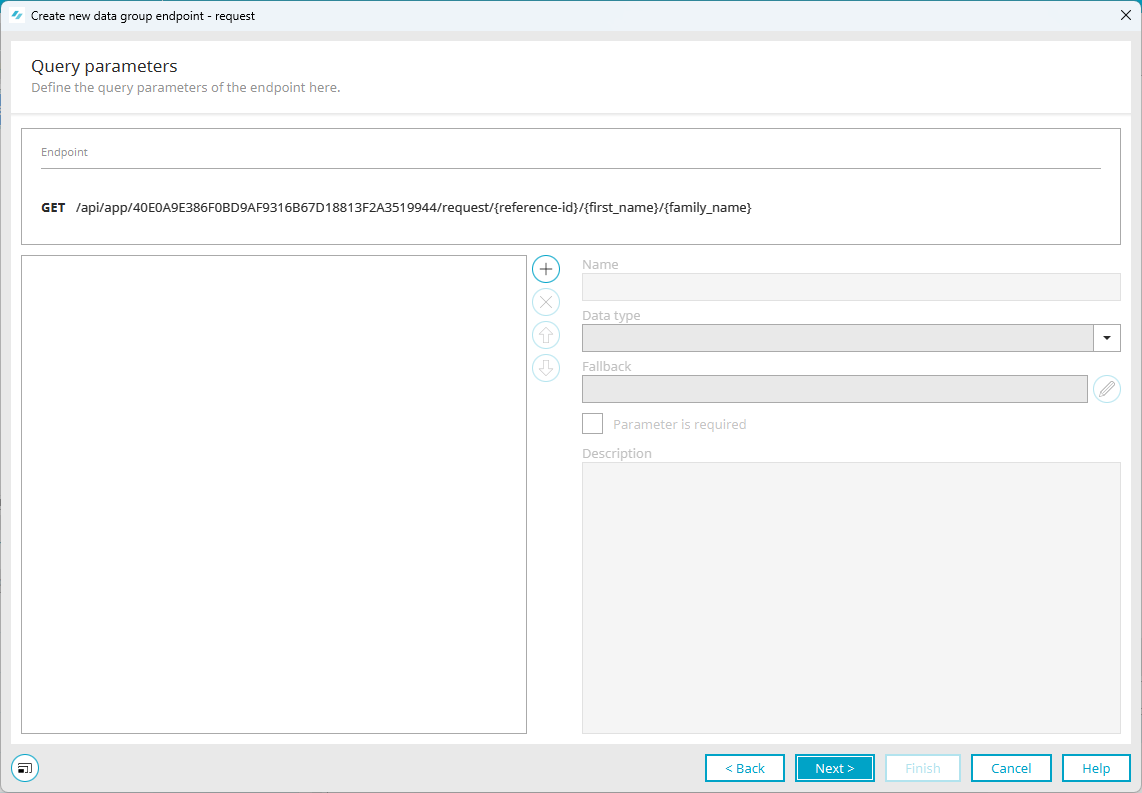
No entries or settings are required in this dialog box.
-
Click "Next."
The "Filter and Sort" dialog box appears.
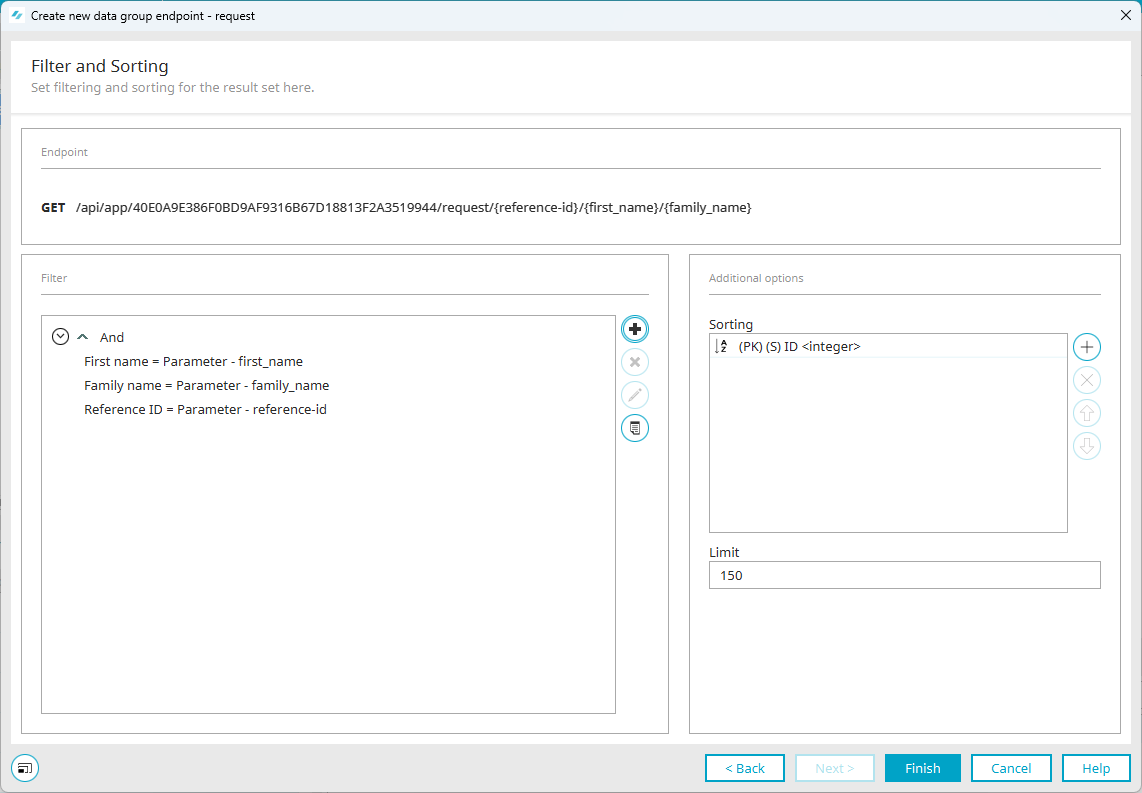
Enter the following filters:
-
First Name
-
Last Name
-
Reference ID
-
-
Click "Finish."
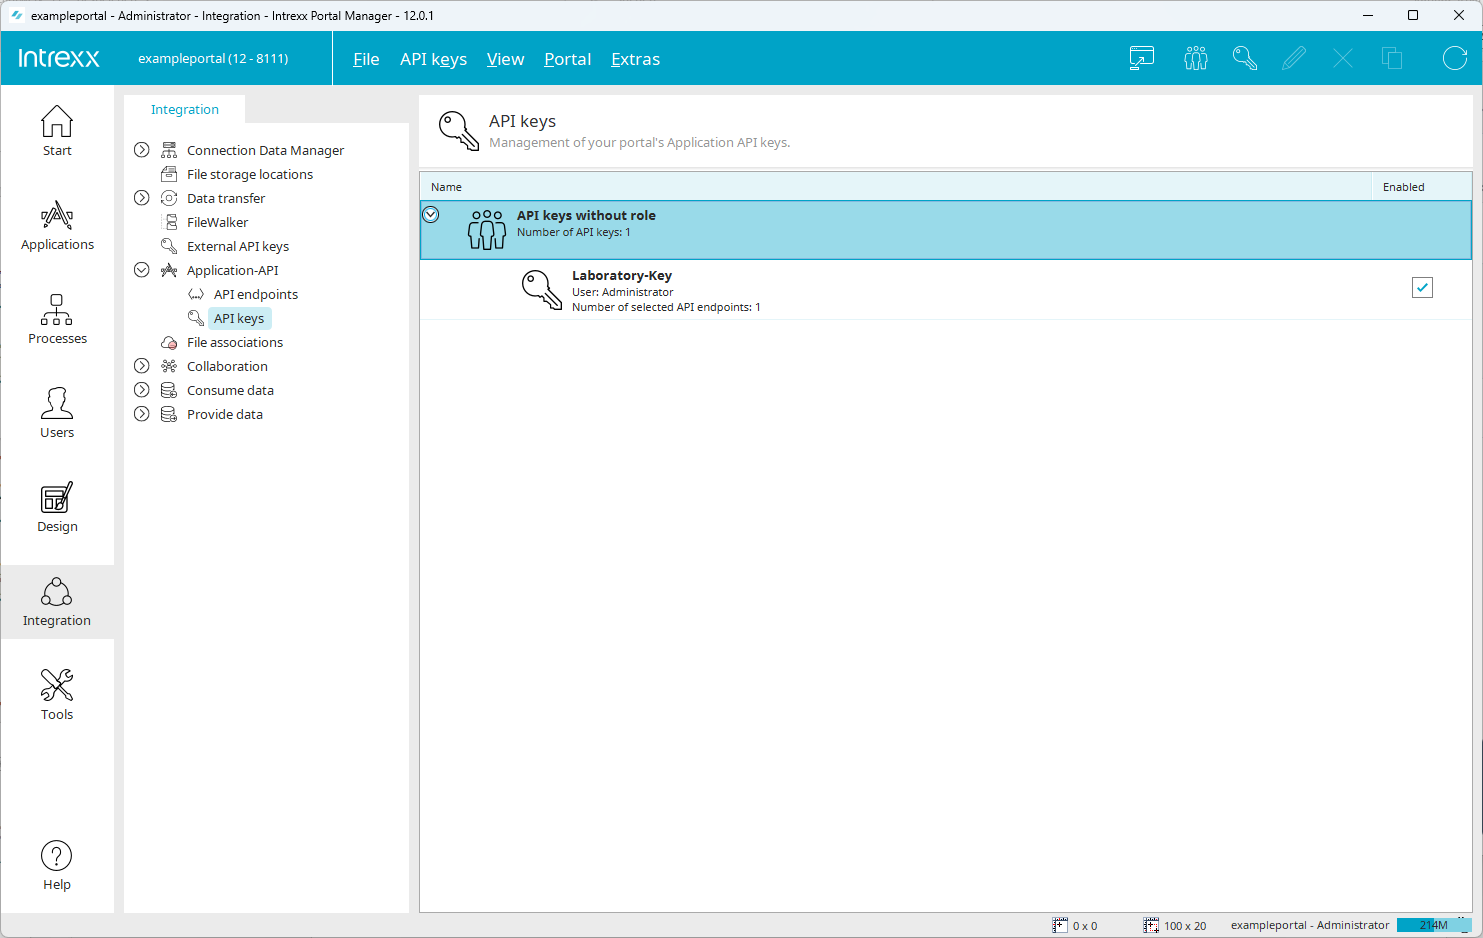
Create an API Key
To allow the clinic or the clinic's app to access the lab's API endpoint, we'll create an API key. This will later be used by the clinic to authenticate itself at the API endpoint.
For detailed information on this topic, see the section " Create and Manage API Keys."
3. Create a clinical application
There are no special considerations to keep in mind when developing the clinic app.
Portal View
The clinic application appears as follows in the portal view:
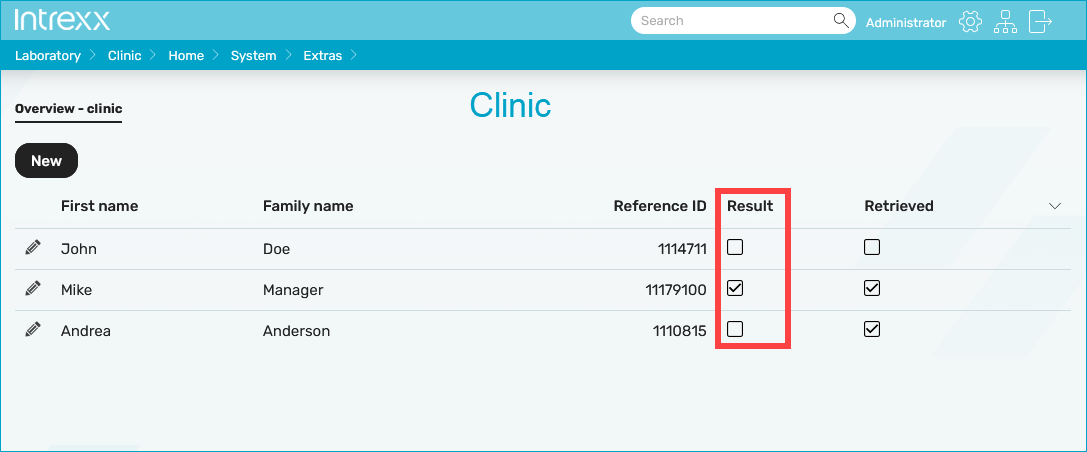
It consists of an overview page where the entered patient data, including the test results, can be viewed and edited.
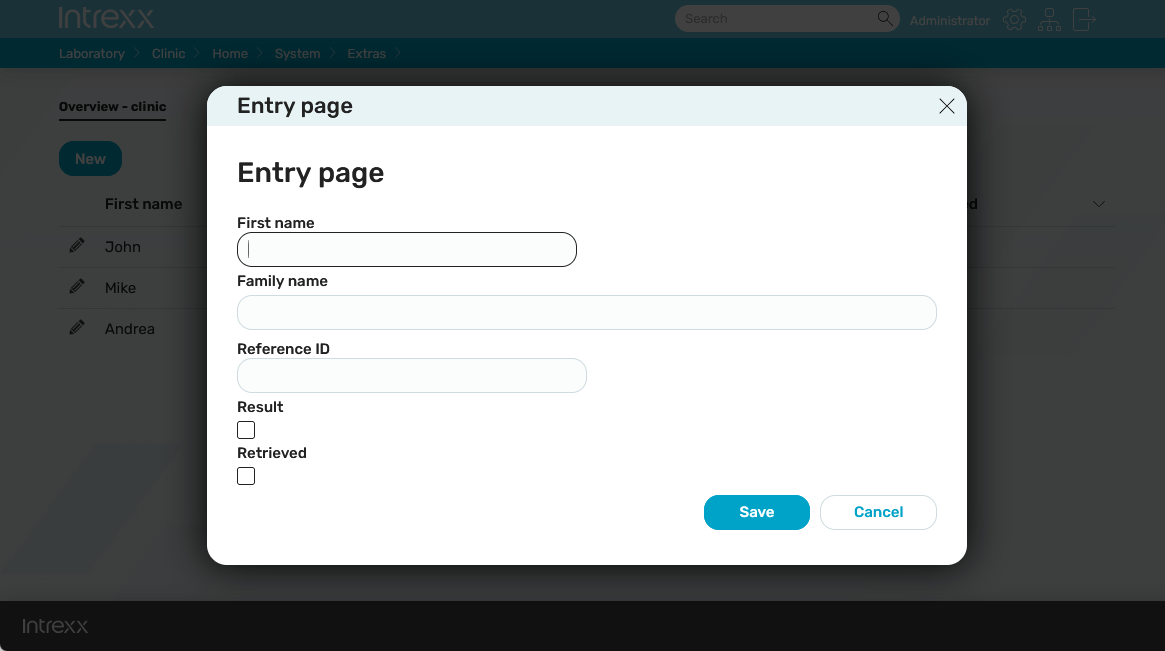
The input dialog looks like this:
Portal Manager
Data Group
The clinic application requires a data group with the following data fields:

First Name (String), Last Name (String)
Enter the patient's first and last name here.
First and last names are used to match records between the laboratory and the hospital.
Reference ID (Integer)
Enter a unique ID here.
In the example described here, the clinic must also know this ID, since it is used—in addition to the first and last names—to identify the patient and ensure accurate data matching.
Result (Boolean)
The result of the REST call action is automatically set here.
Picked up
This field automatically indicates whether a result was retrieved from the lab using the REST call action. Checking this box prevents multiple pickups for the corresponding patient.
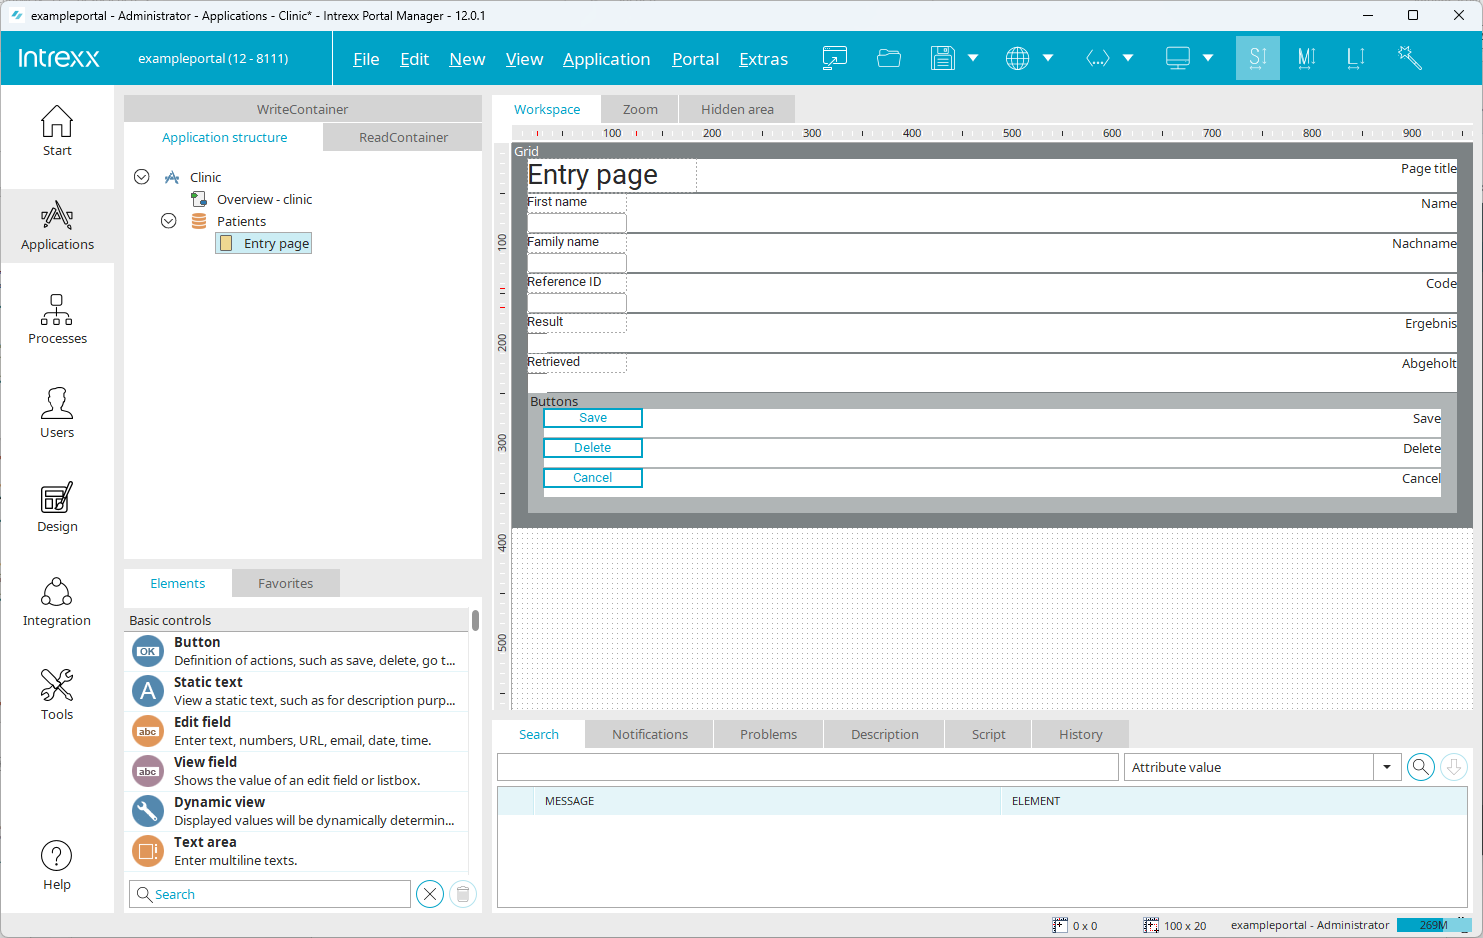
Input Page
Create an input page for the data fields.
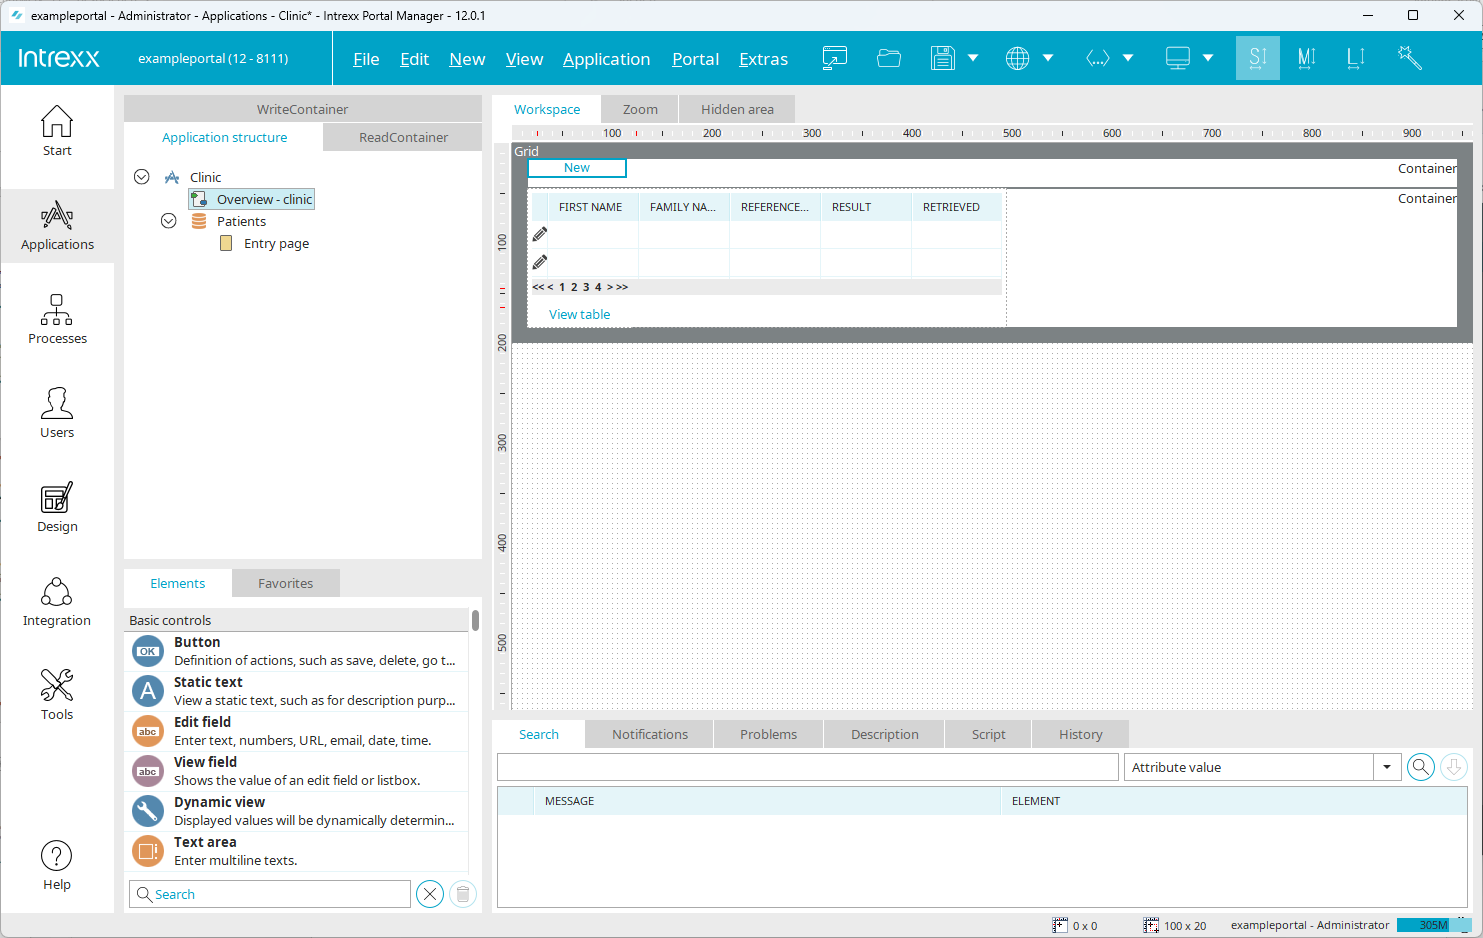
Overview Page
Create a summary page with a table that displays the entries.
4. Create a process with a REST call action
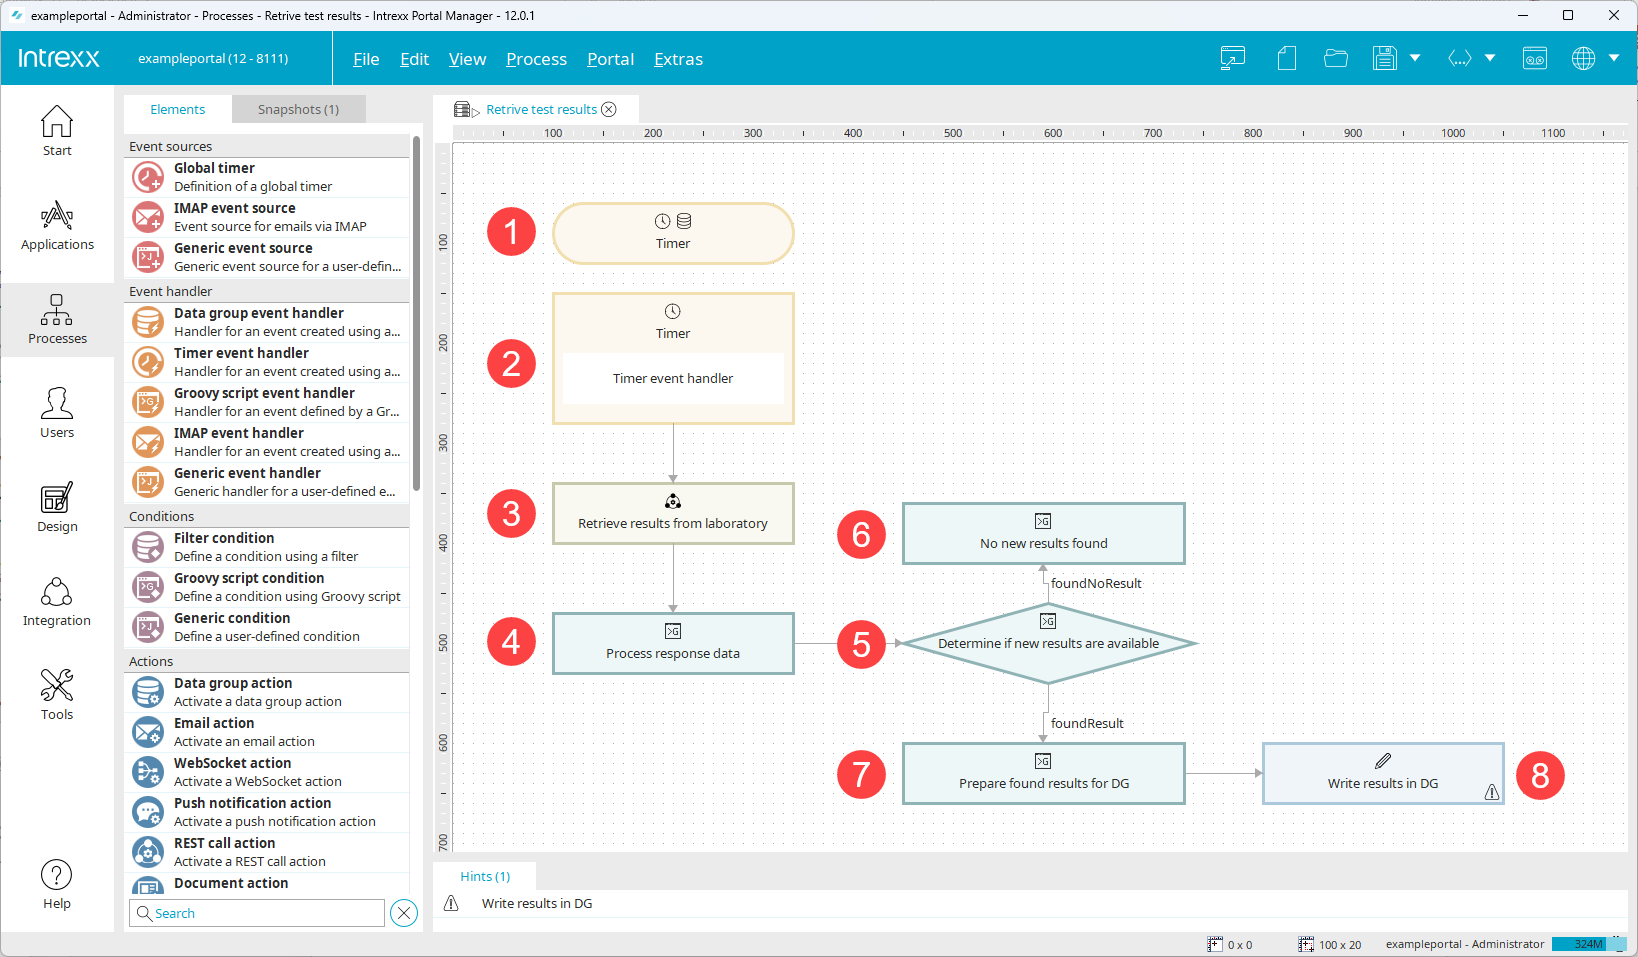
Trigger a Process - Global Timer (1)
The process is started on a schedule.
Add a global timer to the process.
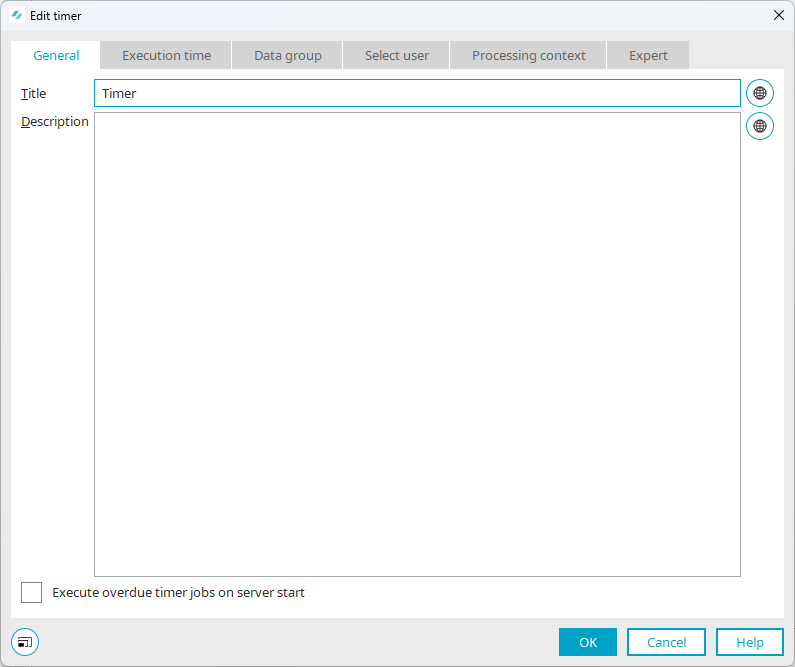
Set the desired execution time. In our example, the process—or REST call action—is executed every 30 minutes.
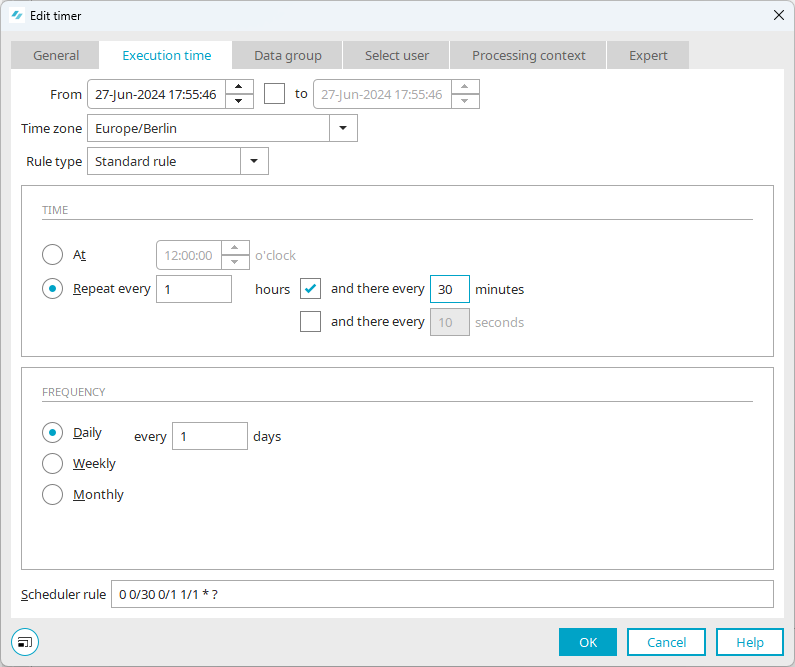
Under "Data Group," select the "Clinic" application and the "Patients" data group.

In the next step, we'll create a filter so that the REST call is performed only for those patients for whom no results have been retrieved yet.
Click the "  " icon.
The "Filter" dialog box appears.
Click the "  " icon.
The "Filter Expression Properties dialogg box appears.
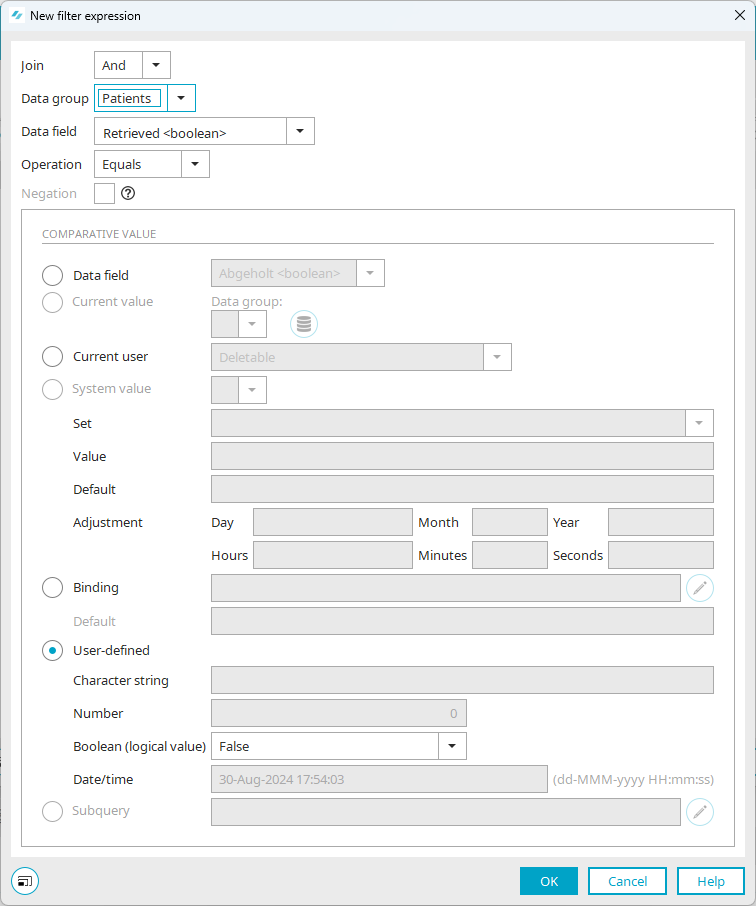
Data Group
Select the "Patients" data group.
Data Field
Select the "Picked up <boolean>" data field.
Operation
Select the "Equal" option.
Custom
Boolean (Logical Value)
Select "False" here.
Trigger a Process - Timer Event Handler (2)
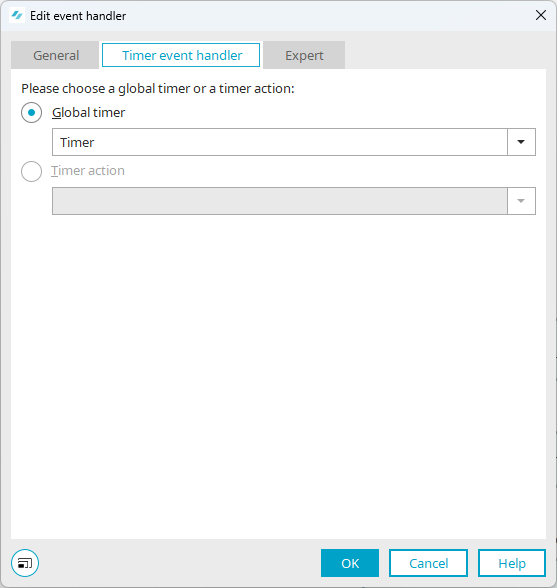
Add a timer event handler to the process.
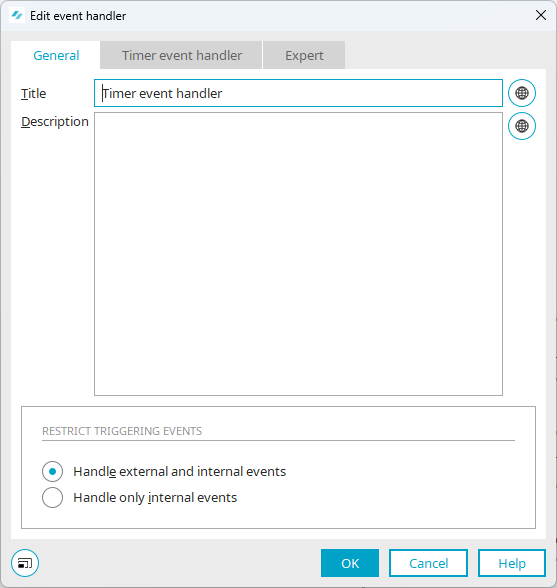
Under "Timer Event Handler," select the Global Timer you added earlier.
Set Up a REST Call - Retrieve Lab Results (3)
General: Enter an alias for the REST call action.
Parse JSON: Check this box because the lab application's API endpoint returns a response in JSON format, which must be parsed.

Authentication and Headers
In this dialog box, you must enter the required information for authentication at the lab application's API endpoint (Create API Endpoint).
Select the "API Key" authentication type.
In the "Token" field, enter the API key you generated for the lab application's API endpoint (Create API Key).
You also have the option to manage the API key via Resource Mapping ( ).
).

Request This dialog box is used to define the request.
For detailed information on this, see the " Configure Request" section.
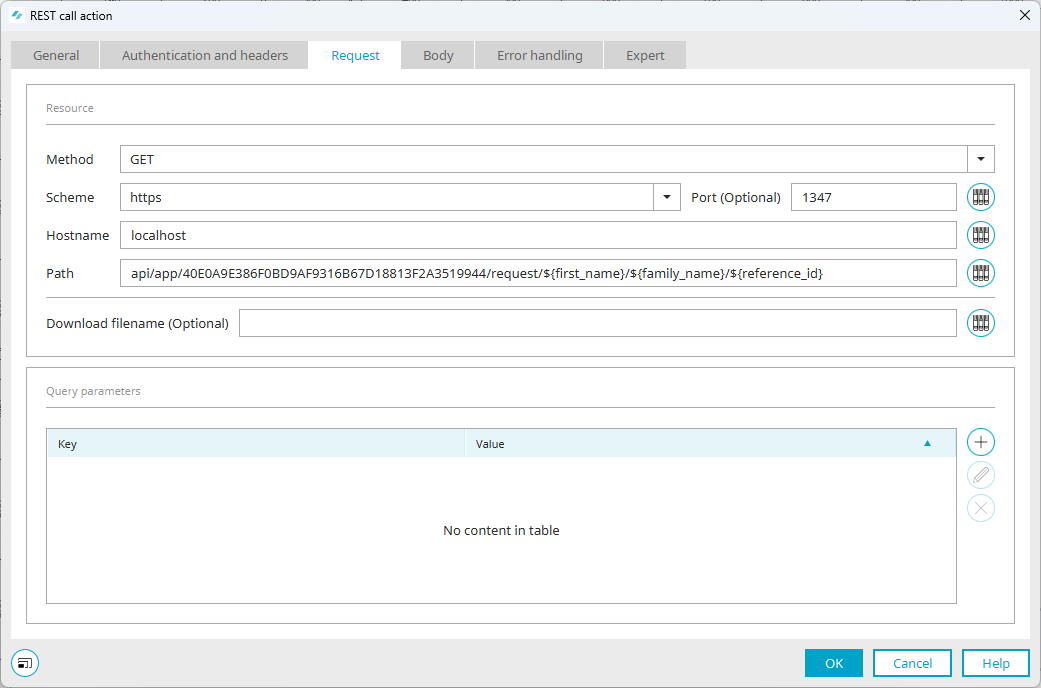
GET Method
Schema https
Port (Optional) In our example, this is port 1342.
If you do not enter a value, the following default values will be used:
-
Port 443 (for HTTPS)
-
Port 80 (for HTTP)
Hostname Enter the hostname here that is used to access the REST API endpoint.
Path Enter the path here.
In our example, the path is structured as follows:
api/app/40AD456DF58779GGG4273F123456789/query/${first-name}/${last-name}/${reference-id}
The following table provides an overview of the general structure of the API URL.
|
Method |
Base Path |
Parameters | |||
| variable | fix | fix | variable | variable | variable |
| GET | /api |
/app/ |
/Application GUID | /Path Parameter | ?/Query Parameter |
For detailed information on this, see the section titled " Structure of the API URL."
You also have the option of managing the path parameters using resource mapping ().
Body: Select "None" as the body type.
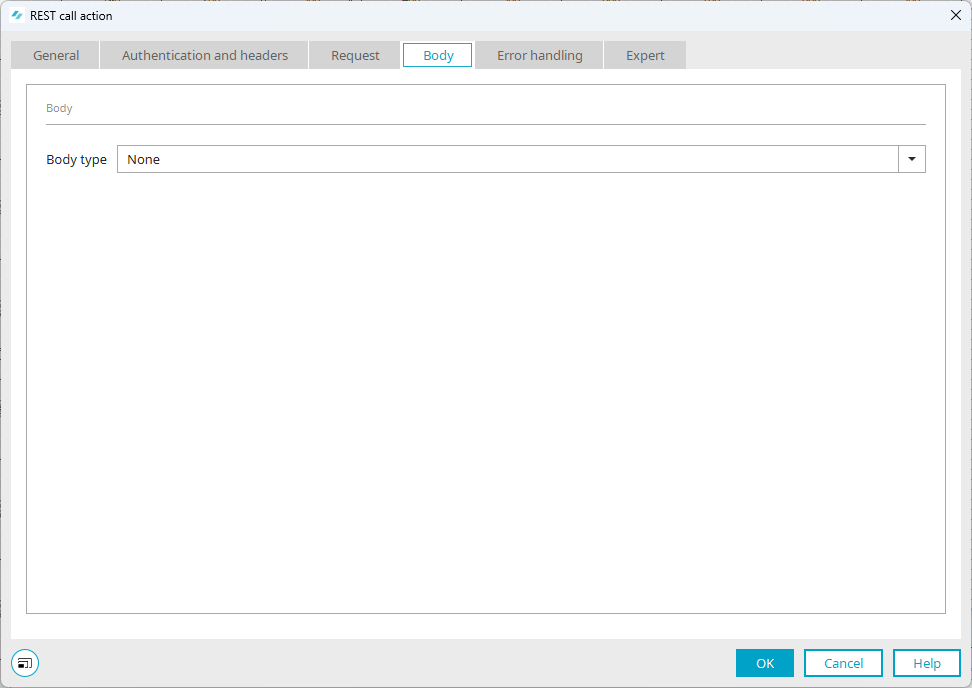
Click "OK."
Processing Response Data (4)
This step in the process involves processing the received JSON and placing the results into the processing context. A Groovy script action is used for this.
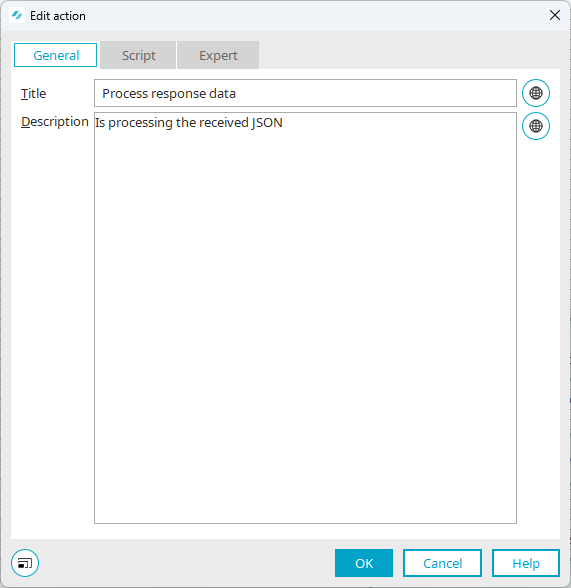
JSON
The response data is presented as follows:
            [
	information:[                <-- "information" kommt aus der App-API und behandelt, was geliefert wird.
		limit:150,
		offset:0,
		orderBy:[
			[
				field:1234B7DFE7A0D74FD2318E540D9AF3B72EF789,
				order:asc
			]
		]
	],
	data:[                      <-- Das ist der abgeholte Datensatz.
		[
			ergebnis:true,
			reference-id:1234,
			vorname:John,
			nachname: Doe,
			created:2024-07-24T11:24:46Z
		]
	]
]
In our example, the following Groovy script is used to process the response data.
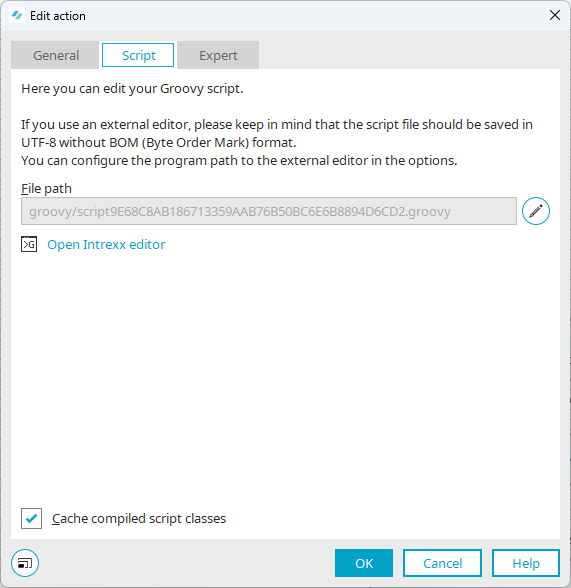
g_syslog.info("\nAbgeholtes Ergebnis: \n" + g_sharedState.abholen.body.json + "\n");
g_syslog.info("\nBefund: \n" + g_sharedState.abholen.body.json.data.ergebnis + "\n");

if (g_sharedState.abholen.body.json.data.ergebnis[0] == null) {
	g_syslog.info("Kein Befund vorhanden")
} else {
	boolean befund = g_sharedState.abholen.body.json.data.ergebnis[0];
	if (befund == false) {
		g_syslog.info("Befund ist negativ");
	} else {
		g_syslog.info("Befund ist positiv");
	}
}
Determine whether a result is available (5)
In this process step, the system determines whether a (new) result was transmitted in the response data. A Groovy condition is used for this.
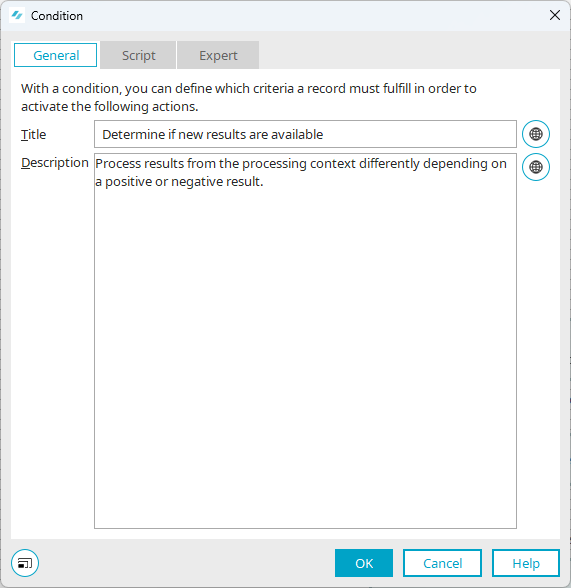
To determine whether a (new) result is available, the following Groovy script is used in our example.
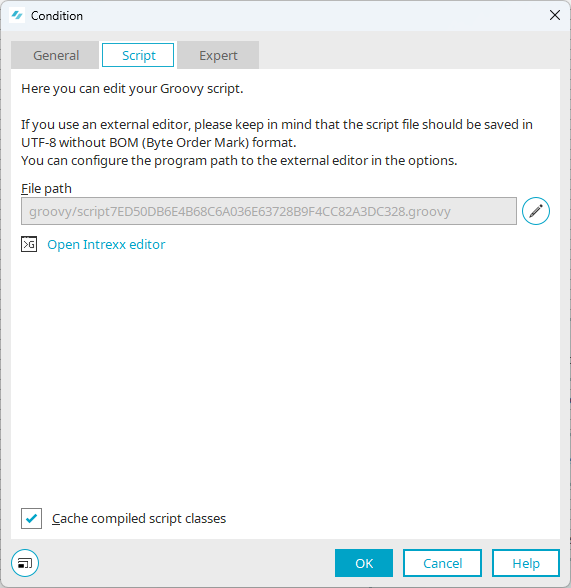
            if (g_sharedState.abholen.body.json.data.ergebnis[0] == null) {
	return [foundNoResult]
} else {
	return [foundResult]
}
There are no new results - Logging(6)
In our example, an entry should be written to a log file if there are no new results.
The logging is for informational purposes only. It has no bearing on the functionality of the process.
For logging, we use a Groovy script action that employs the following Groovy script.
g_syslog.info("Kein Befund");
Prepare Results for Entry into the Patient Data Group (7)
If new results have been submitted in the response data, they should be entered into the patient data group. To make this possible, they are first written to the processing context. The following Groovy script is used for this purpose.
g_sharedState.befund = g_sharedState.abholen.body.json.data.ergebnis[0];Enter results into the patient data group (8)
The final step in the process is to enter the following into the patient data group:
-
the test result itself
-
the fact that a test result was retrieved (This is used as a filter.)
A data group action is used for this purpose.
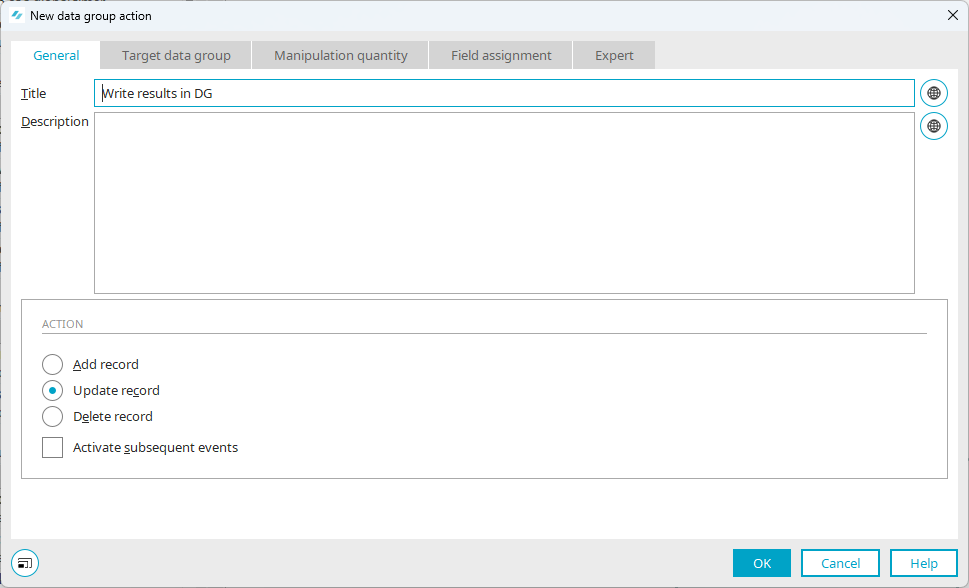
General: Enter a title for the promotion. Make sure the "Change Record" option is selected.
Target Data Group: Select the "Clinic" application. Since this application contains only the "Patients" data group, it is automatically selected.

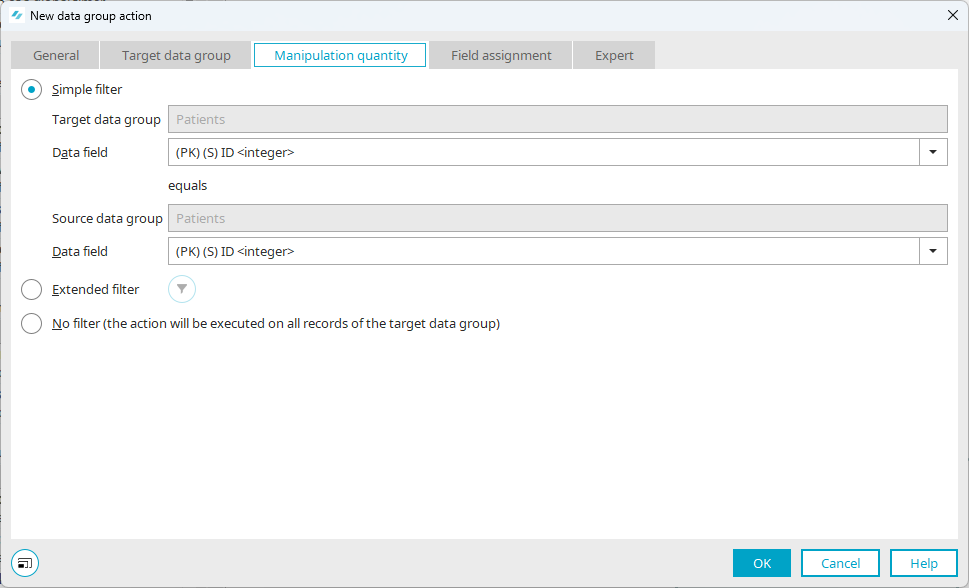
Manipulation Amount: Select the "Simple Filter" option. For both the destination data group and the source data group, select the file field "(PK)(S)ID <integer>."
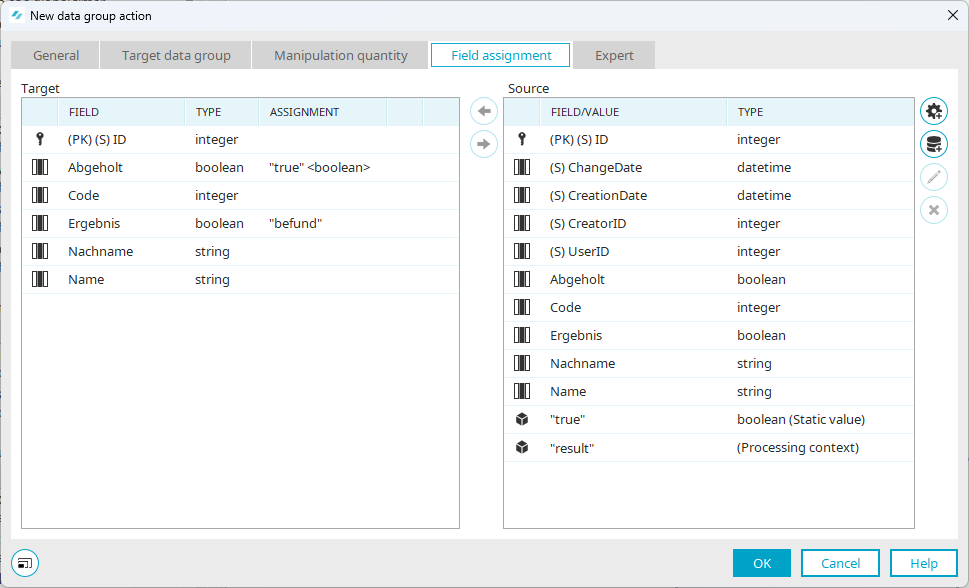
Field Mapping: During field mapping, the "befund" parameter from the processing context must be added to the source.
-
Click the "
 " icon.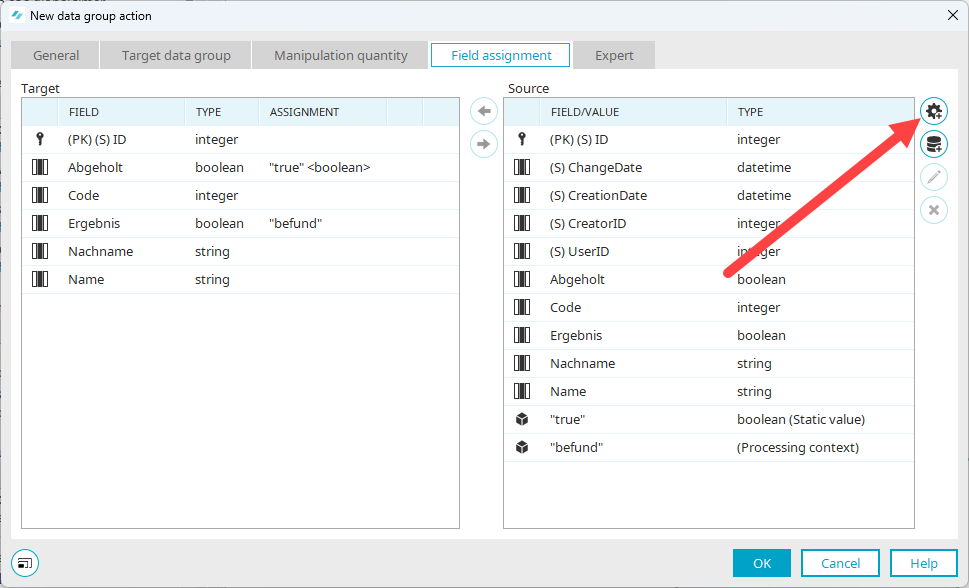
The "Custom Value" dialog box appears.
-
Select the "System Value" option.
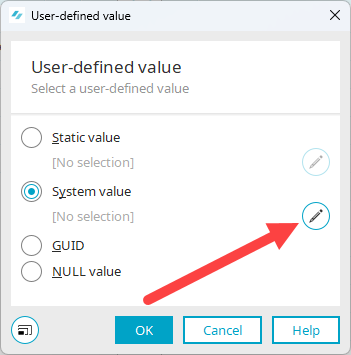
-
Click the "
 " icon.
The "System Value" dialog box appears.
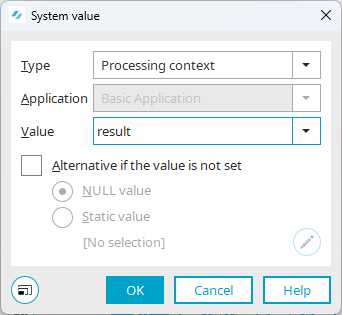
Type: Select the value "Processing Context" here.
Value: Enter the text "findings" here.
-
Click "OK."
You will return to the "Field Mapping" dialog box.
-
Click the "
" icon again.The "Custom Value" dialog box appears.
-
Select the "Static Value" option.
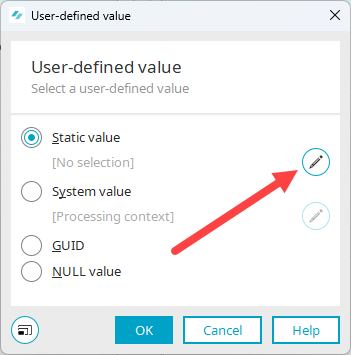
-
Click the "
" icon. -
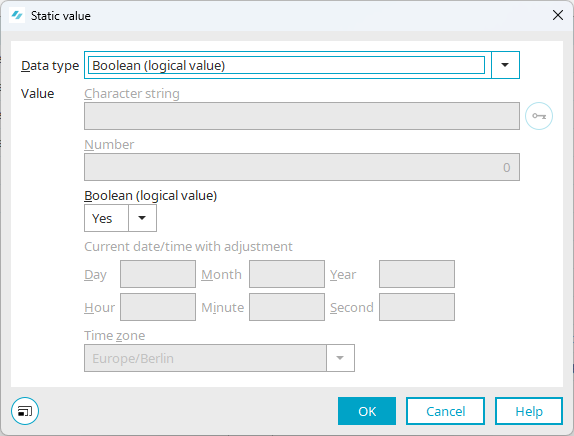
The "Static Value" dialog box appears.
Data Type: Select the value "Boolean (Logical Value)" here.
-
Click "OK."
The "Field Mapping" tab now looks like this:
-
Click "OK."
You have now fully set up the process.