

Manage Permissions Generically (Experts)
Requirements
To access Generic Rights Management, the "Enable expert options" checkbox must be selected under "Tools > Options > Portals."
Target Audience
Generic Rights Management is designed for experts who want to manage additional rights beyond those assigned via dialog boxes. To use this feature, it is helpful to be familiar with "Java Permission Classes."
Function Description
Generic Rights Management allows you to assign the rights classes provided by Intrexx—as well as your own rights classes—to specific objects. You can then assign the objects to rights holders. You can specify which actions should be performed in each case. Later, at runtime, you can use Groovy, for example, to check whether a specific rights holder is allowed to perform a specific action on a specific object and respond accordingly.
The following section provides an example of how to add (another) rights holder to an Intrexx rights class and how to add an additional right.
Using Intrexx Permission Classes - Adding Permission Holders
Step-by-step guide
To add an (additional) permission holder to an Intrexx permission class, follow these steps:
-
In the main menu, click "Portal > Expert Area > Generic Rights."
To access this menu item, the "Enable expert options" checkbox must be selected under "Tools > Options > Portals."
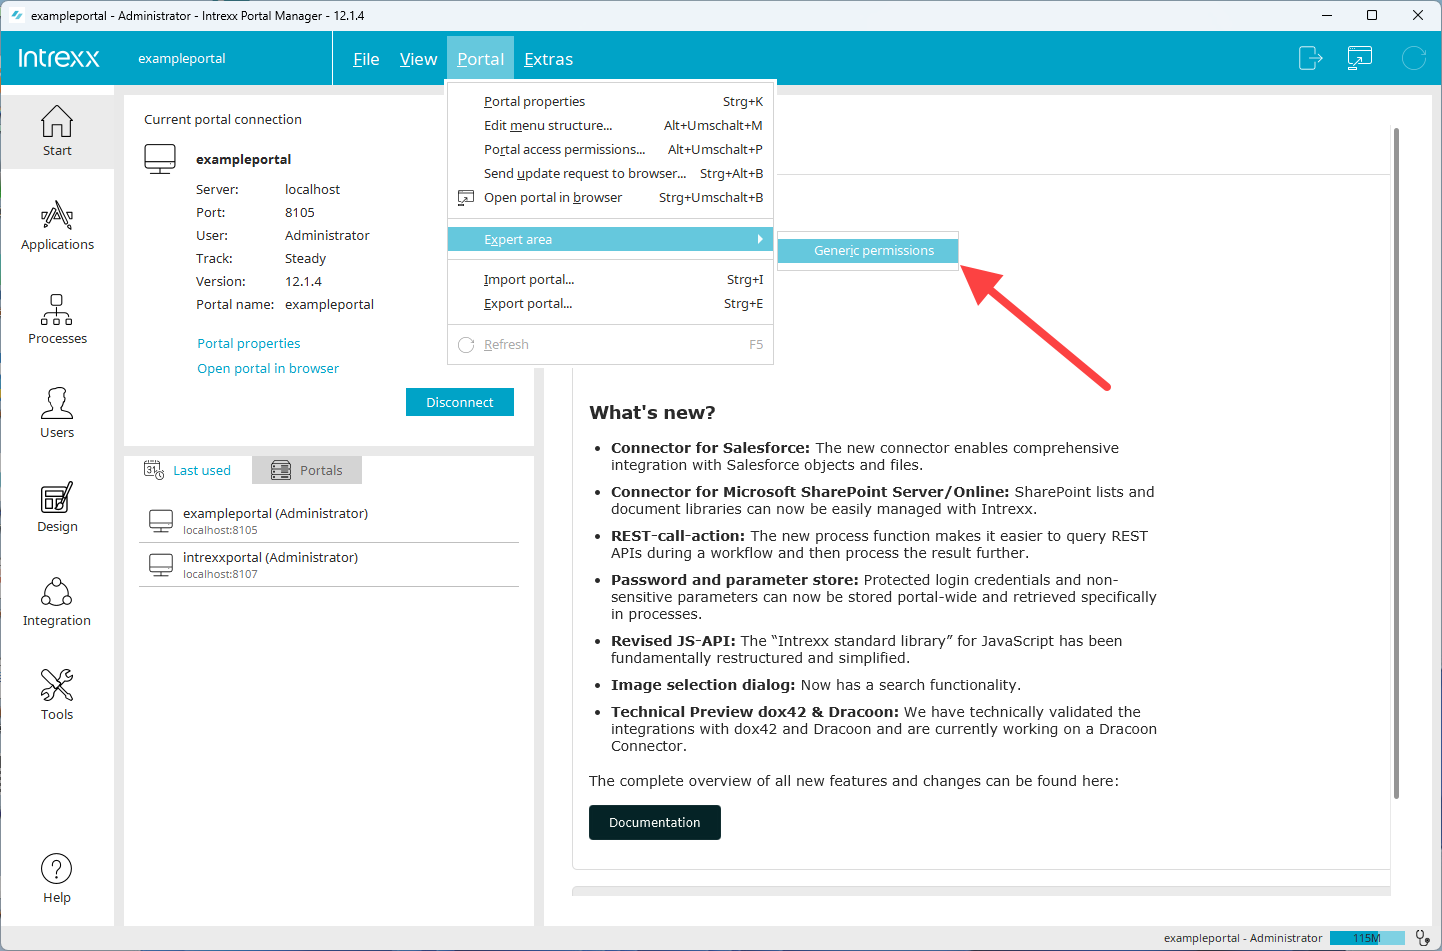
The "Generic Rights Management" dialog box appears.
-
Open the "Permission Class" drop-down list.
The rights classes provided or used by Intrexx are displayed.
For information on Intrexx permission classes, see the following links:
-
Select the desired permission class (
 ).
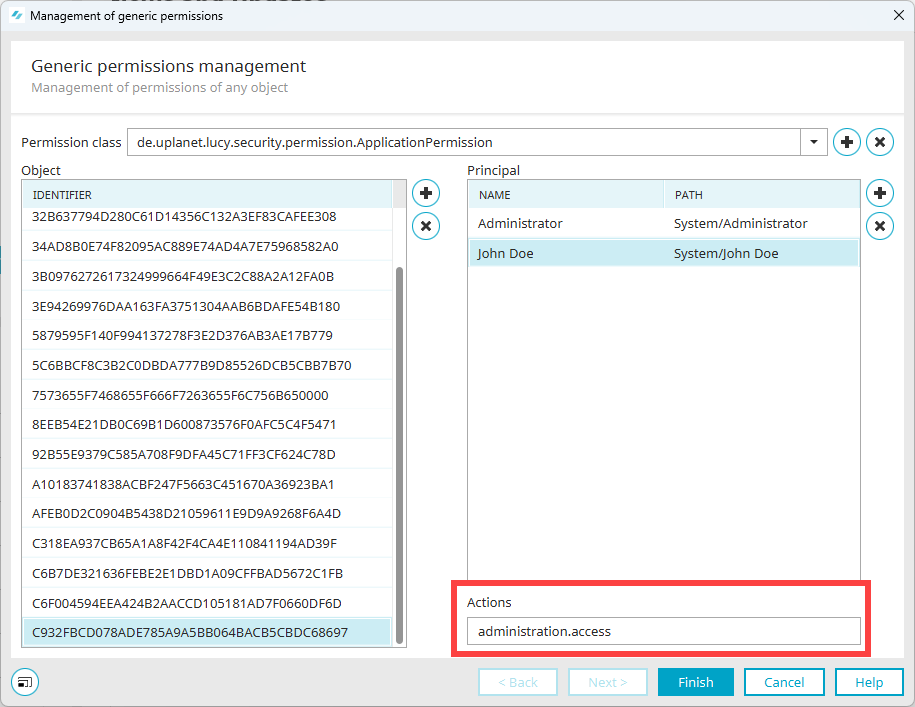
).In the screenshot shown below, the permission class `de.uplanet.lucy.security.permission.ApplicationPermission` has been selected.
The "Object" section (
 ) displays all objects (applications) that use this rights class. In this case, the identifier is the GUID of the respective application.
As soon as you select an identifier, the rights holders are displayed in the "Rights Holders" section (
 ).
).As soon as you select a rights holder, the available actions will be displayed in the "Actions" field (
 ). The "Actions" field is an input field. Here you can add or remove actions (separated by commas).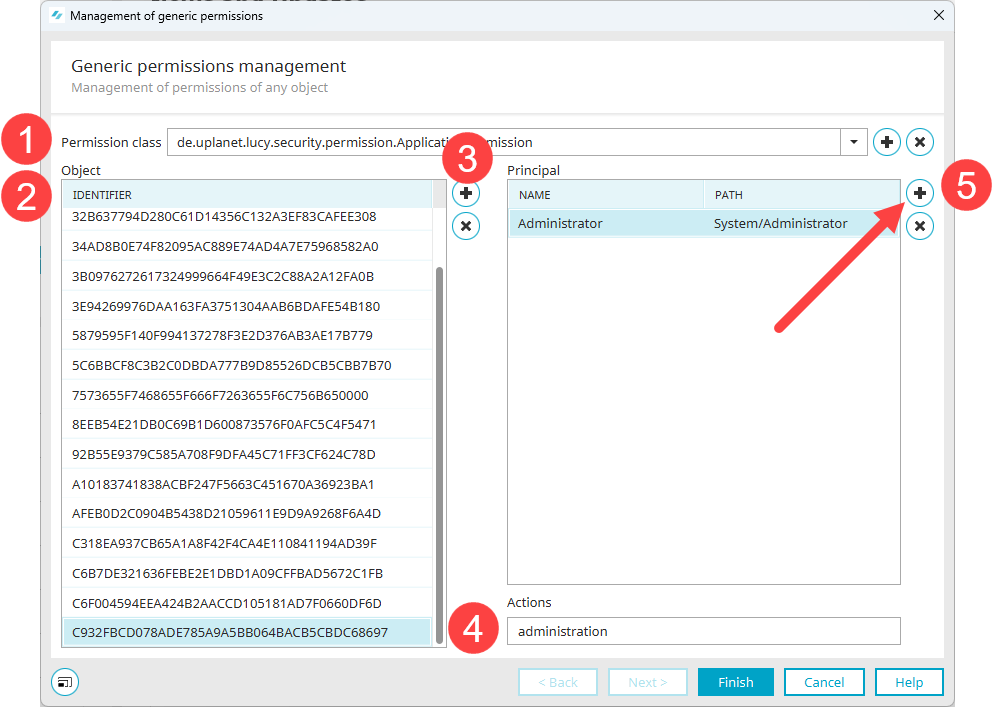
-
Click the "
 " icon.
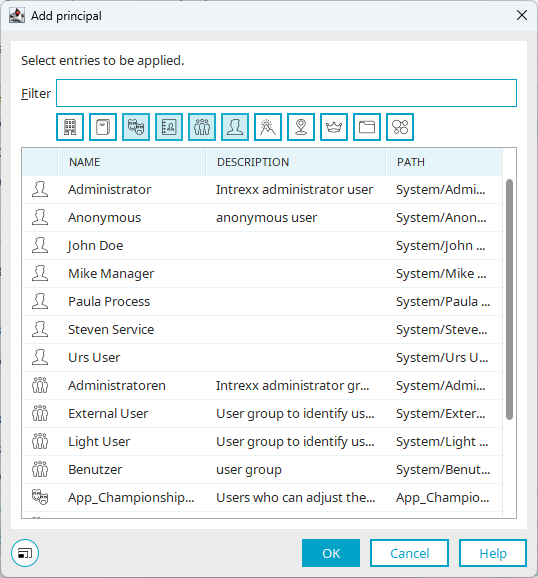
The "Add Rights Holder" dialog box appears.
-
Select the desired rights holder.
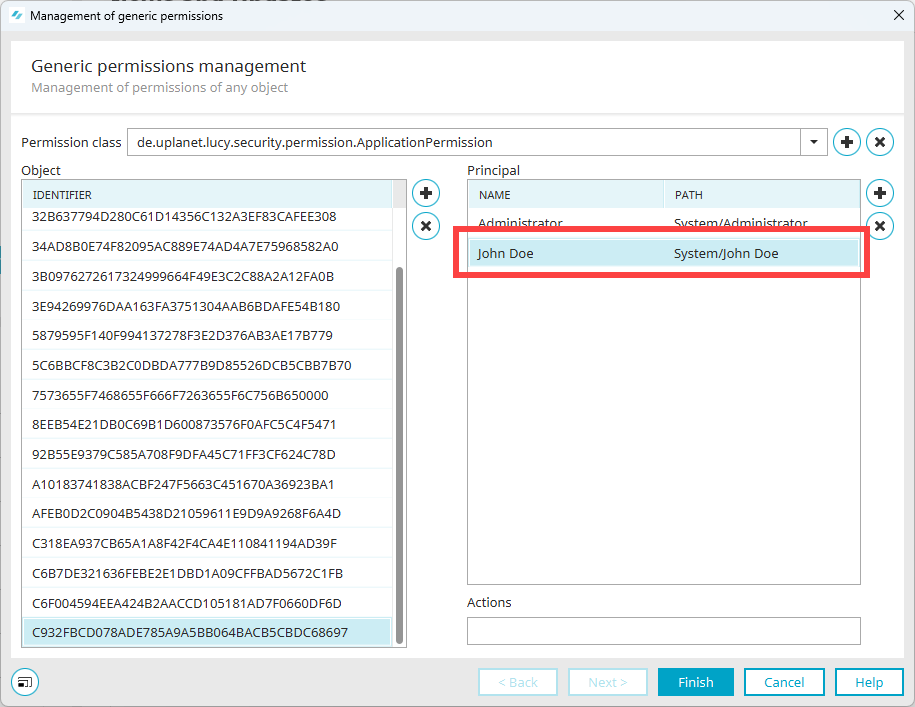
The copyright holder is displayed.
-
Enter the desired permissions in the "Actions" field.
The screenshot shown below depicts the " administration,access" permissions.
-
Click "Finish."
More Information
Add Your Own Rights Classes
Step-by-Step
To add a custom or new rights class, follow these steps:
-
Click the "
" icon.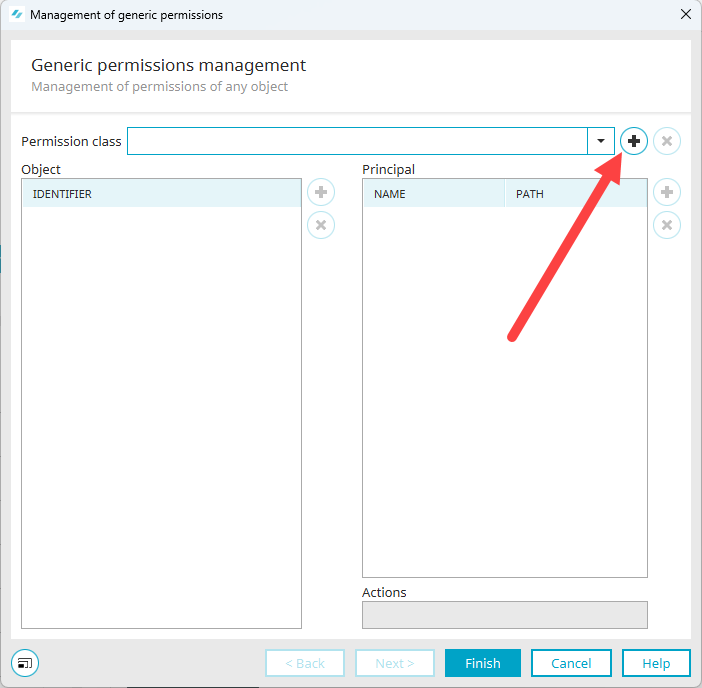
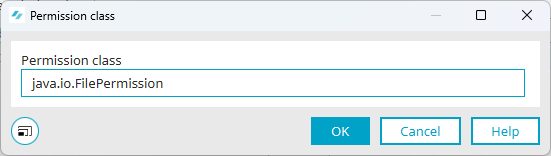
The "Rights Class" dialog box appears.
-
Enter the rights class.
In the screenshot shown below, this is `java.io.FilePermission`.
-
Click "OK."
You will return to the "Generic Rights Management" dialog box.
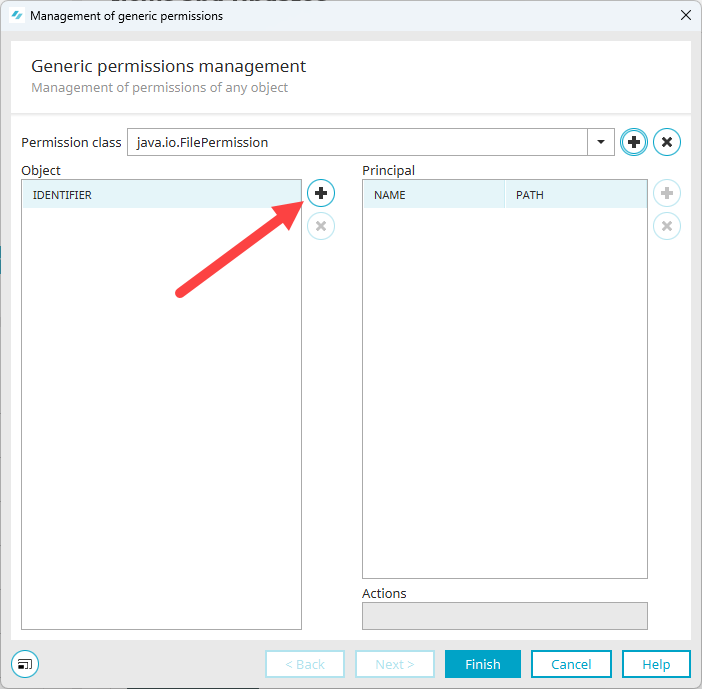
The recorded rights class is displayed.
-
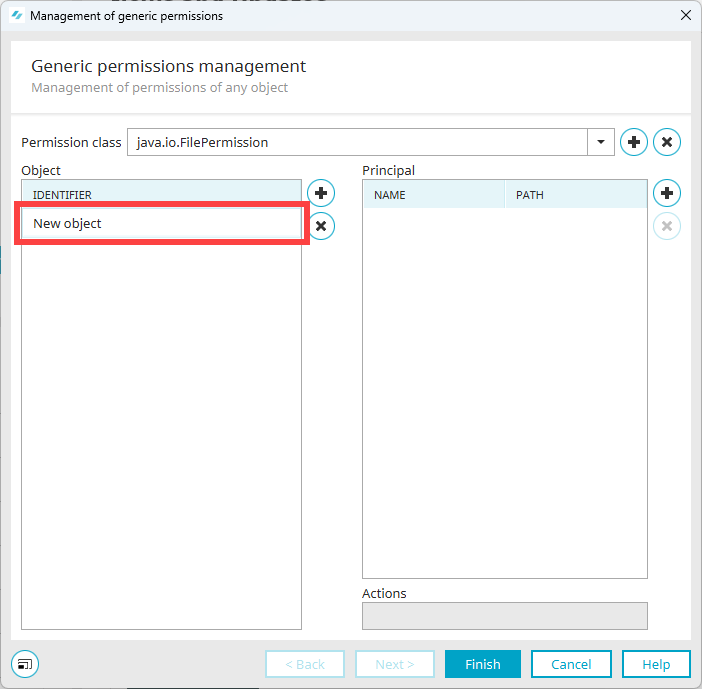
Click the "
" icon.A new row appears in the "Object" section.
-
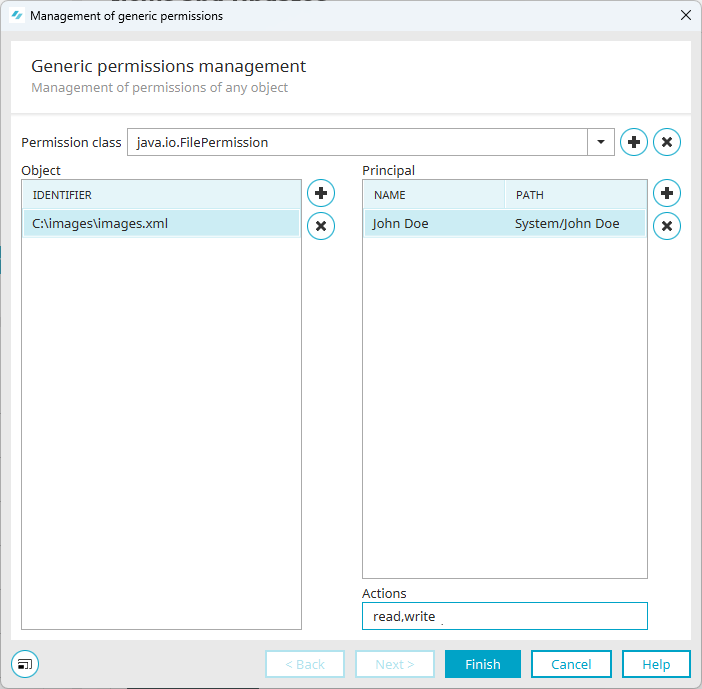
Click in the new row and enter the identifier.
In the screenshot shown below, this is a path to a file.
(For more information, see the FilePermission class
 at .)
at .) -
Click the "
" icon in the "Rights Holder" section. -
The "Add Rights Holder" dialog box appears.
-
Select the desired rights holder.
You will return to the "Generic Rights Management" dialog box.
The copyright holder is displayed.
-
Enter the desired permissions in the "Actions" field.
The screenshot shown below displays the read and write permissions.
-
Click "Finish."
More information