Integration of alternative messaging providers
The "seven.io" phone provider preconfigured by INTREXX can be replaced by any messaging provider. Own hardware (telephone systems, GSM cards) or software can also be connected if necessary.
The following steps must be carried out:
-
Copy the file "00-phone-service-context" and save it in the corresponding directory in the portal
-
Request the necessary information from the provider
-
Create process that converts SMS or voice call
-
Including the provider in the respective method
Copy the file "00-phone-service-context" and store it in the portal
In order for an alternative messaging provider to be used by Intrexx, you must copy the 00-phone-service-context file and save it in the corresponding directory in the portal.
The 00-phone-service-context file can be found in the following directory:
<intrexx-installation-directory> \samples\custom-phone-service\internal\cfg\spring\custom
Copy the file and paste it into the following directory:
<portal directory>\internal\cfg\spring\custom
Restart the portal server service.
The required information from the provider
The following information is required by a provider for sending a voice call / SMS:
-
API key: You need an API key for the Connect, which is provided by the provider. You can obtain information directly from your provider.
-
Request methods for the REST call action: scheme, port, host name, path
-
Storing the API key in the login information store
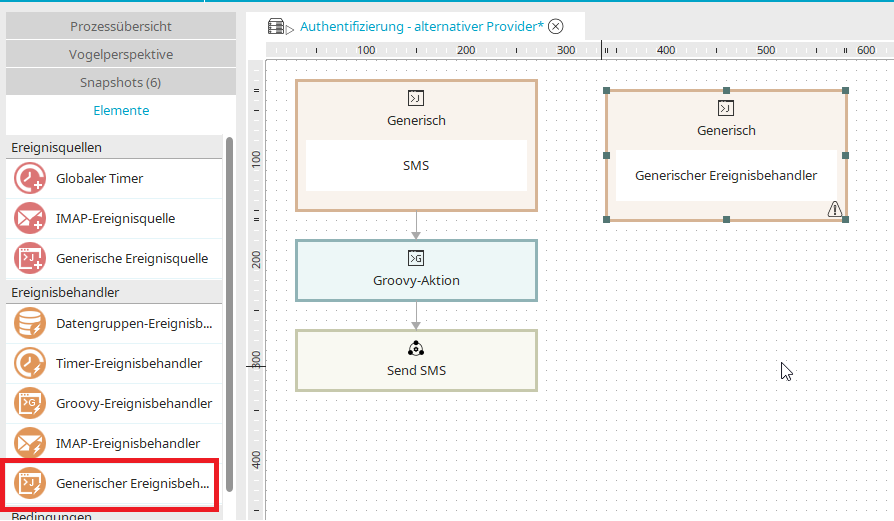
Overview of the structure of the process
Here we will cover the process that determines information from Intrexx and transfers it to the provider.
Overview of the tasks in the process:
-
Generic event handler:
It reacts to the "Multi-factor authentication" event if the SMS or voice call method has been selected.
-
Groovy action:
The message data (sender, message) is determined using Groovy and written to the processing context.
-
Residual call campaign
The Rest-Call executes the request and sends the SMS or voice call to the messaging provider stored in the login information memory.
SMS
To send an SMS using an alternative provider for multi-factor authentication, open the Portal Manager and switch to the "Processes" module. Create a new process.
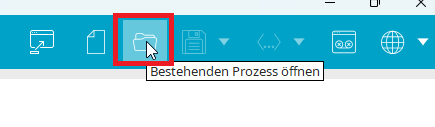
Click on the process manager icon in the toolbar.
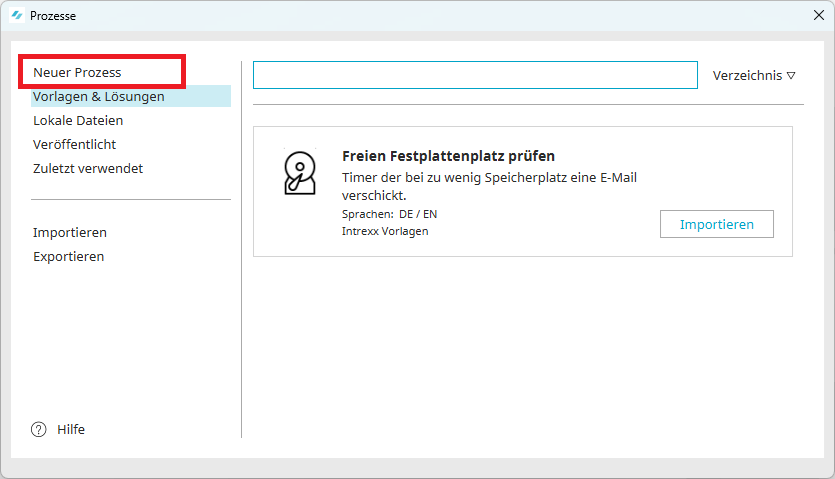
In the Process Manager, click on the first entry "New process".
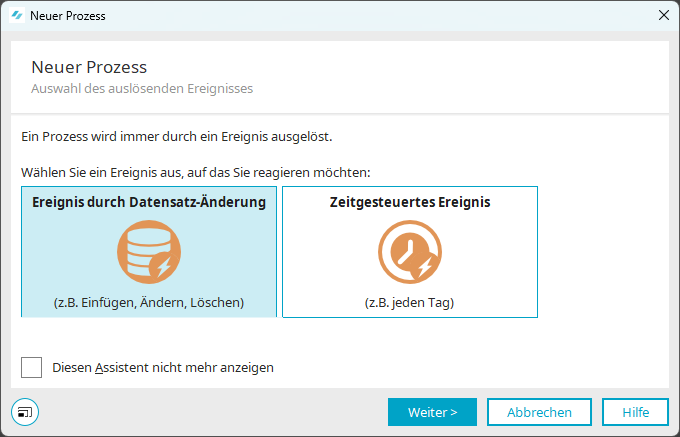
Cancel the "New process" dialog via the "Cancel" button.
Generic event handler
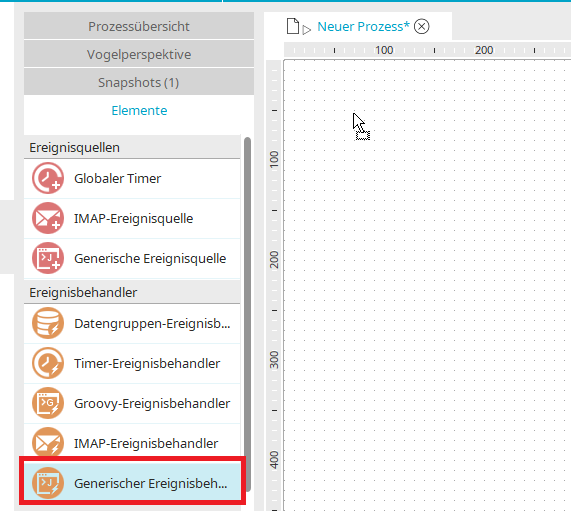
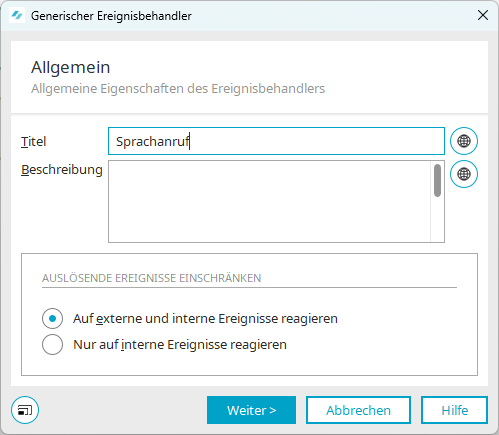
Add the "Generic event source" to the process using drag & drop.
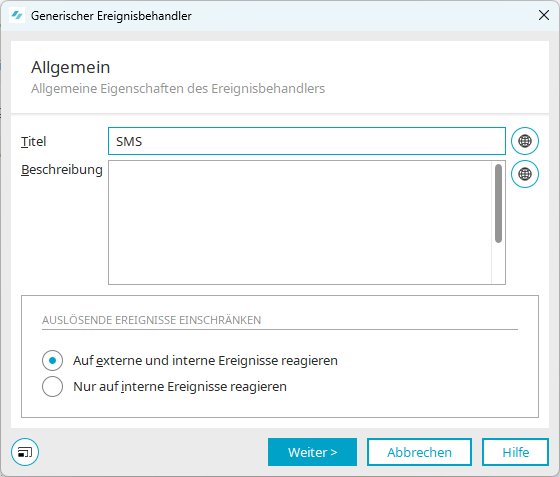
Assign the title "SMS". The process reacts to external and internal events.
Click on "Next".
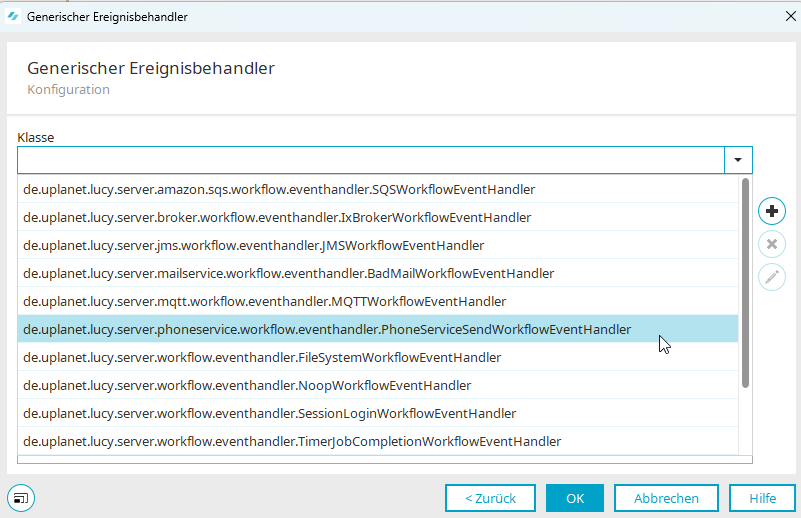
Configuration
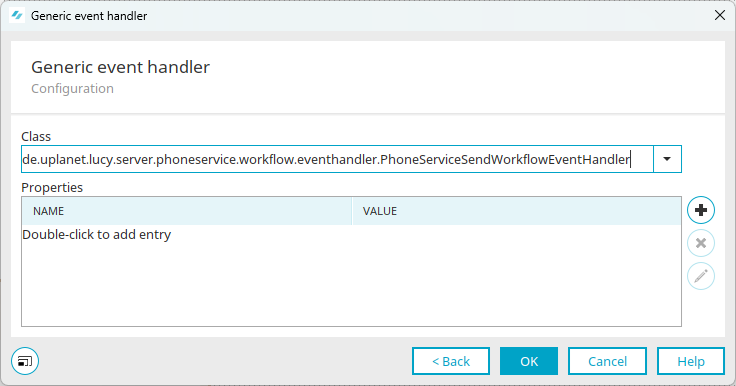
Select the class from the list
"de.uplanet.lucy.server.phoneservice.workflow.eventhandler.PhoneServiceSendWorkflowEventHandler"
menu.
Add a new entry using the plus symbol.
Activate SMS
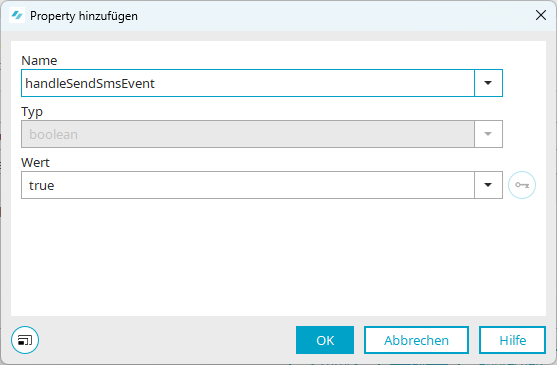
SMS dispatch should be taken into account:
Select the "handleSendSmsEvent" class and enter the value "true".
Deactivate voice call
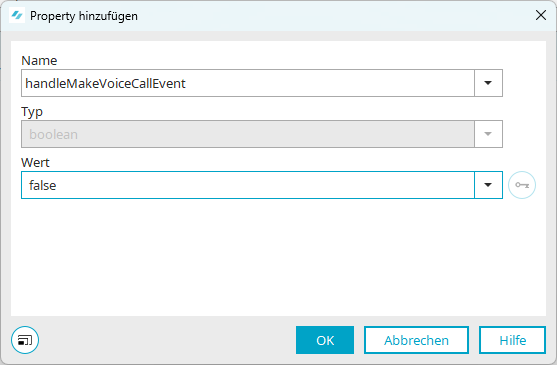
Use the plus symbol to add a new entry so that voice calls are ignored.
Select the "handleMakeVoiceCallEvent" class and enter the value "false".
Close all open dialogs with "OK".
Groovy Script Action
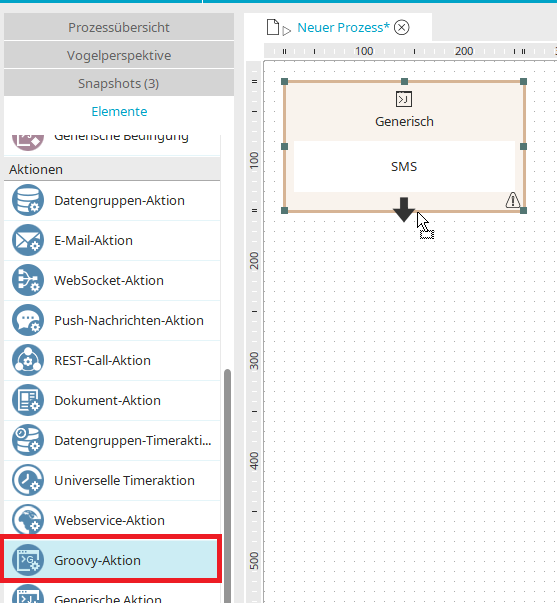
Add a Groovy action to the generic event handler.

Double-click to switch to the properties dialog.
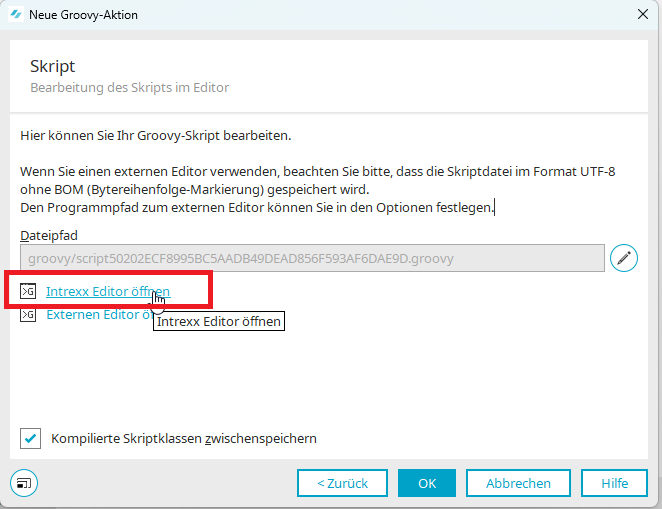
Click on "Next" and open the Intrexx editor via the link of the same name.
The Intrexx script editor will open.
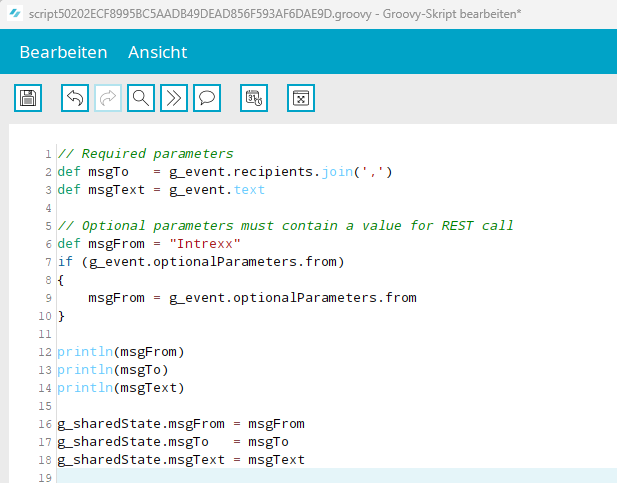
Store the following script, in which the sender, recipient and text are determined and written to the processing context in Intrexx:
            // Required parameters
def msgTo   = g_event.recipients.join(',')
def msgText = g_event.text

// Optional parameters must contain a value for REST call
def msgFrom = "Intrexx"
if (g_event.optionalParameters.from)
	{
		msgFrom = g_event.optionalParameters.from
	}
g_sharedState.msgFrom = msgFrom
g_sharedState.msgTo   = msgTo
g_sharedState.msgText = msgText
Accept all open dialogs with "OK".
REST call action
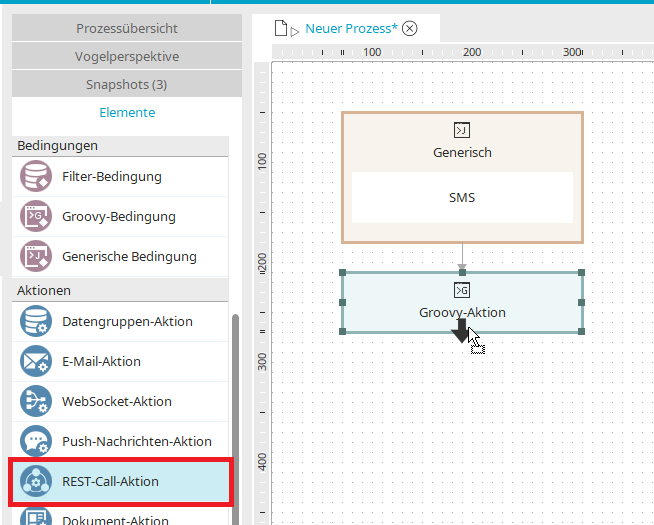
Now add a REST call action to the Groovy action.
General
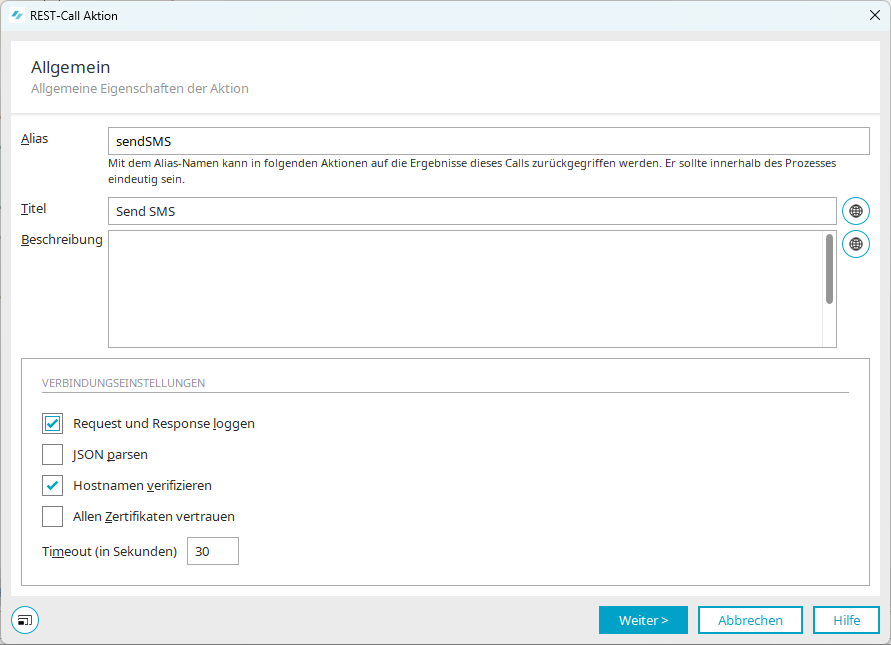
Enter the alias "sendSMS" and a title with "Send SMS". Activate the "Log request and response" and "Verify host name" checkboxes in the connection settings.
Click on "Next".
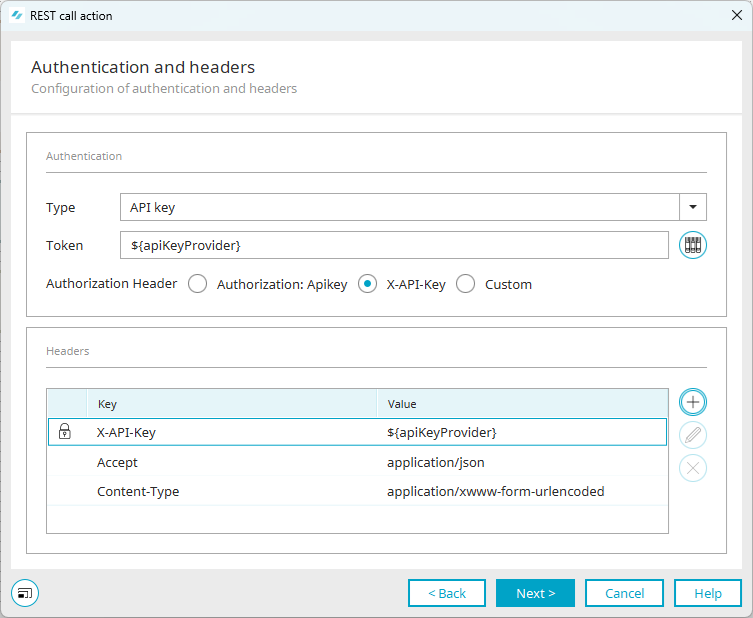
Authentication and header
We will configure the authentication via the API key of the external provider.
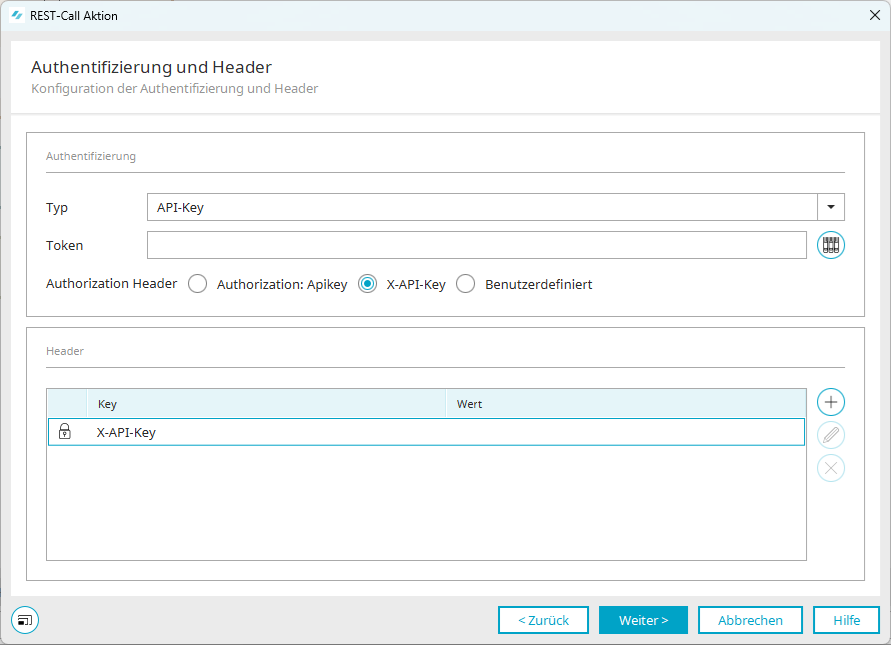
Select the "API key" type from the list and then the "X-API key" option.
Resource mapping
We will now fill the resource mapping with our values from the logon information memory and the processing context:
-
API key of the provider
-
msgFrom
-
msgTo
-
msgText
We will process this information in this and the next dialogs in the request.
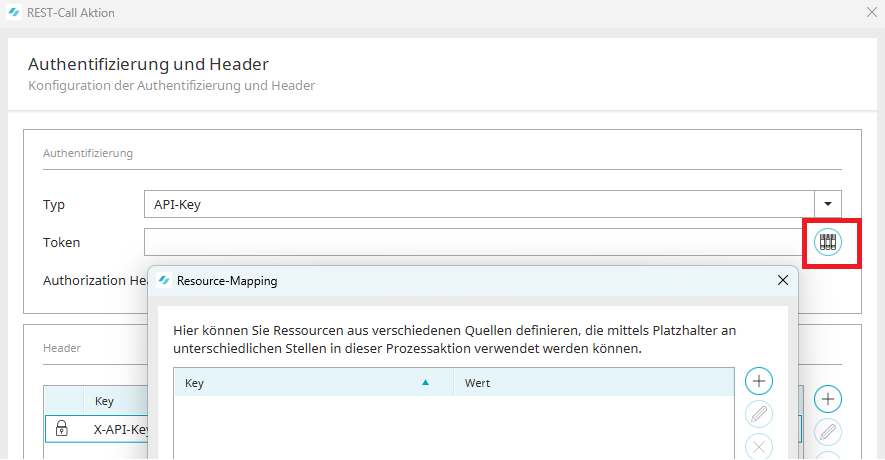
Click on the "Resource mapping" icon next to the "Token" field.
apiKeyProvider
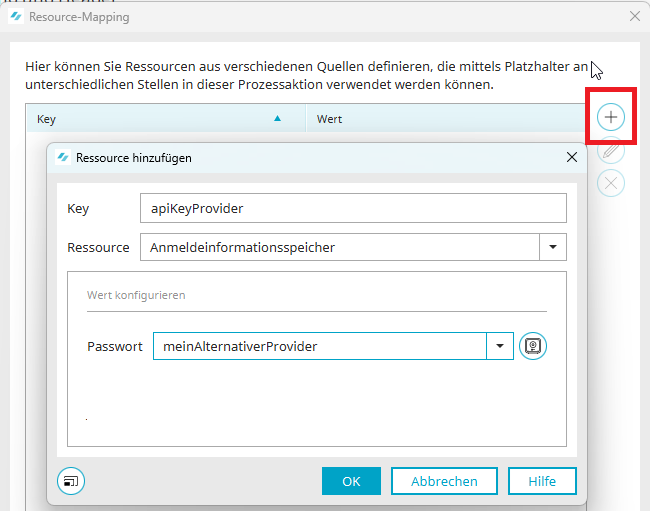
In the resource mapping, add a new resource using the plus symbol:
-
Key: apiKeyProvider
-
Resource: Logon information store
-
Password: Select the entry of the stored API key of your provider
Accept the dialog with "OK".
msgForm

Click on the plus symbol again in the resource mapping to add the "msgForm" resource from the processing context.
-
Key: msgForm
-
Resource: Processing context
-
Value: msgForm
Accept the dialog with "OK".
msgTo
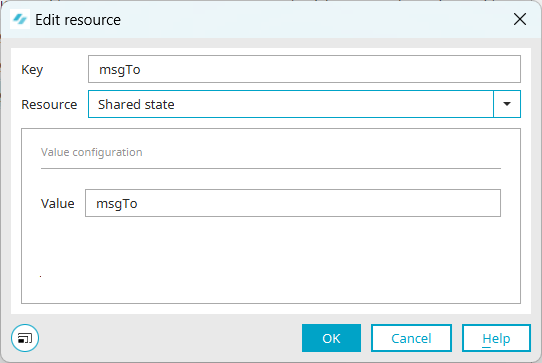
Create a new resource using the plus symbol:
-
Key: msgTo
-
Resource: Processing context
-
Value: msgTo
Accept the dialog with "OK".
msgText

Create a new resource using the plus symbol:
-
Key: msgText
-
Resource: Processing context
-
Value: msgText
Accept the dialog with "OK".
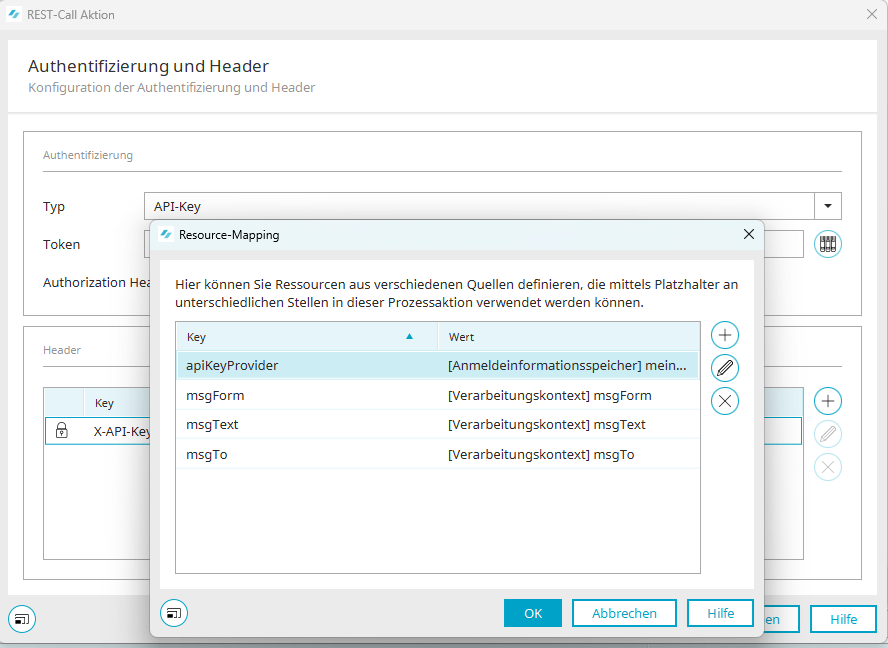
All resources are now defined.
Please select the "apiKeyProvider" resource and accept the dialog by clicking "OK".
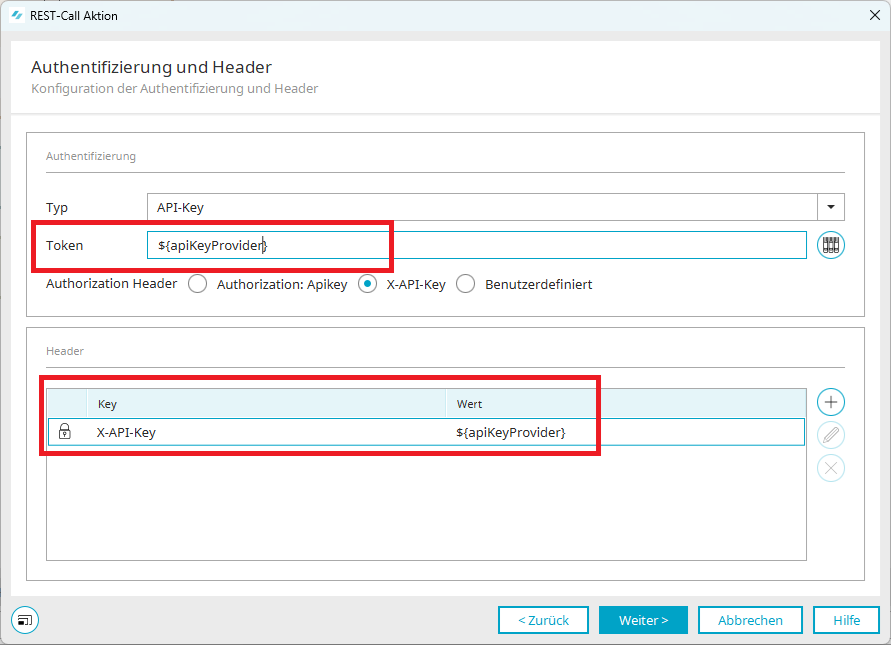
The selected resource was transferred to the "Token" and as a value to the "Header".
Headers
Create two new entries in the header:
-
Accept
-
Content-Type
Click on the plus symbol to define the following entries:
Accept
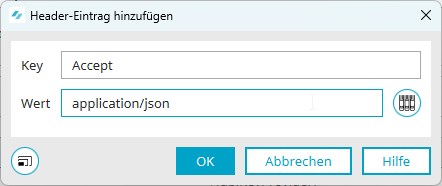
Key: Accept
Value: application/json
Accept the dialog with "OK".
Content-Type
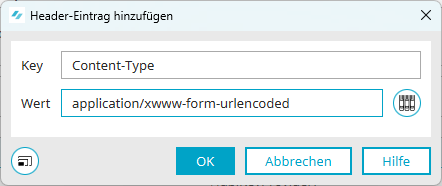
Key: Content-Type
Value: application/xwww-form-urlencoded
Accept the dialog with "OK".

The "Authentication and header" dialog is complete.
Click on "Next".
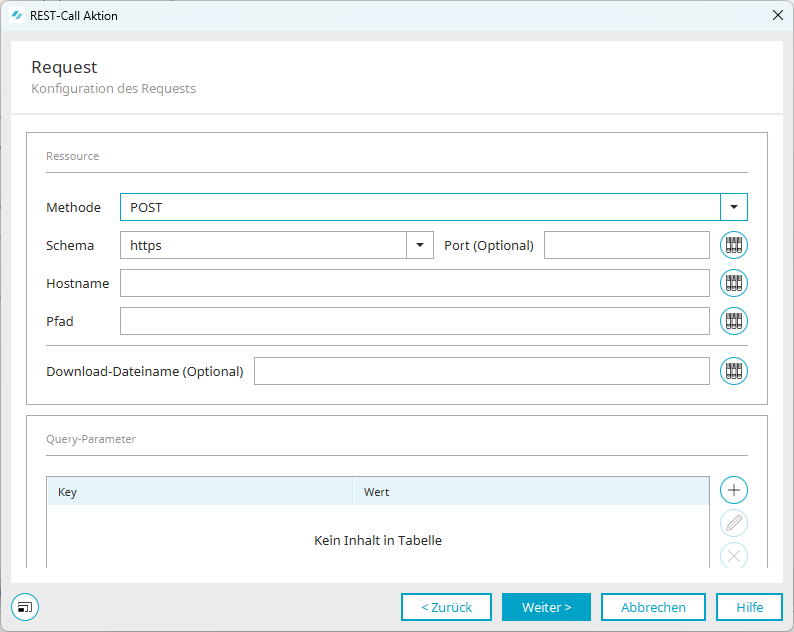
Request
In the request, we will now ensure that the messages are used. To do this, store the "POST" method.

Fill in the following input fields with the information you have from your provider:
-
Schema
-
Hostname
-
Path
Click on "Next".
Body

The SMS message is now defined in the body.
You can use the icon on the right-hand side to access the resource mapping in which you have stored all the required entries from the processing context.
Enter the sender, recipient and text of the message as follows:
from=${msgFrom}&to=${msgTo}&text=${msgText}
Accept the dialog with "OK".

Switch to the properties of the process by double-clicking on the process tab. Assign the title "Authentication - alternative provider". Accept the dialog with "OK" and save the process.
The process is now active: If multi-factor authentication is now selected via the "SMS" method, the process comes into effect and sends the required information to the user.
Voice call
To send a voice call using an alternative provider with multi-factor authentication, open the Portal Manager and switch to the "Processes" module. Open the "Authentication - alternative provider" process you have just created.
Generic event handler
Drag the "Generic event handler" into the process using drag & drop.
Assign the title "Voice call". The process reacts to external and internal events.
Click on "Next".
Configuration
Select the class from the list
"de.uplanet.lucy.server.phoneservice.workflow.eventhandler.PhoneServiceSendWorkflowEventHandler".
Activate voice call
Add a new entry using the plus symbol.
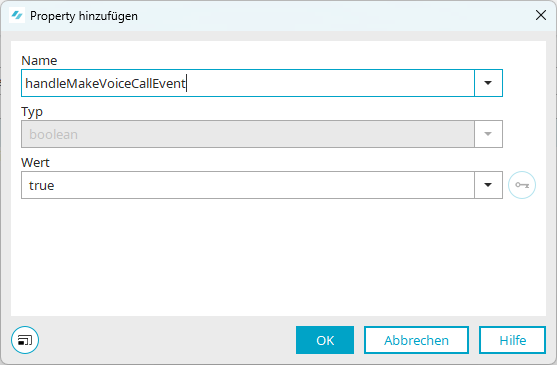
The voice call should be taken into account:
Select the "handleMakeVoiceCallEvent" class and enter the value "true".
Deactivate SMS

Use the plus symbol to add a new entry so that voice calls are ignored:
Select the "handleSendSmsEvent" class and enter the value "false".
Close all open dialogs with "OK".
Groovy Script Action
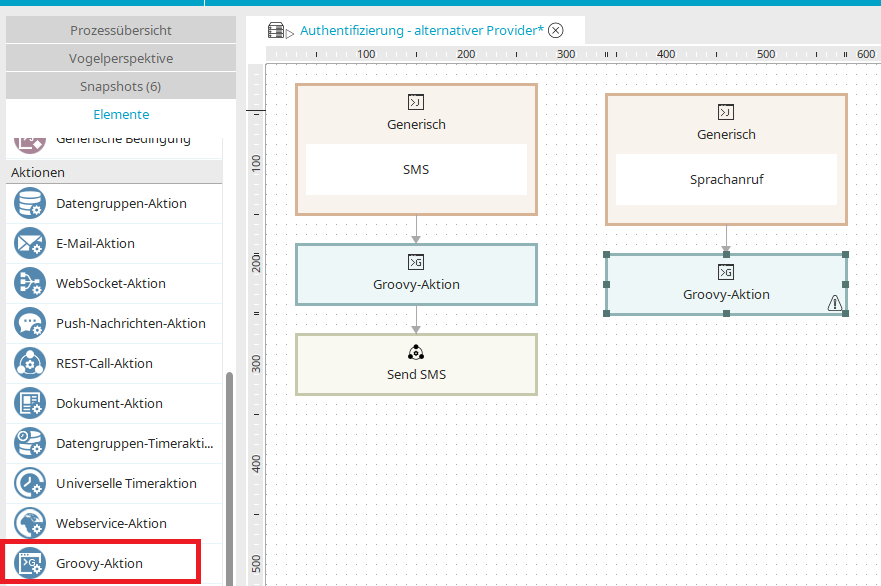
Add a Groovy action to the generic event handler.
Double-click to switch to the properties dialog. Click on "Next" and open the Intrexx editor via the link of the same name.
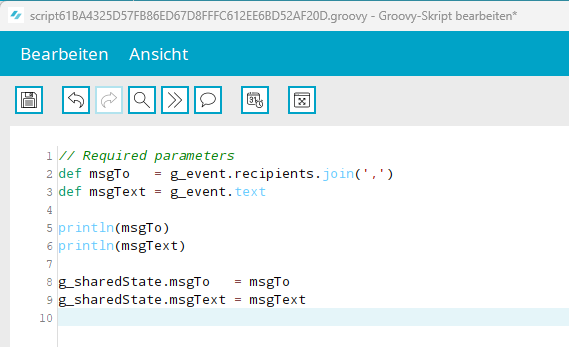
Store the following script in which the recipient and text are determined and written to the processing context in Intrexx:
            // Required parameters
def msgTo   = g_event.recipients.join(',')
def msgText = g_event.text
println(msgTo)
println(msgText)
g_sharedState.msgTo   = msgTo
g_sharedState.msgText = msgText
Accept all open dialogs with "OK".
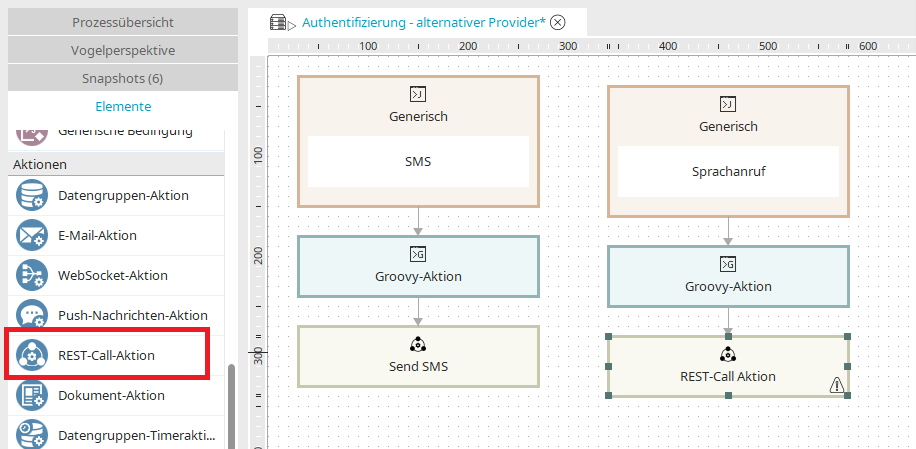
REST call action
Now add a REST call action to the Groovy action.
Double-click to switch to the properties dialog.
General
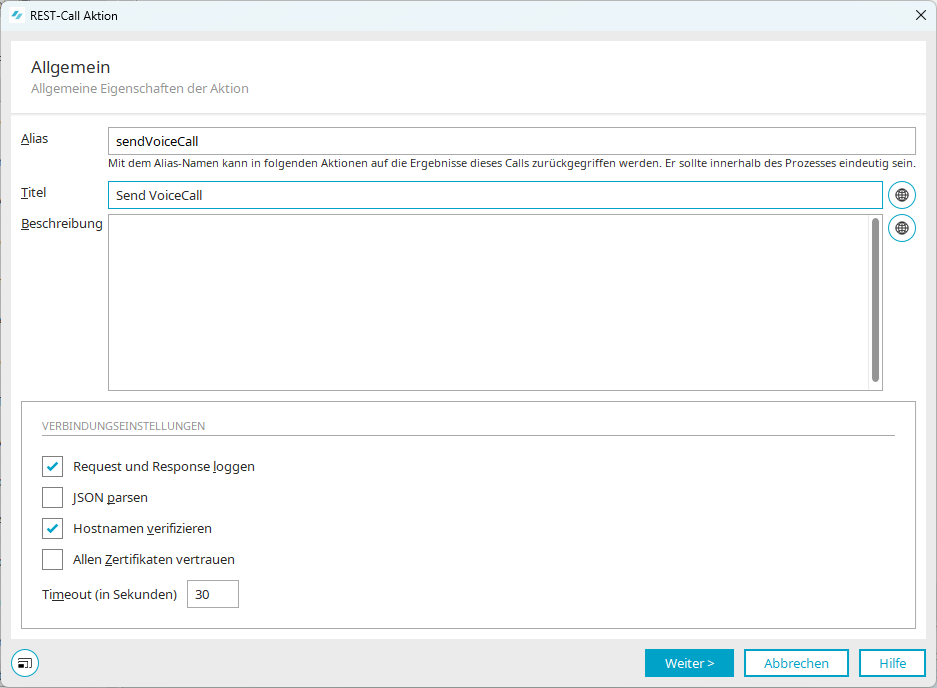
Enter the alias "sendVoiceCall" and a title with "Send VoiceCall". Activate the "Log request and response" and "Verify host name" checkboxes in the connection settings.
Click on "Next".
Authentication and header

We will configure the authentication via the API key of the external provider. Select the "API key" type from the list and select the "X-API key" option.
Resource mapping
We will now fill the resource mapping with the values of the logon information memory and the processing context:
-
API key of the provider
-
msgFrom
-
msgTo
-
msgText
We will process this information in this and the next dialogs in the request.

Click on the "Resource mapping" icon next to the "Token" field.
apiKeyProvider

In the resource mapping, add a new resource using the plus symbol:
-
Key: apiKeyProvider
-
Resource: Logon information store
-
Password: Select the entry of the stored API key of your provider
Accept the dialog with "OK".
msgForm
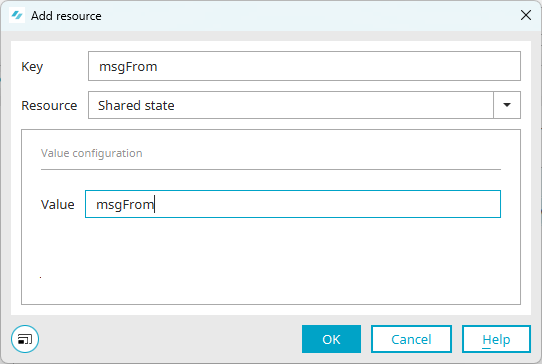
Click on the plus symbol again in the resource mapping to add the "msgForm" resource from the processing context.
-
Key: msgForm
-
Resource: Processing context
-
Value: msgForm
Accept the dialog with "OK".
msgTo
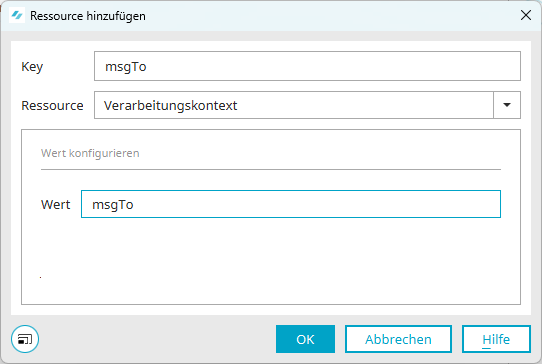
Create a new resource using the plus symbol:
-
Key: msgForm
-
Resource: Processing context
-
Value: msgForm
msgText
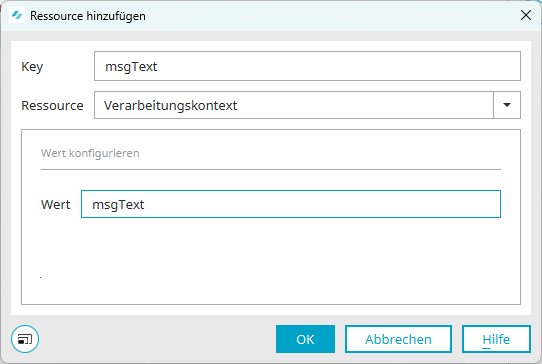
Create a new resource using the plus symbol:
-
Key: msgText
-
Resource: Processing context
-
Value: msgText
Accept the dialog with "OK".
All resources are now defined.

Please select the "apiKeyProvider" resource and accept the dialog by clicking "OK".

The selected resource was transferred to the "Token" and as a value to the "Header".
Header
Create two new entries in the header:
-
Accept
-
Content-Type
Click on the plus symbol to define the entries:
Accept

-
Key: Accept
-
Value: application/json
Accept the dialog with "OK".
Content-Type

-
Key: Content-Type
-
Value: application/xwww-form-urlencoded
Accept the dialog with "OK".
The "Authentication and header" dialog is now complete.
Click on "Next".
Request
In the request, we will now ensure that the messages are used. To do this, store the "POST" method.
Now fill in the following input fields with the information you have from your provider:
-
Schema
-
Hostname
-
Path
Click on "Next".
Body
The SMS message is now defined in the body.

You can use the icon on the right-hand side to access the resource mapping in which you have stored all the required entries from the processing context.
Enter the sender, recipient and text of the message as follows:
from=${msgFrom}&to=${msgTo}&text=${msgText}
Accept the dialog with "OK". The process is complete. If multi-factor authentication is selected via the "Voice call" method, the process takes effect and sends the required information.