The Intrexx Connector API defines a Java API for implementing your own Intrexx connectors, which provide external data in Intrexx via an external data group. In principle, the API specifies two Java interfaces that should be implemented by developers to create, read, update, and delete data records and files in the external system (known as CRUD operations). In addition, a metadata model is stored in the connector configuration file. This describes the structure of the data groups (fields, relationships, settings) provided by the connector implementation. At runtime, the Connector API provides preconfigured clients for HTTP and OData requests that automatically perform user authentication – if required by the service – via HTTP Basic Auth or OAuth2. Furthermore, any Java library (e.g. JDBC, REST APIs, etc.) can be used in your own code.
Quick Start Guide on GitHub
A Quick Start Guide for the Connector for the Connector API can be found at the following link: Quick start guide for the Connector API.
Use in Intrexx
The Connector for Connector API is used in Intrexx for the following connectors:
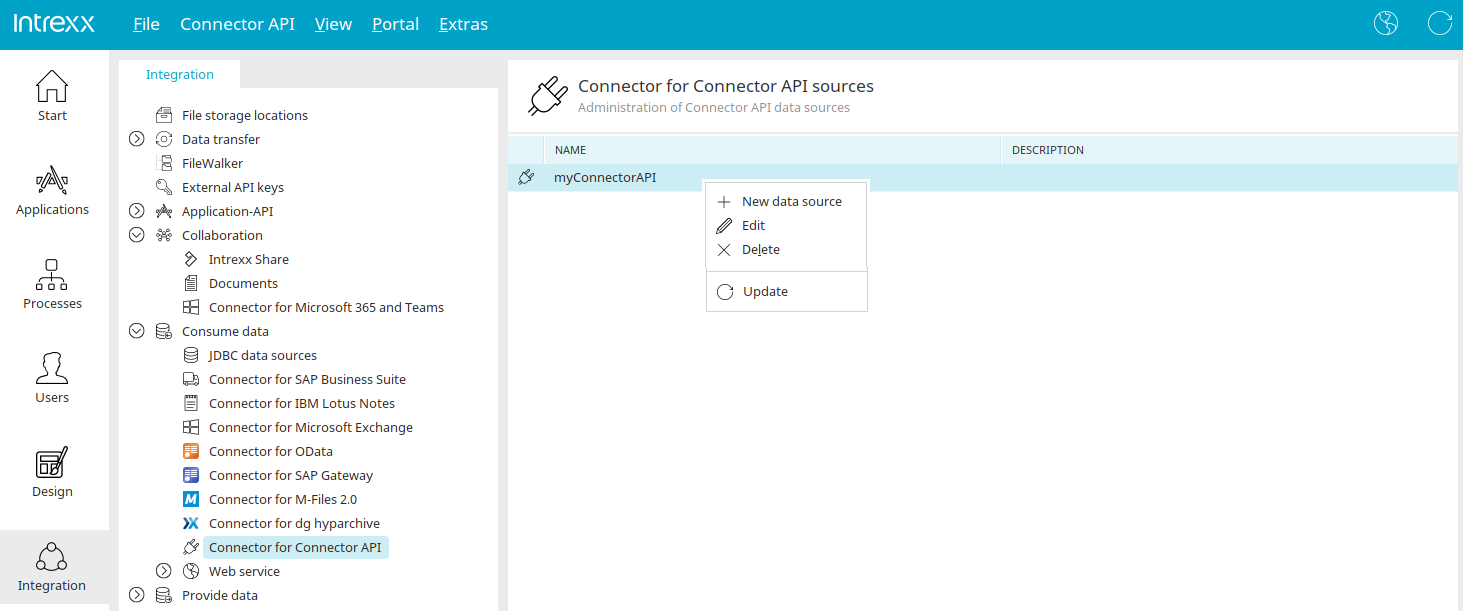
Starting the connector
Via the main menu "Connector API / New data source" or the corresponding context menu, a wizard is opened in which a new connection can be created. This option is available if the Connector for Connector API is selected under "Consume data" on the left-hand side.
General
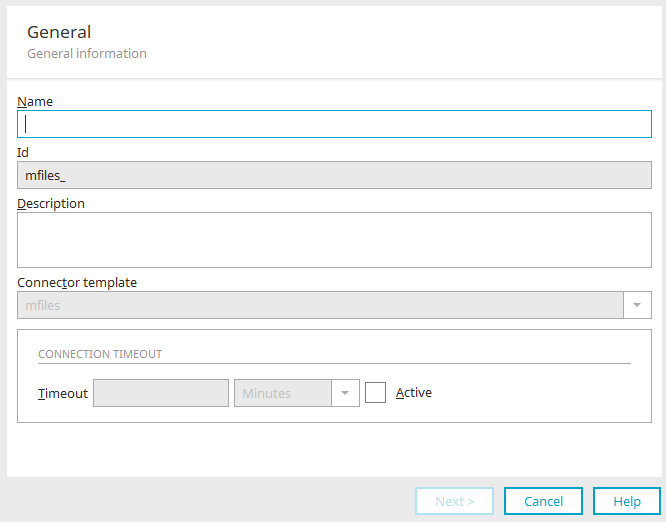
Name
Enter the name of the connection here. The name may only consist of letters [a-zA-Z], numbers [0-9], underscores and hyphens.
Id
Displays the connector or connection ID. This is automatically composed of the connector template and the name of the connector, joined with an underscore.
Description
You can give a description for the connector here.
Connector template
When you create a new Connector API data source, the template "basic" is predefined here.
The template "mfiles" is already entered here for a new M-Files 2.0 connection.
Connection timeout
Timeout
Enter the number of milliseconds, seconds, minutes or hours for the timeout here. Select the time unit from the drop-down list to the right of the field.
Active
The timeout settings are activated with this checkbox.
Data groups
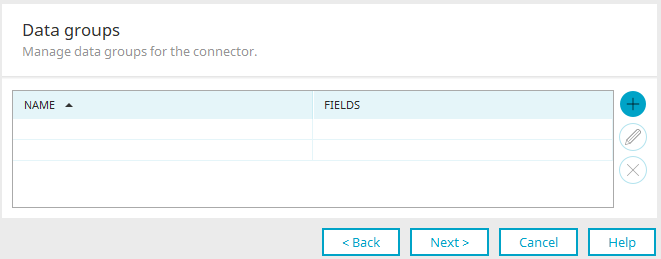
The name of the data groups and fields are displayed here.
![]() Add data group /
Add data group / ![]() Edit data group
Edit data group
Opens a dialog in which data groups and fields can be added or edited.
Data group settings
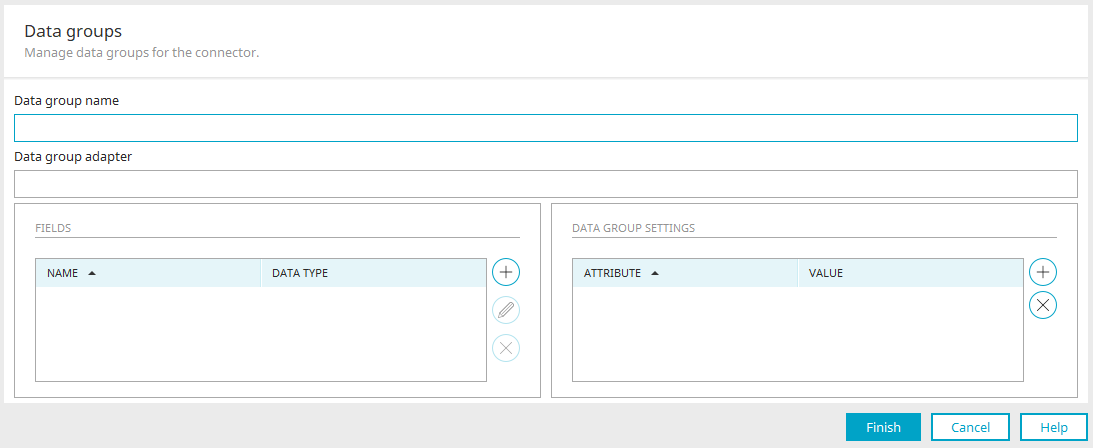
Enter the name of the data group here.
Data group adapter
Displays the name of the data group adapter.
Data fields
Displays the list of integrated data fields.
![]() Add data field /
Add data field / ![]() Edit data field
Edit data field
Opens a dialog where a data field can be defined.
Data field
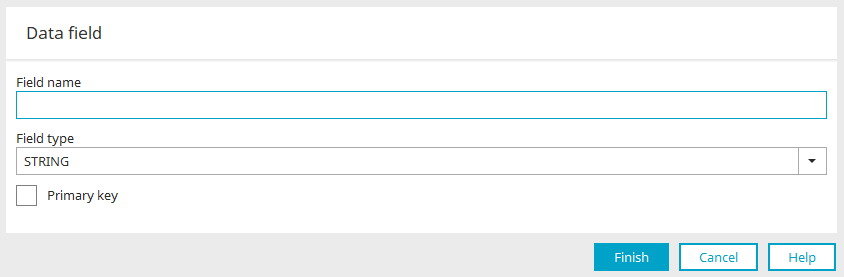
Enter the name here and select the data type of the field.
Primary key
This setting means the data field will be handled as the primary key.
Click on "Finish" to save changes and close the dialog.
![]() Delete data field
Delete data field
Deletes the data field currently selected.
Data group settings
Displays the list of data group settings. "Value" column
![]() Add setting
Add setting
Adds a new line where a new setting can be defined.
![]() Delete setting
Delete setting
Deletes the setting currently selected.
Click on "Finish" to save changes and close the dialog.
![]() Delete data group
Delete data group
Deletes the data group currently selected.
Authentication

Authentication type
Select the desired type of authentication. If "OAUTH2" is selected, additional settings are available in this dialog. These are described below.
Grant-Type
Currently, only the "authorization_code" type is supported.
User authorized URI
Enter the URI of the authorization server.
Access token URI
Enter the URI used to obtain the access token.
Redirect URI
The redirect URI is made up of the portal URI and "service/oauth2/authorize".
Client ID
ID of the OAuth2 client.
Client secret
Secret for the client.
Scope
Authorizations which the client should use to be granted access.
Service user
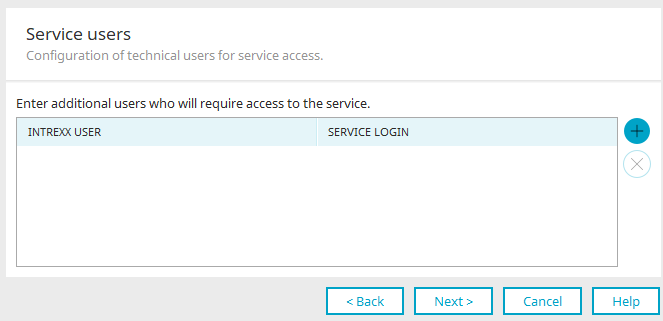
Static login data can be assigned to Intrexx users here.
![]() Add user
Add user
Opens a dialog where the login data can be entered and mapped to the user.
User selection
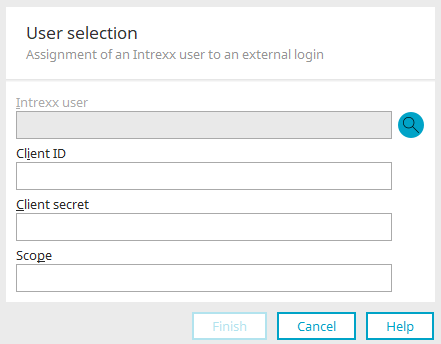
![]() Find user
Find user
Opens a dialog, where the user can be selected. Enter the specific Office365 login data afterwards:
-
Client ID
-
Scope
Click on "Finish" to save changes and close the dialog.
![]() Remove additional user
Remove additional user
Removes the selected user from the list.
Expert settings
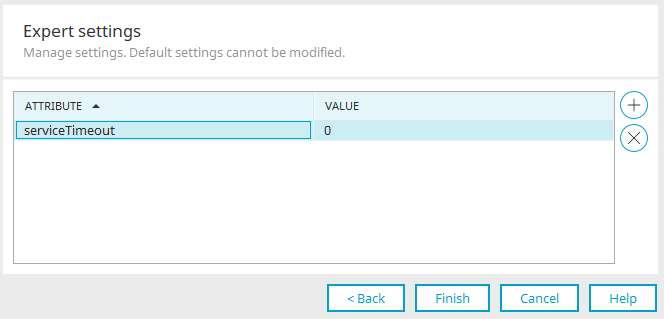
The name and value of the attribute are displayed here.
![]() Add property
Add property
Adds a new line where a new attribute can be defined.
![]() Delete property
Delete property
Deletes the attribute currently selected.
Edit existing connections
Every connection created by you is listed in the right-hand area. You can access all the editing functions via the main menu or the context menu for the selected connection.
Next steps
Once the connection has been fully configured, it can be integrated into applications with an external data group. A guide for this is available here.