Before installing Intrexx, please check whether all requirements are met and that all necessary preparations have been made.
You can also find detailed help for this here:
Start Setup
Below you will find step-by-step instructions for installing Intrexx.
This assumes that you select the "Intrexx Portal Server Production Installation (Single Server)" option. With this option, you install Intrexx with all available components on a (virtual) Linux server.
Step-by-Step
To install Intrexx, follow these steps:
-
Navigate to the directory containing the installation files.
-
Start the installation with the following command:
sudo ./setup.sh
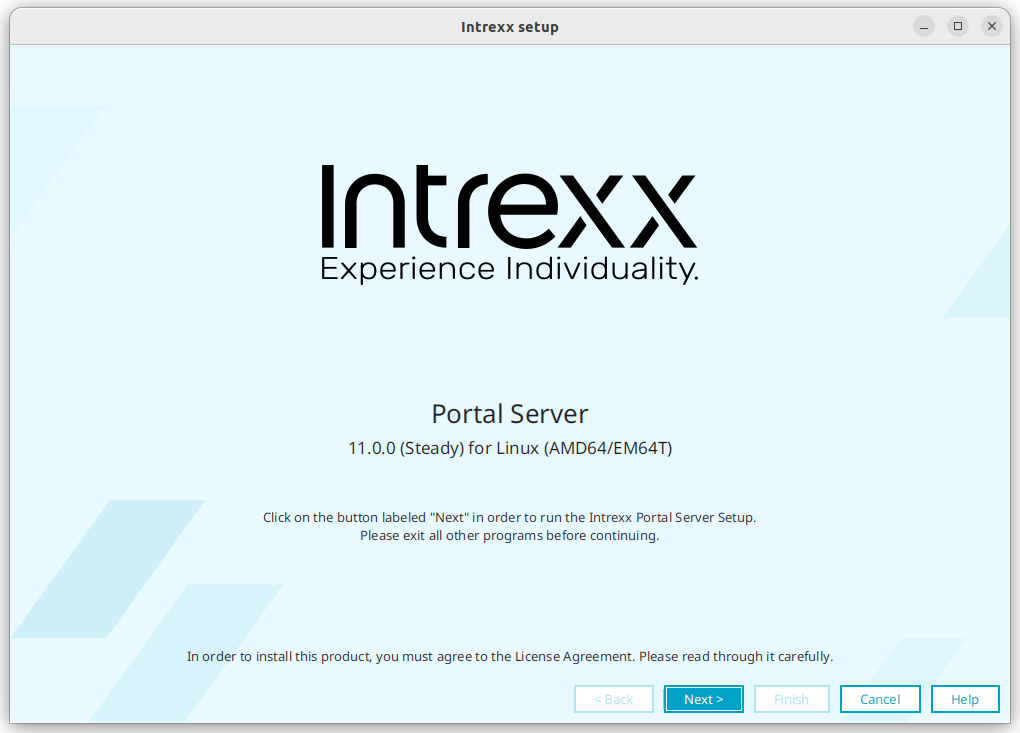
The installation startup dialog box appears.
-
Click "Next."
The terms of the license agreement will be displayed.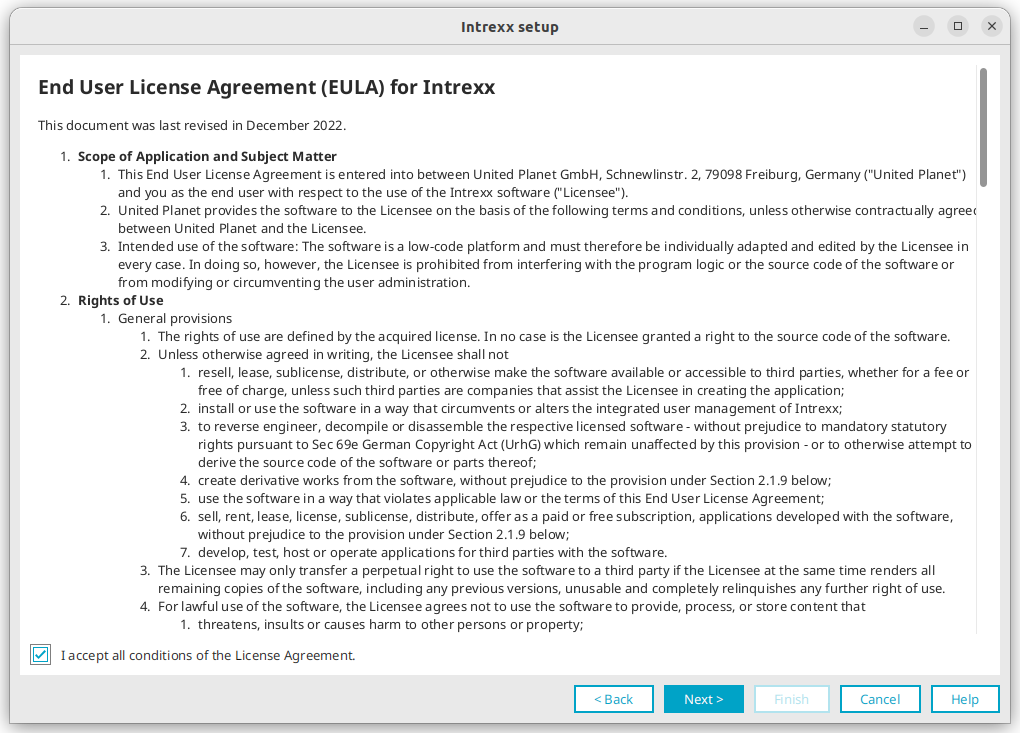
-
Please read the license agreements. Next, check the box labeled "I accept all terms of the license agreement."
-
Click "Next."
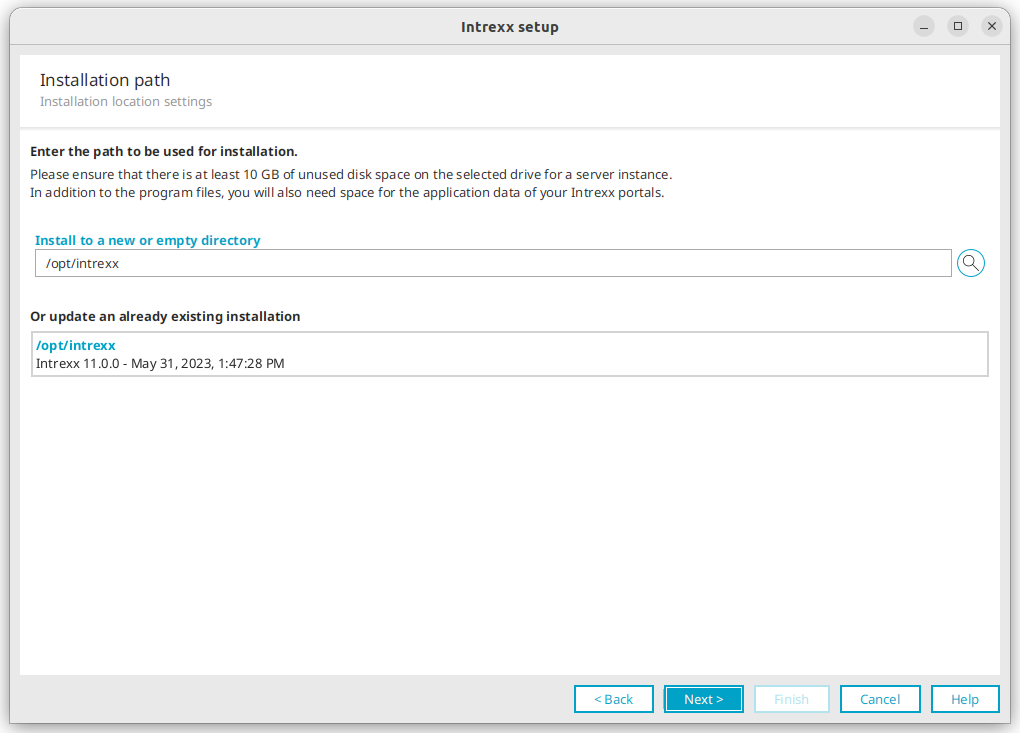
The dialog where you can specify the installation directory will appear.
Please note that the path to the installation directory must not contain any spaces.
-
Click "Next."
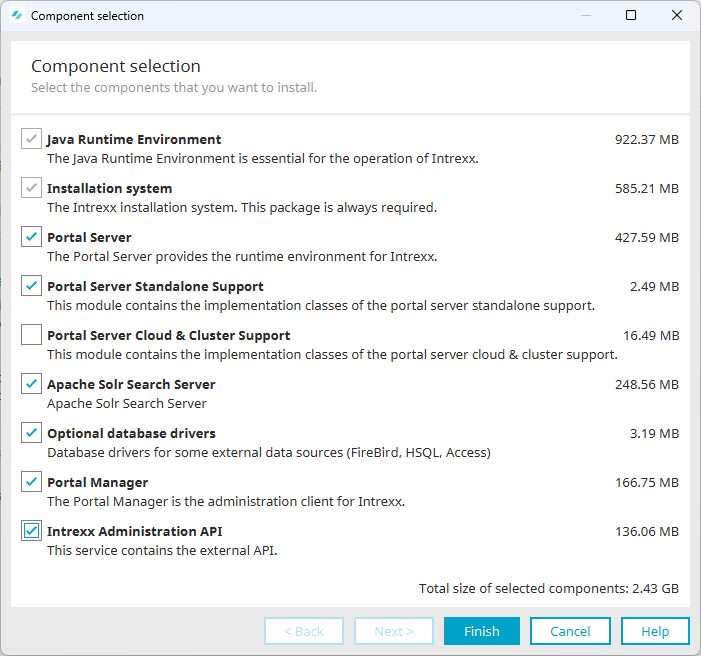
This will take you to the dialog box where you can select various Intrexx components.
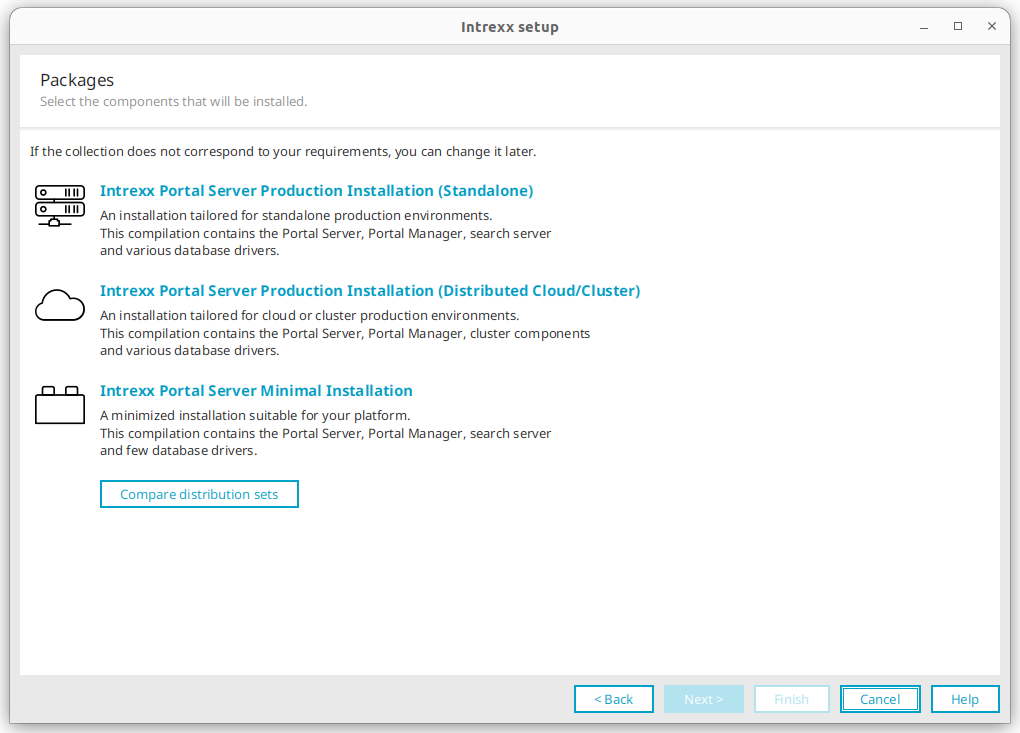
Intrexx Portal Server Production Installation (Standalone)
This option installs a set of components optimized for single-server production use. The package includes Portal Server, Portal Manager, Search Server, and various database drivers.
Intrexx Portal Server Production Installation (Distributed Cloud/Cluster)
A set of components optimized for cloud or cluster deployment is installed here. The package includes Portal Server, Portal Manager, cloud components, a search server, and various database drivers.
For more information on cloud installation, see the section " Installing Intrexx in the Cloud"
Intrexx Portal Server Minimal Installation
This option installs a streamlined set of components tailored to your platform. The package includes Portal Server, Portal Manager, the search server, and the most important database drivers.
Compare Configurations: You can see which installation options include which components by clicking "Compare Configurations."
Please contact our support team to download the Portal Manager.
-
Select the "Intrexx Portal Server Production Installation (Single Server)" option.
-
Click "Next."
You will be taken to the dialog box displaying a summary of the installation process.
In this dialog box, you can review the settings you selected earlier and change them if necessary.
You can also change the default settings that Intrexx sets during installation without you being explicitly asked to do so. These include, among other things, logging in as an "intrexx user," specifying the instance name, or selecting ports.
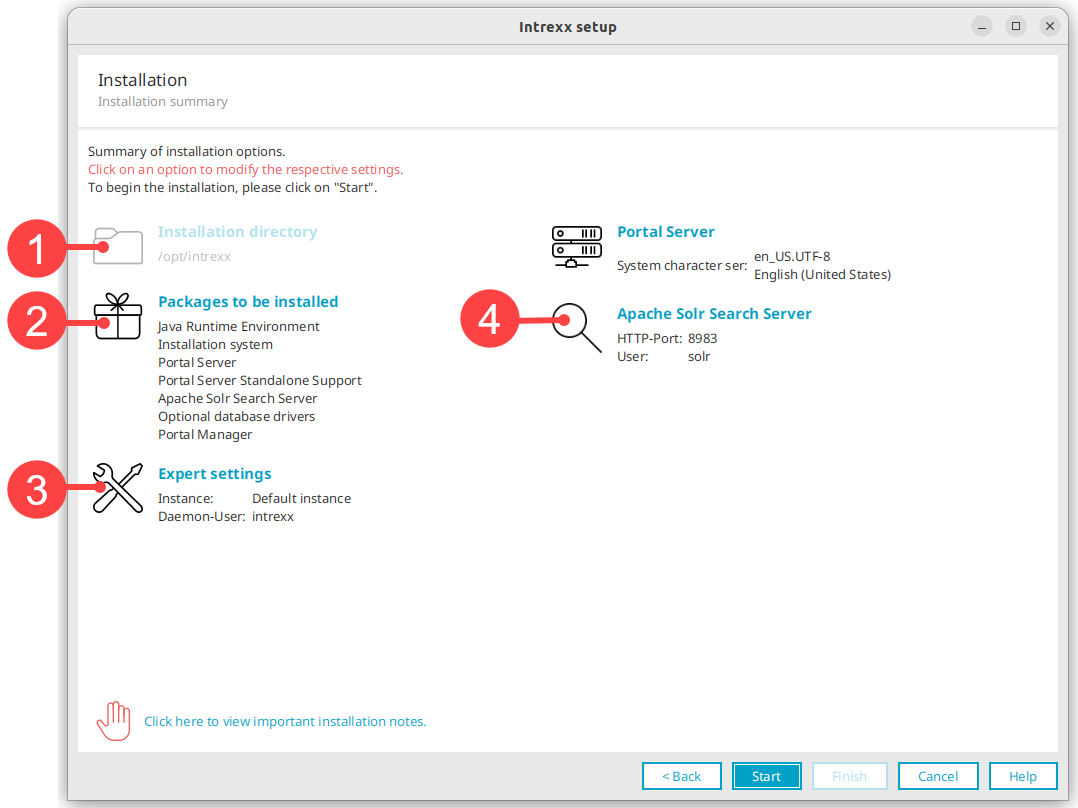
 Installation directory
The installation directory you created earlier is displayed here.
 Packages to Install
You have already selected which Intrexx components you want to install in the "Installation Selection" dialog box. At this point, you can review the Intrexx components to be installed and make changes if necessary.If you want to install the Intrexx Administration API, you must select the appropriate installation package here.
 Advanced Settings
Here, you can change a number of default settings.
intrexx User Installation - Root Installation
Please note, in particular, that you can choose here between installing as "root" and installing as another Linux user.
For detailed information on selecting the appropriate daemon user account, see the following section, " Linux - Installing Intrexx."
 More Information
Advanced Settings
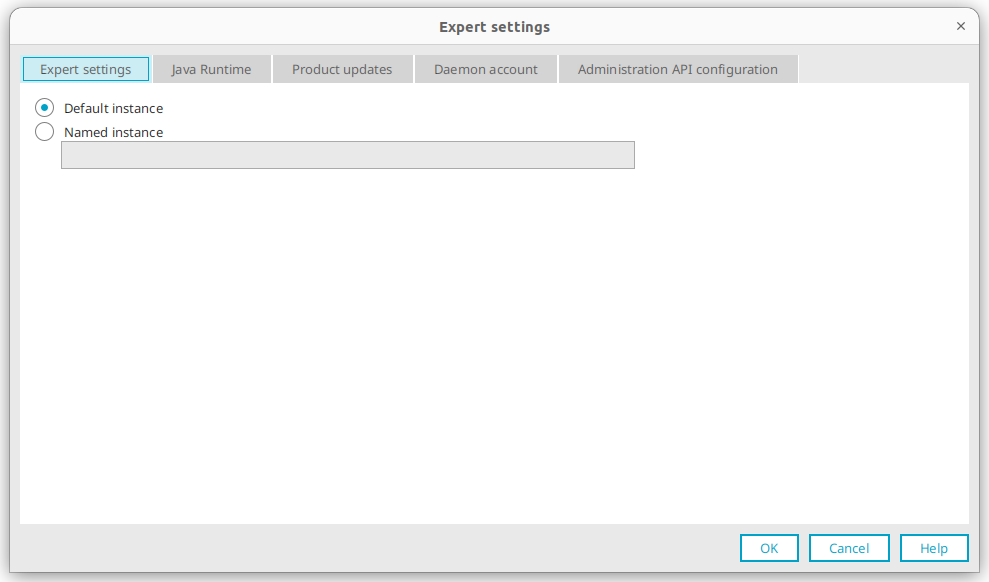
This step in the installation process is relevant to you if you want to install multiple instances of Intrexx on the server.
Advanced Settings
Default instance
With this option, the current installation will be used as the default instance.
Select this option if you want to install or run only one instance of Intrexx (default instance).
Named instance
Give the Intrexx instance a unique name if you want to install or run multiple Intrexx instances. The different names help to distinguish between the different Intrexx instances. At the same time, this option enables the parallel installation of Intrexx.
Java Runtime
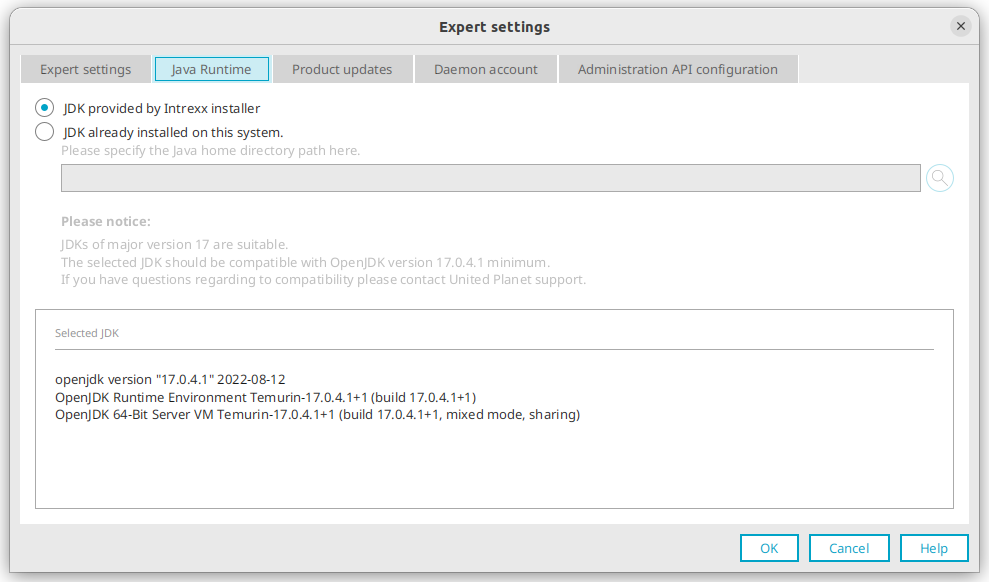
JDK provided by Intrexx installer
With this option, the JDK included within the scope of supply.
JDK already installed on this system
With this option, a suitable Java home directory that is already on the system can be entered. Intrexx will use the JDK located there. The JDK used must be compatible with at least JDK 21.
Make sure that the JDK is compatible with Intrexx. If you're unsure about compatibility, please contact United Planet support.
Selected JDK
Displays the version of the currently selected JDK.
Use proxy server for update
If you have set up a proxy server in your infrastructure to connect to the Internet or to the Intrexx Update Server, you can enter the relevant information here.
Daemon User Account
Root privileges are required to install Intrexx.
In this dialog, you can choose whether to run the installation directly as "root" or as a user who belongs to the sudoer group.
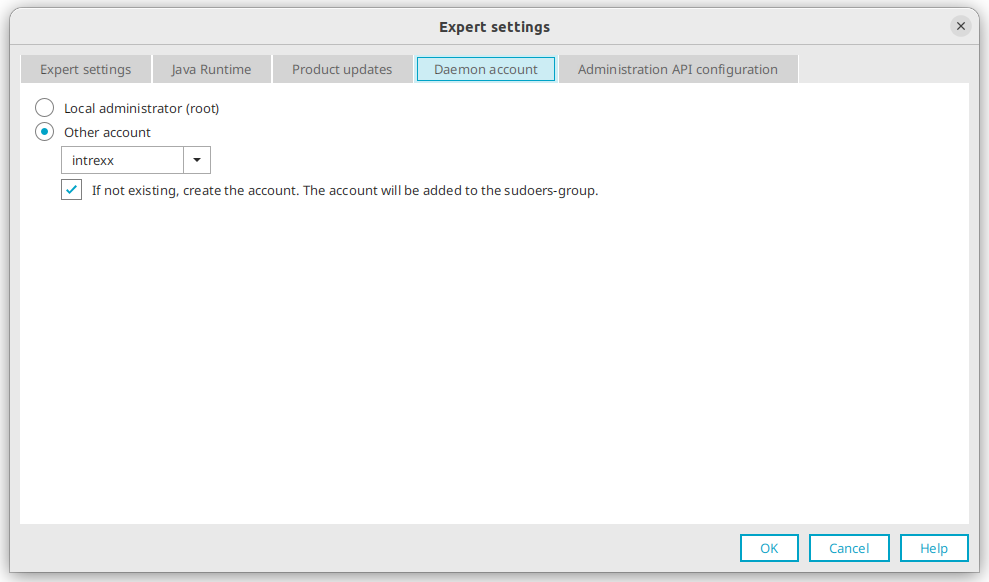
Local administrator (root)
Select this option if you want to run the Intrexx installation as "root."
If you are able or wish to install and run Intrexx in an isolated environment, you can follow the "root installation" instructions. This method does not pose a safety risk in isolated environments.
A VM where you run Intrexx exclusively can serve as an isolated environment. Furthermore, you can run Intrexx in a Docker container. This also allows you to rule out security risks associated with root privileges.
For detailed information on selecting the appropriate daemon user account, see the section "Linux - Installing Intrexx."
Different User Account
Select this option if you do not want to run the Intrexx installation as "root."
By default, the installation routine suggests automatically creating a user named "intrexx." This user will then be added to the sudoer group and will thus have sufficient permissions to install Intrexx. After installation, all Intrexx files belong to this user. In addition, the Supervisor service (Supervisor Daemon) and the Solr service are running under this user.
You can also select other users from the drop-down list.
Intrexx user vs. Linux user
Please note that the user you select or create here is not an Intrexx user. Rather, it is the Linux user meaning a user at the operating system level. At this point, the Intrexx interface offers you the option to create a user for the operating system.
For detailed information on selecting the appropriate daemon user account, see the following section, " Linux - Installing Intrexx."
If you don't have an account, create one.
In the "Other User Account" drop-down list, you can enter a username that does not appear in the list.
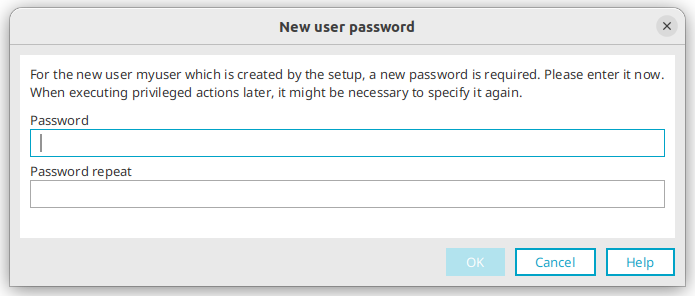
When you do this, Intrexx creates a new Linux user and adds it to the Sudoers group.
You will then be prompted to enter a password for the new Linux user. You will be prompted for this password later when you perform an action in Intrexx that requires root privileges at the operating system level.
New User Password
Administration API Configuration
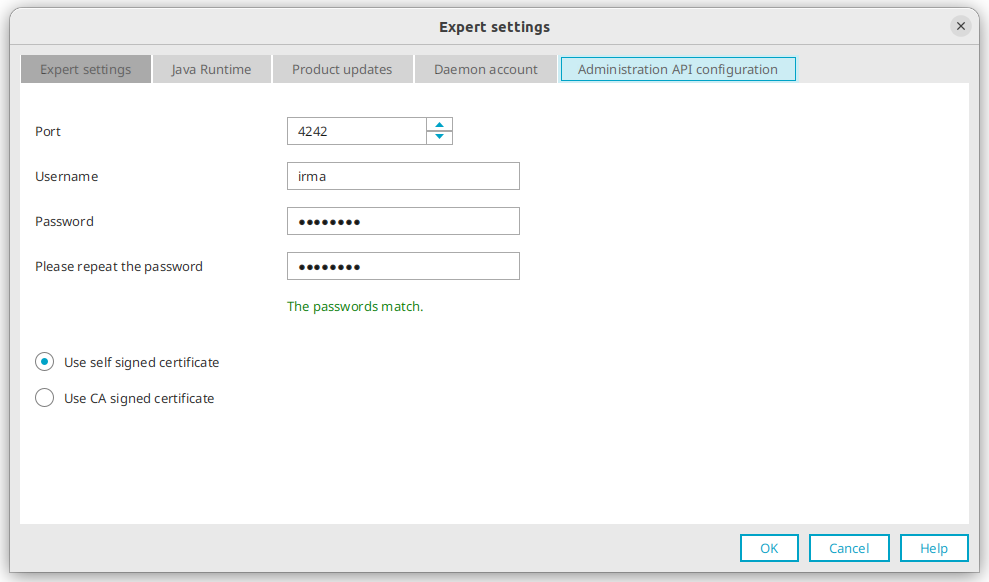
The "Administration API Configuration" tab is displayed only if you previously installed the "Intrexx Administration API" package in the "
 : Packages to Install" step.
For detailed information about the Intrexx Administration API, see the " Intrexx Administration API" section.
 Apache Solr Search Server
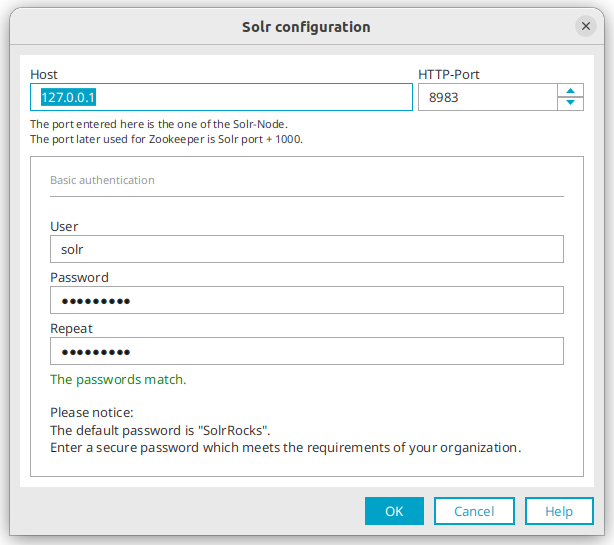
Here you can change the settings for the Apache Solr search server. This is necessary, for example, if you do not want to install the Solr search server on the same server where you have installed Intrexx.
Authentication on the Solr Search Server
The Intrexx Portal Server authenticates itself with a username and password on the Solr search server.
More Information
By default, the Apache Solr search server is installed with Intrexx. It provides the search functionality for your portal.
By default, the Apache Solr search server is installed on the same server as Intrexx. Therefore, "127.0.0.1" (localhost) is set as the default host. The suggested port is 8983.
However, you also have the option of installing the Apache Solr search server on another server. In that case, you need to adjust the specifications accordingly.
The Intrexx Portal Server uses the user and password for authentication to the Solr search server. Change default authentication data.
More information
More Information
https://solr.apache.org/resources.html
https://solr.apache.org/guide/solr/latest/getting-started/tutorial-solrcloud.html
-
Click "Start."
-
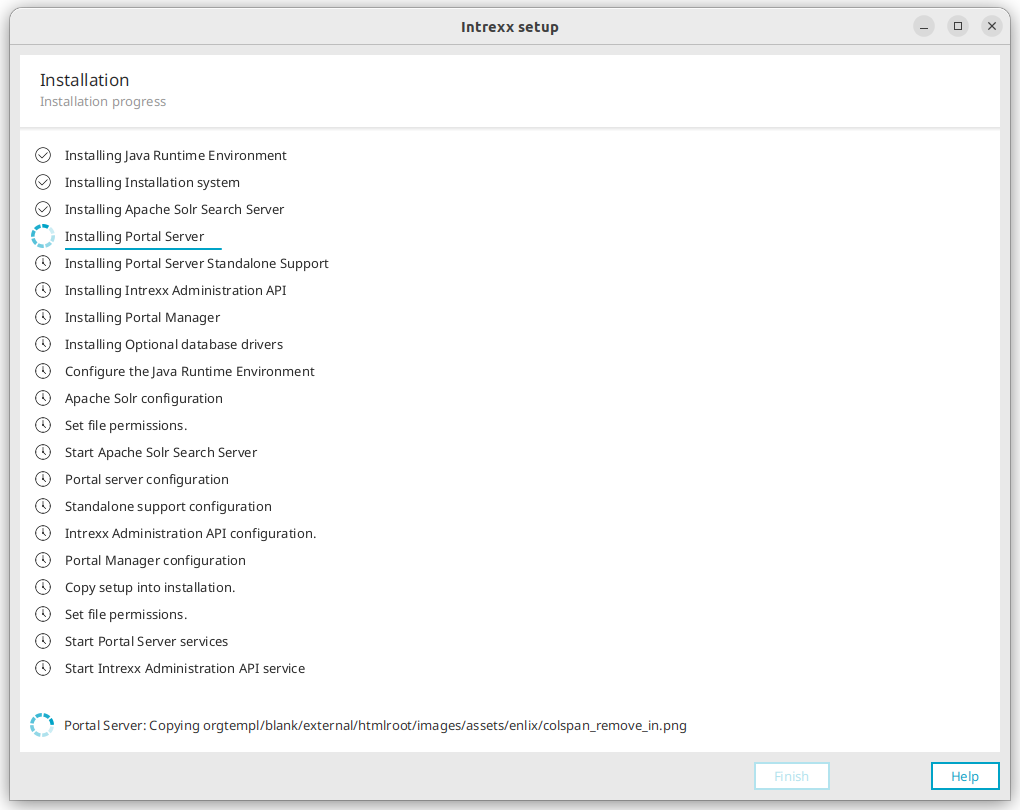
The installation process begins.
-
Once the installation routine has completed, the "Finish" button becomes active.
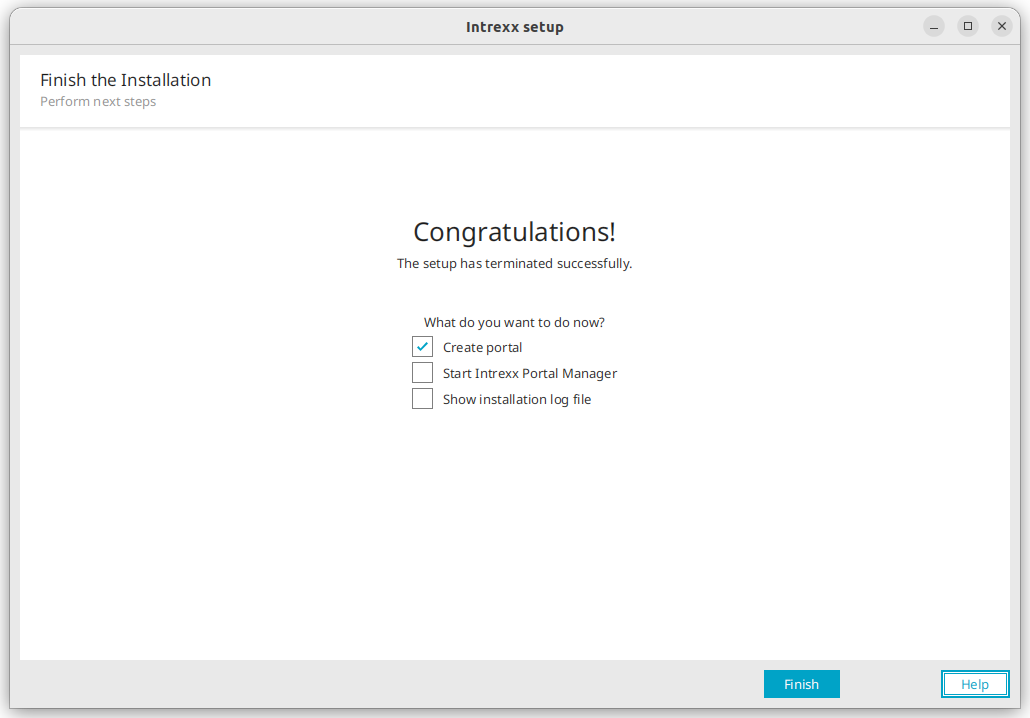
Create portal
Select this checkbox to create a portal immediately after installation.
If you have selected the checkbox, a dialog box ("Portal Builder") will automatically open after the installation is complete, allowing you to begin creating a portal.
Start Intrexx Portal Manager
Activate this checkbox to start the Intrexx Portal Manager immediately after installation is complete.
After installation, you can also start the Portal Manager from the Start menu or the desktop icon, which has been automatically created.
View log file
During installation, Intrexx creates a log file that logs the installation. If you have checked the box, the log file will be displayed automatically once the installation is complete.
-
Click "Finish."