Sample application as a template
The sample application together with the configuration file should make it easier for you to start creating your own DRACOON application. Many of the functions offered by Intrexx DRACOON Connector have already been implemented.

To ensure that your start with the sample application is successful, you need to make a few adjustments. This involves establishing the connection to your DRACOON account bw. Of your DRACOON Web App.
You must have the following information before you can set up the sample application:
-
Authorization URI
-
Dracoon Root URI
-
Client ID
-
Redirect URI
-
Token URI
-
Data room ID, folder ID
-
GUID of the sample application: F100FE46C809B95A41977D74DBEAB1B0BF03B604
 Find DRACOON sample application and DRACOON configuration file
To be able to perform the action described here, you need the corresponding rights on the Intrexx server.
The DRACOON sample application and DRACOON configuration file can be found in the following directory:
<intrexx installation directory>\adapter\dracoon

Copy the DRACOON configuration file and save it in the "connector" directory
To be able to perform the action described here, you need the corresponding rights on the Intrexx server.
Copy the file "dracoon_dracoon.xml".
Add the file to the following directory:
<intrexx installation directory>\org\<portal directory>\internal\cfg\odata\connector
Create Intrexx DRACOON Connector
Step-by-step guide
To create the Intrexx DRACOON Connector, proceed as follows:
-
Start the "Integration" module.
-
yUnder "Consume data", select the "Connector for Connector API" item.

-
Right-click on it.
A dialog window will appear.
-
Click on "Refresh".

The Intrexx DRACOON Connector is displayed.

Intrexx DRACOON Connector set up
Requirements
To set up Intrexx DRACOON Connector, you need the following information from your DRACOON data room or your DRACOON web app:
-
Data room ID, folder ID
-
Dracoon Root URI
-
Client ID
-
Client secret
You also need the GUID of the imported sample application. This reads:
F100FE46C809B95A41977D74DBEAB1B0BF03B604
Step-by-step guide
To set up Intrexx DRACOON Connector, proceed as follows:
-
Double-click on the DRACOON Connector.
The "General" dialog is opened.

-
Enter a meaningful description in the "Description" field.
-
Click on "Data groups" in the left-hand area.
The "Data groups" dialog box is displayed.
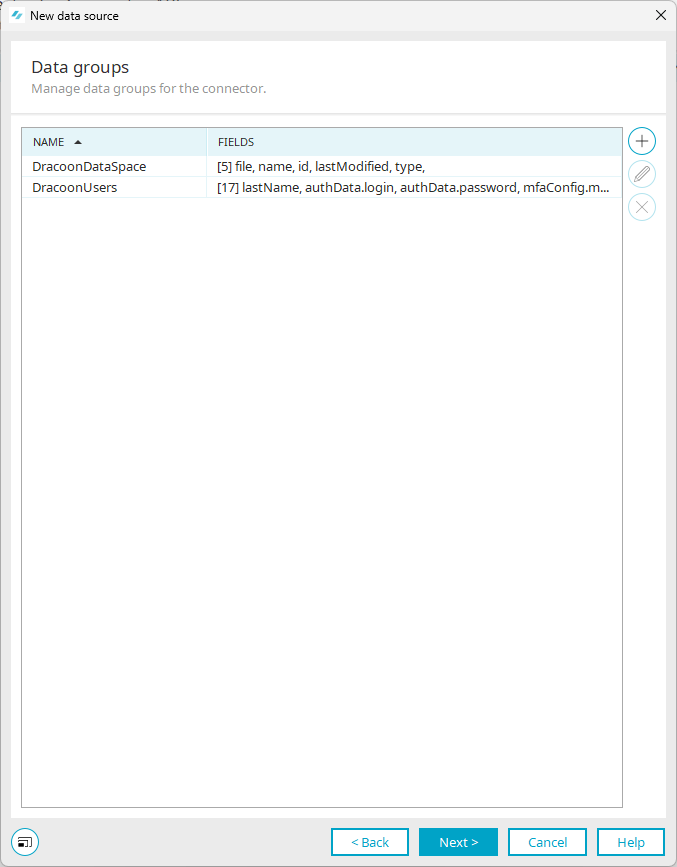
Detailed information on the individual data groups and their use can be found in section Standard data groups in the Intrexx DRACOON Connector.
Store data room ID, folder ID
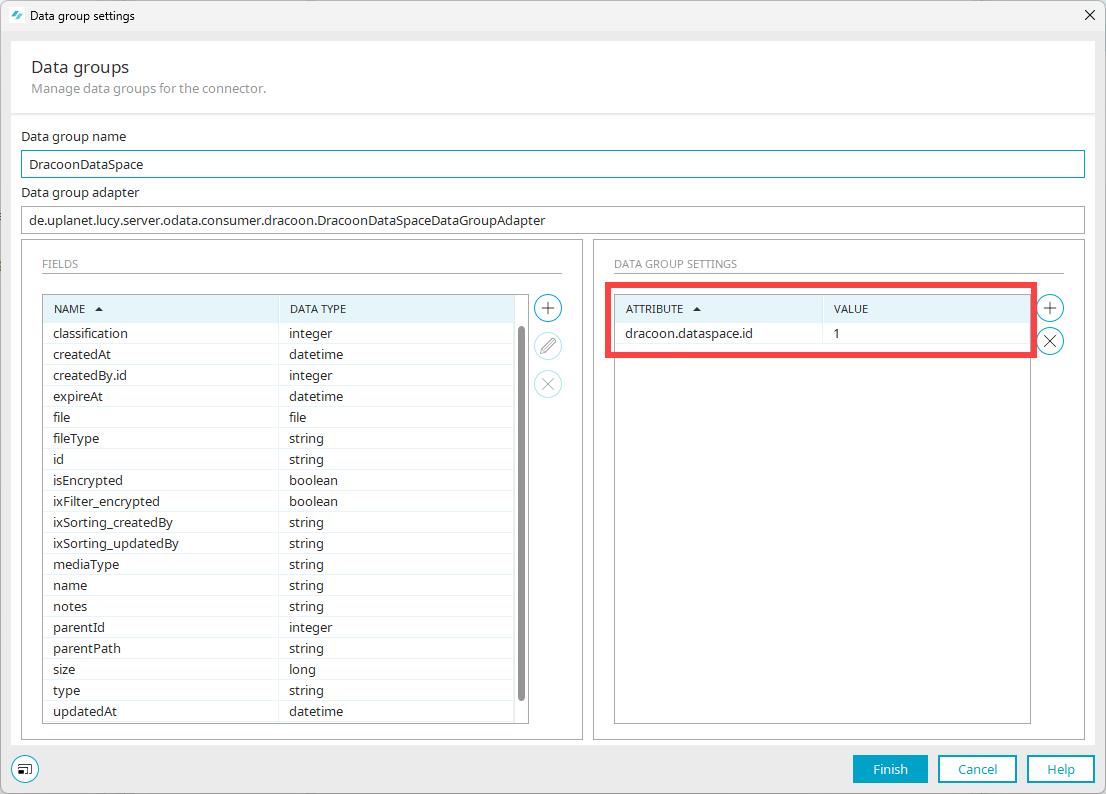
You must make adjustments to the "DracoonDataSpace" data group, as these relate to your data spaces or folders in DRACOON.
-
Select the "DracoonDataSpace" data group.
-
Click on the
 icon.
icon.The "Data groups" dialog box is displayed.
-
Enter your data room ID or folder ID in the "dracoon.dataspace.id" attribute in the data group settings.
The value stored here serves as a fallback value. You can adjust the fallback value in the external data group in the Intrexx application. See section Adjust fallback value for data room ID.
If you do not enter a value here, the contents of the top-level data room will be loaded.
-
Click on "Finish".
-
Click on "Authentication" in the left-hand area.
The "Authentication" dialog box is displayed.

-
You must enter the corresponding values in the following fields.
Authorization URI
The Authorization URI is composed as follows:
<DracoonRootURI>/services/oauth/authorize
Example
https://example.dracoon.software.com/services/oauth/authorize
Token URI
The token URI is composed as follows:
<DracoonRootURI>/services/oauth/token
Example
https://example.dracoon.software.com/services/oauth/token
Redirect URI (response URL)
In the redirect URI, you must replace "dracoon_dracoon" with the GUID of the example application.
This reads: F100FE46C809B95A41977D74DBEAB1B0BF03B604
Example
https://exampleportal/oauth2/token/F100FE46C809B95A41977D74DBEAB1B0BF03B604
Base URL The base URL can be found in the main menu under "Portal > Portal properties > Front-end web server ".

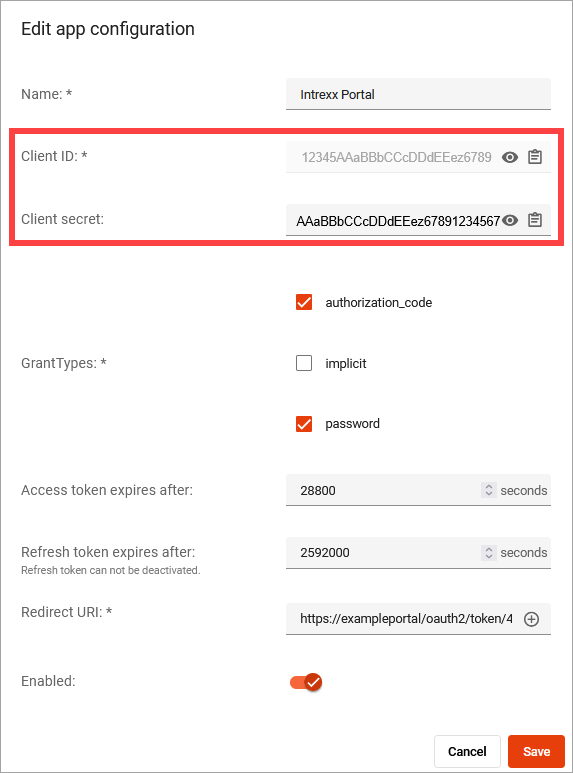
Client ID
Static Enter the client ID from the portal registration in DRACOON here (see Register Intrexx Portal as an app in DRACOON).
Client secret
Static Store the Client Secret Client ID from the portal registration in DRACOON here (see Register Intrexx Portal as an app in DRACOON).
-
Click on "Service user" in the left-hand area.
The "Service user" dialog box is displayed.

-
Delete the displayed service user.
Create new service user
-
Click on the
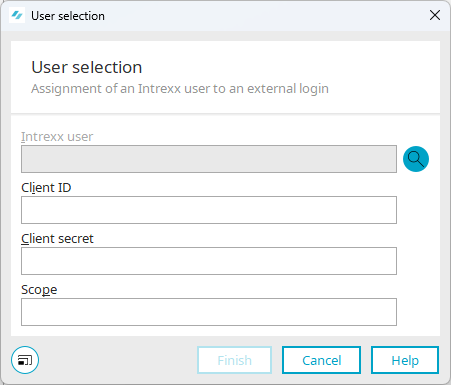
icon (add user).The "User selection" dialog box (1) opens.
-
Click on the
 icon.
icon.The "User selection" dialog box (2) opens.

-
Select "Administrator".
-
Click on "OK".
You are taken back to the "User selection" dialog box (1)
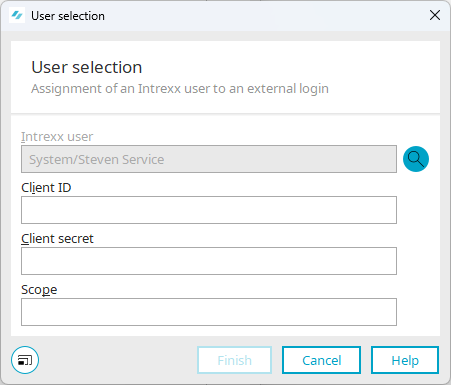
Client ID
Enter the user name (!) of the DRACOON user to be used as the service user here.
Client secret
Enter the password (!) of the DRACOON user to be used as the service user here.
Scope
Enter the value "all" here.
-
Click on "Finish".
-
-
Click on "Expert settings" in the left-hand area.
The "Expert settings" dialog box is displayed.
-
Select the attribute "dracoon.service.root.uri".

-
Double-click in the "Value" column.
-
Replace "xxxxxxx" with the value that applies to you or insert your Dracoon Root URI.
-
Click on "OK".
Importing a DRACOON sample application
The DRACOON sample application is imported in the same way as other applications.
The DRACOON sample application can be found in the following directory:
<intrexx installation directory>\adapter\dracoon
Step-by-step guide
To import the DRACOON sample application, proceed as follows:
-
Start the "Applications" module.
-
Click on "File > Import application".
The "File selection" dialog box is displayed.

-
Click on the icon.
The file explorer is displayed.
-
Navigate to the following directory:
<intrexx installation directory>\adapter\dracoon
-
Select the file "DracoonExampleApp.zip".
The "File selection" dialog box is displayed.

-
Click on "Next".
The "Import" dialog box is displayed.

-
Click on "Next".
The "File storage locations" dialog box is displayed.

-
Click on "Next".
The "Import" dialog box is displayed.

-
Click on "Import".
The import process is executed.

-
Click on "Finish".
You will return to the "Applications" module.
Configuring the DRACOON sample application
Requirements
To configure the DRACOON sample application, you need the following information from your DRACOON data room or your DRACOON web app:
-
Data room ID, folder ID
-
Dracoon Root URI
Overview
You must enter your Dracoon Root URI on the "Expert" tab in all external data groups.
In the external data group "DracoonDataSpace", you must also enter your data room ID or folder ID on the "Expert" tab and in the "file" data field.
The configuration for the external data group "DracoonDataSpace" is described below as an example.
Step-by-step guide
To configure the external data group "DracoonDataSpace" in the sample application, proceed as follows:
-
Start the previously imported DRACOON sample application.
This is how it looks after the import:

-
Double-click on the external data group "DracoonDataSpace".
The properties of the external data group are displayed.
Configure "file" data field
-
Go to the "Data fields" tab.
-
Select the "file" data field.

-
Click on the
 icon.
icon.The "Data field properties" dialog box is displayed.
-
Switch to the "Expert" tab.
-
Enter your DRACOON data room ID or the desired DRACOON folder ID in the "dracoon.dataspace.id" key.
Enter your Dracoon Root URI in the key "dracoon.service.root.uri".

-
Click on "OK".
You return to the "Properties - Data group" dialog box.
-
Switch to the "Expert" tab.
-
Enter your DRACOON data room ID or the desired DRACOON folder ID in the "dracoon.dataspace.id" key.
Enter your Dracoon Root URI in the key "dracoon.service.root.uri".

-
Click on "OK".
Start DRACOON sample application
-
Save the sample application (Publish application completely).
-
Open the portal in your browser.
You will be asked to log in to your DRACOON account.

After logging in, the DRACOON sample application is displayed.
The menu items of the sample application represent the central functionalities of DRACOON.