Install IIS and add features
Please note that IIS is not an integrated Intrexx component. Detailed information about IIS is available at the following links:
The following provides a guide to which features are required to use IIS as a reverse proxy for Intrexx.
Step-by-step guide
To add the features required to use IIS for the upgrade to Intrexx 19.03, please proceed as follows:
-
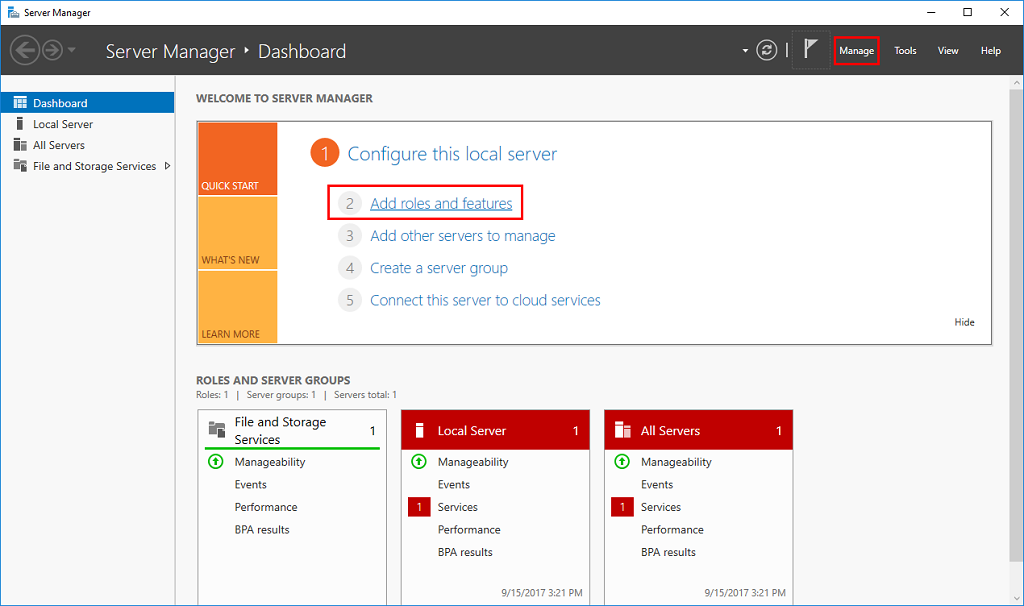
Start the server manager.

-
Click on "Add roles and features".
This will start the wizard for adding roles and features.

-
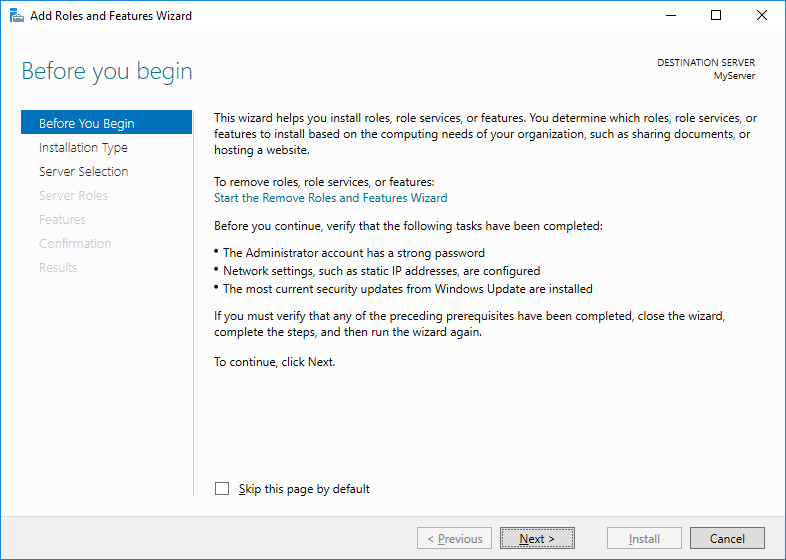
Click on "Next".
This takes you to the "Installation type" page.
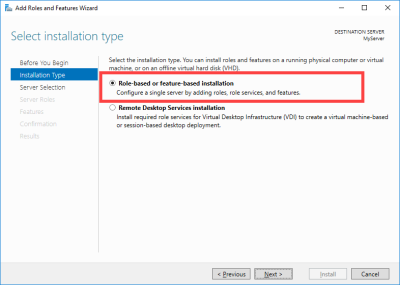
-
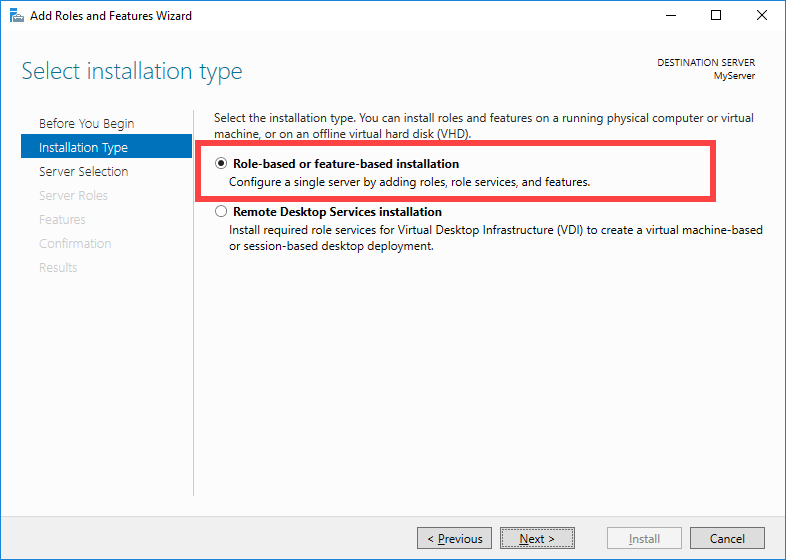
Select the "Role-based or feature-based installation" option.
-
Click on "Next".
The "Server selection" page appears.
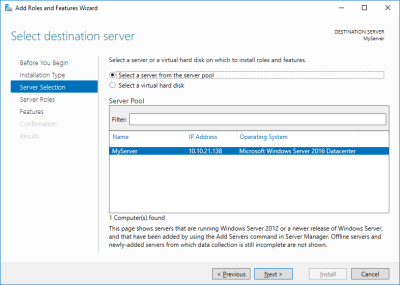
-
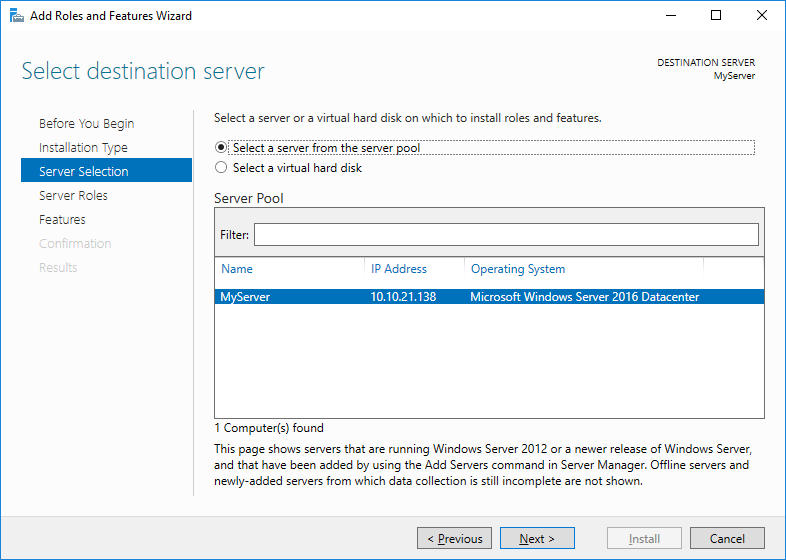
Select the server that Intrexx and IIS are installed on.
-
Click on "Next".
This takes you to the "Select server roles" page.
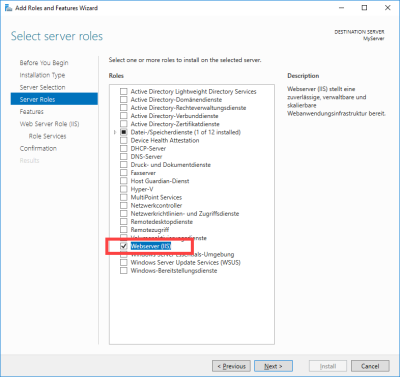
-
Select the "Web server (IIS)" role.
-
Click on "Next".
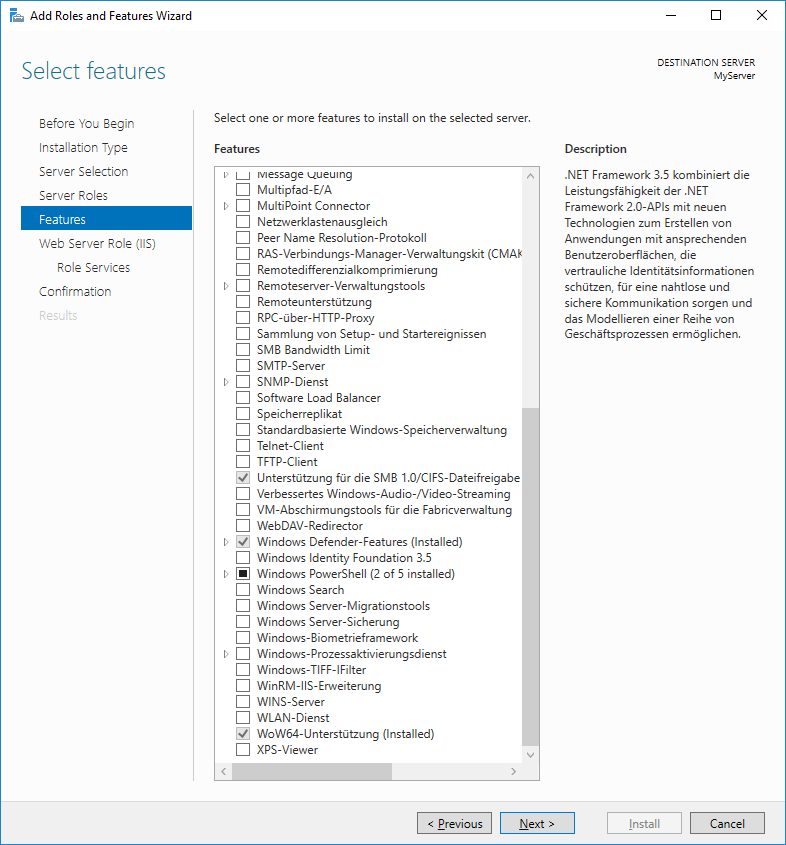
This takes you to the "Select features" page.

-
Click on "Next".
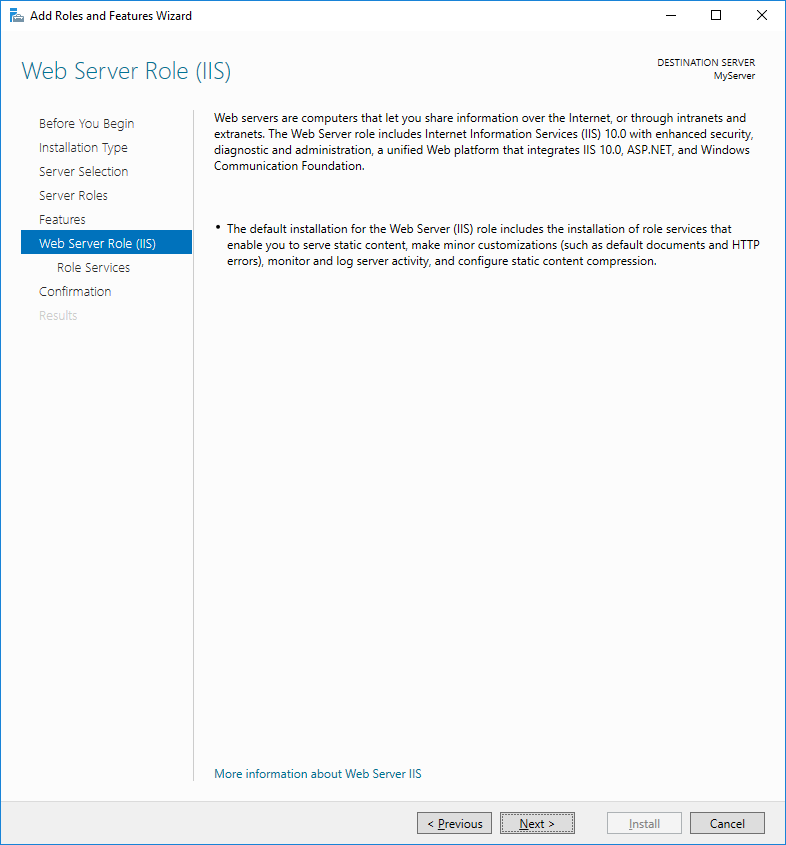
This takes you to the page "Web server role (IIS).
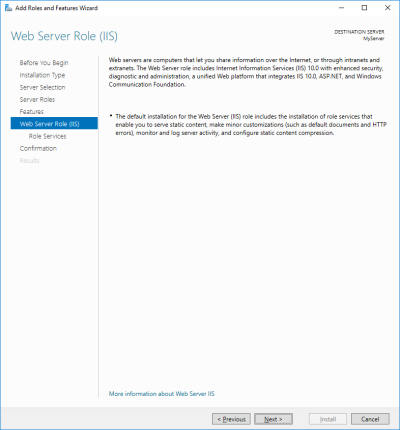
-
Click on "Next".
The "Wizard for adding roles and features (1)" page appears.
-
Click on "Next".
The "Wizard for adding roles and features (2)" page appears.
-
Click on "Next".
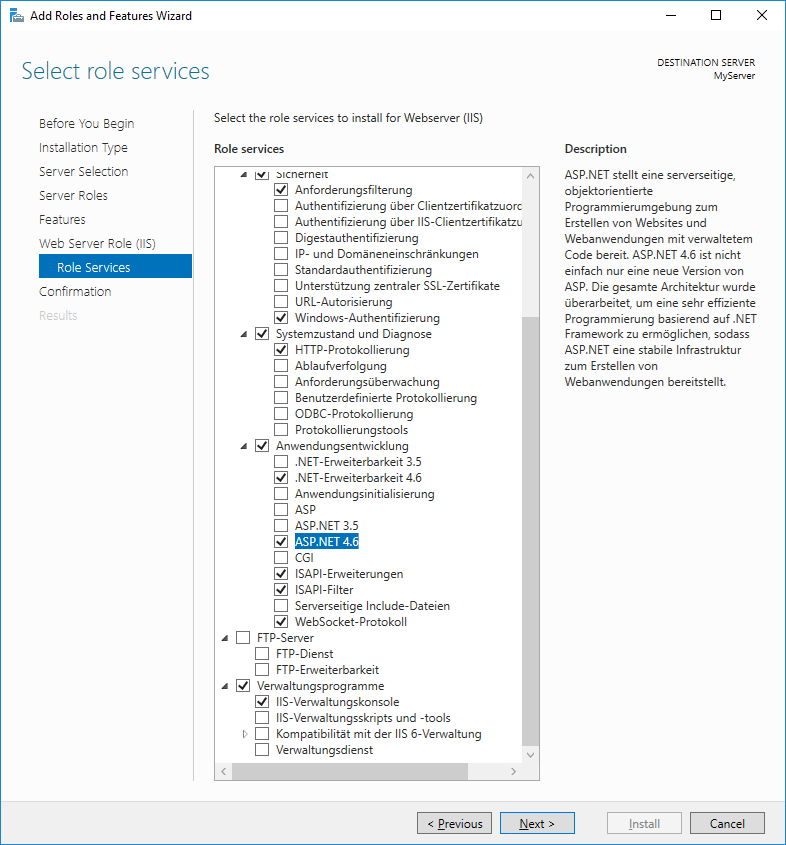
The "Select role services" page appears.

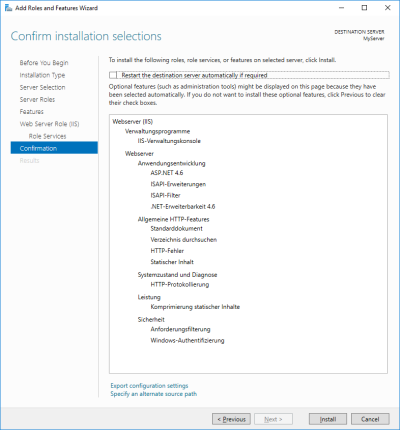
The following features must be added within the Server role > Web server (IIS) > Application development:
Application development
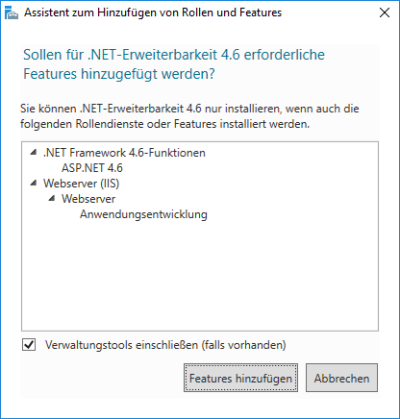
.NET Extensibility 4.6 (4.5 is also adequate)
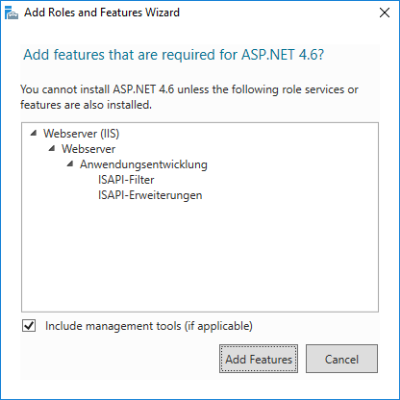
ASP.NET 4.6 (4.5 is also adequate)
ISAPI extensions
ISAPI filters
The following features must be added within the Server role > Web server (IIS) > Application development:
Web server
Common HTTP Features HTTP Errors Default Document Static Content Directory Browsing Performance
Static Content Compression
Security
Request Filtering
Windows Authentication
Health and Diagnostics
HTTP Logging
Application development
.NET Extensibility 4.6 (4.5 is also adequate)
ASP.NET 4.6 (4.5 is also adequate)
ISAPI extensions
ISAPI filters
WebSocket protocol
(See the WebSockets section for more information)
Management Tools
IIS Management Console
-
Please make sure that the Management Console (Under ""Management Tools"") is also installed within ""Web Server (IIS)"".
-
Click on "Next".
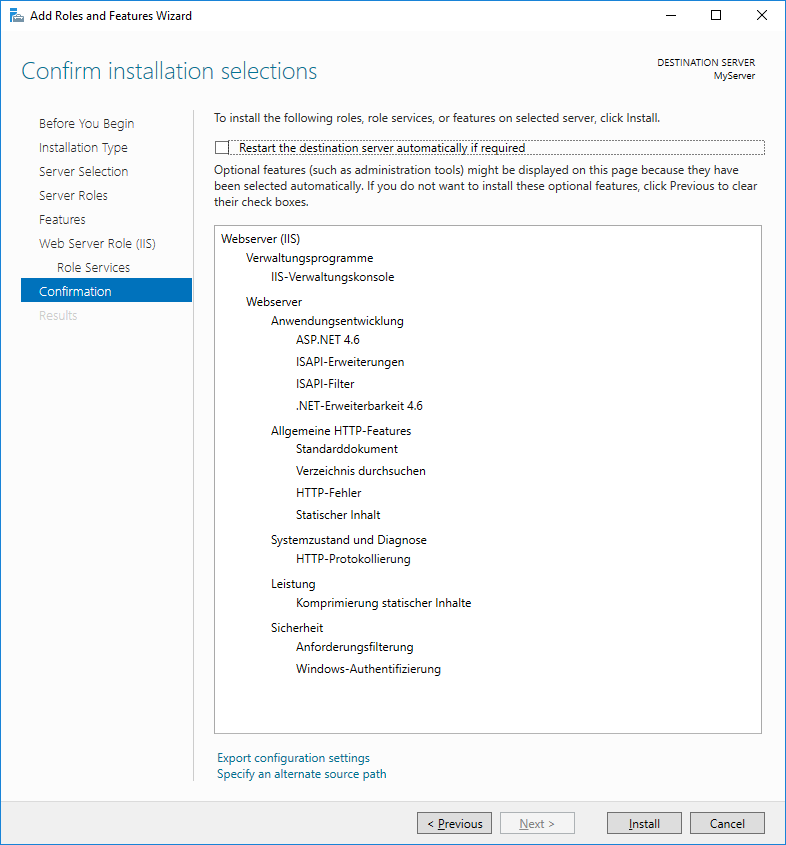
You will be taken to the "Confirmation" page.
This dialog provides a summary of the roles, role services and features that will be installed.
-
Click on "Install".
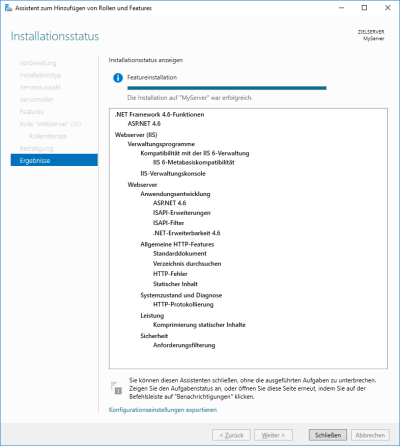
This takes you to the "Results" page.
Wait until the installation is finished.
-
Restart the Portal Server.
You have installed the required roles and features.