

Form and Request Value Validation
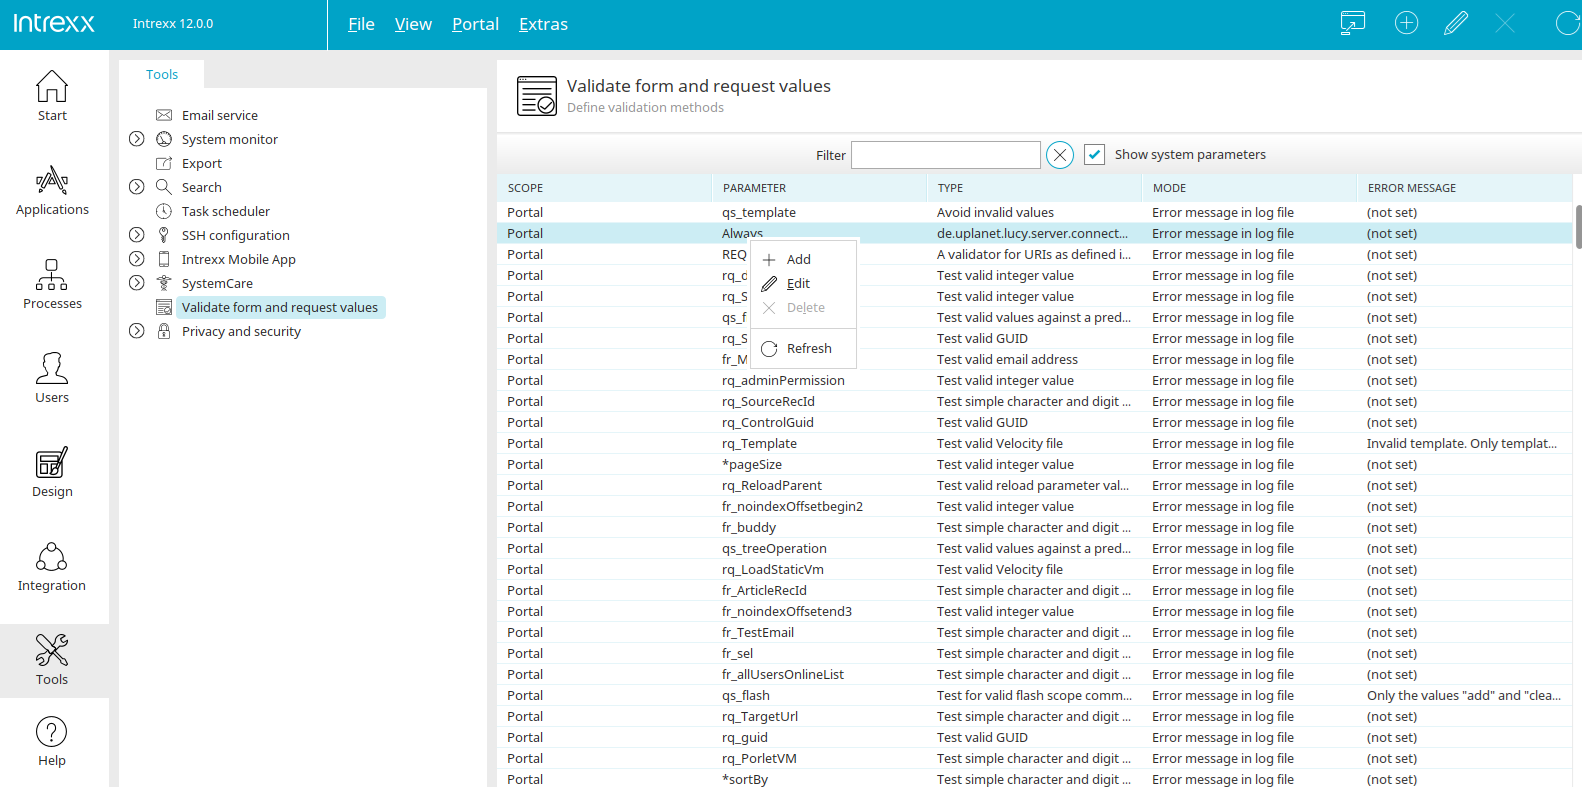
This tool allows you to check form and request values and automatically log warnings or error messages to the "portal log" file (located in the "/log" directory of the portal).
If you select the "Form and Request Value Validation" entry in the left pane, you will see a list of parameters in the right pane.
Filter
You can enter a search term here to filter the list of parameters.
 Remove filter
Removes the search term and clears the filter.
Display System Parameters
If this setting is not selected, only the parameters you have defined yourself will be displayed.
"Scope" column
Indicates the areas for which the audit is being conducted.
"Parameters" Column
Displays the parameter name.
"Type" column
Displays the type of test.
Mode
Displays the mode.
Error Message
Displays the error message.
You can define a new check using the "Add" context menu. You can modify an existing check using the "Modify" context menu.
Add / Edit Review
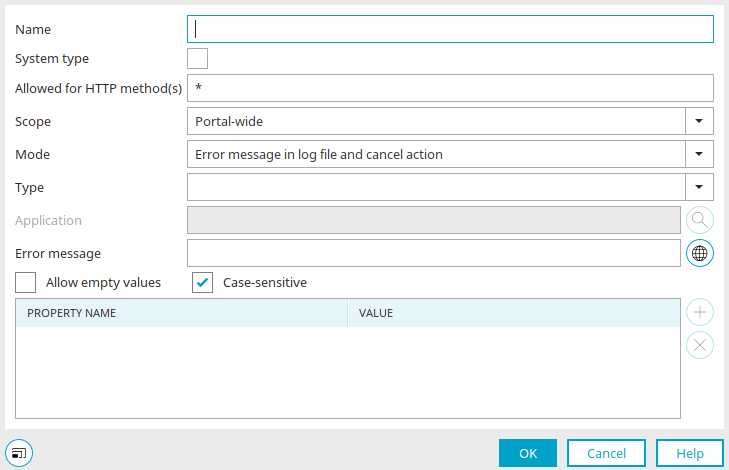
Name
The name entered here must correspond to a request parameter (e.g., "rq_AppGuid") and the regular expression ^\*[A-Za-z_0-9]+$|[A-Za-z_][A-Za-z_0-9]+\*?$".
Examples
For example, "*_Save" checks all request parameters that end with "_Save." "rq_Action*" checks all request parameters that begin with "rq_Action." "rq_ActionId" is used to check only those request parameters that have the name "rq_ActionId."
System Type
The setting is set automatically if the parameter is a system parameter. For custom parameters that you have created yourself, this setting is not enabled.
Allowed for HTTP methods
Allowed values: * for all, POST, GET (separated by spaces).
Scope of Application
The scope can be
-
System-wide
-
Limited on the application side
-
Limited to the application area
-
Across the portal
be selected. In such cases, the scope of validity listed higher in the order takes precedence. With system-wide scope, a parameter is always checked, whereas with scope limited to the application, only parameter values within a single application are checked (for example, if you want to test whether your test parameter has a specific value on the main page of an application).
Mode
The following modes can be selected for error output:
-
Warning in log file
-
Error message in log file and action aborted
The "portal.log" file, to which the portal log is written, is located in the "/log" directory of the portal.
Type
Select the desired type of review here.
Application
If you have selected the scope "Limited to application page," the selected application and application page, separated by a slash, are displayed here. If you have selected the scope "Limited to application area," only the application will be displayed.
 Search
Opens a dialog box where you can select the desired application and, if necessary, the page to be checked can also be selected.
Select an application
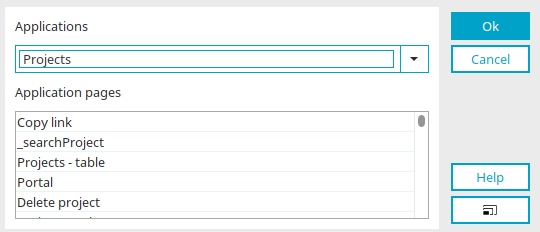
Select the application here and—if you have selected the scope "Limited to application scope"—also select the application page.
Click "OK" to save the changes and close the dialog box.
Error Message
Here you can enter a message that will be logged in the log file in the event of an error. You can view the error message in multiple languages by clicking on "  " "Multilingual." You can find more information here.
"Property Name / Value" column
Depending on which type is selected, the table at the bottom may or may not be editable.
Type: "Check against a specified list of values"
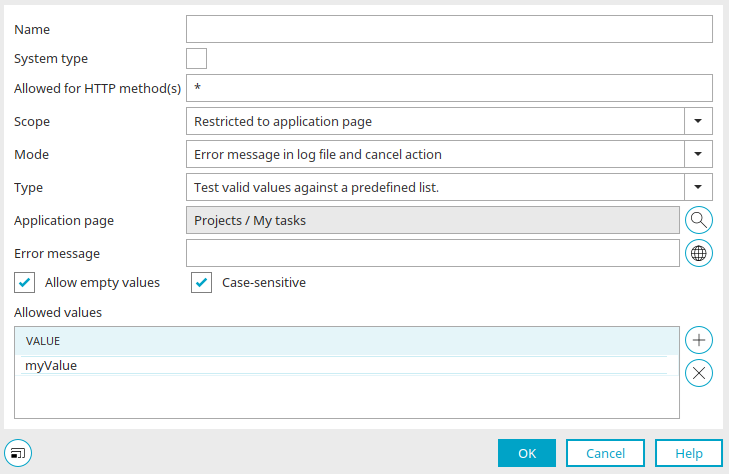
For this type, the permissible value should be set at the lower end of the dialog range.
Blank Values
With this setting, empty values are not treated as errors.
Uppercase / Lowercase
With this setting, the check will be case-sensitive.
 Add
Add
Inserts a new row where the value can be entered.
Delete
Deletes the currently selected row.
"Regular Expression Check" Type
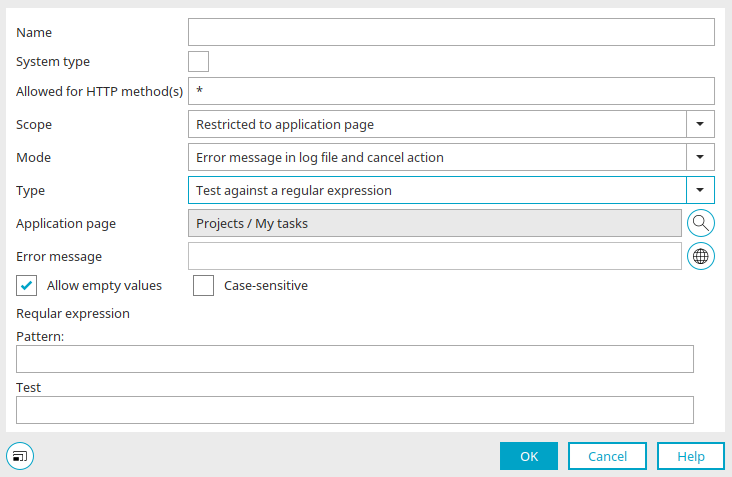
Pattern
Here you can enter the pattern you want to search for. You can recognize a valid pattern by this  icon to the right of the input field, and an invalid pattern by this
  icon.
icon.
You can find more information on this topic here.
Test
Here you can enter strings to test your pattern. You can recognize valid entries by this  icon, and invalid entries by this
  icon.
icon.
Click "OK" to create the new check and close the dialog box.
Add a property
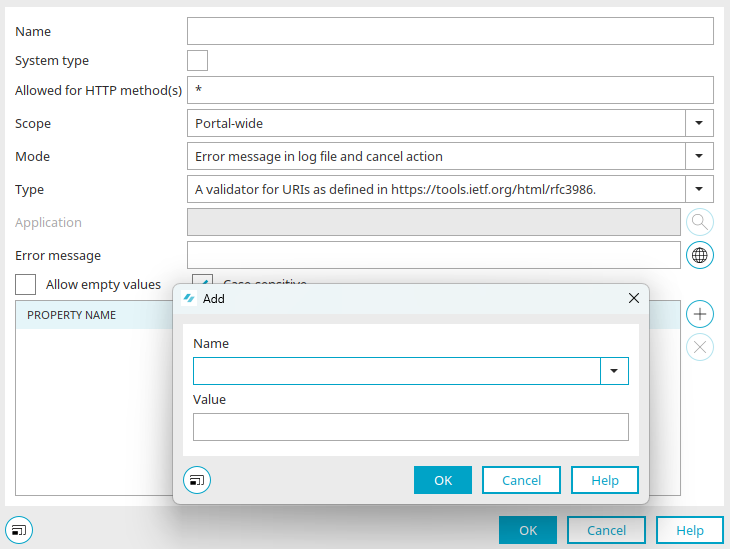
Depending on which type you have selected, you can create a property by clicking "Add" at . In the "Name" drop-down list, you'll find the available properties. Make your selection, and then enter the value of the property. Clicking "OK" adds the property and includes it in the check.