Entering ID provider data in the user administration
You have the option to store login data for identity providers in the user administration.
Key values are already preconfigured for the following identity providers:
-
Microsoft Azure
-
Keycloak
-
Okta
-
Google
Step-by-step guide
Proceed as follows to store login data for identity providers in the user administration:
-
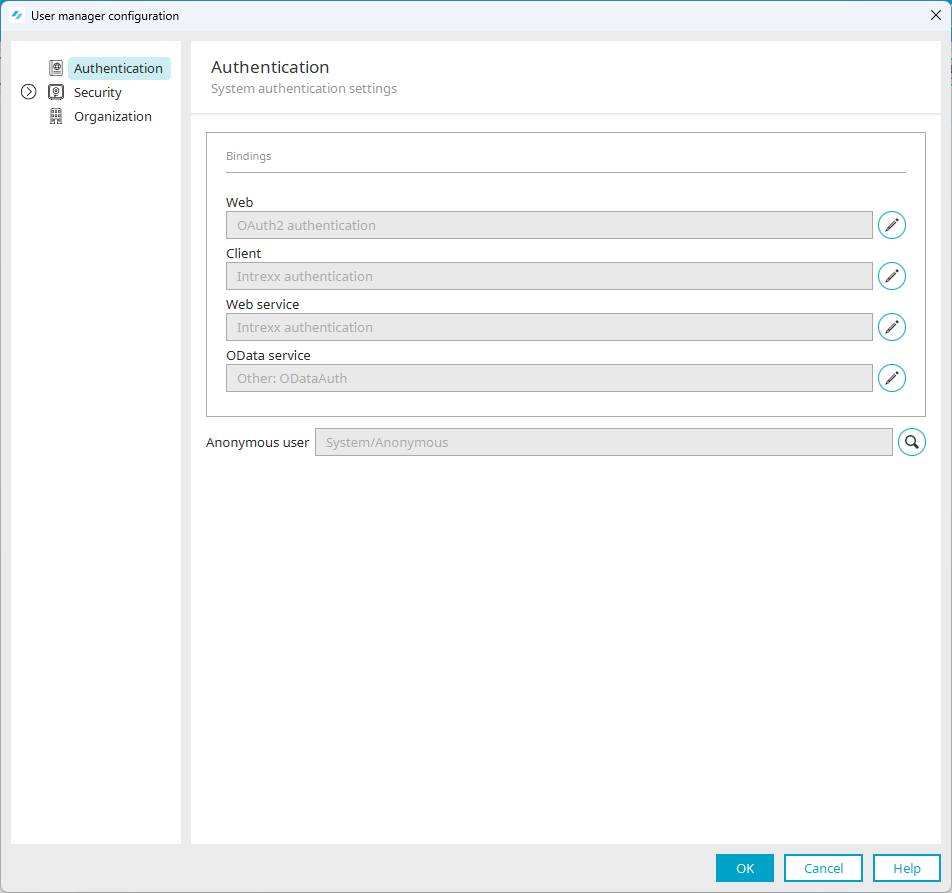
Start the "Users" module.
-
In the "Users" menu, select the "Configuration" item.
The "User Manager configuration" dialog box is displayed.
-
Click on the
 icon under "Web".
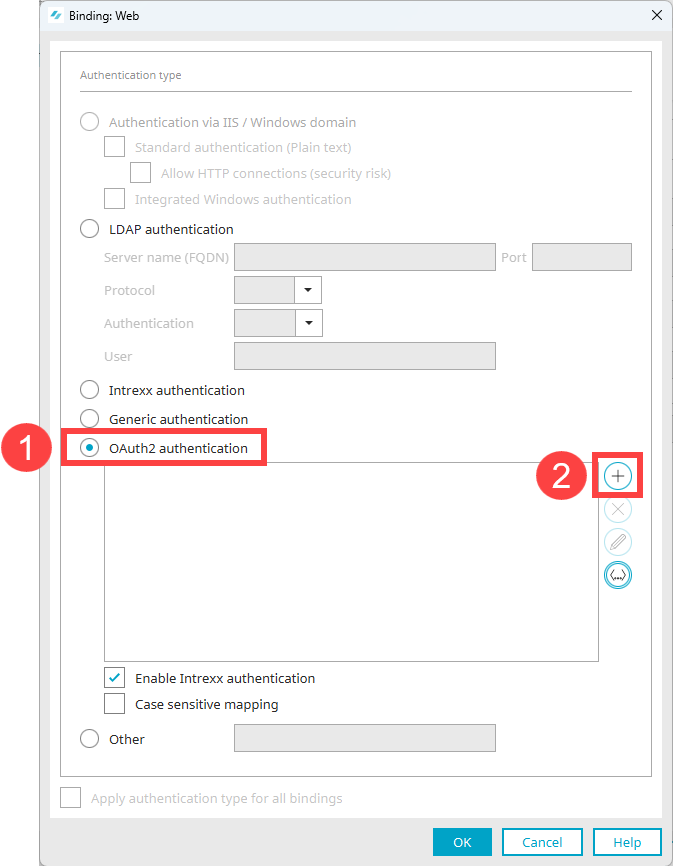
The "Binding: Web" dialog box is displayed.
-
Activate the "OAuth2 authentication" option (
 ).
). -
Click the
 icon (Add provider)(
 ).
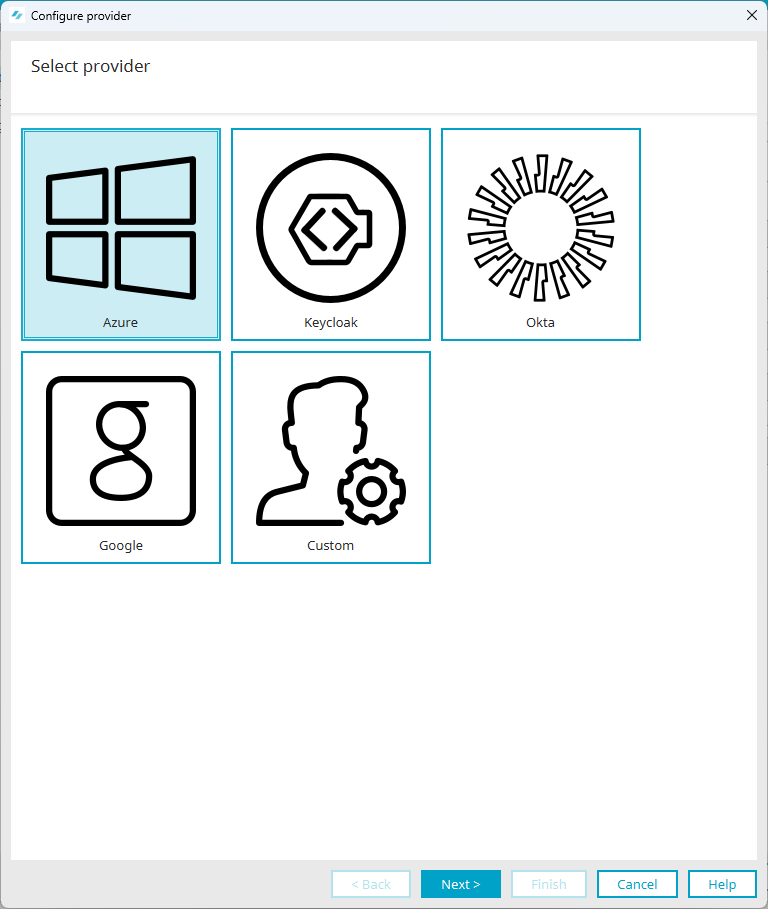
).The "Select provider" dialog box is displayed.
-
Select the desired provider or choose the "User-defined" tile.
-
Click on "Next".
-
The "Configure provider" dialog box is displayed for the provider selected previously.
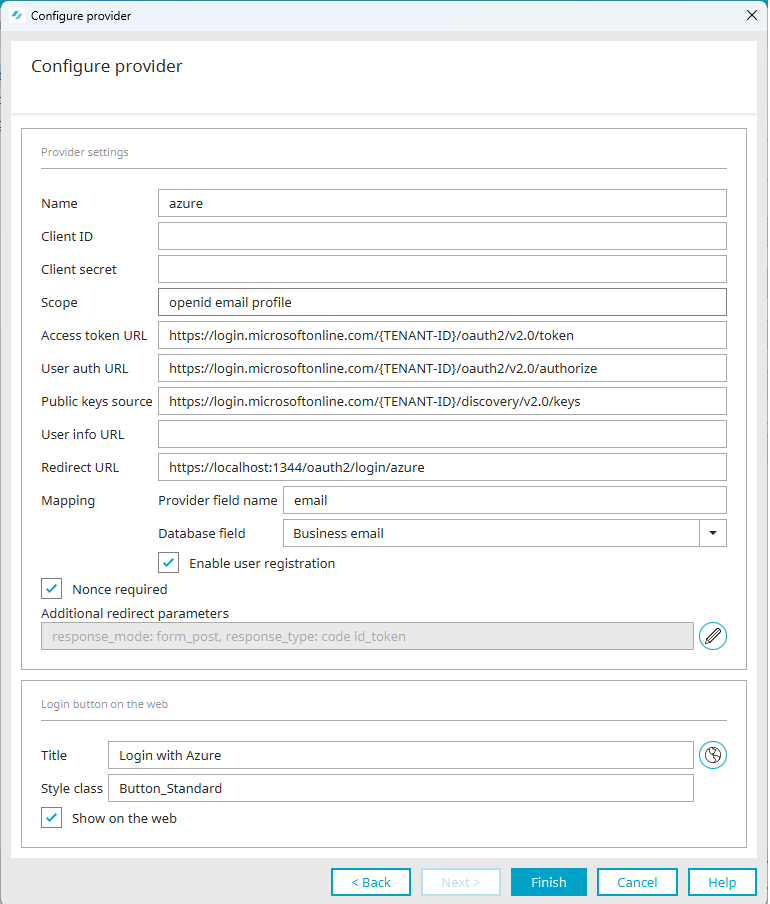
In the dialog window, the values known for the respective provider are already preassigned in whole or in part.
Provider settings
Name
Enter a name for the provider configuration here. The name has to be unique. You can overwrite the name preassigned by Intrexx.
Client ID
Enter the client ID here. You must obtain this from the ID provider. Please refer to the chapter Client ID and client secret for more information.
Client secret
Enter the client secret here. You must obtain this from the ID provider. Please refer to the chapter Client ID and client secret for more information.
Scope
The provider's scope must be stored here. The value is preset by Intrexx.
You can (also) obtain the value from the ID provider. Please refer to the chapter REST API endpoints for more information.
Access Token URL
The access token URL of the provider must be stored here. The value is preassigned by Intrexx for some providers completely and for some providers partially.
If the value is partially preassigned, then it contains variables whose value you must obtain from the provider. (For Microsoft Azure, this is the "Tenant ID".) See the REST API endpoints section.
User Auth URL
The user auth URL for authorization with the provider must be stored here. The value is preassigned by Intrexx for some providers completely and for some providers partially.
If the value is partially preassigned, then it contains variables whose value you must obtain from the provider. (For Microsoft Azure, this is the "Tenant ID".) See the REST API endpoints section.
Public Key Source
The "public key source", which is the URL for the provider's public keys, must be stored here. The value is preassigned by Intrexx for some providers completely and for some providers partially.
If the value is partially preassigned, then it contains variables whose value you must obtain from the provider. (For Microsoft Azure, this is the "Tenant ID".) See the REST API endpoints section.
User Info URL
The "User Info URL", which is the URL for the user information endpoint, can be stored here. The field can be empty. It is preset with the appropriate value from Intrexx if the value is required. If the value is partially preassigned, then it contains variables whose value you must obtain from the provider.
Redirect URL
The "Redirect URL" must be stored here. It is preset by Intrexx. The redirect URL is composed of the base URL of your portal and the following components: "/oauth2/login/<Provider name>"
Please refer to the chapter Enter redirect URL for more information.
Mapping
If authentication data (ID token) is transferred from the ID provider to Intrexx, Intrexx maps the user in the ID provider to the user in the Intrexx user management system.
The users are mapped using a unique field (attribute) both in the ID provider and Intrexx (master user data field). Typically the user's email address is used for this. It is important that the values in the selected master user data field are unique. If multiple users are identified using a token value, the login is canceled with an error.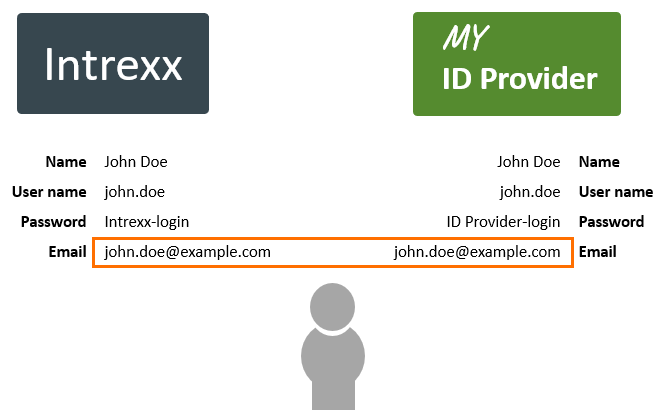
Intrexx presets the mapping with the provider field name "Email" and the database field "Business email".
Provider field name
You must obtain the provider field name from the provider.
Database field
For database fields, data fields of the type String can be selected. User-defined data fields are also available for selection. Intrexx presets the mapping with the provider field name "Email" and the database field "Business email".
Enable user registration
After successful login, a new Intrexx user can optionally be registered if it does not yet exist, or an existing Intrexx user can be changed. Groovy scripts are required for execution and these can be configured via the web binding dialog.
More detailed information is available in section Enable user registration.
Nonce required
Here you can specify whether the provider requires a nonce ("number used once").
To find out if the provider requires a nonce, contact the provider. The value is preset by Intrexx.
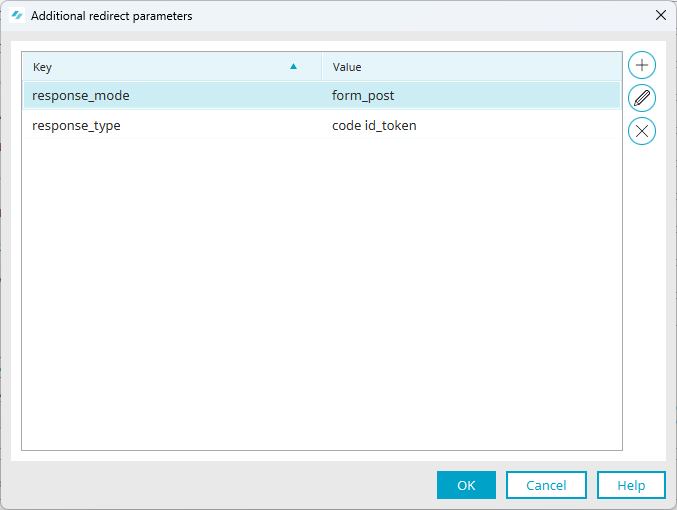
Additional redirect parameters
You have the option to store additional redirect parameters. These are each composed of a key and a value. Intrexx presets redirect parameters, if required.
-
Click on the
icon.The "Additional redirect parameters" dialog box is displayed.
-
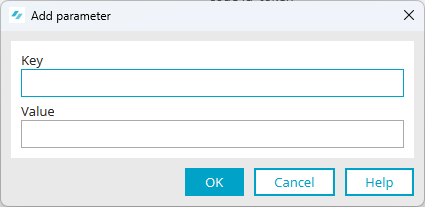
Click on the
icon.The "Add parameters" dialog box is displayed.
-
Enter the key and its value here.
-
Click on "OK".
You will be taken back to the "Additional redirect parameters" dialog box.
-
Click on "OK".
You will be taken back to the "Configure provider" dialog box.
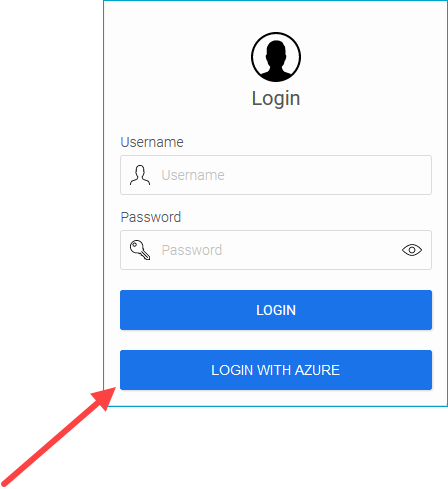
Login button on the web
Title
Enter the text to be displayed on the button here.
Style class
Enter the name of the style class to be used for the login button.
Intrexx preconfigures the style class with "Button_Standard".
User-defined style classes can be defined in the "Layout" module.
Show on the web
Here you can specify whether or not the login button should be displayed on the web.
(Hiding the button may be useful, for example, during a test phase or when a provider is temporarily unavailable.)
Place provider icon on the login button
You have the option of placing the provider's icon or another icon on the login button. More detailed information is available in section Customize login button for identity provider.
-
-
Click on "Finish".
More information